Introduction #
Revolutionize Call Management with 3CX Reception Console: Streamline and Simplify Incoming Calls Like Never Before!
3CX Reception Console is we based software designed to streamline call handling for various organizations. With this solution, you can greet customers with customized messages tailored to their specific organization, ensuring a warm and personalized welcome. No more generic greetings or confusion – each caller receives a carefully crafted response. If you’re working in a shared office space, managing calls for multiple tenants can be challenging. Our 3CX Reception Console add-on simplifies this task, allowing you to handle call transfers, note-taking, and schedule tracking with just a few clicks. The user-friendly interface ensures swift and efficient call management. Embrace the convenience and simplicity of the 3CX Reception Console to create a stress-free work environment and provide exceptional service to your customers.
Why Choose 3CX Reception Console? #
 | FLAWLESS CALL GUIDANCE | Eliminate guesswork with our console, offering accurate and structured answer scripts to expertly handle incoming calls. Get step-by-step guidance for professional call management. |
 | REAL-TIME PRIORITIZATION | You possess access to both answer scripts and priority notes concerning the current call, ensuring that no crucial information will be overlooked. |
 | ENHANCED CALENDAR INTEGRATION | Effortlessly manage your day by accessing the contact’s calendar. Quickly identify availability and efficiently schedule appointments for improved productivity. |
 | SEAMLESS CALL TRANSFER | Efficiently connect callers to the appropriate person by smoothly transferring the call to any extension on your list. Alternatively, you may opt to leave a comprehensive voicemail or send an email containing call details to ensure timely and effective communication with the relevant party. |
Prerequisites #
Before installing 3CX Reception, you need to ensure that your computer meets the minimum requirements mentioned below:
- 3CX Version V18
- Windows 10 or above / Windows Server 2012 (64 bit) or above
- Microsoft SQL Server 2016 or above (Including the free SQL Express edition)
- Microsoft Internet Information Server (IIS) 7.0 or above
- .Net 4.7.2 or above
NOTE:
While installing SQL Server, ensure the following,
- Uninstall the previous versions of SQL Management Studio manually before installing the new version.
- Install it in “Mixed Mode” to include SQL Authentication, and install SQL Management Studio
NOTE:
- When installing IIS, be sure to install Basic Authentication, .Net Extensibility, and ASP.Net 4.X
Installation overview #
 | DOWNLOAD SOFTWARE | You can order 3CX Reception Console online at https://www.voiptools.com. Your order confirmation email will include your license key and a link to download the software. |
 | INSTALL PREREQUISITES | There are a number of prerequisites that must be installed prior to installing the 3CX Reception Console. These prerequisites include Microsoft Internet Information Server (IIS) and Microsoft SQL Server |
 | INSTALL 3CX RECEPTION CONSOLE | This User Guide contains step-by-step instructions to successfully install 3CX Reception Console. Begin by extracting the installer from the downloaded zip file (Step 1 above), then run the setup program named ReceptionConsoleInstaller.exe |
 | REGISTER YOUR SOFTWARE | You must register your license key to activate 3CX Reception Console. Your license key is included in your order confirmation email, and can also be found in your order history on our website. |
Step By Step Installation Procedure #
The following section guides you through a detailed walk-through of the installation process
Step 1: Download 3CX Reception Console #
- Find the software download link in the Order Confirmation Email, or you can find it in your order history on our website and download the 3CX Reception Console application.
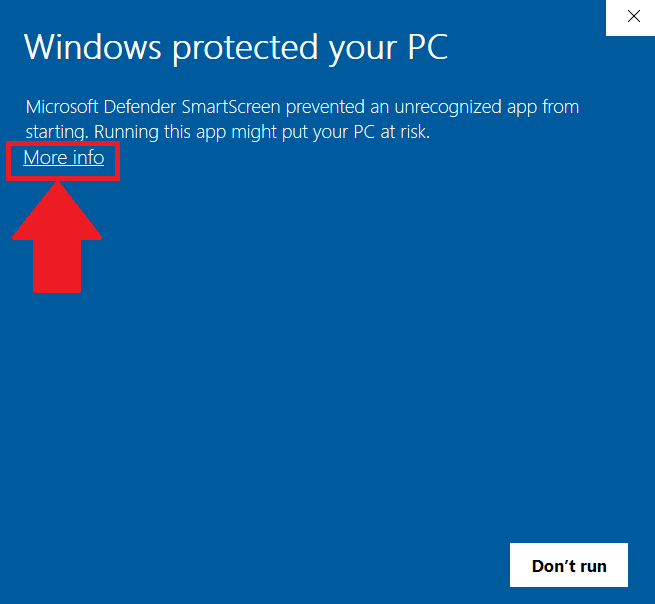
- In the Microsoft Defender SmartScreen, click the More Info option.
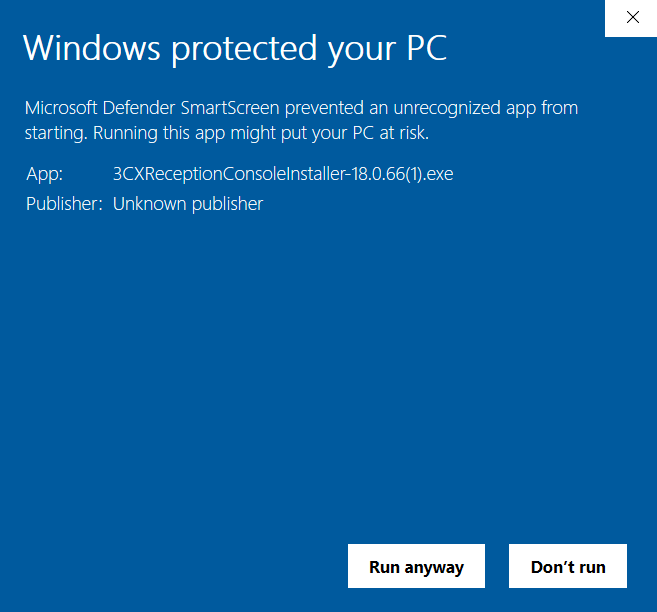
- Click the Run Anyway option to start the installation.
Step 2: Install the Prerequisites #
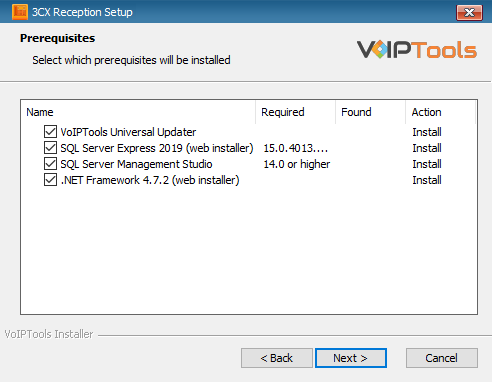
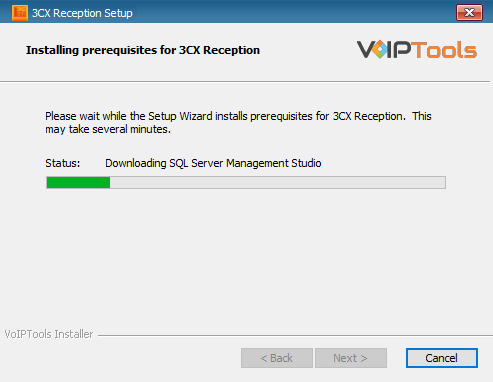
Click on the software installer downloaded in Step 1. The installation wizard will automatically identify the prerequisites and assist you with each installation required to 3CX Reception Console. It includes .NET Framework (Web Installer), SQL Server Express (Web Installer), and SQL Server Management Studio.
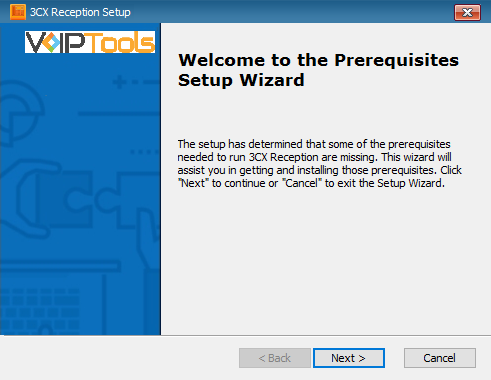
- Click the downloaded installer executable to launch the Prerequisites Setup Wizard and click Next.
- In the Prerequisites window, install all the required prerequisites identified by the installer, or select/ unselect the applications based on your requirements and click Next to continue.
The installer will download and install the selected applications. It may take several minutes to complete.
- In the Microsoft SQL Server License Terms click the Accept button to acknowledge the license terms and continue.
- This page appears if you do not have SQL Server Express preinstalled in your device.
- View the SQL Server Media target location in the Media Location field. If required, you can click the Browse button to change the location. Click Install to begin the installation of SQL Server Express.
SQL server installation is in progress. This may take several minutes to complete.

- Click the Close button once the prerequisites are installed.
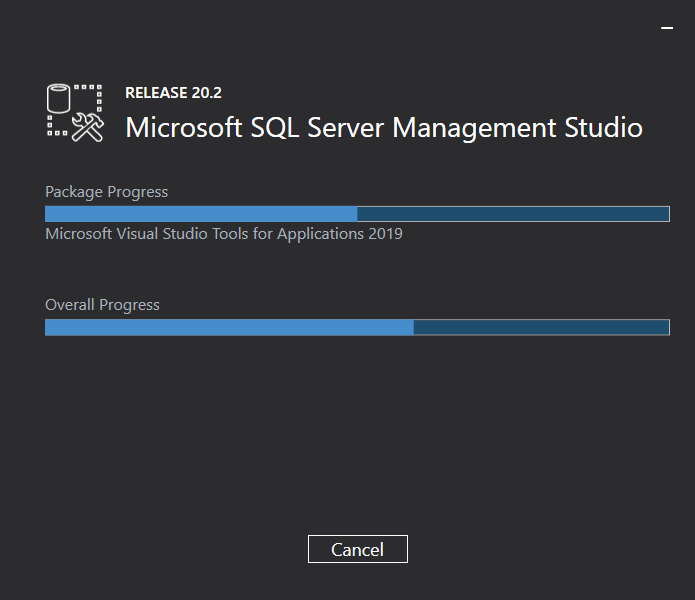
Microsoft SQL Management Studio installation is in progress. This may take several minutes to complete.
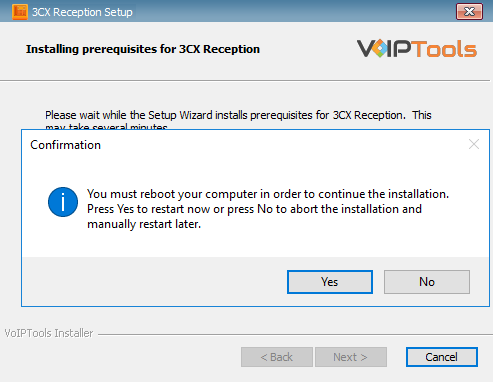
- Click Yes in the Confirmation Message Box to reboot the computer.
Step 3: Start the installation process #
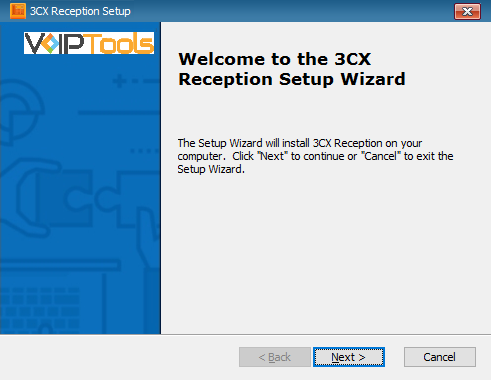
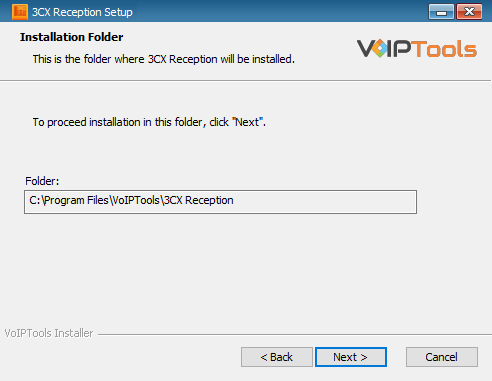
- Click Next on the 3CX Reception Console Wizard screen.
- On the Select Installation Folder window, the Folder field displays the path where the 3CX Reception Console gets installed. You cannot change the location path.
- Click Next to continue with the installation.
Step 4: Test Relay Settings #
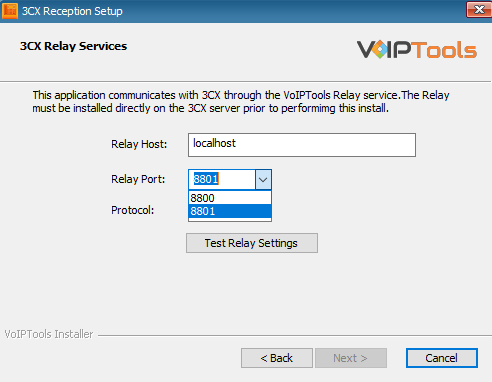
- In the 3CX Relay Services window, in the Relay Host field, enter the FQDN of your 3CX server.
- Enter 8801 in the Relay Port field.
- Enter the public key you took from VoIPTools Relay services in the Public Key text area.
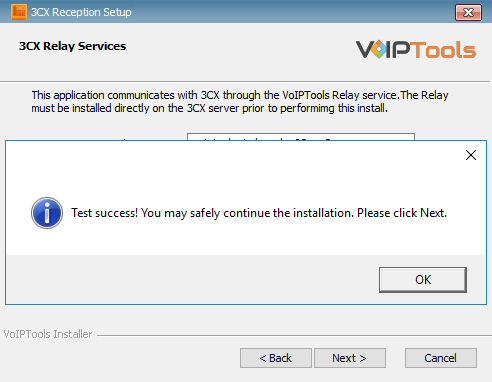
- Click the Test Relay Settings to confirm ‘3CX Reception Console’ can communicate with the Relay services running on the 3CX server.
- If the ‘3CX Reception Console’ is successfully able to communicate with the Relay services that run on the 3CX server, a Success message box appears. Click OK. If the test fails, you will not be able to continue until communication with the relay is established.
- Click Next to continue with the installation.
NOTE:
- You must set the Relay Port to 8801.
- If the Relay test fails, you cannot continue the installation until you establish communication with the Relay. If the test was unsuccessful:
- Confirm you have the correct firewall port open (default TCP 8801) on the 3CX server and the firewall protecting the 3CX server.
- Confirm that you have entered the correct FQDN for the 3CX server.
- Confirm that the 3CX Recording Beep and Relay use the same port and protocol.
Step 5: Configure the database #
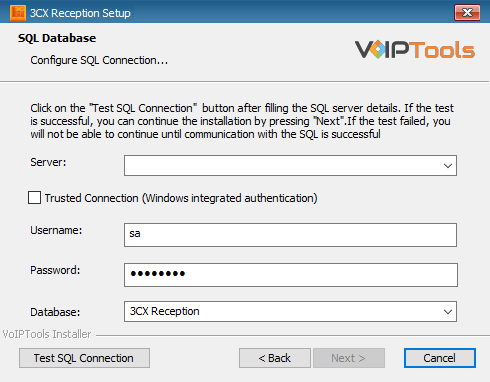
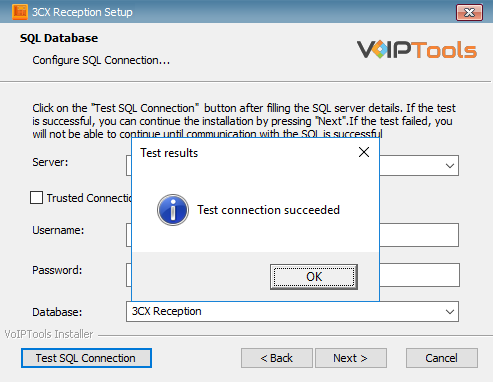
When configuring 3CX Reception Console, select an existing Microsoft SQL Server instance in your environment. The database server can be a remote SQL Server or a local instance running on the VolPTools server.
- On the SQL Database window in the Server field, select the desired instance of SQL Server.
- To use SQL Authentication, uncheck the Trusted Connection checkbox.
- In the Username and Password fields, enter valid SQL login account credentials.
NOTE:
- We recommend you use SQL Authentication rather than Windows authentication. Many of our tools leverage a Call Flow Designer (CFD) application running on the 3CX. Frequently our CFD applications require access to a SQL database. If the 3CX server and the database server are not in an Active Directory domain, Windows authentication will fail.
- To use SQL Authentication, you must configure the SQL server to run in Mixed Mode. If you install SQL Server with our tools, we configure SQL in Mixed Mode.
- To use Windows Integrated Authentication (not recommended), check the Trusted Connection (Windows integrated authentication) checkbox.
NOTE:
In the Database field, the installer will automatically display the default database name. We encourage you to use the default name. To upgrade or reinstall 3CX Reception Console, select the current database name from the list.
- Click the Test SQL Connection button to confirm connectivity to SQL Server. and click OK on the Test Results message box.
Step 6: Installing 3CX Reception Console #
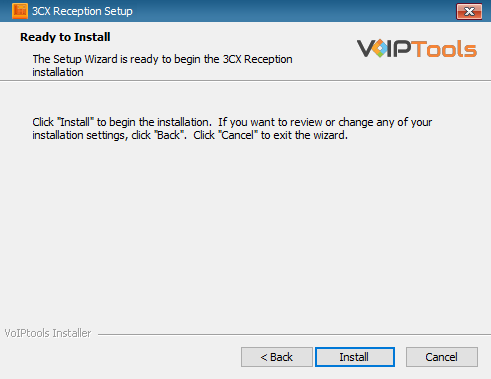
- Click Install in the Ready to Install window.
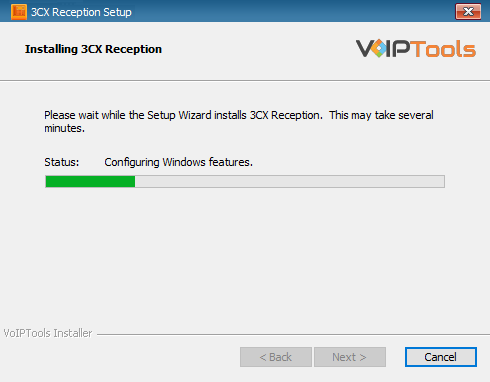
The application installation may take several minutes to complete.
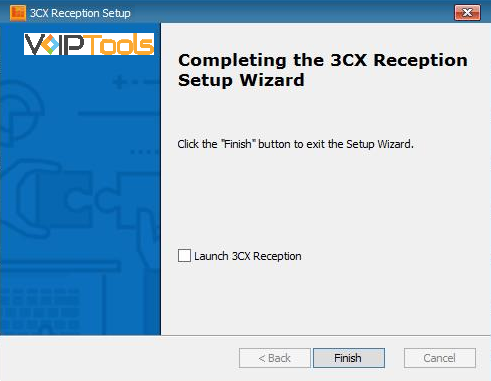
- Check the Launch 3CX Reception Console checkbox and click Finish when the installation is complete.
Step 7: Register your Software #
To ensure the authorization of your license key, it is necessary to complete the registration process. By registering with VoIPTools, you gain access to a range of benefits:
| Key Replacement Assistance | In the unfortunate event of a lost license key, registering with VoIPTools lets us provide you with a replacement key promptly. |
| Product Updates and Reminders | By registering, you will receive timely notifications from VoIPTools regarding any product updates. Additionally, we will send reminders when your key is nearing its renewal date, ensuring uninterrupted access to our services.s |
Follow the procedure to register your software,
- Double-click the 3CX Reception Console desktop
 icon to open the desktop application.
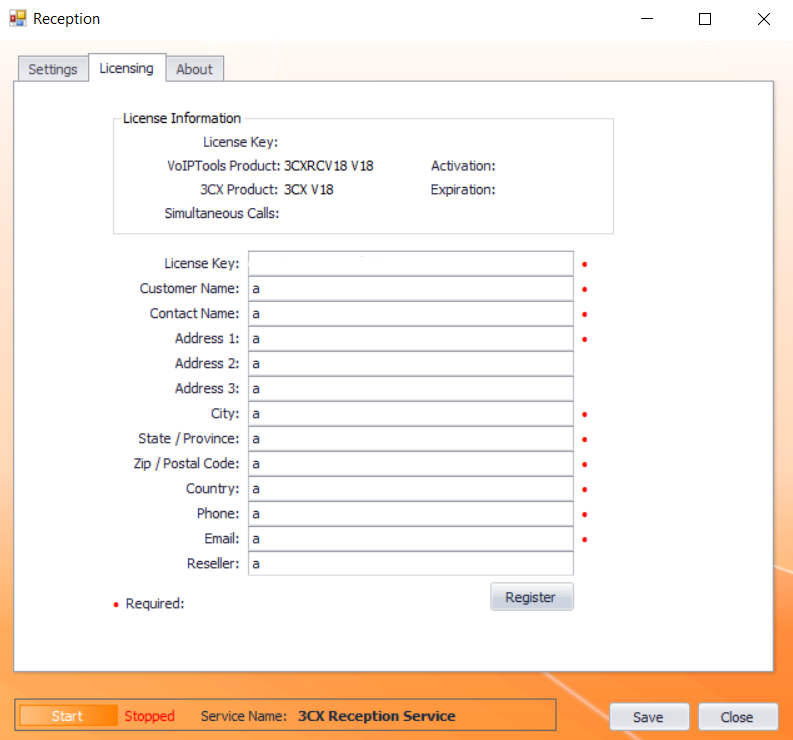
 - On the Reception Configuration screen, in the Licensing tab, enter your registration information in all the required fields (Note the red dot denotes a required field).
- Click the Register
 button to complete the registration.
 - Once the registration is complete and successful, at the footer of the Licensing page, click Start to start the ‘3CX Reception Service’.
NOTE:
The license key permits you to install the software on one computer. This is not free software.
Reception configuration screen #
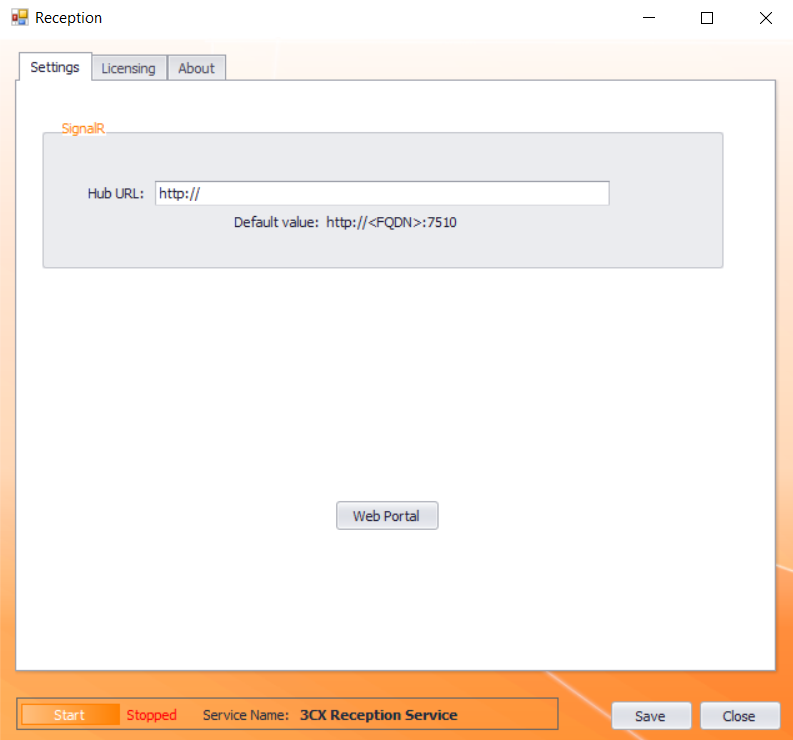
The Reception configuration screen enables you to register the software, start/ stop ‘3cx Reception Service’, check and download latest version of Reception, and configure Hub url.
Configure Hub URL (Settings tab) #
- In the Settings tab, enter the Hub URL (in most cases the default value should work).
- Click Save.
- In the Settings Saved confirmation message box, click OK.
Check for Updates (About tab) #
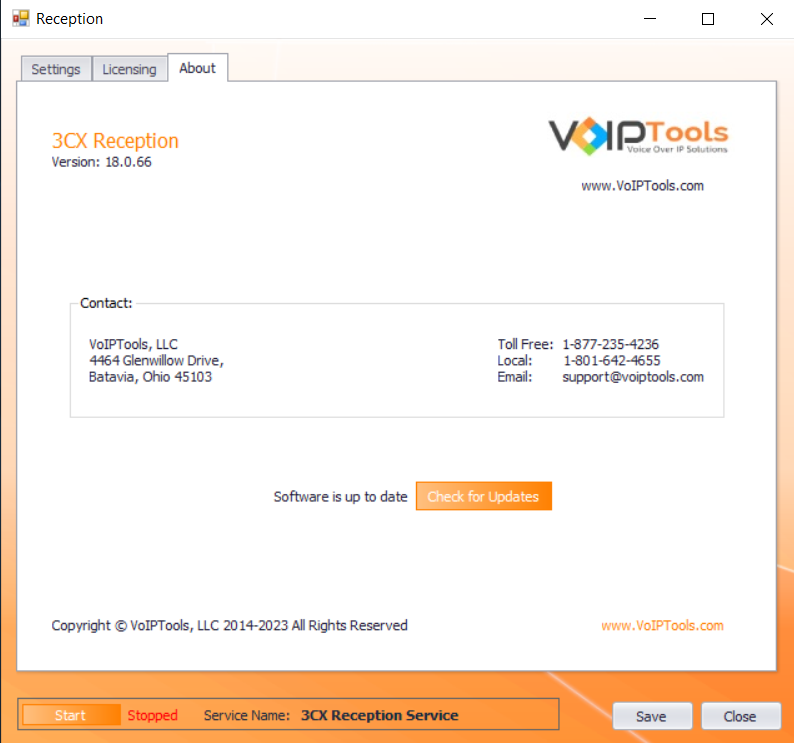
The Check for Updates button in the About tab enables you to easily download the latest version of 3CX Reception. If a newer version of 3CX Reception is available, the message will indicate that a newer version is available. Clicking the button will automatically download a .zip file of the latest version of the software. You can install the new version directly over the top of a previous version without the need to uninstall the previous version.
Reception Console #
To access the ‘Reception Console’ (also known as ‘Web Portal’), click the Web Portal button on the configuration program, or click on the desktop icon that was created during the installation process (Reception Web).
Login to Reception Console #
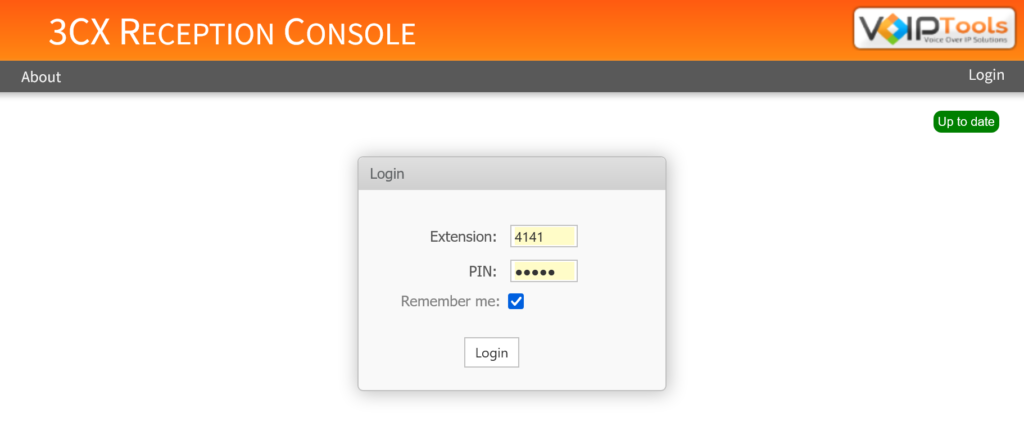
When connecting to the Reception Console, you will be asked to provide login credentials.
- In the Extension //field, enter your 3CX extension number.
- In the PIN field, enter your 3CX voicemail PIN.
- Click Login button to login to your account
Login Privileges #
3CX Reception Console gives different privileges to Managers and Users.
Manager privileges #
As a ‘Manager’ or ‘Admin’, you can view the following tabs:
- Organizations
- Global Settings
- Reports
- About
User privileges #
As a ‘User’, you can view the following tabs,
- Home
- About
3CX Reception Console logged in as an Agent #
Home tab #
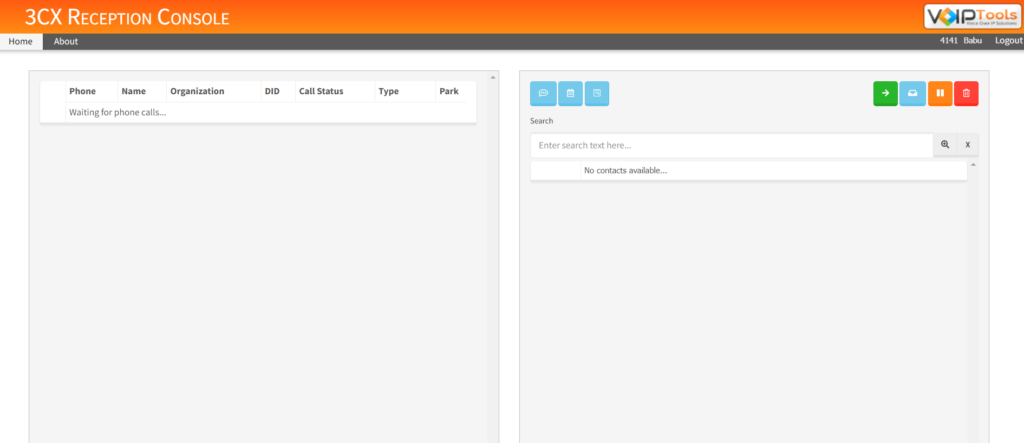
The home tab enables you to perform various actions on an active call like transferring the call to the desired contact, holding, transferring to voicemail, or hanging up the call.
- The ‘3CX Reception’ automatically displays associated ‘Answer Script’ and ‘Notes’ based on the call timing.
- Select the active call to view the associated organization and its contacts on the right hand side of the page.
- The Contact list displays First Name, Last Name, Extension, Email and Status details.
- The Status column displays the availability of the contacts.
- The 3CX Reception retrieves the status values from the 3CX Smart Phone. The default status values for valid extensions are:
- Available
- Away
- Do Not Disturb
- Apart from the above default values, you can also create custom status values in 3CX smartphone.
- For invalid extensions (extensions that are not in 3CX), the status value will be displayed as, ‘Not a Valid Extension’.
- If the contact has a phone number instead of an extension, then the status value will be displayed as, ‘Not Available’.
- The 3CX Reception retrieves the status values from the 3CX Smart Phone. The default status values for valid extensions are:
Figure 26: Organization Associated to the Active Call
5. From the Contact list, select the desired contact to perform the desired call action.
| Blind Transfer | transfer the current active call to the selected contact. |
| Transfer to Voicemail | send the voicemail to the selected contact |
| Hold | hold the current caller on the line. |
| Hang Up | to disconnect current active call. |
Send mail about call notes #
To send mail about Call Notes to the desired contact, perform the following steps:
- Select the contact from the contact list to which you want to send the email.
- On the toolbar, click
 Notes button to display Call Notes dialog box.
 - In the Call Notes dialog box, you can edit Best Time To Call field if desired.
- Check Need Call Back check box if the customer desires a call back.
- Check Urgent check box to set the priority level as high.
- In the Notes field, enter the information about the call for reference.
- Click Email to send the current Call Notes details as email to the selected contact.
- To know if the desired contact is available for the day or not, select the contact from the contact list and click
 Calendar button.
NOTE:
To view the calendar, the calendar visibility property should be set as ‘Public’
- To view all the files associated to a specific organization, select the desired organization and click organization and click
 Forms button.
 - To search for a specific organization whose ‘DID’ number starts with desired digits, enter the digits (minimum 1 digit) and click on Search button.
3CX Reception Console logged in as Manager #
Organizations tab #
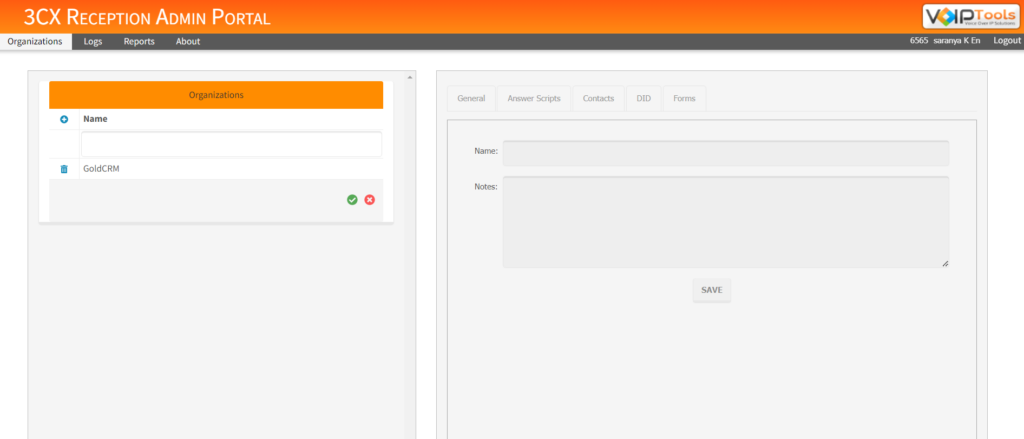
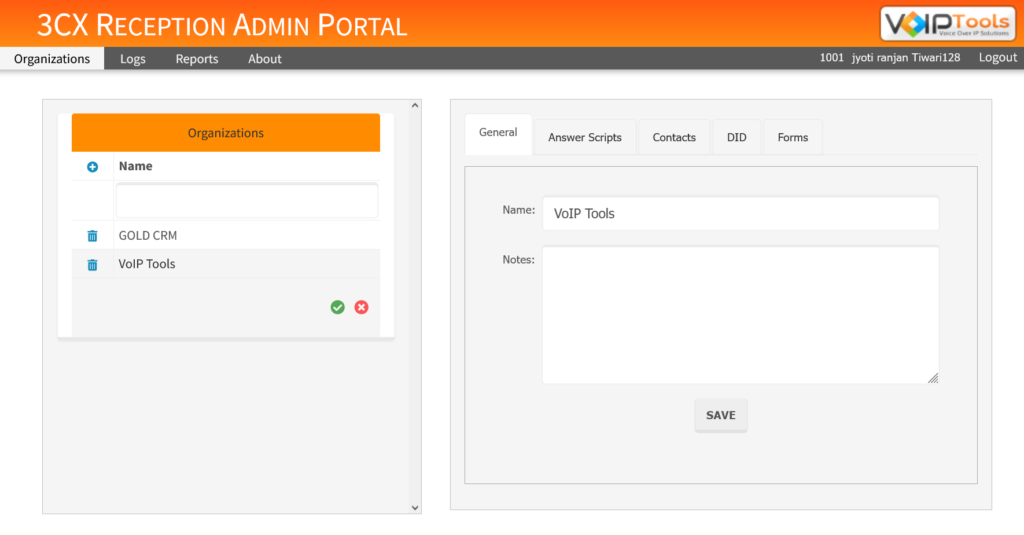
The Organizations tab enables you to create a new organization and add its respective data like Organization Name, Answer Scripts, Contacts details, Dialer IDs and Forms.
Create New Organization #
- In the Organizations tab and under the Organizations section, click the Add
 button beside Name column.
 - In the Name field, enter the name of the new organization that you want to add.
- Click the Save Changes
 button to save your organizations..
Delete Existing Organization #
- In the Organizations tab and under Organizations section, click the Delete
 button beside the organization that you want to delete.
 - Click the Save Changes
 button to save your changes.
Add Data for Specific Organizations #
This section lets you organize and manage data in a tailored manner, enabling streamlined processes, informed decision-making, accurate reporting, and valuable operational insights. It contains the following tabs,
- General tab
- Answer Scripts tab
- Contacts tab
- DID tab
- Forms tab
General tab #
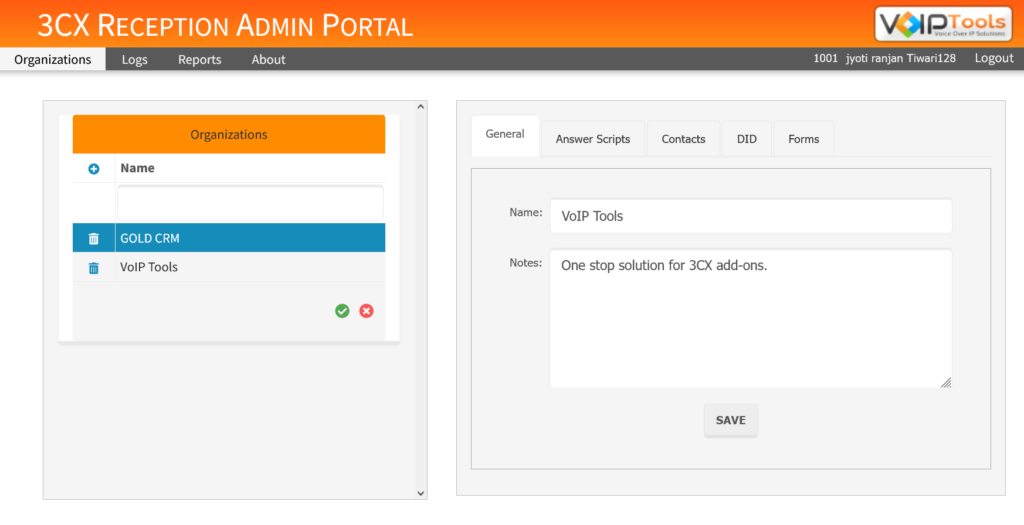
The General tab enables you to add primary data about the organization like the organization name and its respective notes.
- In the Organizations tab and under the Organizations section, select the organization for which you want to add/ edit data.
- In the General tab and in the Name field, enter the name of the Organization.
- In the Notes field, enter the basic information about the organization.
- Click Save to save your settings.
Answer Scripts tab #
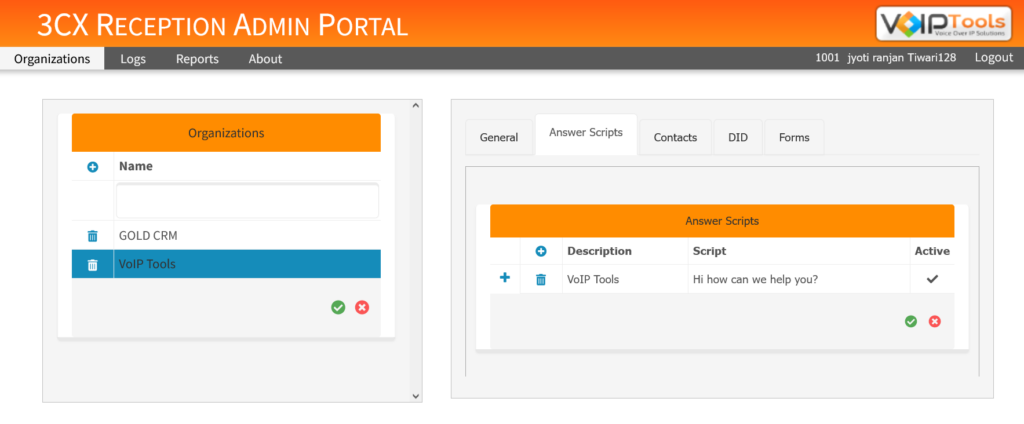
The Answer Scripts tab enables you to add script based on the set timings (‘Working Hours’ for instance). If a call is received at a timing that does not fall within the time range set for all the answer scripts then, the Default Script will be considered. Hence, you need not set timings for Default Script.
In the Answer Script tab you can do the following operations,
- Add new answer script
- Set time range for answer script.
Add New Answer Script #
- In the Answer Scripts tab, click the Add
 button beside the Description column.
 - In the Description field, enter the description for the new Answer Script that you want to add.
- In the Script field, enter the ‘Answer Script’ that you want to convey to the caller who calls during the timings set for the current answer script.
- In the Active field, click till the check mark appears to activate the current Answer Script.
- At the footer of the Answer Scripts page, click the Save Changes
 button to save the data you added.
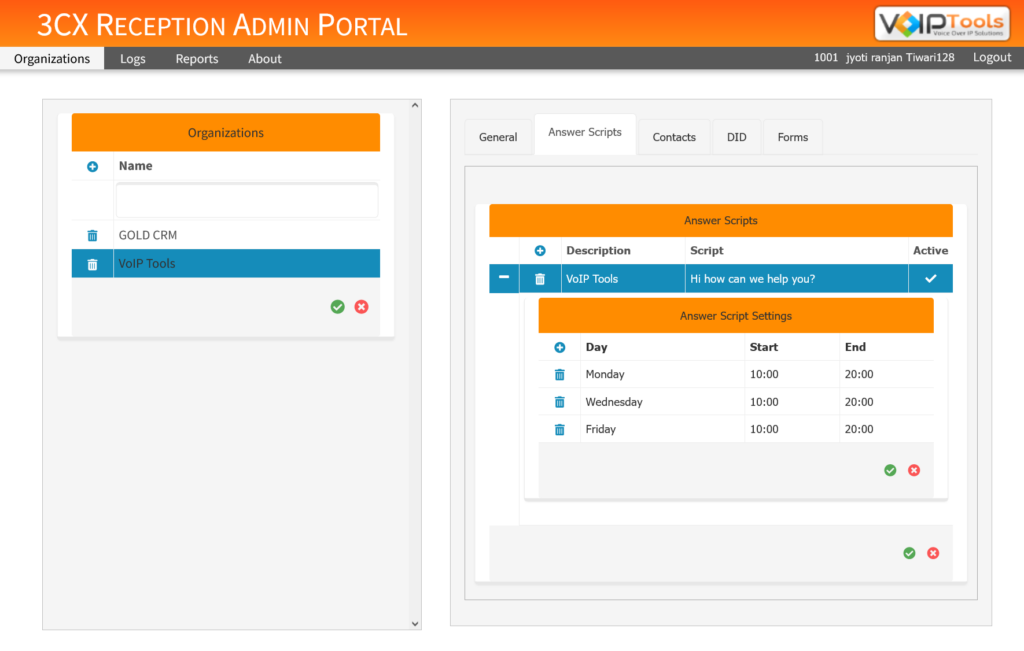
Set Time Range for Answer Script #
- Select the Answer Script for which you want to set the time range.
- Click the Add
 button on the column header and from the Day drop-down, select the desired week day for which you want to apply the current Answer Script.
 - From the Start time box, enter the start time range for the current Answer Script.
- From the End time box, enter the end time range for the current Answer Script.
- Click the Save Changes
 button to save the settings..
NOTE:
After selecting day, on your keyboard, hit ‘Tab’ key to enter start time and end time and save the values automatically.
Contacts tab #
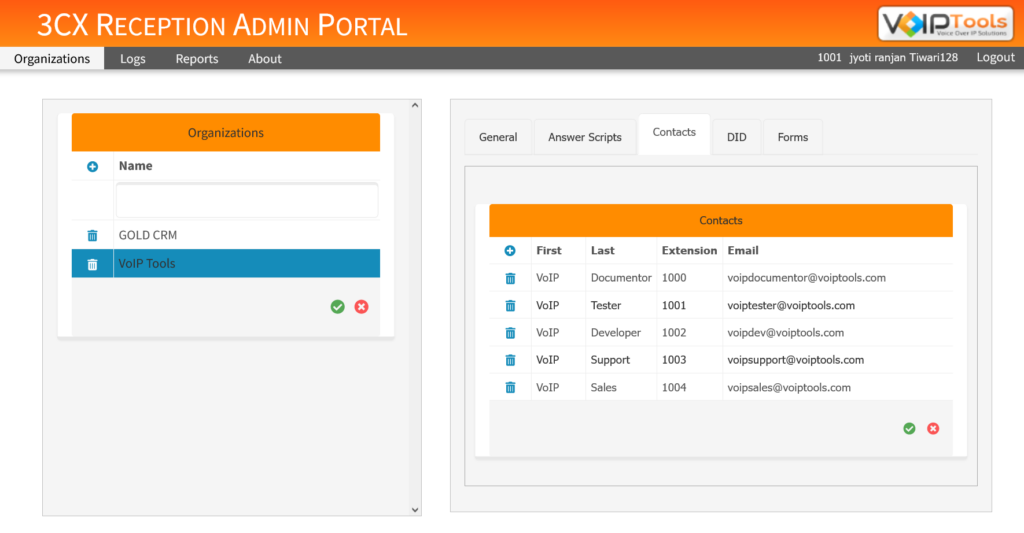
The Contacts tab enables you to add new contacts for the desired organization.
- In the Organizations tab and under the Organizations section, select the organization for which you want to add/ edit data.
- In the Contacts tab and on the column header, click the Add
 button to add a new contact.
 - In the First and Last fields, enter the First Name and Last Name of the contact respectively.
- In the Extension field, enter the extension number for the new contact.
- In the Email field, enter valid email id for the new contact for communication.
- At the footer of the Contacts page, click the Save Changes
 button to save your changes..
DID tab #
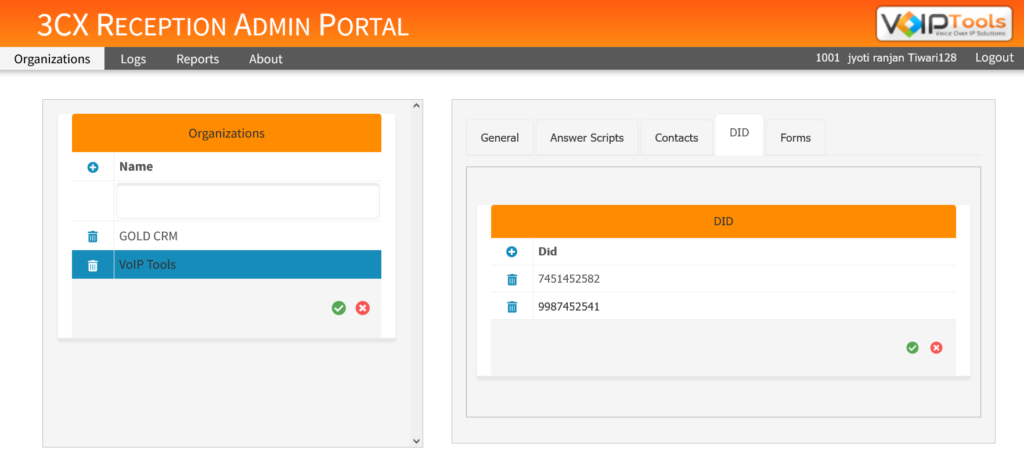
DID tab enables you to add a ‘Dialer ID’ (contact number) for the desired organization.
- In the Organizations tab and under the Organizations section, select the organization for which you want to add/ edit data.
- In the DID tab and on the column header, click the Add
 button to add a new Dialer ID.
 - In the DID field, enter the new dialer id for the selected organization.
- At the footer of the DID page, click the Save Changes
 button to save your changes.
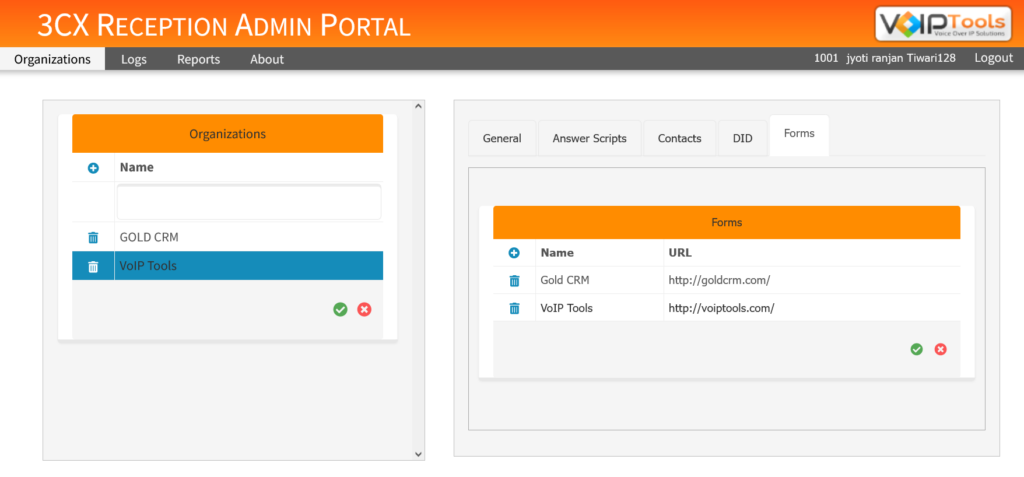
Forms tab #
The Forms tab enables you to add link to various files of type pdf, xls, xlsx, rtf, and csv.
- In the Organizations tab and under Organizations section, select the organization for which you want to add/ edit data.
- In the Forms tab and on the column header, click the Add
 button to add a new form.
 - In the Name field, enter the name for the new form that you want to add.
- In the URL field, enter the URL of the form.
- At the footer of the Forms page, click the Save Changes
 button to save your changes.
Reports #
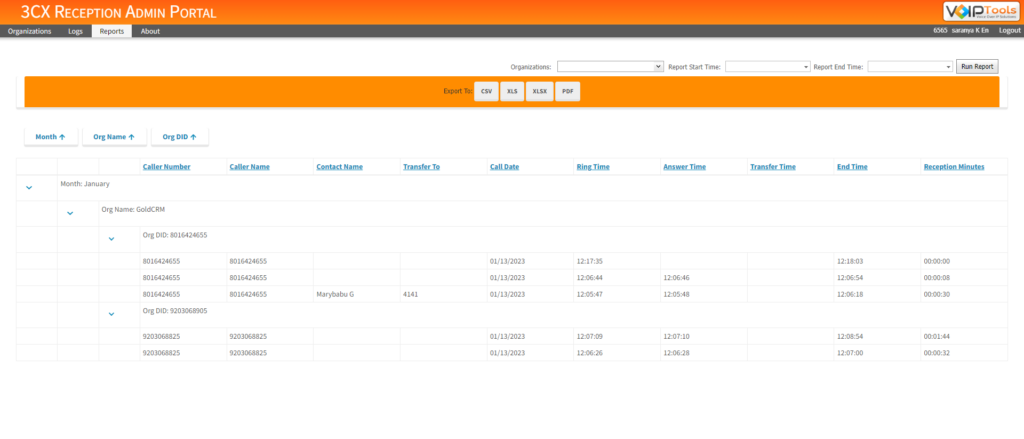
Reports tab enables you to view the complete call data based on the Report Start Time and Report End Time values. If you do not provide the Start and End Times, then the 3CX Reception displays complete call data since the product has been installed. You can export the data in various formats like CSV, XLS, XLSX and PDF.
Need Support? #
You get quick answers to most of your inquiries in our online manual. If you prefer direct contact, we offer various support channels, including phone, email, live chat, and our helpful VoIPTools forums.

24/7 Support Availability #
Rest assured, our dedicated team is here to assist you around the clock, every day of the year. Whether you’re based in the USA or India, we’re ready to provide prompt responses to your technical queries.

Windows Event Log for VoIPTools Applications and Services #
For troubleshooting any application errors, our Windows Event Log contains a comprehensive list of error messages, warnings, and informative notes related to all our VoIPTools applications and services. It’s a valuable resource to help you pinpoint and resolve any issues you may encounter.

Join Our Forum Community #
Are you looking to collaborate with other VoIPTools customers facing similar challenges? Our forum is the perfect platform to exchange ideas, solutions, and best practices. Join the conversation at: https://www.voiptools.com/community/

Real-Time Live Chat Assistance #
Got questions that need immediate answers? Our chat support team is available to assist you in real time. Just click on the Live Chat button located at the lower right corner of our website, and we’ll acknowledge your queries right away.

Efficient Email Support #
To ensure a thorough understanding of your concerns, email us at support@voiptools.com. Describe your issue in detail, and we’ll get back to you within one business day with the support you need.

Reach Us by Phone #
If you prefer to speak with a representative directly, you can reach us at +1 801-642-4655. Our attentive team is available to take your calls from 8:00 AM to 6:00 PM (Central Standard Time).
Comprehensive support services: #

Free Support #
If you’ve purchased our products through a VoIPTools Partner, rest assured that they provide first-level support at no additional cost. Partners have access to 100% free technical assistance and actively participate in the troubleshooting process.
VoIPTools customers enjoy access to our online manuals and receive support through emails (with responses within one business day) and live chat. However, please note that we do not provide remote server login assistance.

Paid Support #
For a more hands-on experience, consider our “Installation Support” package. Our expert support team can log in to your servers, and install and configure all our tools. This comprehensive service includes setting up SQL Server Express and Internet Information Server if necessary. We’ll work closely with you to tailor our applications to meet your requirements.
We’re committed to providing top-notch support to ensure your VoIPTools experience is smooth and hassle-free. Contact us today, and let us assist you in making the most of our powerful tools!
