Effortlessly Sync and Manage 3CX Data with 3CX Exporter for Real-Time Custom Reports.
Experience seamless synchronization and effortless data management with 3CX Exporter. This tool enables you to sync your 3CX data and Call Detail Records (CDR) files with popular databases like Microsoft SQL Server or MySQL. Let this Windows service work in the background, ensuring your external database remains in harmony with your 3CX system. Gain instant access to real-time information and generate custom reports for your business. Say goodbye to manual hassles and hello to streamlined operations with 3CX Exporter.
The 3CX Exporter automates the export of Call Detail Records (CDR) from 3CX’s internal PostgreSQL database to Microsoft SQL Server or MySQL. This Windows service runs in the background, maintaining synchronization between the external database and the data in 3CX.
Discover the capabilities of 3CX Exporter, which enables you to generate customized reports using well-known reporting tools. Store data in SQL or MySQL, opening up numerous opportunities for data analysis and reporting requirements.
REMOTE CDR ACCESS
Exporter provides a simplified solution by utilizing our Relay. This enables you to access CDR files, eliminating any difficulties. Embrace seamless file retrieval with our user-friendly solution.
EFFORTLESS DATABASE SYNC
Achieve smooth synchronization between your external database and 3CX using this efficient Windows service. This service operates in the background, ensuring that your data stays up-to-date.
EASY ARCHIEVING
Archive historical information using 3CX Exporter. Categorize and structure vital data from your 3CX system, enabling convenient retrieval as required.
Optimize your workflow using 3CX Exporter, a user-friendly tool that automates the export of Call Detail Records. Specify your preferred export frequency during installation, and let the tool handle the remaining tasks. You benefit from the convenience of adjusting both the export frequency and database settings as needed, granting you seamless control over your data management.
IIS is needed as a web server to host and manage web-based applications and services.
VoIPTools Universal Updater
This component is necessary for updates, ensuring the application remains current and functional.
VoIPTools Relay Service
It is used for proper integration and functionality of the 3CX Exporter within the 3CX environment.
Microsoft SQL Server 2016 or above (Including the free SQL Express edition)
3CX requires Microsoft SQL Server 2016 or later for database management.
Static IP for VoIPTools and 3CX servers
This is to ensure proper two-way communication, both the 3CX server (Relay) and the VoIPTools server. Dynamically assigned IP addresses are not supported. Additionally, it is recommended to use HTTPS for secure communication, which requires a FQDN for SSL/TLS certificate validation between the VoIPTools server and the Relay.
Port number 6350 opened on your device
Port 6350 is a specific network port used by 3CX for communication purposes. Opening this port on the device’s firewall allows incoming and outgoing traffic to pass through, enabling the 3CX software to send and receive data over the network effectively.
NOTE:
If you are installing 3CX Exporter in a server other than 3CX Server, then you should install ‘C++ 2010 redistribution package (X86)’ in the 3CX Server. You can install it from this link.
Installation on a domain controller may require additional assistance
You can order 3CX Exporter online at https://www.voiptools.com. Your order confirmation email will include your license key and a link to download the software.
INSTALL PREREQUISITES
You must install several prerequisites before installing the 3CX Exporter. The Advanced Installer identifies and installs these applications automatically. Click here to learn about the required prerequisites.
INSTALL 3CX EXPORTER
This User Guide contains step-by-step instructions to successfully install 3CX Exporter. Begin by extracting the installer from the downloaded zip file (Step 1 above), then run the setup program named Exporter.exe
LOG IN TO THE WEB APPLICATION
You can now log in to the web application using the extension number and the PIN.
NOTE:
When installing SQL Server, we recommend you install it in “Mixed Mode” to include SQL Authentication, and install SQL Management Studio
When installing IIS, be sure to install Basic Authentication, .Net Extensibility, and ASP.Net 4.X
Click on the software installer that was downloaded in step 1 above. The installation wizard will automatically identify the needed prerequisites and assist you with the installation of the prerequisites needed to run ‘3CX Exporter’. These include SQL Server Express (Web Installer) and SQL Server Management Studio.
Click the downloaded installer executable to launch the Prerequisites Setup Wizard and click Next.
Figure 1: Prerequisites Setup Wizard
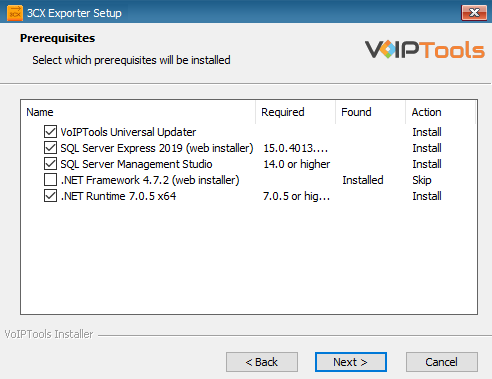
In the Prerequisites window, the installer will identify the missing prerequisites. It is important that you install all the required prerequisites. However, you can select/unselect the applications to be installed based on your unique requirements. Click Next to continue.
Figure 2: Select Prerequisites to Install
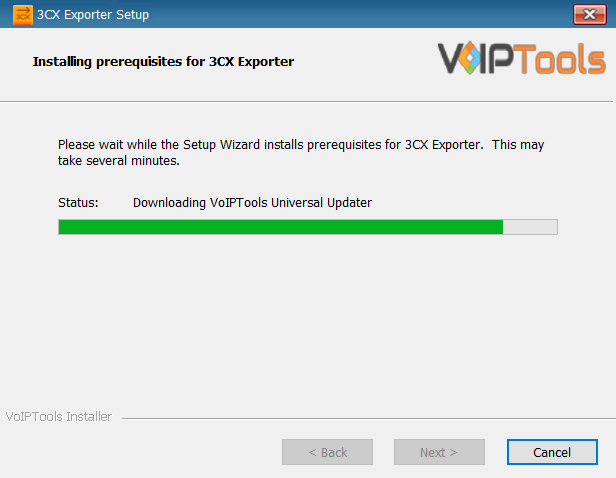
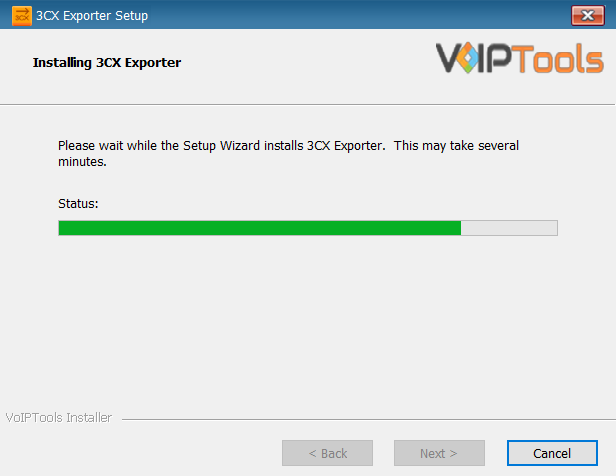
The installer will download and install the selected applications.
Figure 3: Prerequisites Installation in Progress
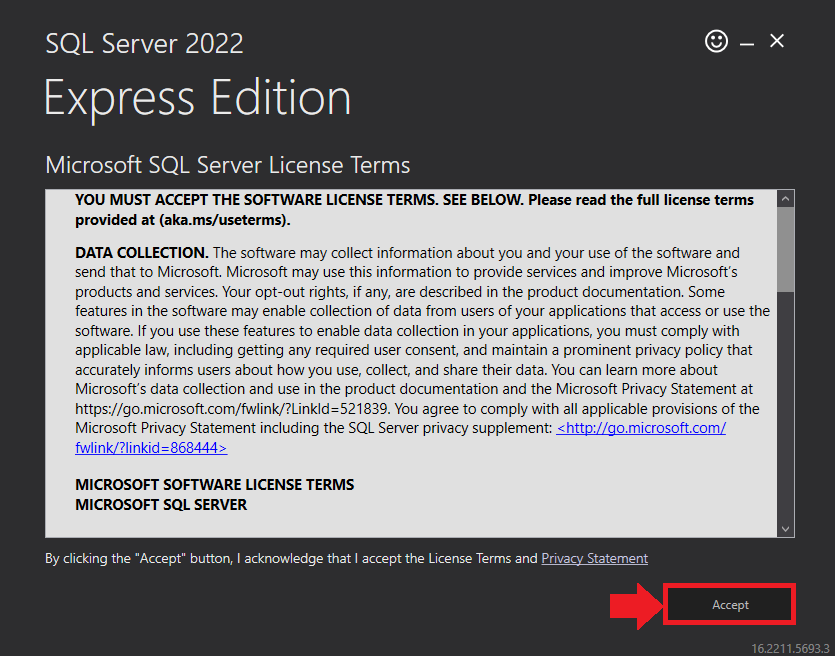
In the Microsoft SQL Server License Terms click the Accept button to acknowledge the license terms and continue.
This page appears if you do not have SQL Server Express preinstalled in your device.
Figure 4: SQL Server Express: Accept License Terms
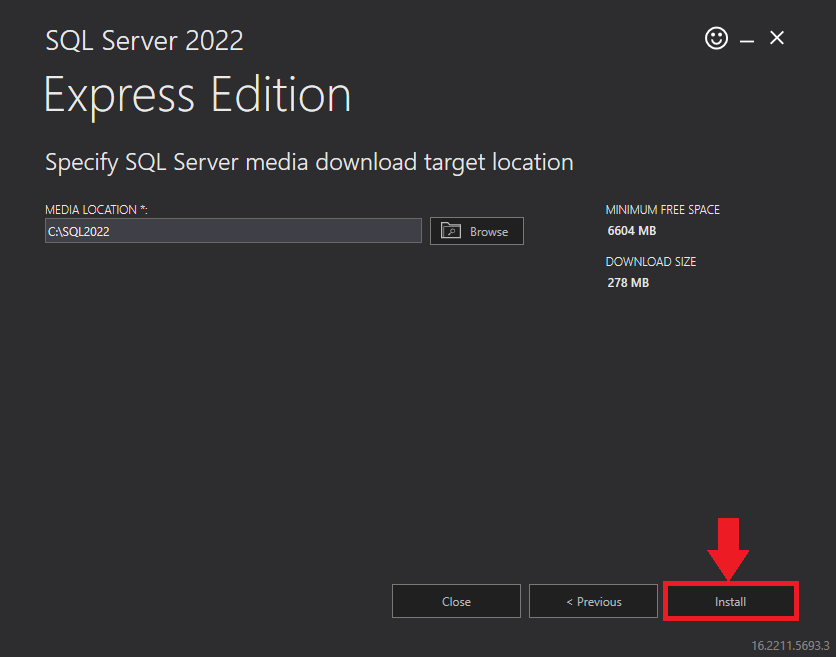
View the SQL Server Media target location in the Media Location field. If required, you can click the Browse button to change the location. Click Install to begin the installation of SQL Server Express.
Figure 5: SQL Server Express: Target Location
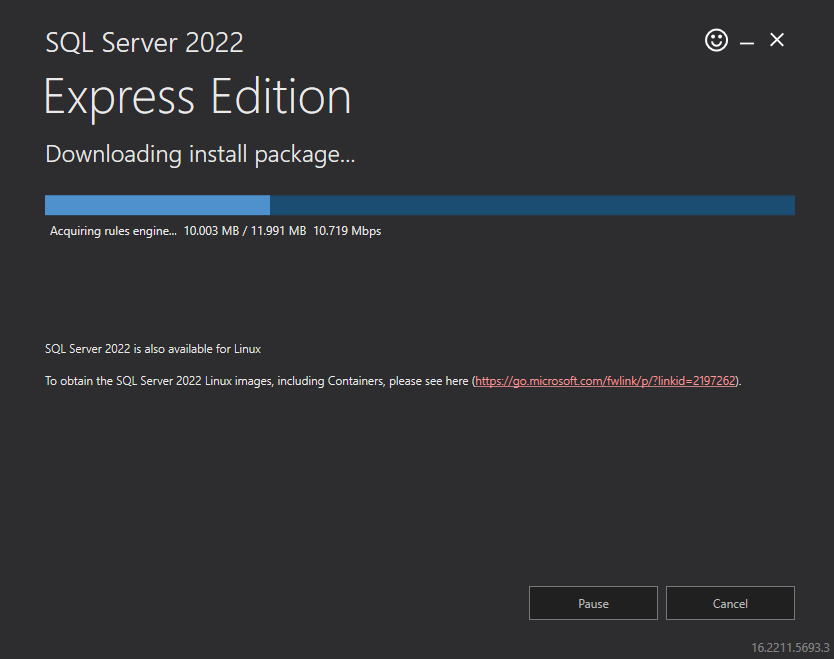
SQL server installation is in progress. This may take several minutes to complete.
Figure 6: SQL Server Installation In Progress
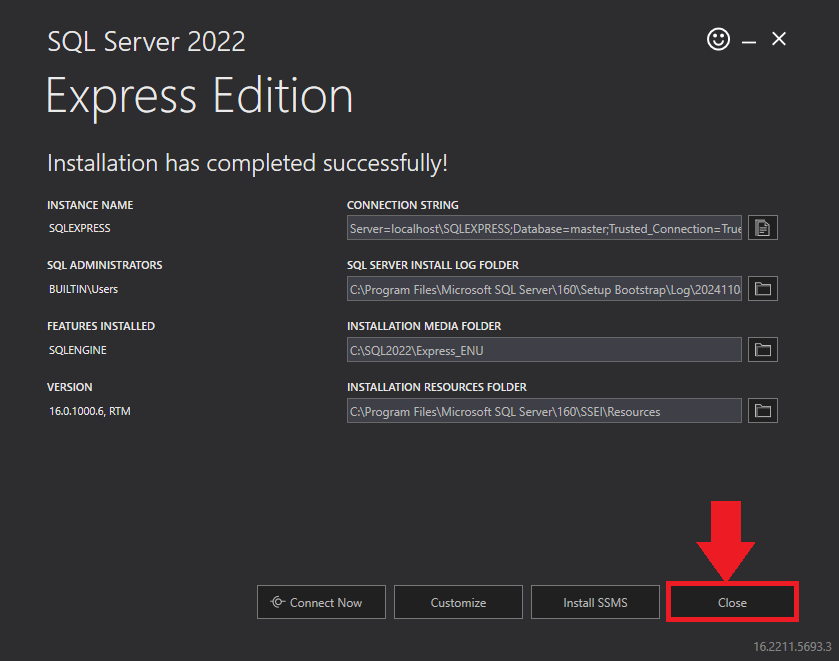
Click the Close button once the prerequisites are installed.
Figure 7: SQL Server Express: Installed Successfully
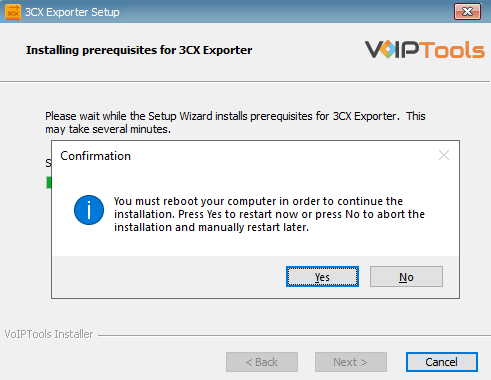
In the confirmation message box, click Yes to reboot the computer.
Figure 9: SQL Server Express: Reboot your computer
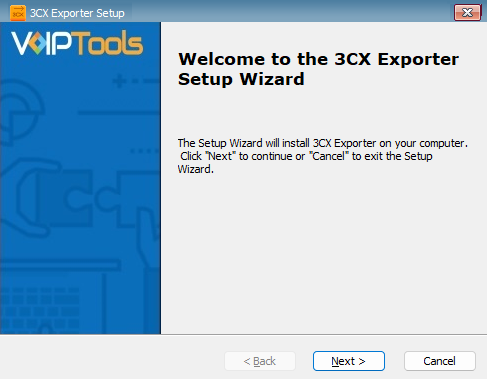
After all the prerequisites are installed, the 3CX Exporter Setup Wizard appears. Click Next to Continue.
Figure 10: 3CX Exporter Setup Wizard
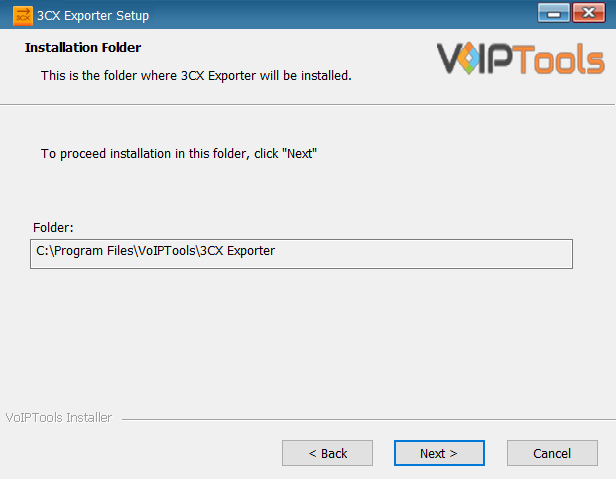
On the Select Installation Folder window, the Folder field displays the location where the ‘3CX Exporter’ will be installed. Note that you cannot change the path.
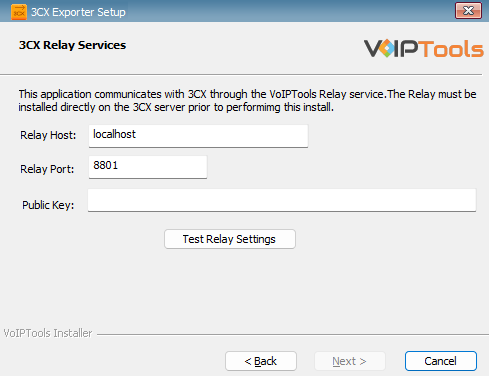
In the 3CX Relay Services window, in the Relay Host field, enter the FQDN of your 3CX server.
Enter 8801 in the Relay Port field.
Enter the public key you took from VoIPTools Relay services in the Public Key text area.
Figure 12: Configure Relay Services
Click the Test Relay Settings to confirm ‘3CX Exporter’ can communicate with the Relay services running on the 3CX server.
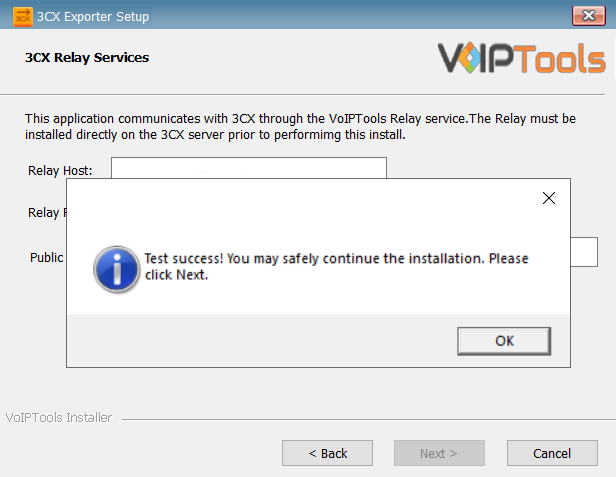
If the ‘3CX Exporter’ is successfully able to communicate with the Relay services that run on the 3CX server, a Success message box appears. Click OK. If the test fails, you will not be able to continue until communication with the relay is established.
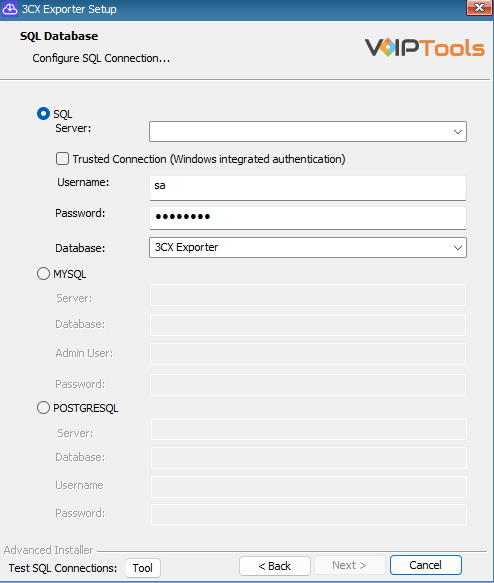
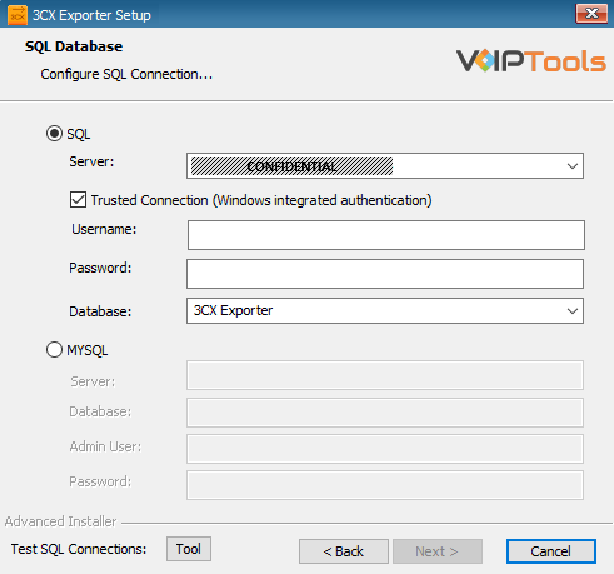
If using the free SQL Express Edition, the default SQL Instance name is SQLExpress.
NOTE:
If you want to use ‘SQL Authentication’, then install SQL Server in ‘Mixed‘ mode.
If SQL Server is installed on a server other than the server where 3CX Exporter is installed, you will need to configure SQL Server to allow remote connections.
Enter your credentials in the Username and Password fields.
NOTE:
Make sure that you select a SQL Login that has sufficient permissions to alter the database and create SQL objects.
Select or enter 3CX Exporter in the Database dropdown.
Figure 14: Configuring SQL Database
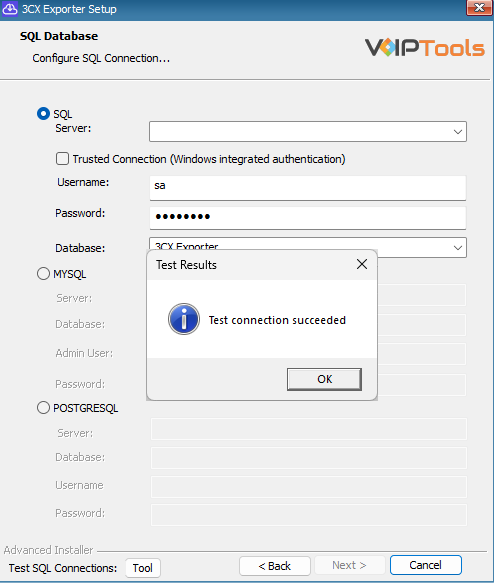
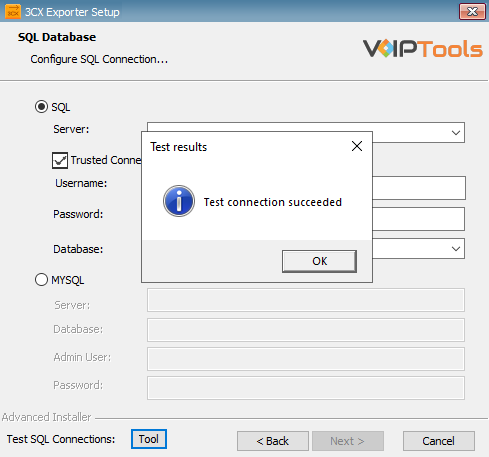
In the Test SQL Connections section, click the Tool button to test the connection.
Figure 15: SQL Authentication – Test Connection Success
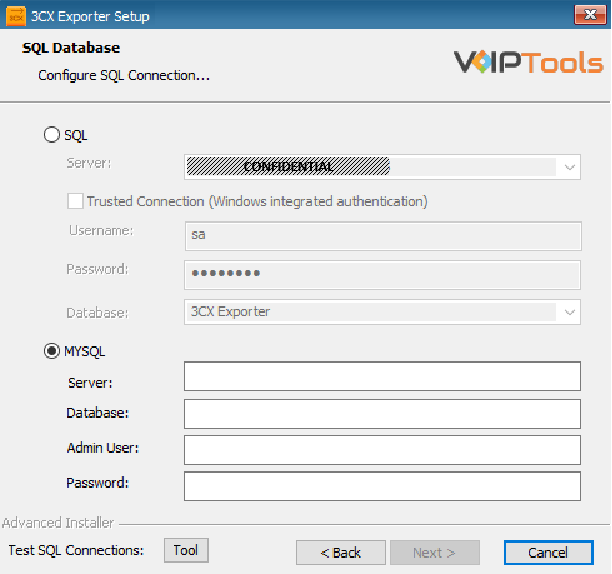
Click the MySQL radio box to use the MySQL database.
Enter the name of the server in the Server field.
Enter the name of the database in the Database field.
Enter your credentials in the Admin User and the Password fields.
Figure 16: Configuring MySQL Server
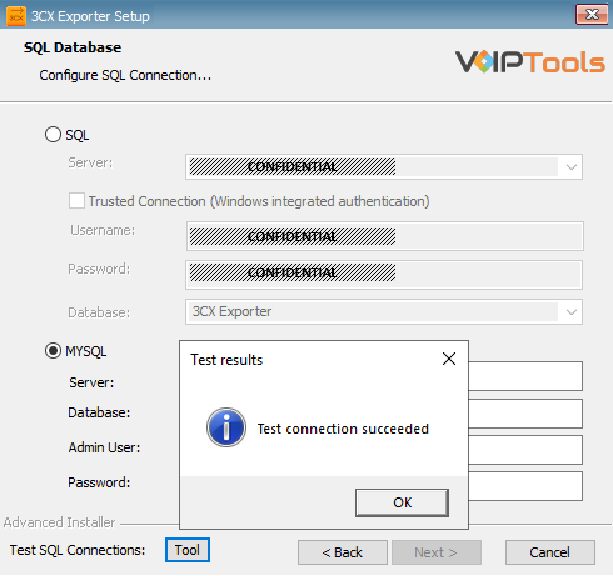
Click the Tool button to test the connection.
Figure 17: MySQL Connection Test Successful Message Box
NOTE:
The first time you install 3CX Exporter, DO NOT enter a database name. Choose Select or enter a database name and leave the database name blank. The installer will create the SQL database automatically and apply the necessary permissions. If upgrading 3CX Exporter from a previous version, select the existing database from the list.
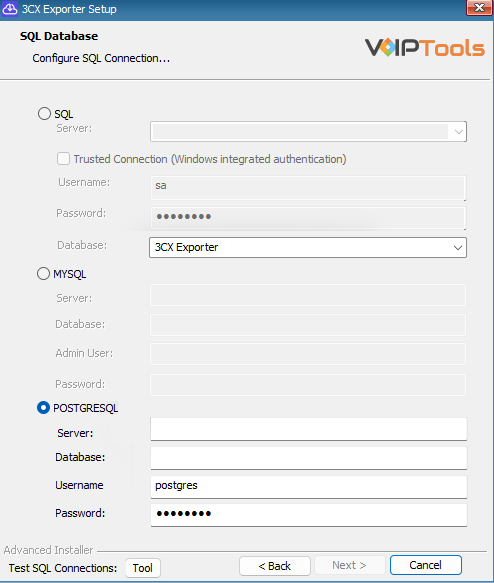
Click the POSTGRESQL radio box to use the POSTGRESQL database.
Enter the name of the server in the Server field.
Enter the name of the database in the Database field.
Enter your credentials in the Username and the Password fields.
Figure 18: Configuring POSTGRESQL Server
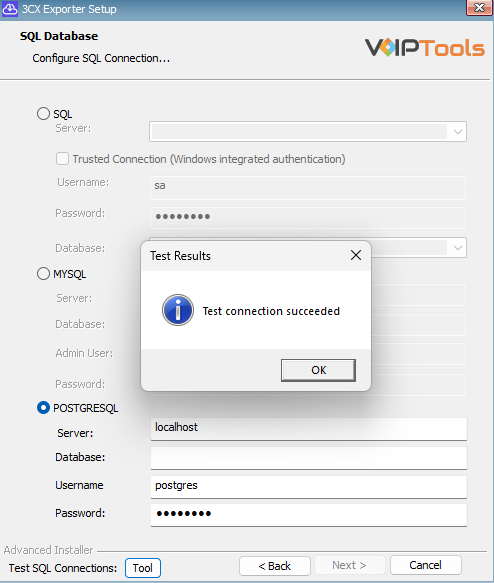
Click the Tool button to test the connection.
Figure 19: POSTGRESQL Connection Test Successful Message Box
NOTE:
The first time you install 3CX Exporter, DO NOT enter a database name. Choose Select or enter a database name and leave the database name blank. The installer will create the SQL database automatically and apply the necessary permissions. If upgrading 3CX Exporter from a previous version, select the existing database from the list.
To use Windows Integrated Authentication check the Trusted Connection (Windows integrated authentication) checkbox.
The VoIPTools installer will create a local Windows user name as “VoIPToys” and give you sufficient rights to this user to create/update the SQL database.
Figure 20: Windows Integrated Authentication
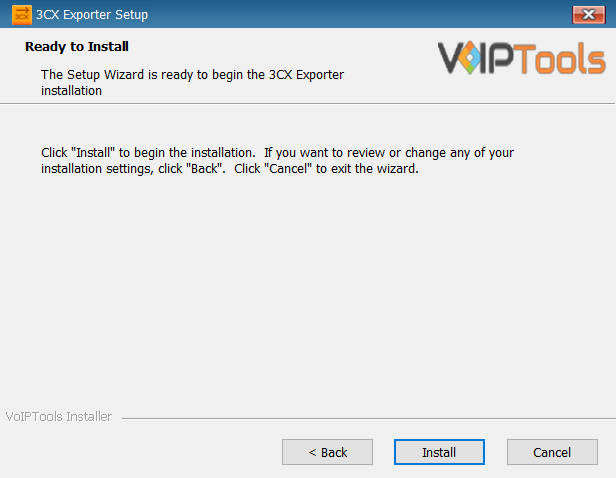
In the Advanced Installer section, click the Tool button to test the connection.
Figure 21: Windows Integrated Authentication – Test Connection Success
NOTE:
We recommend you use SQL Authentication rather than Windows authentication. Many of our tools leverage a Call Flow Designer (CFD) application running on the 3CX.Frequently our CFD applications require access to an SQL database. If the 3CX server and the database server are not in an Active Directory domain, Windows authentication will fail.
To use SQL Authentication, you must configure the SQL server to run in Mixed Mode. If you install SQL Server with our tools, we configure SQL in Mixed Mode.
Double-click the 3CX Exporter Icon to open the web application.
On the Login page, do the following tasks,
In the Extension field, enter your 3CX extension number.
In the PIN field, enter your 3CX voicemail PIN.
Click the Login button to log in to your account.
Figure 25: Login Page
NOTE:
Access to the 3CX Exporter application is limited to Manager accounts. If you attempt to log in as a User, access will be denied, and the following image will be displayed.
NOTE:
It is essential to re-register the Exporter application because the framework application has transitioned from Windows to Blazer.
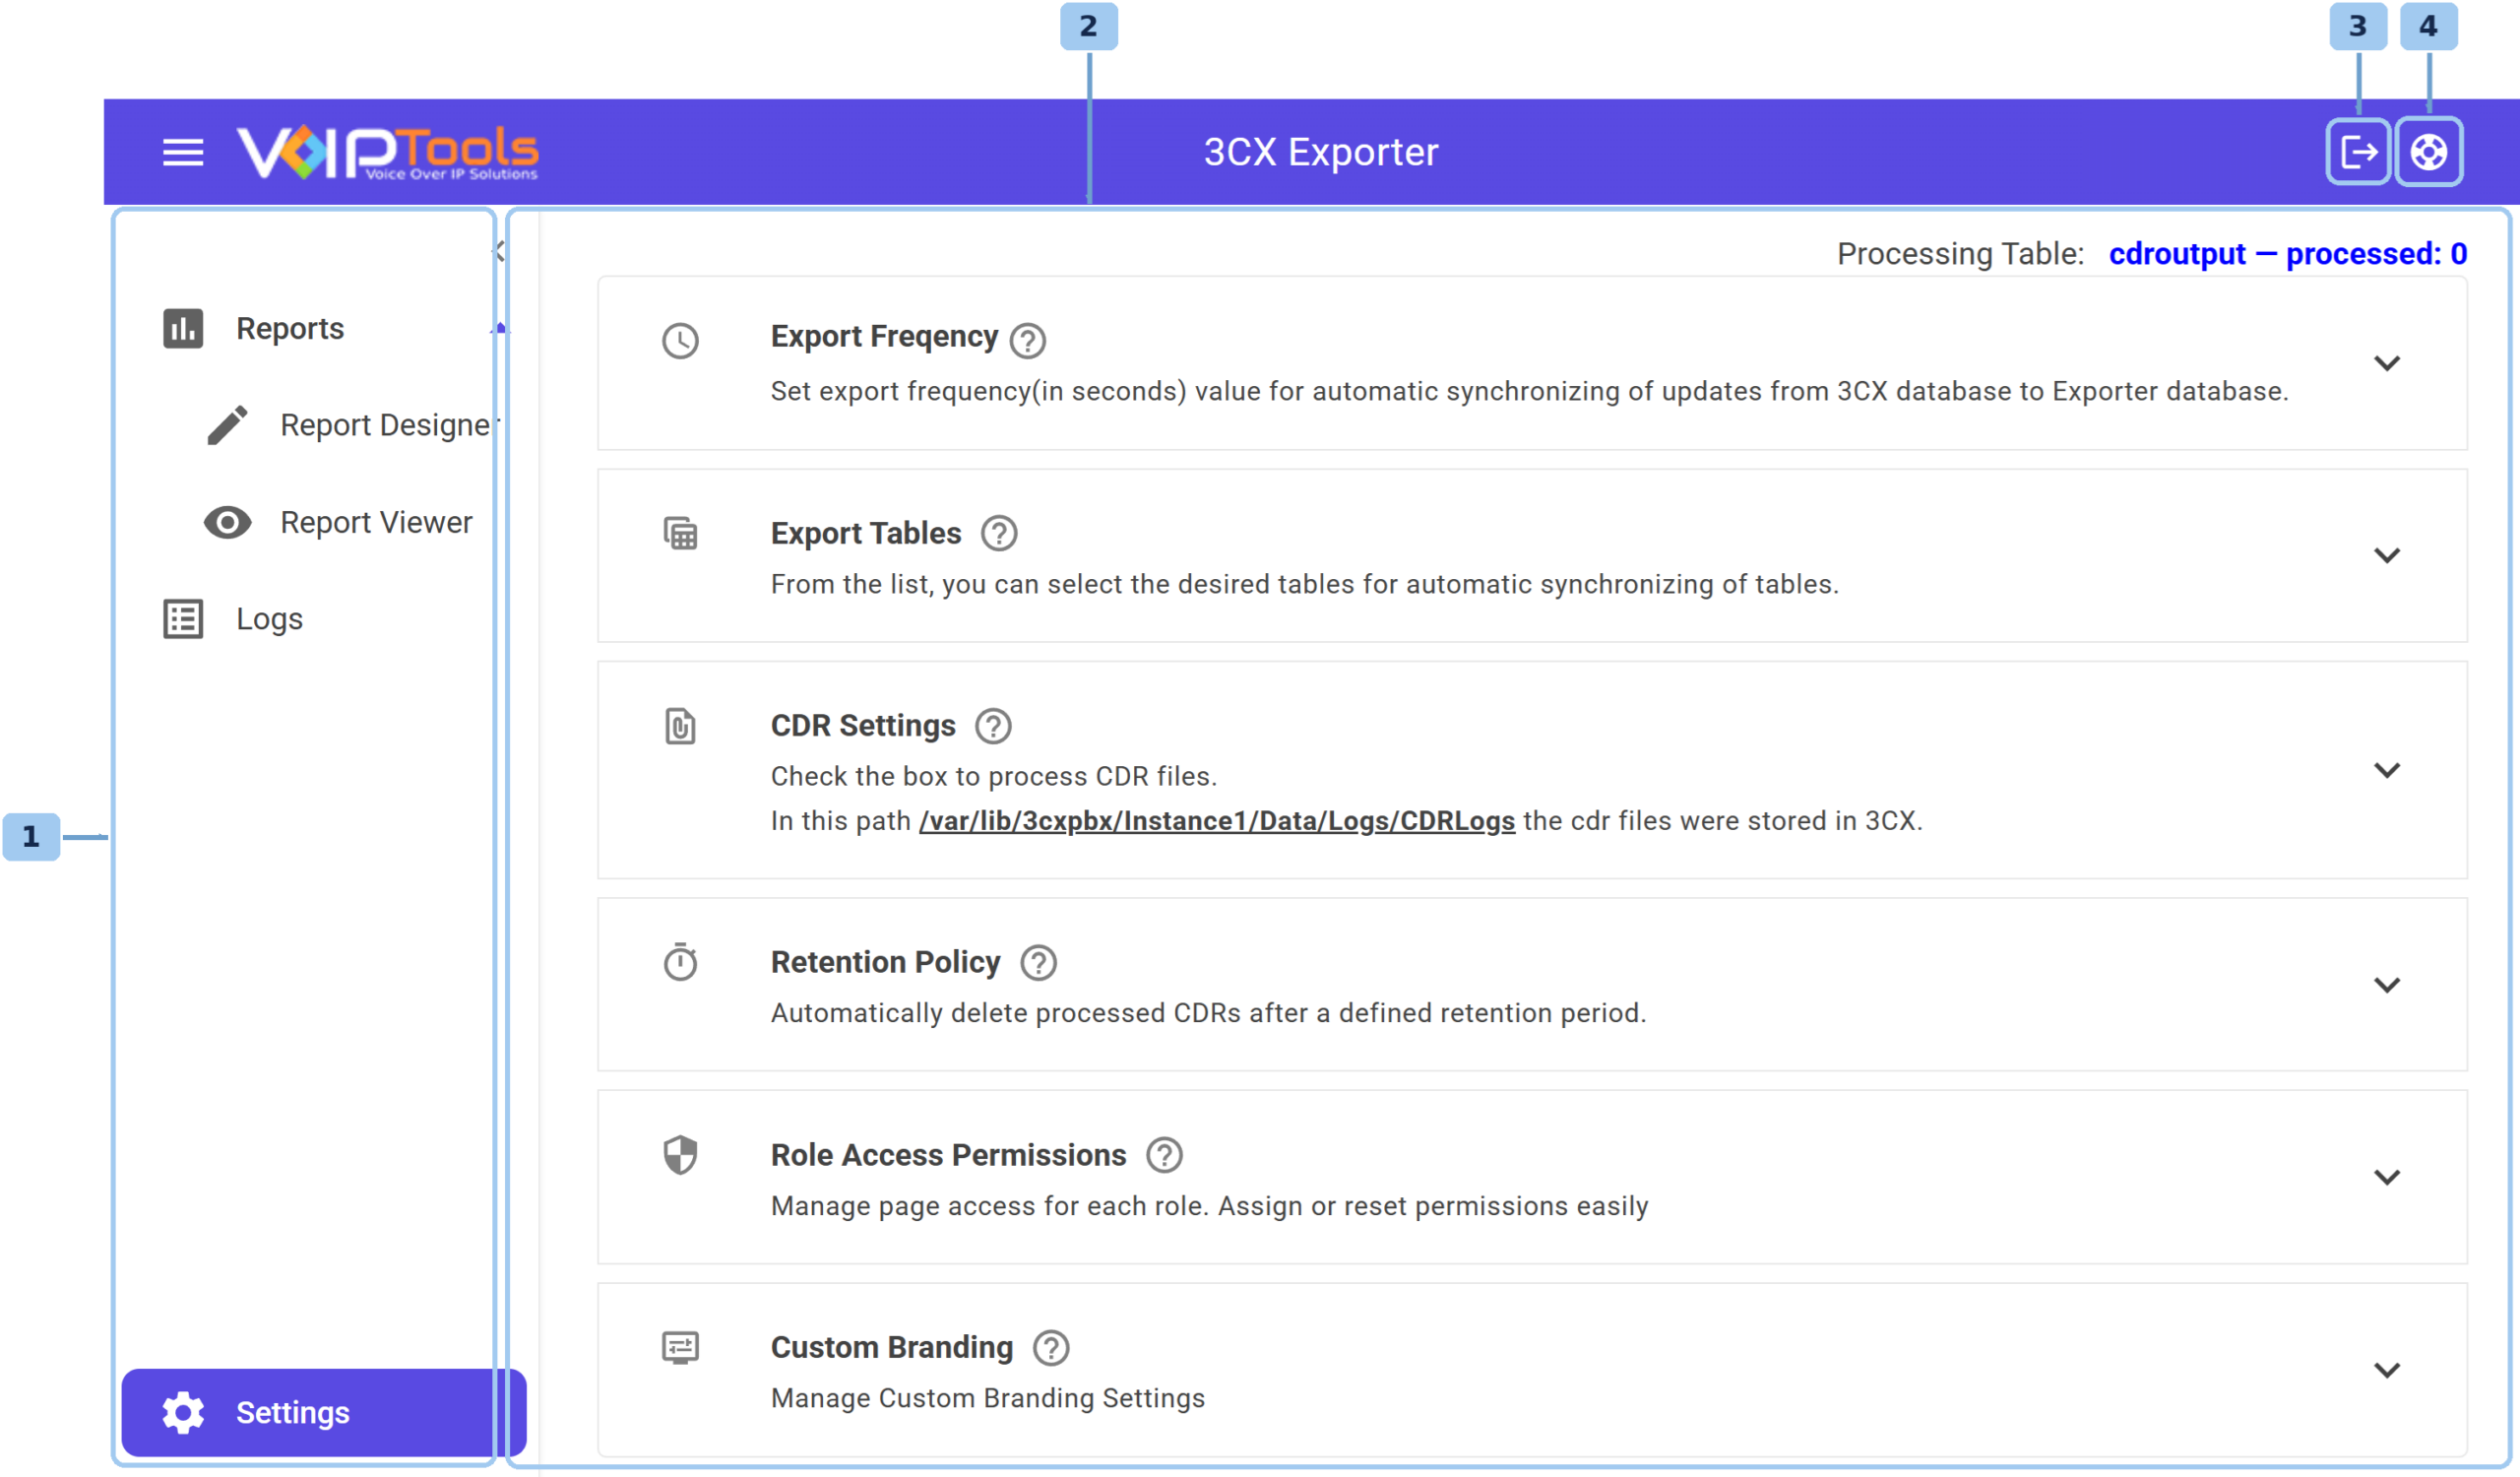
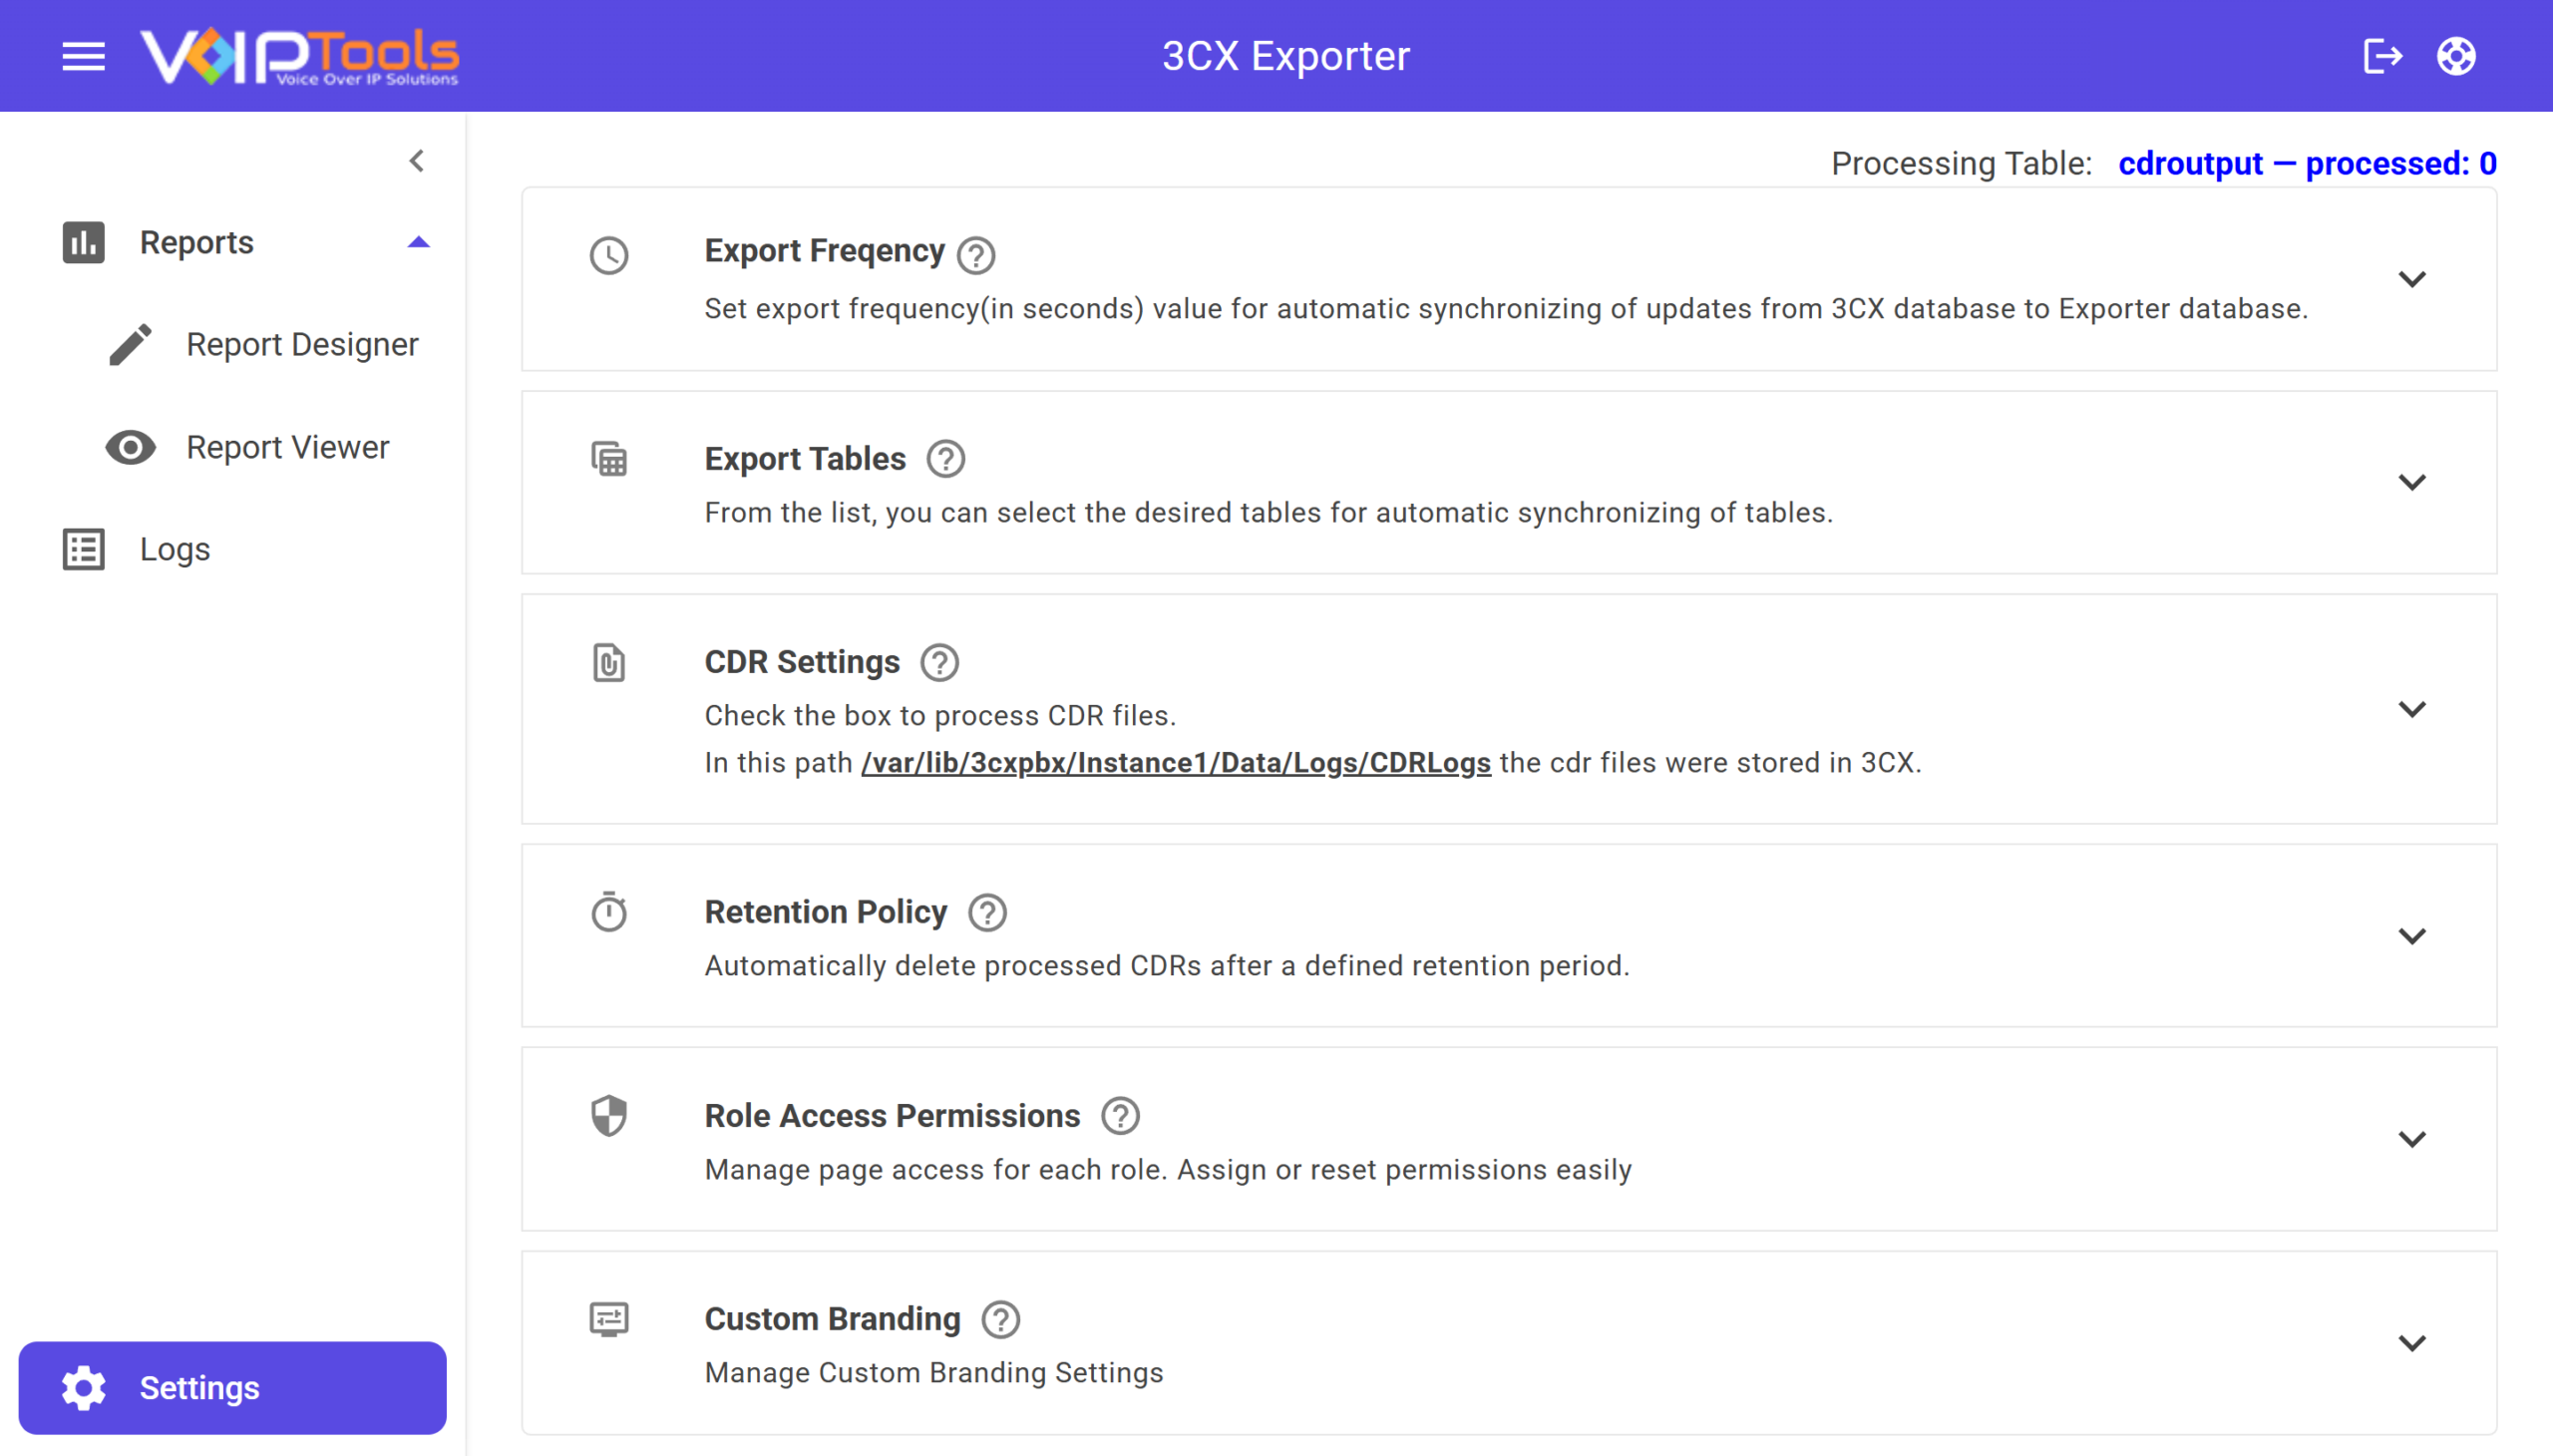
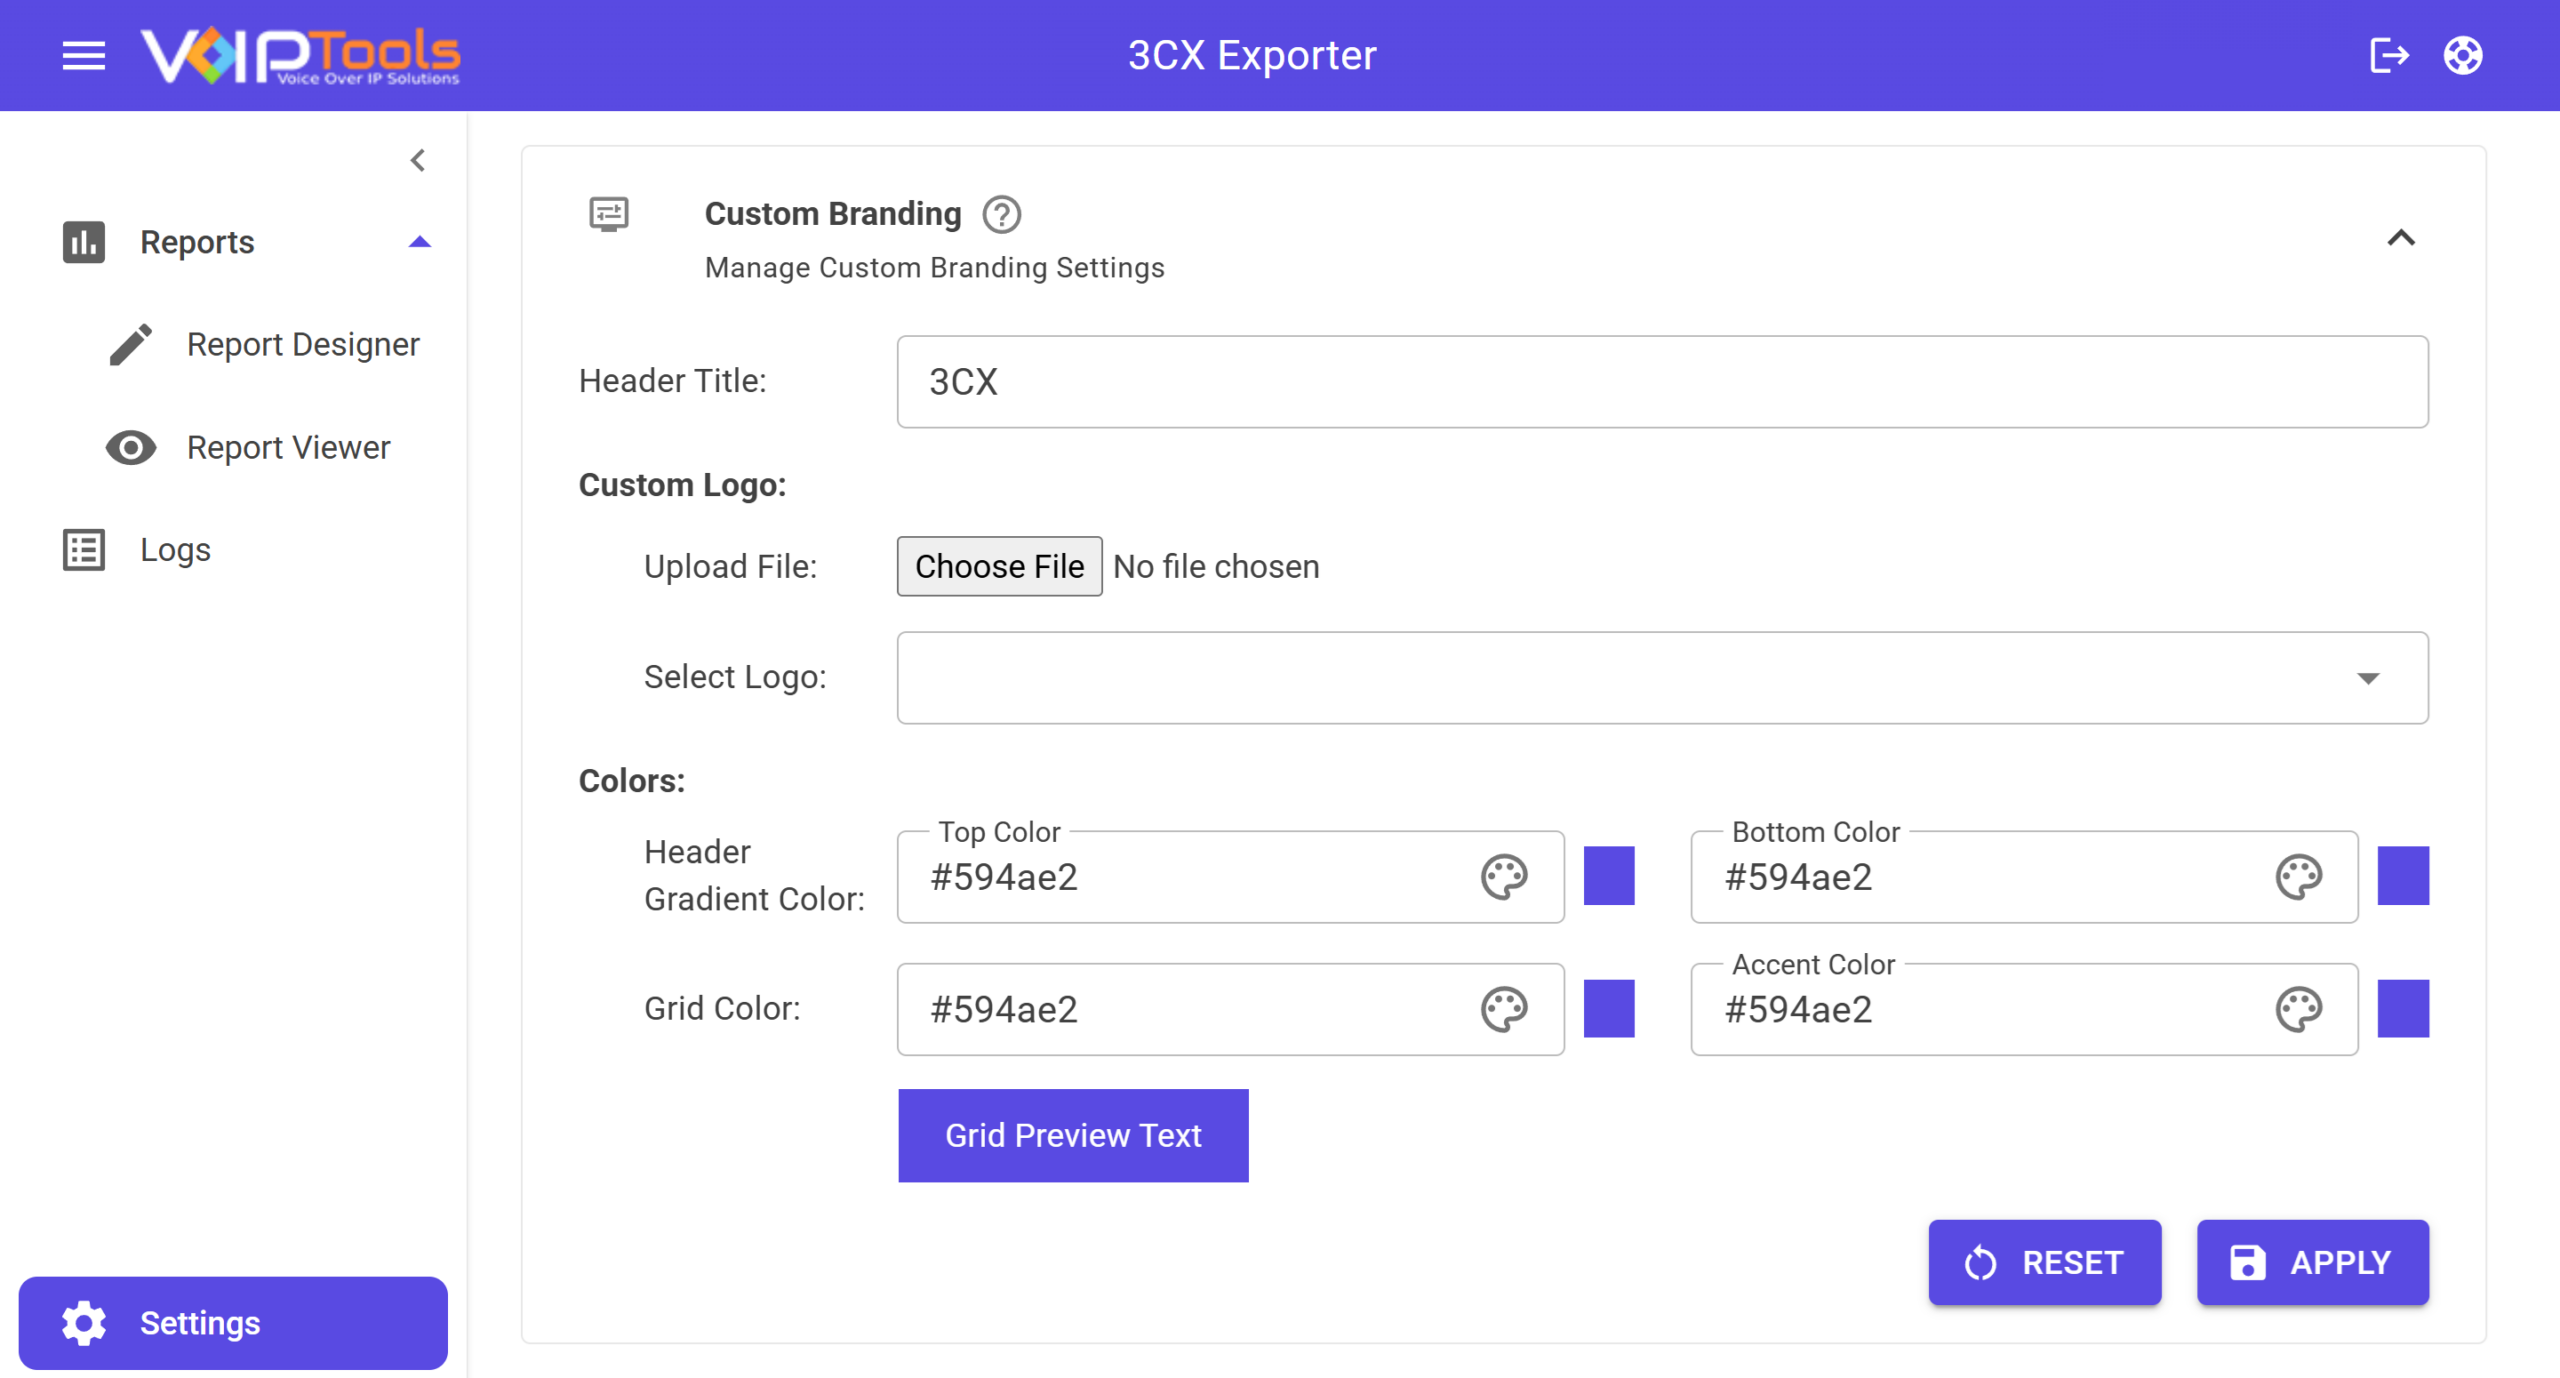
The Settings menu is the first page displayed after you log in to 3CX Exporter. Use this page to configure export settings, data processing, retention policies, role-based access, and custom branding.
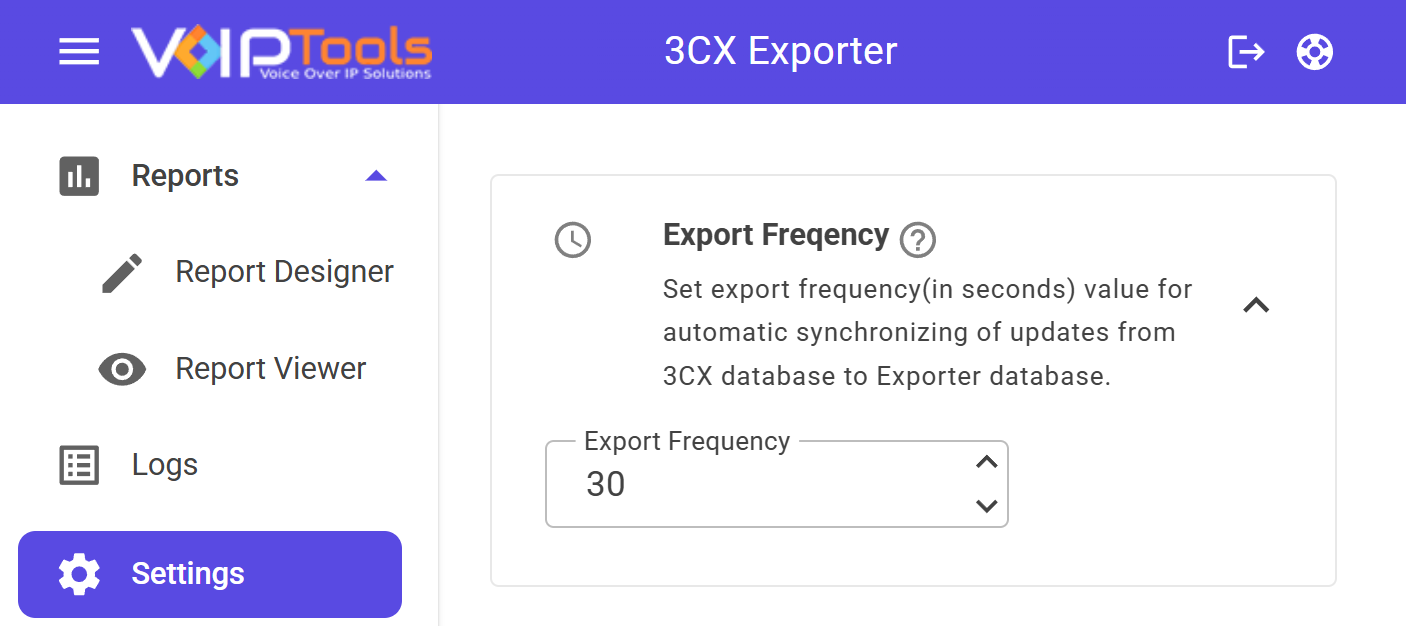
In the Export Frequency section, you can define how often you want to export tables to the database. This setting controls the automatic synchronization of updates from the 3CX database to the Exporter database.
To set the export frequency, follow the procedure,
In the Settings menu, expand the Export Frequency section.
In the Export Frequency field, set the frequency (in seconds).
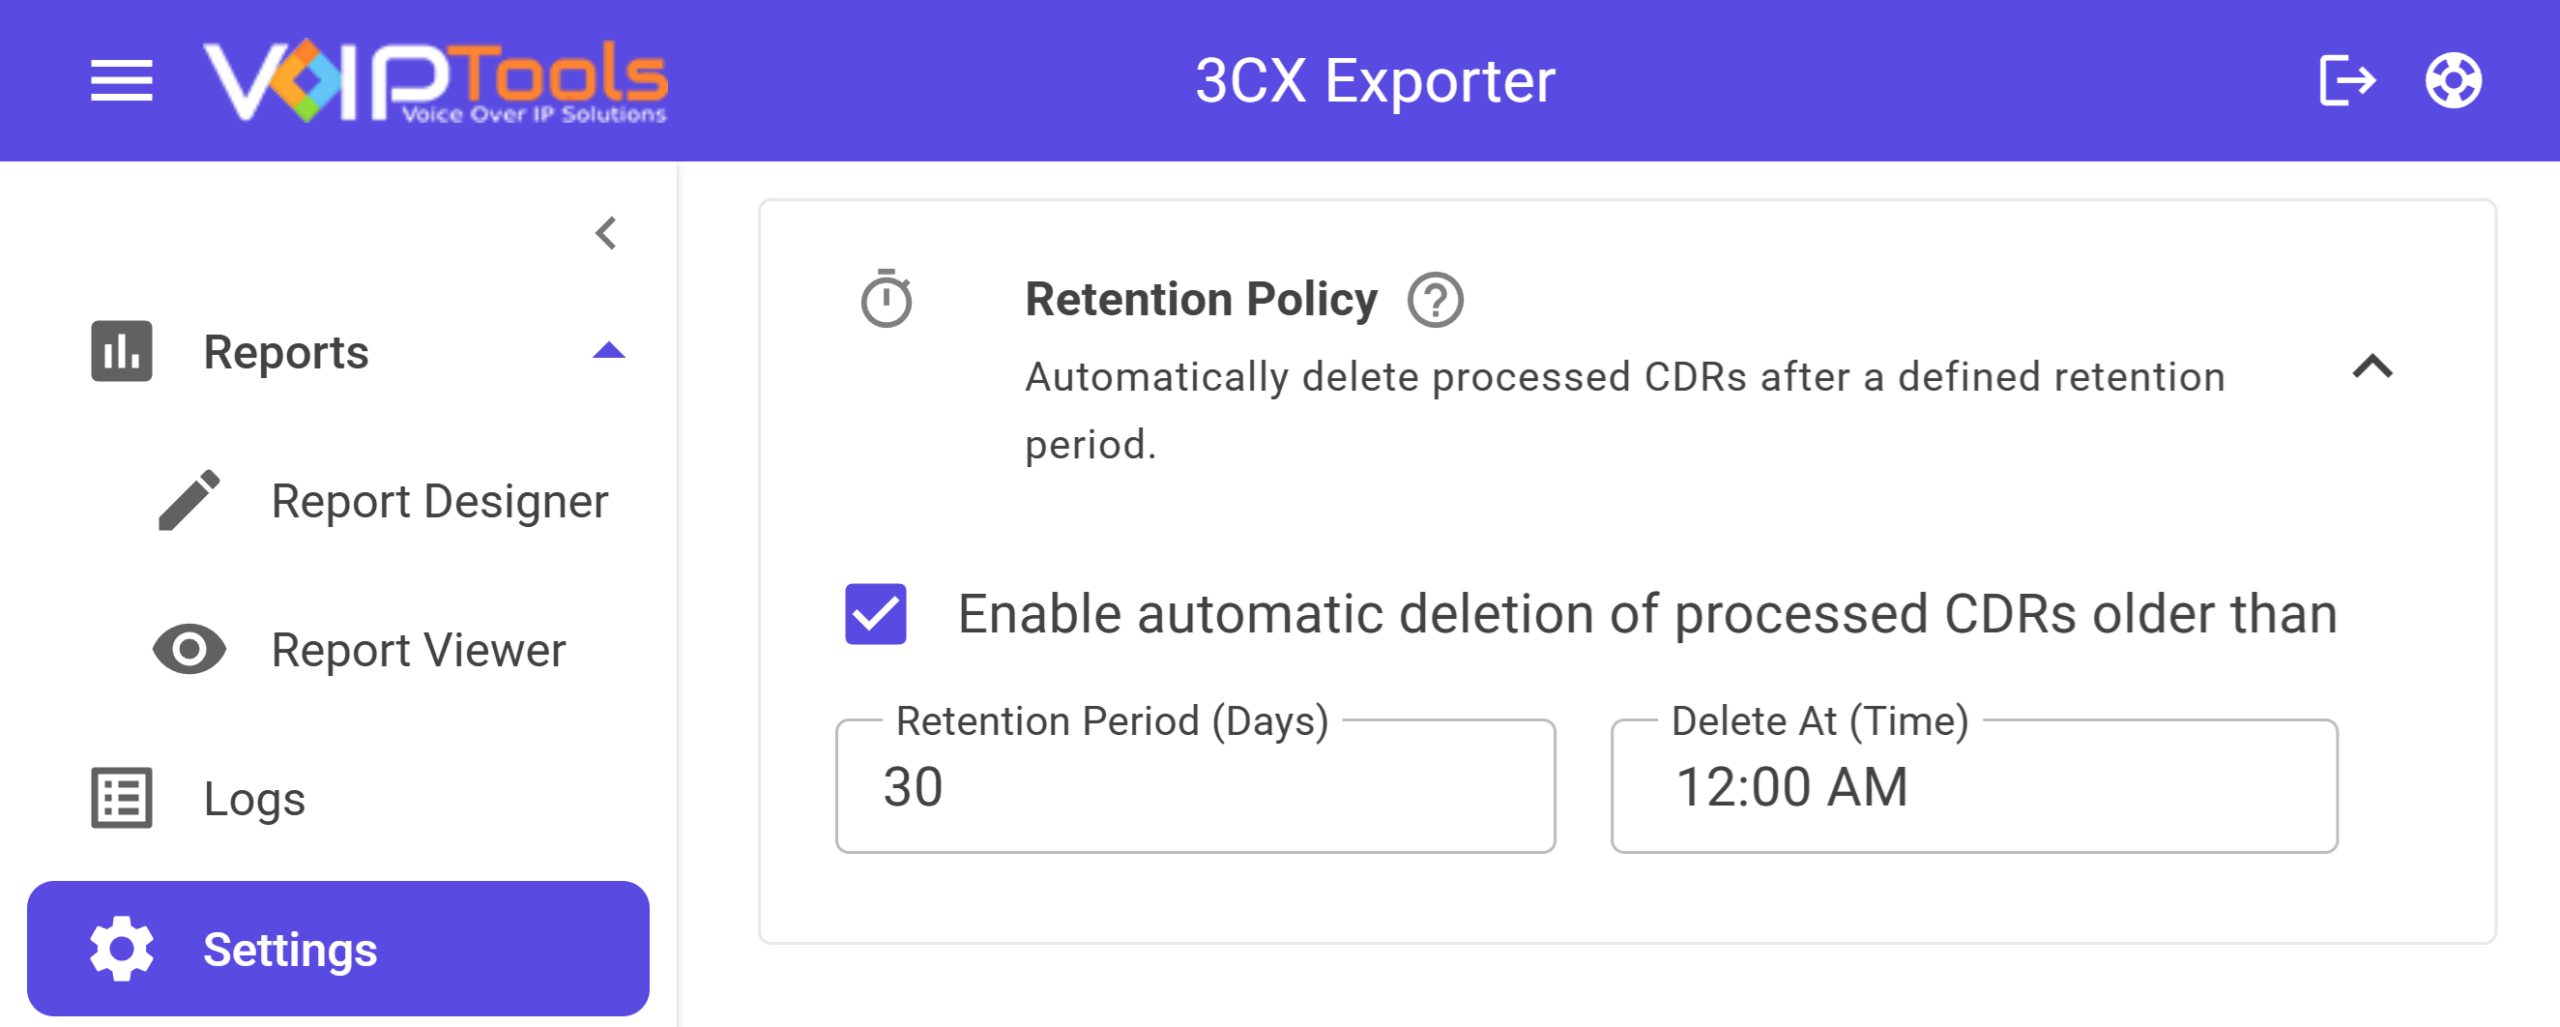
The CDR Settings section lets you manage and process your CDR (Call Detail Record) files within the 3CX Console. By configuring the CDR Settings and Delete Policy, you can streamline the storage and maintenance of your call records. This ensures that older processed CDR files are automatically deleted, saving you time and resources.
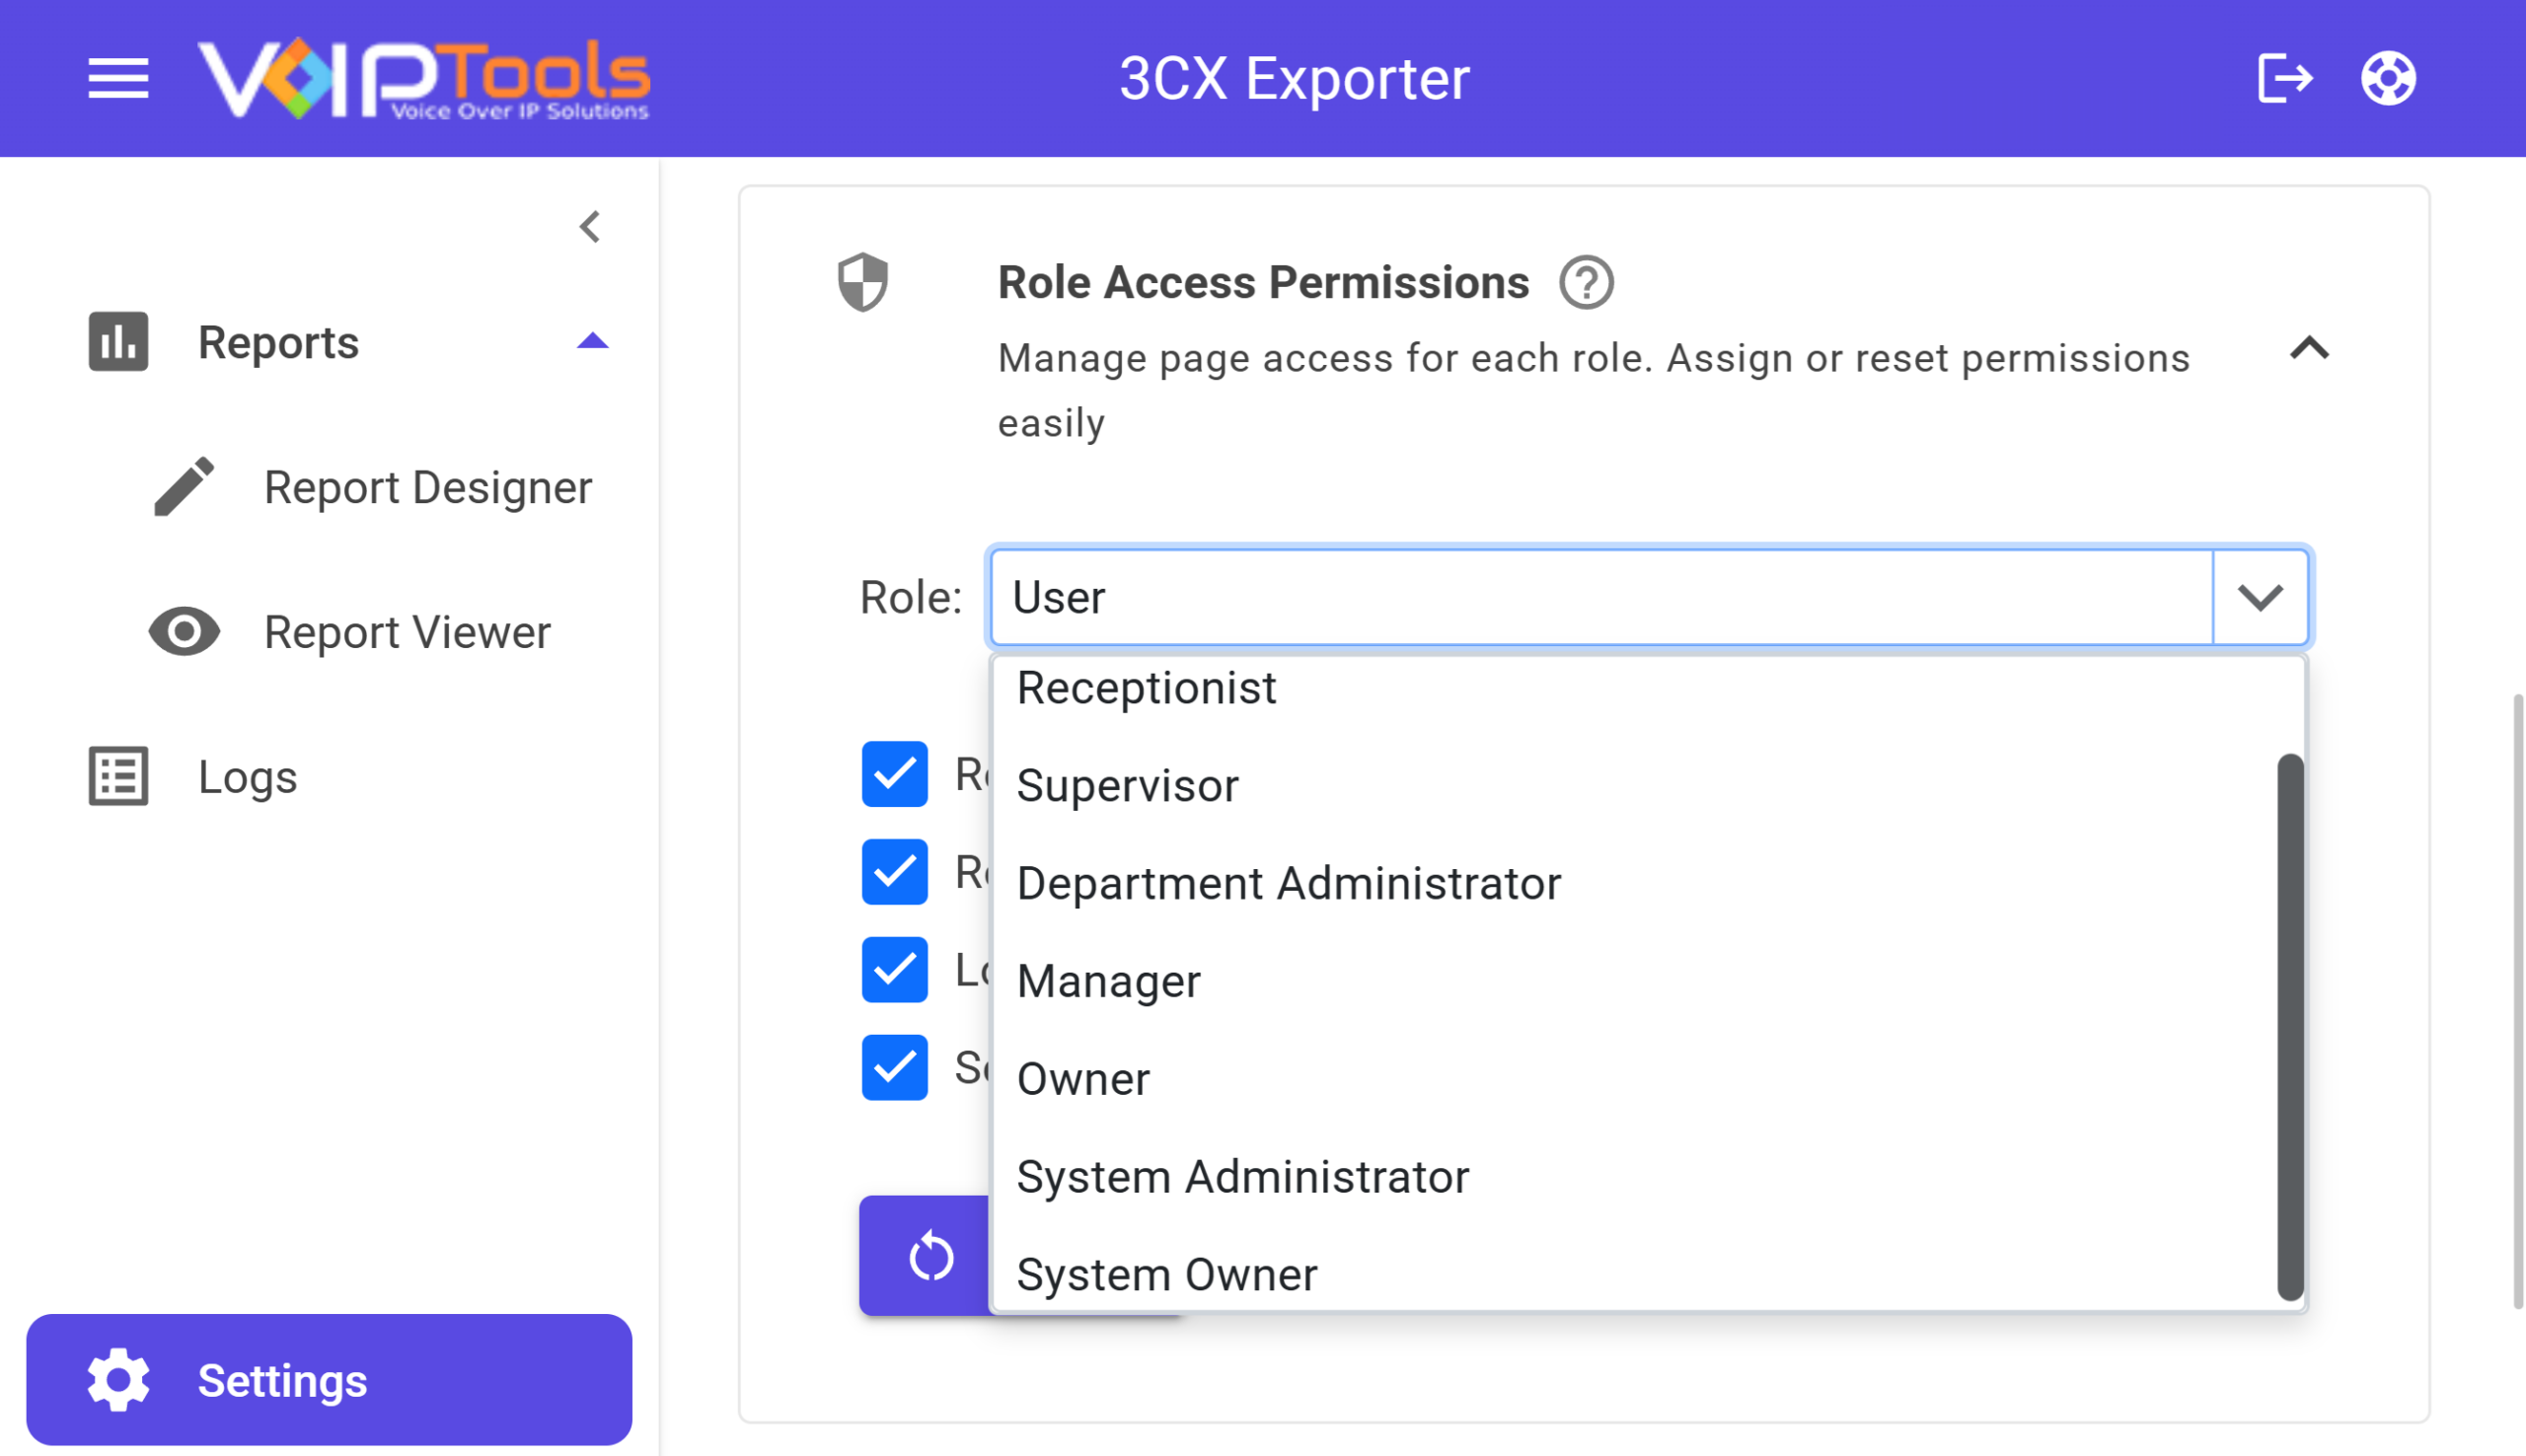
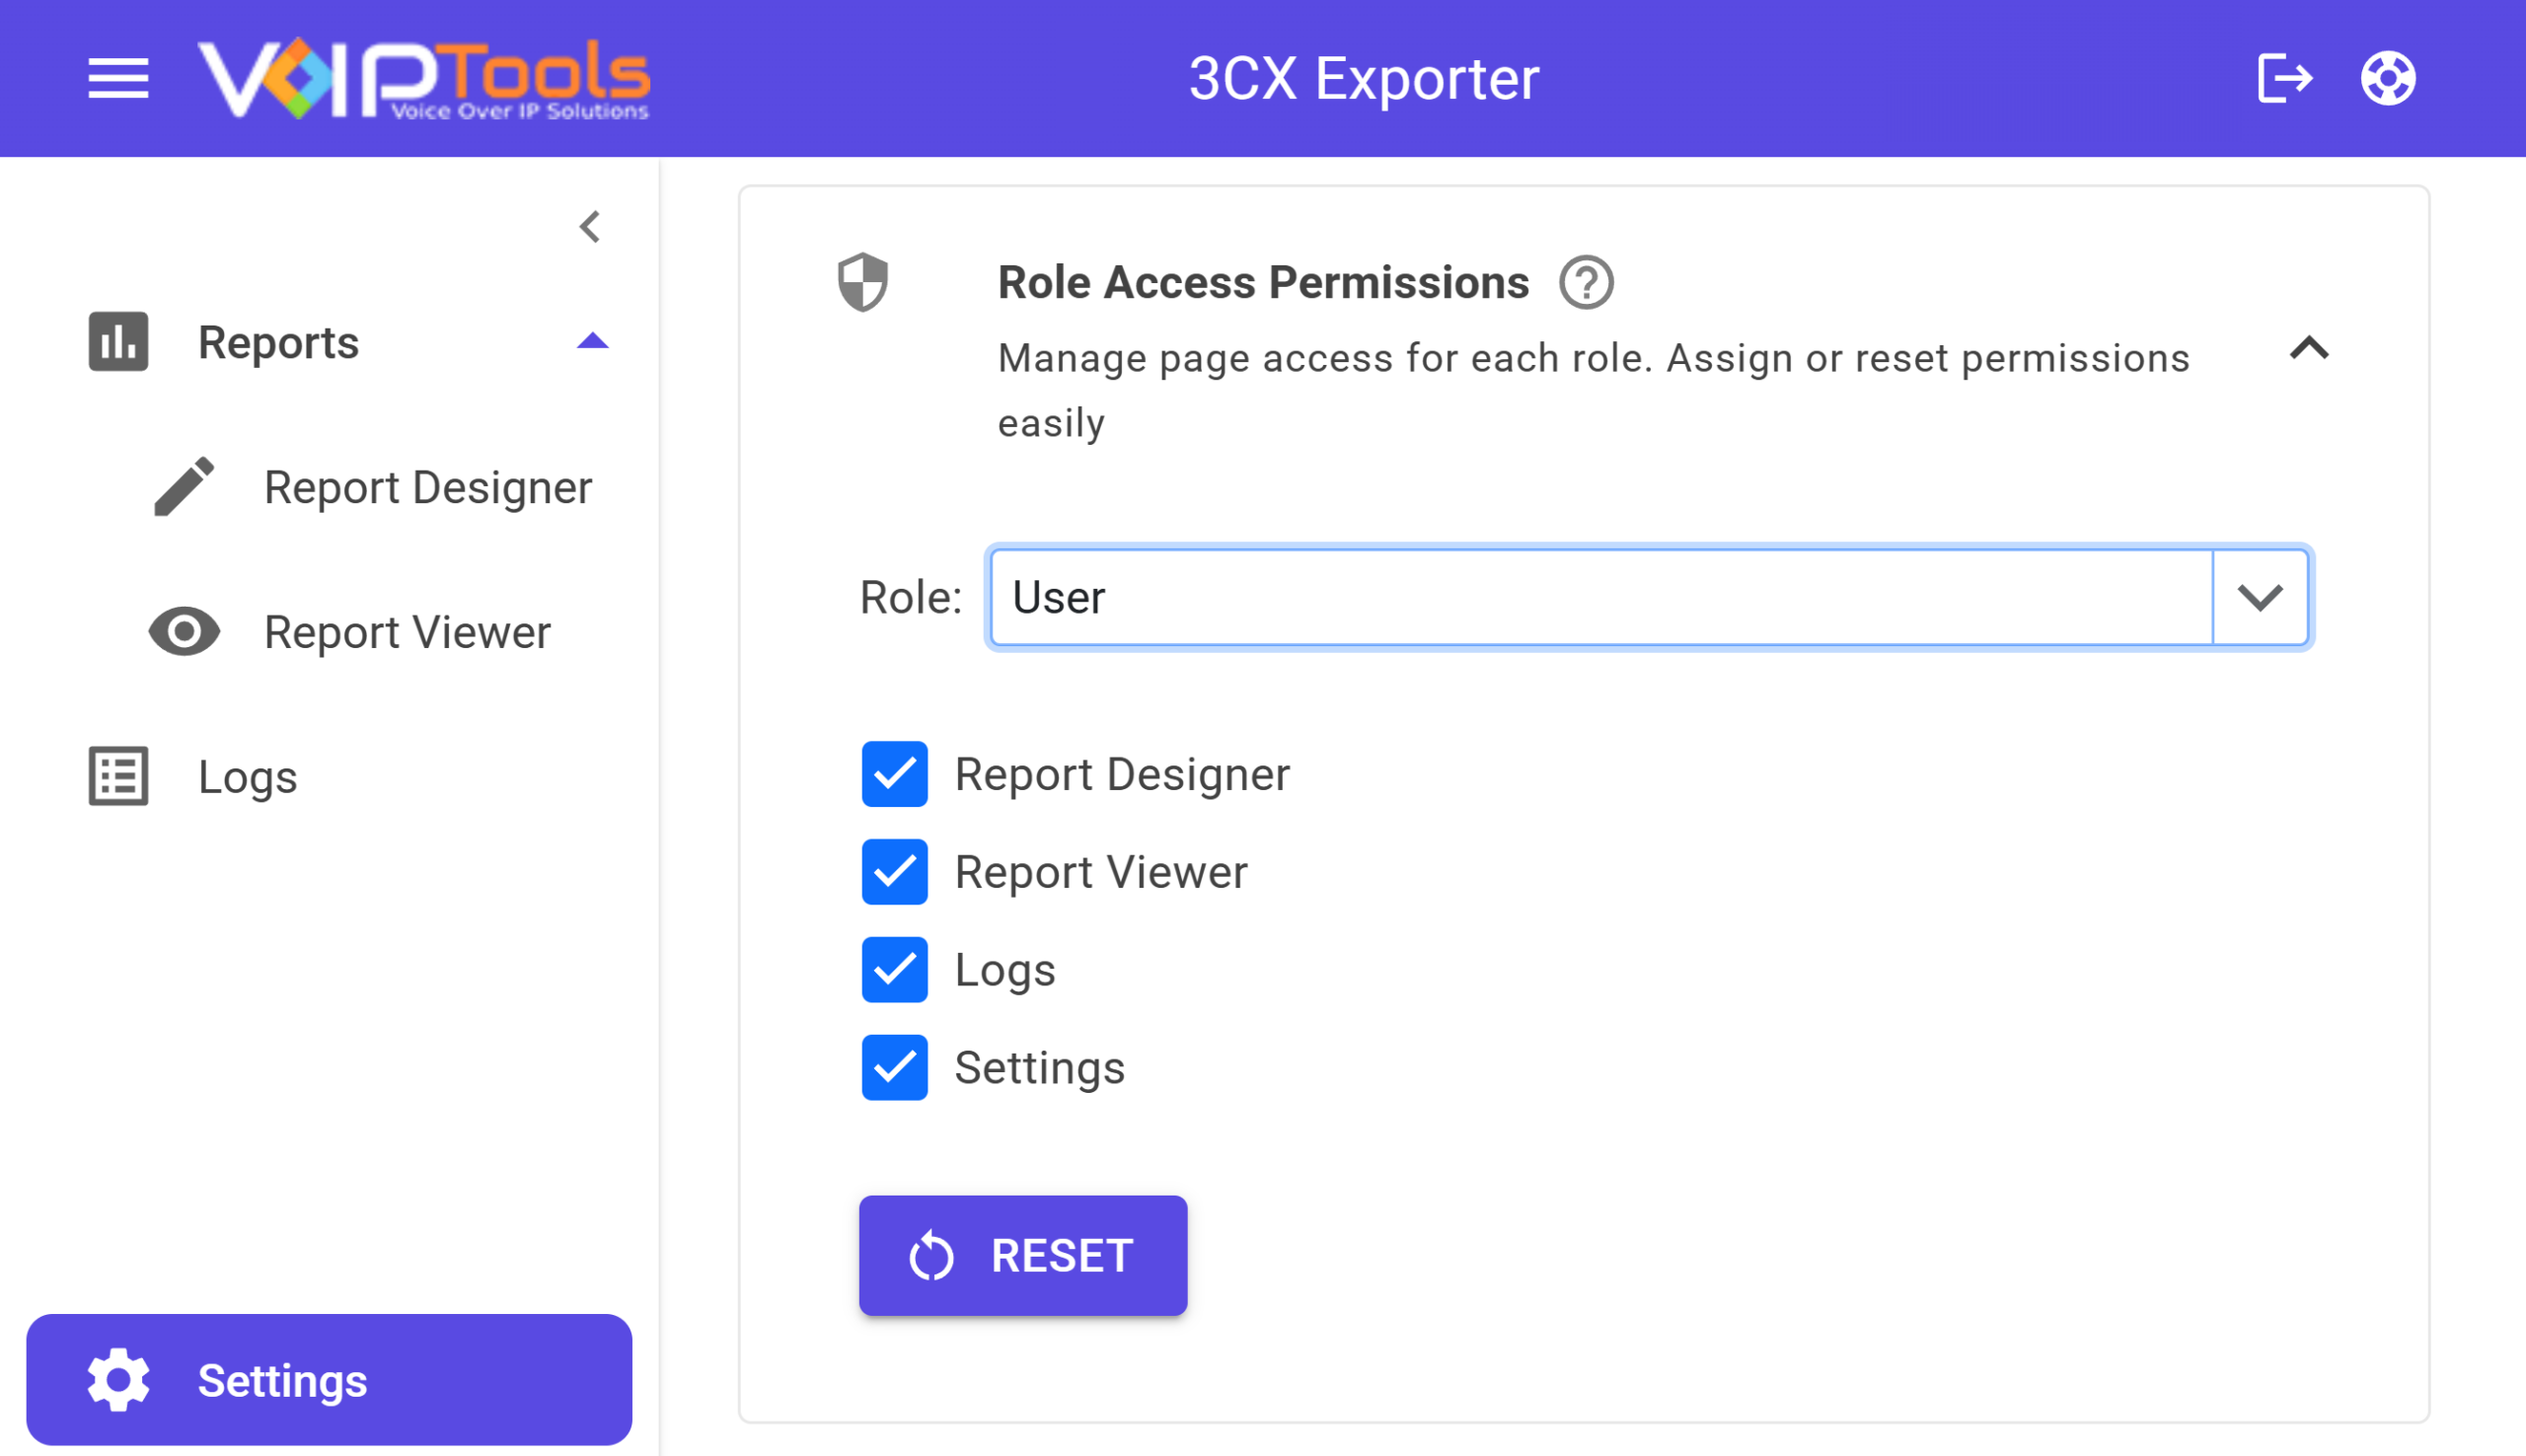
Select Reset to restore the permission settings for the selected role.
System Administrator and System Owner permissions #
System Administrator and System Owner have all four page permissions selected by default. Their checkboxes appear greyed out and cannot be changed from this section.
The Report Designer is a visual tool that lets you build and customize report templates for 3CX Exporter. You can add data fields, arrange layout elements, and preview the result before anyone runs a report.
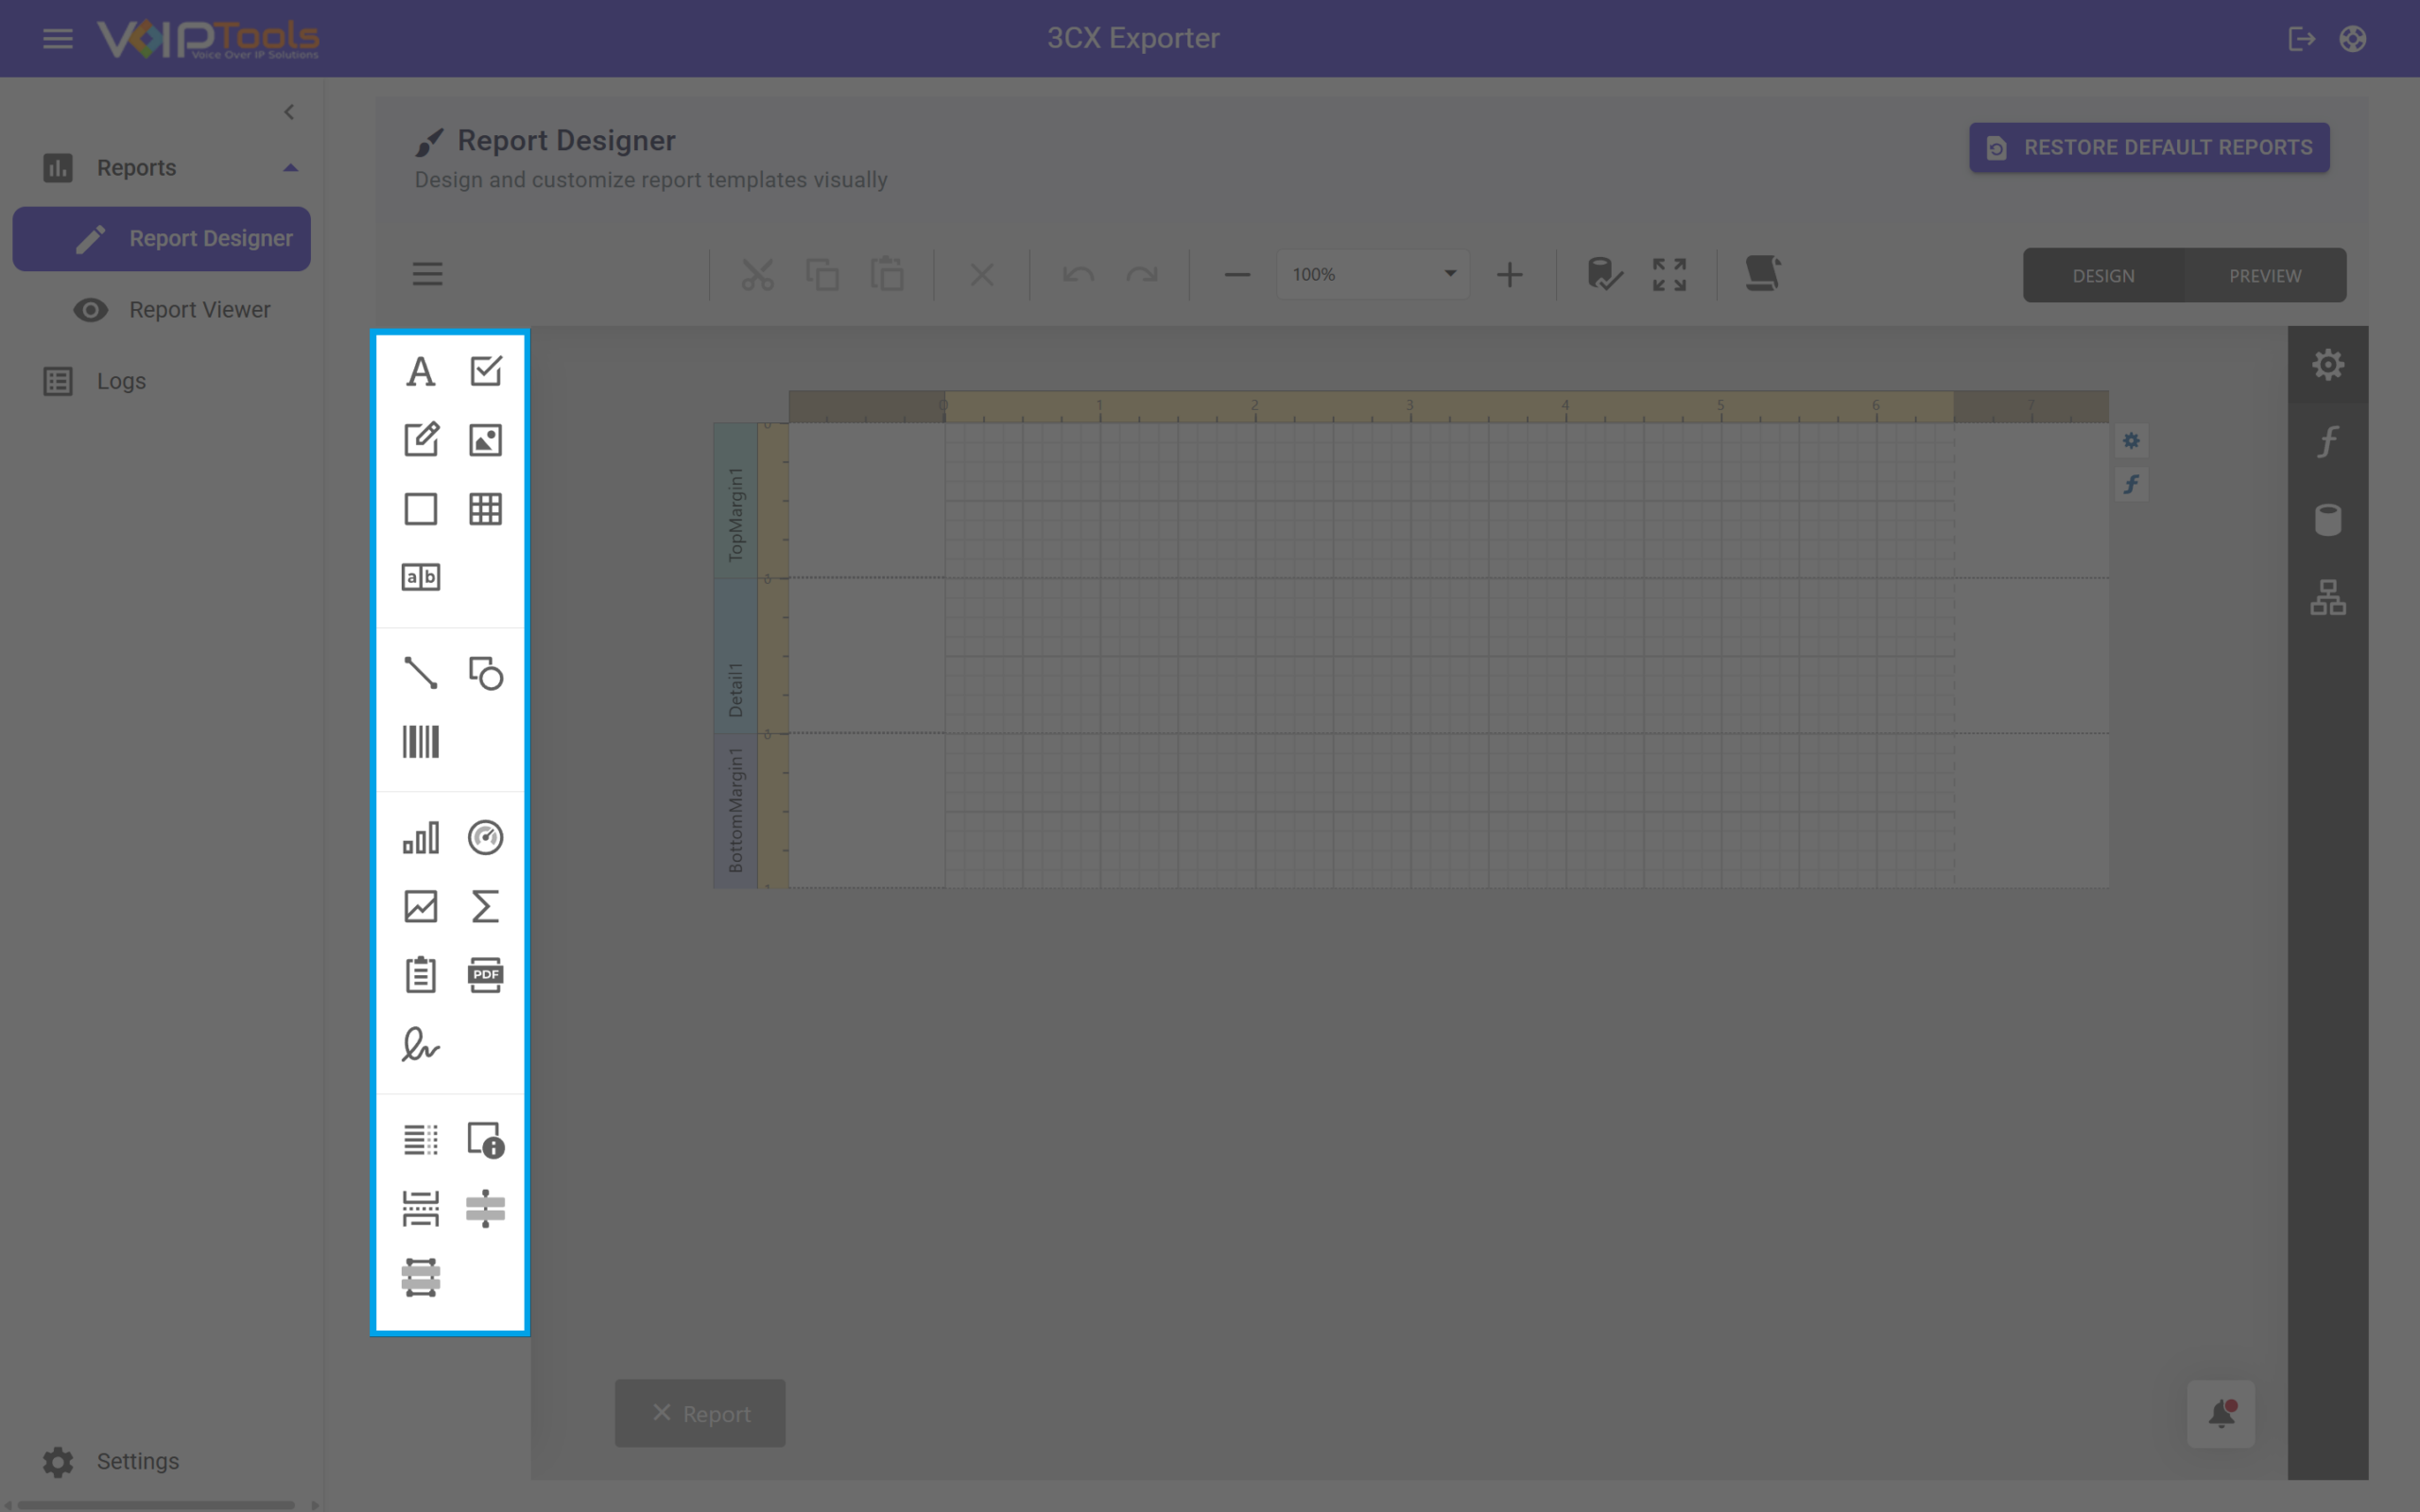
The left sidebar holds all the elements you can place on a report. Click any icon and then click on the canvas to place that element. The tools are organized into four groups.
The tools are grouped into four categories based on what they do. The groupings below match the visual sections separated by spacing in the sidebar.
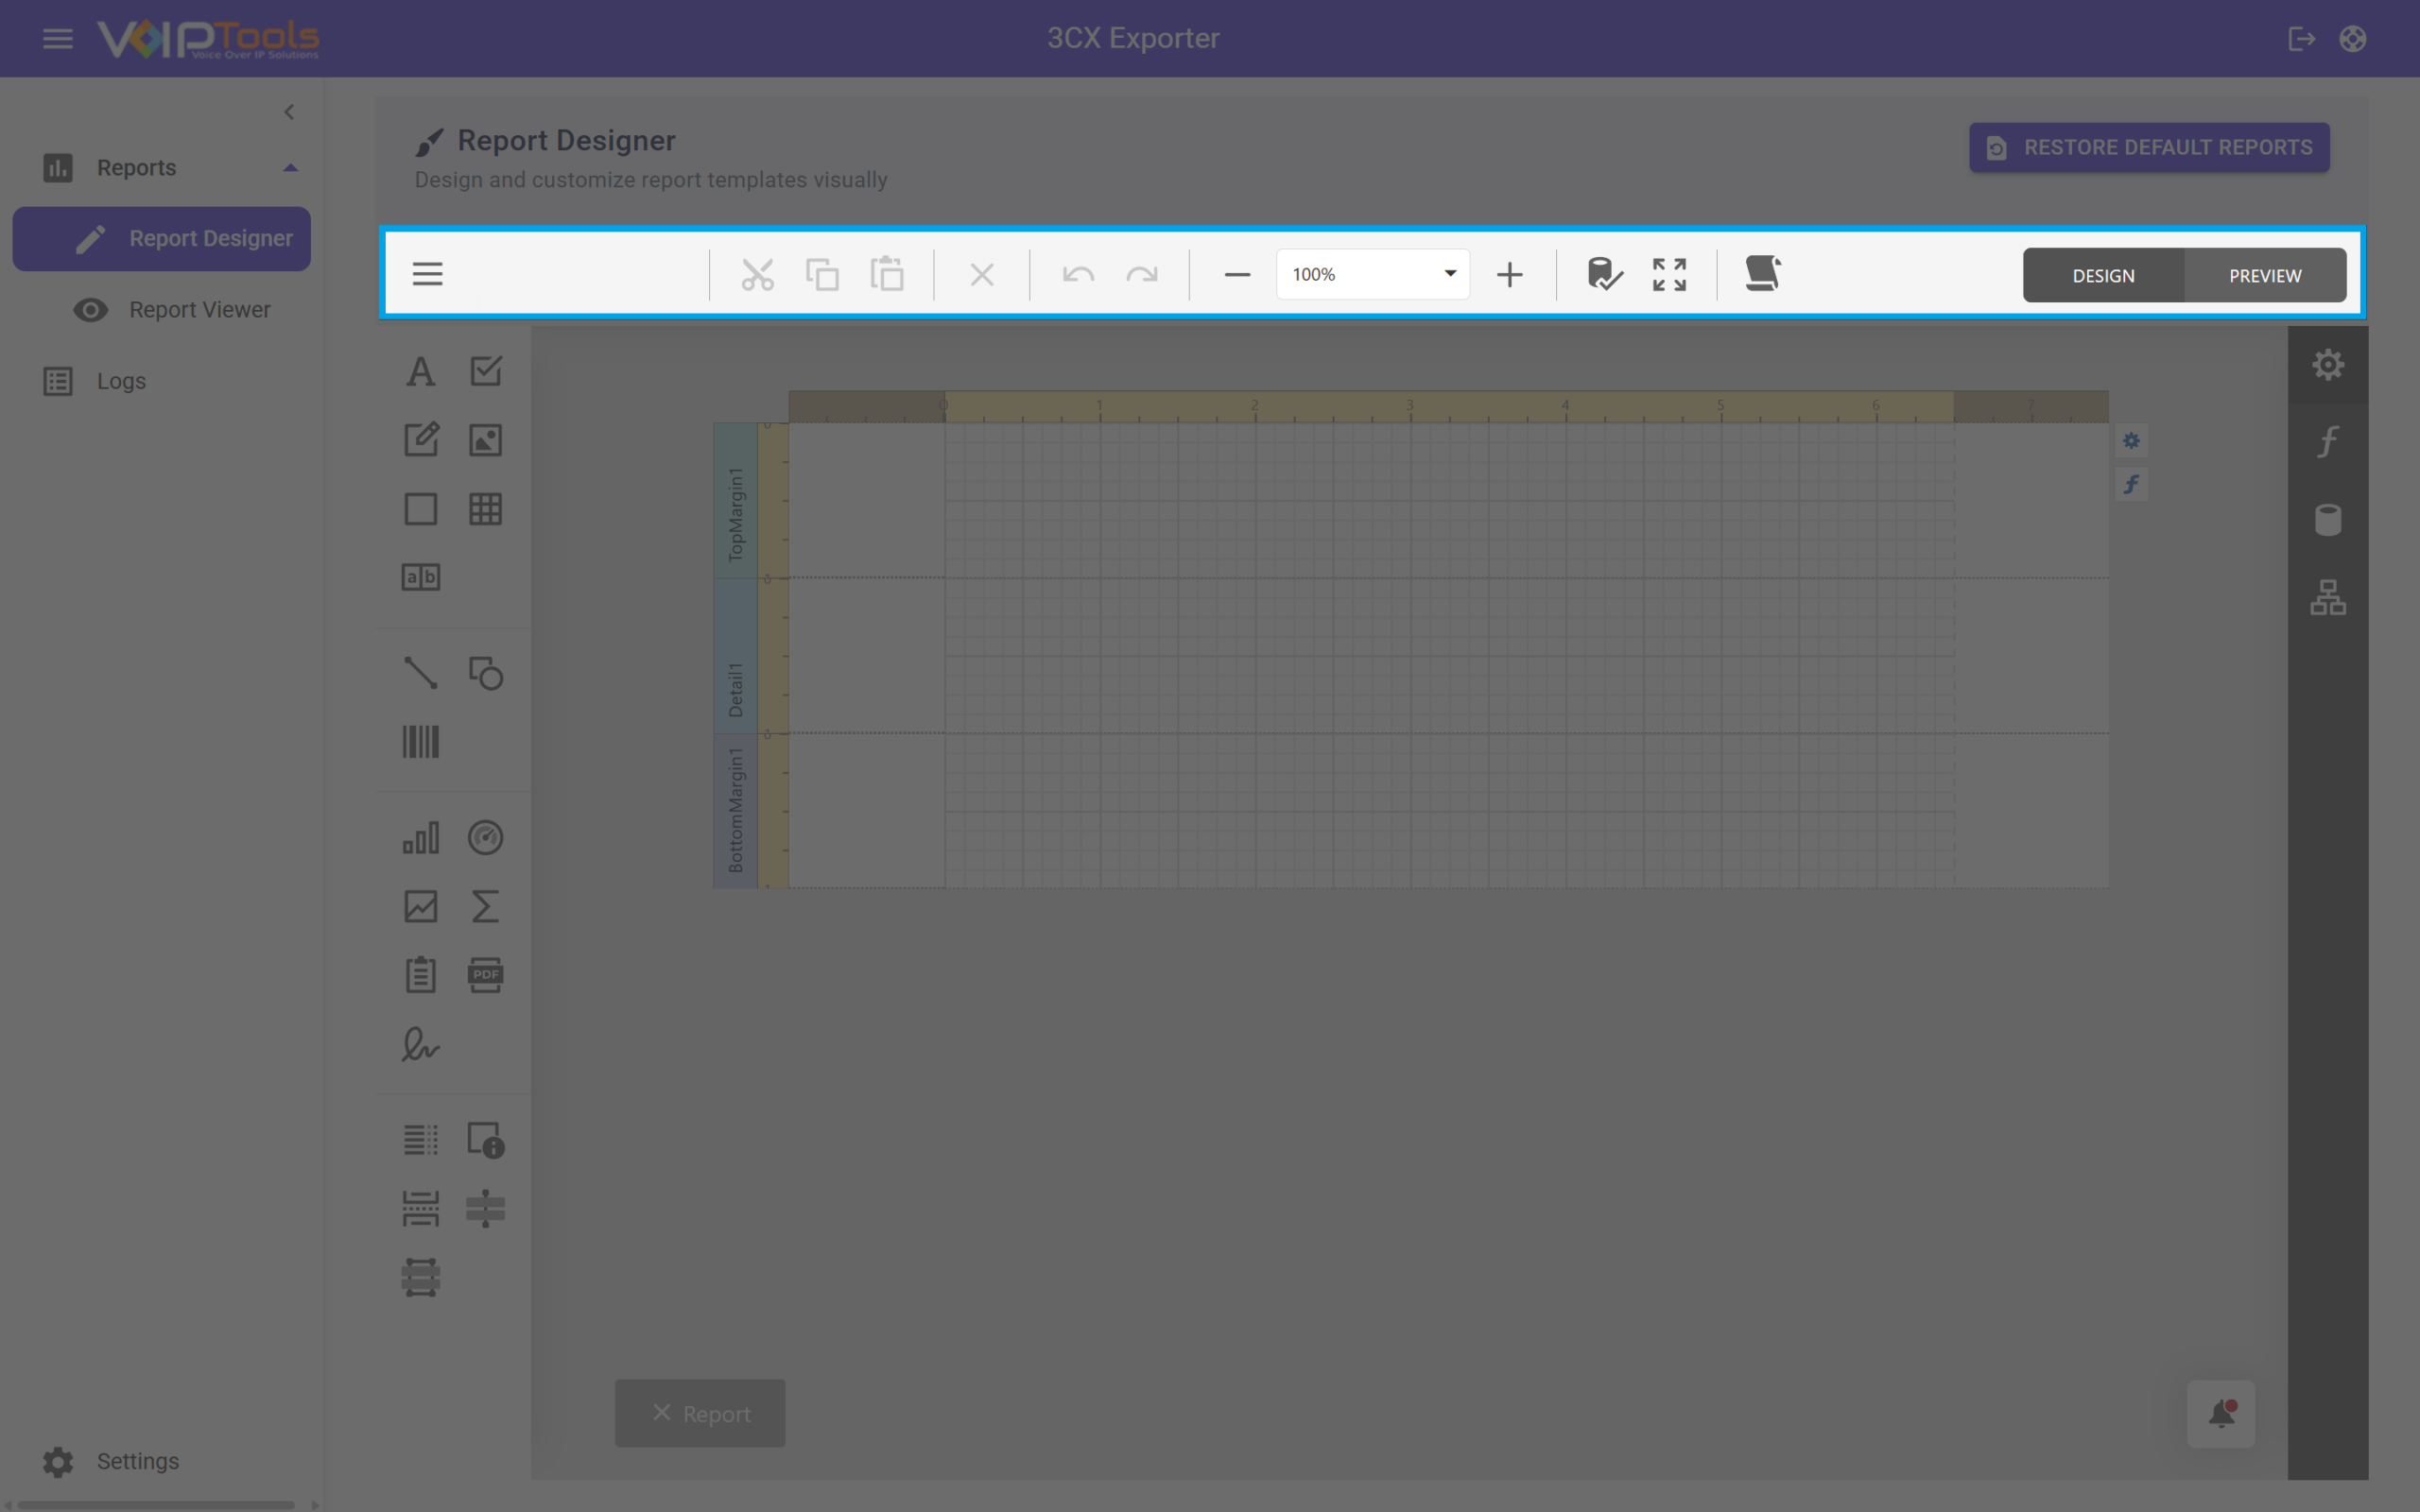
The toolbar runs across the top of the canvas. It gives you quick access to common editing actions.
Figure 37: Toolbar Icons Overview
Control
What it does
☰ (Menu)
Opens a file menu with options to create, open, save, and configure the report. See the Menu section below.
Cut / Copy / Paste
Standard clipboard actions for selected elements on the canvas.
Delete (✕)
Removes the selected element from the canvas.
Undo / Redo
Steps backward or forward through your recent changes.
Zoom controls
Use the minus and plus buttons or the dropdown box to change the canvas zoom level. 💡Tip Set the zoom to 50% or 75% when you want to check the overall page layout. Use 150% or 200% when placing or aligning small elements with precision.
Validate Binding
The Validate Binding button checks all data fields on the canvas to ensure they are connected to valid data sources and highlights any broken or invalid bindings. Run it before entering Preview mode to prevent blank fields or missing data in the report.
Full screen (⛶)
The Full Screen button expands the design canvas to fill your browser window, providing more workspace for designing complex reports. Click it again to return to the standard view while keeping all toolbar controls and panels accessible.
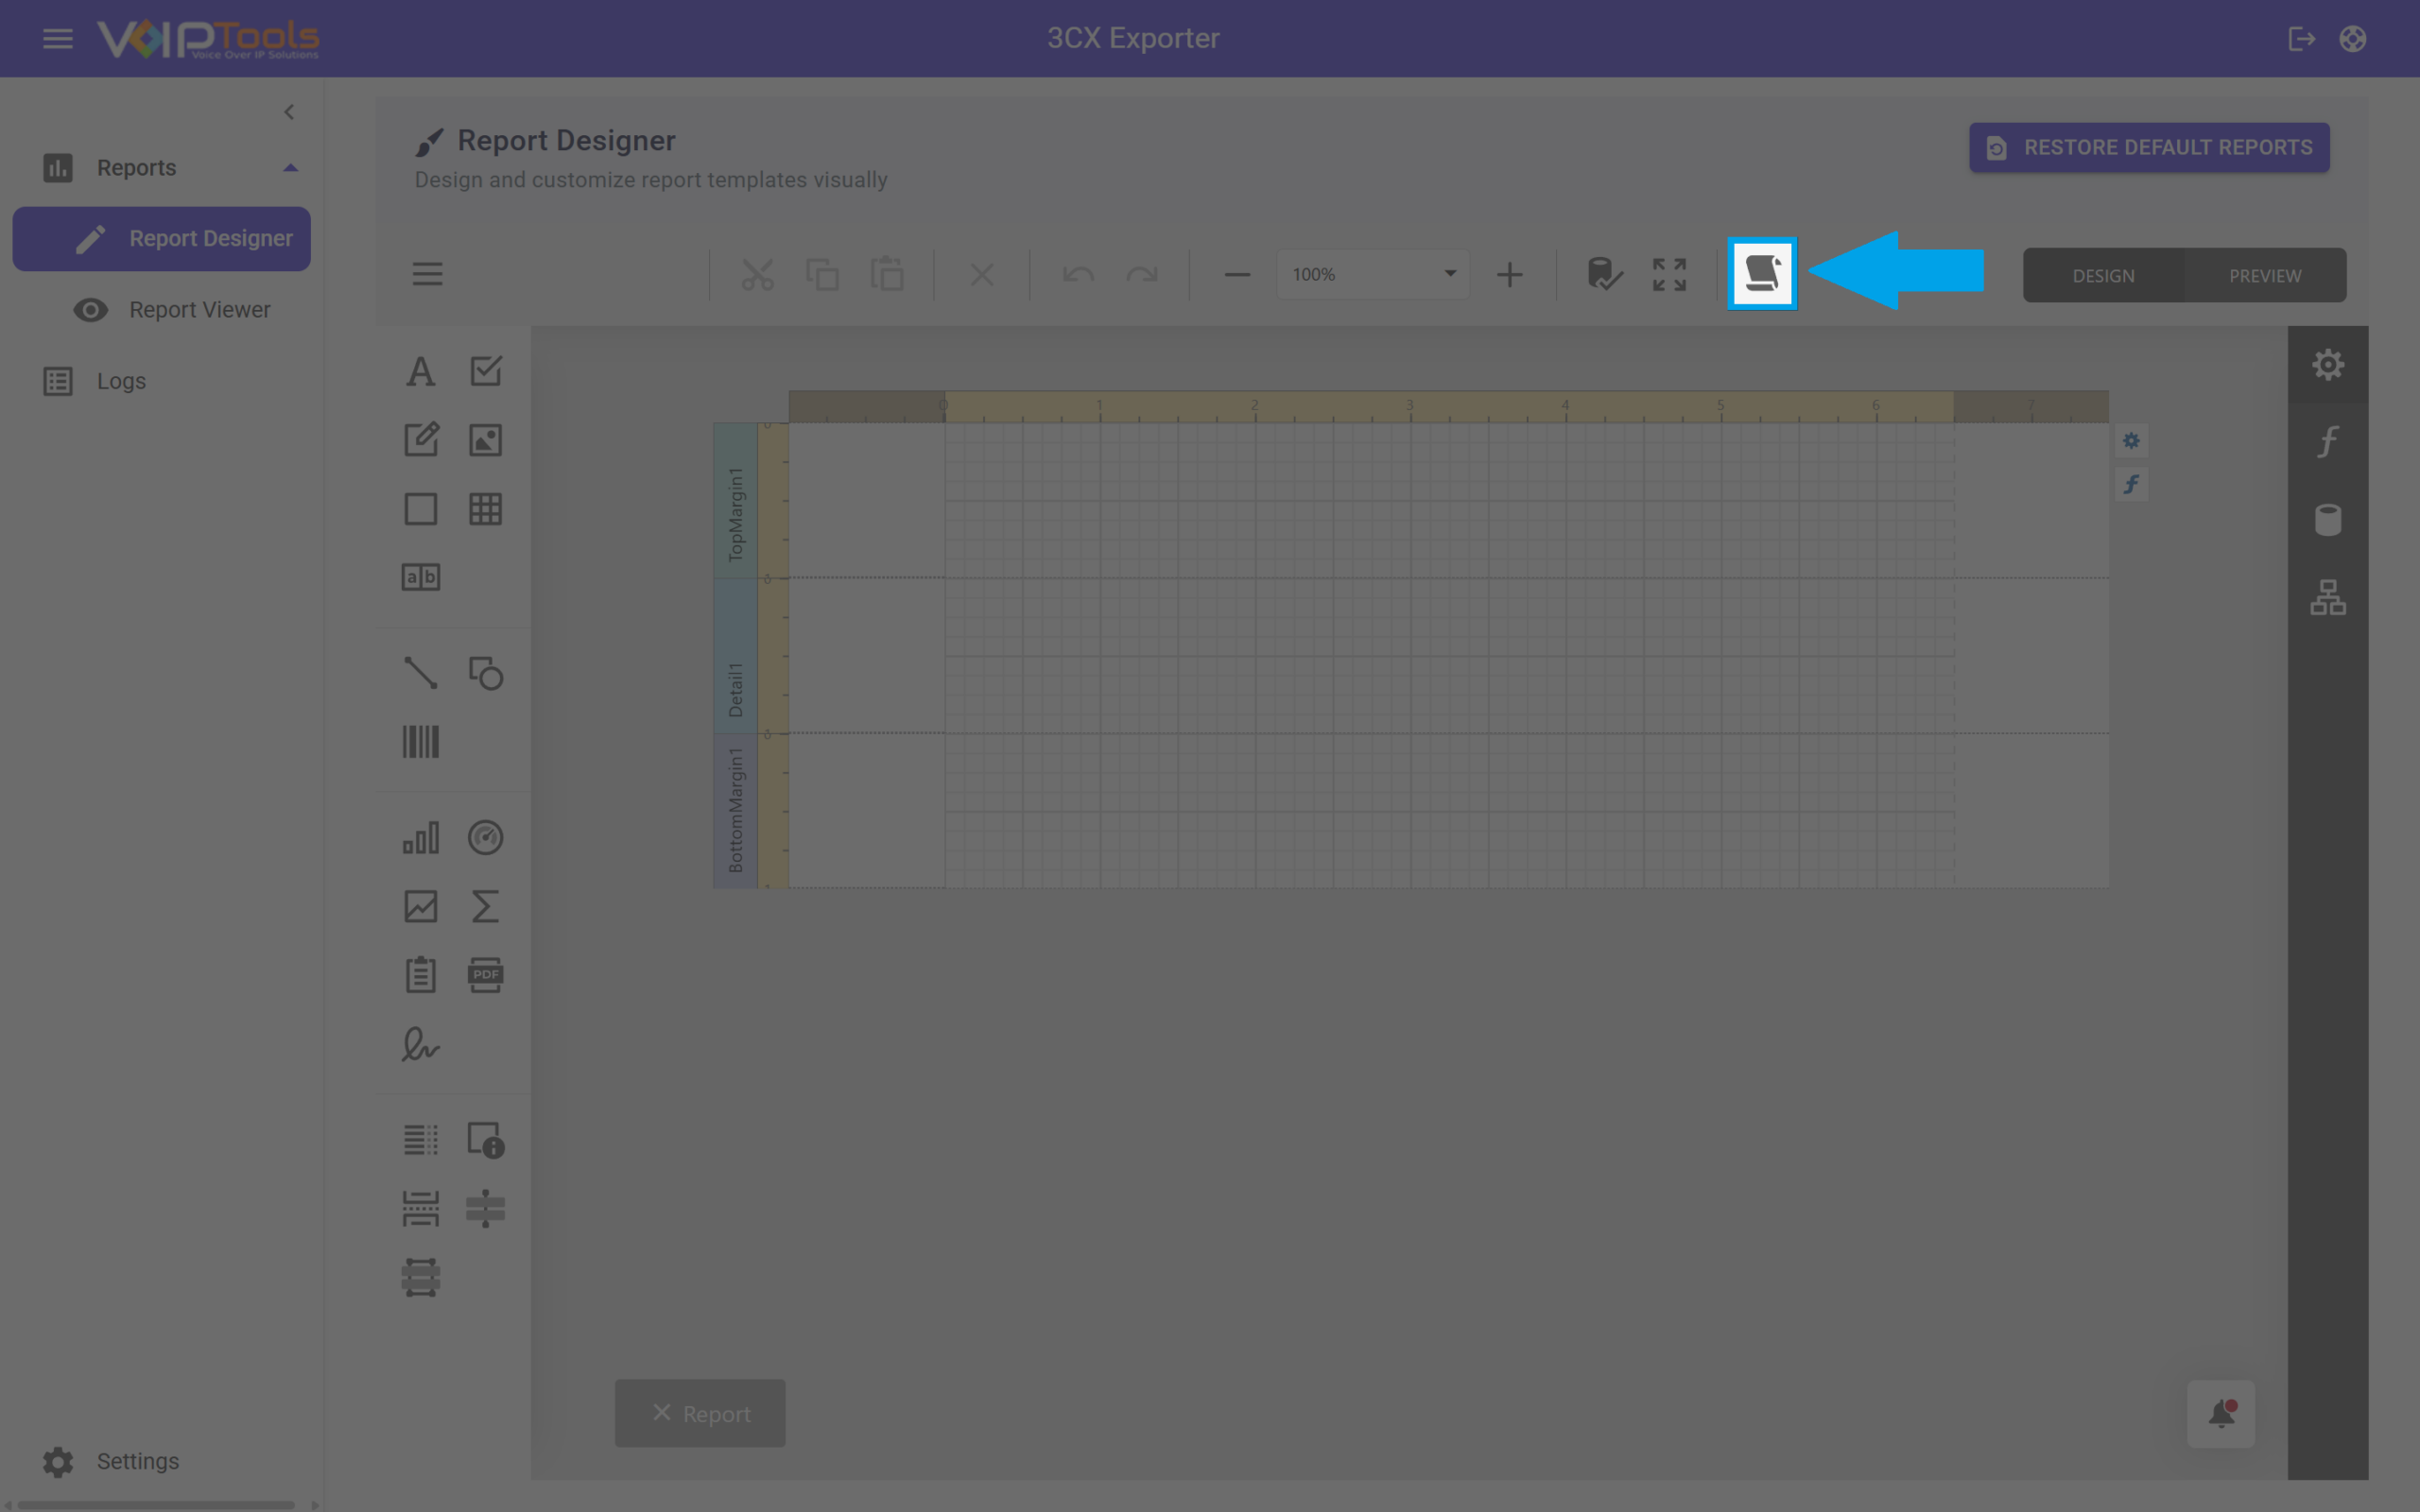
Scripts (📜)
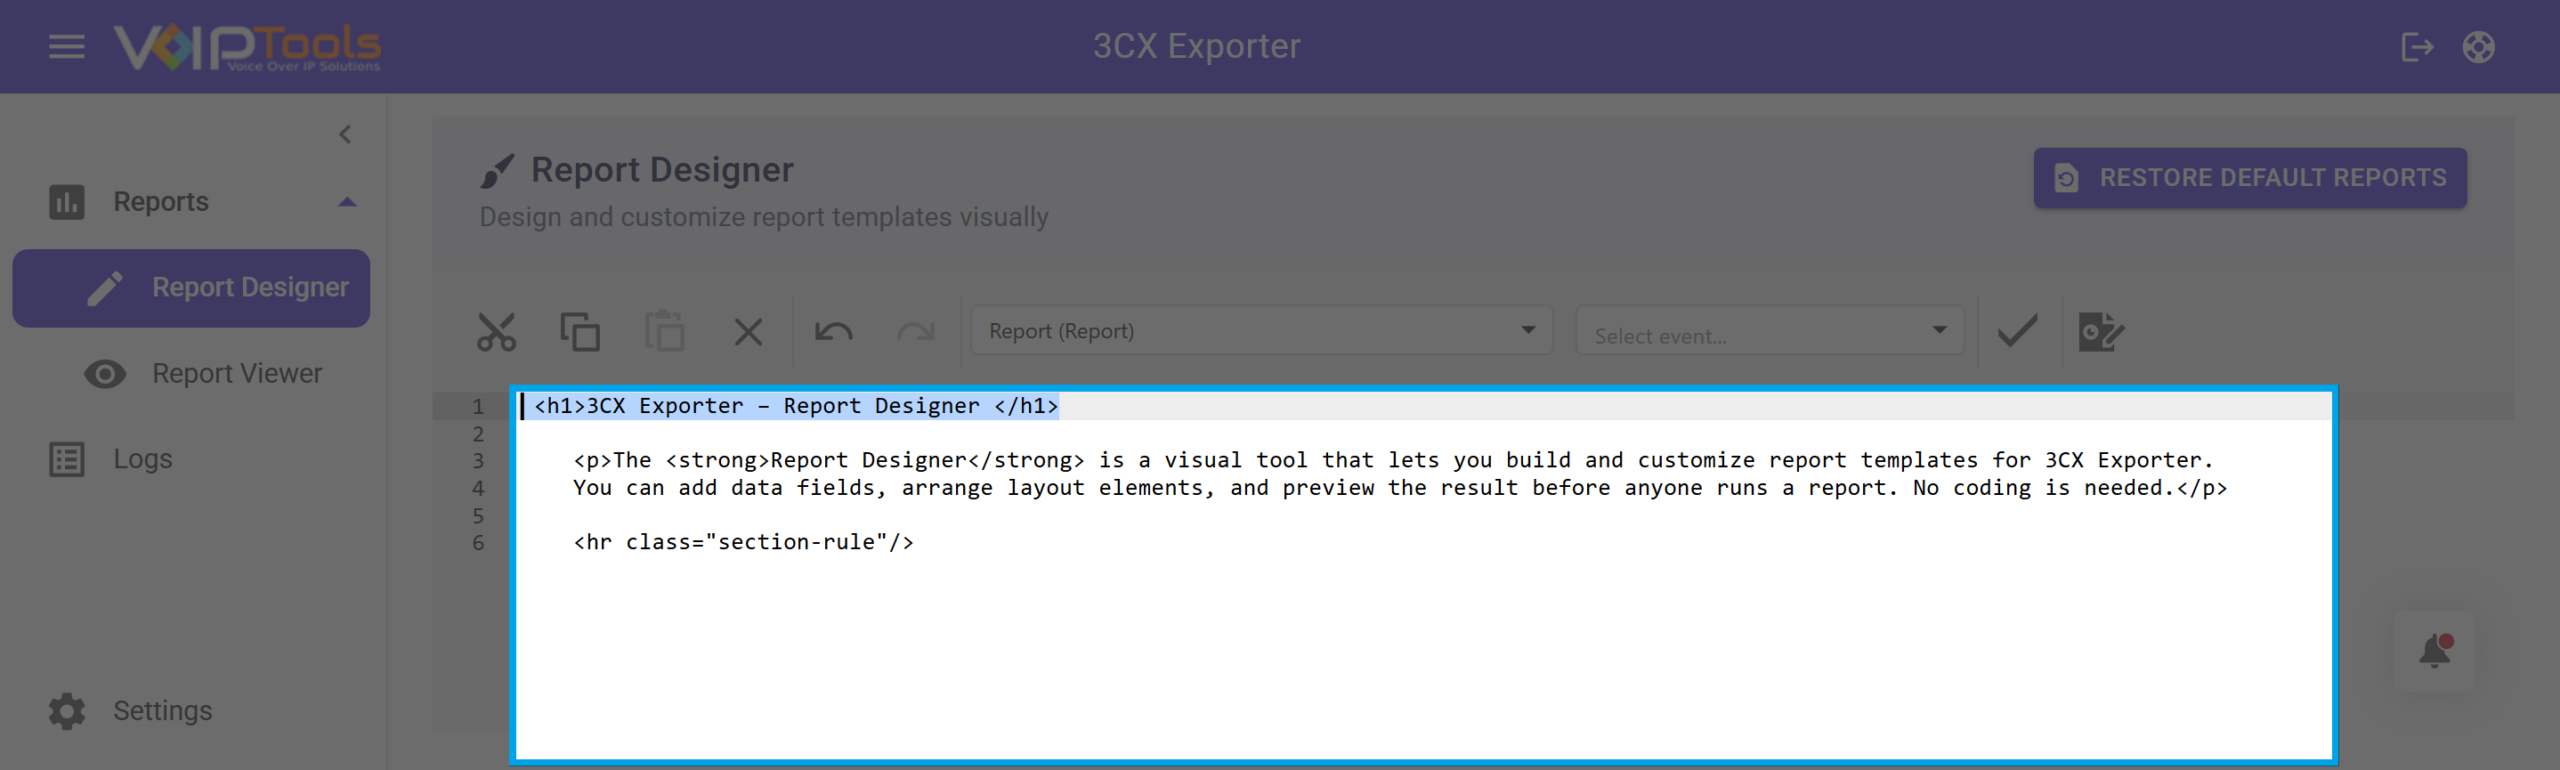
The Scripts button (the page icon at the right of the toolbar) opens a code editor that replaces the visual canvas. It lets you write custom logic for the report using standard HTML and CSS. Use this when you need behavior that the visual design tools cannot produce on their own.
DESIGN / PREVIEW
Switches between editing mode and a live preview of the report.
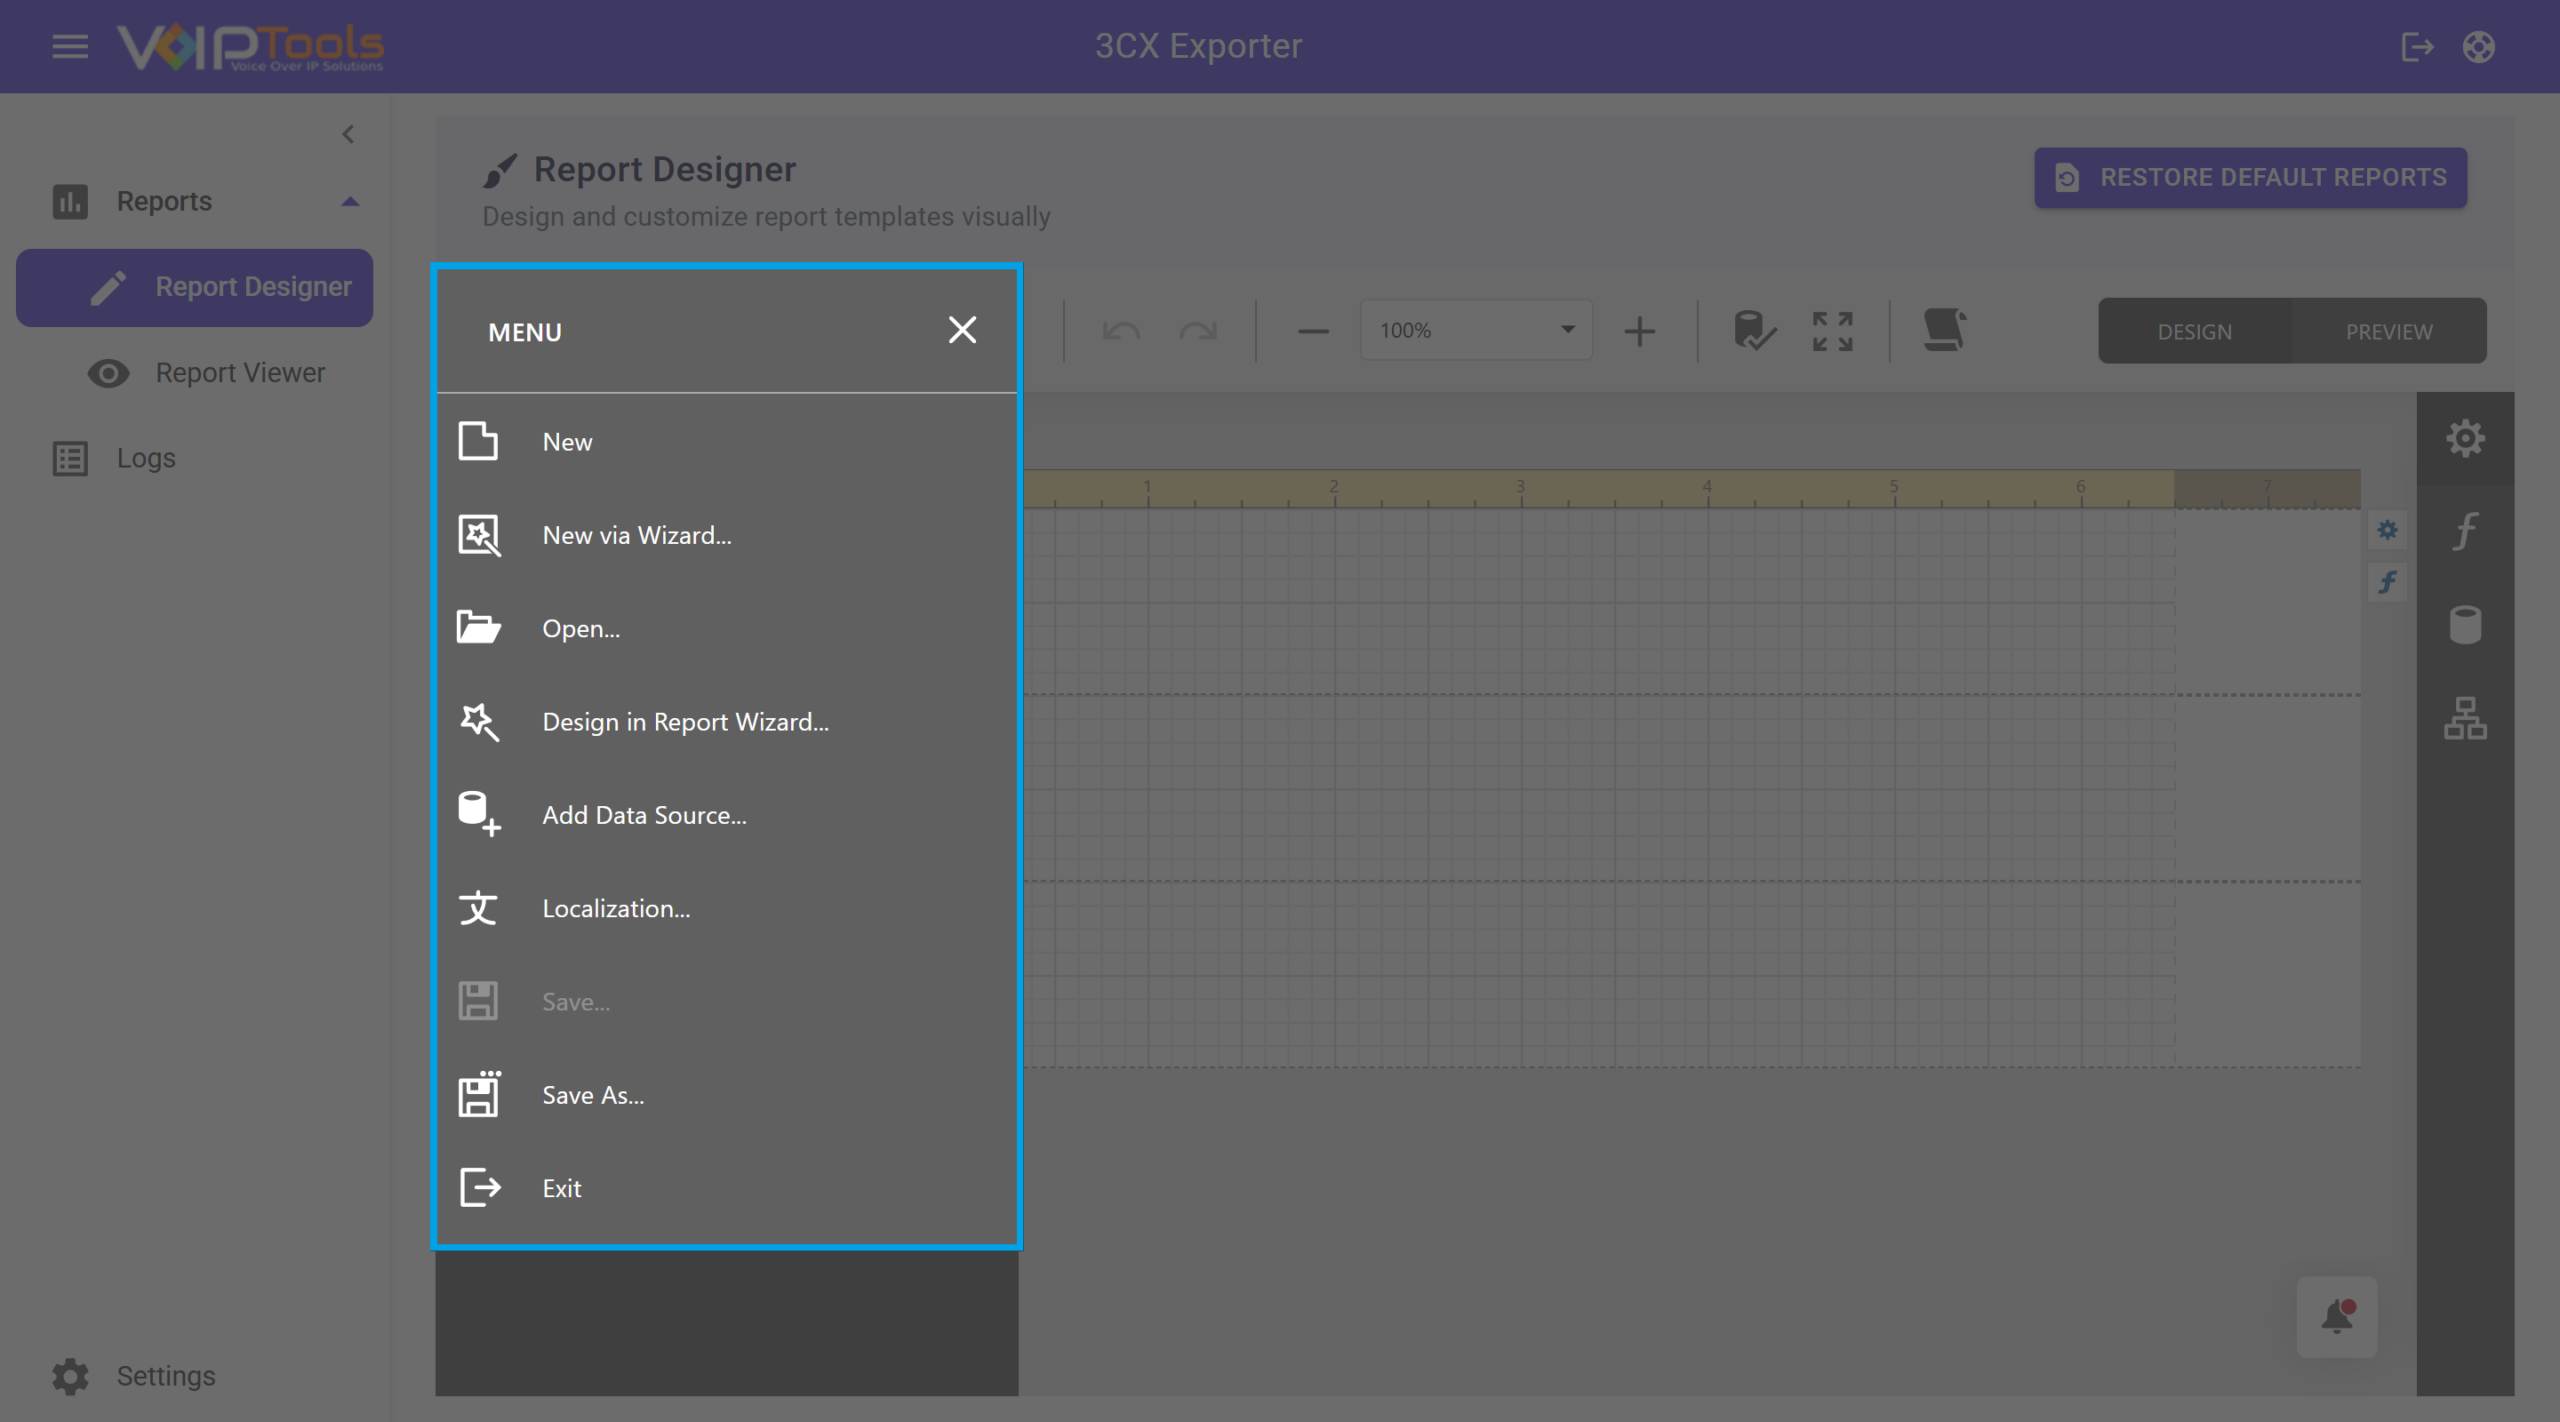
Click the three-line icon (☰) at the far left of the toolbar to open the Menu. This panel gives you file management options for your report template.
Figure 38: Menu Panel Open
Option
What it does
New
Creates a blank report template on the canvas. Any unsaved work on the current report will be lost.
New via Wizard…
Opens a step-by-step guide that helps you build a new report by choosing data fields and layout options. A good starting point for first-time users.
Open…
Loads an existing report template file from your system.
Design in Report Wizard…
Opens the current report in the guided wizard view so you can make changes using the step-by-step interface instead of the free-form canvas.
Add Data Source…
Connects a new database or data feed to the report. This is the same as using the Add Data Source button in the Field List panel.
Localization…
Opens tools for translating the report into other languages.
Save…
Saves the current report template. This option appears grayed out if there are no unsaved changes.
Save As…
Saves a copy of the report template with a new name. Use this to create variations of an existing report without overwriting the original.
Exit
Closes the Report Designer and returns you to the previous screen.
💡Tip Use New via Wizard when building a report for the first time. It walks you through connecting data and arranging columns so you start with a working template rather than an empty canvas.
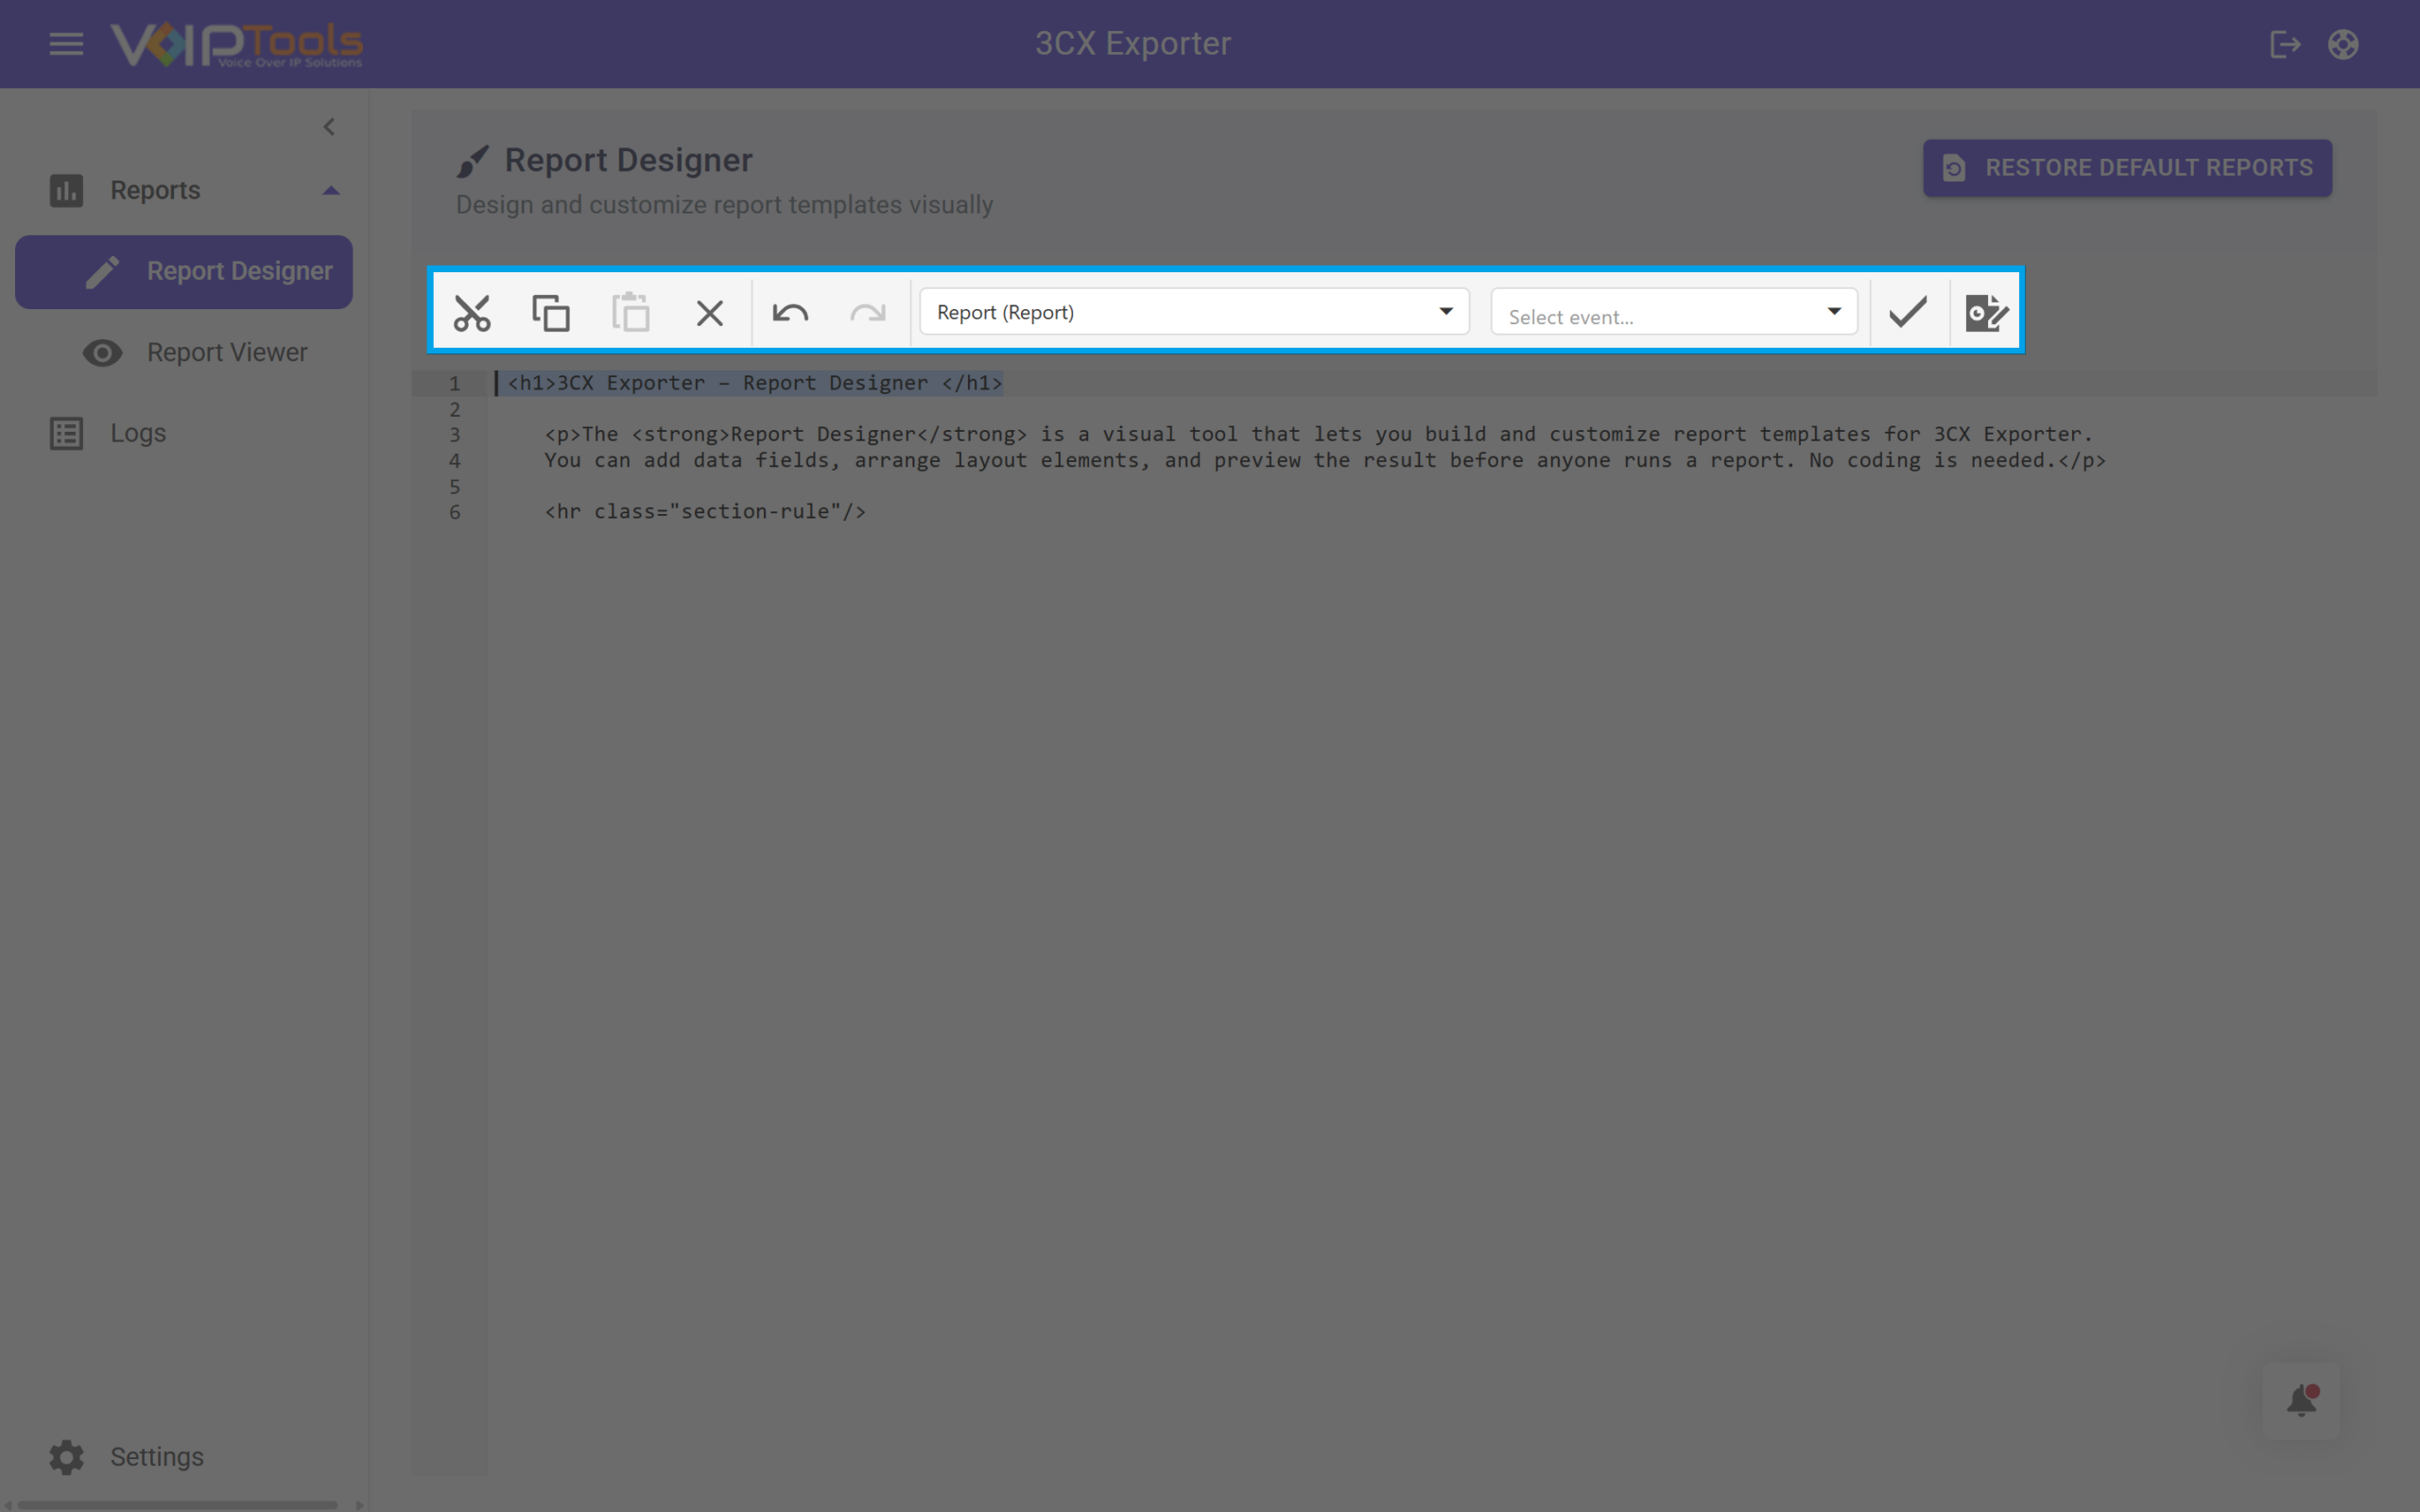
When Scripts mode is active, the toolbar changes to show a set of controls specific to code editing.
Figure 39: Scripts Toolbar Controls
Control
What it does
Cut
Removes the selected code and copies it to the clipboard
Copy
Copies the selected code to the clipboard without removing it
Paste
Inserts the code on the clipboard at the cursor position
Clear (X)
Removes all code from the editor
Undo
Reverts the last change made in the editor
Redo
Reapplies a change that was undone
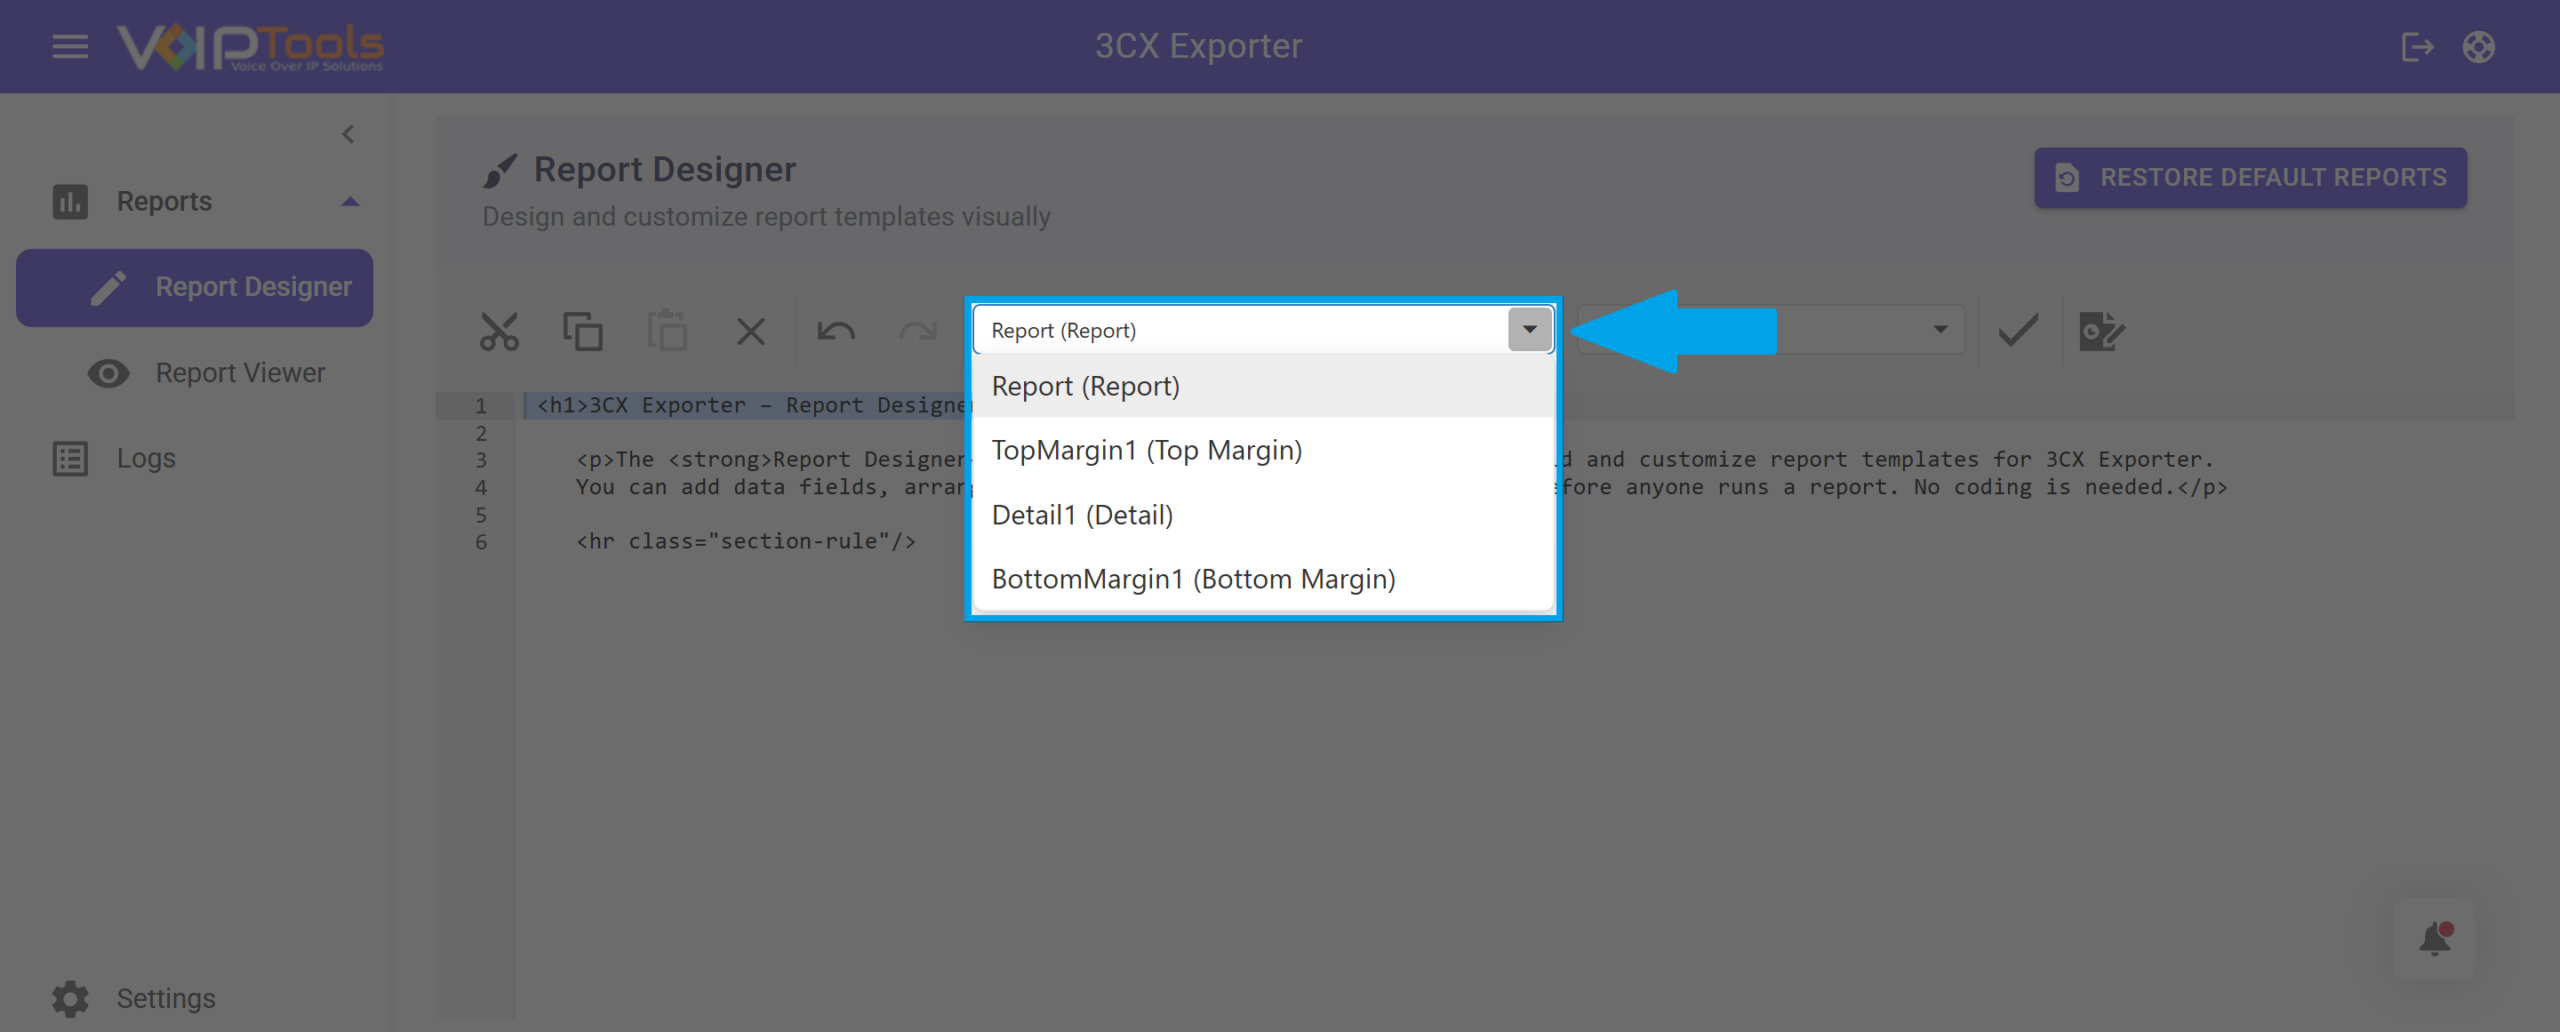
Element selector dropdown
Lists every element in the report: the Report itself, each band (TopMargin1, Detail1, BottomMargin1), and any elements placed on the canvas such as label1. Select an element here to write a script that targets it
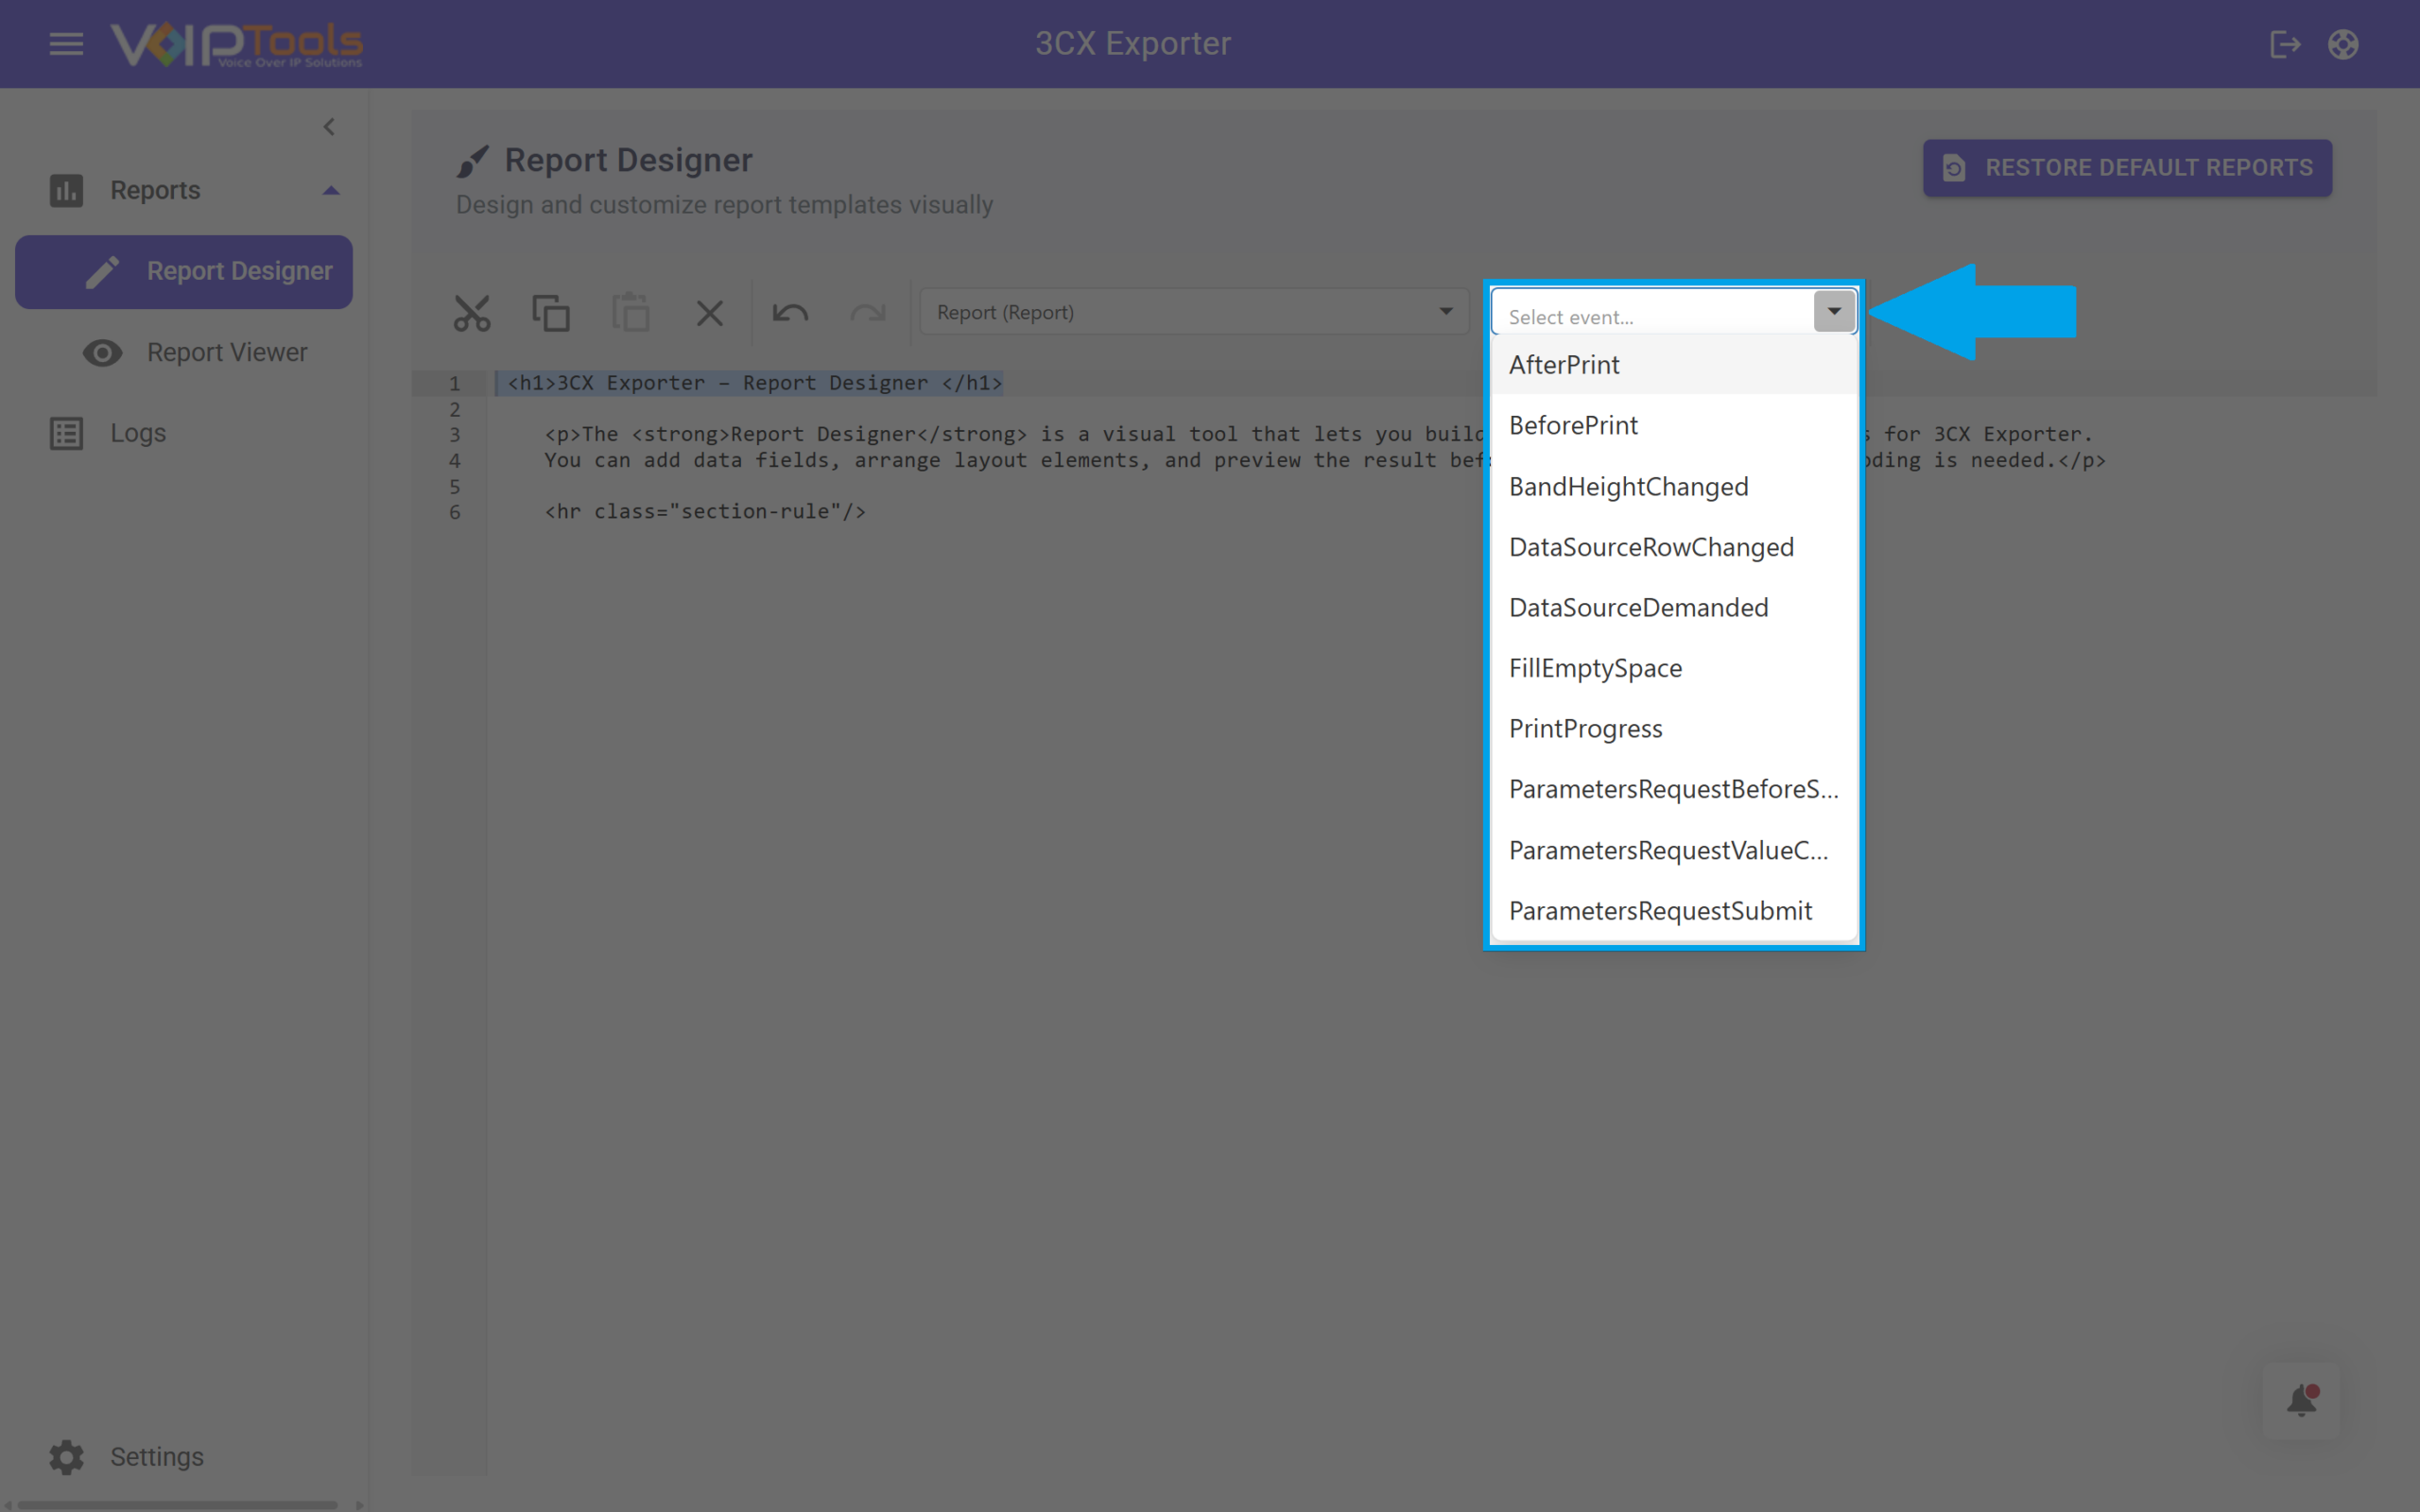
Select event dropdown
Lists the events that can trigger your script for the selected element. Choose an event and the editor creates the matching script entry
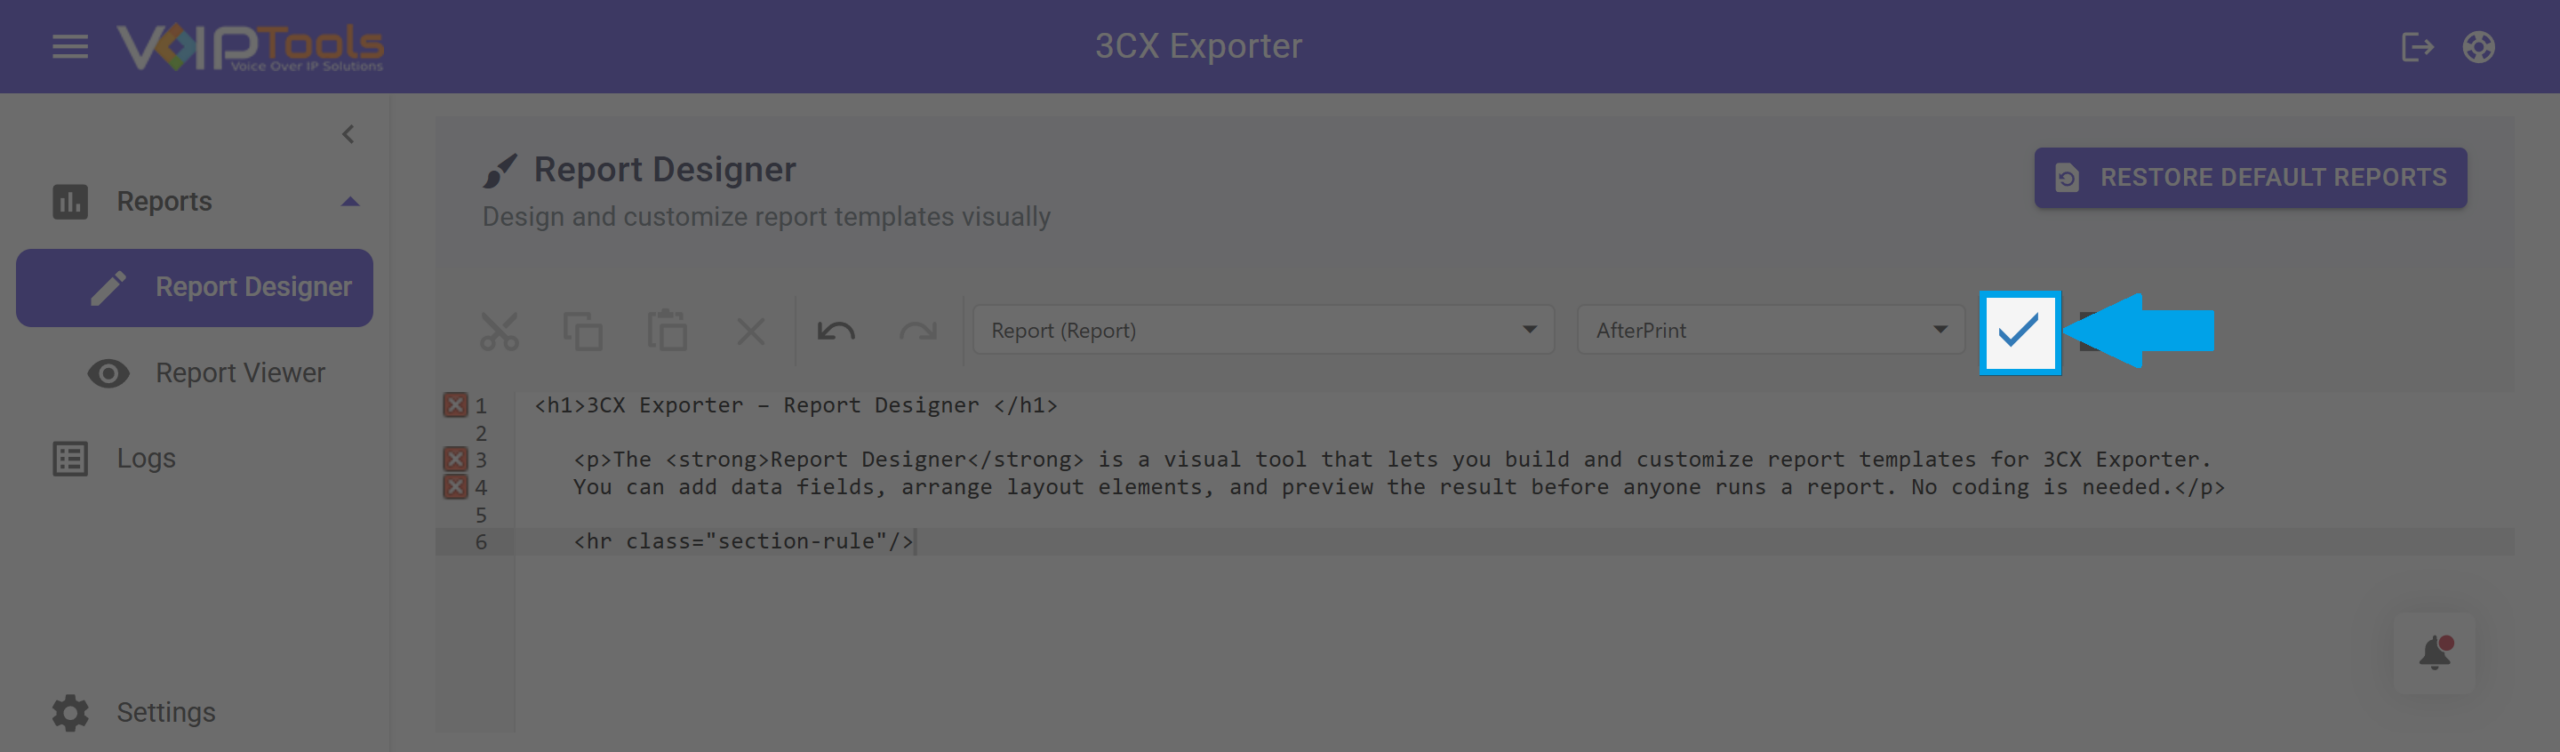
Validate (check mark)
Checks the code in the editor for syntax errors before you apply it. Run this after writing or editing any script to confirm the code is correct. If there are no errors, the check mark stays active
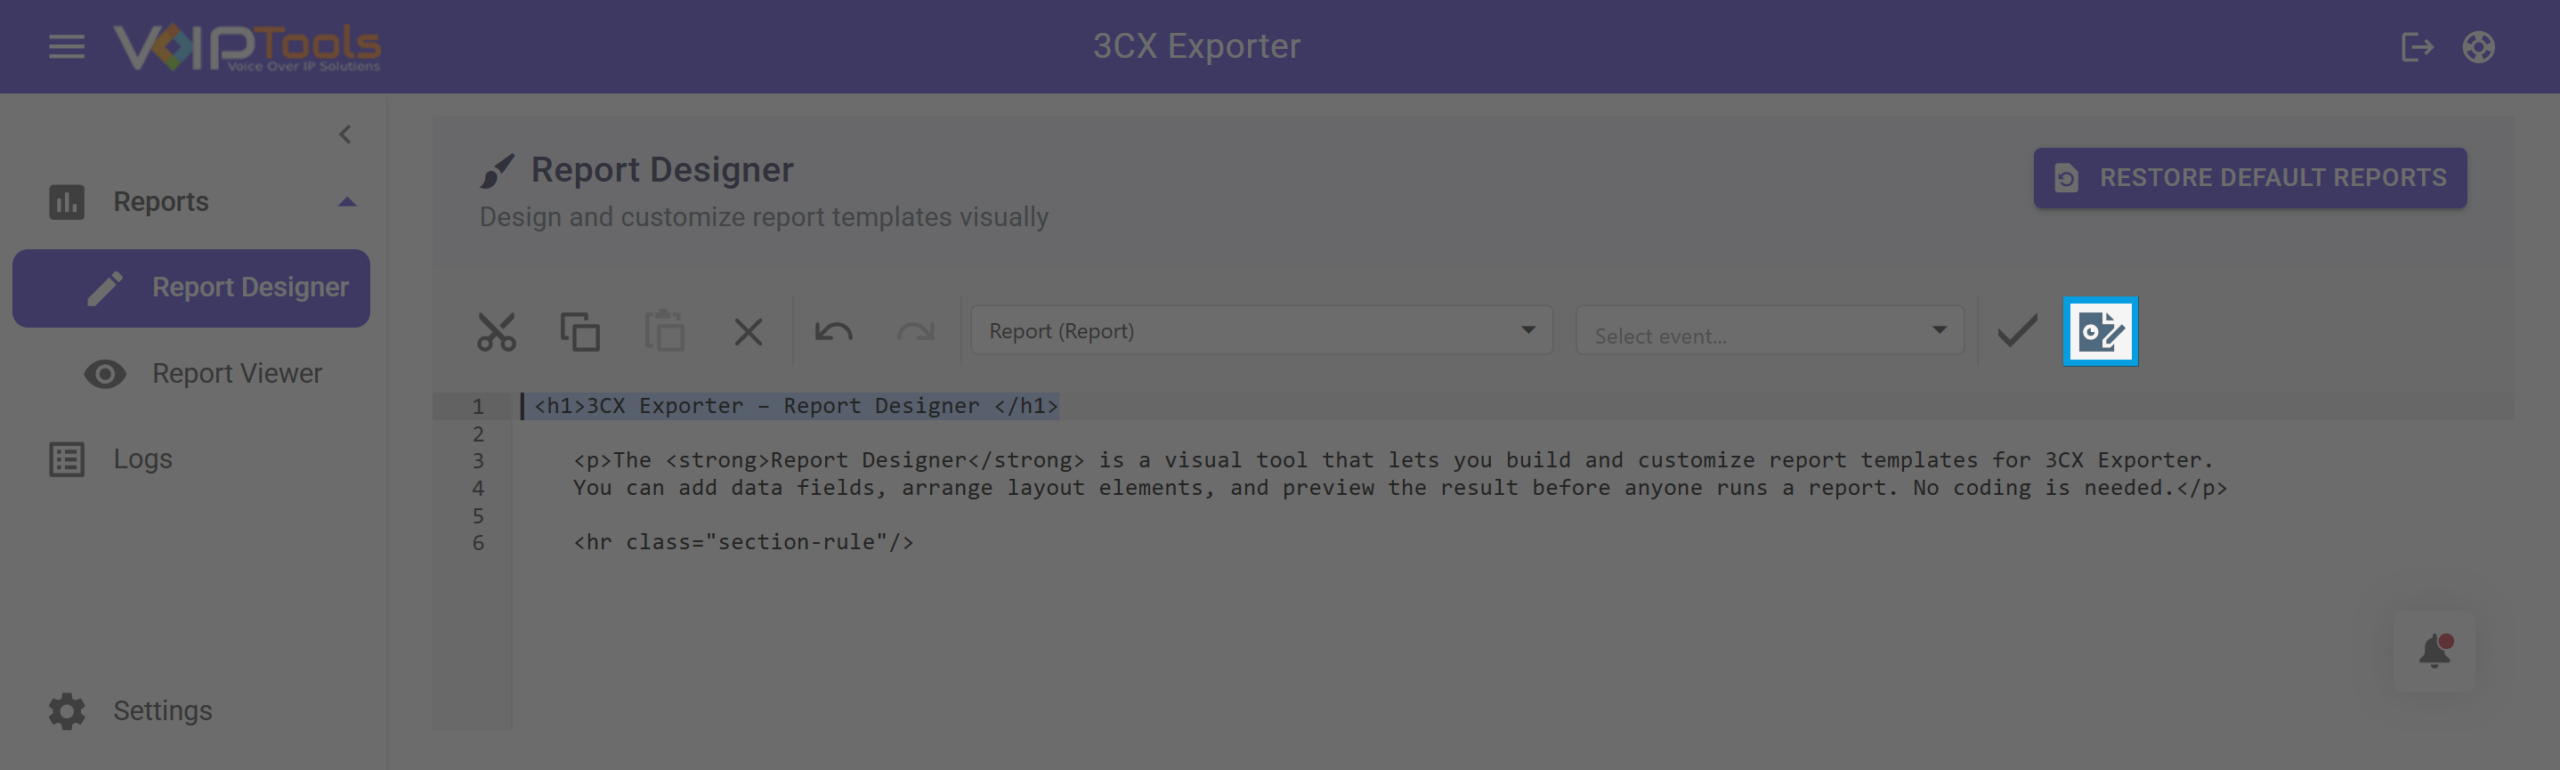
Return to Designer
Closes the Scripts editor and returns you to the full visual Design canvas with all tools, panels, and the sidebar restored. Scripts you wrote are saved when you switch back
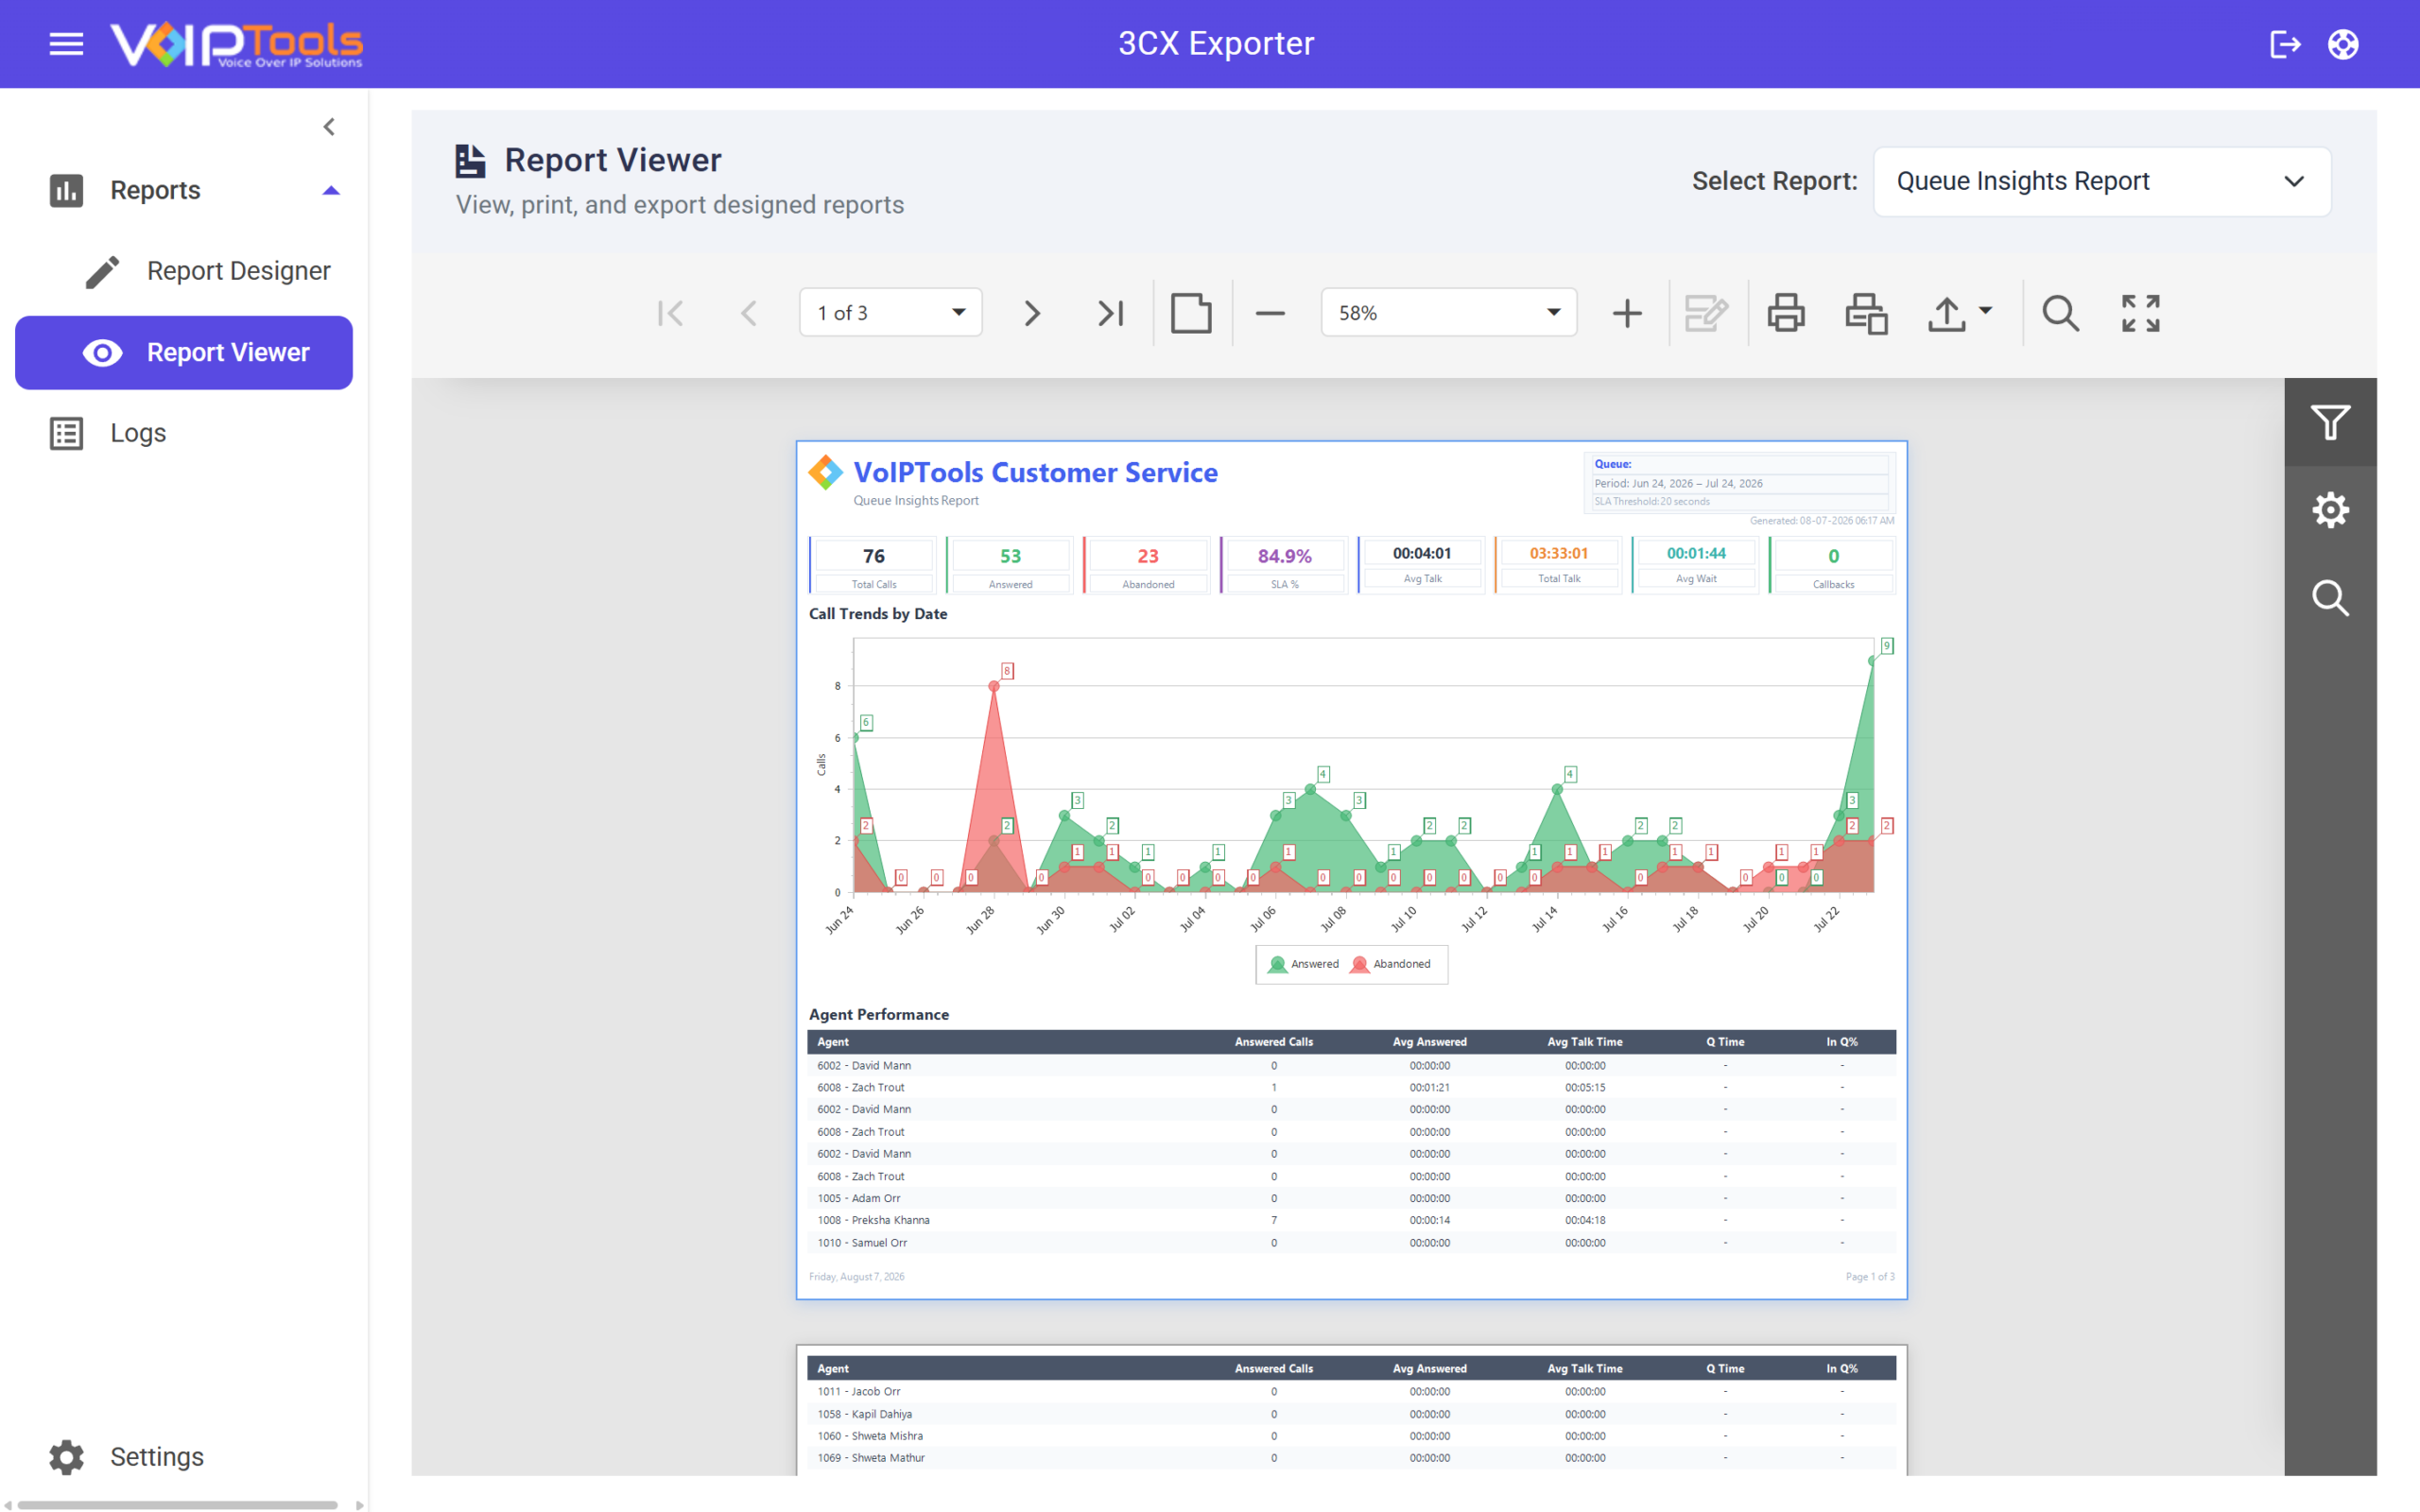
The Report Viewer lets you run, view, and export any report template built in the Report Designer. Set your parameters, click Submit, and the report loads in the preview area ready to print or download.
The first thing to do is choose which report to run. The dropdown groups reports by category so you can find the right one fast.
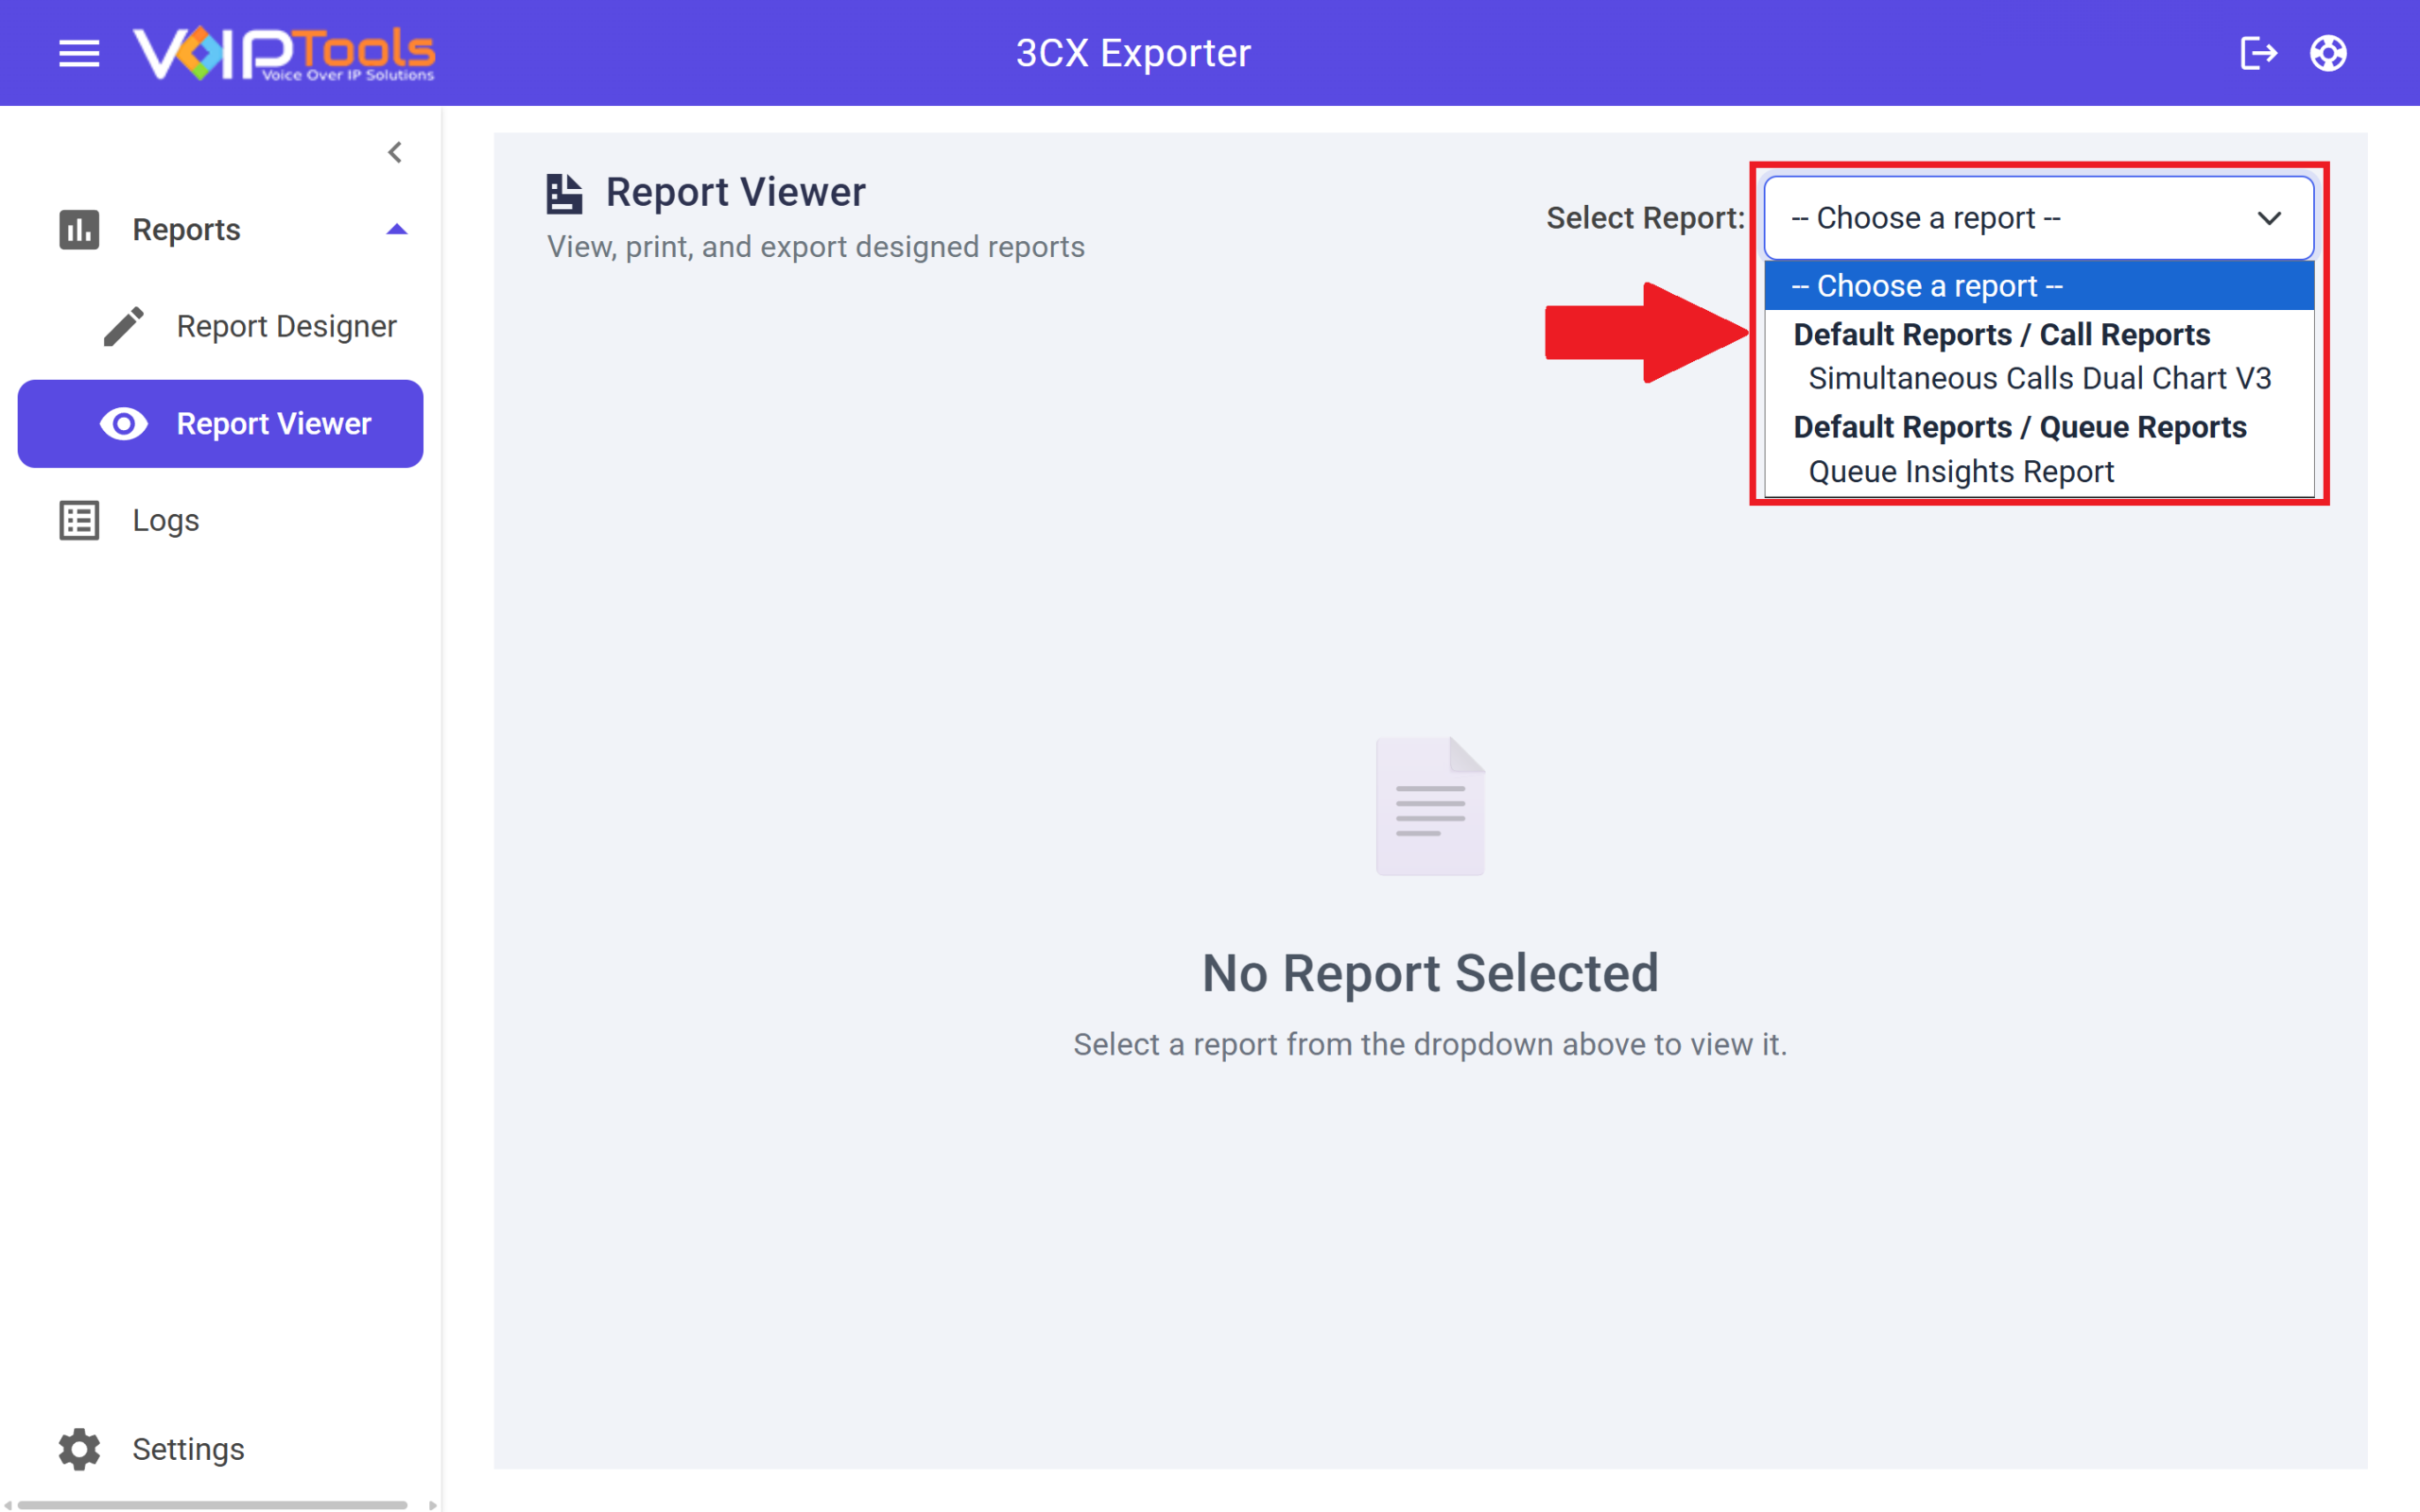
Click the Select Report dropdown at the top right of the page.
Figure 46: Select Report Dropdown Options
Choose a report from the list. Reports are grouped under headings such as Default Reports / Call Reports and Default Reports / Queue Reports.
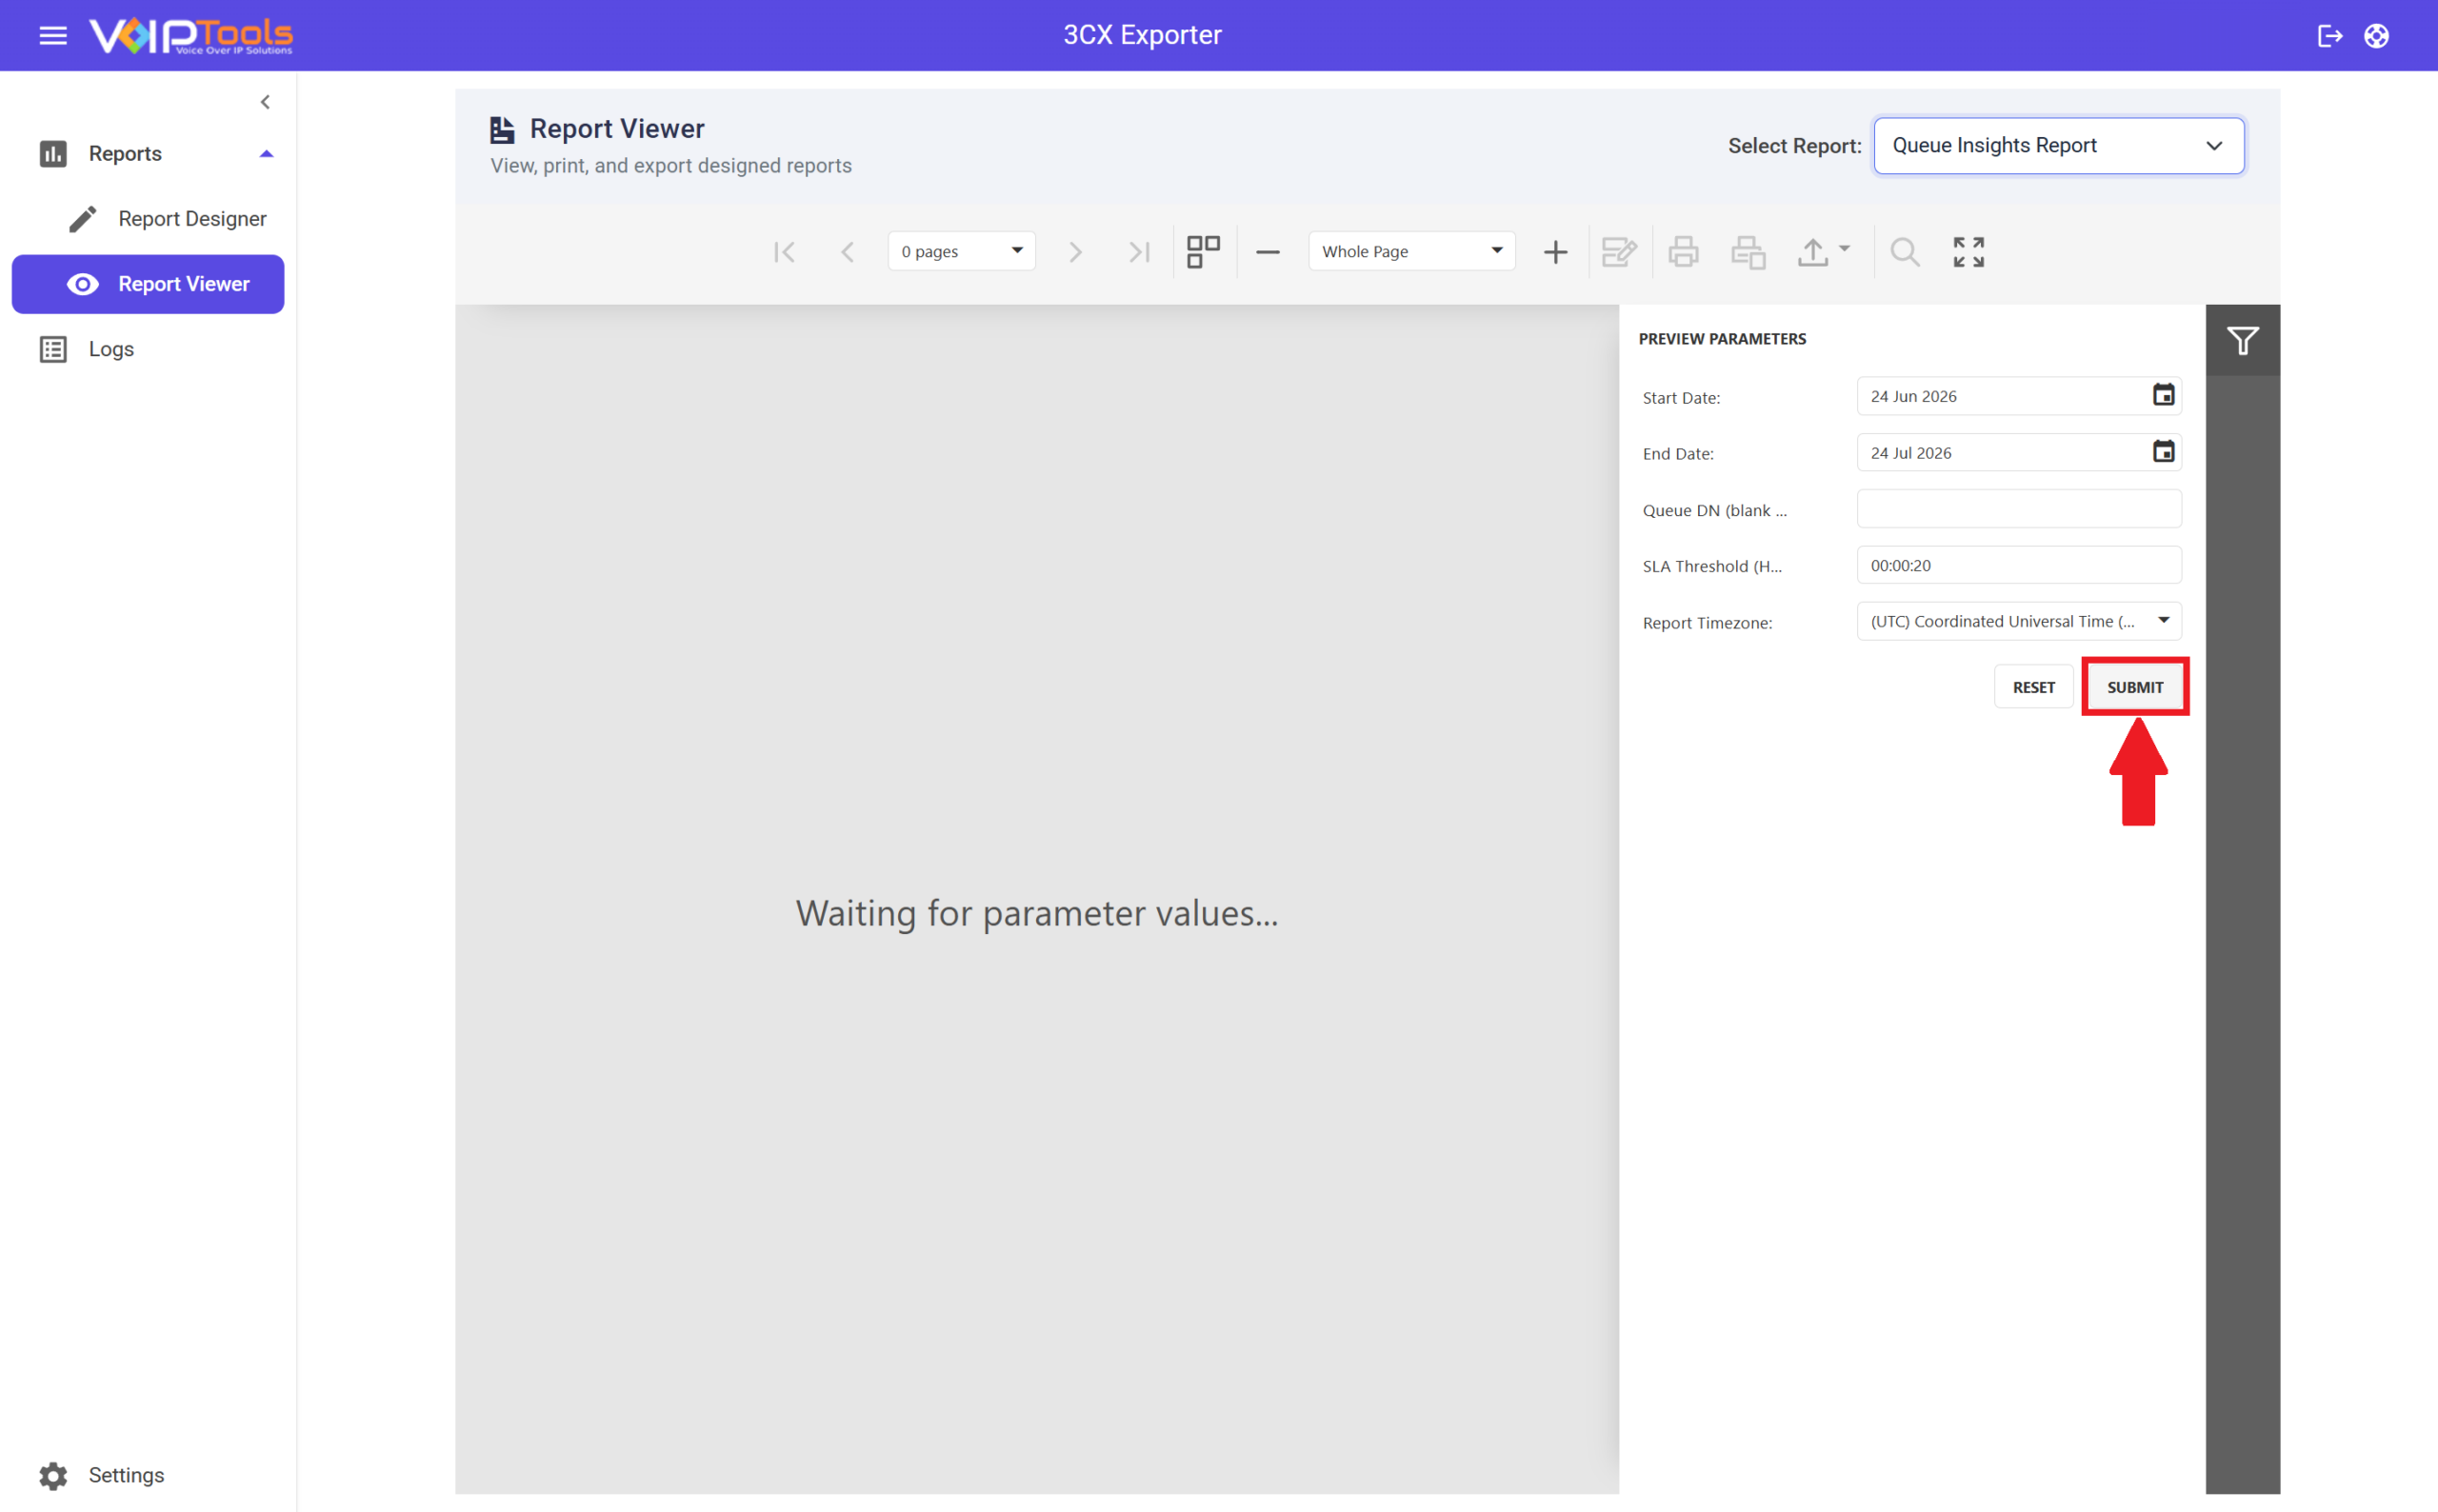
Once you select a report, the preview area shows Waiting for parameter values… and the Preview Parameters panel appears on the right. Fill in the parameters before the report can load.
The Preview Parameters panel appears on the right side of the screen when a report is selected. It controls what data the report shows. Fill in all fields before clicking Submit.
After a report loads, a toolbar appears at the top of the preview area. The toolbar covers page navigation, zoom, print, export, search, and full screen controls.
The navigation controls on the left side of the toolbar let you move between pages of the report.
Control
What it does
|◀ (First page)
Jumps to page 1 of the report.
◀ (Previous page)
Goes back one page from where you are now.
Page counter dropdown
Shows the current page number and total page count, for example 1 of 3. Click the dropdown arrow to jump to a specific page number without stepping through each one.
The grid icon in the toolbar toggles a data table view of the report. When active, the preview switches from the visual page layout to a plain rows-and-columns table of the same data, which is easier to scan for specific values.
Click the grid icon to switch to data table view. The icon becomes highlighted to show the mode is active.
Click it again to return to the standard page layout view.
The edit icon (✏) opens the current report template in the Report Designer. Use it to make layout or data changes to the template without leaving the Report Viewer.
Click the edit icon in the toolbar. The Report Designer opens with the current report template loaded.
Make your changes in the designer.
Return to Report Viewer and run the report again to see the updated output.
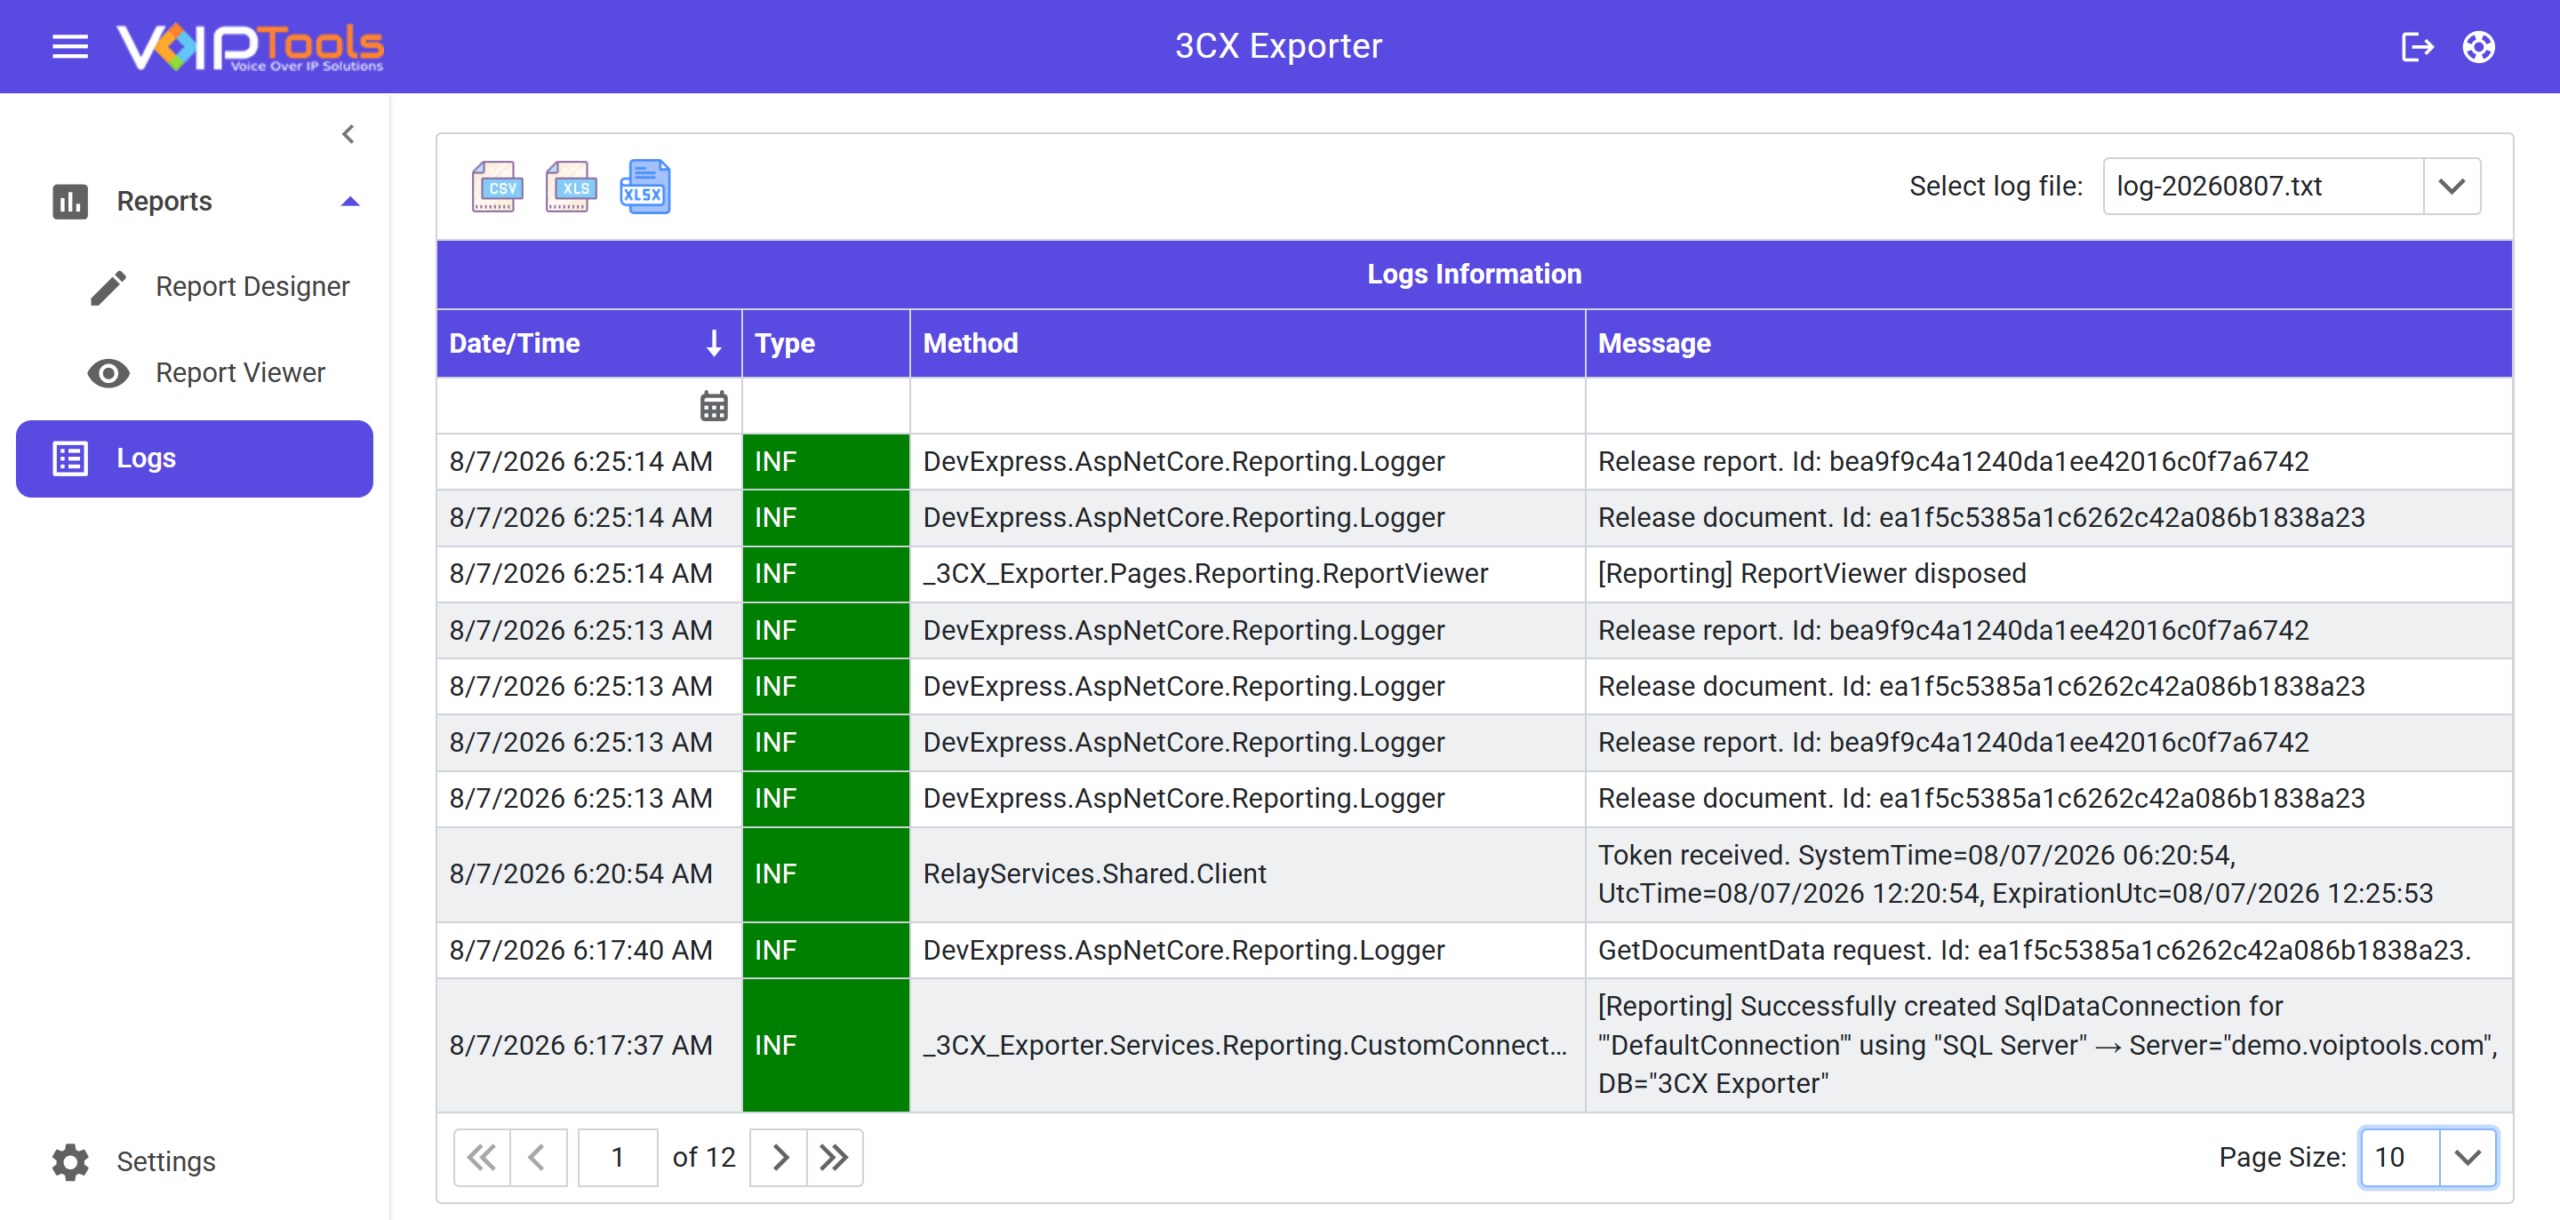
The Logs Menu lets you view the login and logout events of all the sessions along with ‘Date’ and ‘Time’ that is according to the time zone set in the ‘Web Portal’ tab in Settings menu.
Figure 49: Logs Menu Overview
Field Definitions
Field
Definition
Logs Information Table
Displays system events and activity records used for monitoring, troubleshooting, and auditing. It helps users review application behavior, track system actions, and identify issues based on the selected log file.
Date/Time
Displays the date and time when the log event occurred based on the system-generated timestamp.
Type
Indicates the category or severity level of the log entry to help identify the nature of the event: INF = Informational (normal activity), WRN = Warning (potential issue), ERR = Error (system issue or failure).
Method
Displays the system component, process, or function where the log event originated.
Message
Shows detailed information about the recorded event, including actions performed, warnings, errors, or system responses.
Select Log File
Allows you to select a specific log file to view its recorded events.
Page Size
Defines the number of log entries displayed per page.
Besides extracting data directly from the 3CX PostgreSQL database, Exporter efficiently exports Call Detail Records (CDR) as text files. These CDR files encapsulate valuable call information, encompassing participants, durations, and the call chain. While not as extensive as the PostgreSQL database, the CDR files offer a more user-friendly data structure. If the CDR files fulfill your data requirements, it’s advisable to prioritize their use over accessing the PostgreSQL database.
Follow the procedure to configure 3CX to create these CDR files,
Log in to the 3CX Management Console with valid credentials.
On the left navigation pane, click the Advanced option.
Figure 50: Left Side Panel – Advanced Menu
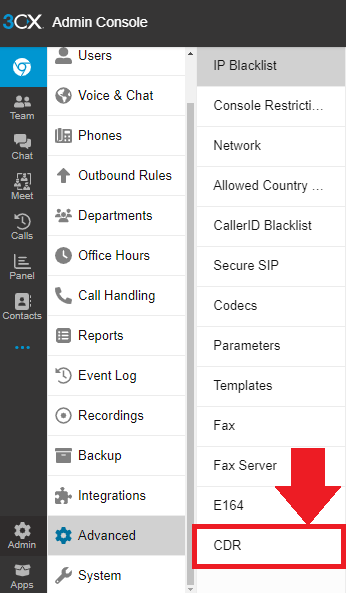
In the Advanced Menu dropdown, click the CDR option.
Figure 51: Advanced Menu Dropdown – CDR Option
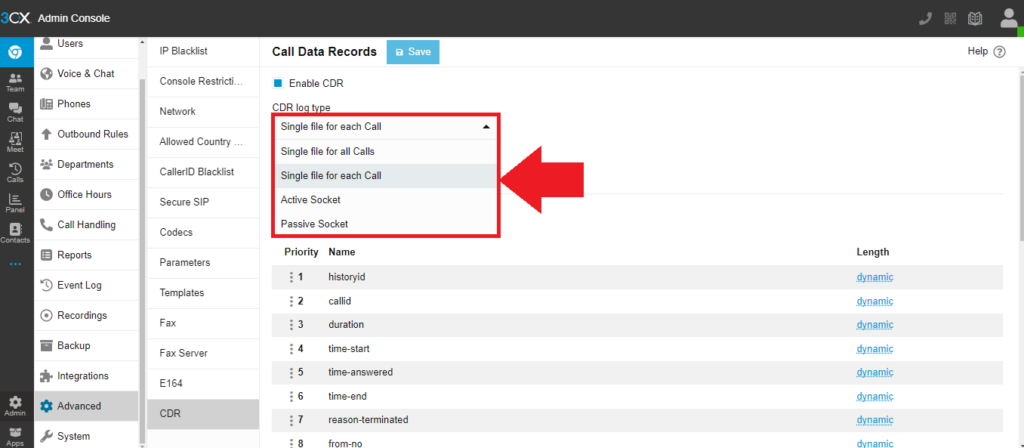
In the CDR Log Type dropdown, select the Single File For Each Call option.
Figure 52: CDR Log Type Dropdown
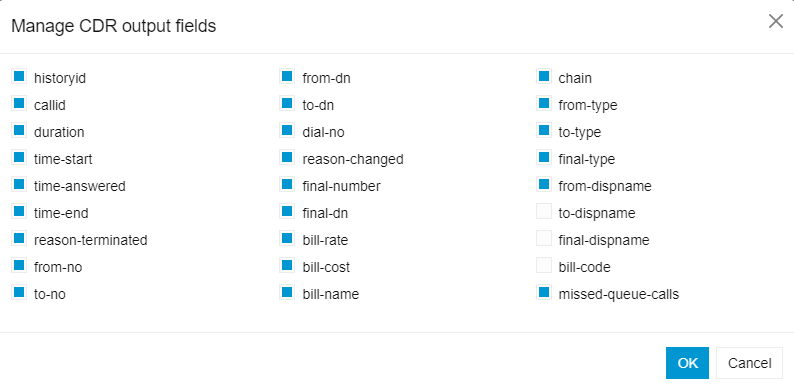
In the Manage CDR Output Fields popup, select the desired output fields and click the OK button.
It is important that you configure 3CX to save each call as an individual file.
NOTE:
Be sure not to remove any fields from the list or change the order of the fields. Exporter expects all the fields to be exported in the default order. Therefore, order is important. Below is a list of all the fields in the proper order.
Once you have successfully configured 3CX to automatically create CDR files, all the CDR data from then on will be exported into the Exporter database.
NOTE:
Exporter will place the CDR data extracted from the 3CX CDR files into the table named cdr. Click the link to learn how to view the 3CX CDR files.
Follow the procedure to upload images to the DN table,
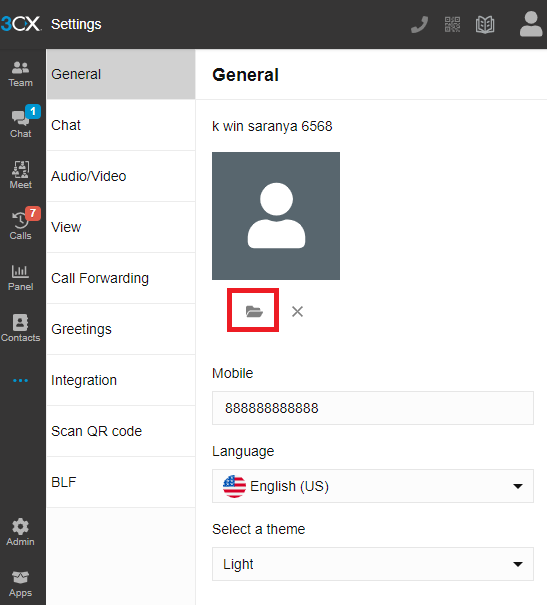
Open your 3CX Electron Phone application.
In the left side menu, click the General tab.
Click the Image Upload icon to upload an image from your local device.
Figure 54: Upload Icon
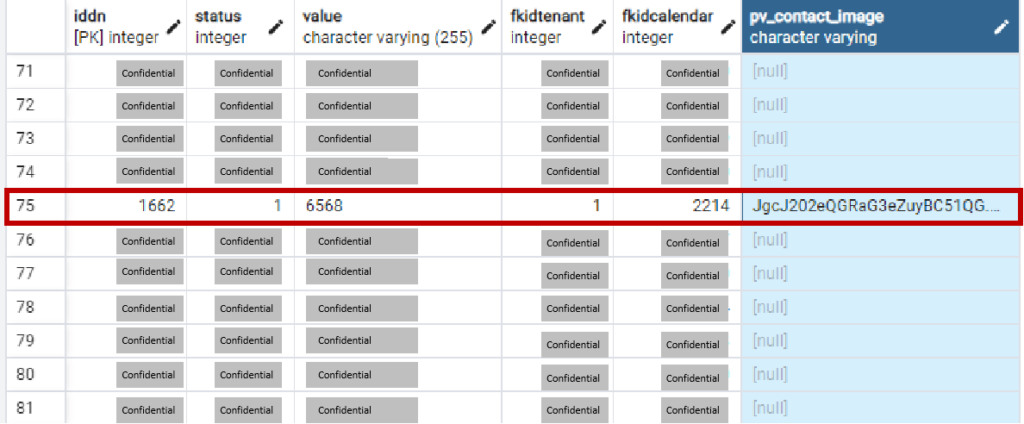
Open your database application and you can see the image added to the extension in the Pv_Contact_Image column.
Figure 55: Image Added to the Database
NOTE:
The pv_contact_image column in your database will be visible if there is an image associated with at least one extension in the 3CX Electron Phone application.
To view the exported data in the Microsoft SQL Server database, install the SQL Server Management Studio and follow the instructions below:
Connect to Microsoft SQL Server database server with valid credentials.
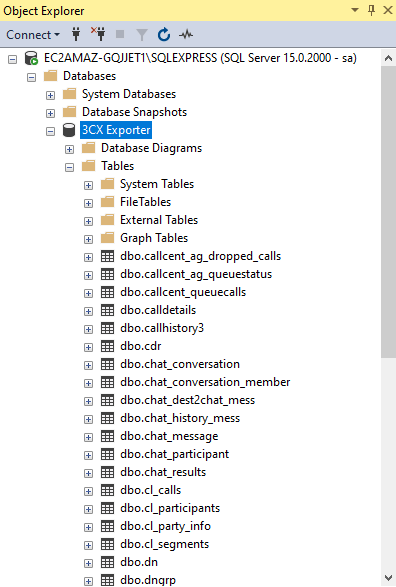
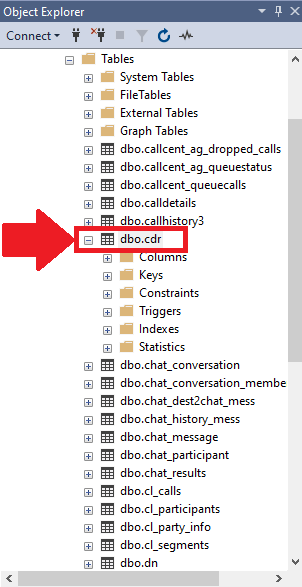
Under the Object Explorer navigation pane, expand Databases, and then expand 3CX Exporter and Tables to see the dbo.cdr table.
Figure 58: dbo.cdr Table
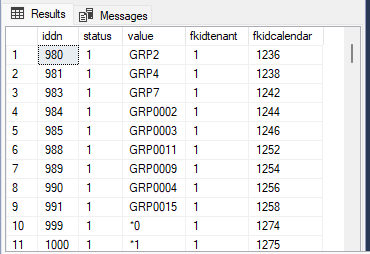
Right-click to open the Right Click menu and click on the Execute option to view the new CDR Output fields that you added through the 3CX Management Console.
Figure 59: New CDR Output Fields Added to the dbo.cdr table in the Database Server
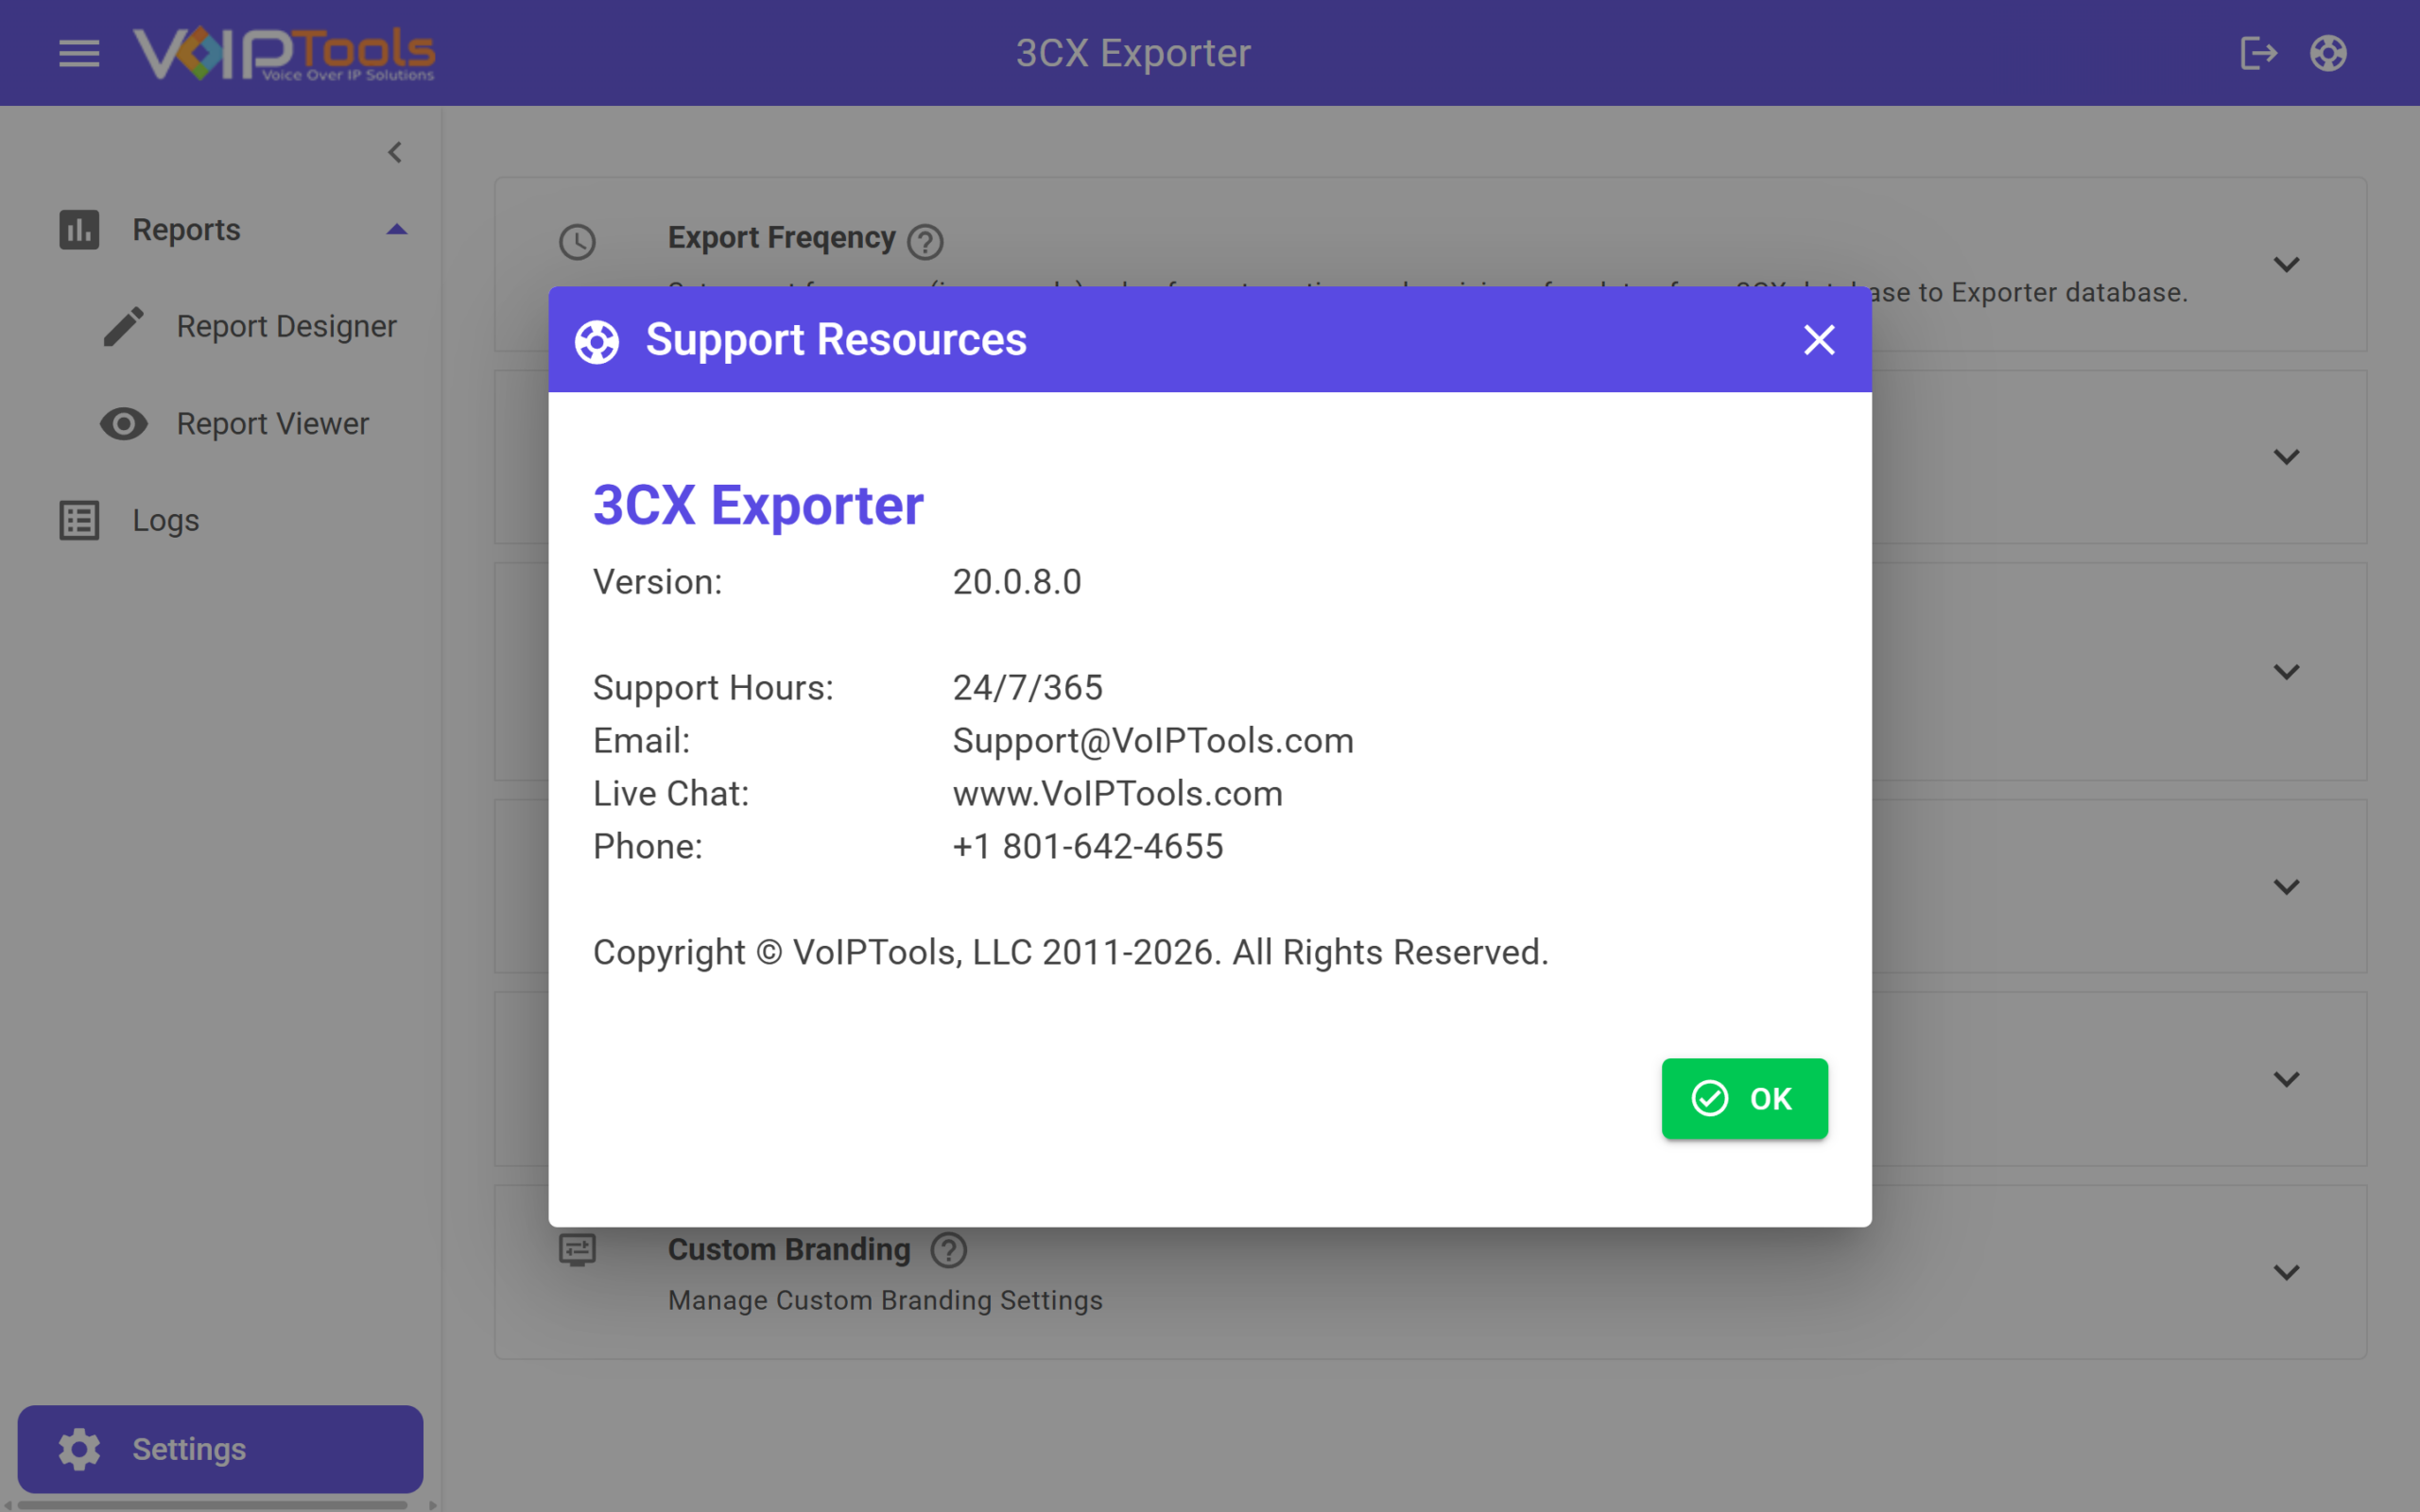
The Support Resources screen displays the version number of the application and the contact information of VoIPTools. Click on the link to learn about the comprehensive support provided by VoIPTools.
Click the Support Resources button on the top right of the application to open the Support Resources screen.
You get quick answers to most of your inquiries in our online manual. If you prefer direct contact, we offer various support channels, including phone, email, live chat, and our helpful VoIPTools forums.
Rest assured, our dedicated team is here to assist you around the clock, every day of the year. Whether you're based in the USA or India, we're ready to provide prompt responses to your technical queries.
Windows Event Log for VoIPTools Applications and Services #
For troubleshooting any application errors, our Windows Event Log contains a comprehensive list of error messages, warnings, and informative notes related to all our VoIPTools applications and services. It's a valuable resource to help you pinpoint and resolve any issues you may encounter.
Are you looking to collaborate with other VoIPTools customers facing similar challenges? Our forum is the perfect platform to exchange ideas, solutions, and best practices. Join the conversation at: https://www.voiptools.com/community/
Got questions that need immediate answers? Our chat support team is available to assist you in real time. Just click on the Live Chat button located at the lower right corner of our website, and we'll acknowledge your queries right away.
To ensure a thorough understanding of your concerns, email us at support@voiptools.com. Describe your issue in detail, and we'll get back to you within one business day with the support you need.
If you prefer to speak with a representative directly, you can reach us at +1 801-642-4655. Our attentive team is available to take your calls from 8:00 AM to 6:00 PM (Central Standard Time).
If you've purchased our products through a VoIPTools Partner, rest assured that they provide first-level support at no additional cost. Partners have access to 100% free technical assistance and actively participate in the troubleshooting process.
VoIPTools customers enjoy access to our online manuals and receive support through emails (with responses within one business day) and live chat. However, please note that we do not provide remote server login assistance.
For a more hands-on experience, consider our "Installation Support" package. Our expert support team can log in to your servers, and install and configure all our tools. This comprehensive service includes setting up SQL Server Express and Internet Information Server if necessary. We'll work closely with you to tailor our applications to meet your requirements.
We're committed to providing top-notch support to ensure your VoIPTools experience is smooth and hassle-free. Contact us today, and let us assist you in making the most of our powerful tools!





NOTE:


 button to download your application.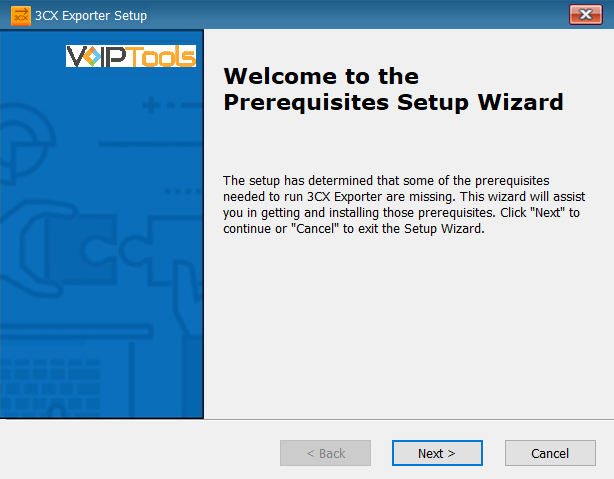
NOTE:
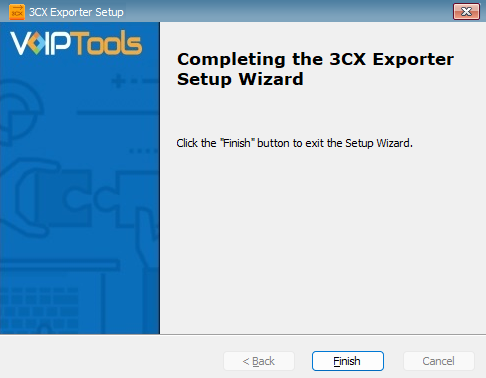
 to open the web application.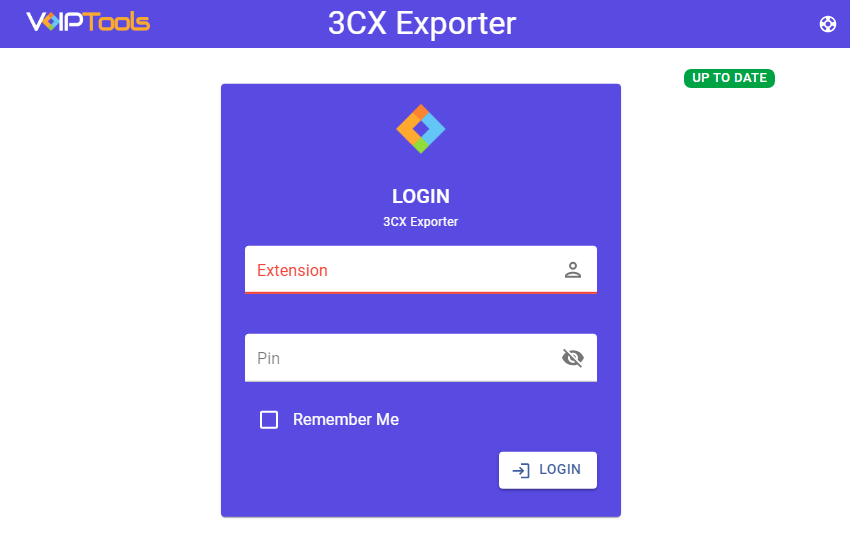
NOTE:


 button.

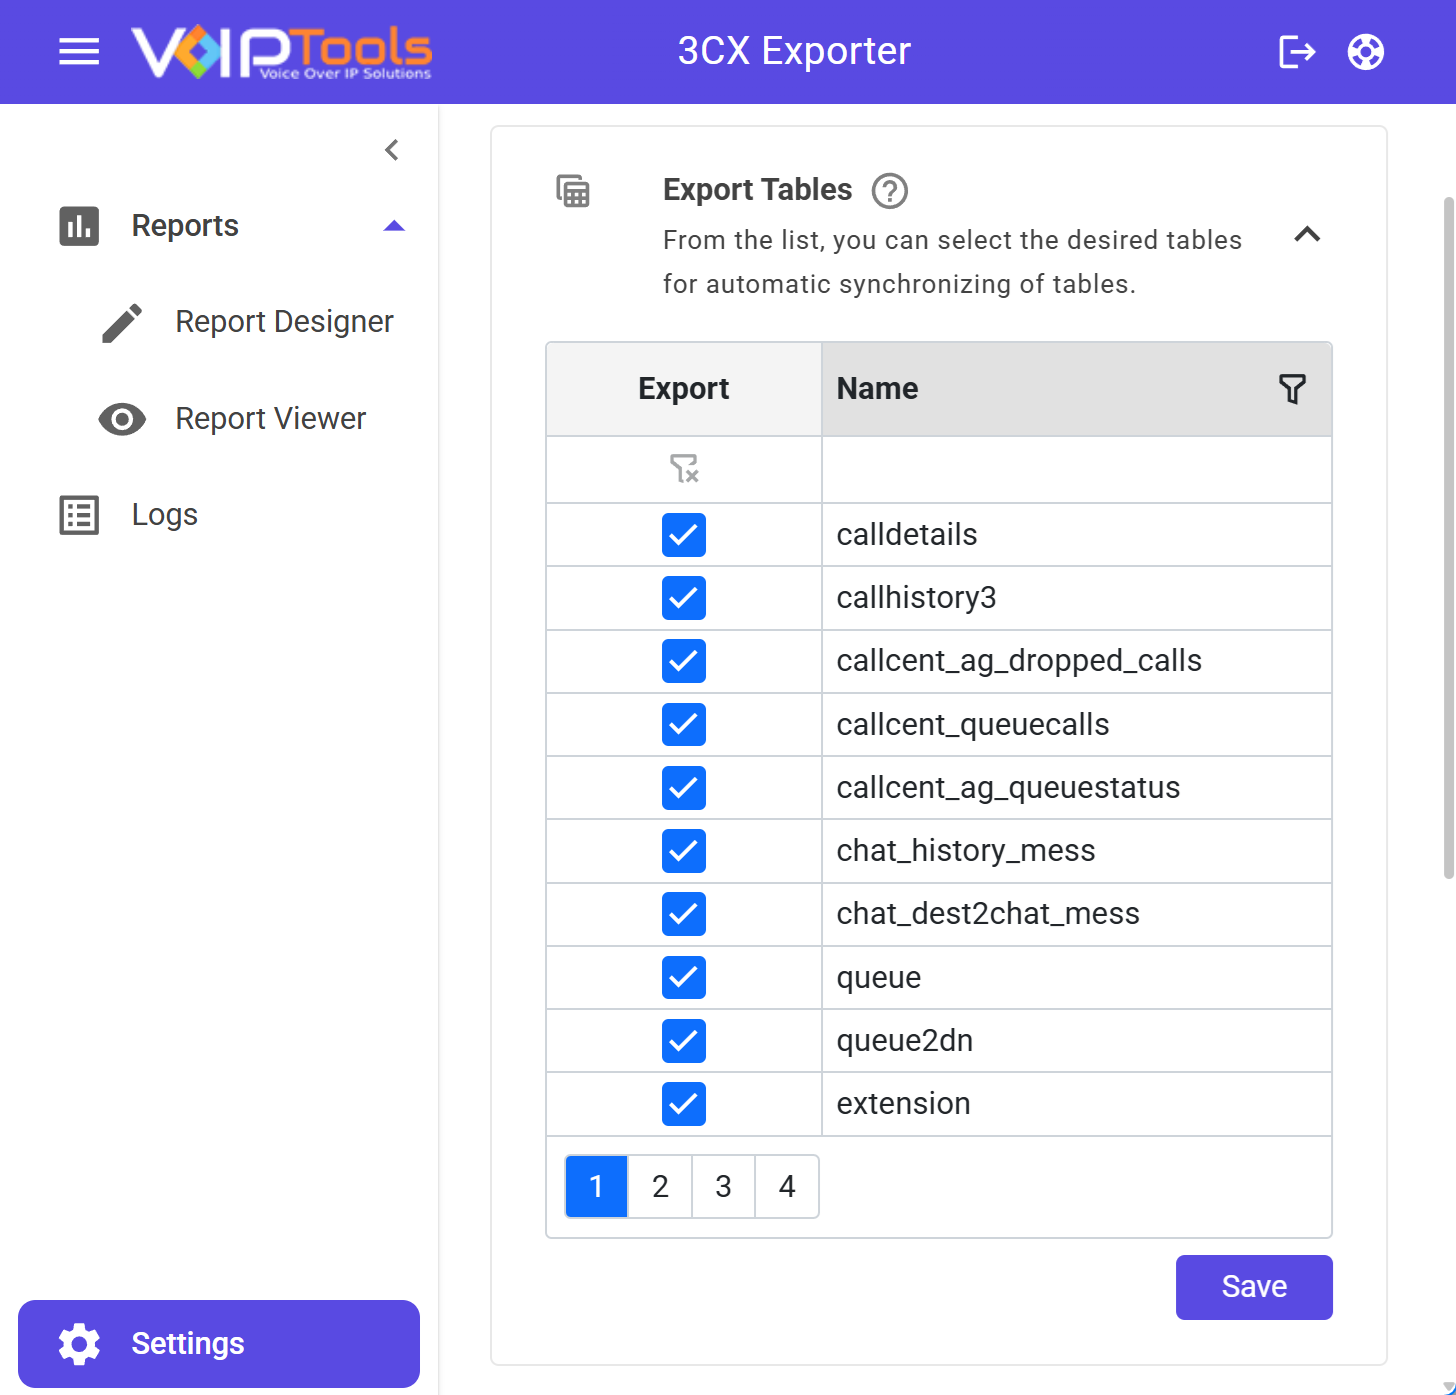
 button to save your settings.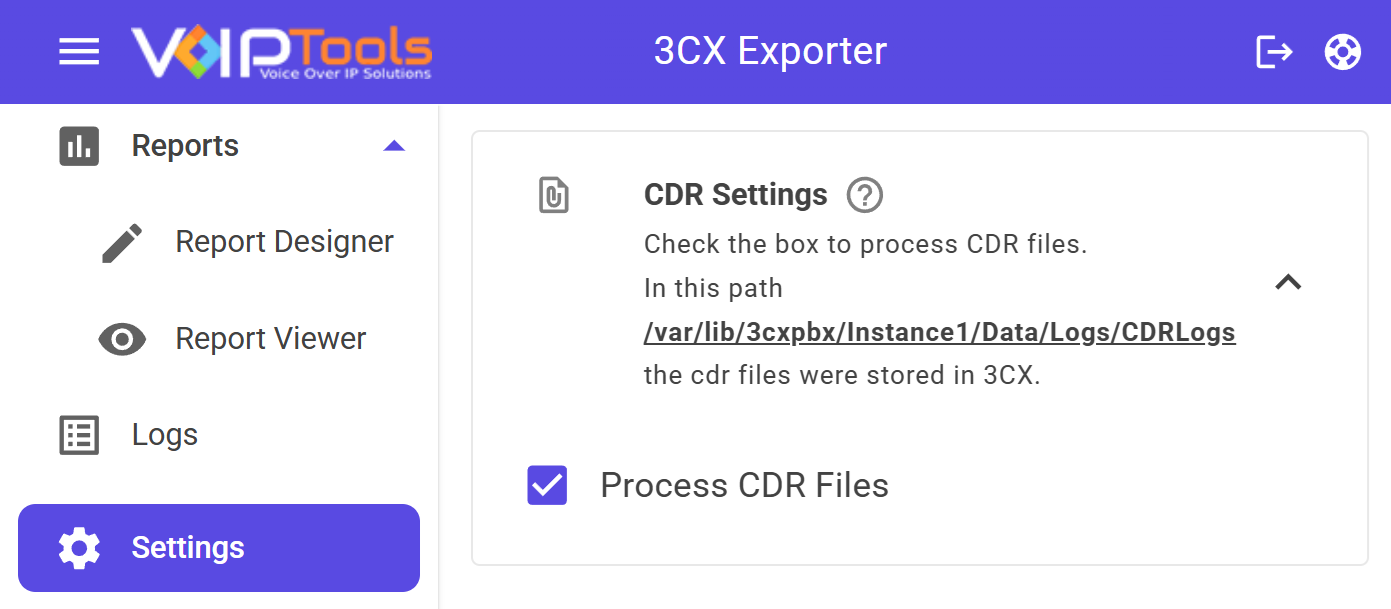
 dropdown.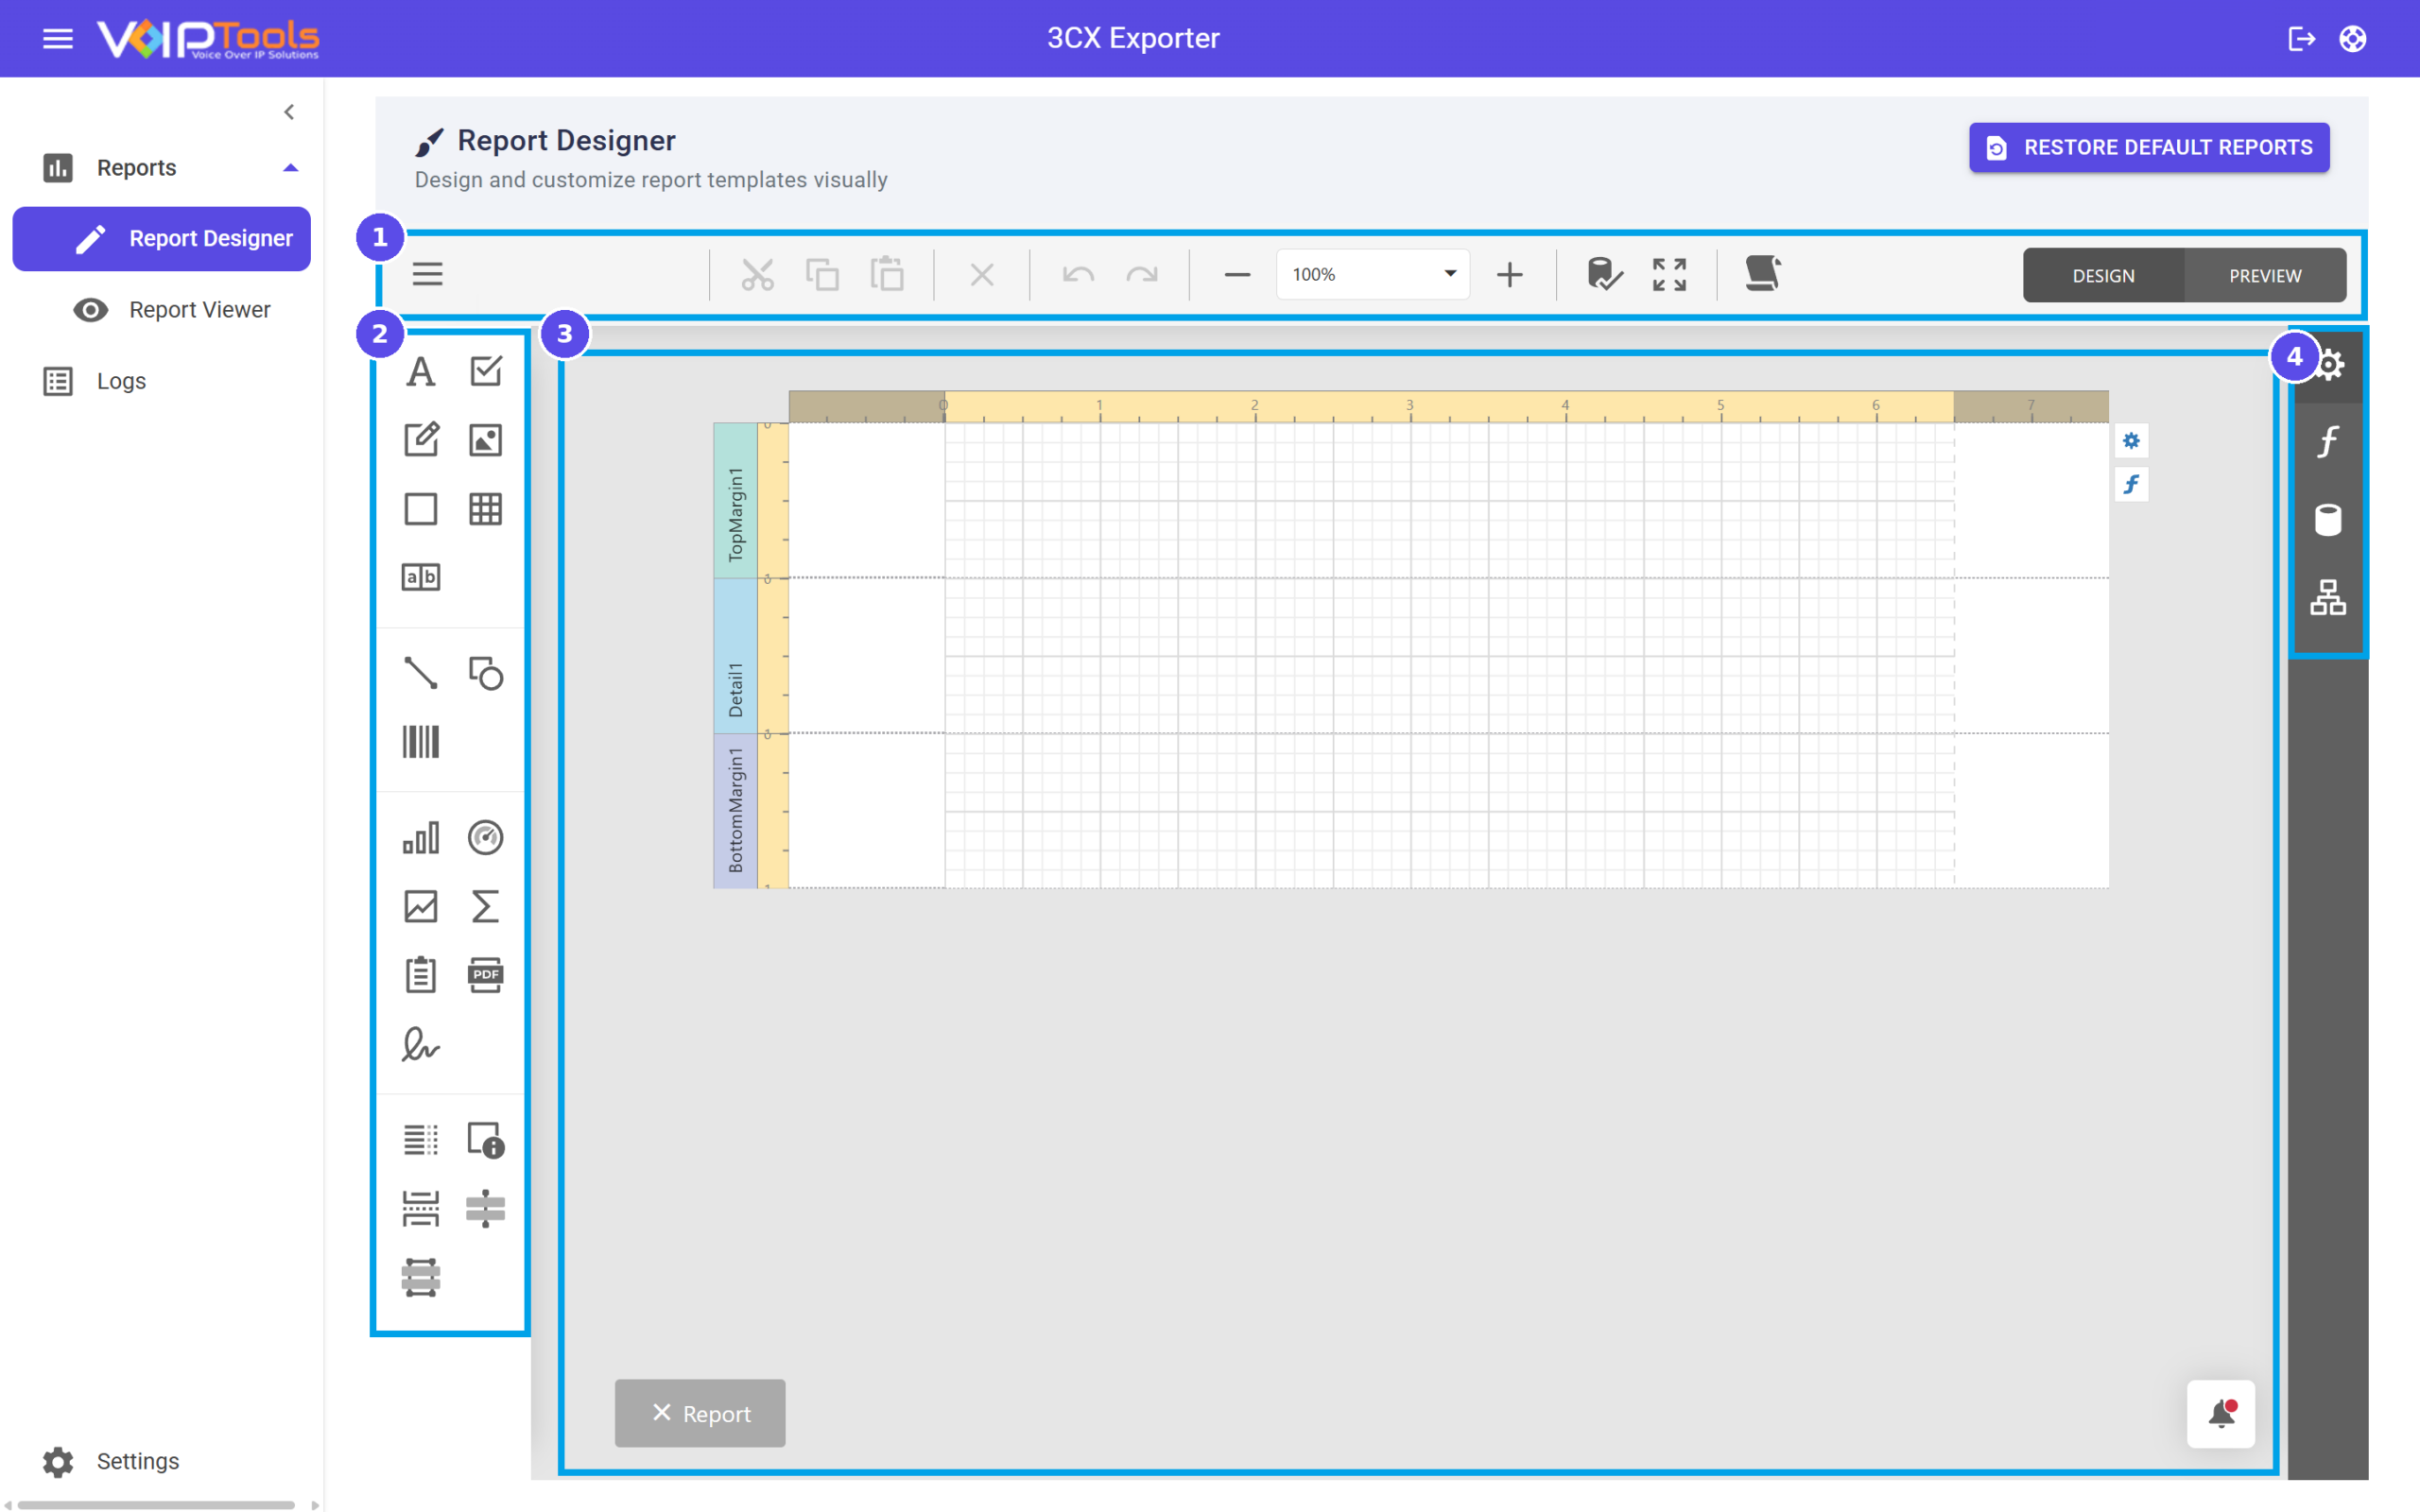
 option.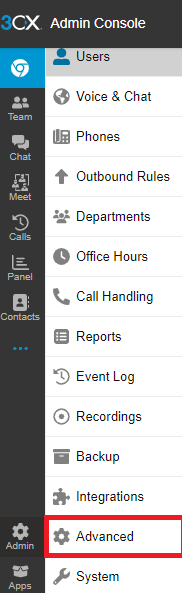
 icon to upload an image from your local device.