Introduction #
Simplify important message delivery and enhance phone call communication with 3CX Barge Messages. With this innovative tool, you can easily convey crucial information during phone conversations. Simply select a prerecorded message of your choice, and 3CX Barge Messages will join the call, play the selected message seamlessly, and exit the conversation smoothly. This user-friendly feature ensures effective and efficient delivery of important messages, providing a seamless communication experience. Revolutionize your phone call interactions and experience the power of clear and concise communication with 3CX Barge Messages.
Where do you need the 3CX Barge Message? #
Companies all over the world use Compliance messages on an everyday basis. Some examples of these messages are,
- Privacy Policy Compliance Message
- Consent Compliance Message
- Legal Disclosure Compliance Message
- Financial Regulations Compliance Message
- Security Compliance Message
- Industry-Specific Compliance Message
- Call Recording Notice Compliance Message
- Consumer Protection Compliance Message
- Fair Debt Collection Practices Act (FDCPA) Compliance Message
- Accessibility Compliance Message
Benefits of 3CX Barge Messages: #
 | STAY CONSISTENT | 3CX Barge Messages offers a seamless and customized caller experience, ensuring clear and reliable messages whenever you answer a call. |
 | SIMPLIFY TASKS | Simplify the process of delivering long, standardized messages to callers by providing agents with a straightforward and easy-to-use method. |
 | STAY COMPLIANT | Improve regulatory compliance by simplifying the communication of mandated information to callers, facilitating seamless interactions between agents and customers. |
 | WEB BASED | Access on-demand messages seamlessly through our user-friendly web interface, eliminating the requirement for additional software. |
How do Barge Messages work? #
The functionality of 3CX Barge Messages involves the assignment of prompt (.wav audio) files to Digital Receptionists (IVR) in order to facilitate effective communication. Through a user-friendly web interface, agents are able to conveniently select the desired prompt. Once the selection is made, agents can initiate the playback of the chosen message by clicking a button on the web page. This enables both the agent and all other callers involved in the ongoing phone call to hear the message simultaneously.
NOTE:
Click the link to access 3CX’s audio file conversion feature to convert your audio files into .WAV format.
Prerequisites: #
Before you attempt to install 3CX Barge Messages, you need to ensure your computer meets the minimum
requirements outlined below:
- 3CX Professional / Enterprise Edition Version 18 Service Pack 4 or above
- Windows 10 or above / Windows Server 2016 or above
- Microsoft SQL Server 2016 or above (Including the free SQL Express edition)
- Microsoft .Net 4.7.2 or above
- VoIPTools 3CX Relay Service installed on the 3CX server (Windows or Linux)
- Microsoft Internet Information Server IIS 7.0 or above
- Static IP for VoIPTools and 3CX servers
- Port number 7850 opened on your device.
NOTE:
You need a Static IP for both VoIPTools and 3CX servers to ensure proper two-way communication, both the 3CX server (Relay) and the VoIPTools server. Dynamically assigned IP addresses are not supported. Additionally, it is recommended to use HTTPS for secure communication, which requires a FQDN for SSL/TLS certificate validation between the VoIPTools server and the Relay.
NOTE:
While installing SQL Server, ensure the following,
- Uninstall the previous versions of SQL Management Studio manually before installing the new version.
- Install it in “Mixed Mode” to include SQL Authentication, and install SQL Management Studio
NOTE:
- Installation on a domain controller may require additional assistance.
- When installing IIS, be sure to install Basic Authentication, .Net Extensibility, and ASP.Net 4.X.
Installation overview #
 | DOWNLOAD SOFTWARE | You can order 3CX Barge Messages online at https://www.voiptools.com. Your order confirmation email will include your license key and a link to download the software. |
 | INSTALL PREREQUISITES | There are a number of prerequisites that must be installed prior to installing the 3CX Barge Messages. These prerequisites include Microsoft Internet Information Server (IIS) and Microsoft SQL Server |
 | INSTALL 3CX BARGE MESSAGES | This User Guide contains step-by-step instructions to successfully install 3CX Barge Messages. Begin by extracting the installer from the downloaded zip file (Step 1 above), then run the setup program named BargeMessagesInstaller.exe |
 | REGISTER YOUR SOFTWARE | You must register your license key to activate 3CX Barge Messages. Your license key is included in your order confirmation email, and can also be found in your order history on our website. |
Step-by-Step Installation Procedure: #
The following section guides you through a detailed walk-through of the installation process:
Step 1: Download ‘3CX Barge Messages’. #
- Find the software download link in the Order Confirmation Email, or you can find it in your order history on our website and download the 3CX Barge Message application.
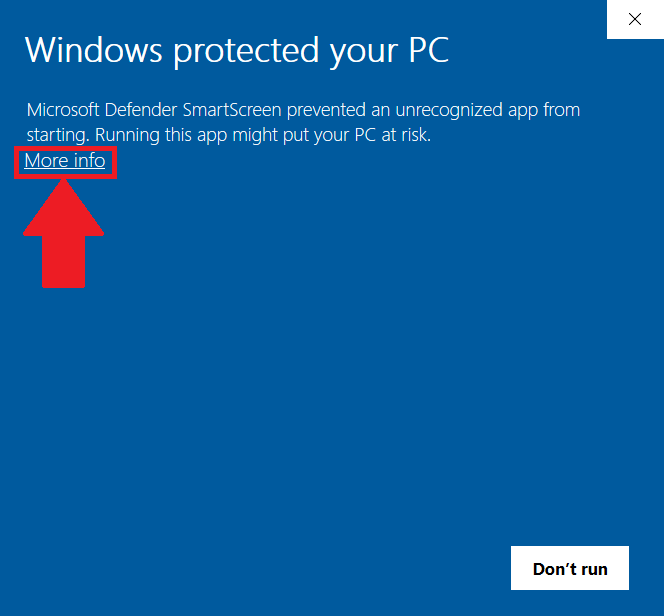
- In the Microsoft Defender SmartScreen, click the More Info option.
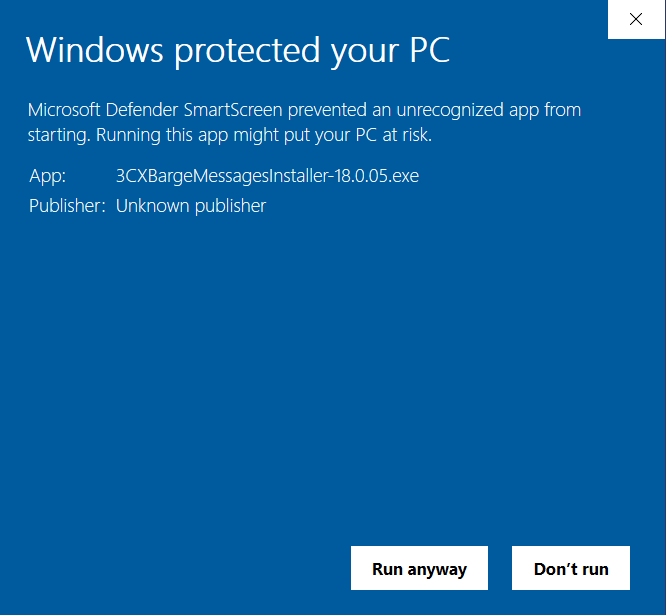
- Click the Run Anyway option to start the installation.
Step 2: Install Prerequisites #
Click on the software installer that was downloaded in step 1 above. The installation wizard will automatically
identify the needed prerequisites and assist you with the install of each prerequisite needed to run ‘3CX Barge
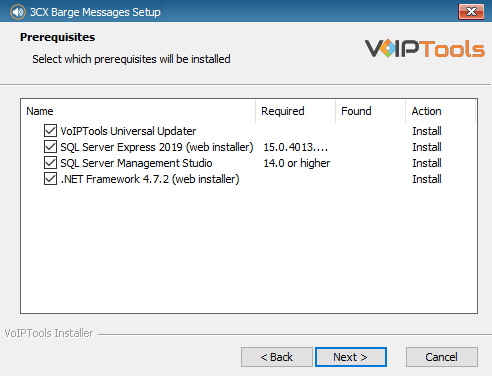
Messages’. Prerequisites include .NET Framework (Web Installer), SQL Server Express (Web Installer) and,
SQL Server Management Studio.
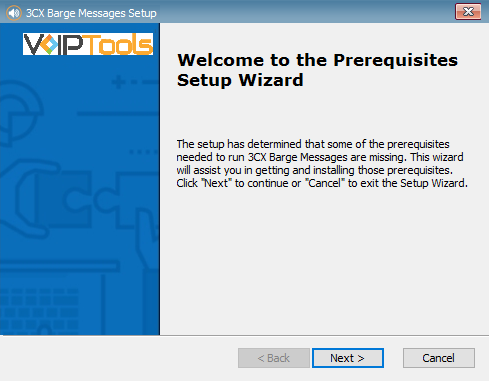
- Double-click on the downloaded installer executable to launch the Prerequisites Setup Wizard and click Next.
- Select/unselect the applications to be installed based on your unique requirements and click Next to continue.
NOTE:
It is important that you install all the required prerequisites.
The installer automatically downloads and installs the prerequisites. The download may take several minutes.
- In the Microsoft SQL Server License Terms click the Accept button to acknowledge the license terms and continue.
- This page appears if do not have SQL Server Express preinstalled in your device.
- View the SQL Server Media target location in the Media Location field. If required, you can click the Browse button to change the location. Click Install to begin the installation of SQL Server Express.
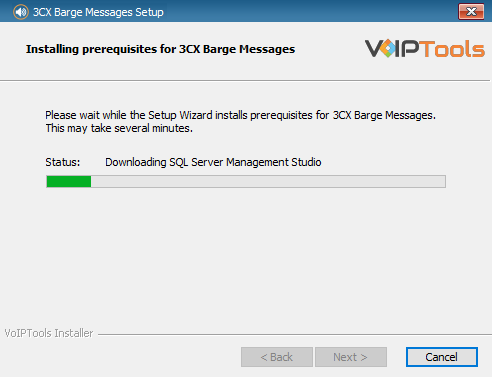
SQL server installation is in progress. This may take several minutes to complete.

- Click the Close button once the prerequisites are installed.
Microsoft SQL Management Studio installation is in progress. This may take several minutes to complete.
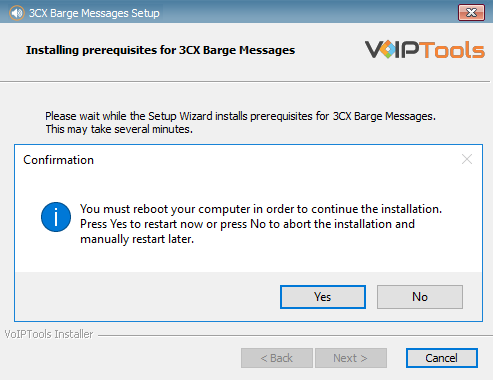
- In the Reboot Confirmation popup, click Yes to reboot your computer.
Step 3: Start the installation process #
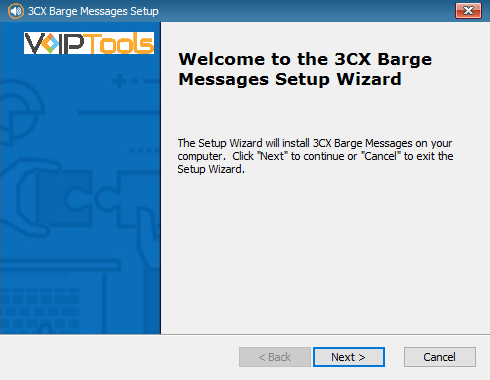
- Click Next to Continue on the 3CX Barge Messages Setup Wizard page.
- Note the Installation Folder where ‘3CX Barge Messages’ will be installed. Note that you cannot change the path.
- Click Next to continue.
Step 4: Test Relay Settings: #
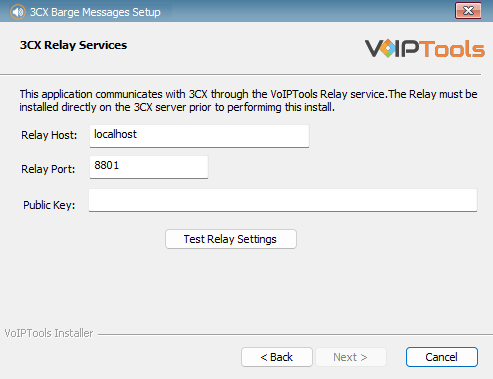
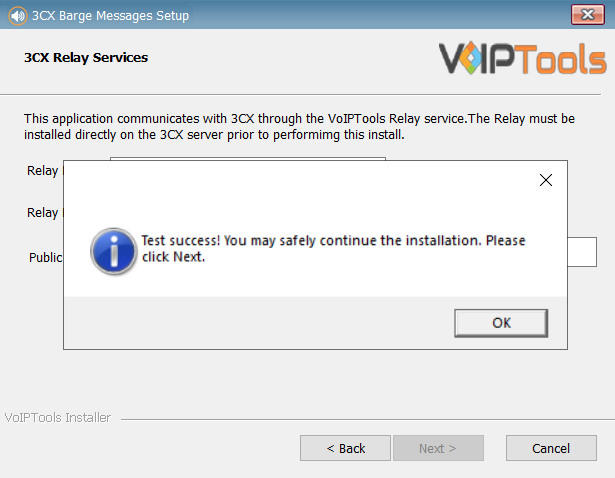
- In the 3CX Relay Services window, in the Relay Host field, enter the FQDN of your 3CX server.
- Enter 8801 in the Relay Port field.
- Enter the public key you took from VoIPTools Relay services in the Public Key text area.
- Click the Test Relay Settings to confirm ‘3CX Barge Messages’ can communicate with the Relay services running on the 3CX server.
- If the ‘3CX Barge Messages’ is successfully able to communicate with the Relay services that run on the 3CX server, a Success message box appears. Click OK. If the test fails, you will not be able to continue until communication with the relay is established.
- Click Next to continue with the installation.
NOTE:
If the Relay test was unsuccessful,
- Confirm you have the correct firewall port(s) open (default TCP 8801) on the 3CX server and the perimeter firewall protecting the 3CX server.
- Confirm that you have entered the correct IP address / FQDN for the 3CX server. If using an FQDN, confirm you can resolve the FQDN by pinging the name.
- Confirm that 3CX Barge Messages and the Relay are attempting to communicate on the same port and protocol (HTTPS/8801 or HTTP/8800).
Step 5: Configure the database #
When configuring 3CX Barge Messages, select an existing Microsoft SQL Server instance in your environment. The database server can be a remote SQL Server or a local instance running on the VoIPTools server.
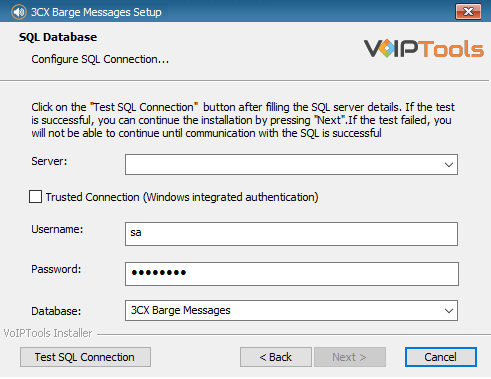
- On the SQL Database window, in the Server field, select the desired instance of SQL Server.
NOTE:
- We strongly encourage you to use SQL Authentication rather than Windows authentication. Many of our tools leverage a Call Flow Designer (CFD) application running on the 3CX. Frequently our CFD applications require access to a SQL database.
- If the 3CX server and the database server are not in an Active Directory domain, Windows authentication will fail. To use SQL authentication, your SQL Server must be configured to run in “Mixed Mode”. If you installed SQL Server with one of our tools, we automatically configure SQL in “Mixed Mode”.
- Uncheck the Trusted Connection checkbox to use SQL Authentication.
- In the Username and Password fields, enter valid SQL login account credentials.
- Check the Trusted Connection (Windows integrated authentication) checkbox to use Windows Integrated Authentication (not recommended)
- Select an existing database name from the list if you are upgrading or reinstalling 3CX Barge Messages. If installing for the first time use the default name In the Database field.
- Click the Test SQL Connection button to confirm connectivity to SQL Server and then click Next to continue.
Step 6: Installing 3CX Barge Messages #
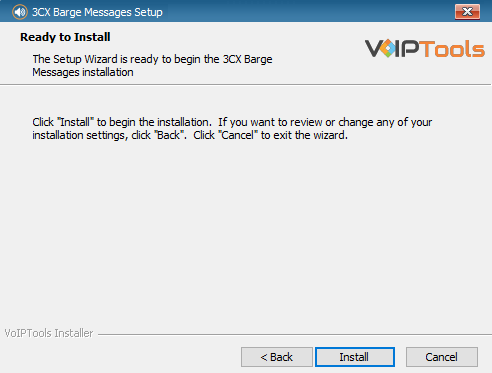
- Click Install to start the installation of ‘3CX Barge Messages’ In the Ready to Install window.
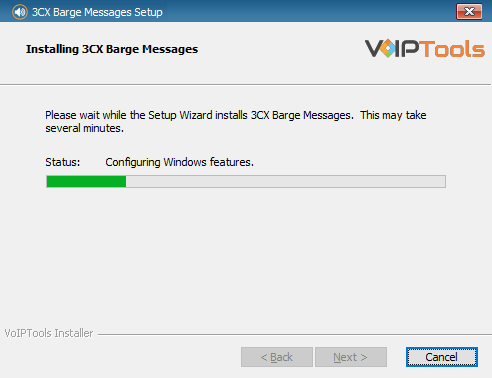
The application installation progresses. This may take several minutes to complete.
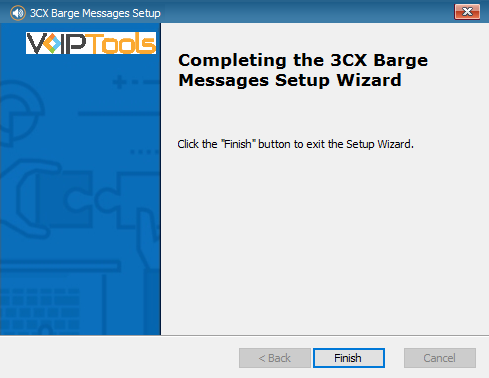
- Click Finish when the installation is complete.
Step 7: Register your Software #
To ensure the authorization of your license key, it is necessary to complete the registration process. By registering with VoIPTools, you gain access to a range of benefits:
| Key Replacement Assistance | In the unfortunate event of a lost license key, registering with VoIPTools lets us provide you with a replacement key promptly. |
| Product Updates and Reminders | By registering, you will receive timely notifications from VoIPTools regarding any product updates. Additionally, we will send reminders when your key is nearing its renewal date, ensuring uninterrupted access to our services. |
Follow the procedure to register your software,
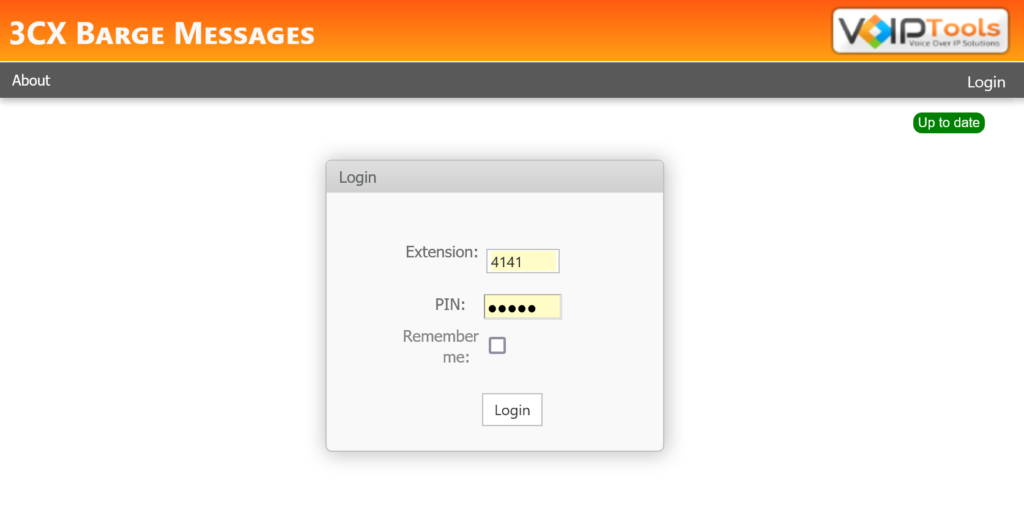
- Click the 3CX Barge Messages desktop icon
 to open the web application.
 - In the Login page, do the following tasks,
- In the Extension field, enter your 3CX extension number.
- In the PIN field, enter your 3CX voicemail PIN.
- Click Login to log in to your account.
NOTE:
Managers can only login as System Admin in 3CX Barge Messages.
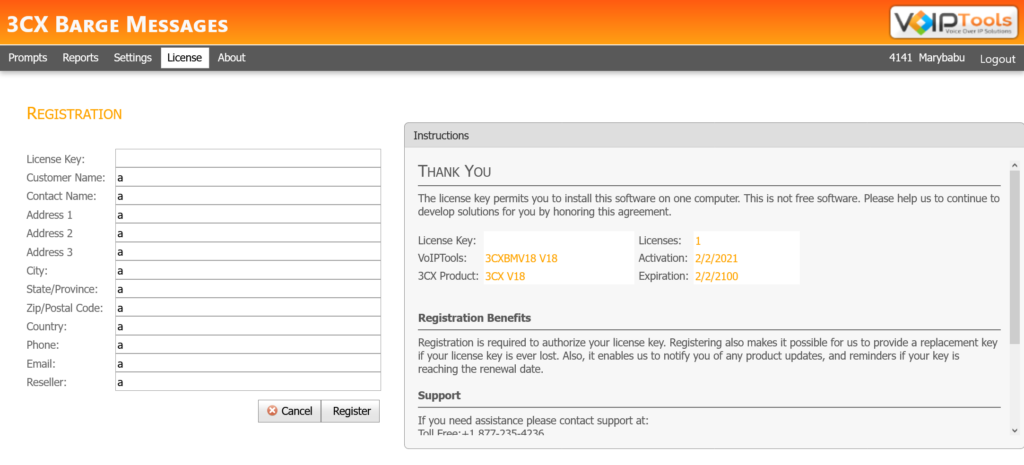
- On the 3CX Barge Messages web portal, in the top menu, click the License tab.
- In the Registration section, enter your License Key and other details appropriately and click the Register button.
Web Portal #
To access the 3CX Barge Messages web portal, click the Web Portal button on the configuration program, or Click the desktop ![]() icon created in the installation process.
icon created in the installation process.
About Screen: #
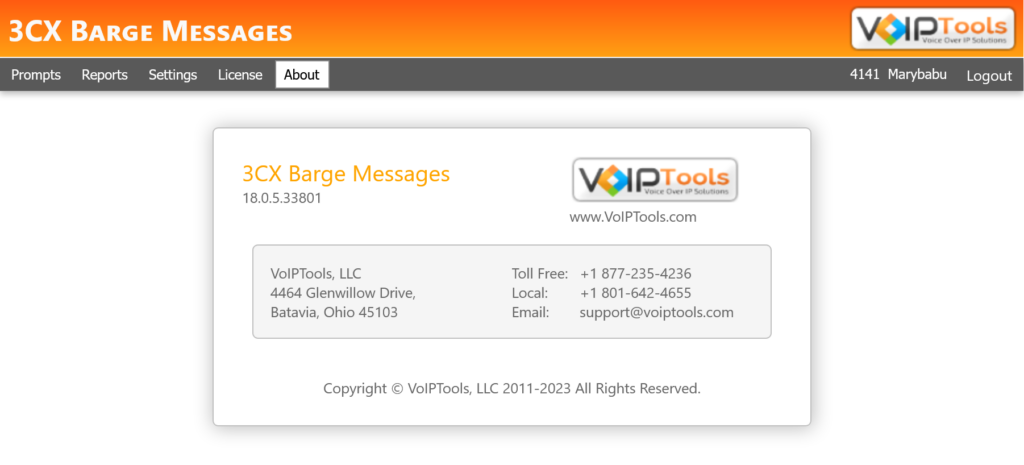
After you register, click About in the main menu. You can check for the Version Number of the product, the
Copyrights year, and the Address of VoipTools, LLC.,
If you find any discrepancy, you can contact or mail us.
Settings Screen #
In the Settings screen, you can do General Settings and Voice Settings for your prompts.
Voice Settings: #
3CX Barge Messages can call your contacts and play recordings. The recordings can be prerecorded or dynamically created using Text-To-Speech. A dynamically created recording can list information about the extension where you dialed the emergency number.
You can choose the TTS type as Windows TTS or Amazon Polly.
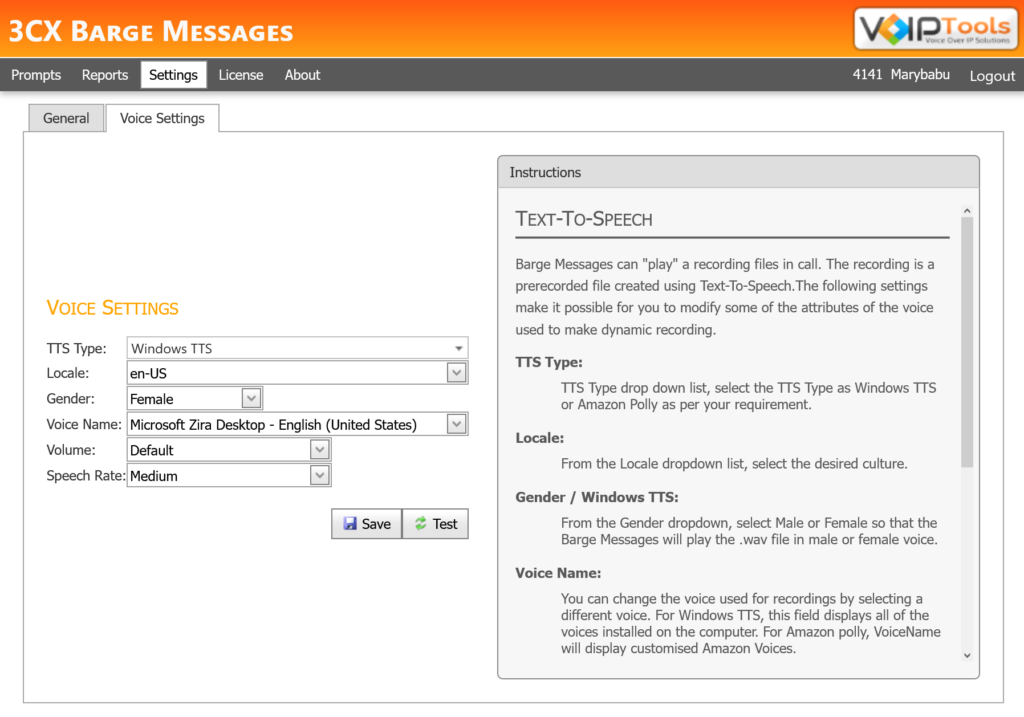
TTS type: Windows TTS #
- Select Windows TTS from the TTS Type dropdown list.
- From the Locale drop-down list, select the desired culture.
- On the Gender drop-down, select Male or Female so that the Emergency Notifier will play the .wav file in the male or female voice.
- In the Voice Name drop-down list, select the voice you want to use for dynamic recordings. The drop-down list generally displays all Voices installed on the computer.
- In the Volume drop-down list, select the volume you want to apply for your recording.
- On the Speech Rate drop-down list, select the desired speech rate to adjust the speed of the speech.
- Click Save
 to save the data.
TTS type: Amazon Polly #
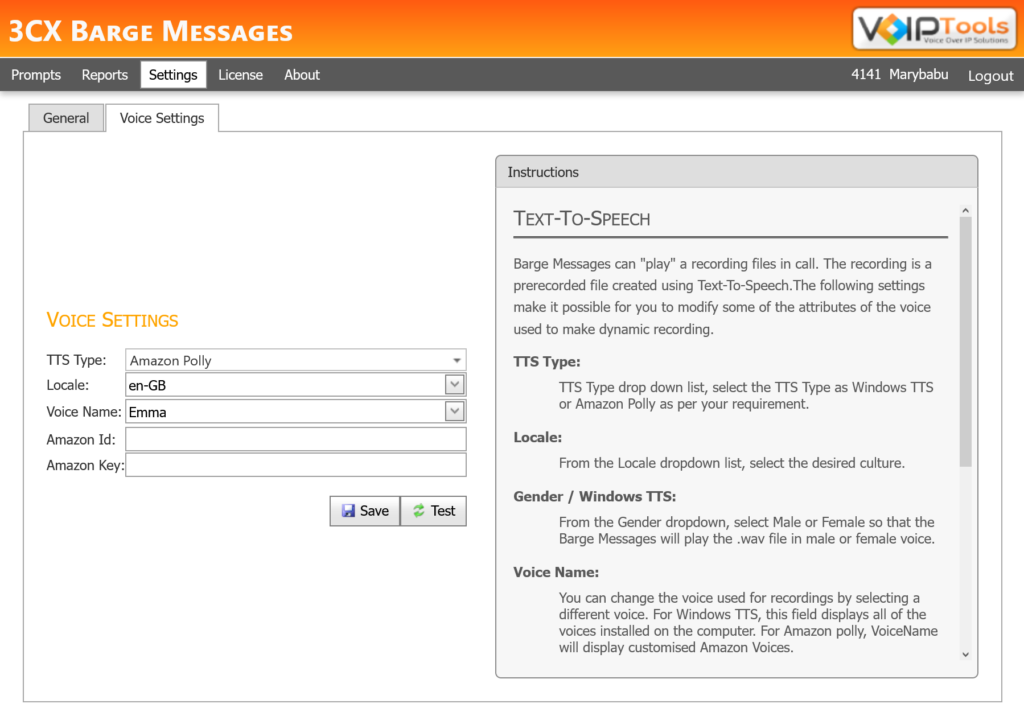
- Select Amazon Polly from the TTS Type dropdown list to create a Self Identification Message (.wav file) using Amazon Web Services.
- From the Locale drop-down list, select the desired culture.
- In the Voice Name drop-down list, select the voice you want to use for dynamic recordings. The drop-down list generally displays all the Voices installed on your computer
- In the Amazon Id and Amazon Key fields, enter valid details.
- Click Save
 to save the data.
NOTE:
Learn to create an account on Amazon Web Services (AWS) and generate an AWS access key ID and the secret keyID using this link.(#aws)
General Settings: Select IVRs to barge in #
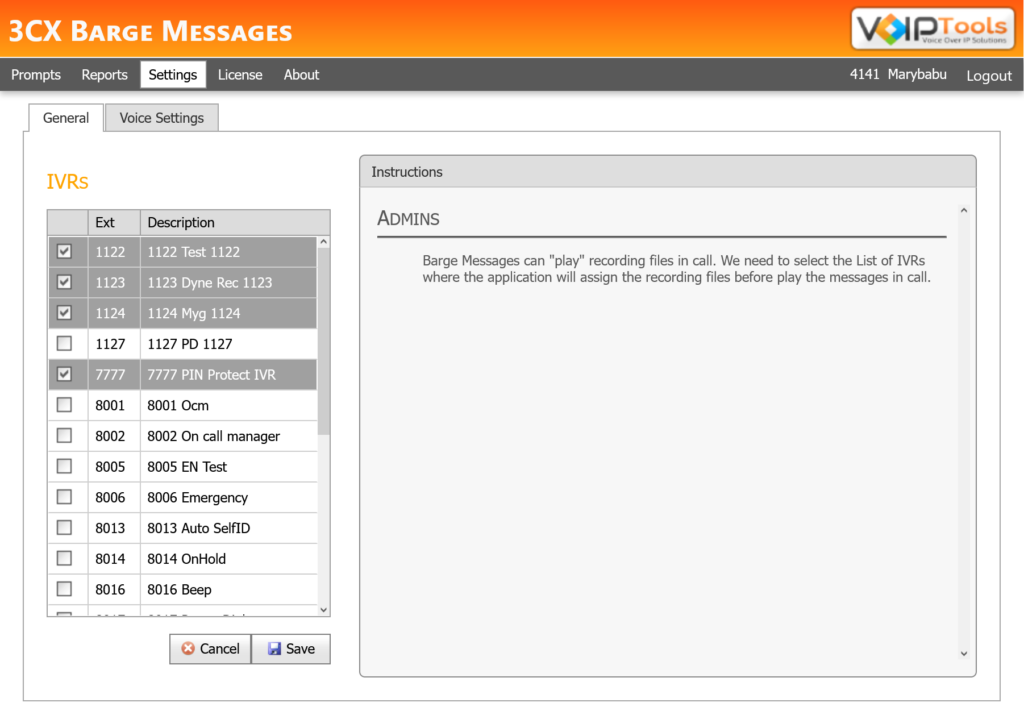
In General settings, you can select the list of IVRs for barging in the calls. The IVRs are fetched from the Digital Receptionists under the 3CX Console Management.
- Select the checkboxes of the desired barge messages
- Click Save
 to save the IVRs for barging in.
 - Once you save the IVR selections, click OK on the displayed Success dialogue box.
Prompts Screen #
In the Prompts screen, you can insert your Prompt Messages and barge the Prompt Messages in calls.
Insert Prompt #
Follow the procedure to insert a prompt,
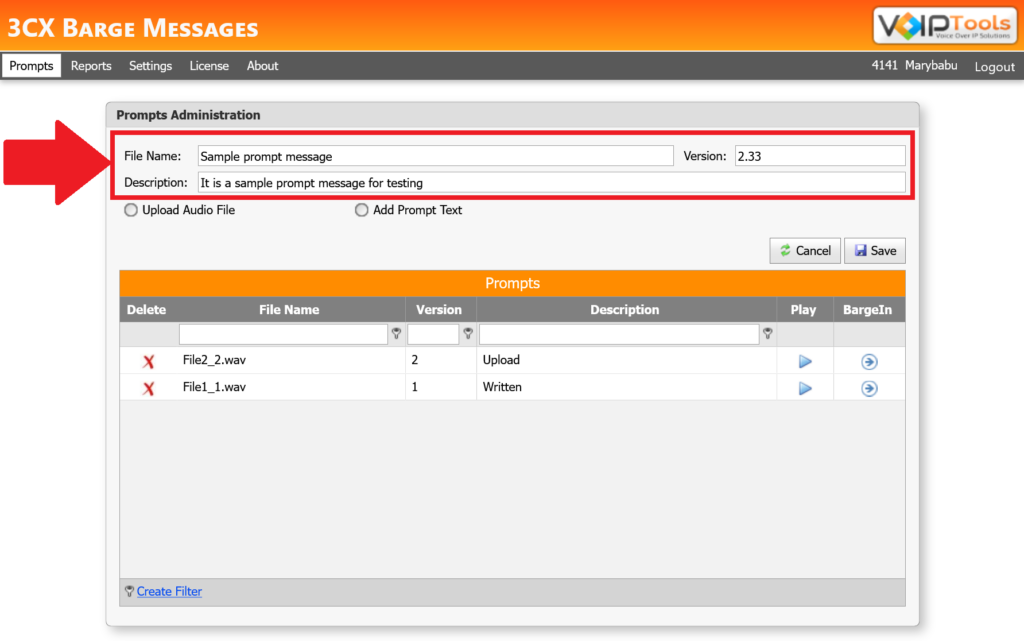
- On the Prompt Administration box in the File Name field, enter the name for your Prompt Message.
- In the Version field, enter the version for your Prompt Message.
- In the Description field, enter the description for your Prompt Message.
- Select any one of the following,
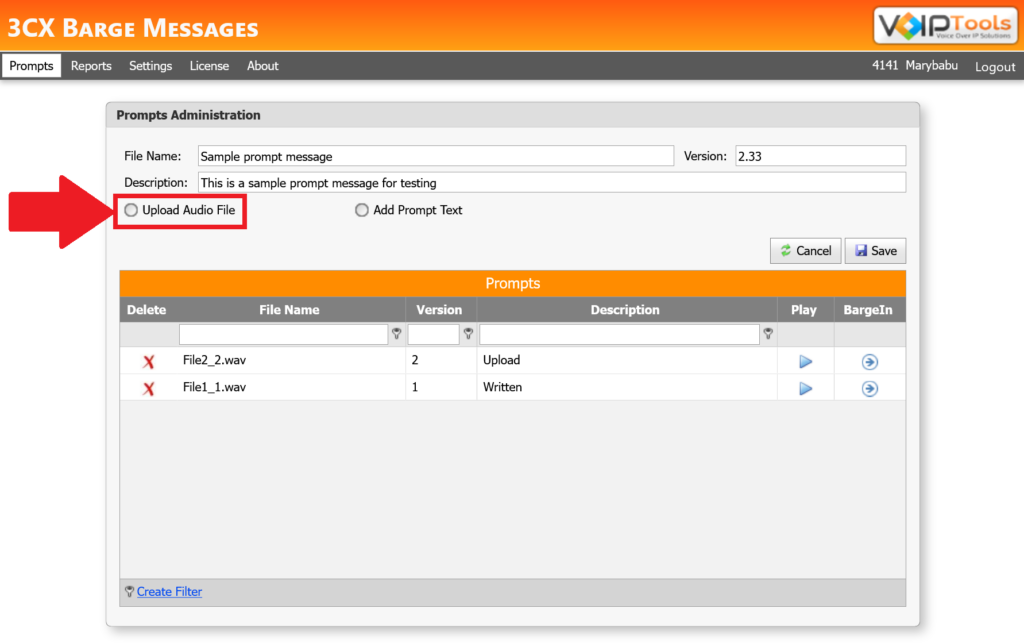
- Upload Audio File checkbox to upload a pre-recorded audio file in your device.
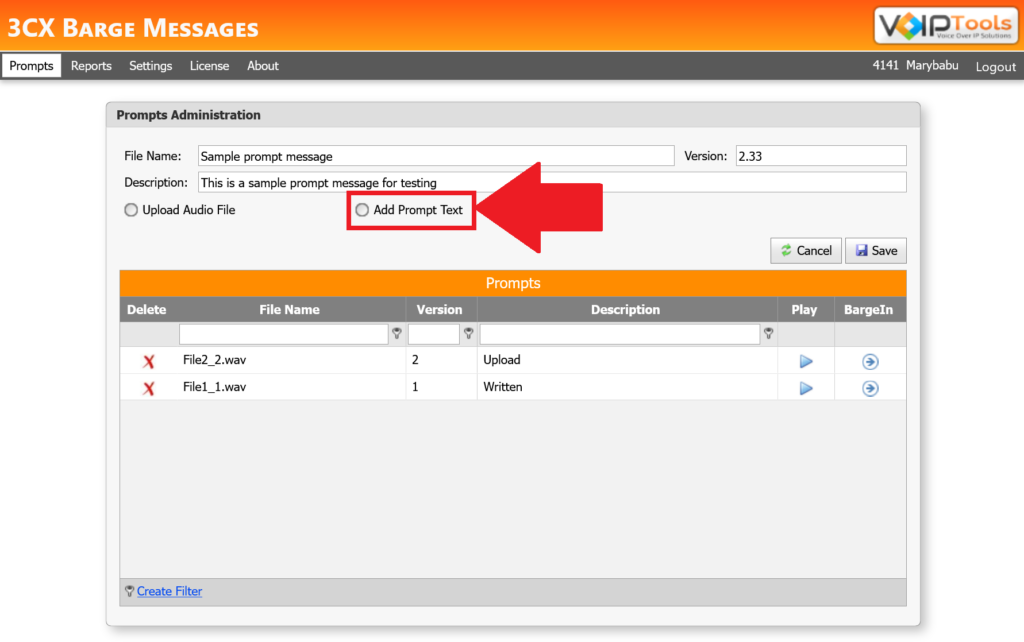
- Add Prompt Text checkbox to add a text and convert the text into speech using the inbuilt TTS software.
Upload an audio file #
Follow the procedure if you wish to use a pre-recorded audio file as a prompt.
- Select the Upload Audio File Checkbox.
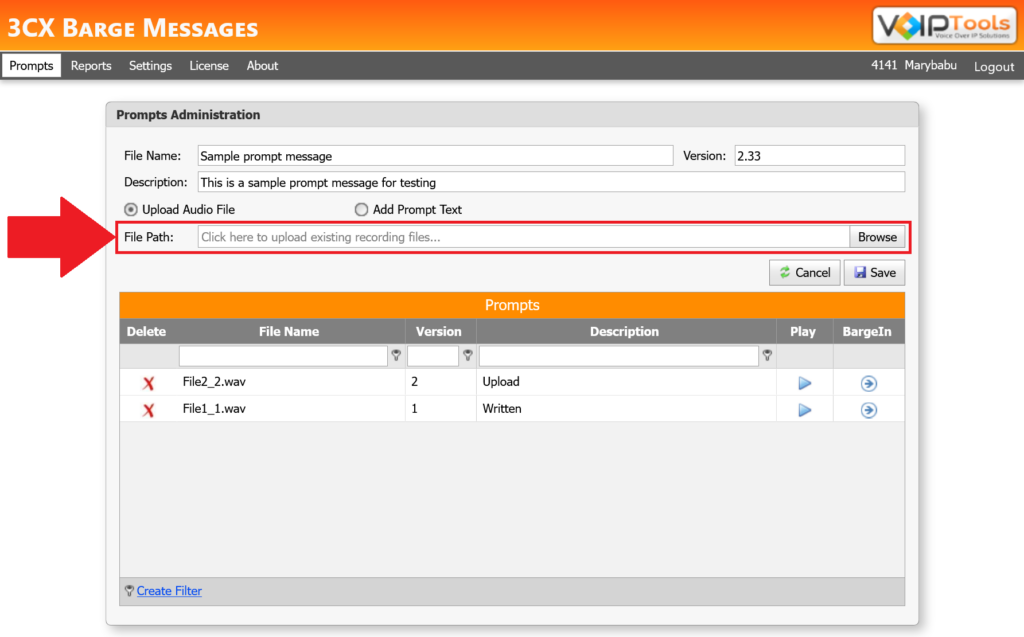
- Click the Browse button to browse your audio file or enter the file path in the File Path field.
- Click Save
 to save the prompt settings.
Insert prompt by Prompt text #
Follow the procedure if you wish to add a text and convert the text into speech using the inbuilt TTS software.
- Select the Add Prompt Text checkbox.
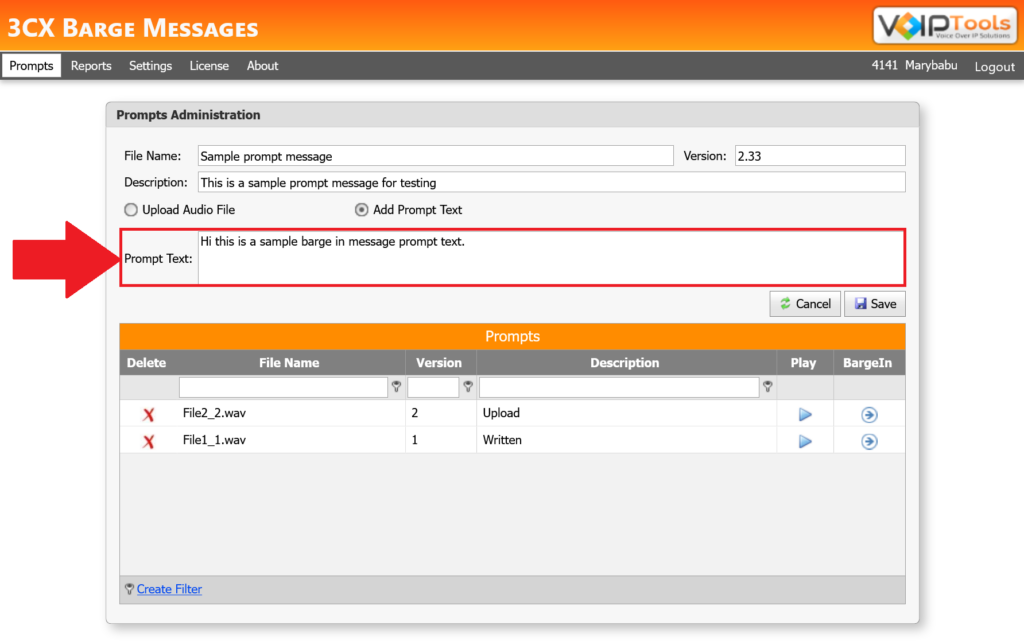
- In the Prompt Text field, enter the text you want to play as audio.
- Click Save
 to save the prompt settings.
NOTE:
- You can have the same File Names with different versions.
- Example :
- If you can have a file “Test_Sample version 1”, you can have “Test_Sample version 2,” but you
- cannot have “Test_Sample version 1.”
Prompts Table functions #
- Click the Play
 to play and test your prompt message.
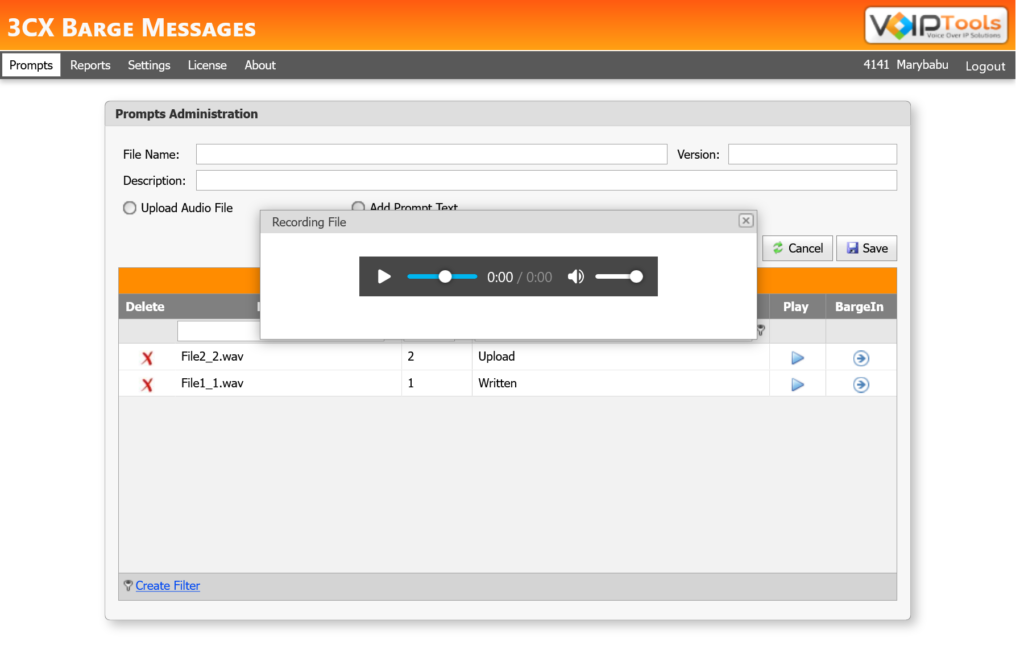
- Click BargeIn
 to barge in your prompt message to the call.
Figure 31: Barge in prompt
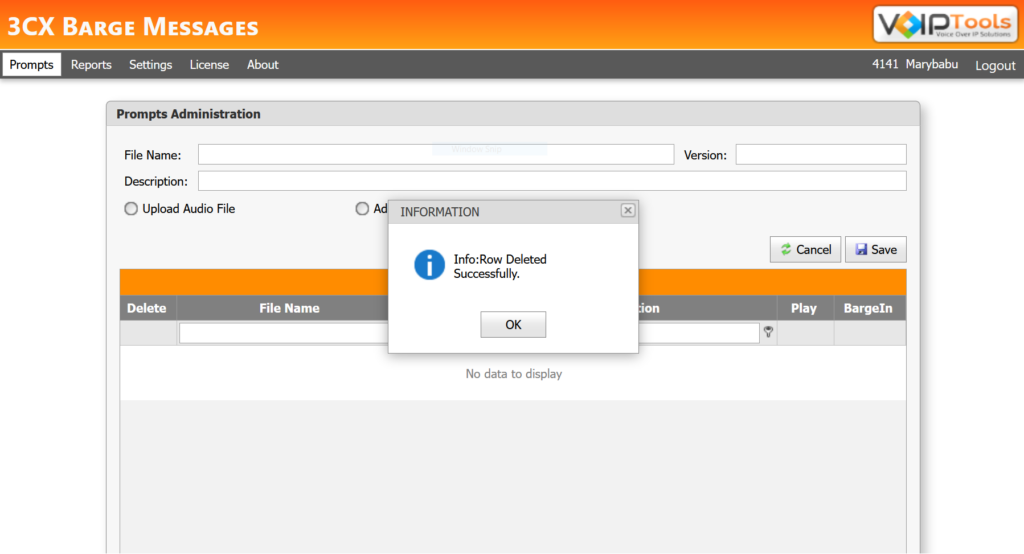
- Click Delete
 to delete the prompt messages from the Prompt Table.
Reports Screen #
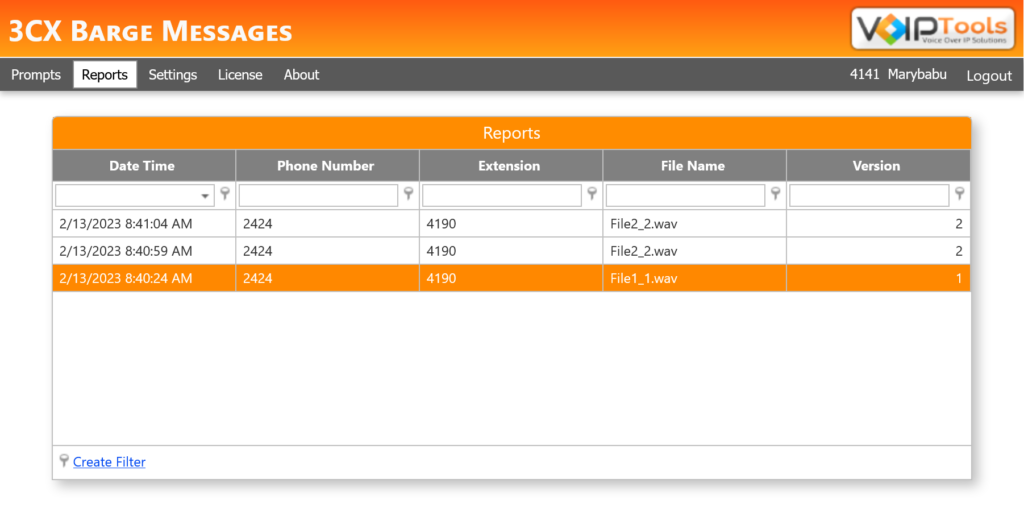
In the Reports screen, you can see the reports of the BargedIn calls made by the user and the manager.
| DATE AND TIME | The date and time of the prompt messages barged in. The date format is MM/DD/YYYY and the time format is HH:DD:YYYY. |
| PHONE NUMBER | Phone number to which your prompt messages barged in. If the phone number is the same server extension, it is an Internal inbound call. If the phone number has another server inbound number, it is an External call. |
| EXTENSION | The extensions to which you barged in your prompt messages. |
| FILE NAME | The file name of your prompt message. |
| VERSION | The version of your prompt message. |
Need Support? #
You get quick answers to most of your inquiries in our online manual. If you prefer direct contact, we offer various support channels, including phone, email, live chat, and our helpful VoIPTools forums.
24/7 Support Availability #
Rest assured, our dedicated team is here to assist you around the clock, every day of the year. Whether you’re based in the USA or India, we’re ready to provide prompt responses to your technical queries.

Windows Event Log for VoIPTools Applications and Services #
For troubleshooting any application errors, our Windows Event Log contains a comprehensive list of error messages, warnings, and informative notes related to all our VoIPTools applications and services. It’s a valuable resource to help you pinpoint and resolve any issues you may encounter.

Join Our Forum Community #
Are you looking to collaborate with other VoIPTools customers facing similar challenges? Our forum is the perfect platform to exchange ideas, solutions, and best practices. Join the conversation at: https://www.voiptools.com/community/

Real-Time Live Chat Assistance #
Got questions that need immediate answers? Our chat support team is available to assist you in real time. Just click on the Live Chat button located at the lower right corner of our website, and we’ll acknowledge your queries right away.

Efficient Email Support #
To ensure a thorough understanding of your concerns, email us at support@voiptools.com. Describe your issue in detail, and we’ll get back to you within one business day with the support you need.

Reach Us by Phone #
If you prefer to speak with a representative directly, you can reach us at +1 801-642-4655. Our attentive team is available to take your calls from 8:00 AM to 6:00 PM (Central Standard Time).
Comprehensive support services: #

Free Support #
If you’ve purchased our products through a VoIPTools Partner, rest assured that they provide first-level support at no additional cost. Partners have access to 100% free technical assistance and actively participate in the troubleshooting process.
VoIPTools customers enjoy access to our online manuals and receive support through emails (with responses within one business day) and live chat. However, please note that we do not provide remote server login assistance.

Paid Support #
For a more hands-on experience, consider our “Installation Support” package. Our expert support team can log in to your servers, and install and configure all our tools. This comprehensive service includes setting up SQL Server Express and Internet Information Server if necessary. We’ll work closely with you to tailor our applications to meet your requirements.
We’re committed to providing top-notch support to ensure your VoIPTools experience is smooth and hassle-free. Contact us today, and let us assist you in making the most of our powerful tools!
