Revolutionize your organization’s inbound call routing with VoIPTools. Our tailored solutions offer effective call management, allowing you to route calls based on geography, assigned agents, and account numbers, or prioritize VIP customers through a dedicated queue. Take control of your call routing with our comprehensive collection of cutting-edge solutions, including the versatile 3CX Call Router. If your routing needs go beyond our existing offerings, our dedicated experts can create a custom solution exclusively for you. Enhance your call management capabilities, optimize productivity, and elevate customer satisfaction with VoIPTools. Experience the power of our innovative solutions today.
Stay informed about your delivery with the 3CX Call Router driver-delivery tool. It utilizes an interactive voice response (IVR) system that connects you directly to the driver. Simply enter your driver code and order number, and inquire about the delivery status to receive instant updates.
ON-CALL ROUTING
3CX Call Router ensures that it promptly routes the calls received during designated support hours to the assigned employee for assistance. If needed, it can direct calls to voicemail for further attention.
DELIVERY STATUS
Stay up-to-date with the status of your delivery using our driver-delivery tool. 3CX Call Router incorporates an interactive voice response (IVR) system, allowing you to connect directly with the driver. By entering your driver code and order number, you can inquire about the delivery status and receive instant updates.
PRIORITY STATUS
Direct your valued customers to a specialized priority queue, guaranteeing exceptional service, while efficiently routing other customers to the standard queue, ensuring organized and streamlined customer flow.
You can order 3CX Call Router online at https://www.voiptools.com. Your order confirmation email will include your license key and a link to download the software.
There are a number of prerequisites that must be installed prior to installing the 3CX Call Router. These prerequisites include Microsoft Internet Information Server (IIS) and Microsoft SQL Server
This User Guide contains step-by-step instructions to successfully install 3CX Call Router. Begin by extracting the installer from the downloaded zip file (Step 1 above), then run the setup program named CallRouter.exe
You must register your license key to activate 3CX Call Router. Your license key is included in your order confirmation email, and can also be found in your order history on our website.
NOTE:
To achieve efficient results of call routing feature in ‘3CX Call Router’, you should install ‘3CX Exporter’ as well.
Find the software download link in the Order Confirmation Email, or you can find it in your order history on our website and download the 3CX Call Router application.
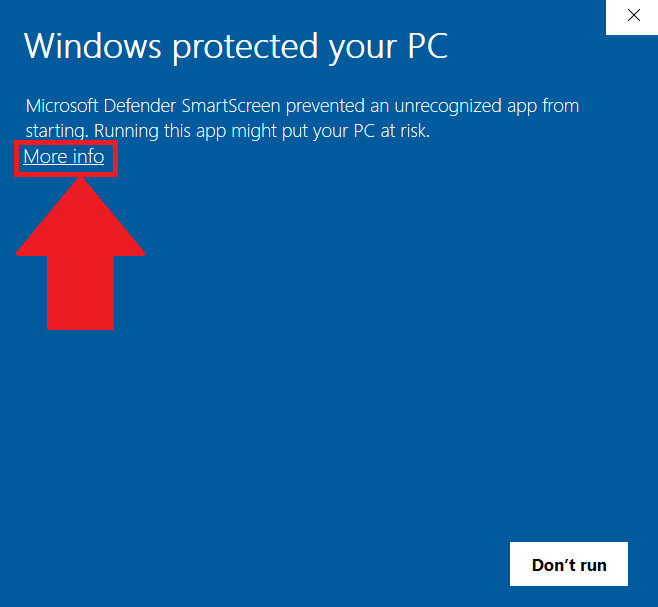
In the Microsoft Defender SmartScreen, click the More Info option.
Figure 1: Microsoft Defender: More info
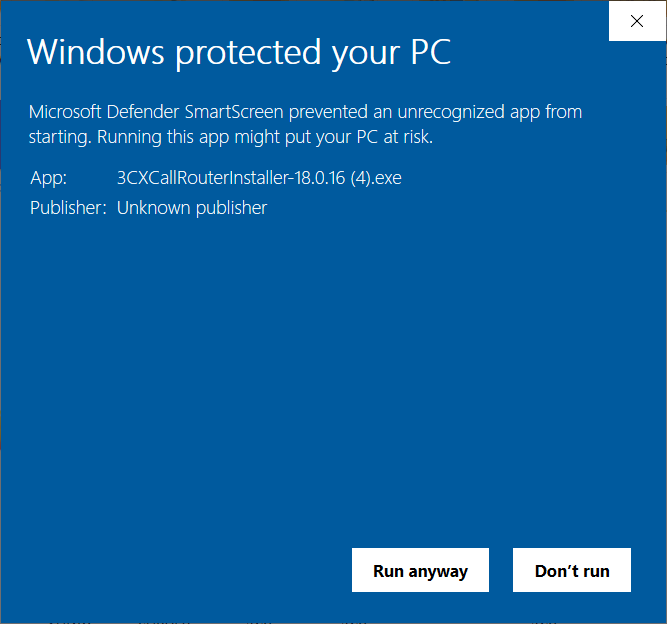
Click the Run Anyway option to start the installation.
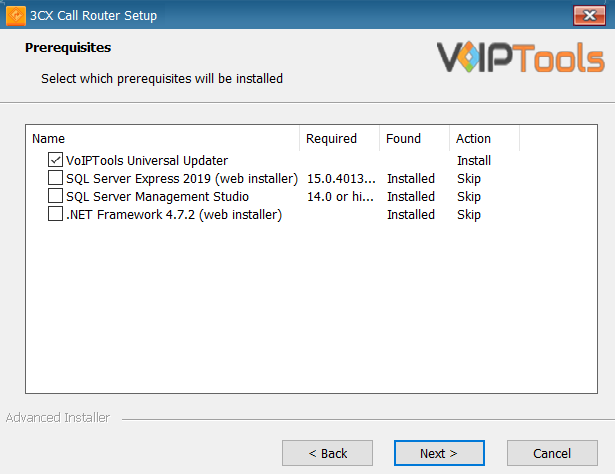
Click on the software installer that was downloaded in Step 1 above. The installation wizard will automatically identify the needed prerequisites and assist you with the installation of the prerequisites needed to run ‘3CX Auto Voicemail’. These include .NET Framework (Web Installer), SQL Server Express (Web Installer), and, SQL Server Management Studio.
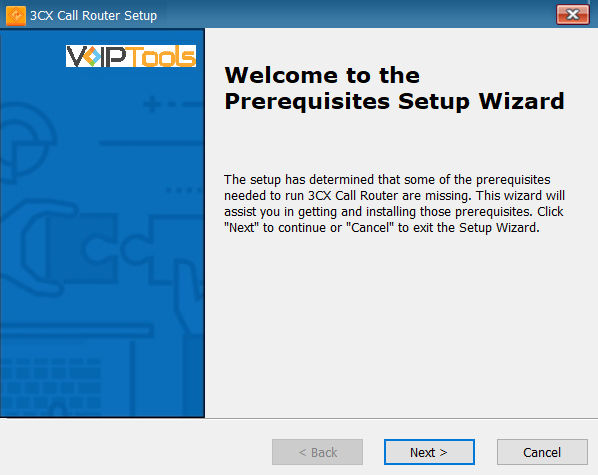
Click the downloaded installer executable to launch the Prerequisites Setup Wizard and click Next.
Figure 3: Prerequisites setup wizard
In the Prerequisites window, the installer will identify the missing prerequisites. It is important that you install all the required prerequisites. However, you can select/unselect the applications to be installed based on your unique requirements. Click Next to continue.
Figure 4: Select the prerequisite to install
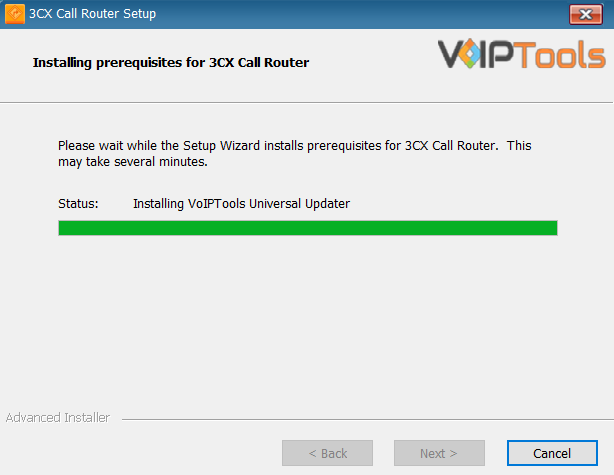
The installer will download and install the selected applications.
Figure 5: Prerequisites Installation in progress
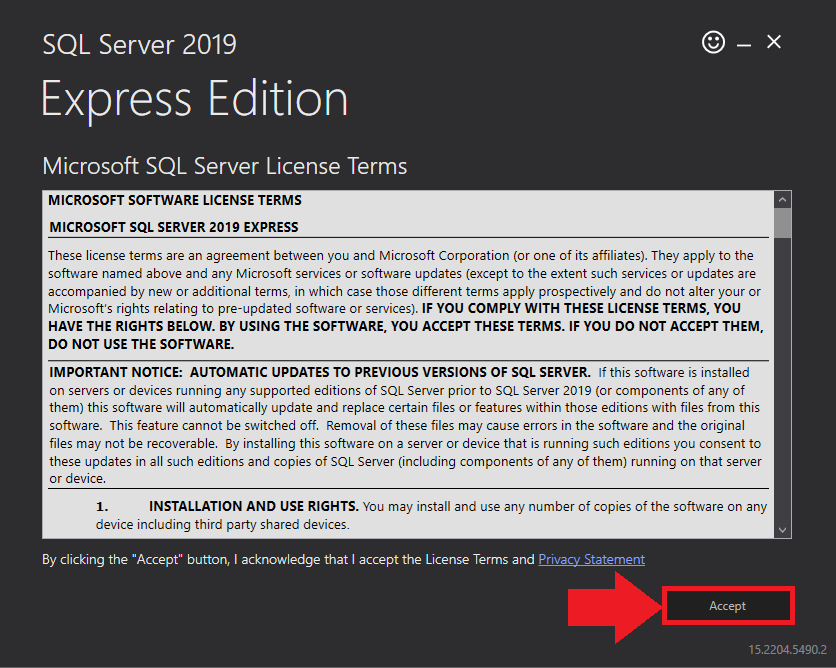
In the Microsoft SQL Server License Terms click the Accept button to acknowledge the license terms and continue.
This page appears if do not have SQL Server Express preinstalled in your device.
Figure 6: SQL Server Express: Accept License Terms
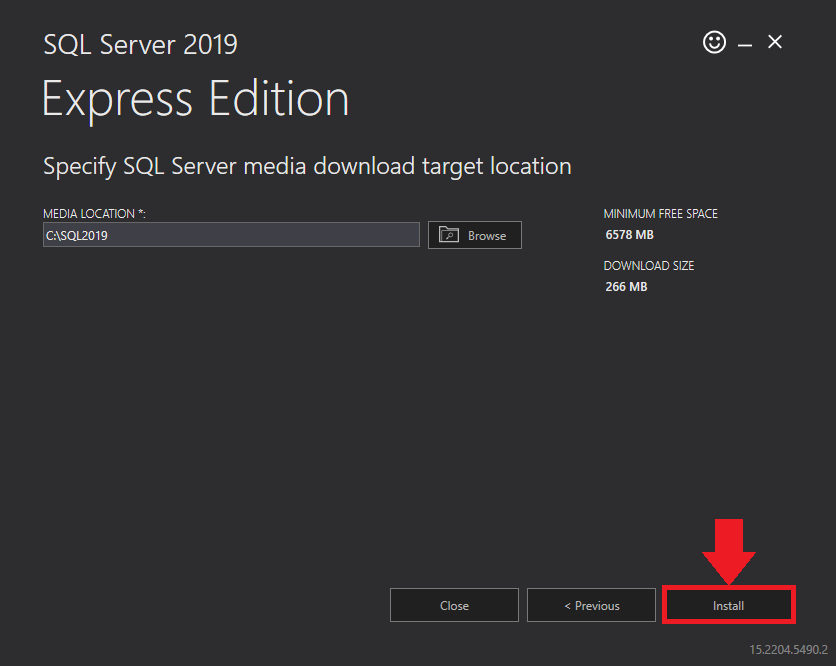
View the SQL Server Media target location in the Media Location field. If required, you can click the Browse button to change the location. Click Install to begin the installation of SQL Server Express.
Figure 7: SQL Server Express: Target Location
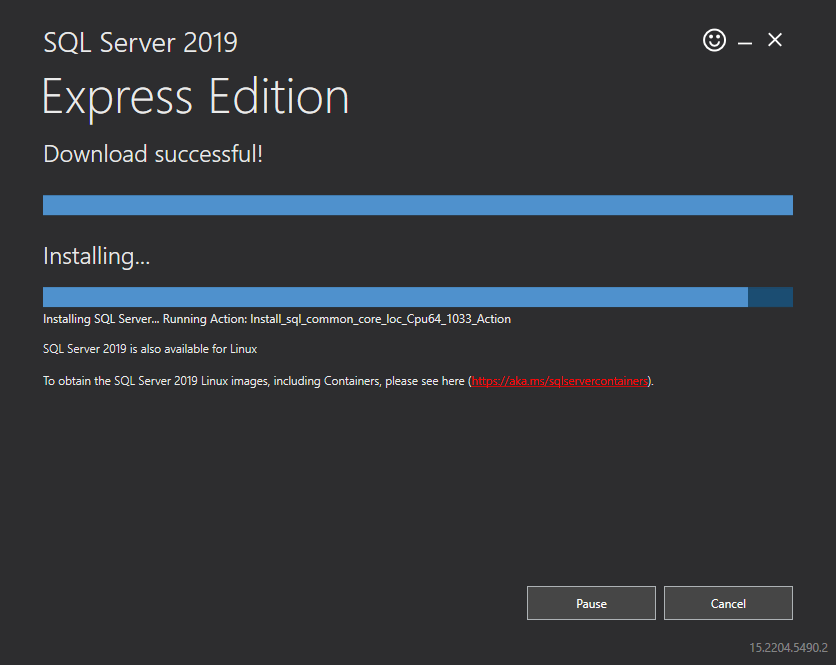
SQL server installation is in progress. This may take several minutes to complete.
Figure: SQL Server Installation In Progress
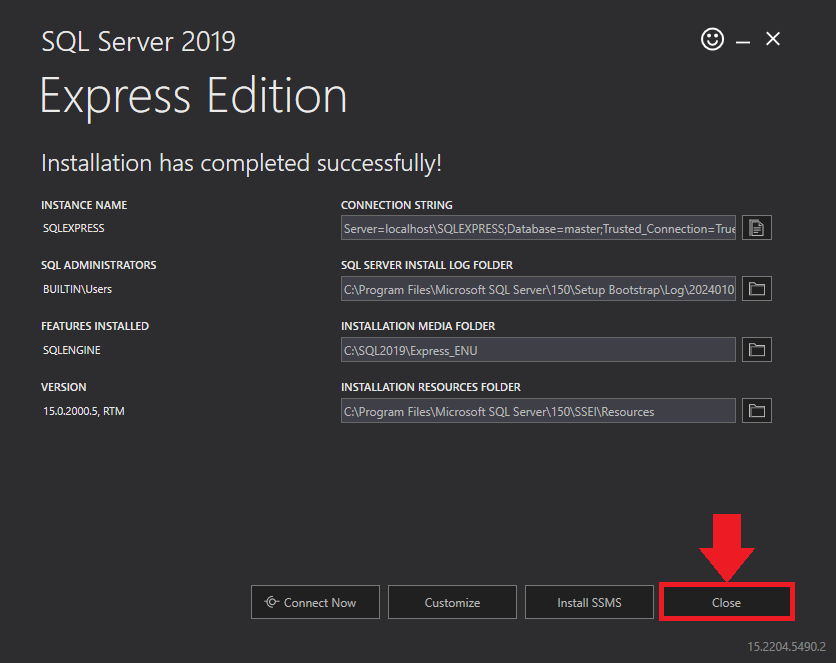
Click the Close button once the prerequisites are installed.
Figure 8: SQL Server Express: Installed Successfully
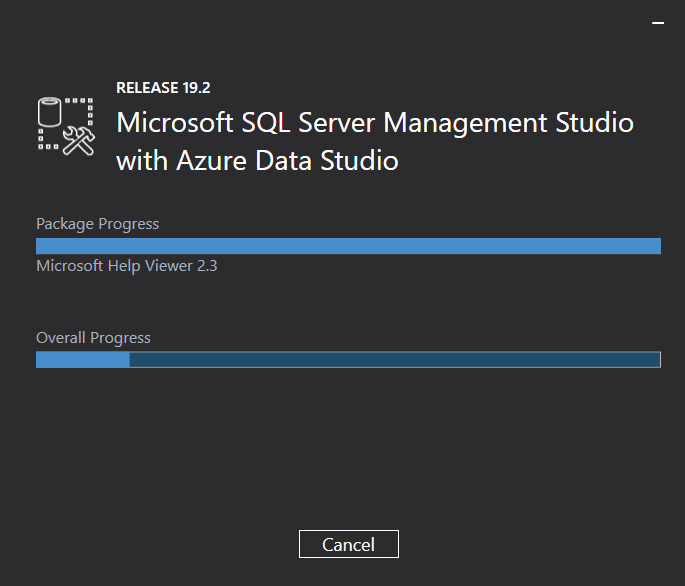
Microsoft SQL Management Studio installation is in progress. This may take several minutes to complete.
Figure 9: Microsoft SQL Server Management Studio: Installation in progress
Click Yes in the Confirmation Message Box to reboot the computer.
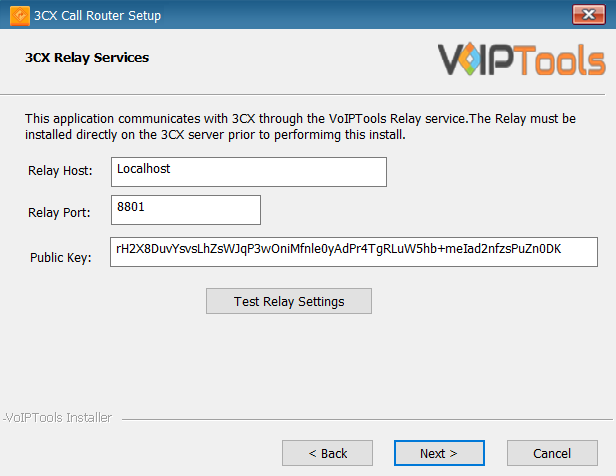
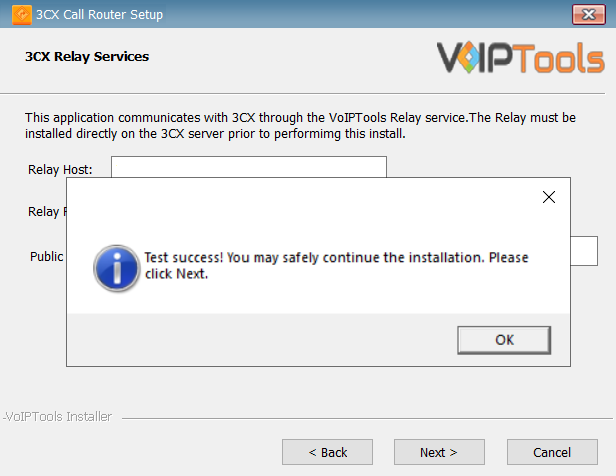
In the 3CX Relay Services window, in the Relay Host field, enter the FQDN of your 3CX server.
Enter 8801 in the Relay Port field.
Enter the public key you took from VoIPTools Relay services in the Public Key text area.
Figure 13: Configure Relay Services
Click the Test Relay Settings to confirm ‘3CX Call Router’ can communicate with the Relay services running on the 3CX server.
If the ‘3CX Call Router’ is successfully able to communicate with the Relay services that run on the 3CX server, a Success message box appears. Click OK. If the test fails, you will not be able to continue until communication with the relay is established.
Click Next to continue with the installation.
Figure 14:Test Relay services
NOTE:
If the test was unsuccessful:
confirm you have the correct firewall port open (default TCP 8801) on the 3CX server and the firewall protecting the 3CX server.
confirm that you have entered the correct IP address / FQDN for the 3CX server.
confirm that 3CX Call Router and the Relay are using the same port and protocol.
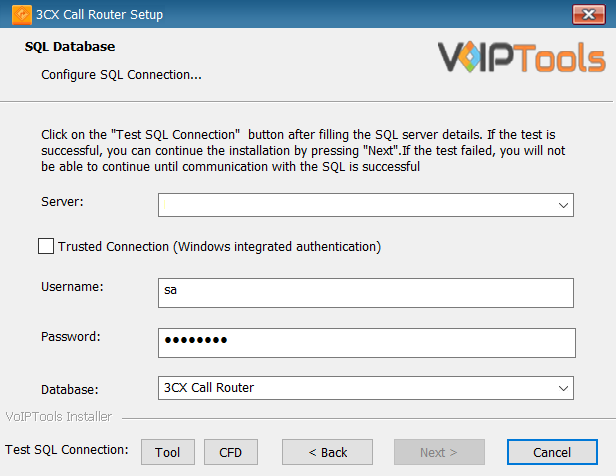
When configuring 3CX Call Router, select an existing Microsoft SQL Server instance in your environment. The database server can be a remote SQL Server, or a local instance running on the VoIPTools server.
On the SQL Database window, in the Server field, select the desired instance of SQL Server
NOTE:
We encourage you to use SQL Authentication rather than Windows authentication. Many of our tools leverage a Call Flow Designer (CFD) application running on the 3CX. Frequently our CFD applications require access to a SQL database. If the 3CX server and the database server are not in an Active Directory domain, Windows authentication will fail. To use SQL authentication, your SQL Server must be configured to run in “Mixed Mode”. If you installed SQL Server with one of our tools, we configure SQL in “Mixed Mode”.
Figure 15: Test SQL Database connection
To use SQL Authentication, be sure to uncheck the Trusted Connection checkbox.
In the Username and Password fields, enter valid SQL login account credentials
To use Windows Integrated Authentication (not recommended), check the Trusted Connection (Windows integrated authentication) checkbox.
In the Database field, the installer will automatically display the default database name. We encourage you to use the default name. If you are upgrading or reinstalling 3CX Call Router, select the existing database name from the list.
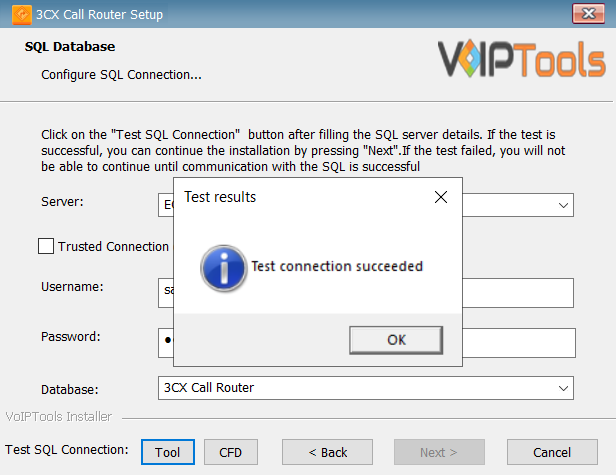
Click the TOOL button in the Test SQL Connection section to confirm connectivity to SQL Server and click OK in the Test Results popup box.
Figure 16: Test SQL Connection for TOOL
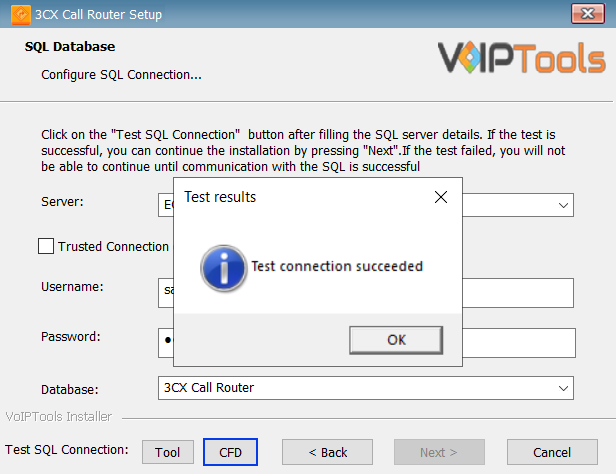
Click the CFD button in the Test SQL Connection section to confirm connectivity to SQL Server and click OK in the Test Results popup box.
Click the Next button which gets enabled when the database connection is successful.
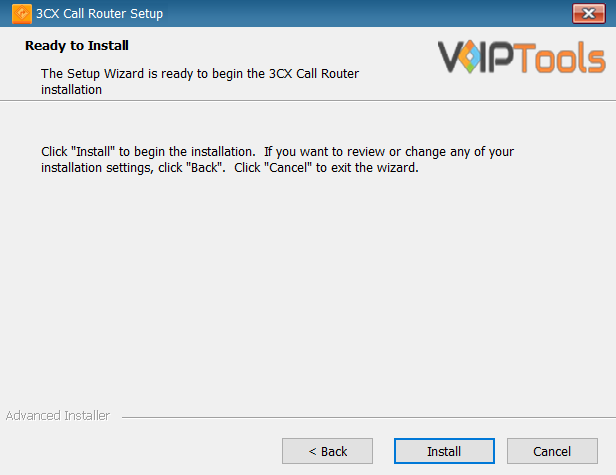
In the Ready to Install window, click Install to start the installation of the ‘3CX Call Router’.
Figure 18: Install 3CXCall Router
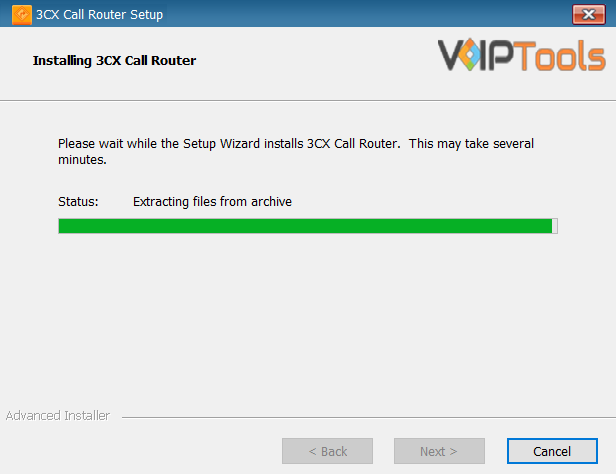
The application installation progresses. This may take several minutes to complete.
Figure 19: Installation in progress
Once the installation is complete, check the Launch 3CX Call Router check box and then click Finish. The 3CX Call Router configuration screen opens. If you want to simply close the installer without opening the configuration screen, then simply uncheck Launch 3CX Call Router check box and then click Finish
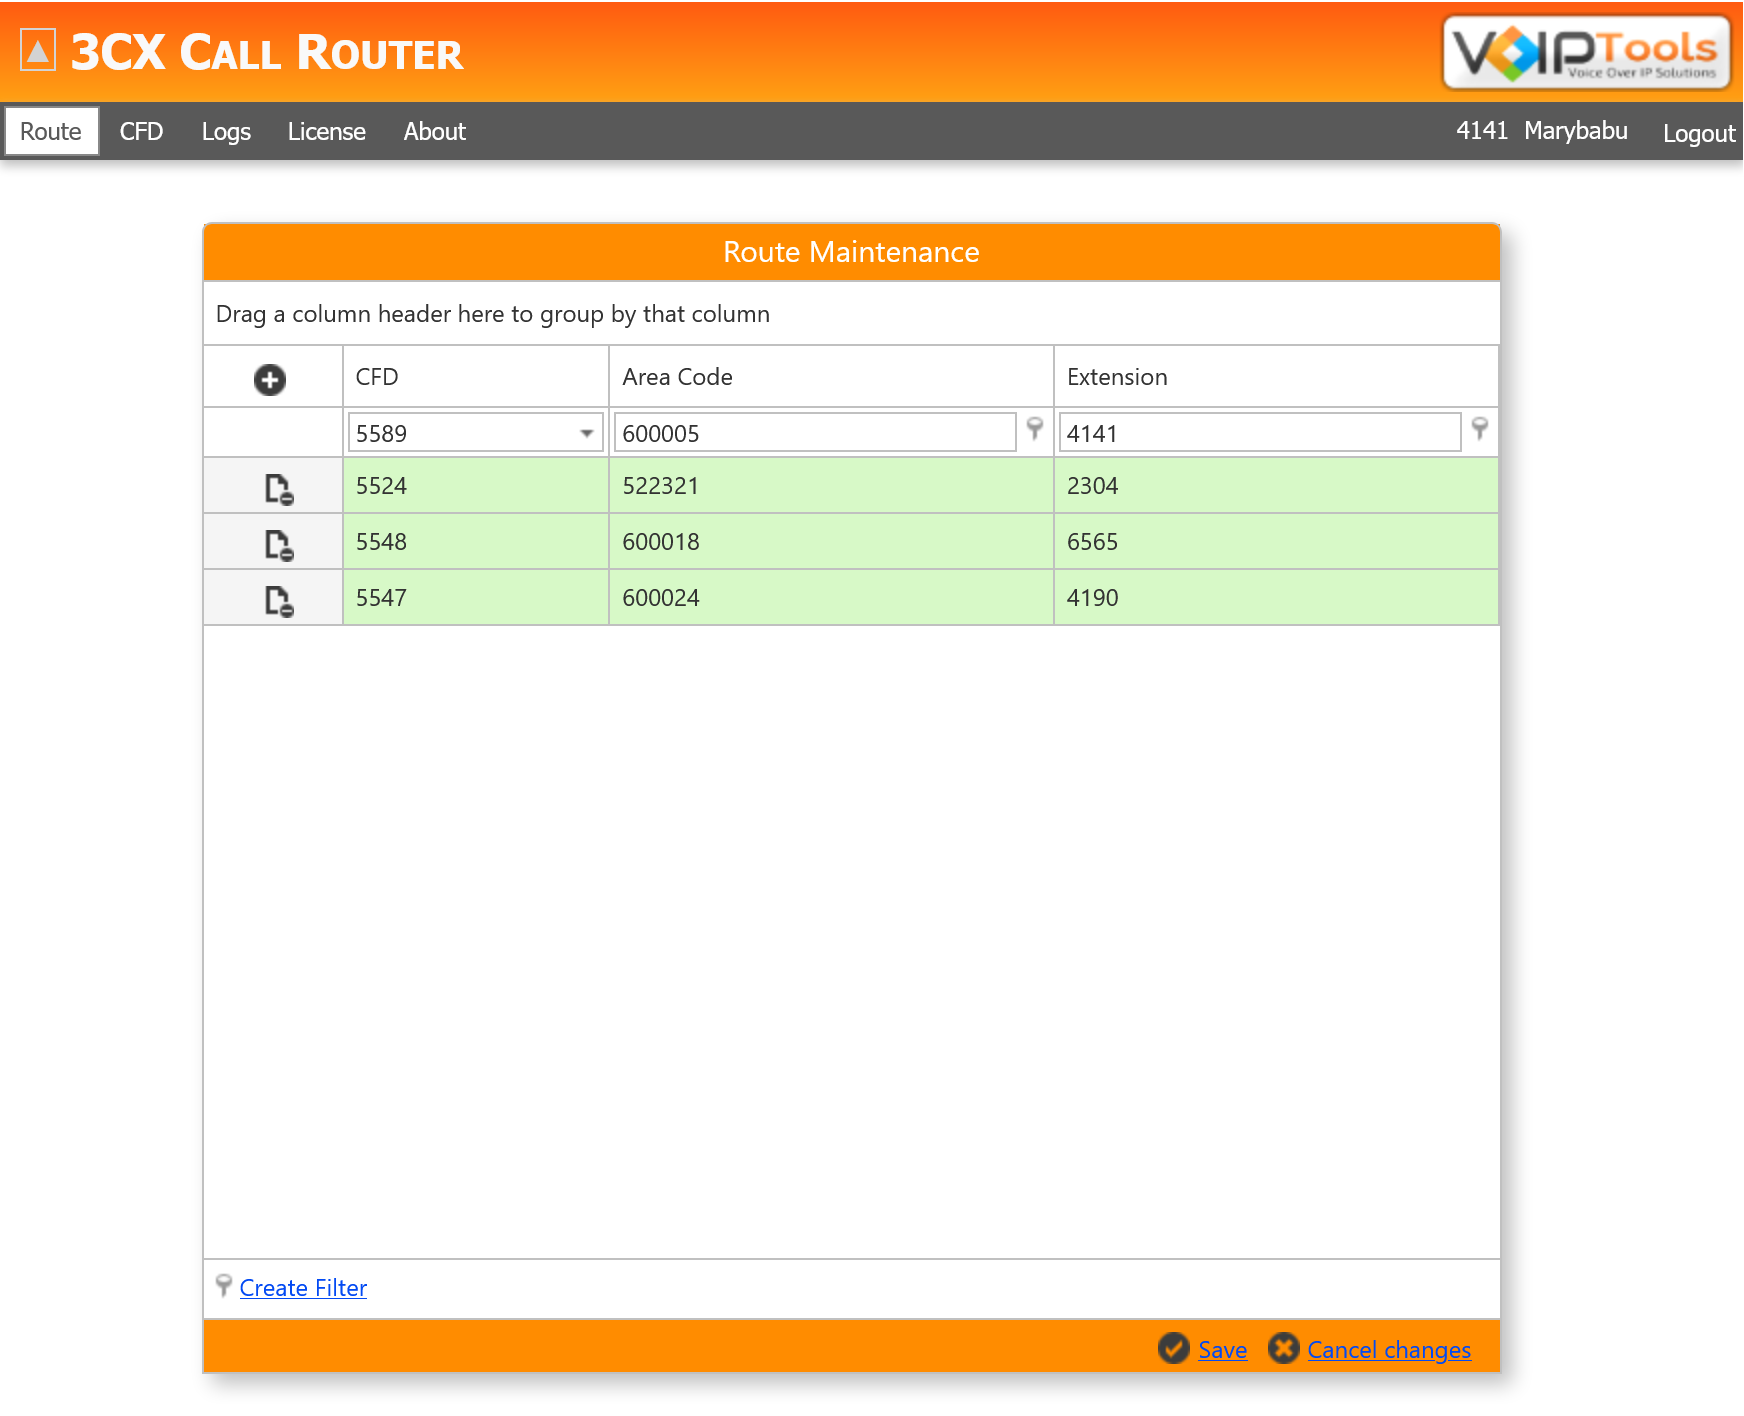
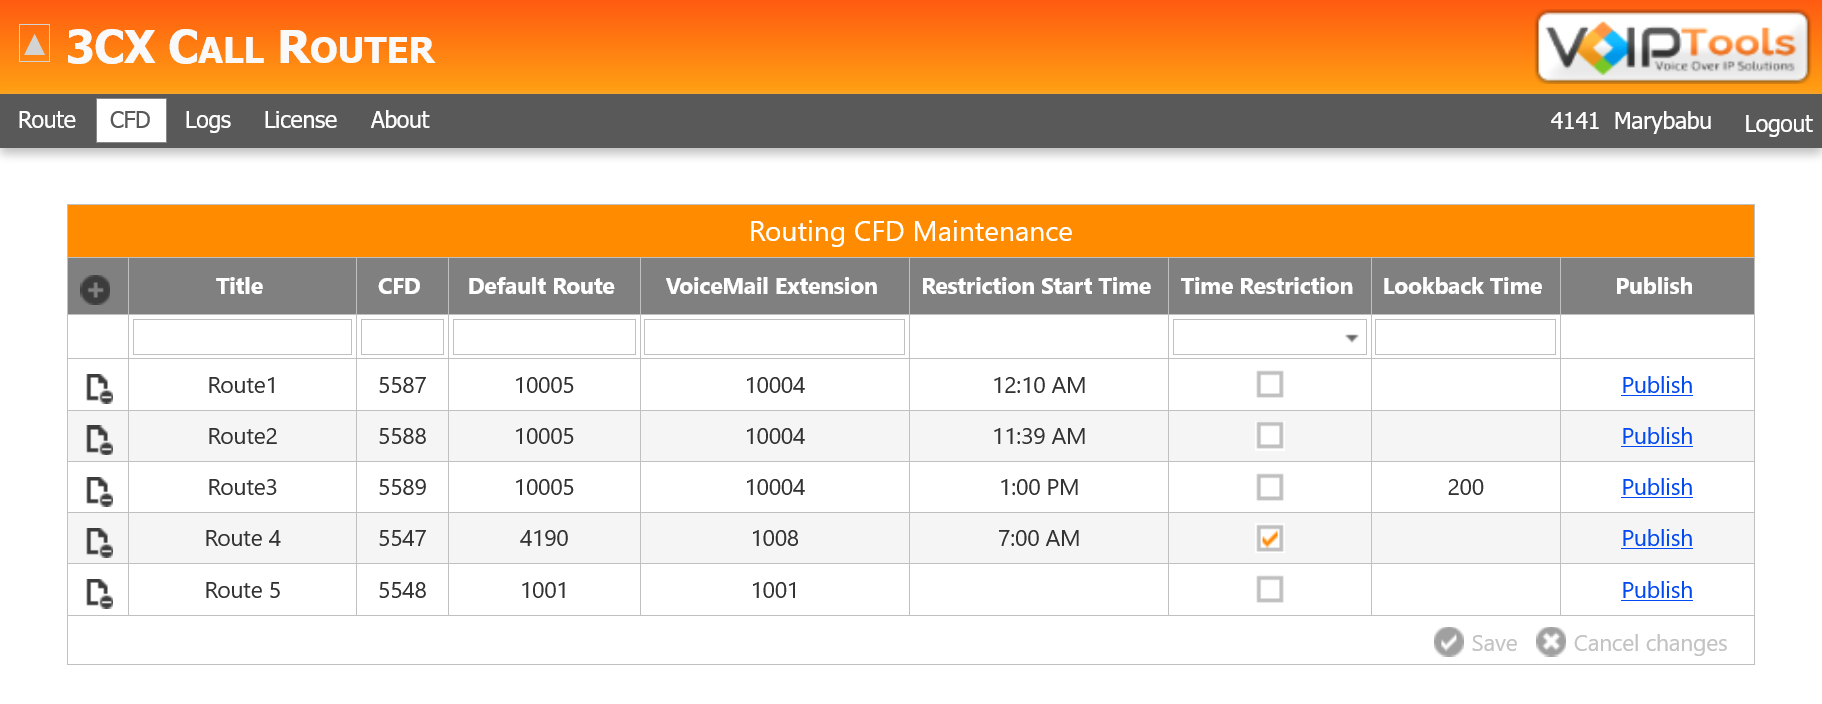
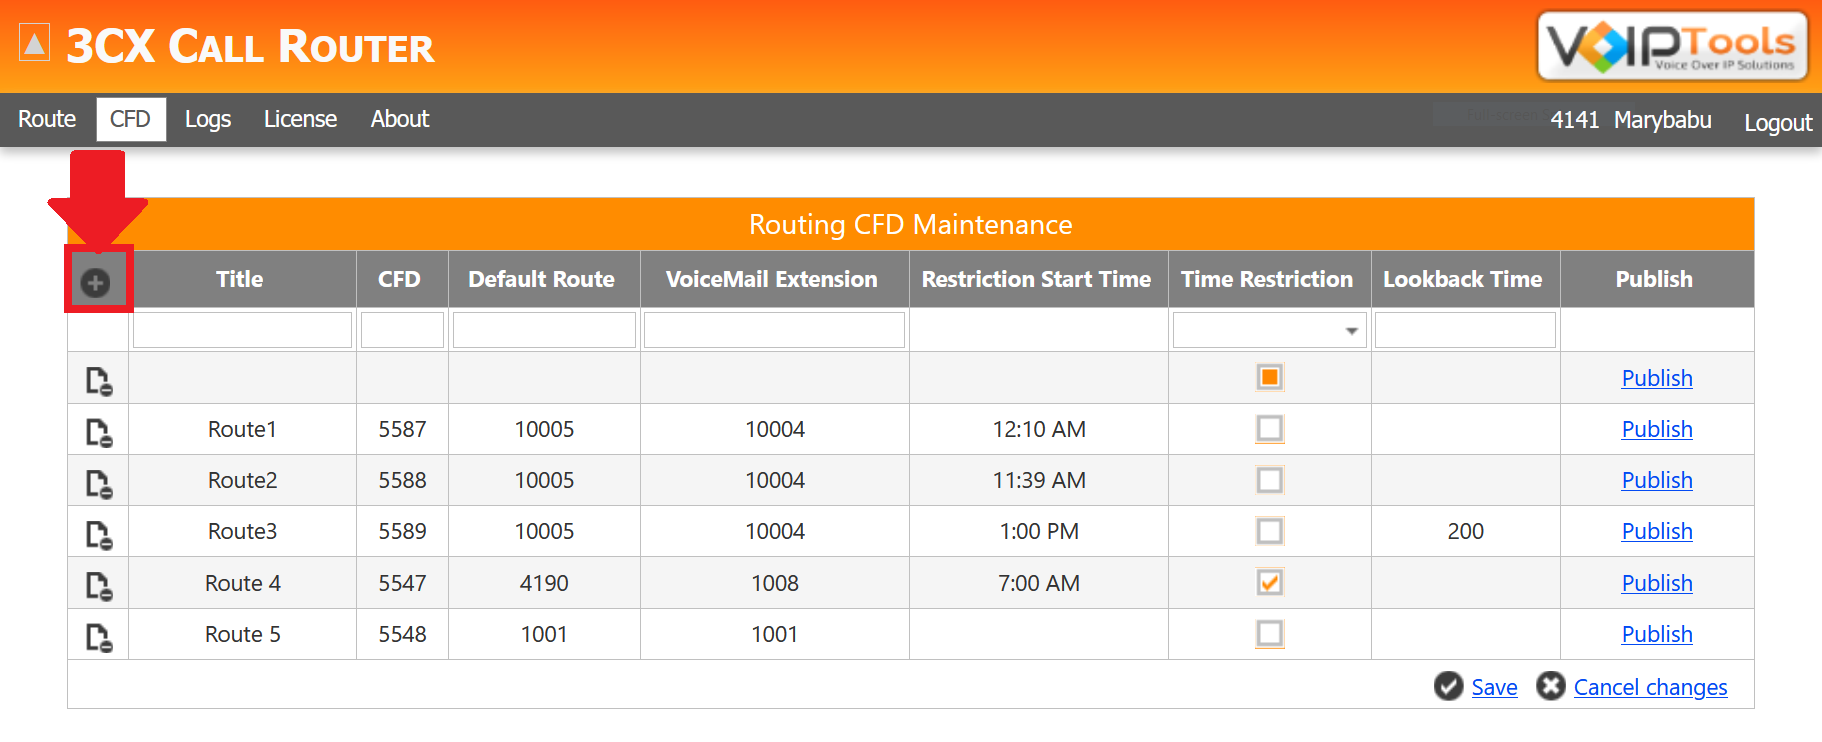
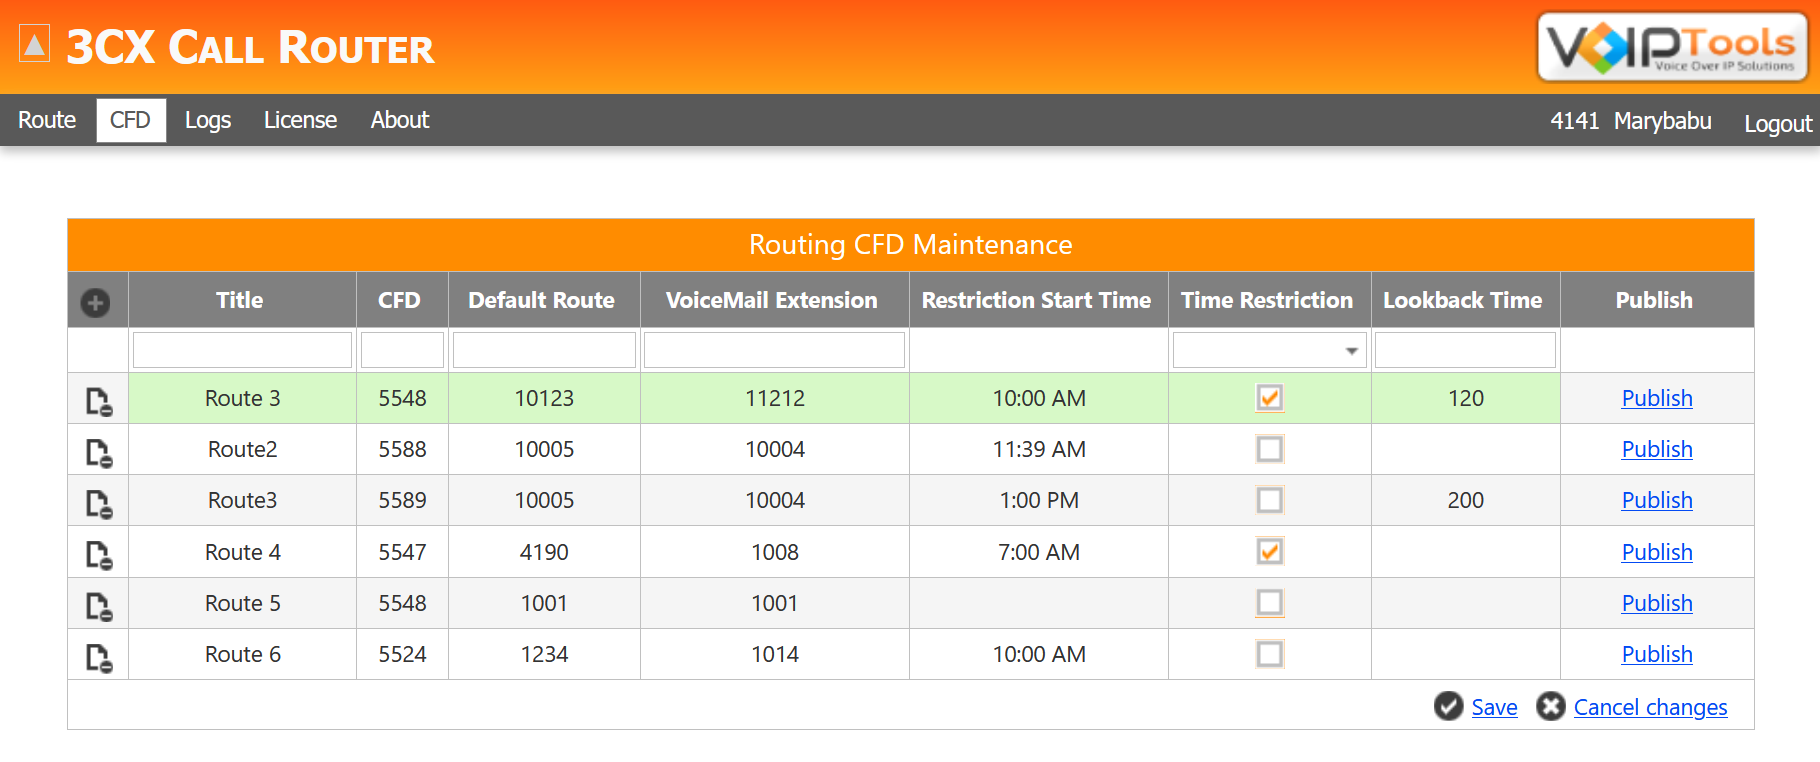
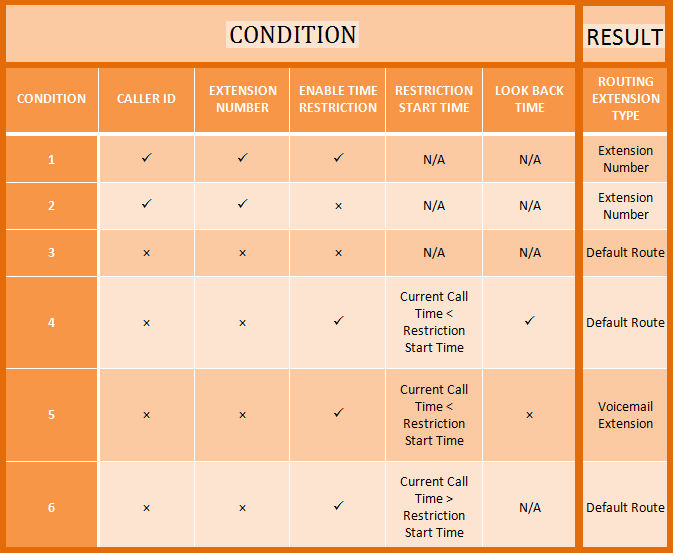
The Route Screen enables you to perform route maintenance. The ‘3CX Call Router’ will route an incoming call to either Extension Number mentioned in Route Screen or to Default Route or Voicemail Extension mentioned in CFD Screen based on the conditions mentioned below:
NOTE:
The CFD dropdown list in the Route screen displays only published CFDs.
Figure 28: Route Screen
CFD
Published CFD in the CFD screen
CALLER ID
Specific extension from which you want to make the call
EXTENSION
Specific extension to which you want to get the call
The extension number to which the caller makes the call
DEFAULT ROUTE
The extension to which the calls must be routed based on the conditions mentioned below:• In Route Screen, the ‘Caller ID’ and ‘Extension’ is null for a CFD • In CFD Screen:— The Time Restriction is not enabled — The Time Restriction is enabled and the current call time is within the ‘Time Restriction’ and ‘Look Back’ time frame limits — The Time Restriction is enabled but the current call time is out of ‘Time Restriction’ time frame limit
VOICEMAIL EXTENSION
The extension to which the calls must be routed based on the conditions mentioned below:• In Route Screen, the Caller ID and Extension is null for a CFD • In CFD Screen, The Time Restriction is enabled and the current call time is within the ‘Time Restriction’ limits but not within the ‘Look Back’ time frame
RESTRICTION START TIME
It is the defined timing of the day that restricts the routing of the call to either Default extension or Voicemail extension
TIME RESTRICTION
Check the check box to enable Time Restriction feature
LOOKBACK TIME
It is the time frame since the last specified hours during which the current call has been made, or not
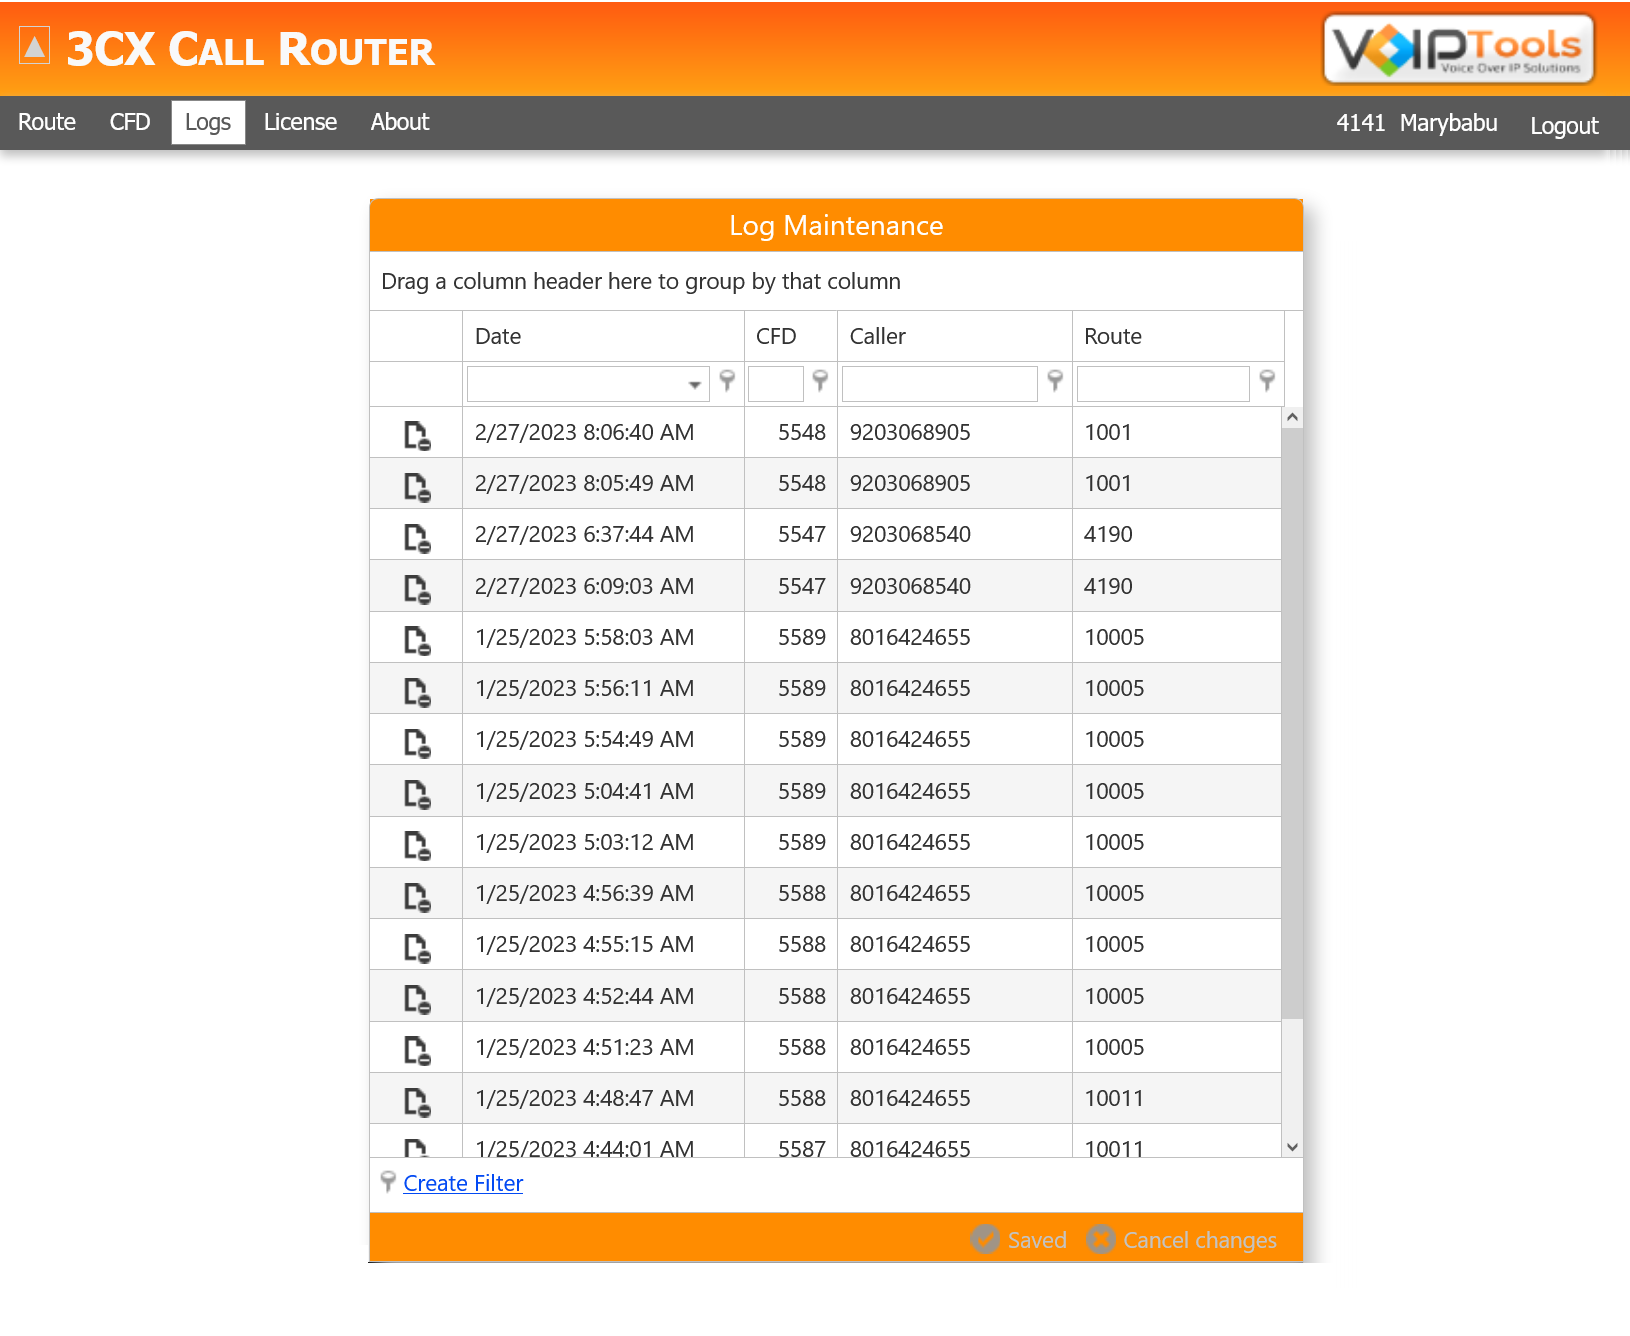
The Logs screen generates time-stamped events of all the call transactions automatically. From here, you can view the time at which a specific call has been performed, the caller number, the CFD extension to which the call has been made, and the extension number to which the call has been routed.
The date and time at which the call has been made by the CFD extension. The date format is MM/DD/YYYY. The time format is 12 hours clock with HH:MM:SSformat.
CFD
The CFD extension to which the call has been made
CALLER
The number of the caller
ROUTE
The extension number to which the call has been routed.
NOTE:
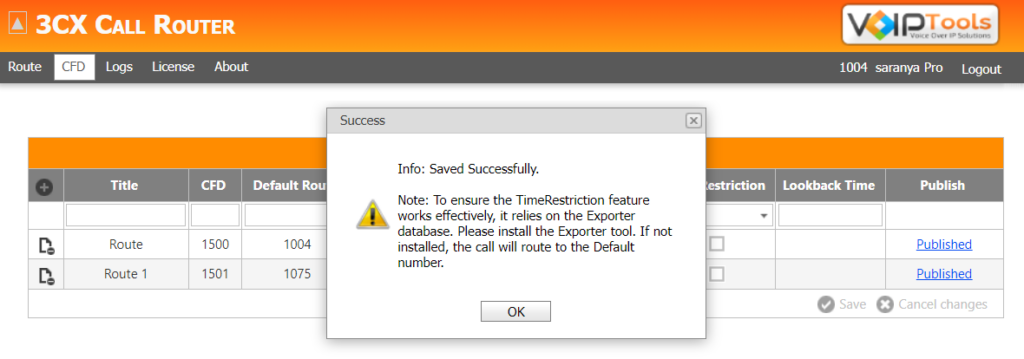
The Call Router system relies on the Exporter database CDR table to route calls effectively. This table holds critical data essential for proper call routing. If the CDR table does not exist, the system may default to routing calls to a designated extension, potentially causing disruptions in call management.
If the Exporter database CDR table is missing or there are issues with the database, a pop-up notification will alert you. To ensure smooth operation and avoid interruptions during testing or regular use, always verify that the Exporter database CDR table is present and up to date.
Visit our website to access our online manuals and get quick answers to most of your inquiries. If you prefer direct contact, we offer various support channels, including phone, email, live chat, and our helpful VoIPTools forums.
Rest assured, our dedicated team is here to assist you around the clock, every day of the year. Whether you’re based in the USA or India, we’re ready to provide prompt responses to your technical queries.
Windows Event Log for VoIPTools Applications and Services #
For troubleshooting any application errors, our Windows Event Log contains a comprehensive list of error messages, warnings, and informative notes related to all our VoIPTools applications and services. It’s a valuable resource to help you pinpoint and resolve any issues you may encounter.
Are you looking to collaborate with other VoIPTools customers facing similar challenges? Our forum is the perfect platform to exchange ideas, solutions, and best practices. Join the conversation at: https://www.voiptools.com/community/
If you encounter a potential bug in any of our VoIPTools products, we appreciate your help in improving our software. Report the issue to us at: https://www.voiptools.com/report-a-bug/ and we’ll address it promptly.
Got questions that need immediate answers? Our chat support team is available to assist you in real time. Just click on the Live Chat button located at the lower right corner of our website, and we’ll acknowledge your queries right away.
To ensure a thorough understanding of your concerns, feel free to email us at support@voiptools.com. Describe your issue in detail, and we’ll get back to you within one business day with the support you need.
If you prefer to speak with a representative directly, you can reach us at +1 801-642-4655. Our attentive team is available to take your calls from 8:00 AM to 6:00 PM (Central Standard Time).
If you’ve purchased our products through a VoIPTools Partner, rest assured that they provide first-level support at no additional cost. Partners have access to 100% free technical assistance and actively participate in the troubleshooting process.
VoIPTools customers enjoy access to our online manuals and receive support through emails (with responses within one business day) and live chat. However, please note that we do not provide remote server login assistance.
For a more hands-on experience, consider our “Installation Support” package. Our expert support team can log in to your servers, and install and configure all our tools for you. This comprehensive service includes setting up SQL Server Express and Internet Information Server if necessary. We’ll work closely with you to tailor our applications to best meet your specific requirements.
We’re committed to providing top-notch support to ensure your VoIPTools experience is smooth and hassle-free. Contact us today, and let us assist you in making the most of our powerful tools!


NOTE:


 to open the web application.
 button to complete the registration.
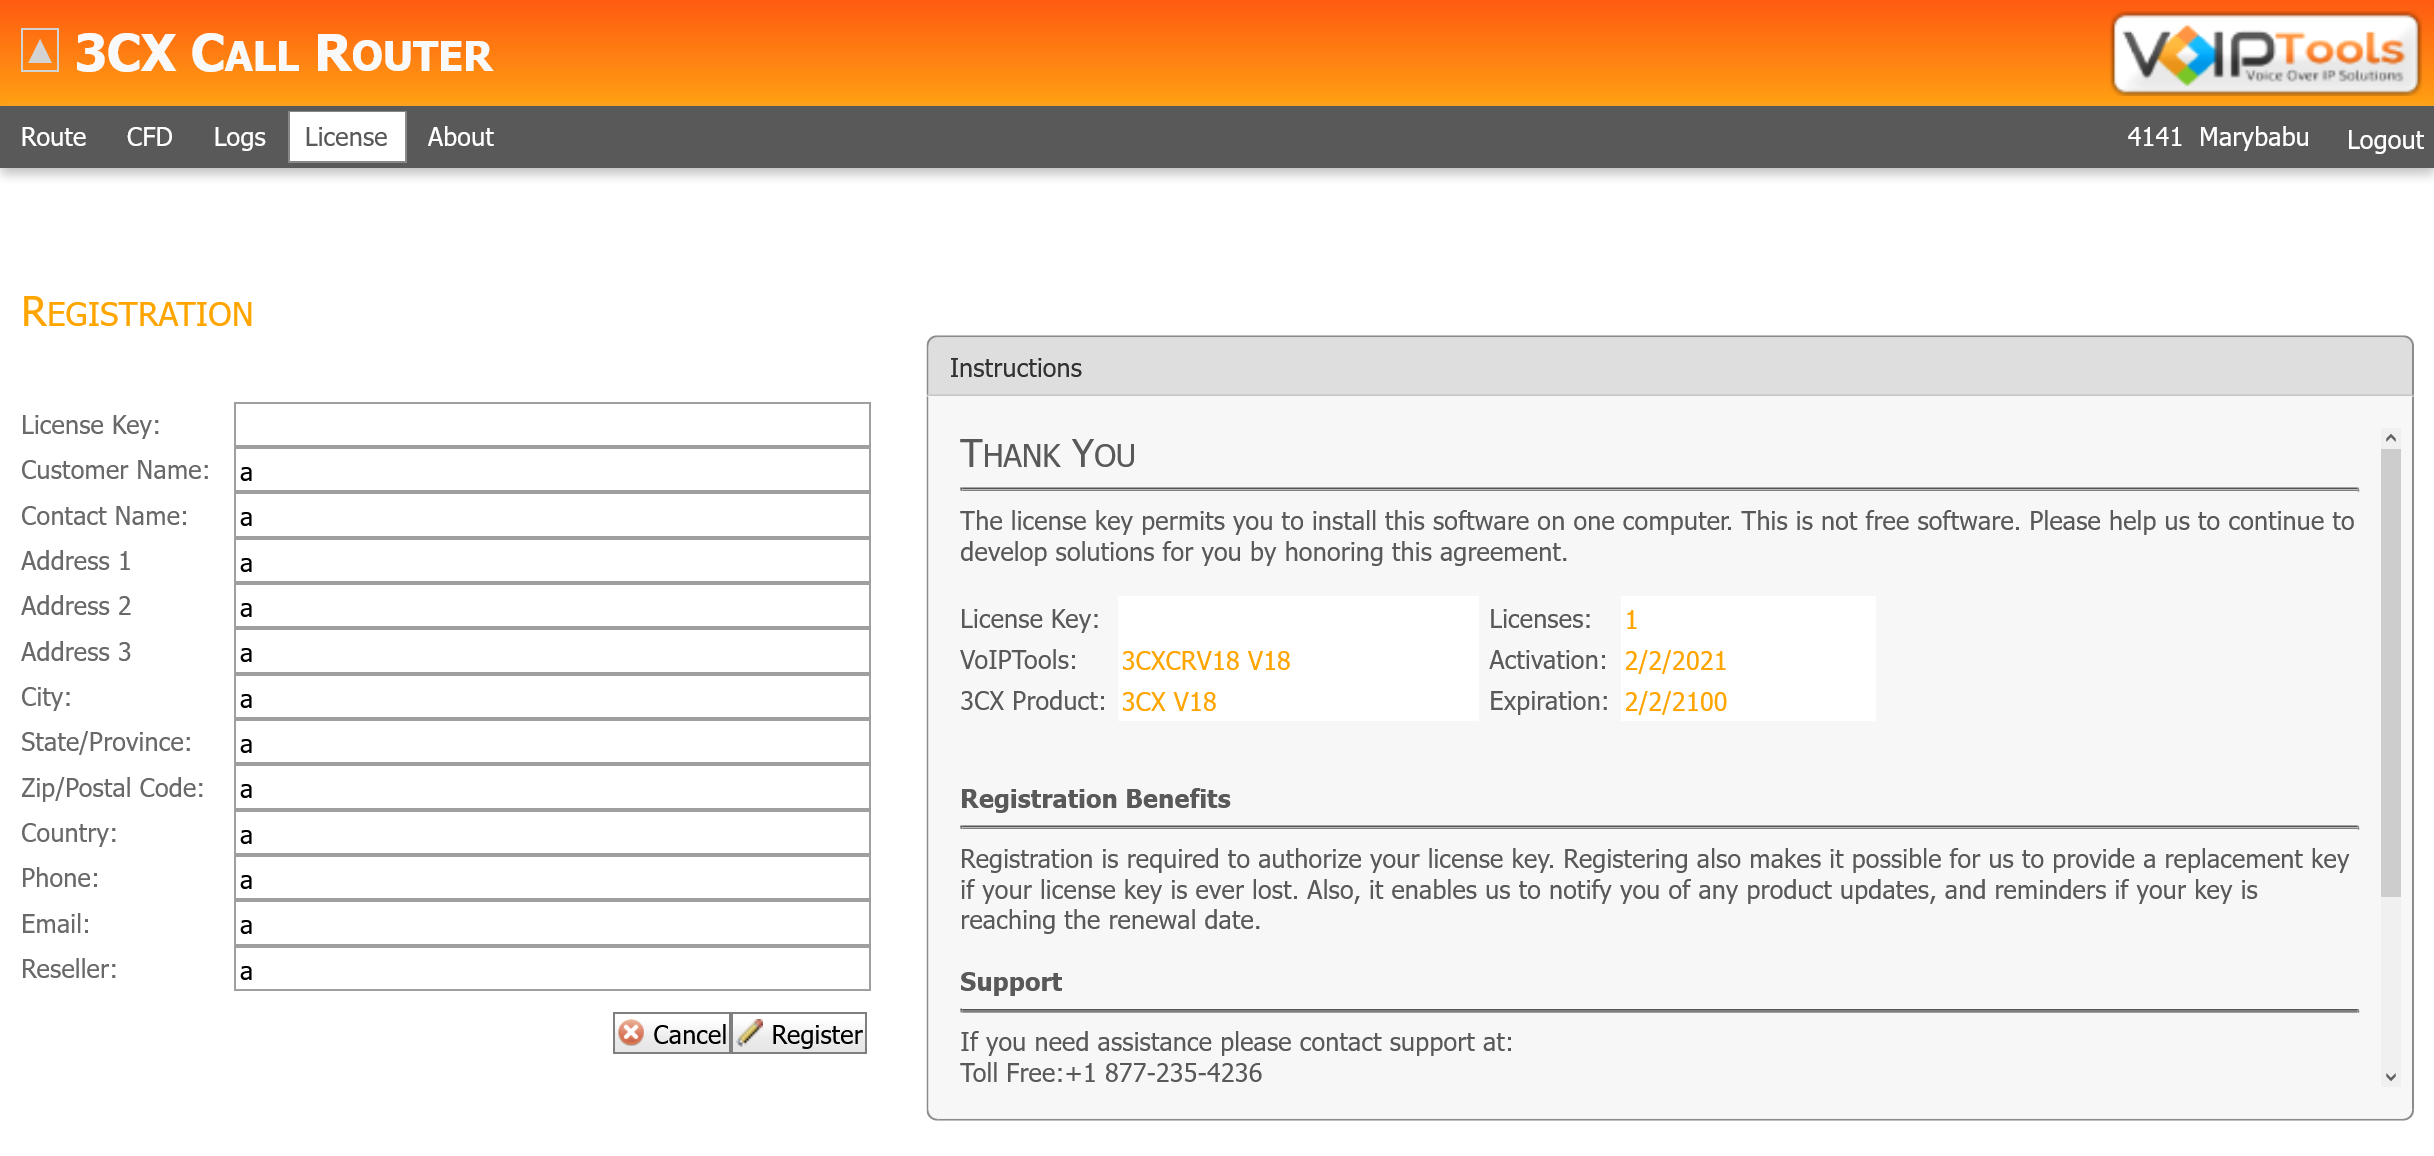
 button associated with the respective CFD.


