Introduction #
Experience Seamless Queue Management with 3CX Auto Logout
Introducing 3CX Auto Logout, the monitoring tool designed to transform your queue management system. Say goodbye to the inconvenience caused by agents forgetting to log out of queues, leading to missed calls and disruptions in your office environment. With 3CX Auto Logout, agents will be automatically logged out of the queue when they exceed the permitted number of missed calls. This eliminates long hold times, improves customer satisfaction, and creates a more productive and peaceful office environment. Additionally, the tool ensures the accuracy of your 3CX statistical reports by tracking agent activity, providing reliable data for informed decision-making.
Key features of 3CX Auto Logout #
 |
MISSED CALL MONITORING | Ensure optimum performance and accountability with Auto Logout as it actively monitors and records the count of consecutive missed calls for every queue agent. |
 |
AUTOMATIC LOGOUT | An automated system that actively logs out agents from the queue as soon as they exceed the allowed number of missed calls. Maximize efficiency and ensure prompt customer service, enhancing user experience and driving more visitors to your website |
 |
CUSTOMIZABLE THRESHOLD | Ensure optimal agent productivity by configuring the threshold for missed calls, and enabling automatic agent logouts after surpassing the maximum limit. |
Prerequisites #
Before installing the 3CX Auto Logout, you need to ensure that your computer meets the minimum requirements mentioned below:
| PREREQUISITE | PURPOSE |
|---|---|
| 3CX Version V20 | 3CX Auto Logout is designed to work seamlessly with this version for enhanced features and performance. |
| Windows 10 or above / Windows Server 2012 or above | These operating systems provide the necessary environment for the application to run efficiently. |
| IIS Features and Configuration – VoIPTools | IIS is needed as a web server to host and manage web-based applications and services. |
| .NET Framework 4.7.2 (Web Installer) | This framework provides essential components for running and developing applications. |
| VoIPTools Universal Updater | This component is necessary for updates, ensuring the application remains current and functional. |
| VoIPTools Relay Service | It is used for proper integration and functionality of the 3CX Competitive Wallboard within the 3CX environment. |
| Microsoft SQL Server 2016 or above (Including the free SQL Express edition) | 3CX requires Microsoft SQL Server 2016 or later for database management. |
| Static IP for VoIPTools and 3CX servers | This is to ensure proper two-way communication, both the 3CX server (Relay) and the VoIPTools server. Dynamically assigned IP addresses are not supported. Additionally, it is recommended to use HTTPS for secure communication, which requires a FQDN for SSL/TLS certificate validation between the VoIPTools server and the Relay. |
| Port number 6150 opened on your device | Port 6150 is a specific network port used by 3CX for communication purposes. Opening this port on the device’s firewall allows incoming and outgoing traffic to pass through, enabling the 3CX software to send and receive data over the network effectively. |
NOTE:
- When installing SQL Server, we recommend you install it in Mixed Mode to include SQL Authentication and install SQL Management Studio
- When installing IIS, be sure to install Basic Authentication, .Net Extensibility, and ASP.Net 4.X
Installation overview #
 |
DOWNLOAD SOFTWARE | You can order 3CX Auto Logout online at https://www.voiptools.com. Your order confirmation email will include your license key and a link to download the software. |
 |
INSTALL PREREQUISITES | You must install several prerequisites before installing the 3CX Auto Logout. The Advanced Installer identifies and installs these applications automatically. Click here to learn about the required prerequisites. |
 |
INSTALL 3CX AUTO LOGOUT | This User Guide contains step-by-step instructions to successfully install 3CX Auto Logout. Begin by extracting the installer from the downloaded zip file (Step 1 above), then run the setup program named AutoLogoutInstaller.exe |
 |
LOGIN TO THE WEB APPLICATION | You can now log in to your software using the Extension and PIN. |
Step-by-Step Installation Procedure #
The following section guides you through a detailed walk-through of the installation process.
Step 1: Download 3CX Auto Logout #
Find the software download link in the Order Confirmation Email, or you can download the application by following the procedure,
- Open your browser and go to the VoIPTools official website or click here to get redirected to the website.
- Search for the 3CX Auto Logout and click the Download
 button to download your application.
Step 2: Install the Prerequisites #
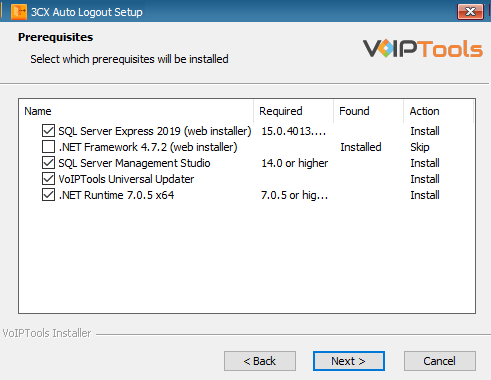
Click on the software installer downloaded in Step 1. The installation wizard will automatically identify the prerequisites and assist you with each installation required to 3CX Auto Logout. It includes .NET Framework (Web Installer), SQL Server Express (Web Installer), and SQL Server Management Studio.
- Click the downloaded installer executable to launch the Prerequisites Setup Wizard and click Next.
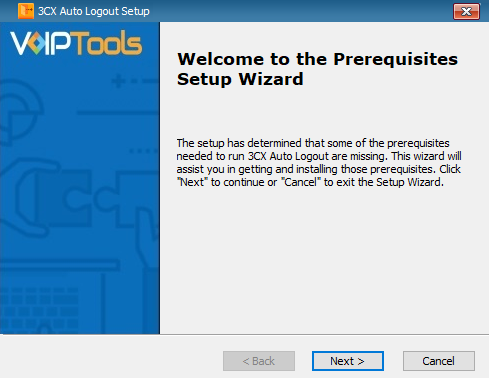
- In the Prerequisites window, install all the required prerequisites identified by the installer, or select/ unselect the applications based on your requirements and click Next to continue.
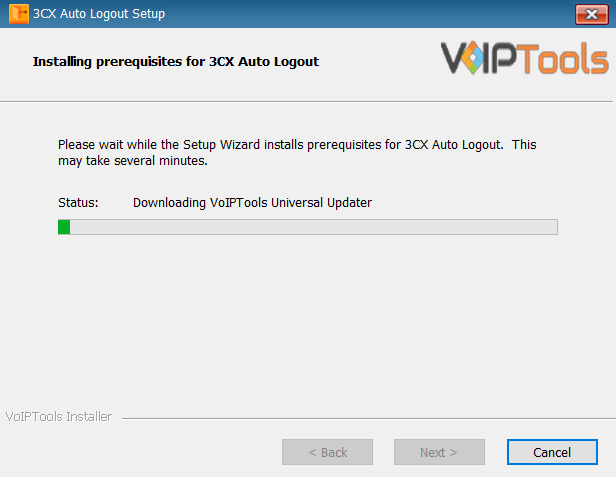
The installer will download and install the selected applications. It may take several minutes to complete.
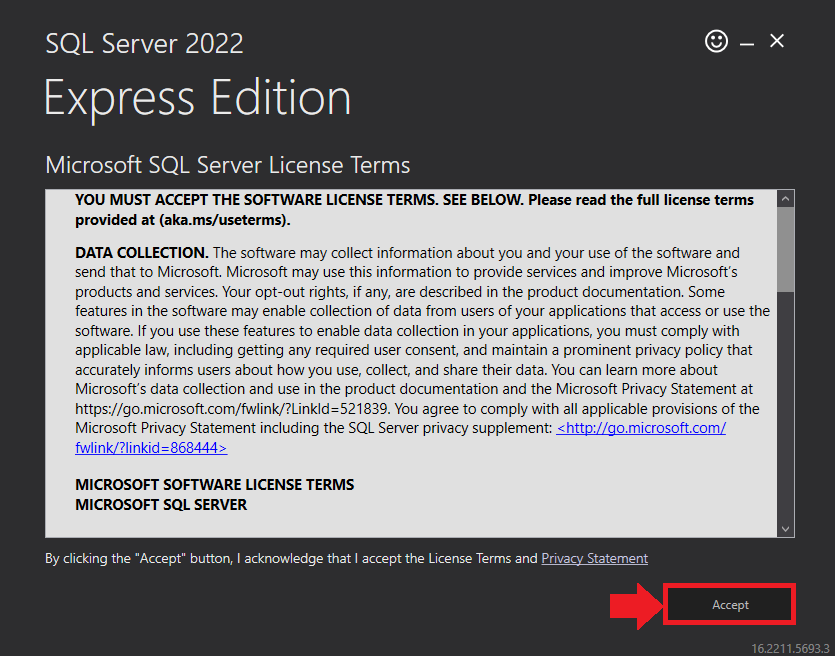
- In the Microsoft SQL Server License Terms click the Accept button to acknowledge the license terms and continue.
- This page appears if you do not have SQL Server Express preinstalled in your device.
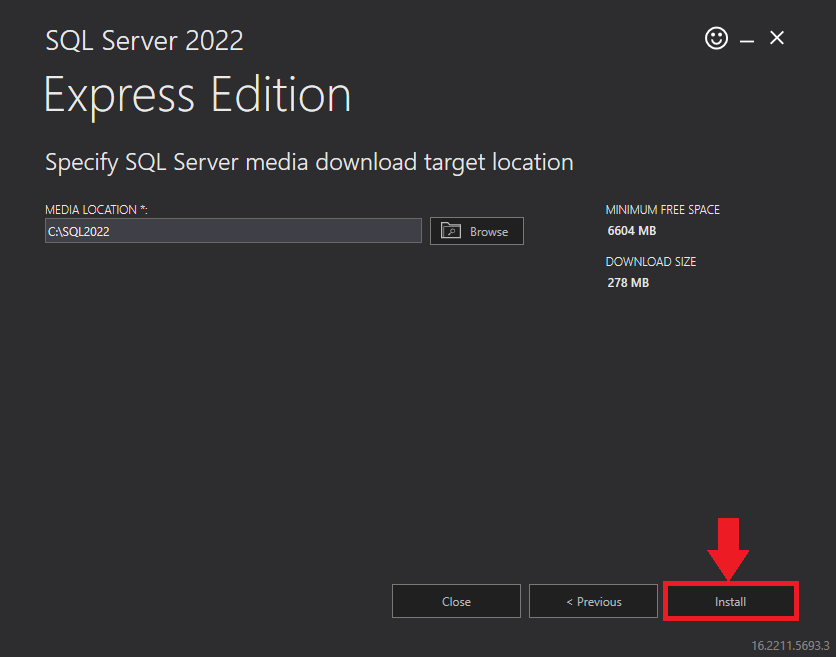
- View the SQL Server Media target location in the Media Location field. If required, you can click the Browse button to change the location. Click Install to begin the installation of SQL Server Express.
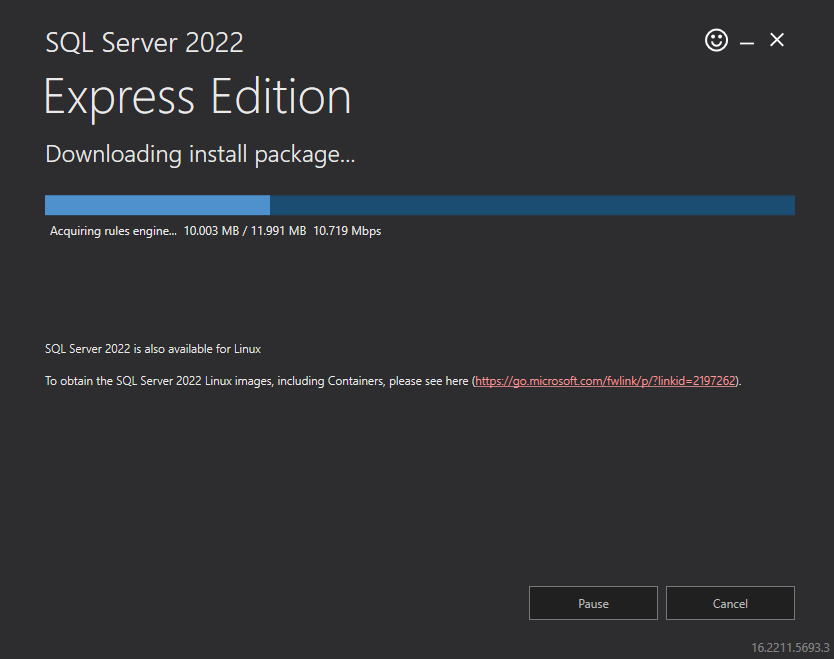
SQL server installation is in progress. This may take several minutes to complete.
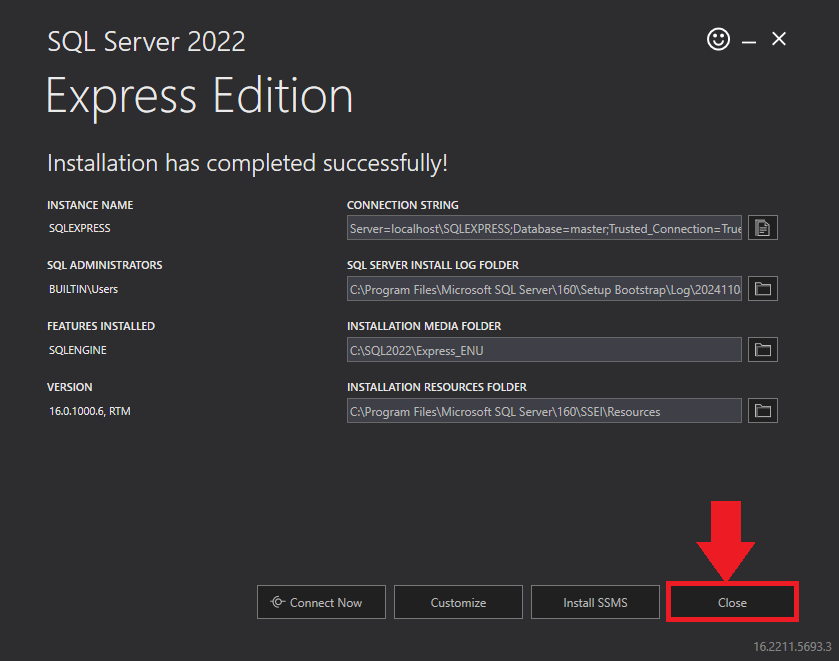
- Click the Close button once the prerequisites are installed.
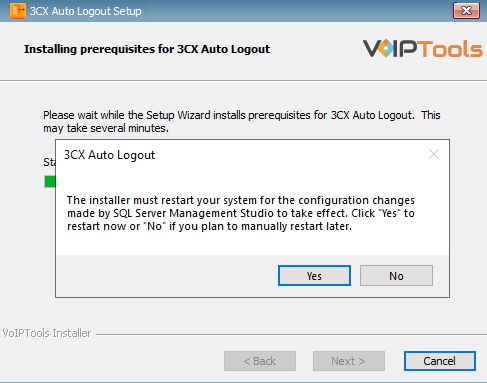
- Click Yes in the Confirmation Message Box to reboot the computer.
Step 3: Start the installation process #
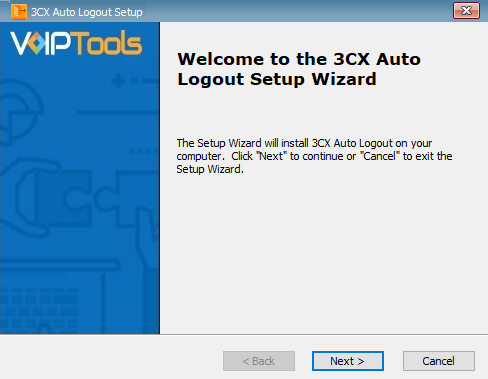
- Click Next on the 3CX Auto Logout Setup Wizard screen.
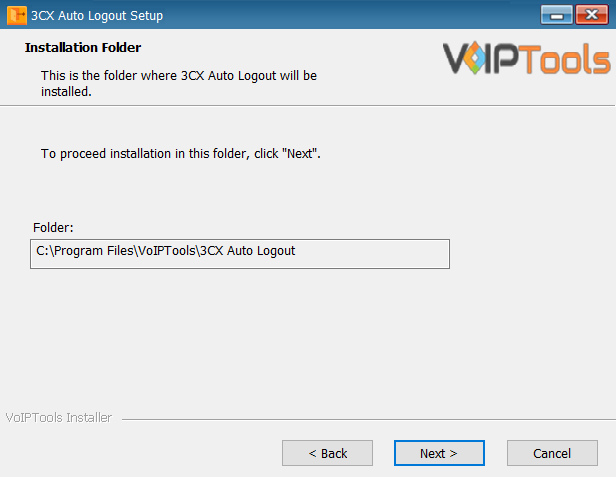
- On the Select Installation Folder window, the Folder field displays the path where the 3CX Auto Logout gets installed. You cannot change the location path.
- Click Next to continue.
Step 4: Test Relay Settings #
- In the 3CX Relay Services window, in the Relay Host field, enter the FQDN of your 3CX server.
- Enter 8801 in the Relay Port field.
- Enter the public key you took from VoIPTools Relay services in the Public Key text area.
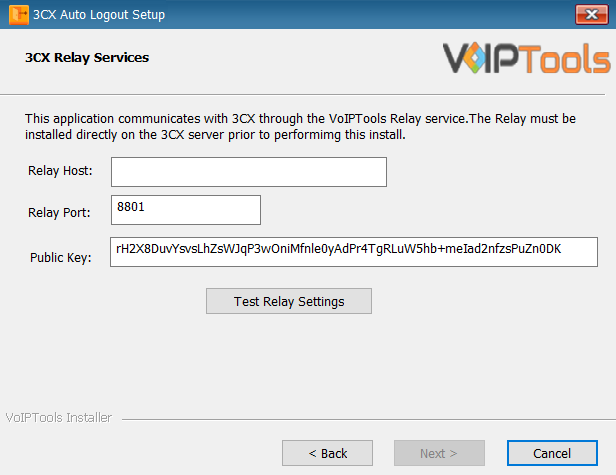
- Click the Test Relay Settings to confirm ‘3CX Auto Logout’ can communicate with the Relay services running on the 3CX server.
- If the ‘3CX Auto Logout’ is successfully able to communicate with the Relay services that run on the 3CX server, a Success message box appears. Click OK. If the test fails, you will not be able to continue until communication with the relay is established.
- Click Next to continue with the installation.
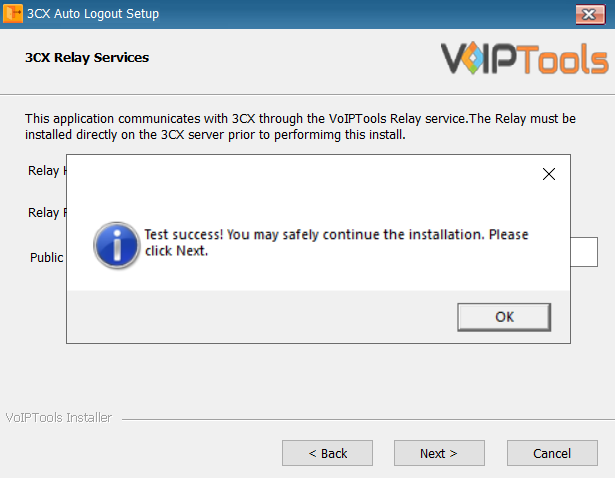
- You must set the Relay Port to 8801.
- If the Relay test fails, you cannot continue the installation until you establish communication with the Relay. Confirm the following if the test was unsuccessful:
- Confirm you have the correct firewall port open (default TCP 8801) on the 3CX server and the firewall protecting the 3CX server.
- Confirm that you have entered the correct IP address / FQDN for the 3CX server.
- Confirm that the 3CX Auto Logout and Relay use the same port and protocol.
Step 5: Configure the database #
When configuring the 3CX Power Dialer, select an existing Microsoft SQL Server instance in your environment. The database server can be a remote SQL Server, or a local instance running on the VoIPTools server.
You can set up the SQL database using SQL Authentication or Windows Integrated Authentication.
SQL Authentication #
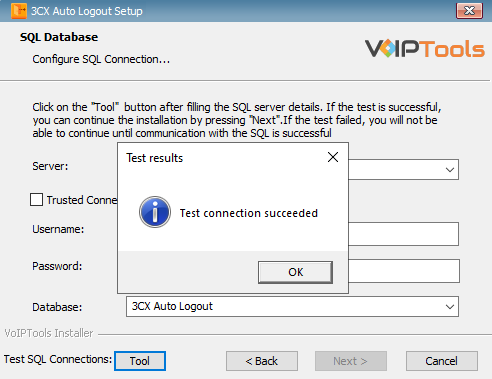
- Enter your server name in the Server field.
- If using the free SQL Express Edition, the default SQL Instance name is SQLExpress.
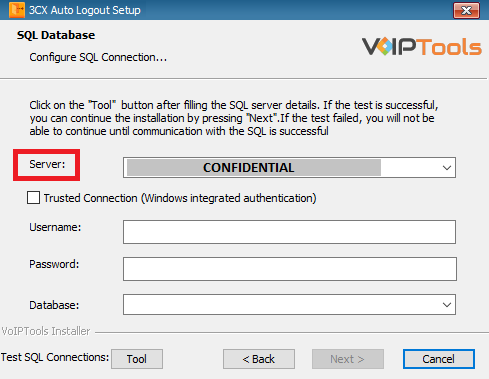
- If you want to use ‘SQL Authentication’, then install SQL Server in ‘Mixed‘ mode.
- If SQL Server is installed on a server other than the server where 3CX Exporter is installed, you will need to configure SQL Server to allow remote connections.
- Enter your credentials in the Username and Password fields.
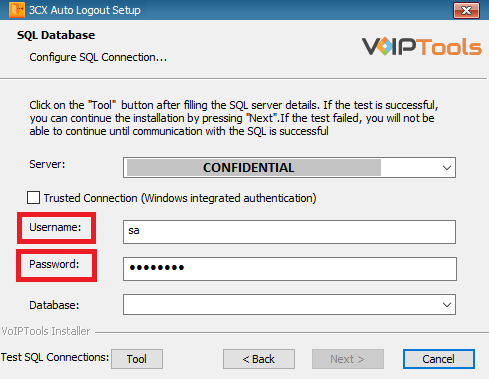
Make sure that you select a SQL Login that has sufficient permissions to alter the database and create SQL objects.
- Select or enter the 3CX Emergency Notifier in the Database dropdown.
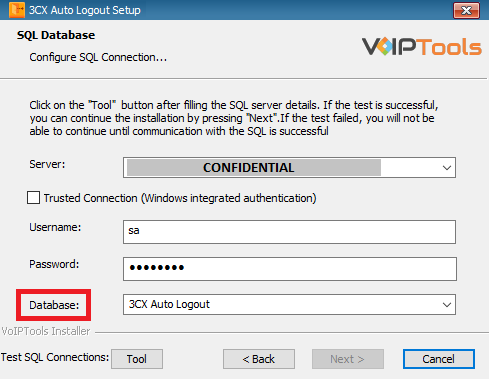
- In the Test SQL Connections section, click the Tool button to test the connection and click OK in the Test Results popup box.
Windows Integrated Authentication #
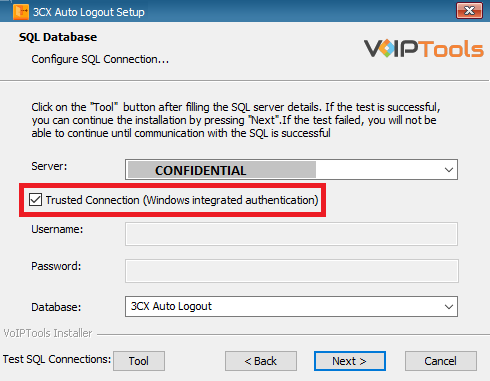
- To use Windows Integrated Authentication check the Trusted Connection (Windows integrated authentication) checkbox.
- The VoIPTools installer will create a local Windows user name as “VoIPToys” and give you sufficient rights to this user to create/update the SQL database.
- In the Test SQL Connection section, click the Tool button to test the connection.
- Click the Next button which gets enabled when the database connection is successful.
We encourage you to use SQL Authentication rather than Windows authentication. Many of our tools leverage a Call Flow Designer (CFD) application running on the 3CX. Frequently our CFD applications require access to a SQL database. If the 3CX server and the database server are not in an Active Directory domain, Windows authentication will fail. To use SQL authentication, your SQL Server must be configured to run in “Mixed Mode”. If you installed SQL Server with one of our tools, we configure SQL in “Mixed Mode”.
Step 6: Installing 3CX Auto Logout #
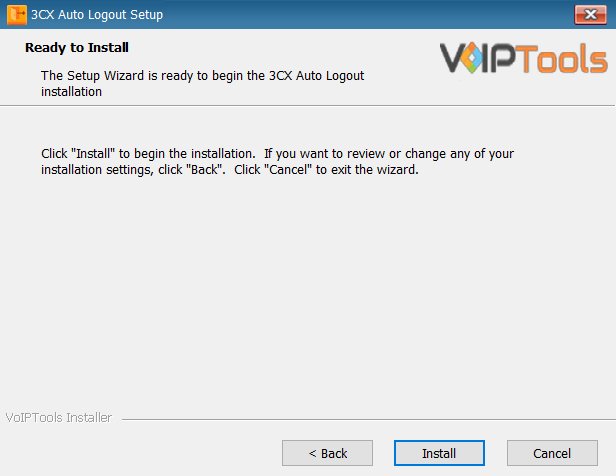
- Click Install in the Ready to Install window.
The application installation may take several minutes to complete.
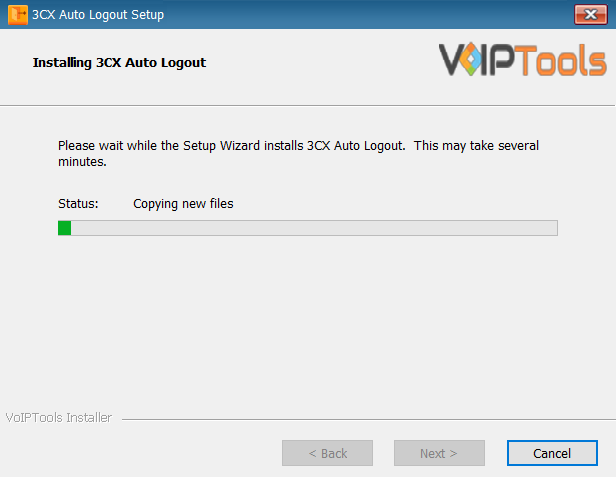
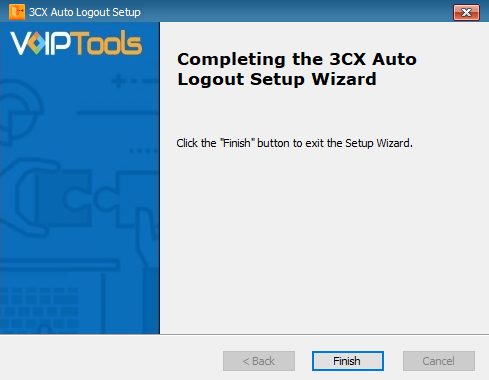
- Click the Finish button when the installation is complete.
Step 7: Login to the Web Application #
Follow the procedure to login to your web application,
- Click the Auto Logout desktop icon
 that appears once the installation is successfully done.
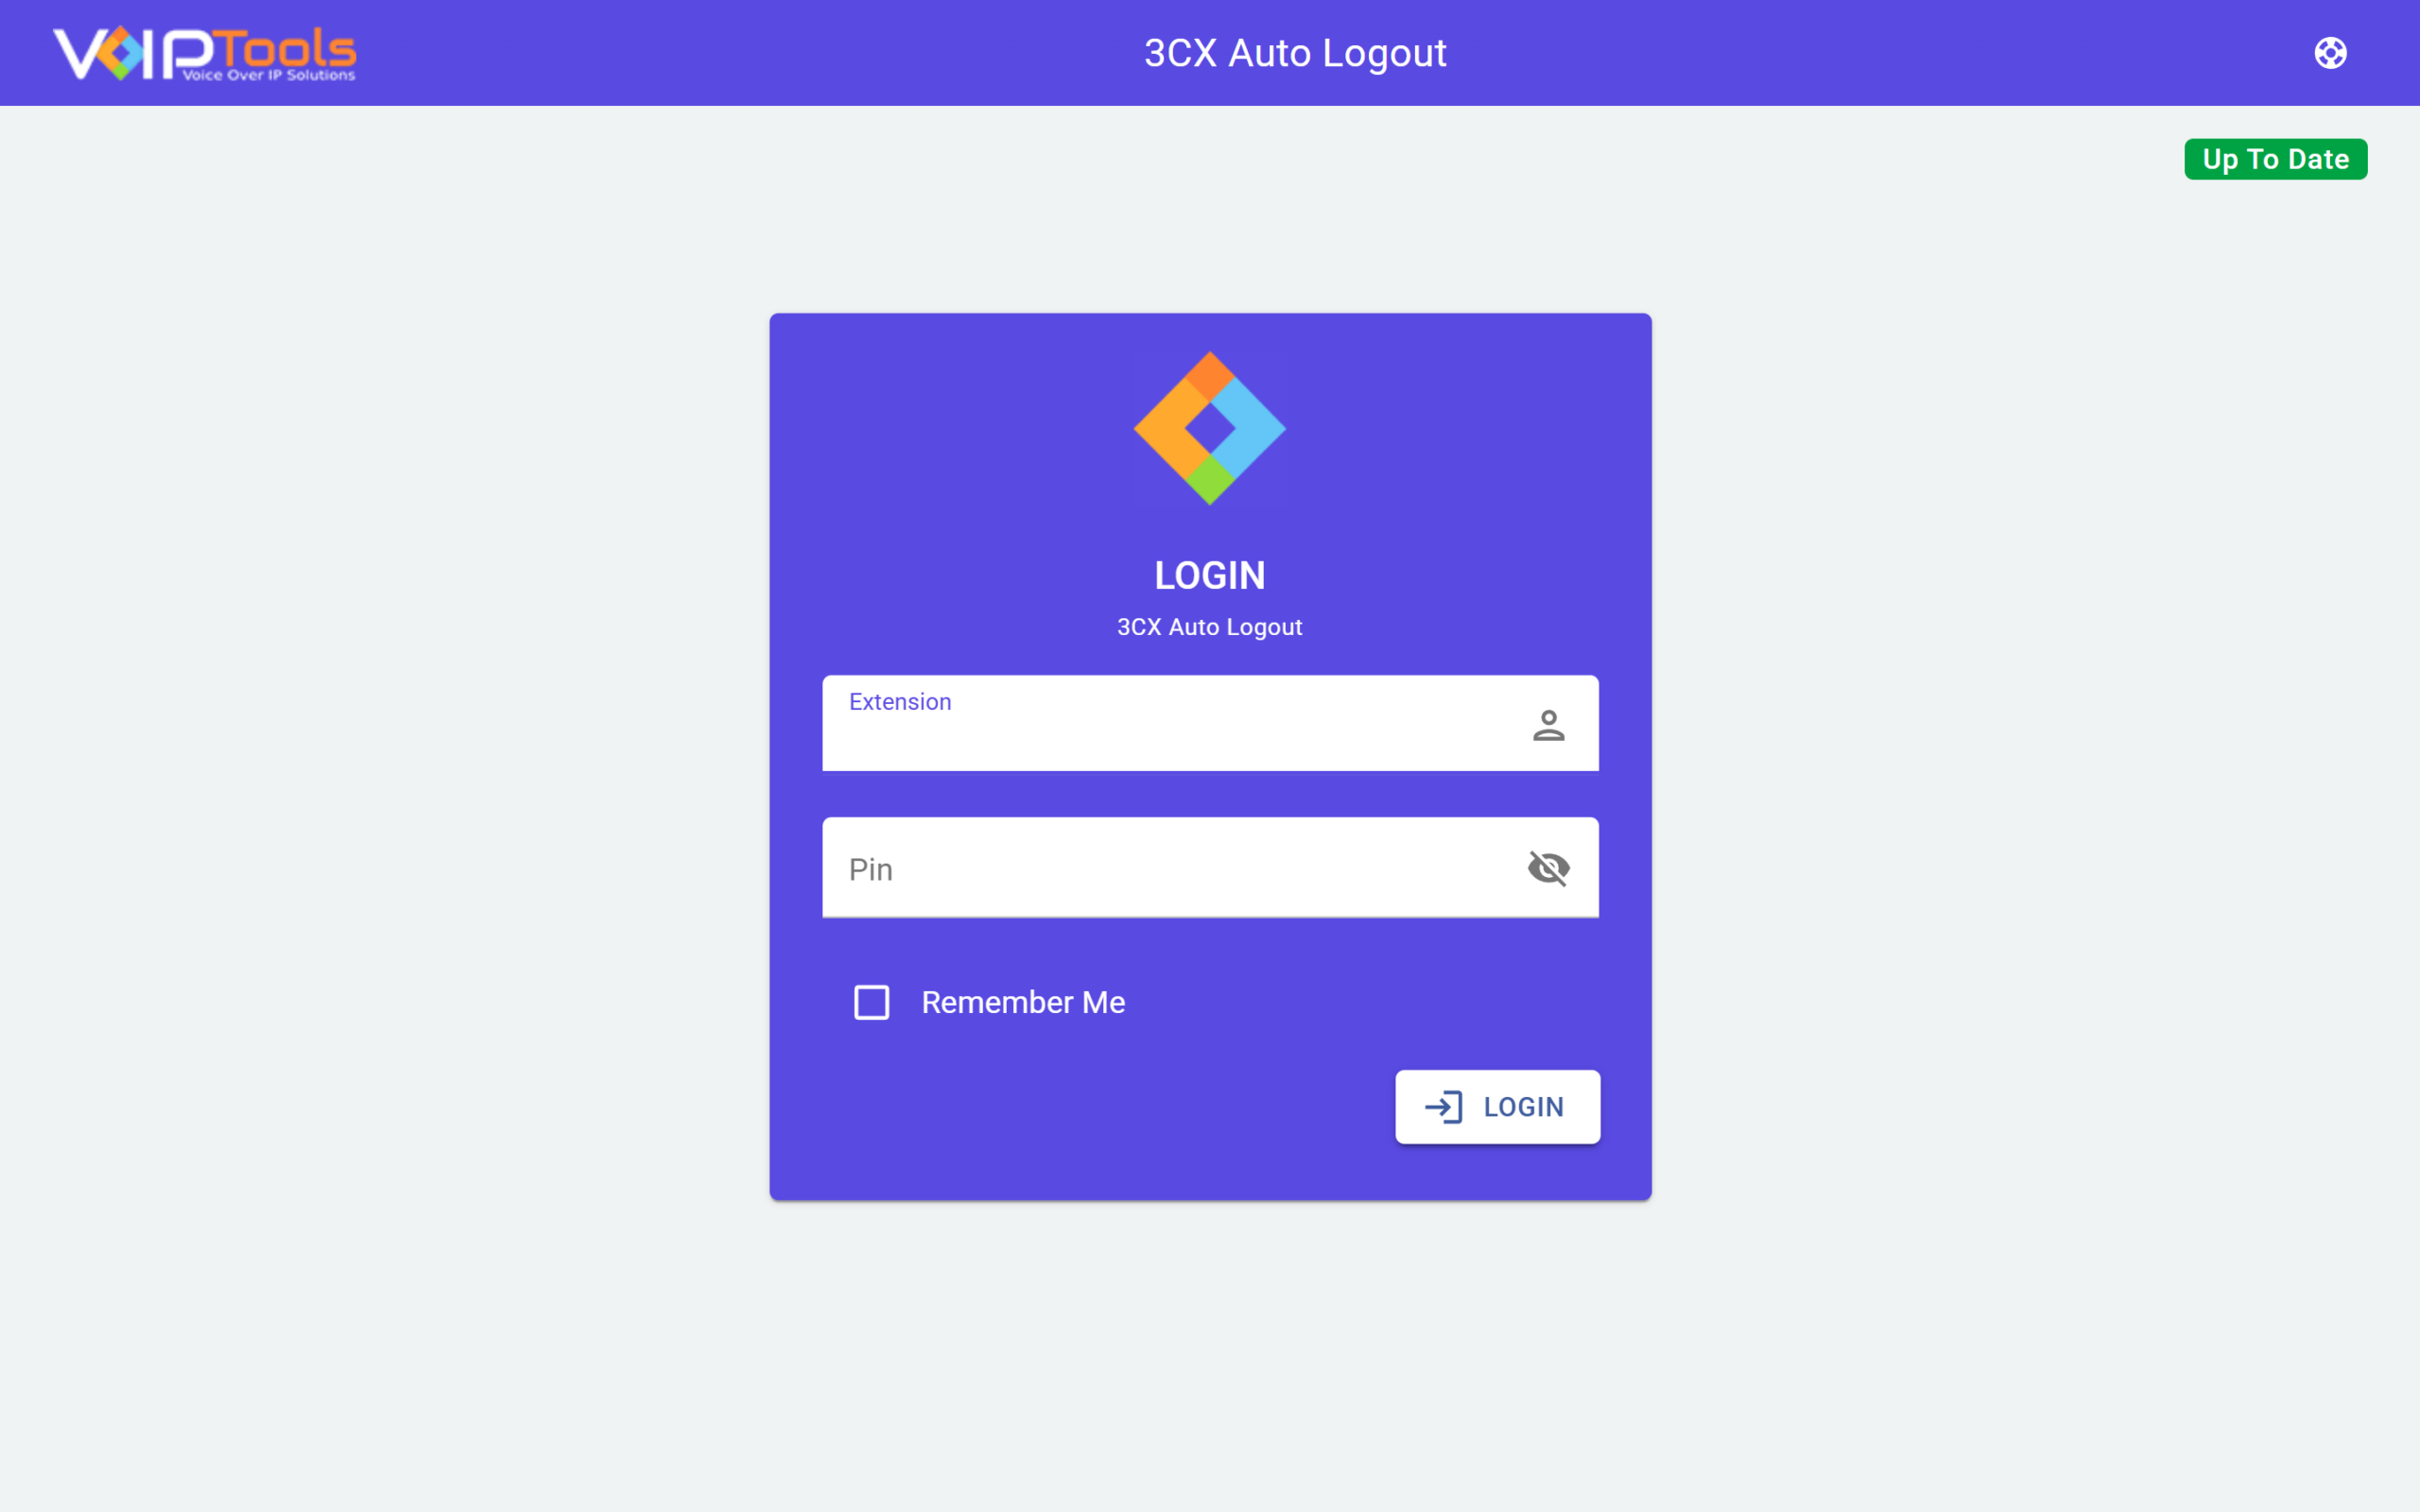
 - On the Login page, do the following tasks,
- In the Extension field, enter your 3CX extension number.
- In the PIN field, enter your 3CX voicemail PIN.
- Click the Login button to log in to your account.
3CX Auto Logout Web Application #
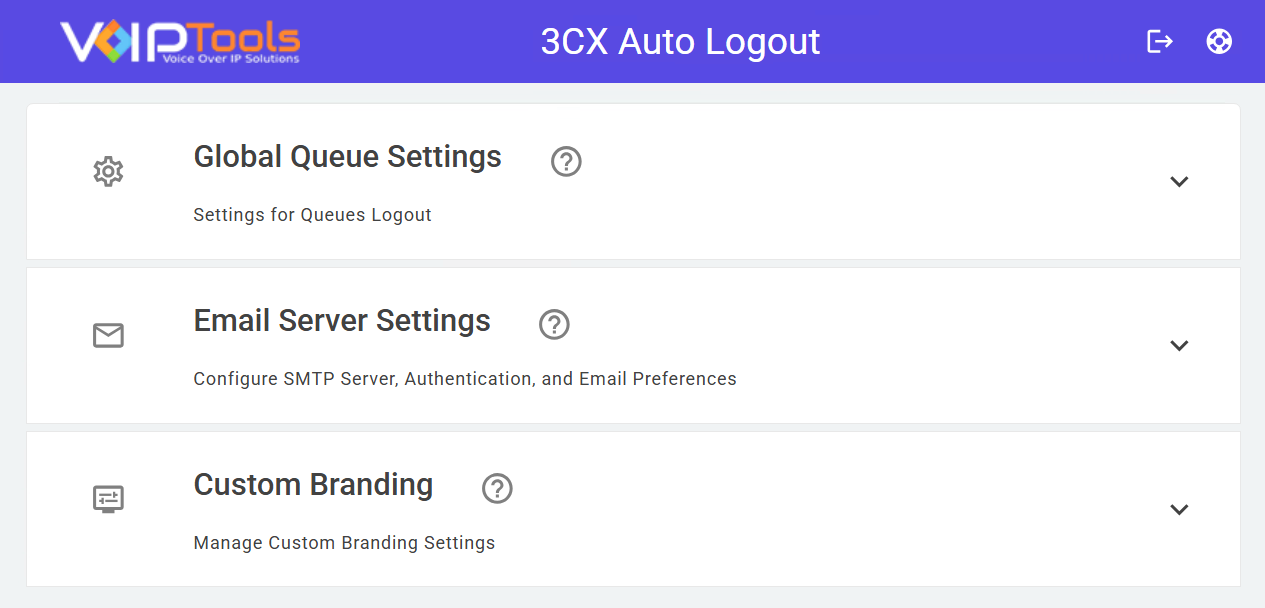
Missed calls cost you customers. When an agent steps away or loses focus, calls keep ringing into an empty line until someone hangs up frustrated. 3CX Auto Logout watches every queue and catches this the moment it happens, then logs the agent out or changes their status so calls move to someone who can pick up. Managers get an email too, turning a complaint into a quick check in instead. Log in from any browser, set your limits once, and Auto Logout keeps watch on every queue, call after call.
Global Queue Settings #
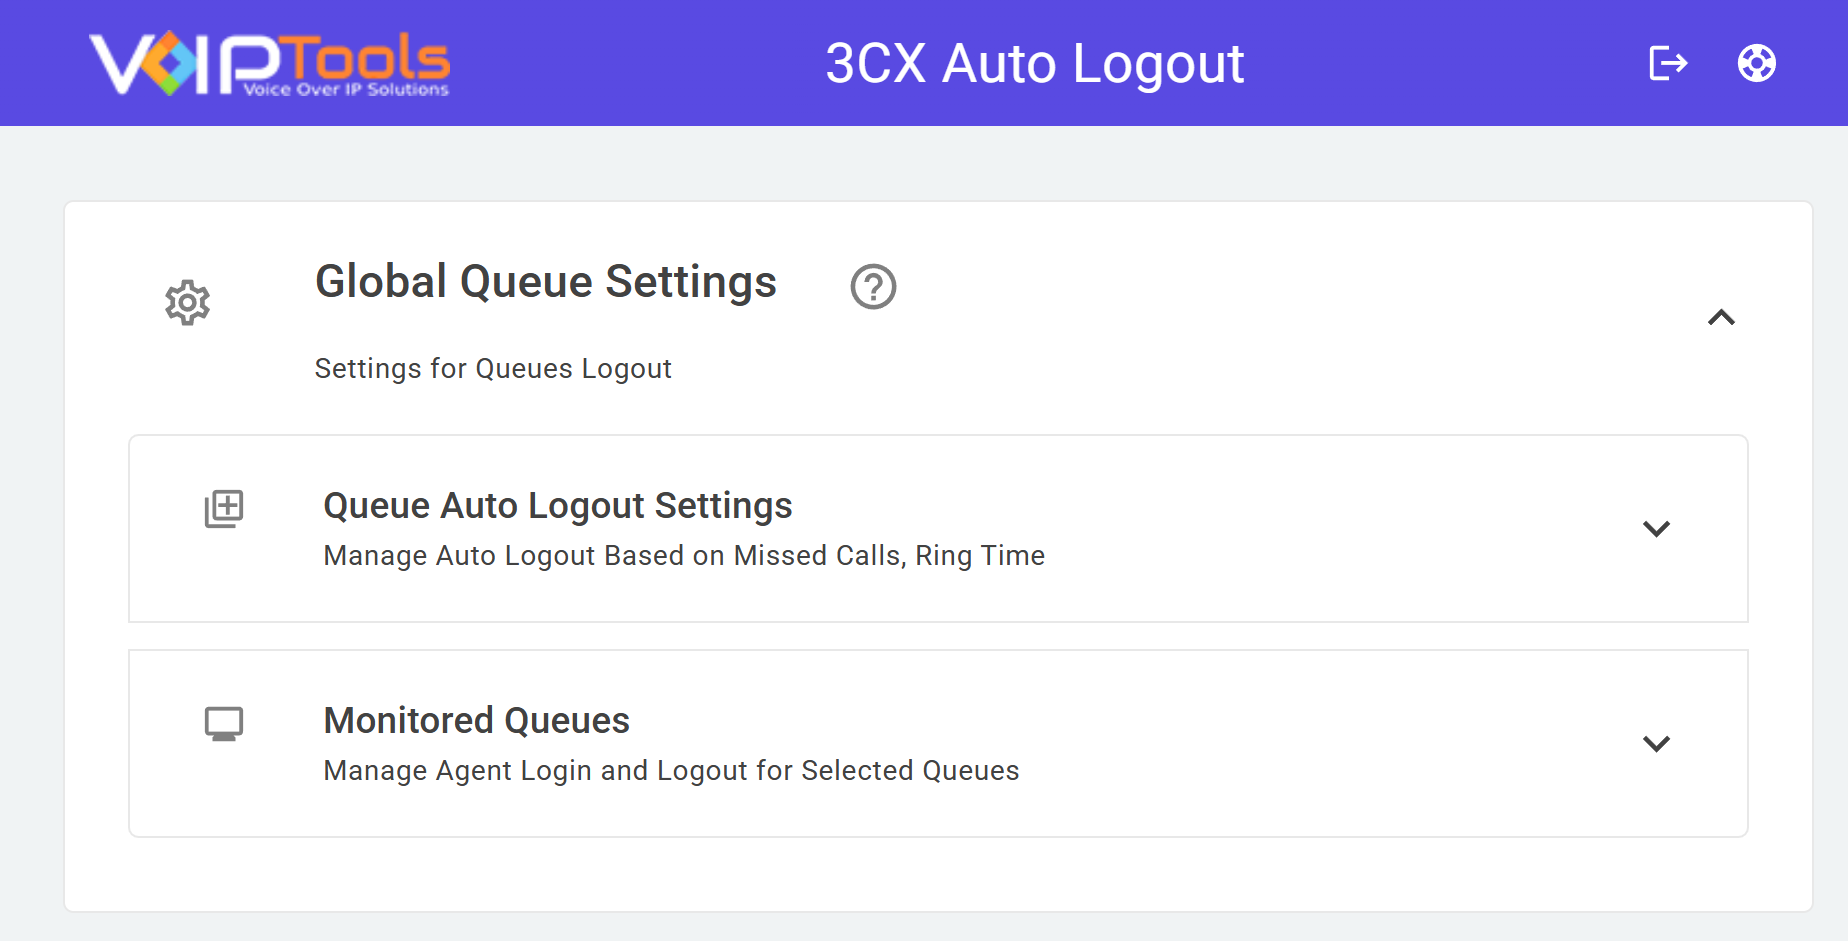
Use Global Queue Settings to set the rules for what happens when an agent misses too many calls.
Queue Auto Logout Settings #
Use Queue Auto Logout Settings to set the missed call count, ring time, and the action Auto Logout takes.
- Max Missed Calls: Enter the number of calls in a row an agent can miss.
- Threshold Ring Time: Enter how long a call can ring, in seconds, before it counts as missed.
- Schedule Timer: Set the time each day when the missed call count returns to zero.
- Select Logout to log the agent out of the queue when they reach the missed call count, or select Set 3CX Status to change the agent’s phone status instead.
- If you selected Set 3CX Status, choose a status from the 3CX Status list, or type your own text in the Custom Status field.
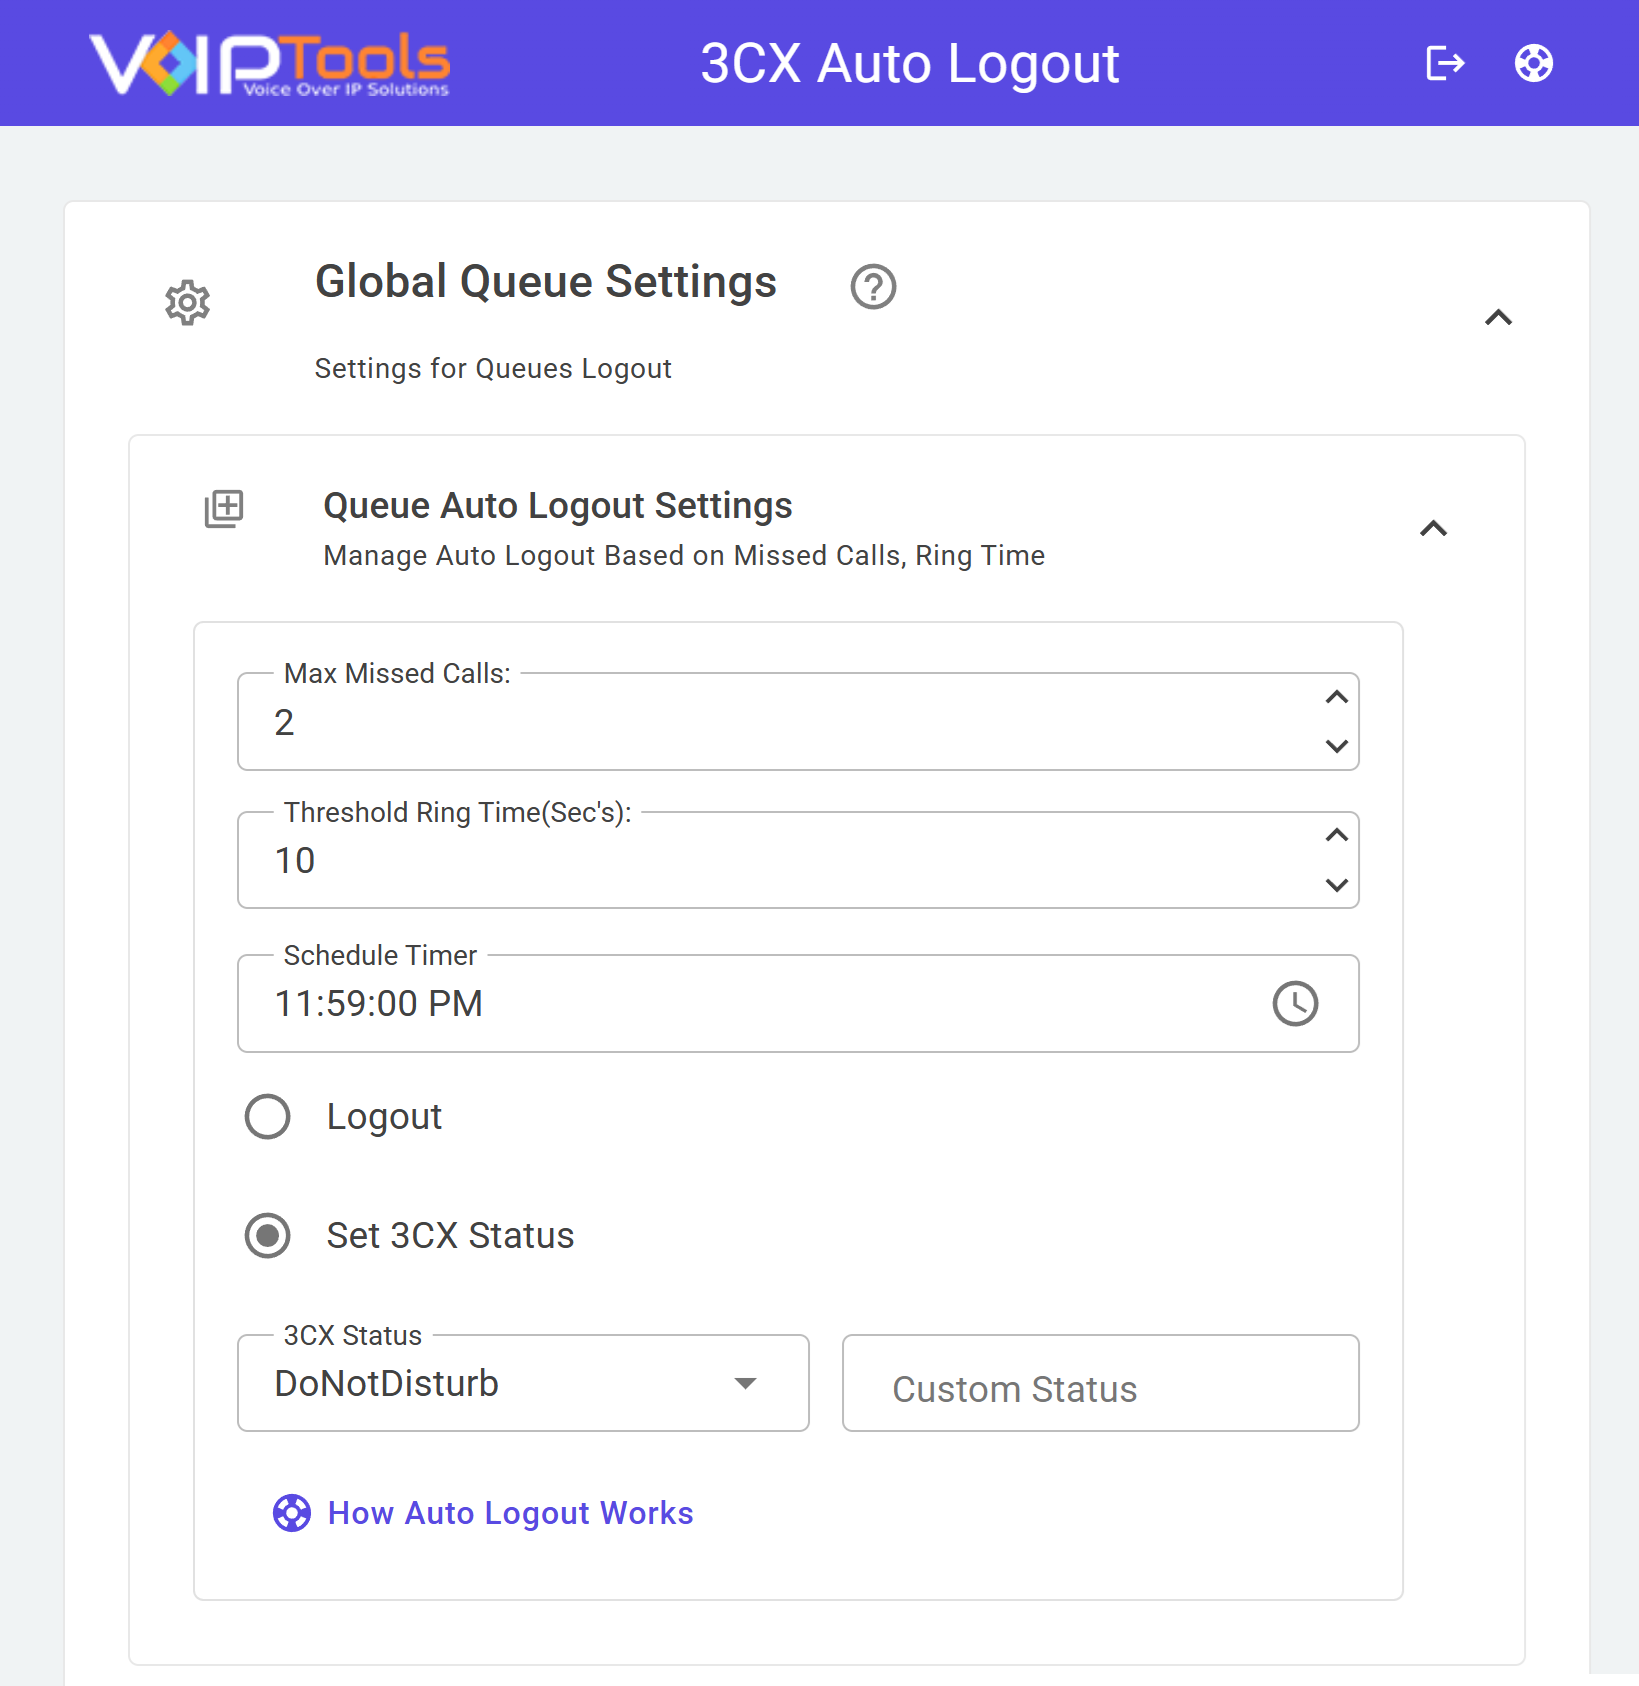
Example: Set Max Missed Calls to 2 and Schedule Timer to 12:00 AM. An agent who misses one call sees no change. When that agent misses a second call, Auto Logout takes the action you chose, either logging them out or changing their status. At 12:00 AM, the missed call count returns to zero, and the agent must miss two calls again before Auto Logout responds.
Monitored Queues #
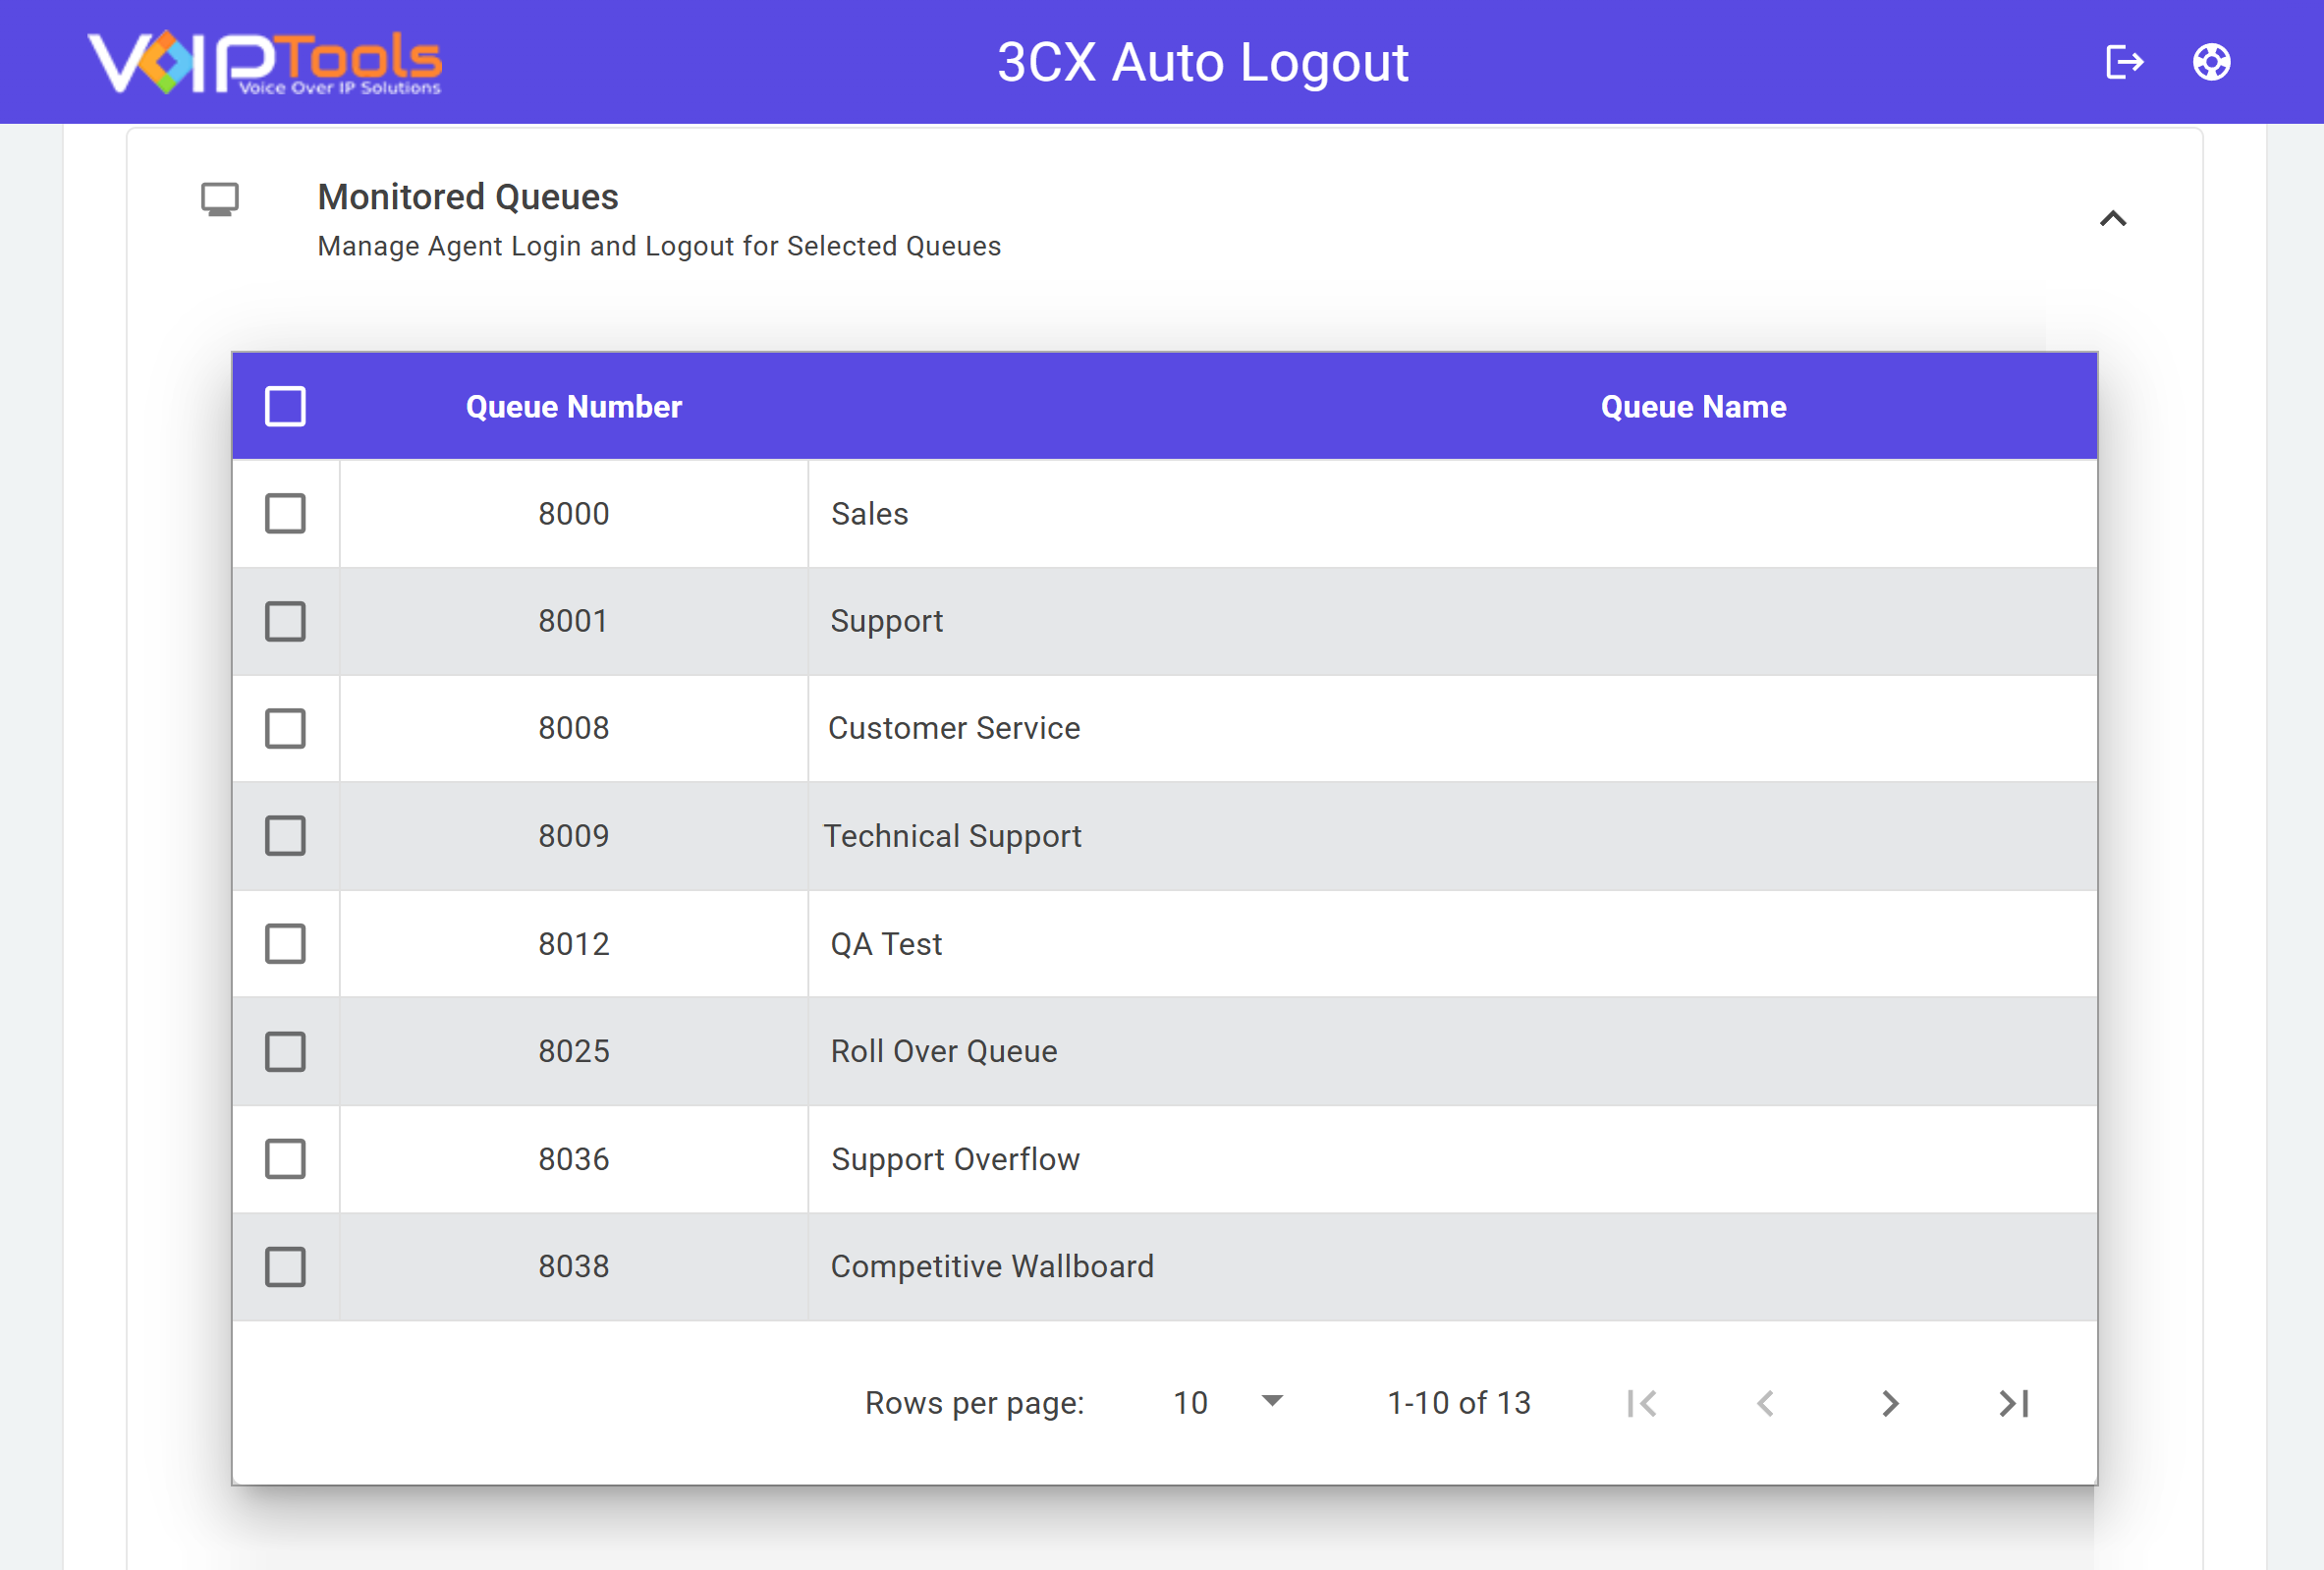
Use Monitored Queues to choose which queues Auto Logout watches.
- Select the checkbox next to each queue you want Auto Logout to watch. Select the checkbox in the header row to choose every queue at once.
Email Server Settings #
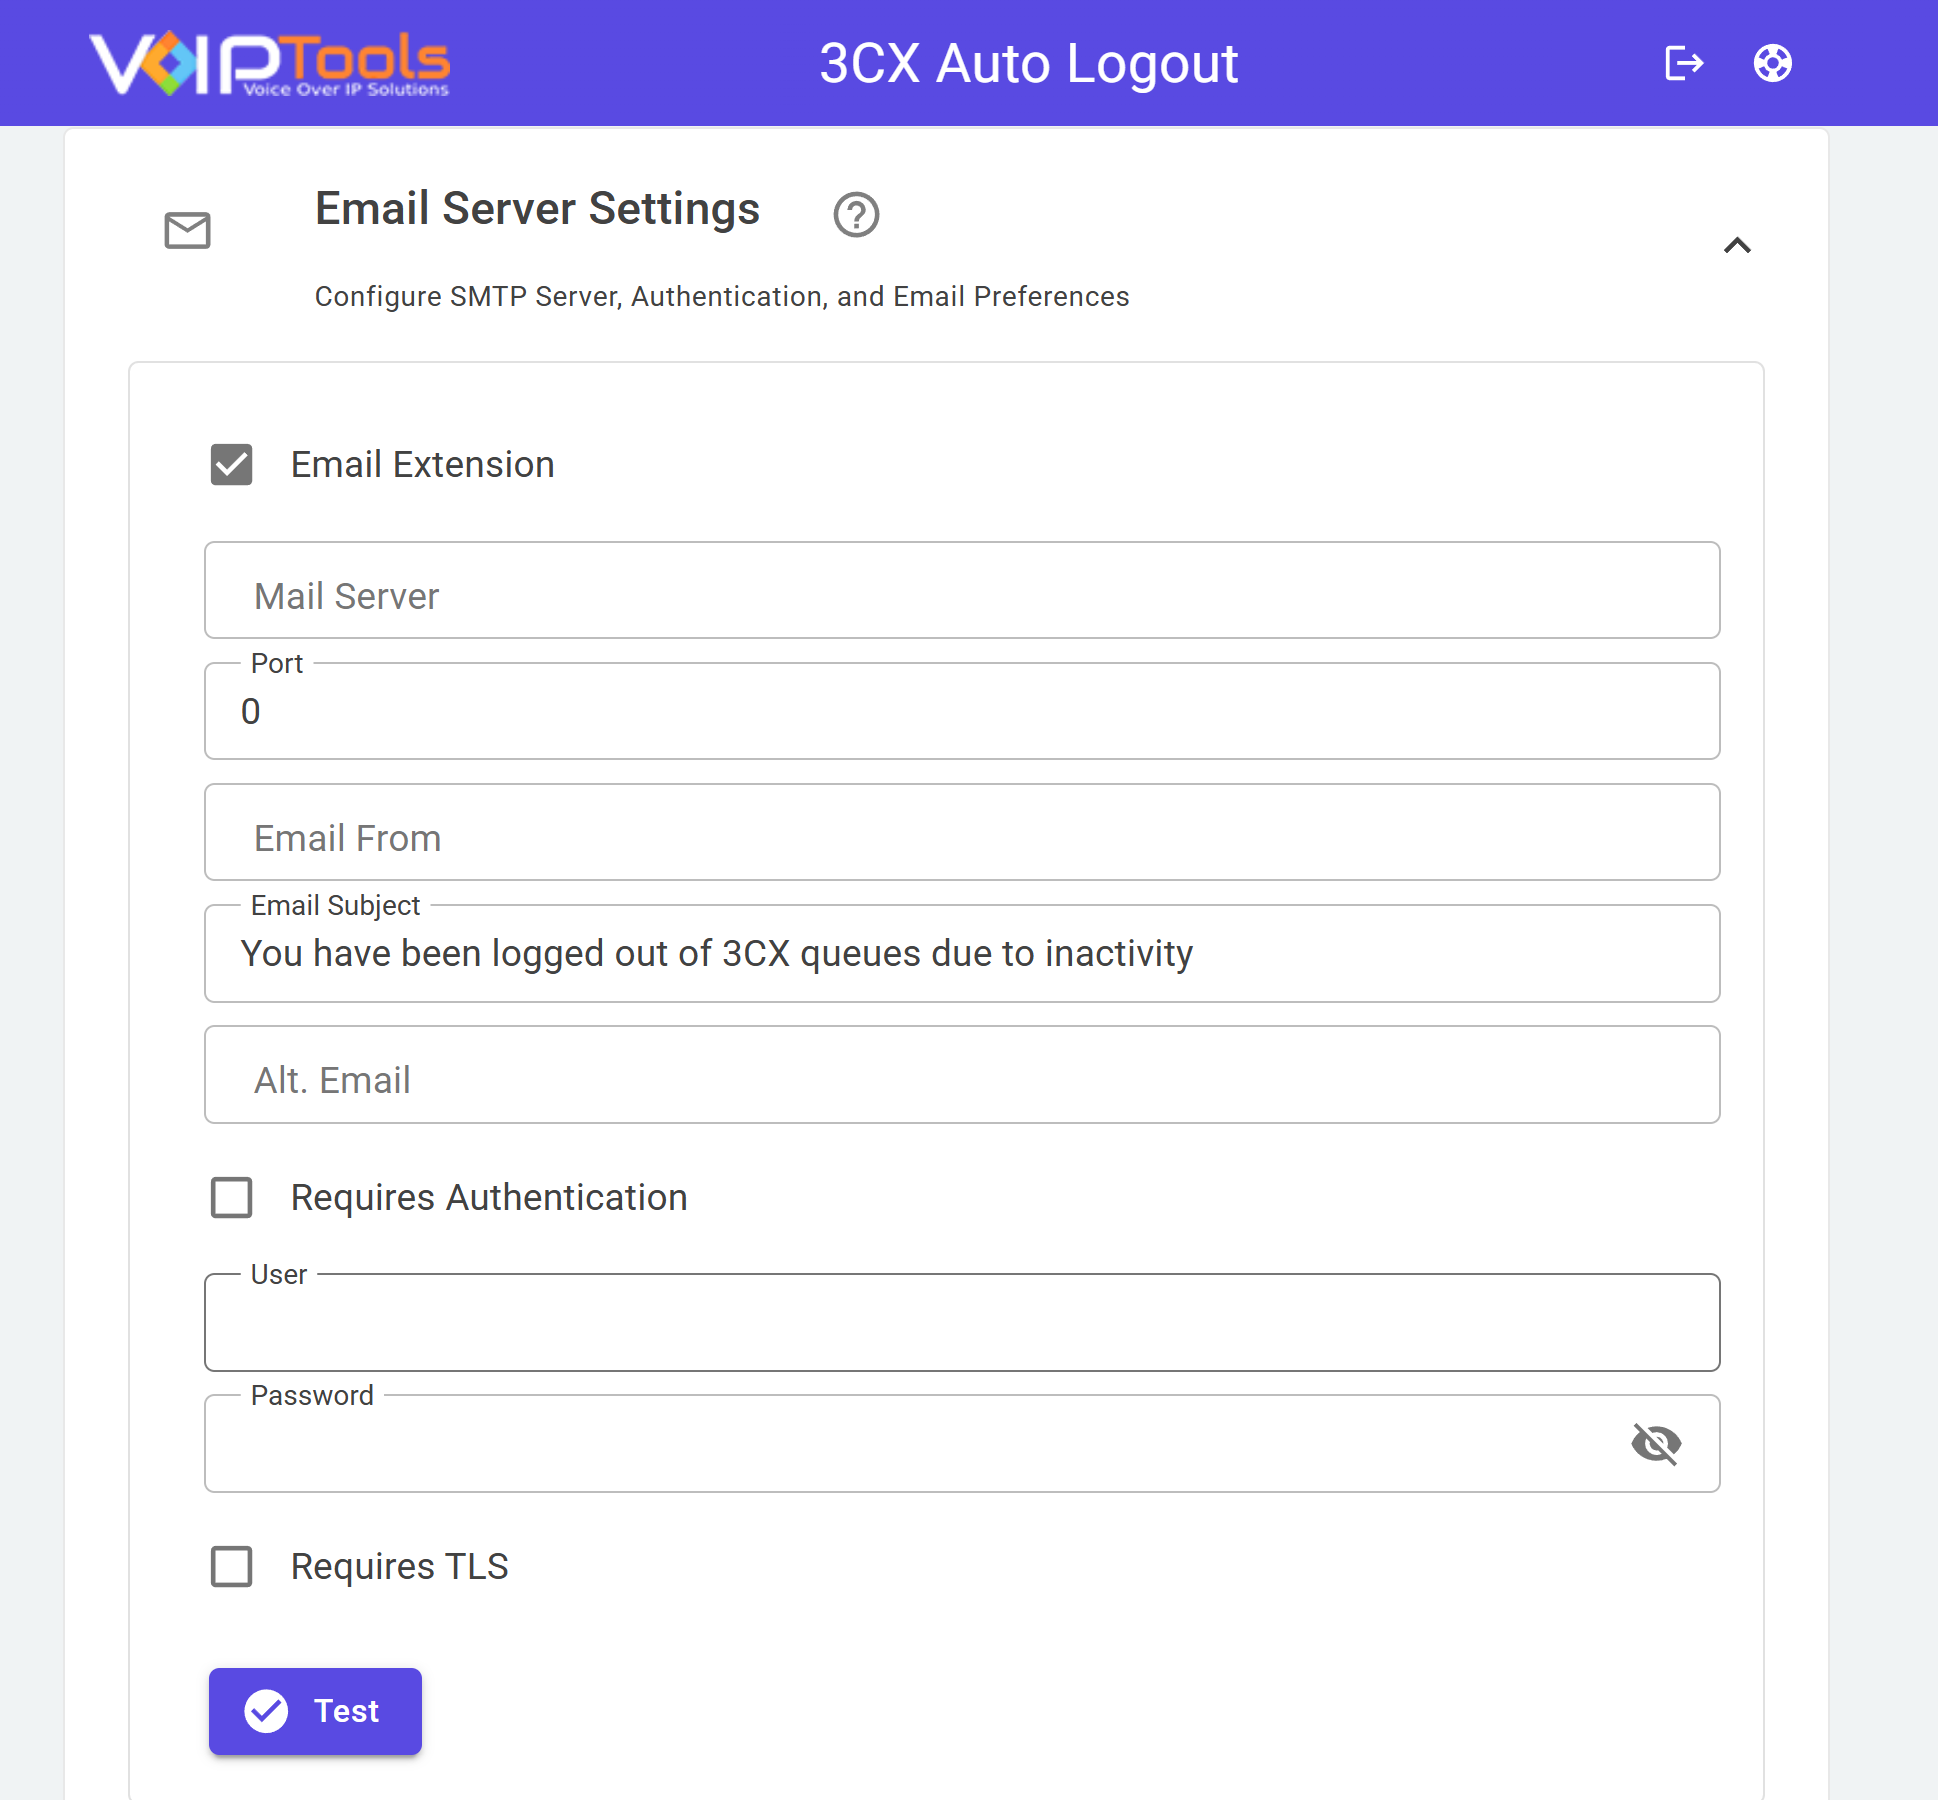
Use Email Server Settings so Auto Logout can email a logged out agent and their manager whenever it takes action.
- Email Extension: Check this box to turn on these email alerts.
- Mail Server: Enter your mail server address, such as smtp.gmail.com or an IP address.
- Port: Enter the port number for your mail server. Most mail servers use port 25. Gmail and Google Workspace use port 587.
- Email From: Enter the address alerts come from, such as noreply@mydomain.com.
- Email Subject: Keep the subject line the app provides, or write your own.
- Alt. Email: Enter a second address to receive a copy of each alert.
- Requires Authentication: Check this box if your mail server needs a login.
- Enter your User name and Password.
- Select the eye icon in the Password field to view what you typed.
- Requires TLS: Check this box if your mail server needs a secure connection. Gmail, Google Workspace, and Microsoft 365 all need this box checked.
- Select Test to send a trial email and confirm your settings work.
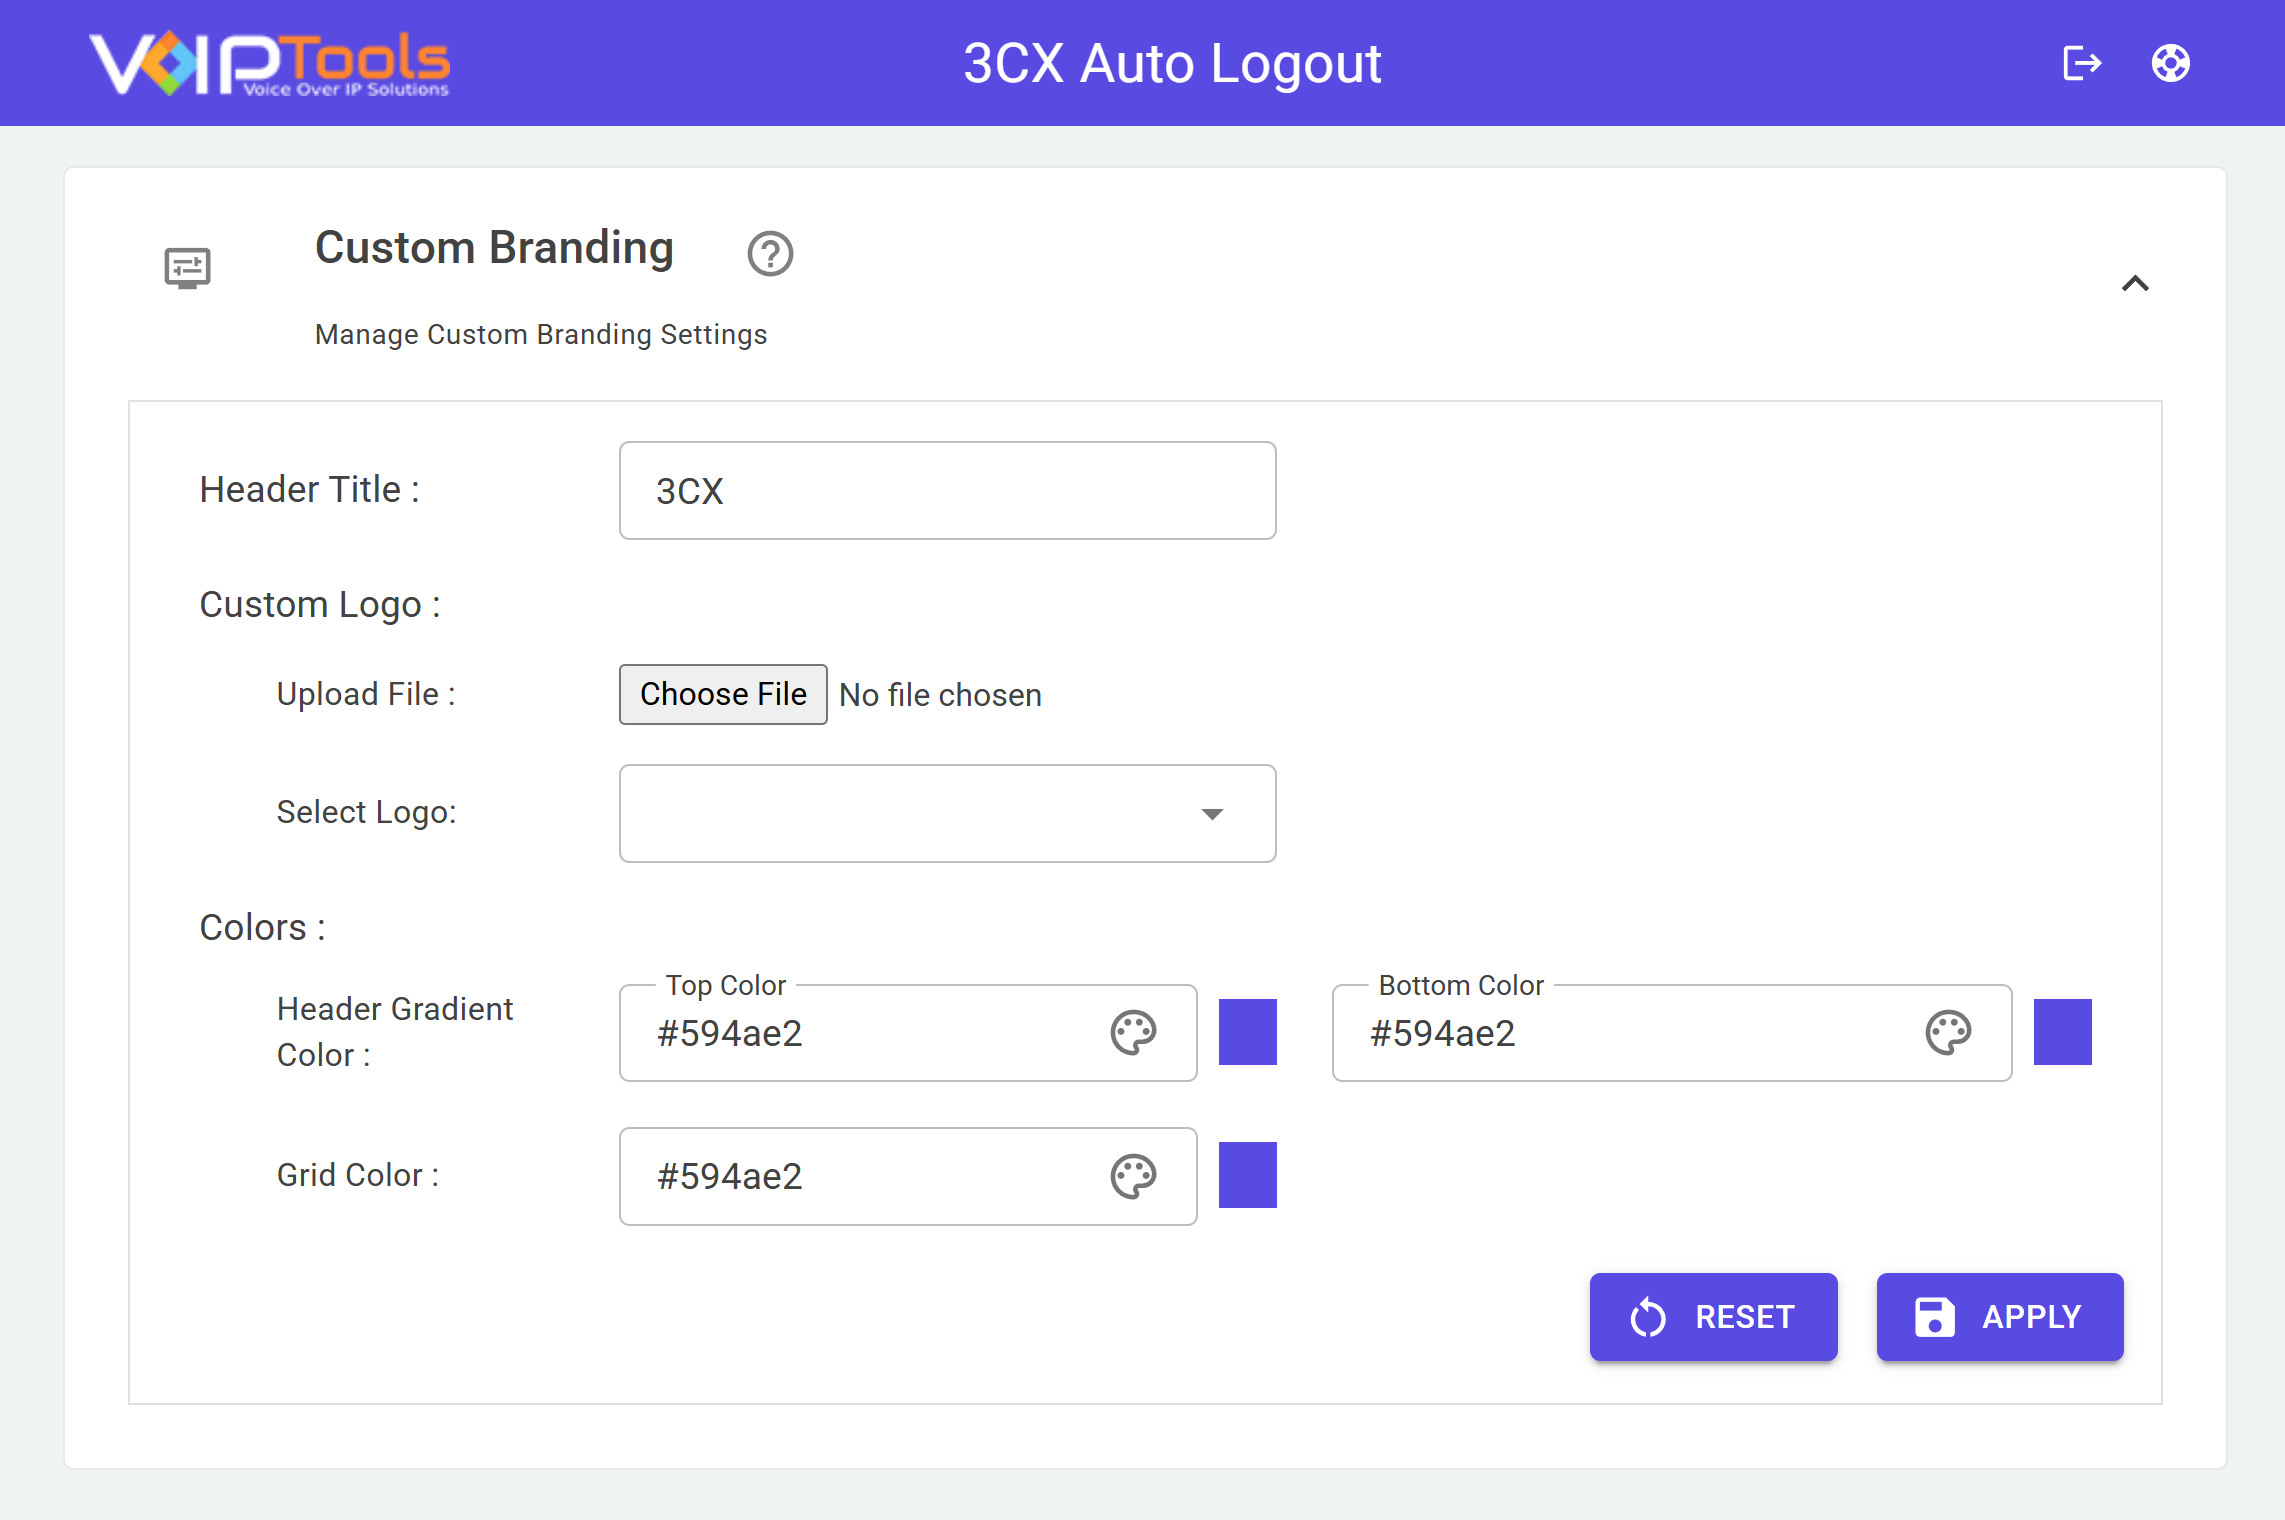
Custom Branding #
Use Custom Branding to set the title, logo, and colors you see across the app.
- Header Title: Enter the text you want to show at the top of the page.
- To add a new logo, select Choose File and pick an image from your computer.
- To use a logo you already uploaded, choose it from the Select Logo list.
- Header Gradient Color: Pick a Top Color and a Bottom Color to set the fade in the header bar.
- Grid Color: Pick a color to set the table backgrounds across the app.
- Select Apply to save your changes.
- Select Reset to undo your changes and return to the last saved settings.