Enhance Emergency Response and Safety with 3CX Emergency Notifier: Take Control of Your Notifications
Take control of emergency communications with 3CX Emergency Notifier. Easily manage alerts, recipients, and delivery methods like email, SMS, and phone calls, while helping responders quickly locate emergencies.
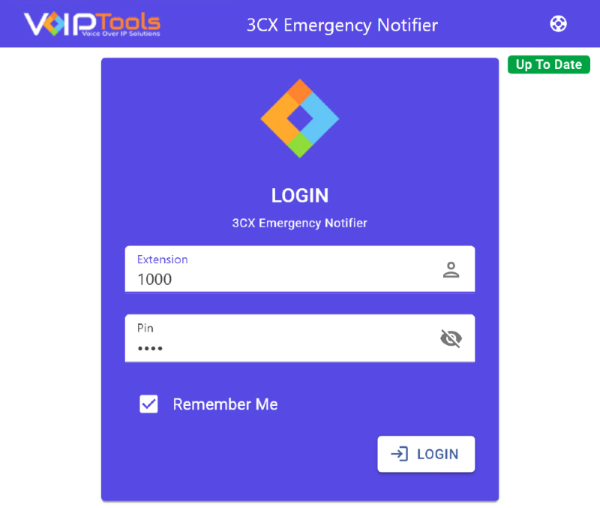
Getting started is simple. Log in using your voicemail PIN or web app password, review your extension details, and run a quick test to ensure everything works. In just minutes, you’ll have a reliable system that notifies the right people when it matters most. 3CX Emergency Notifier provides confidence, clarity, and peace of mind during critical moments.
Quickly notify the right people through email, SMS, or phone calls to ensure fast and reliable communication during critical moments.
REAL-TIME PRECISION
Receive precise location details during emergencies, including floor level, nearby areas, or specific zones, helping responders act faster and more accurately.
SEAMLESS DISPATCH
Guide responders directly to the correct location using accurate mapping and extension data for faster and more effective emergency response.
INSTANT EMERGENCY ALERT
Trigger emergency alerts instantly with a single button press. Activate or deactivate alerts easily while maintaining full control through a simple and user friendly interface.
ENHANCED INSIGHTS
Review detailed event logs to understand what happened, who was notified, and when. These insights help improve preparedness and future response planning.
ONE TIME INSTALLATION
Get up and running quickly with a straightforward installation process. Manage everything from an intuitive web portal designed for ease of use and long term reliability.
Before you begin with the installation steps mentioned in this guide, you need to ensure that your computer meets the minimum requirements mentioned below for installing the 3CX Emergency Notifier.
PREREQUISITE
PURPOSE
3CX Version V20
3CX Emergency Notifier is designed to work seamlessly with this version for enhanced features and performance.
Windows 10 or above / Windows Server 2012 or above
These operating systems provide the necessary environment for the application to run efficiently.
IIS is needed as a web server to host and manage web-based applications and services.
.NET Framework 4.7.2 (Web Installer)
This framework provides essential components for running and developing applications.
VoIPTools Universal Updater
This component is necessary for updates, ensuring the application remains current and functional.
Microsoft SQL Server 2016 or above (Including the free SQL Express edition)
3CX requires Microsoft SQL Server 2016 or later for database management.
Static IP for VoIPTools and 3CX servers
This ensures reliable two-way communication between the 3CX server and the VoIPTools server. Dynamic IP addresses are not supported. For secure communication, HTTPS is recommended and requires a valid FQDN for SSL or TLS verification between the servers.
Port number 5600 opened on your device
Port 5600 is used by 3CX for communication. Opening this port on the firewall allows data to send and receive properly between systems.
NOTE:
Since the add-on ‘3CX Emergency Notifier’ includes a CFD application, you will need to install either Pro or Enterprise version of 3CX
Windows 8 has a much better Text-To-Speech engine compared to Windows 7
When installing SQL Server, we recommend you install it in “Mixed Mode” to include SQL Authentication, and install SQL Management Studio
When installing IIS, be sure to install Basic Authentication, .Net Extensibility, and ASP.Net 4.X
Download the setup application from the VoIPTools website or you can find the download link in the Order Confirmation Email.
INSTALL PREREQUISITES
You must install several prerequisites before installing the 3CX Emergency Notifier. The Advanced Installer identifies and installs these applications automatically. Click here to learn about the required prerequisites.
INSTALL 3CX EMERGENCY NOTIFIER
This guide walks you through installing 3CX Emergency Notifier. Start by extracting the downloaded ZIP file, then run EmergencyNotifierInstaller.exe to begin setup.
CHECK FOR DEFAULT DATA IN DATABASE SERVER
To confirm the installation was successful, log into the database and check that the default data appears in the basic tables.
INSTALLING THE DESKTOP ALERT APPLICATION
In addition to phone, email, and SMS alerts, you can also receive notifications on your desktop.
LOGIN TO THE WEB APPLICATION
You can now log in to the web application using the extension number and the PIN.
Click on the software installer downloaded in Step 1. The installation wizard
will automatically identify the prerequisites and assist you with each
installation required for the 3CX Emergency Notifier. It includes .NET Framework
(Web Installer), SQL Server Express (Web Installer), and SQL Server Management Studio.
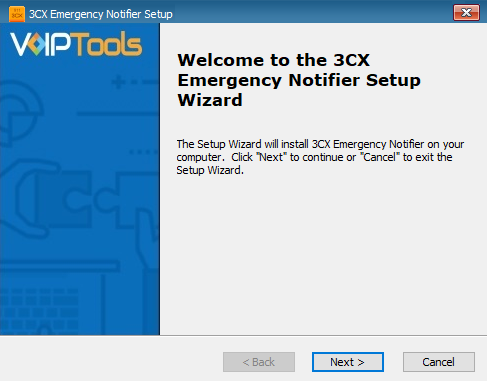
Click the downloaded installer executable to launch the
Prerequisites Setup Wizard and click Next.
Figure 1: Prerequisites Setup Wizard
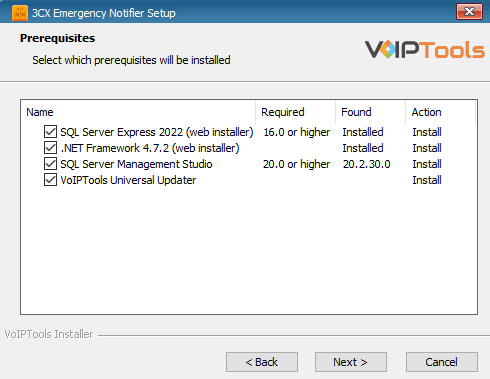
In the Prerequisites window, install all the required
prerequisites identified by the installer, or select/unselect the
applications based on your requirements and click Next
to continue.
Figure 2: Prerequisite Installation Selection
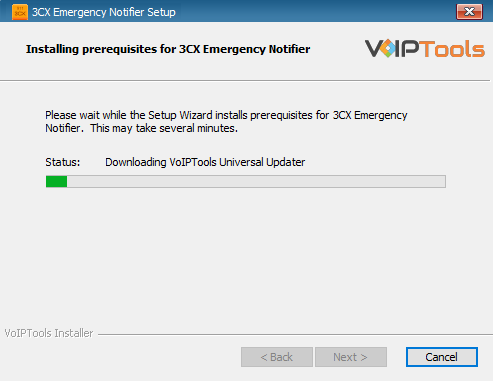
The installer will download and install the selected applications. This may
take several minutes to complete.
Figure 3: Prerequisites Installation in Progress
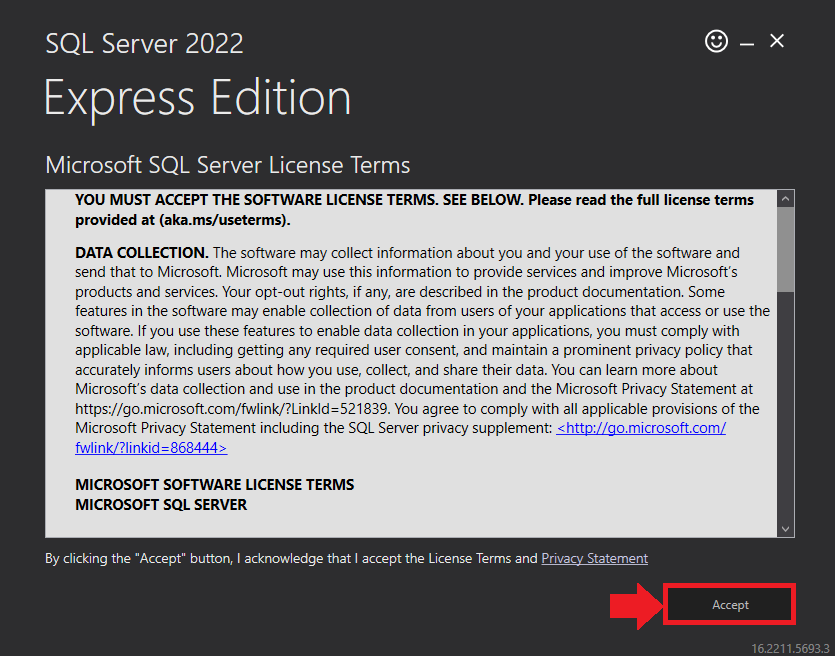
In the Microsoft SQL Server License Terms, click
Accept to acknowledge the license terms and continue.
This page appears if you do not have
SQL Server Express preinstalled on your device.
Figure 4: SQL Server Express – Accept License Terms
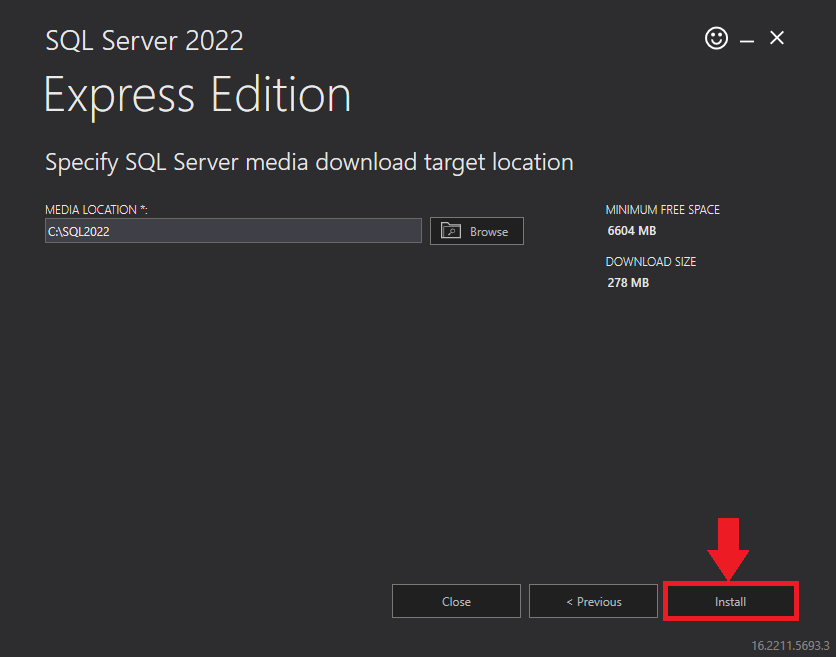
View the SQL Server media target location in the
Media Location field. If required, click
Browse to change the location, then click
Install to begin installation.
Figure 5: SQL Server Express – Target Location
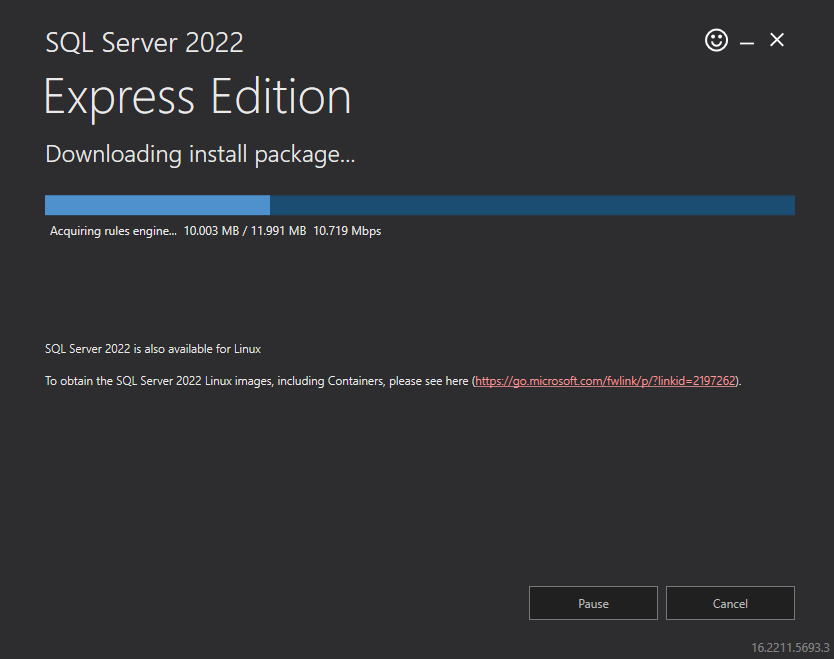
SQL Server installation is in progress. This may take several minutes to complete.
Figure 6: SQL Server Installation in Progress
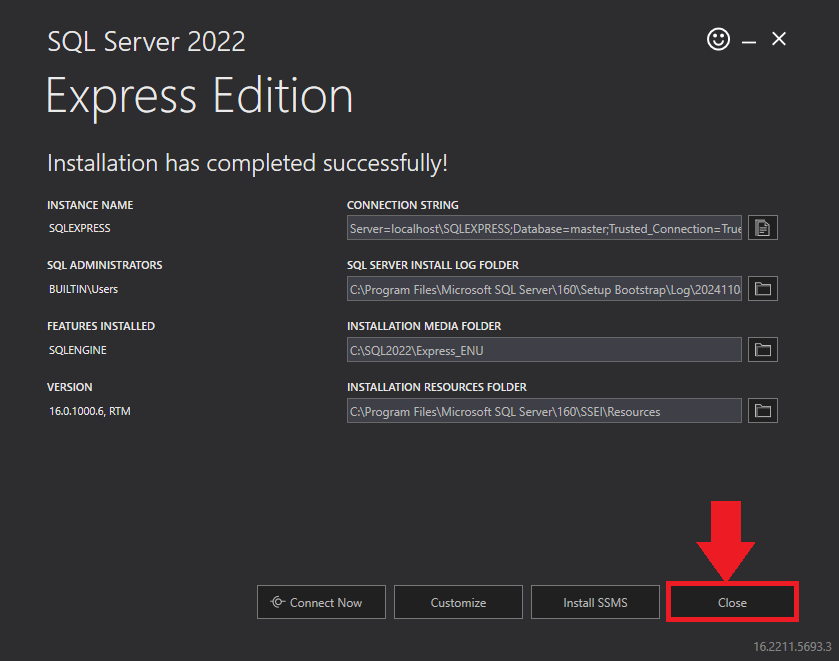
Click the Close button once the prerequisites are installed.
Figure 7: SQL Server Express – Installed Successfully
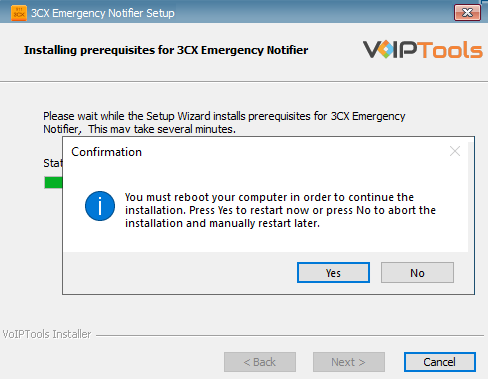
Click Yes in the Confirmation Message Box
to reboot the computer.
In the 3CX Relay Services window, in the Relay Host field, enter the FQDN of your 3CX server.
Enter 8801 in the Relay Port field.
Enter the JWT public key you took from VoIPTools Relay services in the Public Key text area. Click here to know more.
Figure 11: Configure Relay services
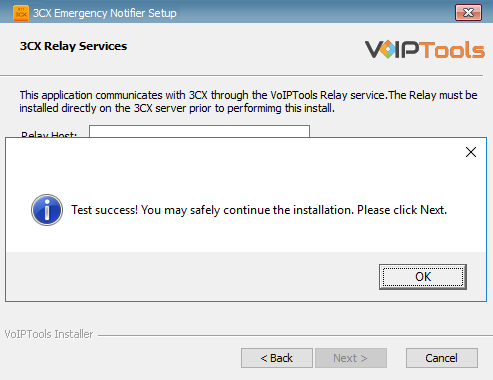
Click the Test Relay Settings to confirm that the ‘3CX Emergency Notifier’ can communicate with the Relay services running on the 3CX server.
If the ‘3CX Emergency Notifier’ is successfully able to communicate with the Relay services that run on the 3CX server, a Success message box appears. Click OK. If the test fails, you will not be able to continue until communication with the relay is established.
Figure 12: Test Relay Success
NOTE:
You must set the Relay Port to 8801.
If the Relay test fails, you cannot continue the installation until you establish communication with the Relay. If your Relay test failed then confirm the following conditions,
Confirm you have the correct firewall port open (default TCP 8801) on the 3CX server and the firewall protecting the 3CX server.
Confirm that you have entered the correct FQDN for the 3CX server.
Confirm that the 3CX Emergency Notifier and Relay use the same port and protocol.
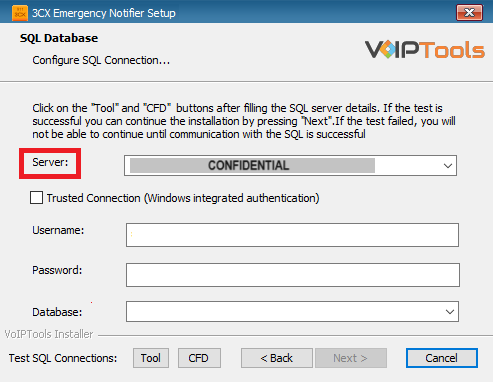
When configuring the 3CX Emergency Notifier, select an existing Microsoft SQL Server instance in your environment. The database server can be a remote SQL Server, or a local instance running on the VoIPTools server.
You can set up the SQL database using SQL Authentication or Windows Integrated Authentication.
If using the free SQL Express Edition, the default SQL Instance name is SQLExpress.
Figure 13: Configure Database – Server Field
NOTE:
If you want to use ‘SQL Authentication’, then install SQL Server in ‘Mixed‘ mode.
If SQL Server is installed on a server other than the server where 3CX Exporter is installed, you will need to configure SQL Server to allow remote connections.
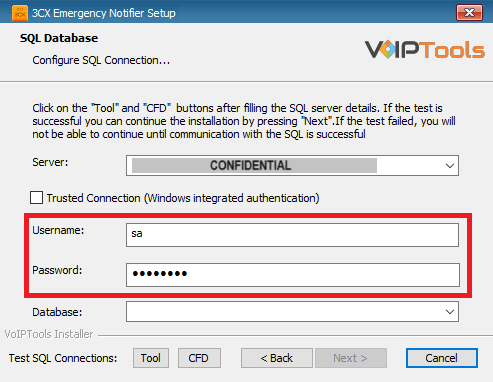
Enter your credentials in the Username and Password fields.
To use Windows Integrated Authentication check the Trusted Connection (Windows integrated authentication) checkbox.
The VoIPTools installer will create a local Windows user name as “VoIPToys” and give you sufficient rights to this user to create/update the SQL database.
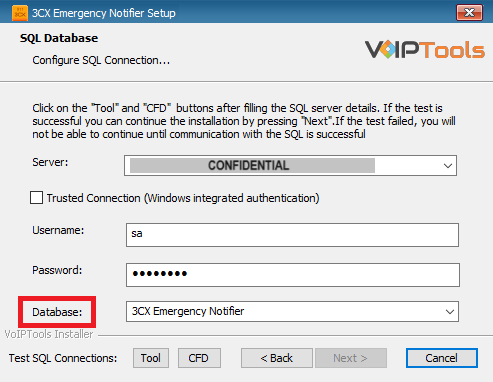
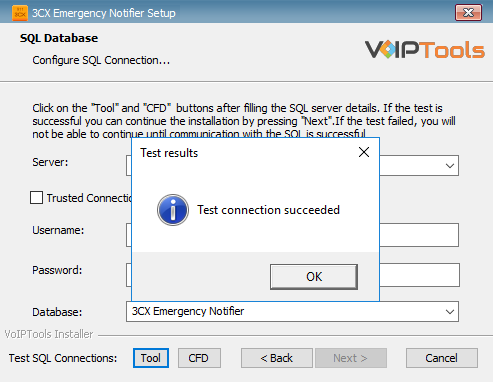
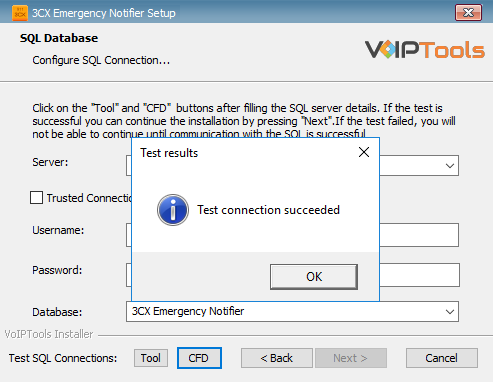
In the Test SQL Connection section, click the Tool button to test the connection.
Click the Next button which gets enabled when the database connection is successful.
NOTE:
We encourage you to use SQL Authentication rather than Windows authentication. Many of our tools leverage a Call Flow Designer (CFD) application running on the 3CX. Frequently our CFD applications require access to a SQL database. If the 3CX server and the database server are not in an Active Directory domain, Windows authentication will fail. To use SQL authentication, your SQL Server must be configured to run in “Mixed Mode”. If you installed SQL Server with one of our tools, we configure SQL in “Mixed Mode”.
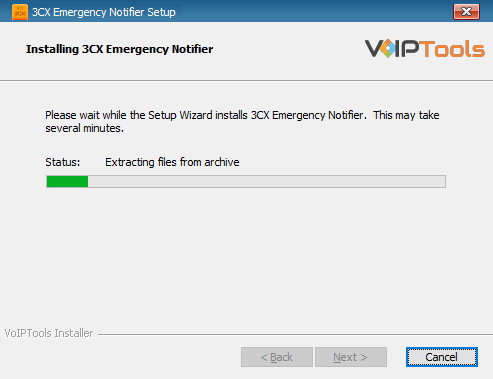
The application installation may take several minutes to complete.
Figure 19: Installing 3CX Emergency Notifier
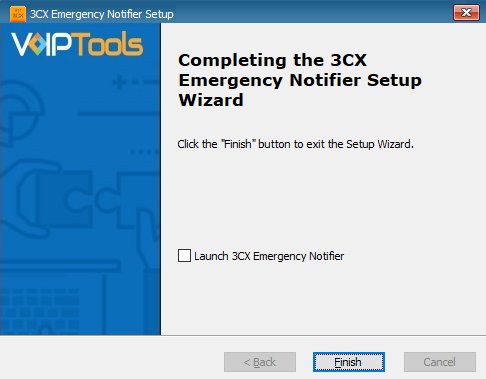
Check the Launch 3CX Emergency Notifier checkbox and click Finish when the installation is complete.
Figure 20: Installation Completed Page
Step 8: Check for default data in the database server #
To verify if you have successfully installed the 3CX Emergency Notifier application, log into the database and check for default data in the basic tables.
Log into the SQL database.
In the Object Explorer accordion, expand Databases and then expand Tables
From the tables list
Open dbo.EmergencyNumbers table to see the emergency contact number “911”
Open dbo.Messages table to see message type for the emergency number as Email, SMS and Email Subject.
Open dbo.NotificationSettings table to see the emergency contact number “911”
Open dbo.Settings table to see the default database settings.
Step 9: Installing the Desktop Alert Application #
In addition to sending emergency notifications by phone, email, and SMS text, you can also receive notifications on your desktop.
The following instructions outline how to install the desktop notification application:
NOTE:
Before you launch the application, you must ensure Microsoft .Net Framework 4.6.1 (x86 and x64) is installed in your device. If the above component is already installed, you can launch the application. Otherwise, follow the instructions as outlined below to install the component.
The Desktop Notifications application receives events and client software updates from the VoIPTools server. You will need to configure your public facing and Windows firewalls to open ports 5600 TCP and 5610 TCP.
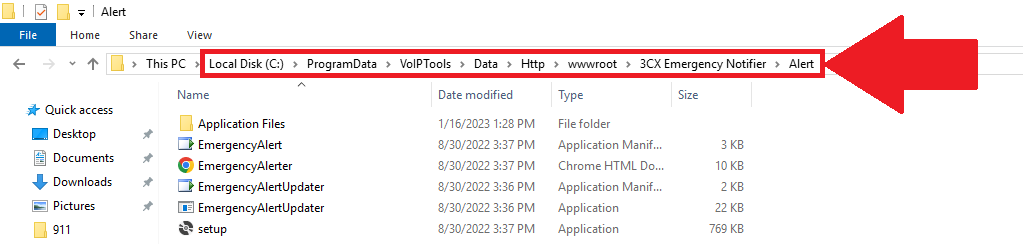
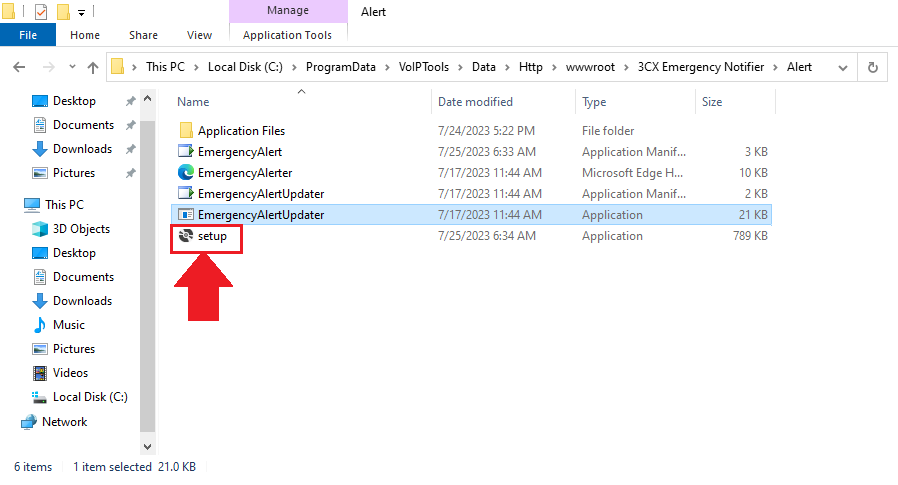
In the File Explorer, navigate to C:\\ProgramData\VoIPTools\Data\Http\wwwroot\3CX Emergency Notifier\Alert
Figure 21: Navigate to ‘3CX Emergency Notifier Alert’
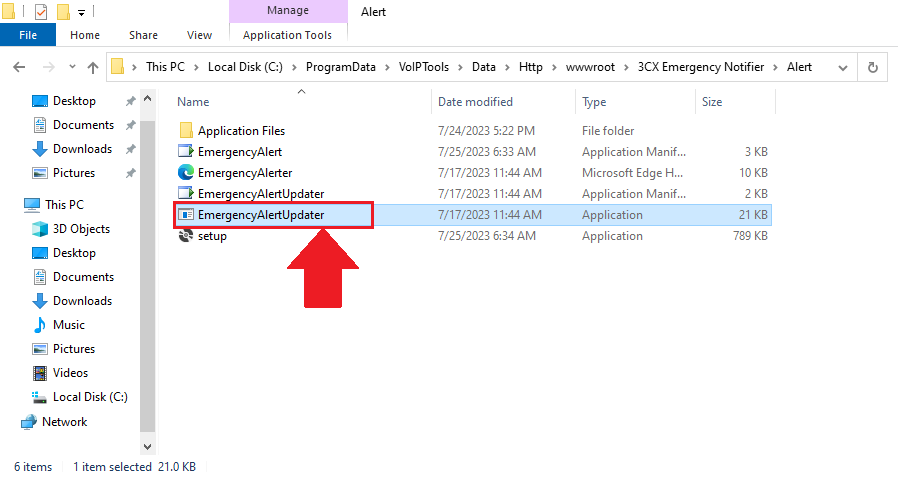
Double-click EmergencyAlertUpdater to display Emergency Alert URLUpdate popup.
Figure 22: Emergency Notifier Setup
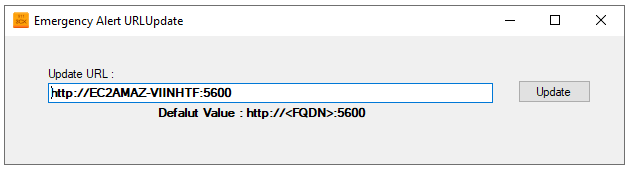
In the Emergency Alert URLUpdate popup, enter your URL in the format http://localhost:5600/Alert/EmergencyAlerter.htm and click Update.
Figure 23: Update the URL
NOTE:
It is important that your FQDN resolve to an IP address that is accessible by your client workstations. If, for example, your VoIPTools server is hosted in the cloud, the FQDN should resolve to the public IP address of your VoIPTools server. It may be necessary to update your DNS, or you can update the workstation’s Host file to map the FQDN to an accessible IP address.
To access the folder, ‘3CX Emergency Notifier’ ensure that you have full admin rights.
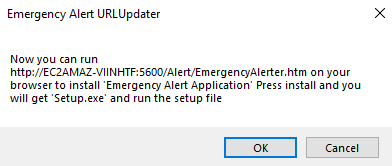
In the Emergency Alert Application Update URL popup, click OK.
Figure 24: URL to Install Prerequisites
Double-click the Setup application.
Figure 25: Setup Application
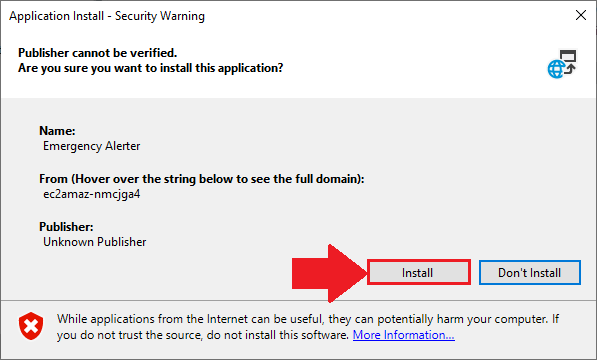
In the Application Install screen, click the Install button to start the installation.
Figure 26: Install Button
The application starts to install. This may take a few minutes to install.
Figure 27: Installation in Progress
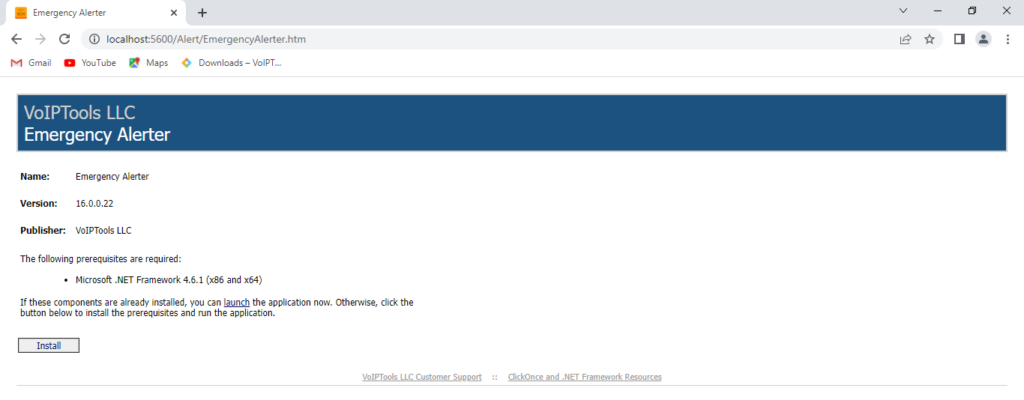
Open the web browser and in the address bar enter the following URL,
http://localhost:5600/Alert/EmergencyAlerter.htm
NOTE:
Replace with your local host value in the place of URL mentioned above.
The following web page appears:
Figure 28: Install Prerequisites
Click Install to install the prerequisites.
On the taskbar and in the notification area, click the Show Hidden Icons icon to display notification area overflow
Figure 29: Show Hidden Icons: Notification Area Overflow
In the notification area overflow, right-click on the Emergency Alerts icon and in the right click menu, click Preferences.
Figure 30: Notification Area Overflow: Emergency Alerts – Preferences
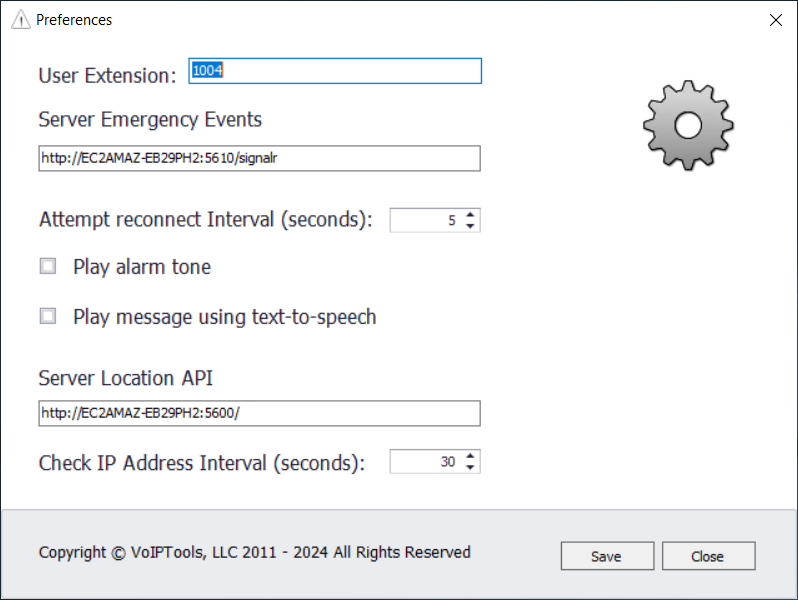
In the Preferences screen and in the Server URL field, enter the URL:
NOTE:
In the URL mentioned above, replace it with your FQDN value.
You must enter /signalr at the end of the URL.
Figure 31: Server URL
Click Save to save the url and then click Close to close the Preferences screen.
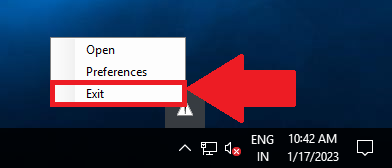
In the notification area overflow, right-click on the Emergency Alertsicon and in the right click menu, click Exit to exit from the Emergency Alerts.
Figure 32: Notification Area Overflow: Emergency Alerts – Exit
On the desktop, click the 3CX Emergency Notifier icon to launch the application.
NOTE:
Emergency Notifier gives you an desktop alert whenever you recieve a call to the emergency number. The ALERT popup has the following details,


NOTE:


 button to download your application.
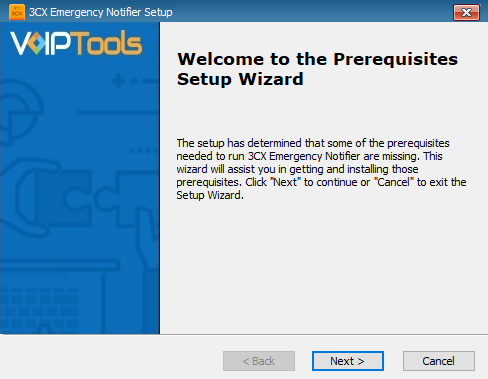


 icon to display notification area overflow
 Emergency Alerts icon and in the right click menu, click Preferences.
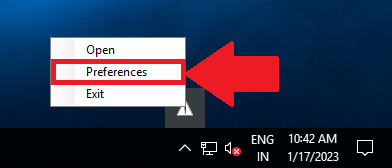
 icon to launch the application.