Simplify workplace communication with 3CX Audio Scheduler, the smart way to automate audio announcements across your phones and paging system. Schedule alarms, tones, and announcements for breaks, shift changes, and critical alerts, and let the system handle the rest.
Customize audio for emergencies, safety notifications, or daily operations to keep your team informed and responsive. Ideal for schools, airports, factories, and shift-based organizations, 3CX Audio Scheduler helps you stay organized, efficient, and always on time.
Why 3CX Audio Scheduler?
SCHEDULE NOTIFICATIONS
Improve communication by scheduling tones or alarms to play automatically on your paging system and phones. Use the built-in scheduling features to deliver custom alerts on time and support workplace productivity.
SIMPLE CONFIGURATION
Use the web portal to schedule and manage paging notifications through a clear, easy-to-use interface. The portal provides straightforward controls that help you configure, coordinate, and customize notifications to meet your requirements.
CUSTOM AUDIO
Upload custom audio files for announcements or notifications. Using personalized audio helps distinguish messages and ensures they are easily recognized by listeners.
AUTOMATE NOTIFICATIONS
Use the scheduling features to plan and deliver notifications or messages as needed. This helps streamline communication and support efficient operations.
IIS is needed as a web server to host and manage web-based applications and services.
.NET Framework 4.7.2 (Web Installer)
This framework provides essential components for running and developing applications.
VoIPTools Universal Updater
This component is necessary for updates, ensuring the application remains current and functional.
Microsoft SQL Server 2016 or above (Including the free SQL Express edition)
3CX requires Microsoft SQL Server 2016 or later for database management.
Static IP for VoIPTools and 3CX servers
This is to ensure proper two-way communication, both the 3CX server (Relay) and the VoIPTools server. Dynamically assigned IP addresses are not supported. Additionally, it is recommended to use HTTPS for secure communication, which requires a FQDN for SSL/TLS certificate validation between the VoIPTools server and the Relay.
Port number 5950 opened on your device
Port 5950 is a specific network port used by 3CX for communication purposes. Opening this port on the device’s firewall allows incoming and outgoing traffic to pass through, enabling the 3CX software to send and receive data over the network effectively.
NOTE:
When installing IIS, be sure to install Basic Authentication, .Net Extensibility, and ASP.Net 4.X
There are several prerequisites that must be installed prior to installing the 3CX Audio Scheduler. These prerequisites include Microsoft Internet Information Server (IIS) and Microsoft SQL Server
INSTALL PREREQUISITES
You must install several prerequisites before installing the 3CX On Call Manager. The Advanced Installer identifies and installs these applications automatically.
INSTALL 3CX AUDIO SCHEDULER
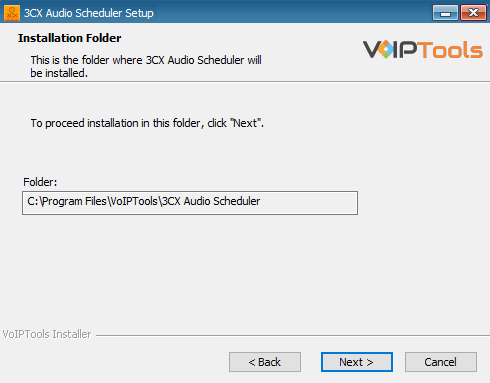
This User Guide contains step-by-step instructions to successfully install 3CX Audio Scheduler. Begin by extracting the installer from the downloaded zip file (Step 1 above), then run the setup program named AudioSchedulerInstaller.exe
REGISTER YOUR SOFTWARE
You must register your license key to activate 3CX Audio Scheduler. Your license key is included in your order confirmation email and can also be found in your order history on our website.
Click on the software installer downloaded in Step 1. The installation wizard will automatically identify the prerequisites and assist you with each installation required to 3CX Power Dialer. It includes .NET Framework (Web Installer), SQL Server Express (Web Installer), and SQL Server Management Studio.
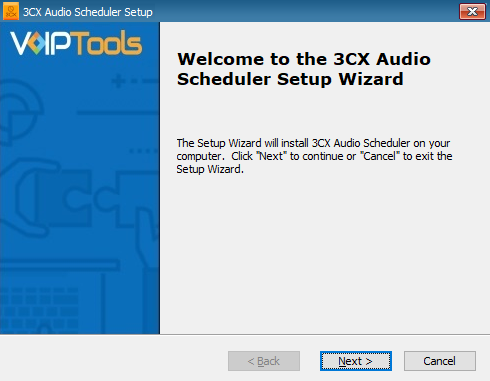
Click the downloaded installer executable to launch the Prerequisites Setup Wizard and click Next.
Figure 1: Prerequisites setup wizard
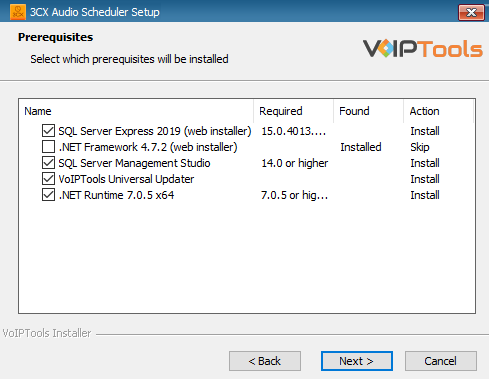
In the Prerequisites window, install all the required prerequisites identified by the installer, or select/ unselect the applications based on your requirements and click Next to continue.
Figure 2: Select prerequisites
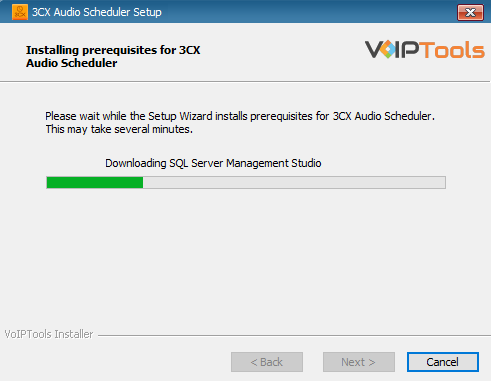
The Advanced Installer installs the required prerequisites. This may take several minutes to complete.
Figure 3: Prerequisites Installation in Process
NOTE:
The installer will identify any prerequisites needed. It is recommended that you allow the installer to automatically install and configure the required prerequisites. Once all the prerequisites are installed, you can continue with the tool install.
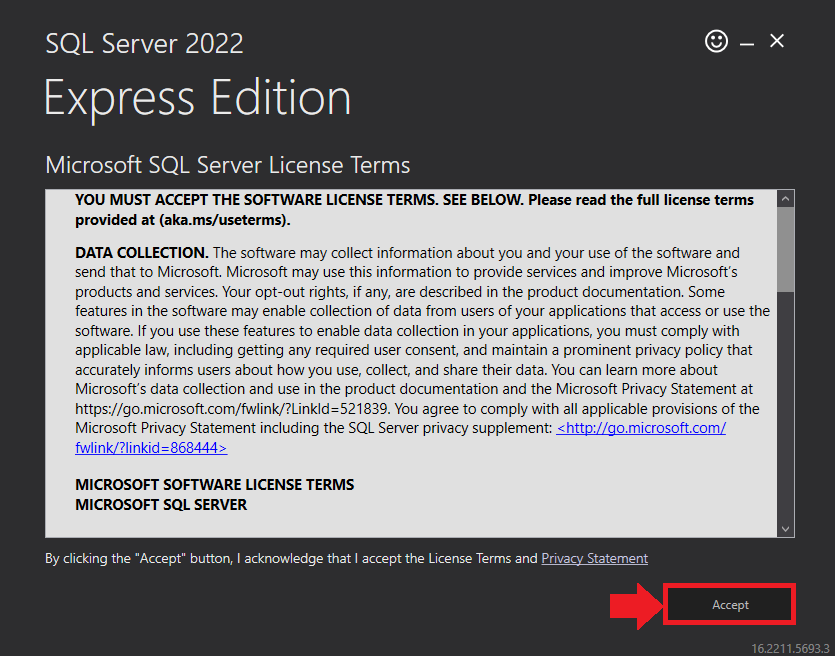
In the Microsoft SQL Server License Terms click the Accept button to acknowledge the license terms and continue.
This page appears if you do not have SQL Server Express preinstalled in your device.
Figure 4: SQL Server Express: Accept License Terms
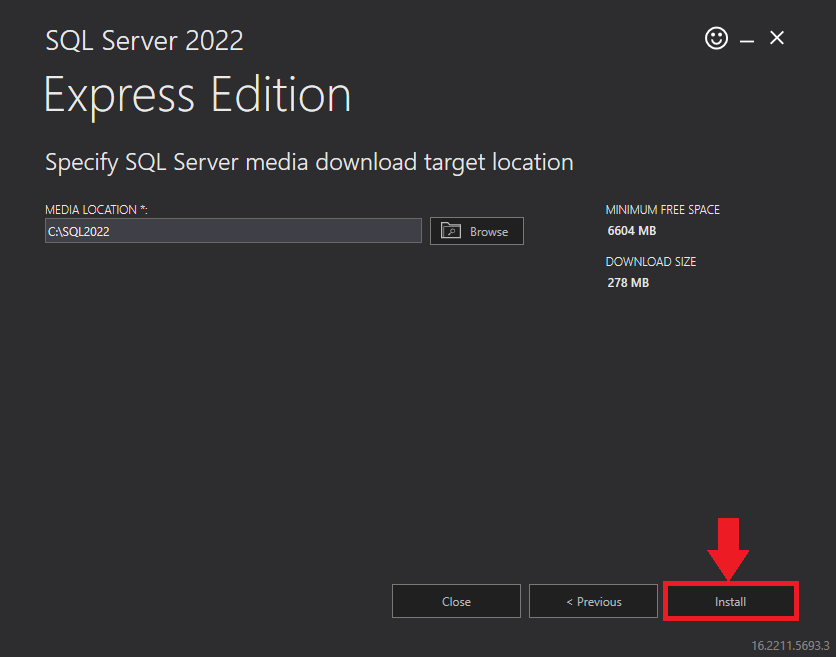
View the SQL Server Media target location in the Media Location field. If required, you can click the Browse button to change the location. Click Install to begin the installation of SQL Server Express.
Figure 5: SQL Server Express: Target Location
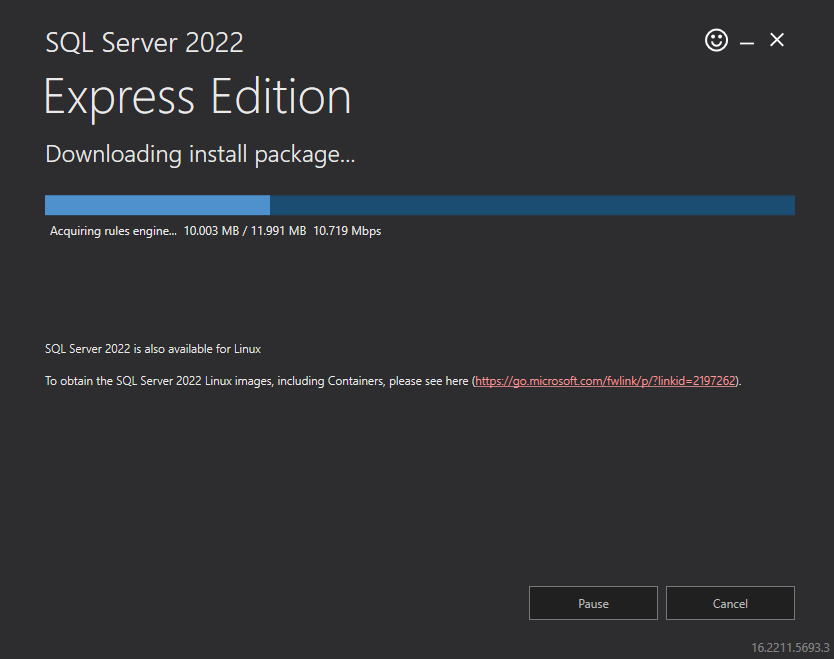
SQL server installation is in progress. This may take several minutes to complete.
Figure 6: SQL Server Installation In Progress
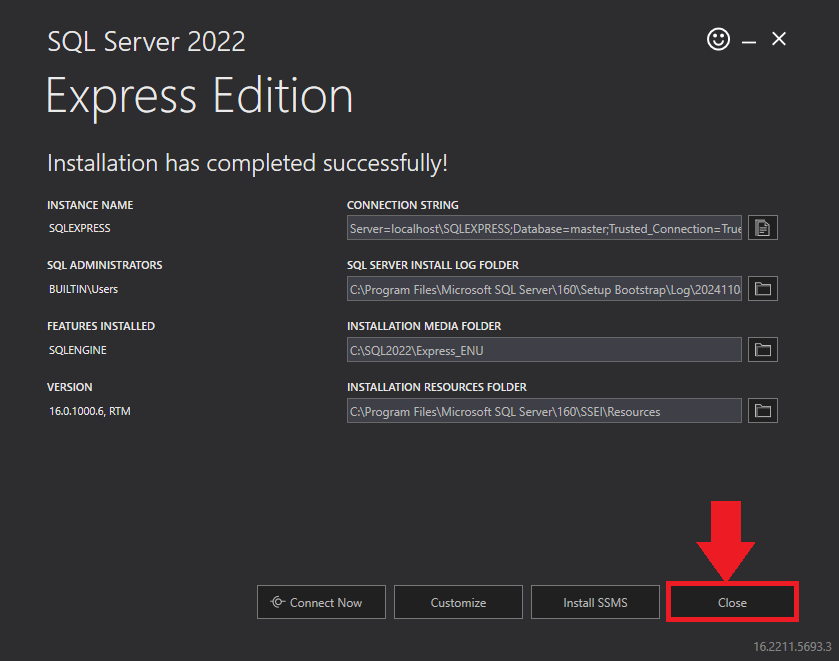
Click the Close button once the prerequisites are installed.
Figure 7: SQL Server Express: Installed Successfully
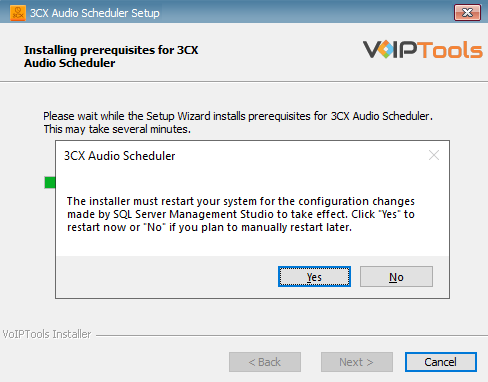
Click Yes in the Confirmation Message Box to reboot the computer.
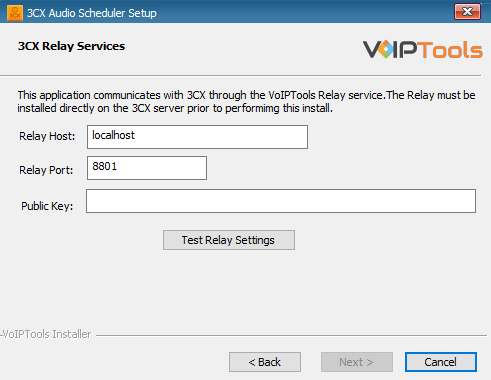
In the 3CX Relay Services window, in the Relay Host field, enter the FQDN of your 3CX server.
NOTE:
Do not include https:// to the Relay host data.
Enter 8801 in the Relay Port field.
Enter the public key you copied from VoIPTools Relay services in the Public Key text area.
Figure 12: Windows Installer: Relay Settings
Click the Test Relay Settings to confirm 3CX Audio Scheduler can communicate with the Relay services running on the 3CX server.
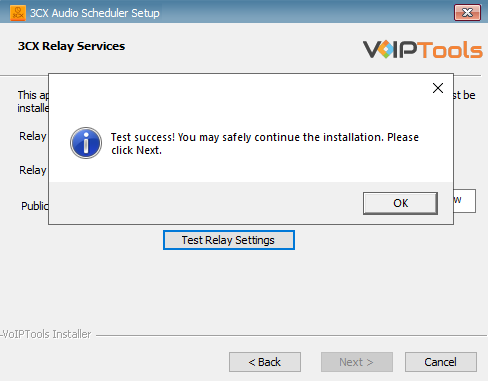
If the 3CX Audio Scheduler is successfully able to communicate with the Relay services that run on the 3CX server, a Success message box appears. Click OK. If the test fails, you will not be able to continue until communication with the relay is established.
Click Next to continue with the installation.
Figure13: Test Relay Success
NOTE:
You must set the Relay Port to 8801.
If the Relay test fails, you cannot continue the installation until you establish communication with the Relay. If the test was unsuccessful:
Confirm you have the correct firewall port open (default TCP 8801) on the 3CX server and the firewall protecting the 3CX server.
Confirm that you have entered the correct FQDN for the 3CX server.
Confirm that the 3CX Power Dialer and Relay use the same port and protocol.
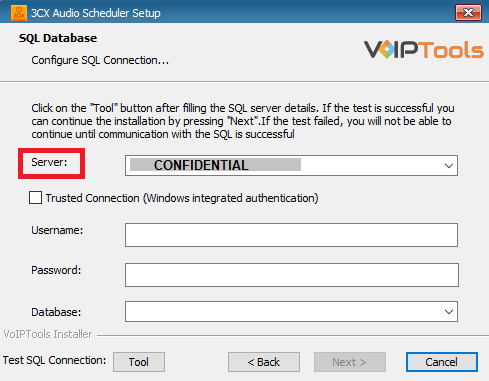
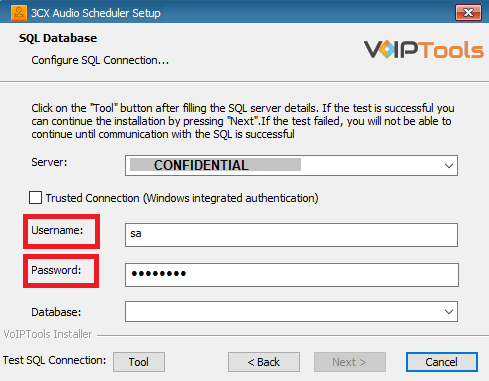
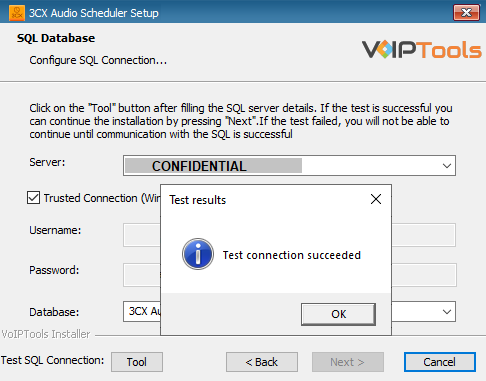
When configuring the 3CX Audio Scheduler, select an existing Microsoft SQL Server instance in your environment. The database server can be a remote SQL Server, or a local instance running on the VoIPTools server.
You can set up the SQL database using SQL Authentication or Windows Integrated Authentication.
If using the free SQL Express Edition, the default SQL Instance name is SQLExpress.
Figure 14: Configure Database – Server Field
NOTE:
If you want to use ‘SQL Authentication’, then install SQL Server in ‘Mixed‘ mode.
If SQL Server is installed on a server other than the server where 3CX Exporter is installed, you will need to configure SQL Server to allow remote connections.
Enter your credentials in the Username and Password fields.
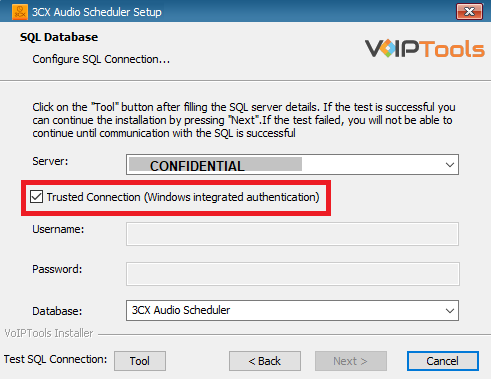
To use Windows Integrated Authentication check the Trusted Connection (Windows integrated authentication) checkbox.
The VoIPTools installer will create a local Windows user name as “VoIPToys” and give you sufficient rights to this user to create/update the SQL database.
Figure 18: Trusted Connection Checkbox
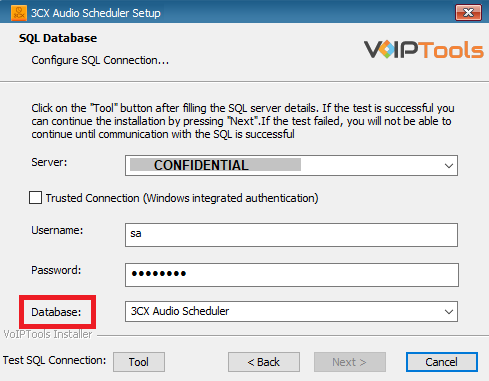
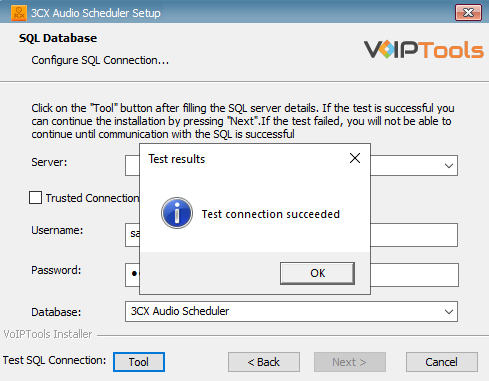
In the Test SQL Connection section, click the Tool button to test the connection.
Click the Next button which gets enabled when the database connection is successful.
Figure 19: Trusted Connection Test Results Message Box
NOTE:
We encourage you to use SQL Authentication rather than Windows authentication. Many of our tools leverage a Call Flow Designer (CFD) application running on the 3CX. Frequently our CFD applications require access to a SQL database. If the 3CX server and the database server are not in an Active Directory domain, Windows authentication will fail. To use SQL authentication, your SQL Server must be configured to run in “Mixed Mode”. If you installed SQL Server with one of our tools, we configure SQL in “Mixed Mode”.
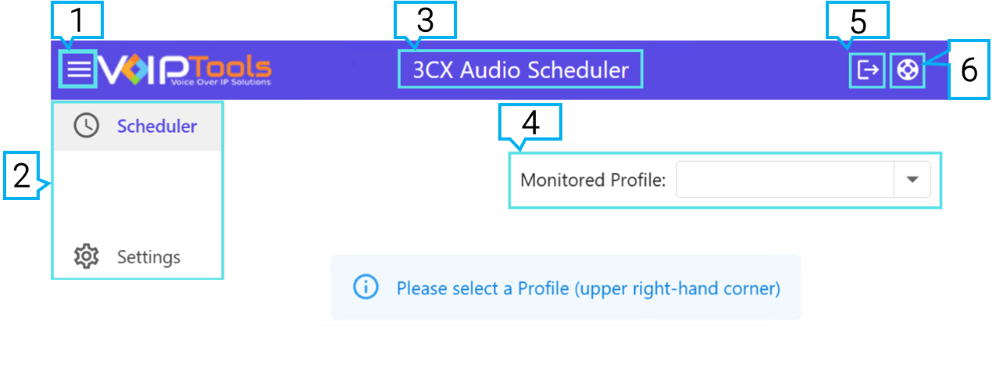
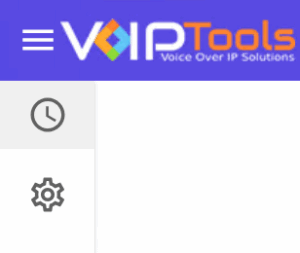
The Left Side Panel consists of all the menus of the web application. You can minimize the Left Side Panel to enlarge your main content.
Figure 25: Left Side Panel – Compact View
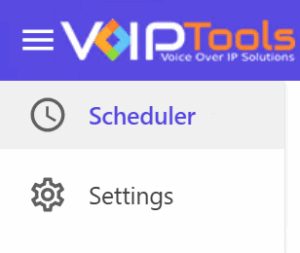
Figure 26: Left Side Panel – Expanded View
The left side panel consists of the following menus,
Scheduler menu
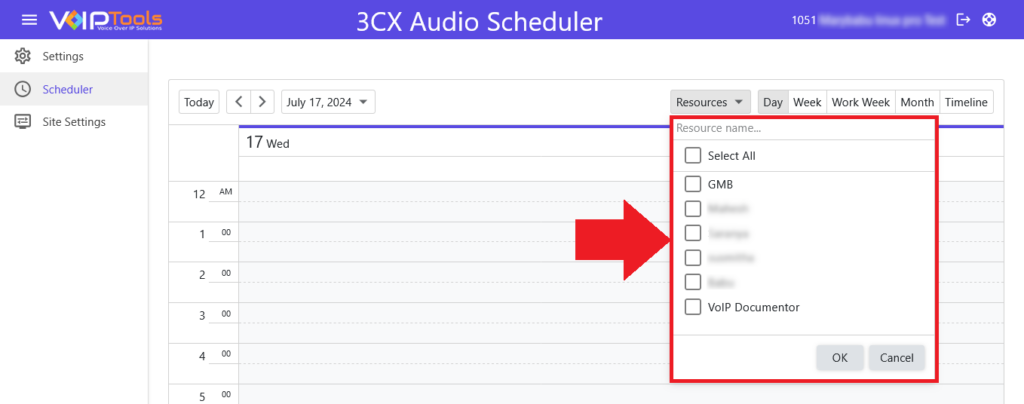
The Scheduler menu is the main workspace for managing scheduled audio. It allows you to create, edit, and delete schedules, view entries by date, select target devices or groups, configure one-time or recurring schedules , adjust audio playback speed and change schedule views.
Settings menu
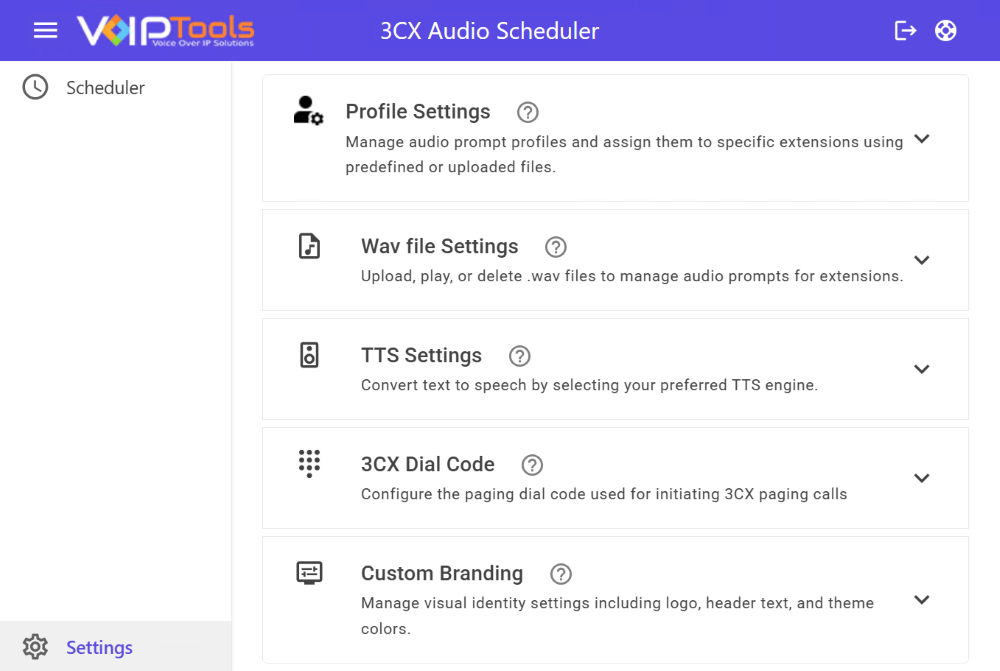
The Settings menu is used to configure core application options and is organized into: Profile Settings, WAV File Settings, TTS Settings, 3CX Dial Code, and Custom Branding.
The Settings menu is used to configure core application options and includes the following sections: Profile Settings, WAV File Settings, TTS Settings, 3CX Dial Code, and Custom Branding. From these sections, you can manage audio profiles and assignments, upload and maintain WAV files, generate text-to-speech audio, configure the paging dial code for 3CX calls, and customize the application’s visual appearance.
Figure 27: Settings Menu – Overview
Profile Settings
Manage audio profiles and assign predefined or uploaded audio to extensions.
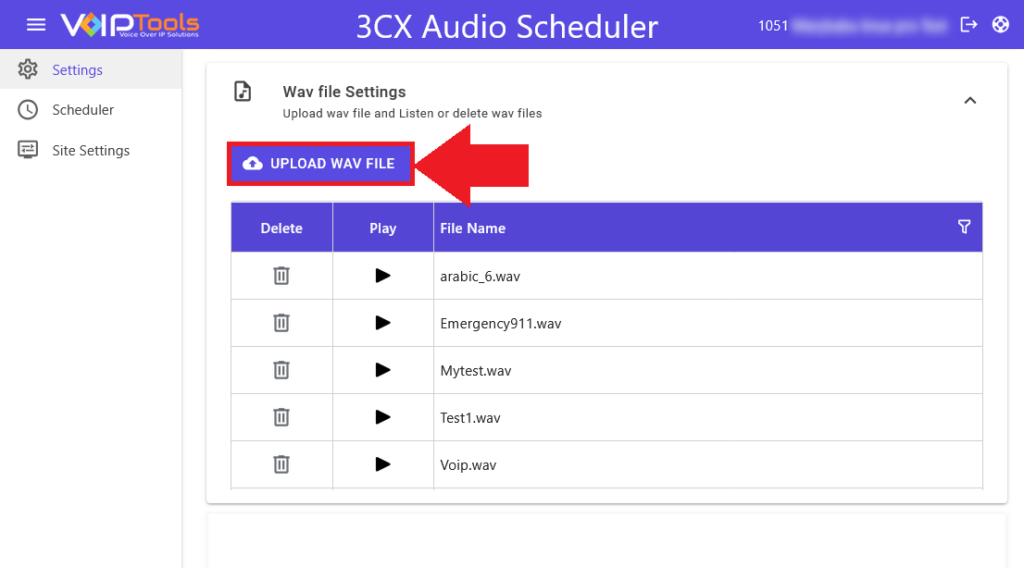
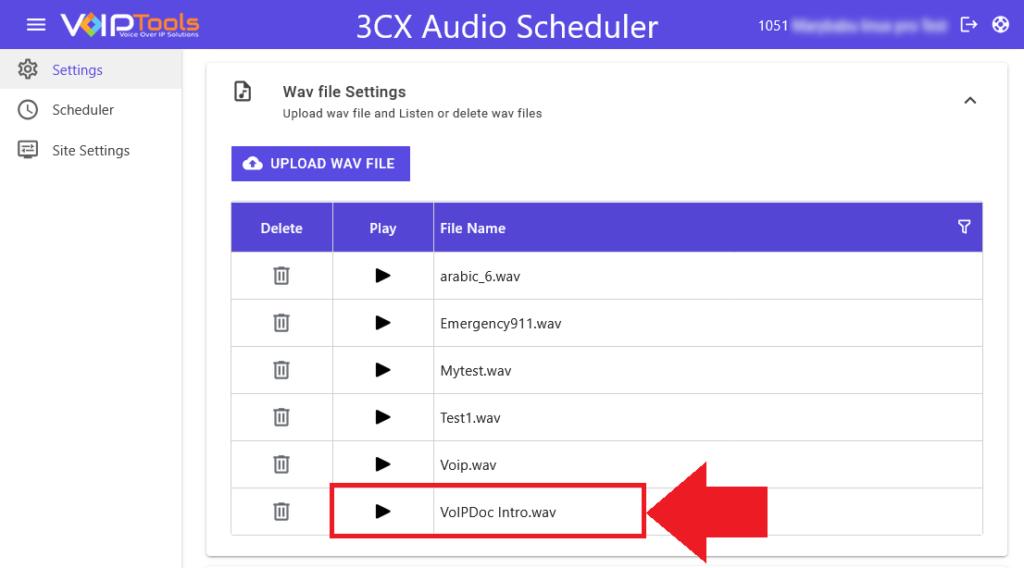
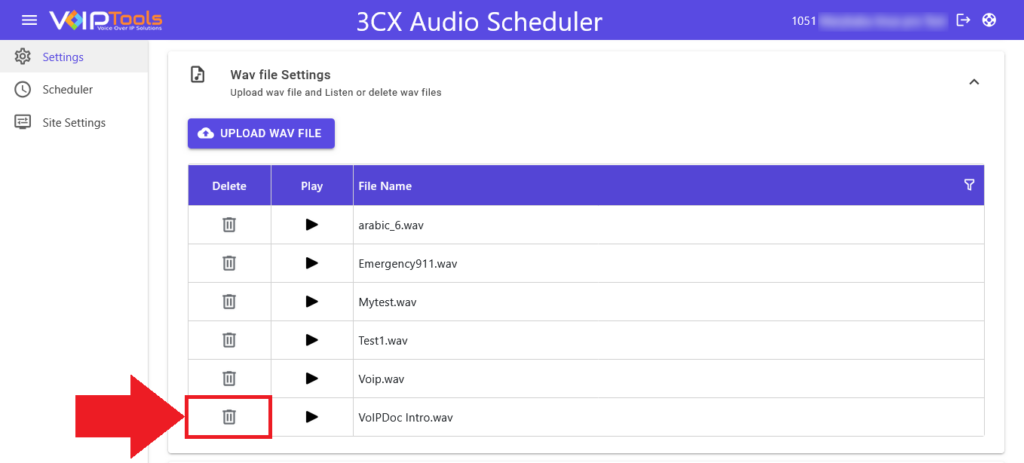
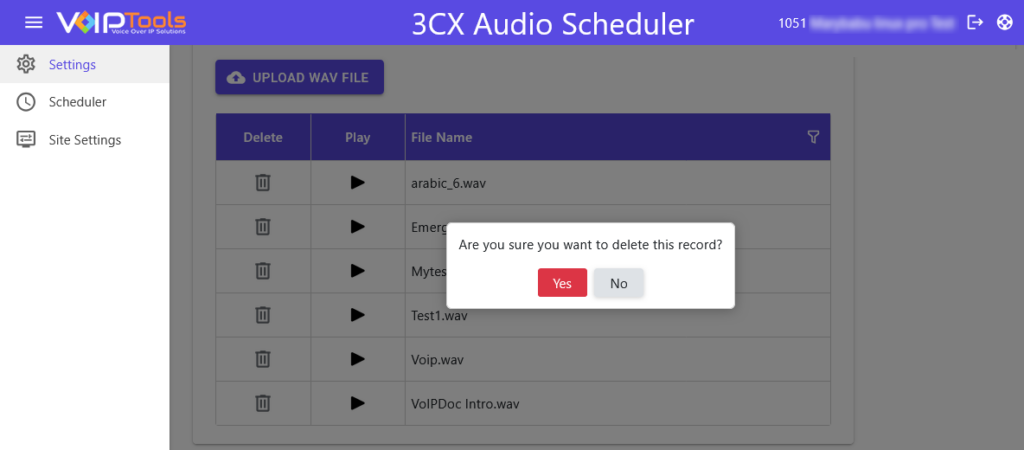
WAV File Settings
Upload, play, or delete .wav files used for audio prompts.
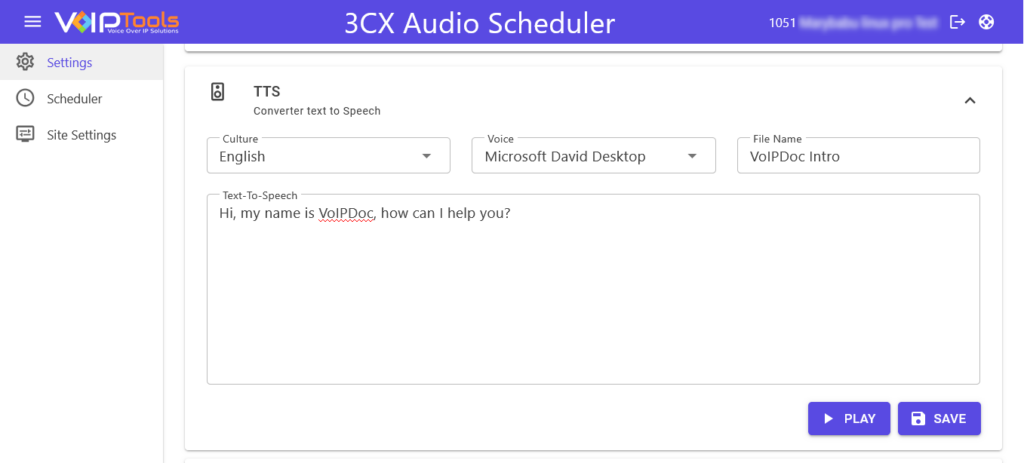
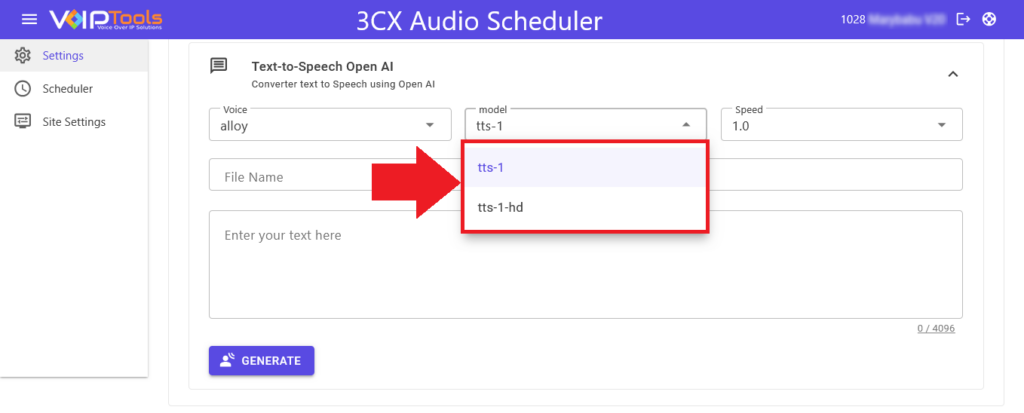
TTS Settings
Create audio by converting text to speech using a selected TTS engine.
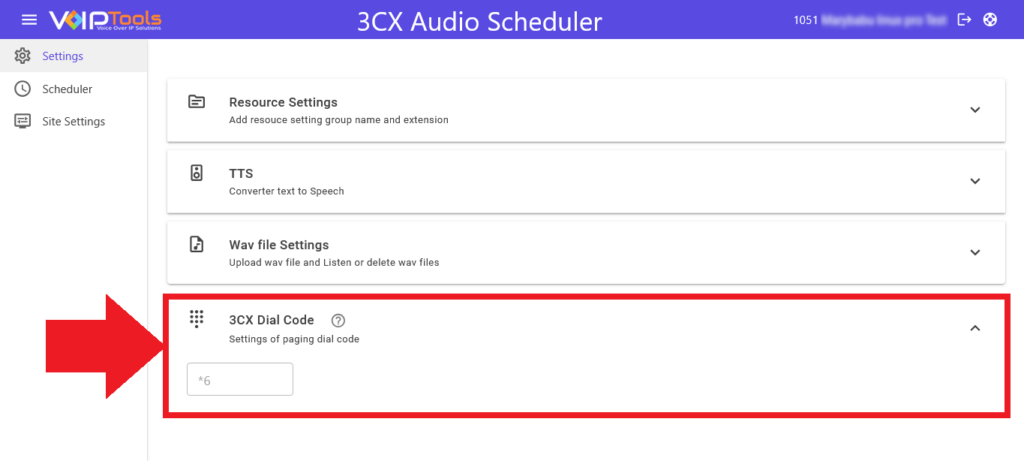
3CX Dial Code
Configure the paging dial code used to initiate 3CX paging calls.
Custom Branding
Customize the application appearance, including logo, header text, and theme colors.
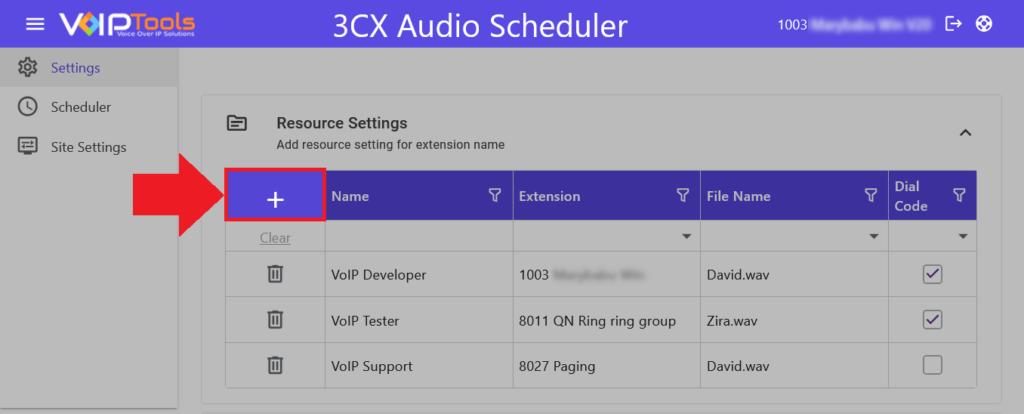
The Profile Settings section allows you to create, manage, and assign audio prompt profiles to specific extensions. From this area, you can define which audio file is used, enable a single active profile, and control how profiles are applied across extensions using dial codes. This section serves as the central place for configuring how scheduled or triggered audio is delivered within the system.
Expand the Profile Settings tab and click the Add button to add the resource.
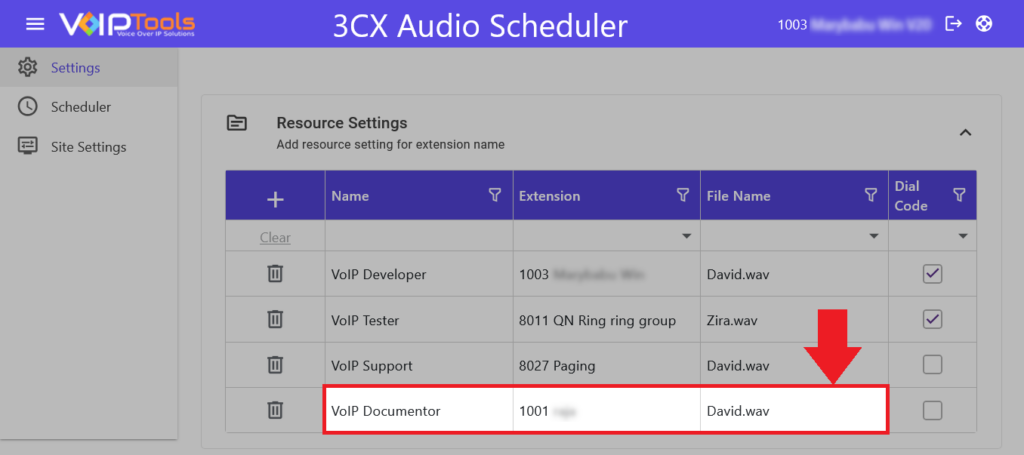
In the Resource Name field enter the name for your resource.
In the Extension dropdown, select the extension.
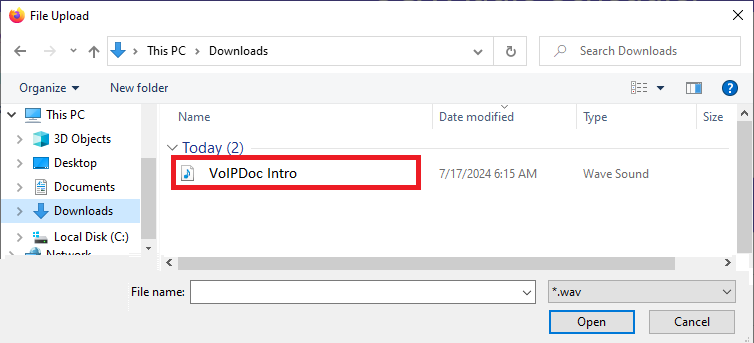
In the File Name dropdown, select the audio file you want to assign to the resource. You can either upload the audio file from your device orcreate a new audio file TTS.
Figure 29: Details of the Resource
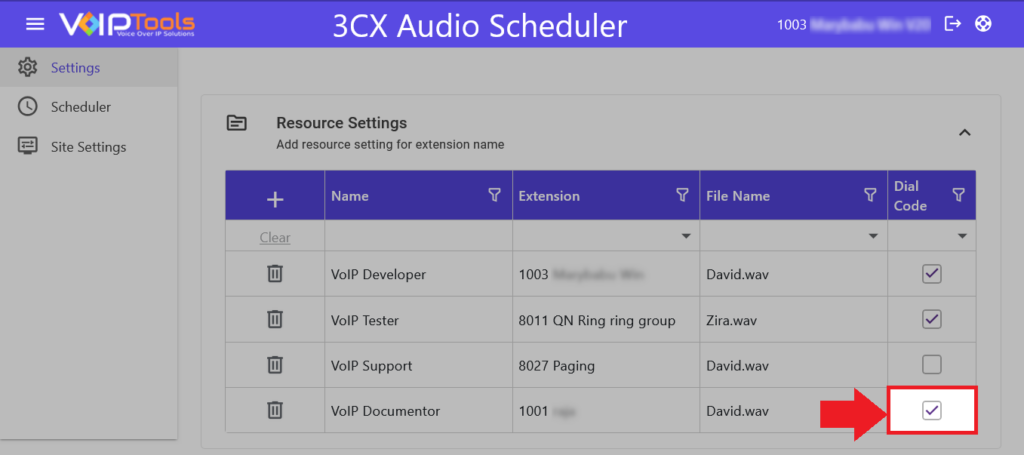
Select the Dial Code box to automatically receive the incoming calls or unselect it to manually receive the incoming calls.
Figure 30: Dial Code Checkbox
NOTE:
The Dial Code feature applies only to normal extensions. For paging extensions, incoming calls are always auto-answered, even if you deselect the Dial Code checkbox. For ring groups, you must manually answer incoming calls, as the auto-answer feature does not work, even if you select the Dial Code checkbox.
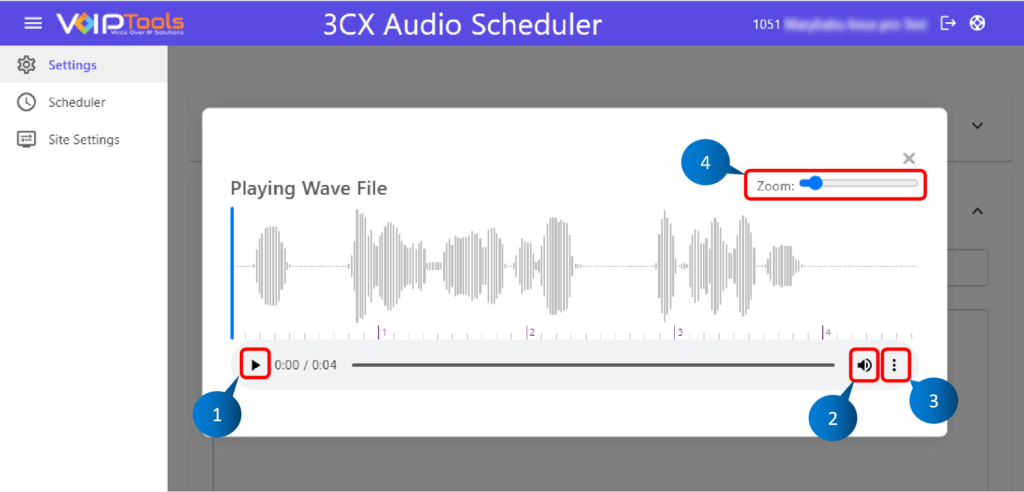
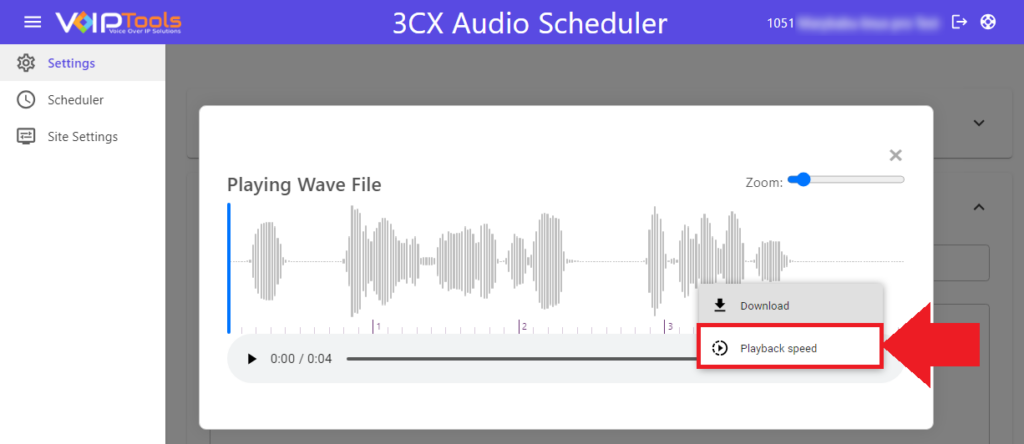
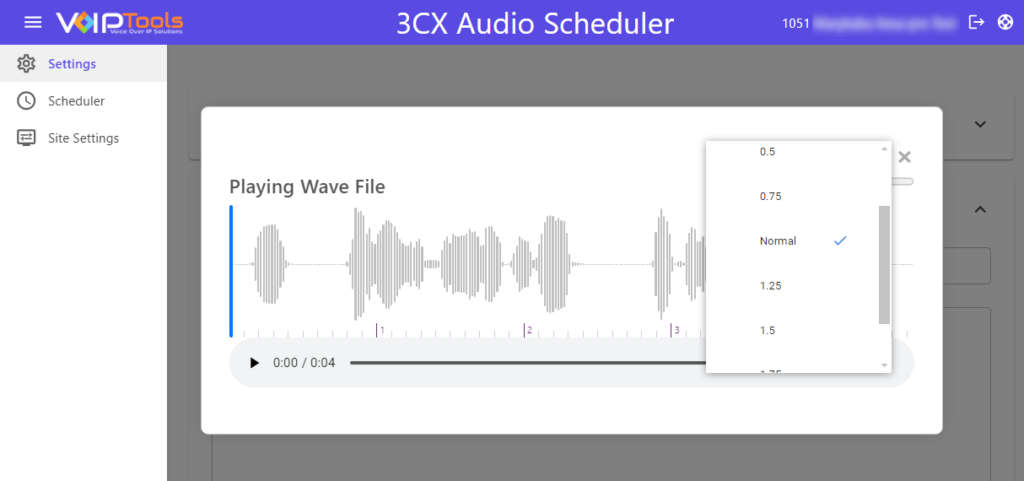
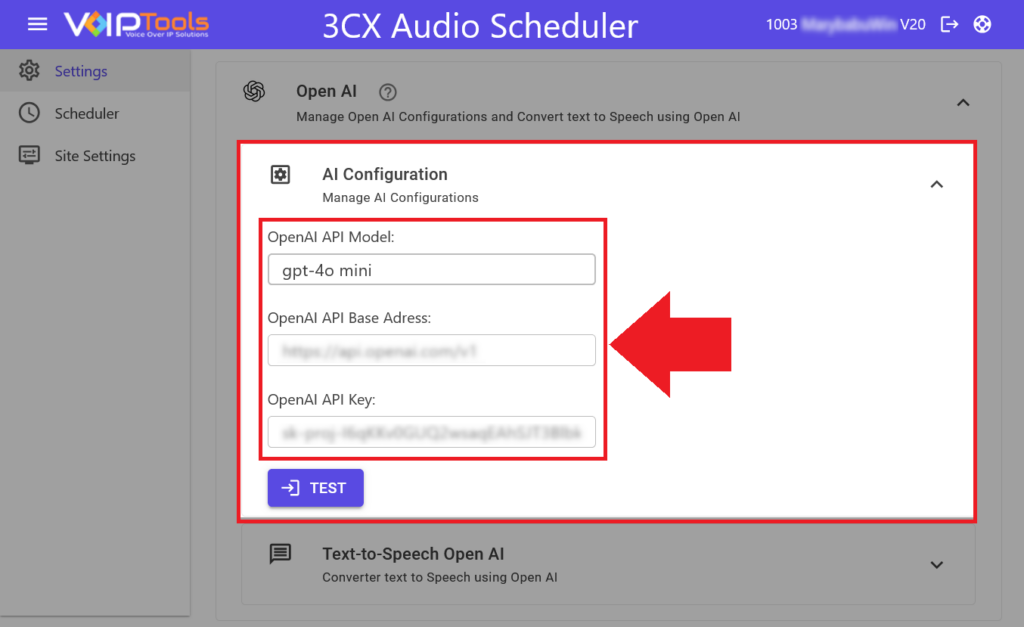
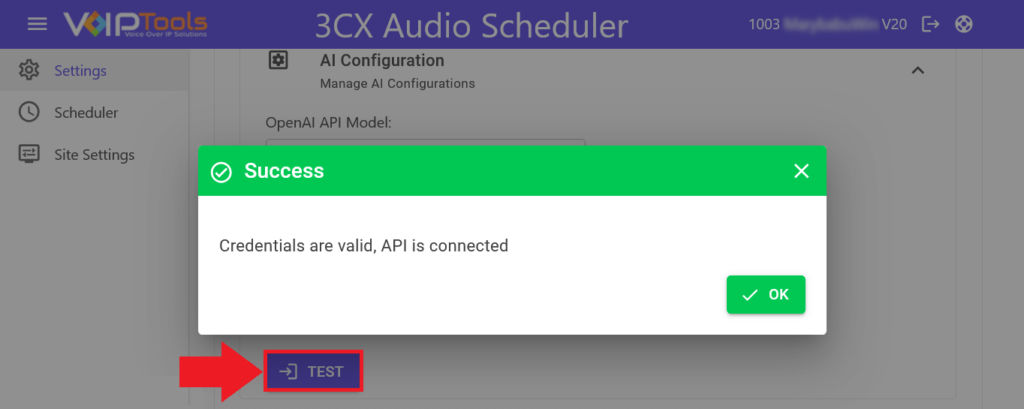
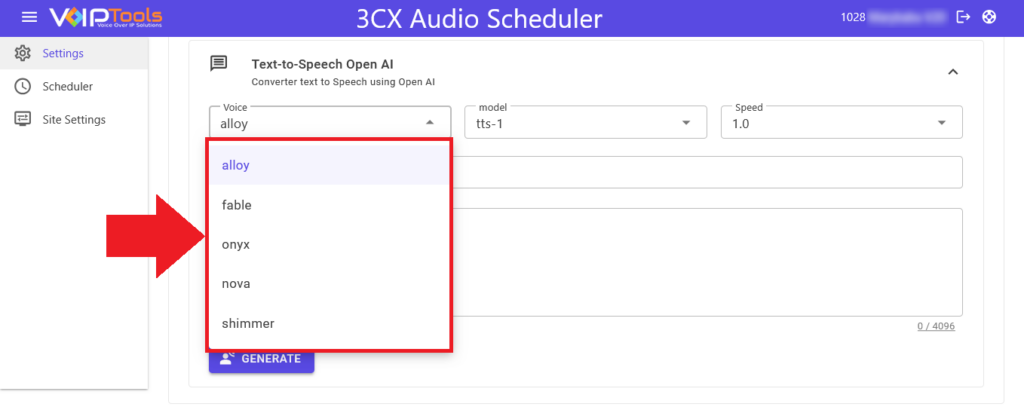
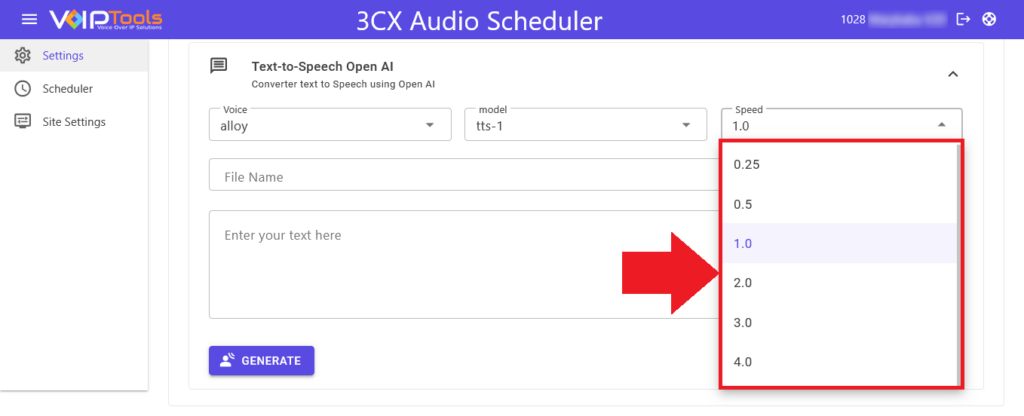
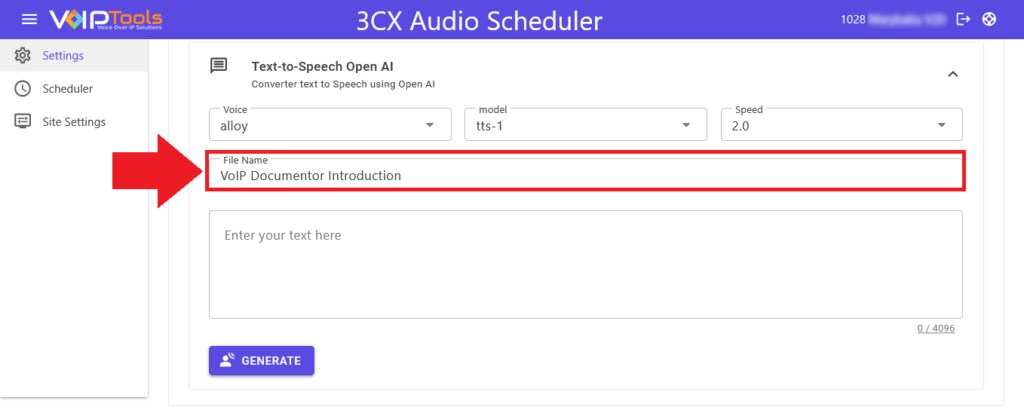
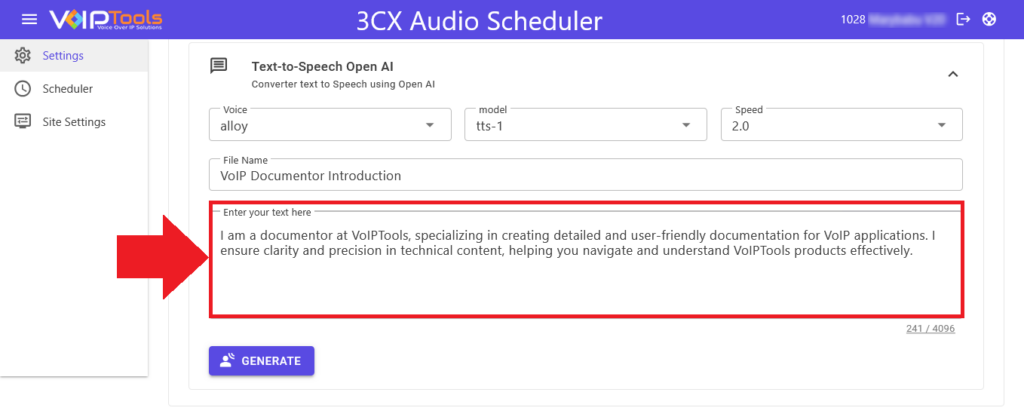
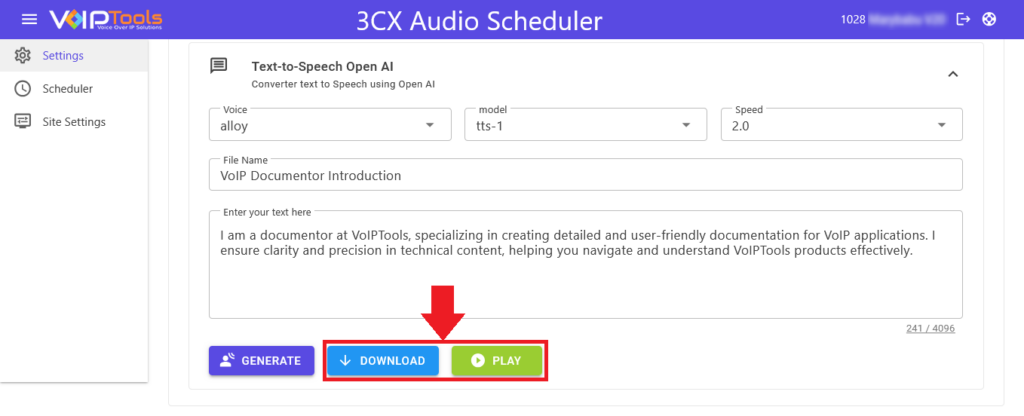
The AI Configuration and Text-to-Speech Open AI features allow you to connect to the OpenAI API, generate custom audio from text, and adjust settings like voice, model, and speech speed. You can save, play, and download the generated audio, with tools to fine-tune and view the waveform in detail.
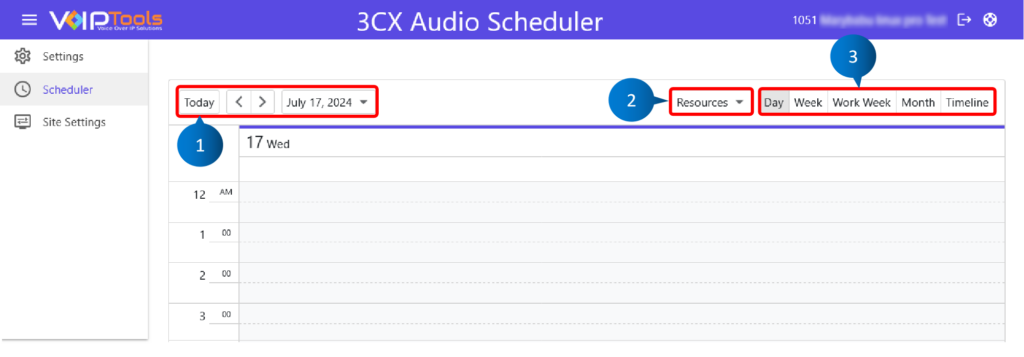
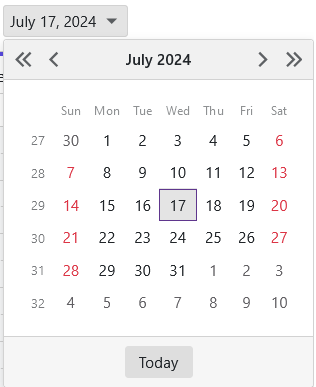
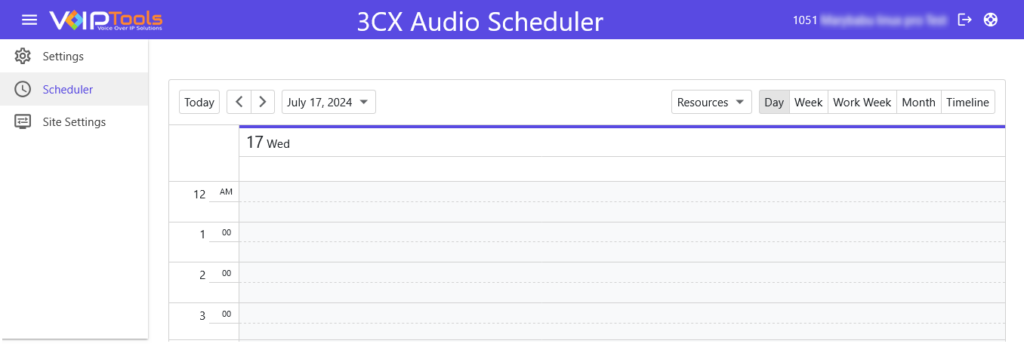
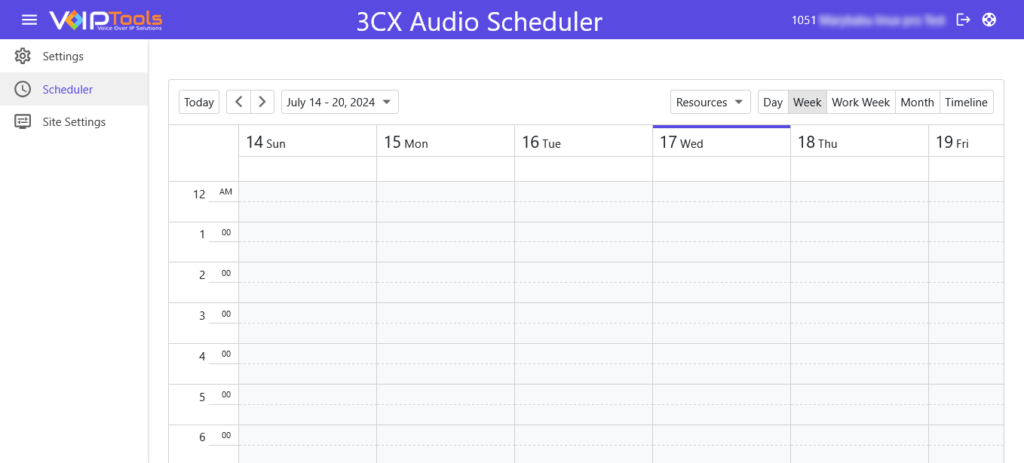
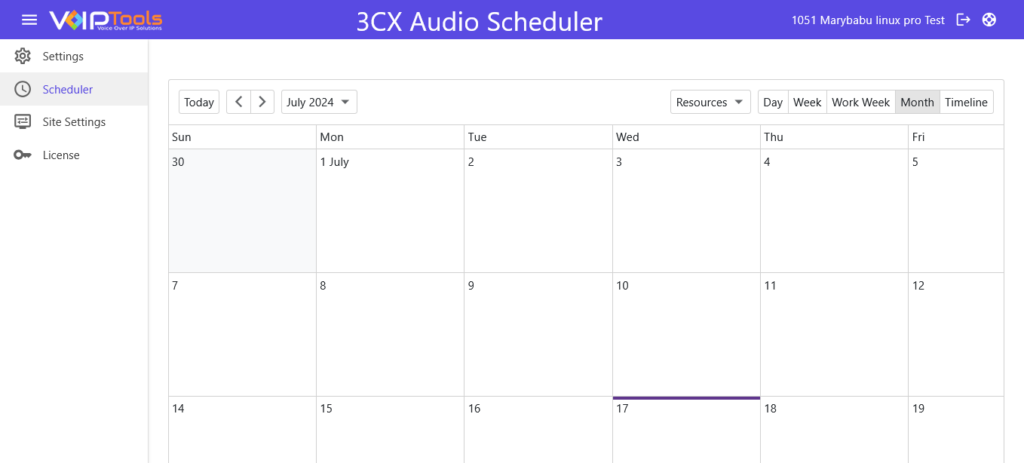
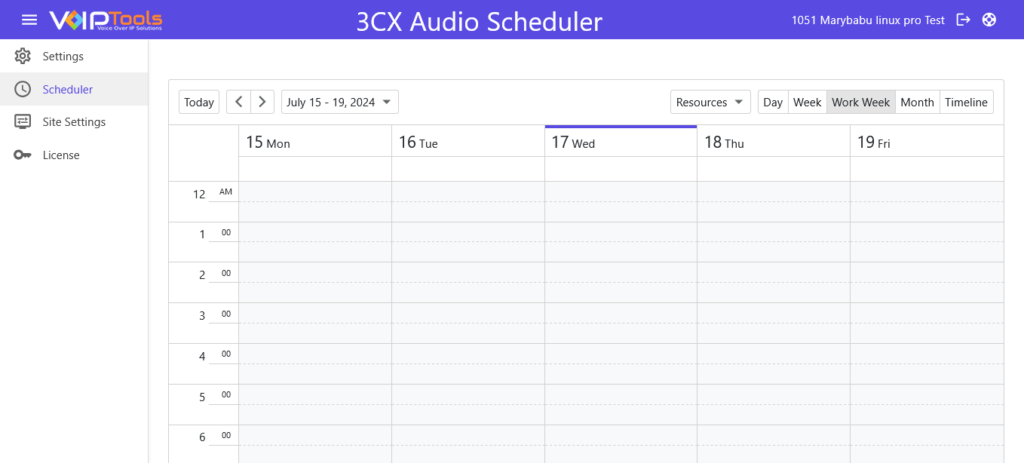
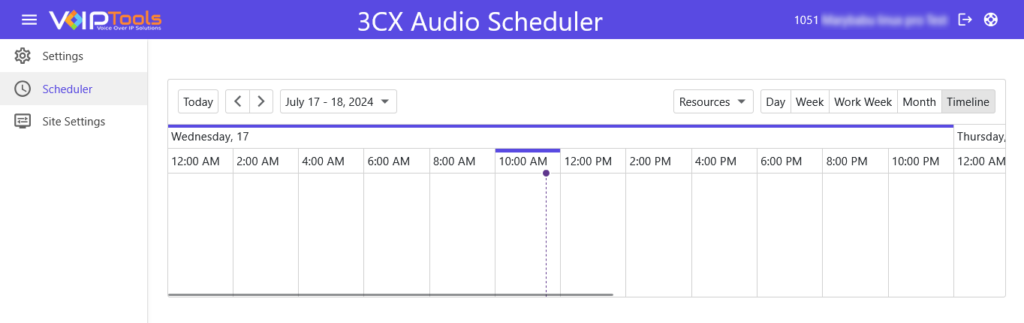
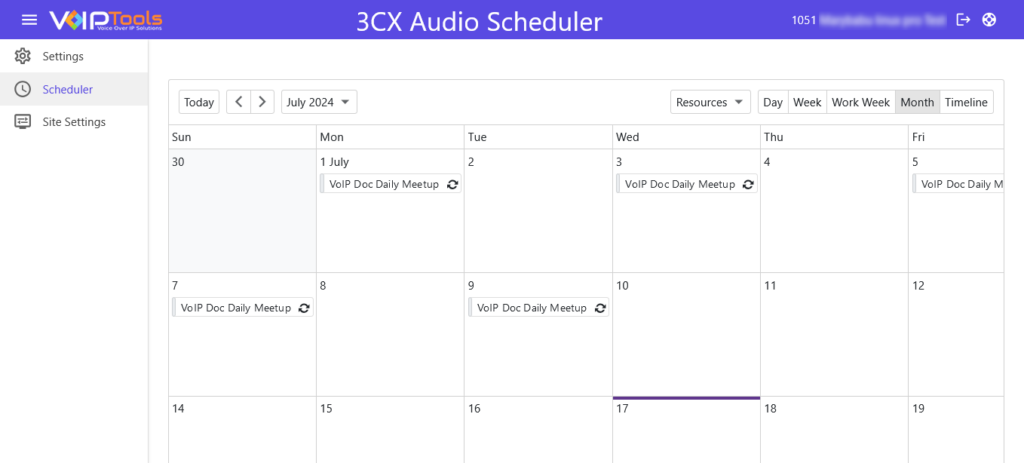
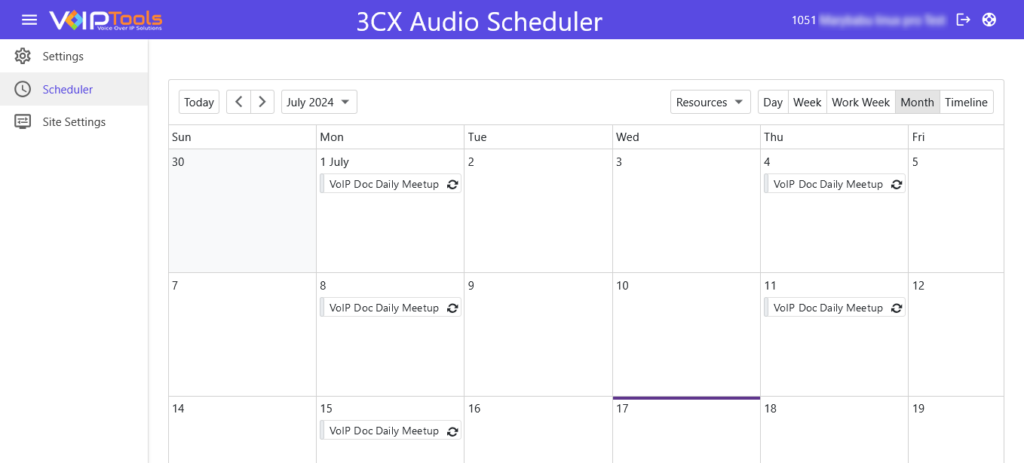
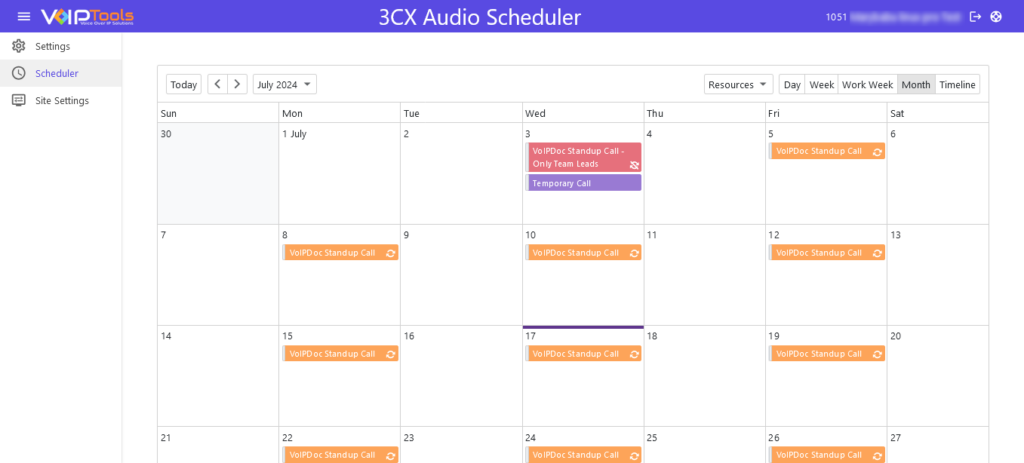
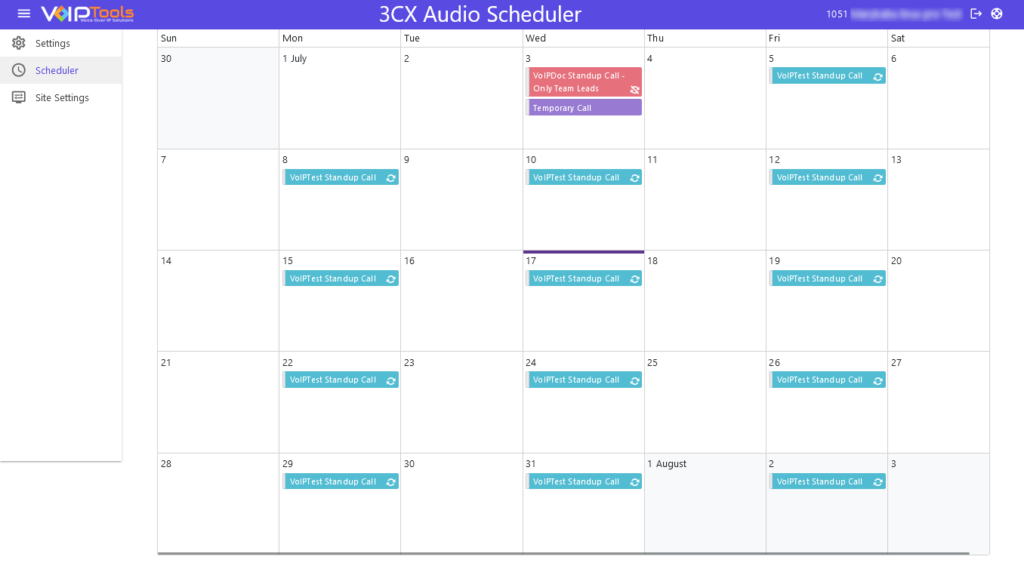
This feature offers enhanced flexibility and efficiency by allowing customized views. Whether a detailed daily schedule or a monthly overview is required, the various display formats facilitate improved time management, planning, and productivity. You can view the display area in multiple formats: Day, Week, Work Week, Month, and Timeline views.
Select the display type using the Display Option tool.
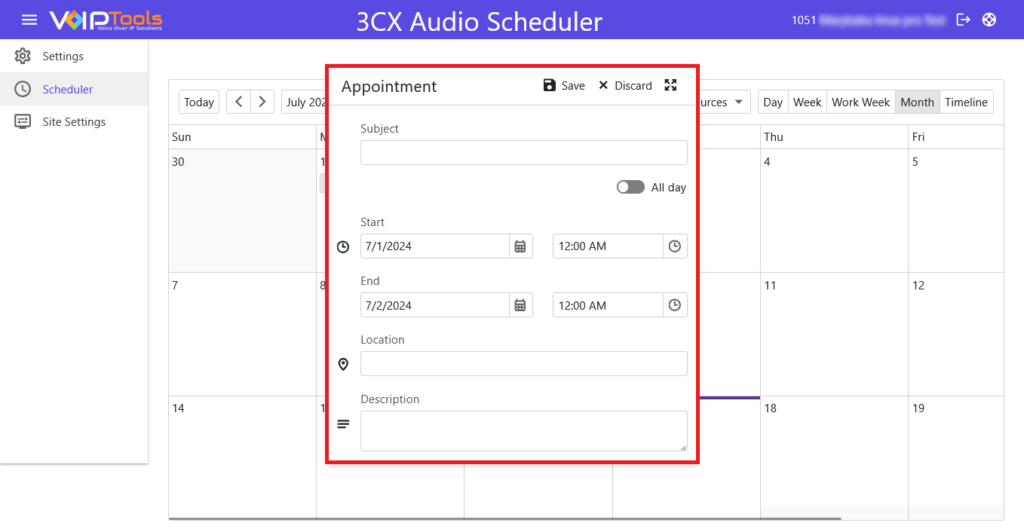
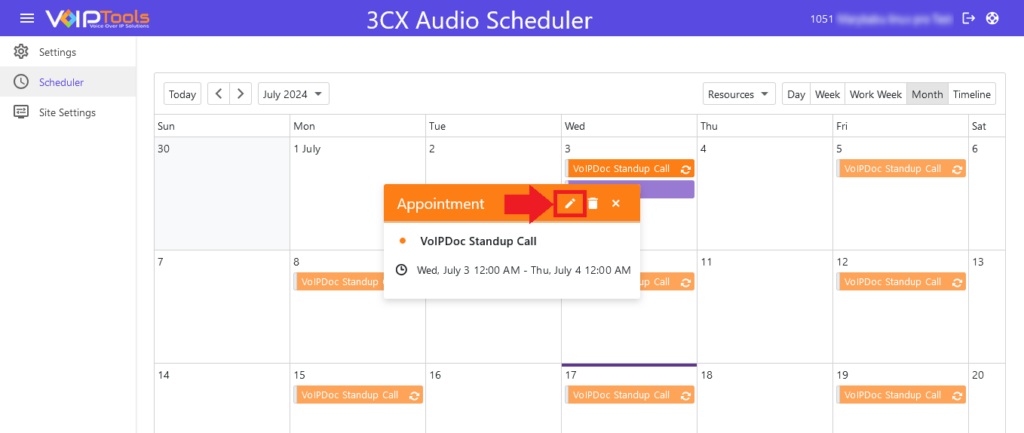
Click any day or date in the display to open the Add Appointment popup.
Figure 60: Simple Appointment Box
Enter the appointment details and click the Save button to save the appointment or click the Advanced Appointments button to further edit the appointment.
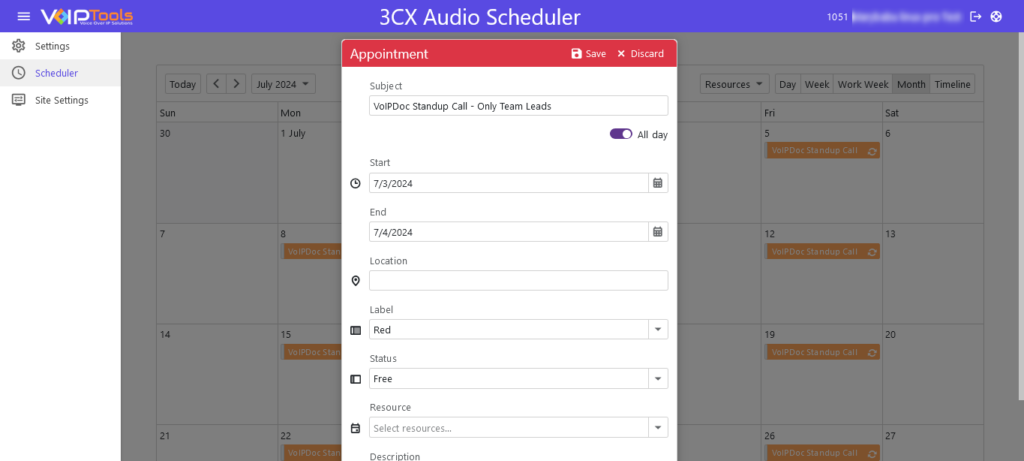
Follow the procedure to add more advanced appointments,
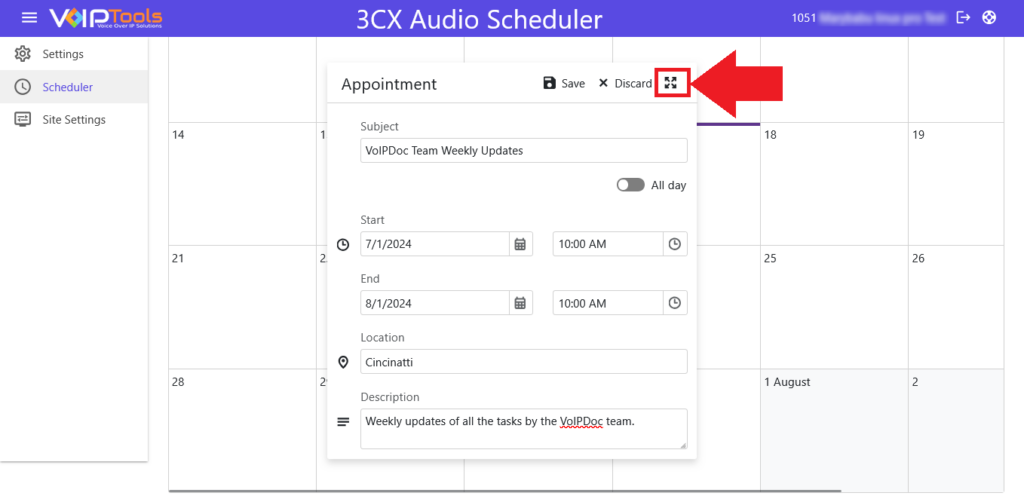
Click any day or date in the display to open the Add Appointment popup.
click the Advanced Appointments button to further edit the appointment.
Figure 62: Advance Appointment Button
Enter the appointment details and click the Save button to save the appointment.
Figure 63: Advanced Appointment Details
SUBJECT
Brief description of the appointment
ALL DAY TOGGLE
If the schedule is for the complete day, then check the All-day event box. If you check this box, you will observe that the time selection box (from ‘Start time’) will disappear.
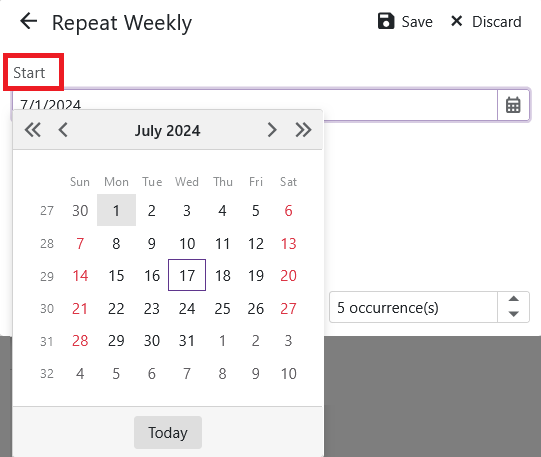
START TIME
The date and time from which the ‘On Call’ time starts for the agent
END TIME
The date and time at which the ‘On Call’ time ends for the agent
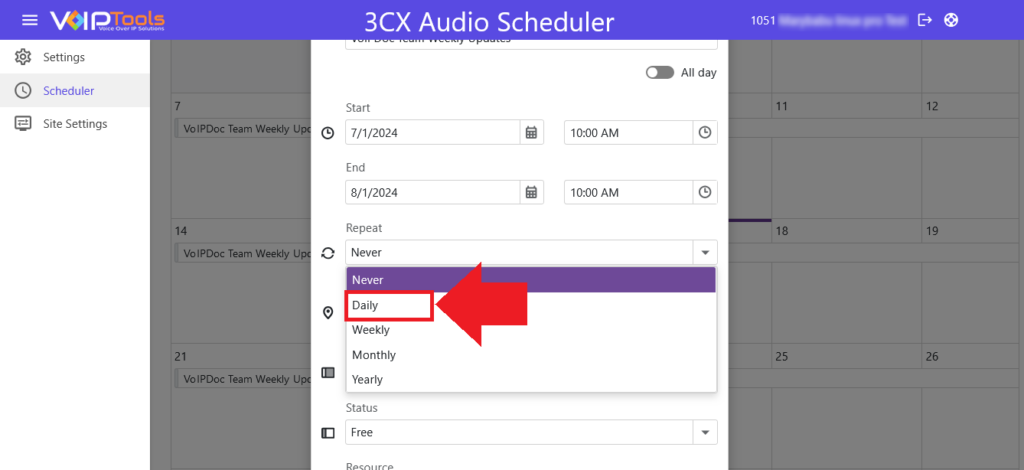
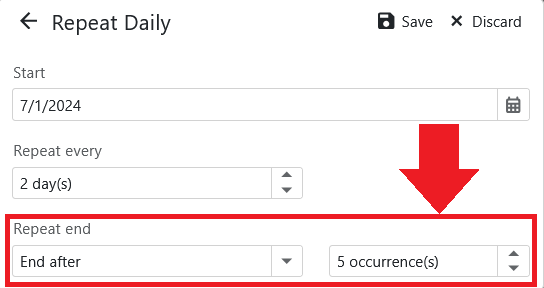
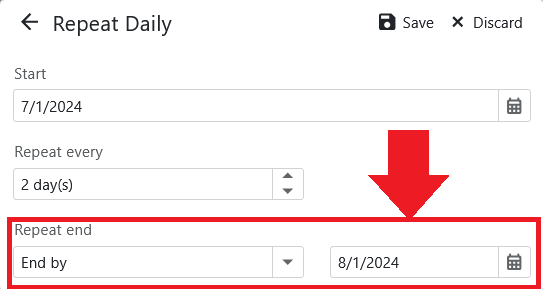
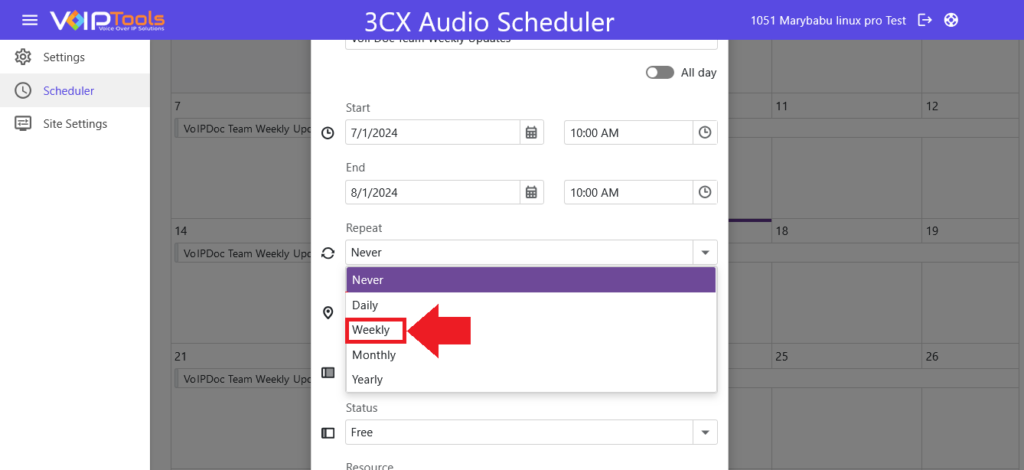
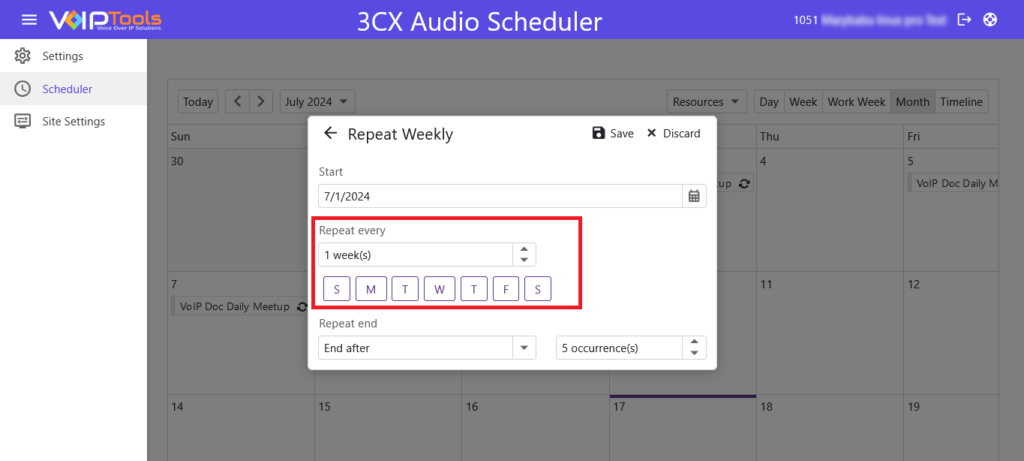
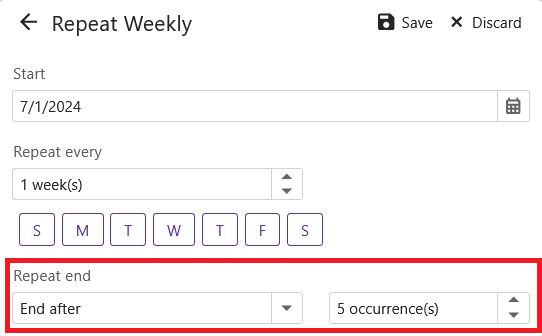
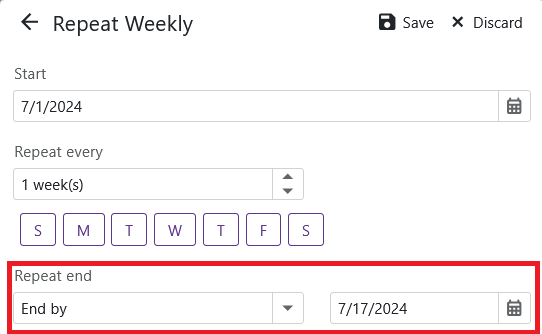
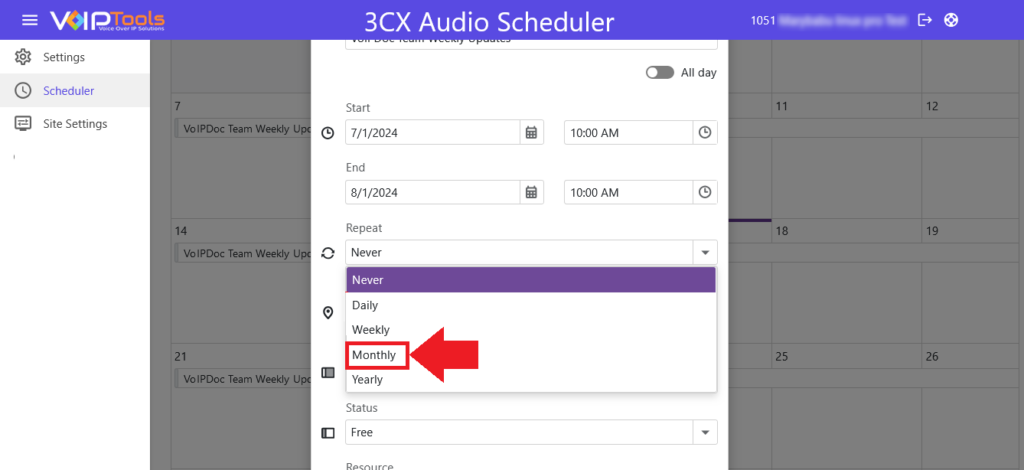
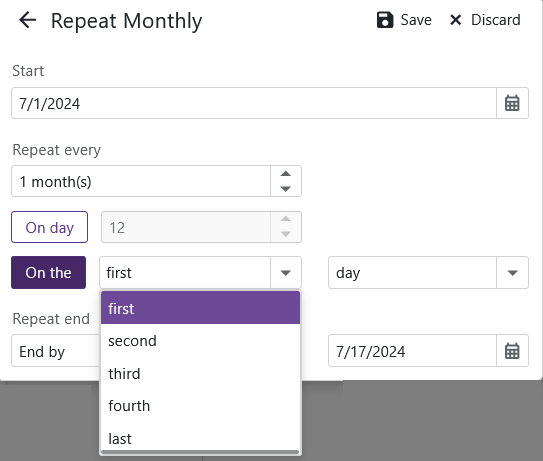
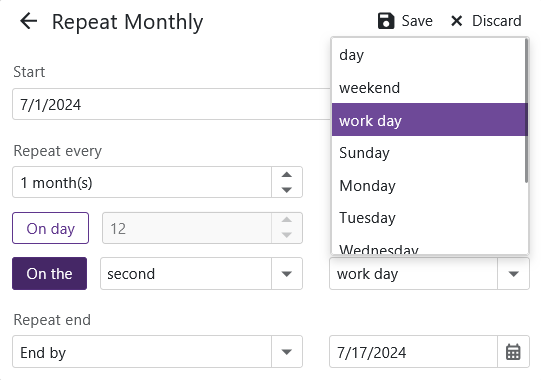
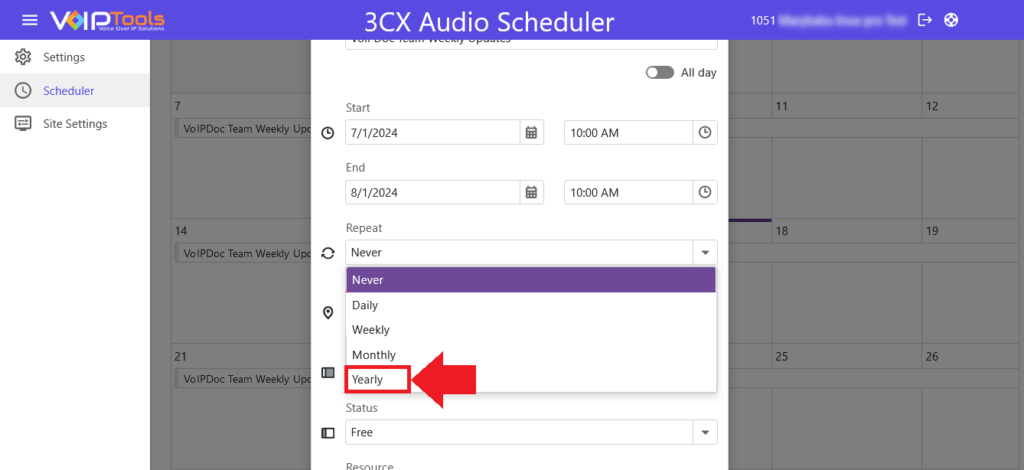
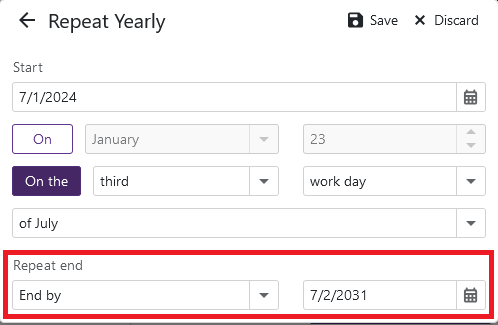
RECURRENCE
If you want the appointment to recur, check the Recurrence box. From the available options select the appropriate value (Daily, Weekly, Monthly, Yearly, Every—day(s) or Every weekday) for the appointment to recur.
LOCATION
Location of the agent for whom you are creating the appointment
LABEL
You can label the appointments using different colors.
STATUS
Specifies the work status of the agent as busy, free, tentative, out of the office or working elsewhere. Show time as is valid for Start time to End time
RESOURCE DROPDOWN
Select the agent from the dropdown for whom you are creating the appointment.
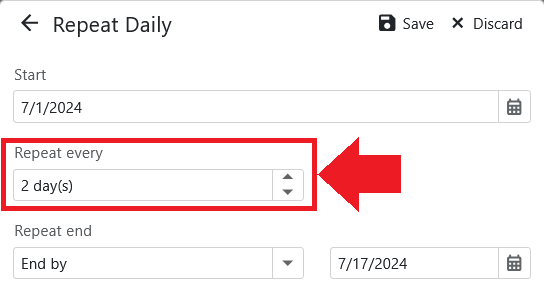
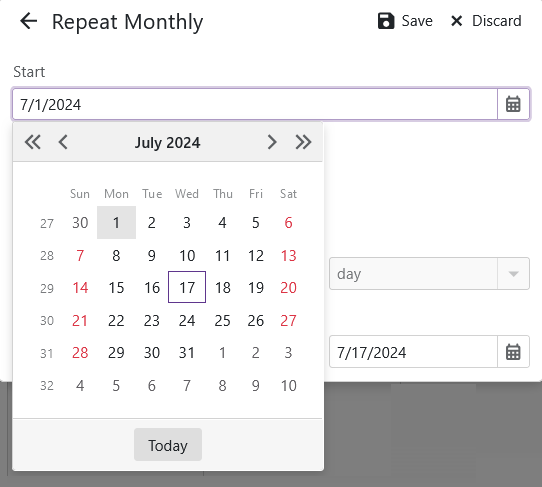
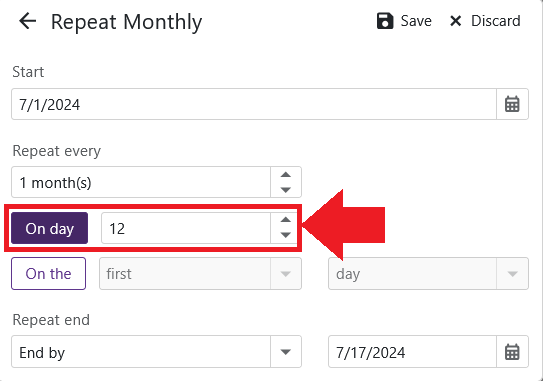
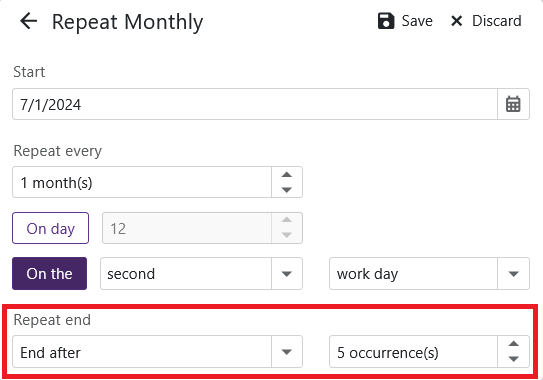
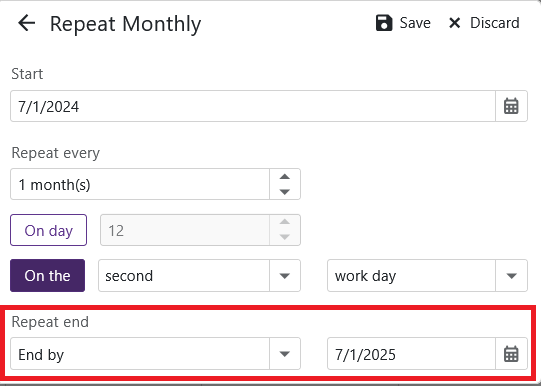
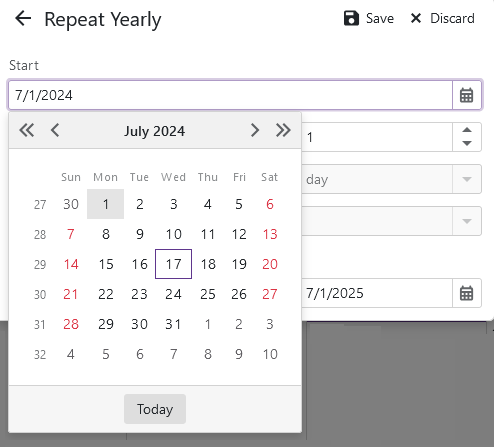
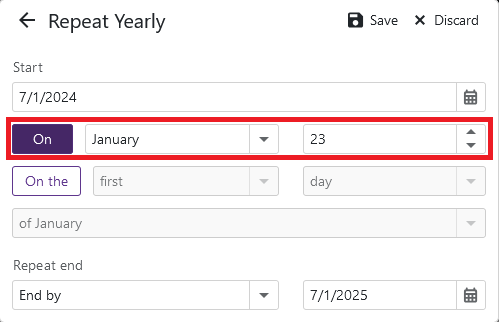
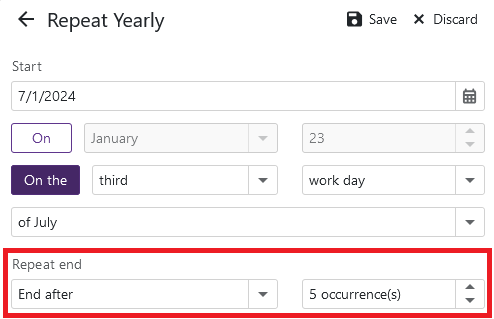
Recurring Appointments feature streamlines scheduling by automating repetitive appointments, saving time, reducing errors, and ensuring consistent and timely engagement for daily, weekly, monthly, or yearly events.
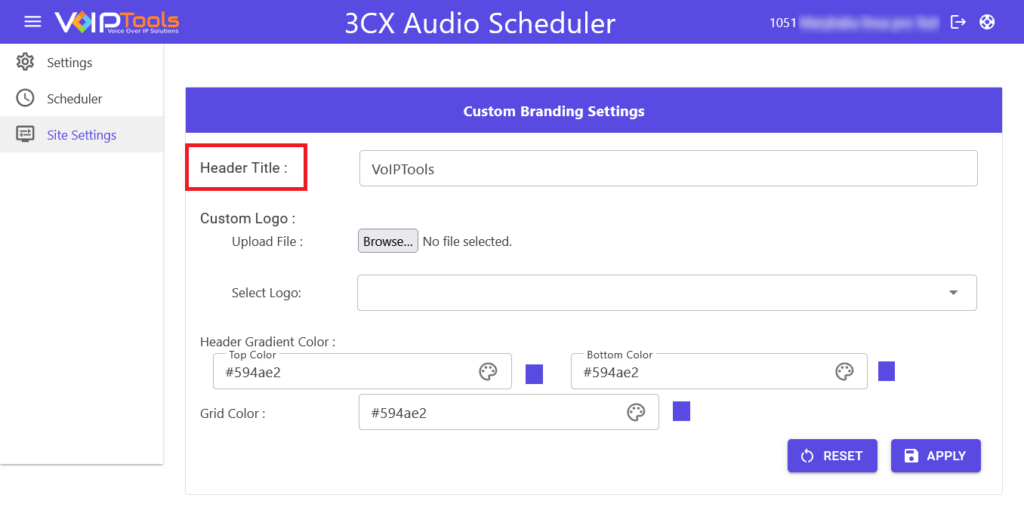
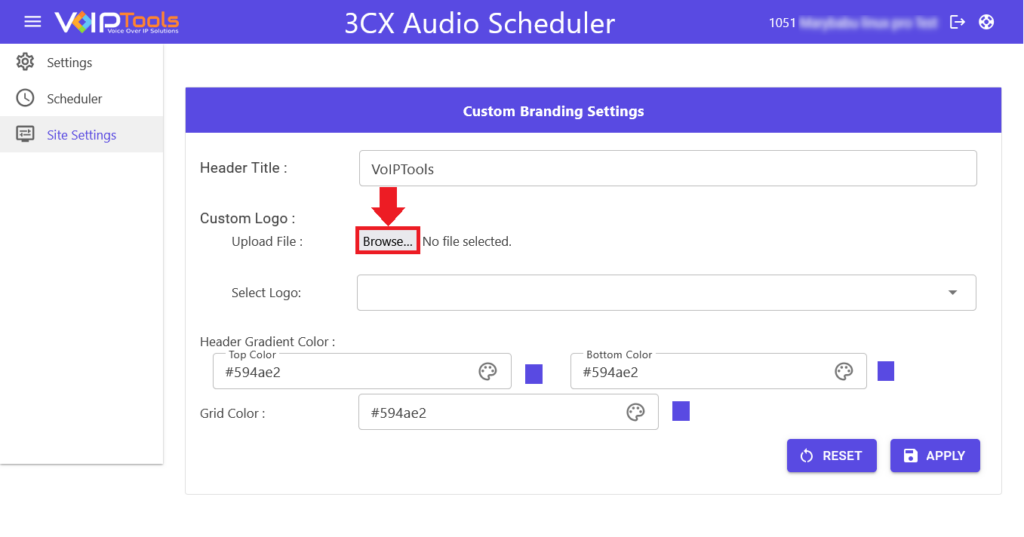
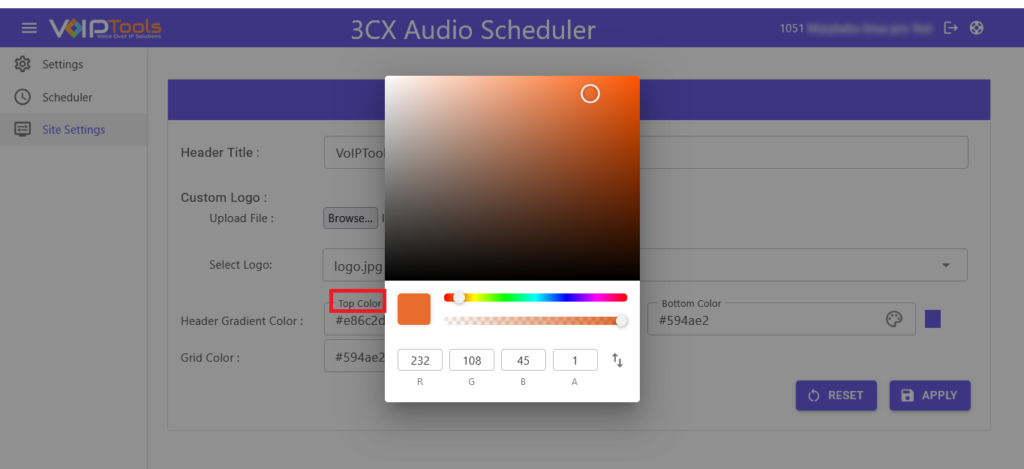
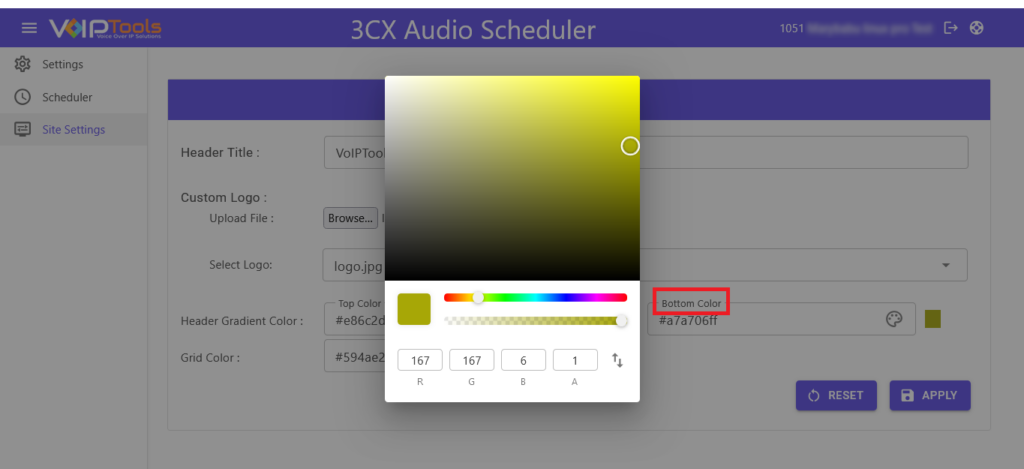
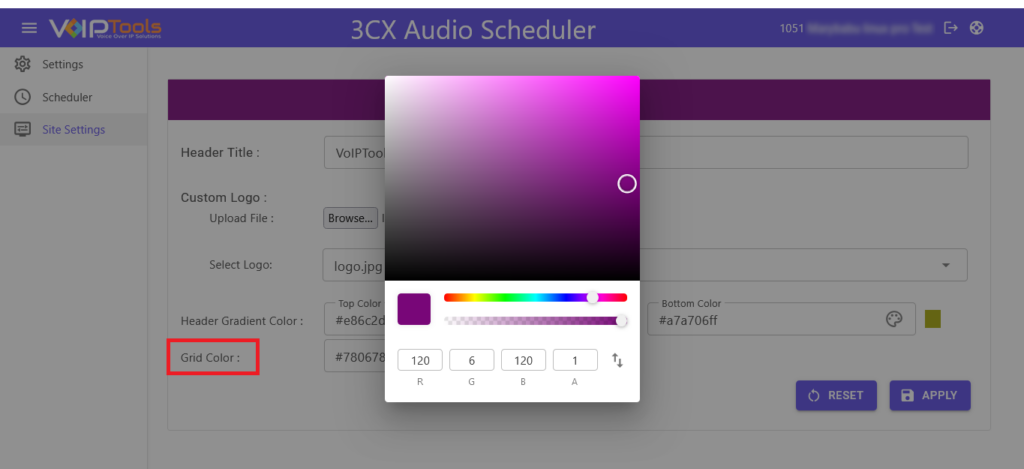
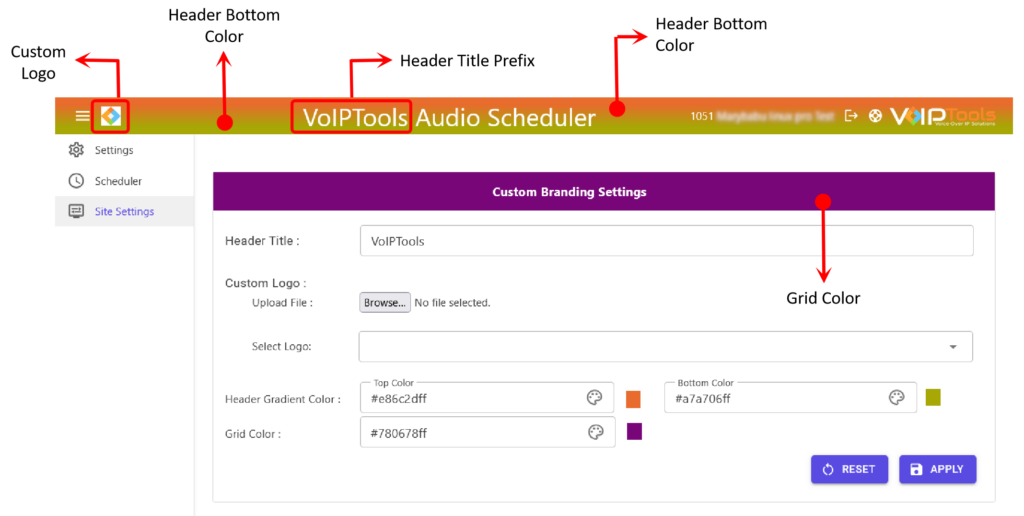
The Site Settings feature provides the advantage of comprehensive customization, allowing you to personalize the application’s branding. This includes adjusting the application header’s gradient color, grid color, logo, and header title prefix. These customizations enhance the user experience by aligning the application’s appearance with your company’s branding.
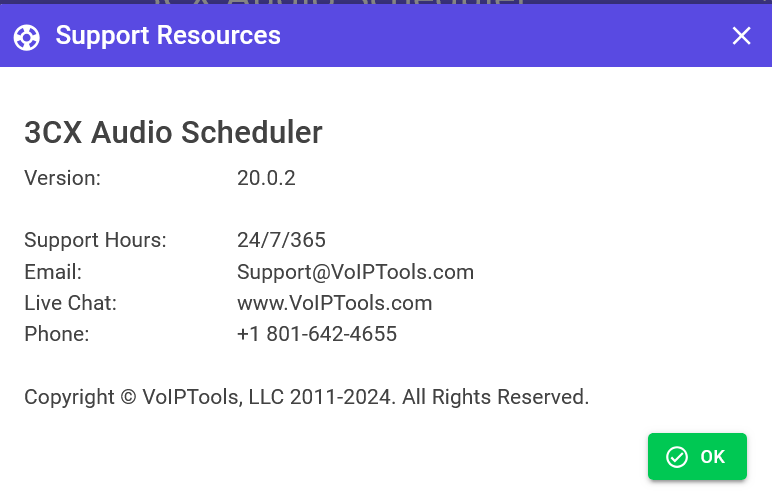
This tab provides you with essential support resources for the 3CX Audio Scheduler. It includes the version number (18.0.39), contact email, live chat link, and phone number. This information ensures you can access technical support and assistance whenever needed. For more details on VoIPTools Support click here.


NOTE:


 button to download your application.
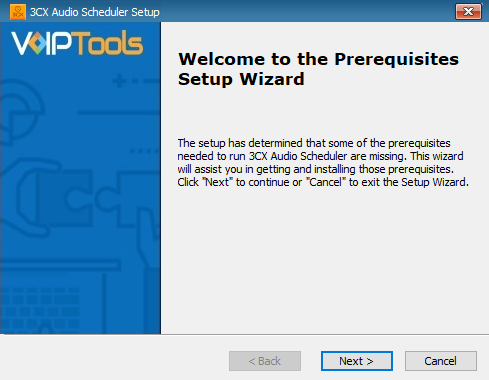

 on your desktop to open the web application.


NOTE:
 button to save your audio file.
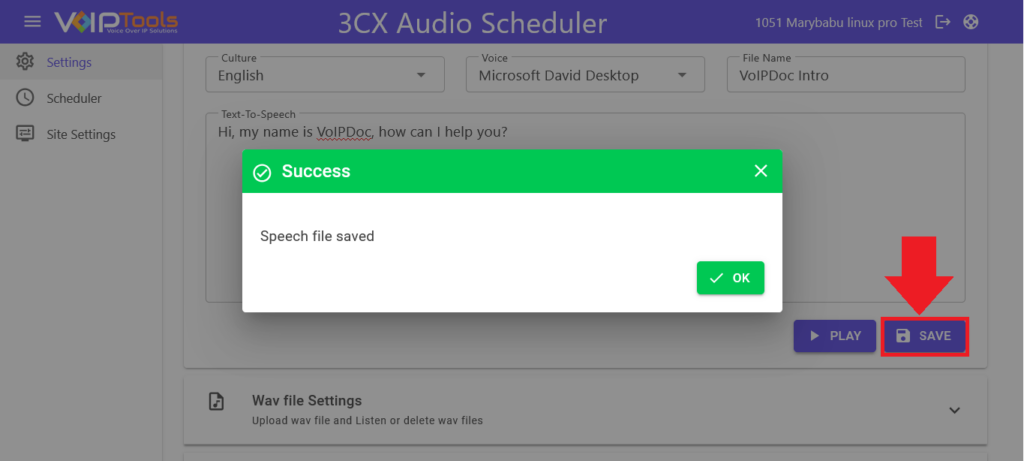


 section.
 section.
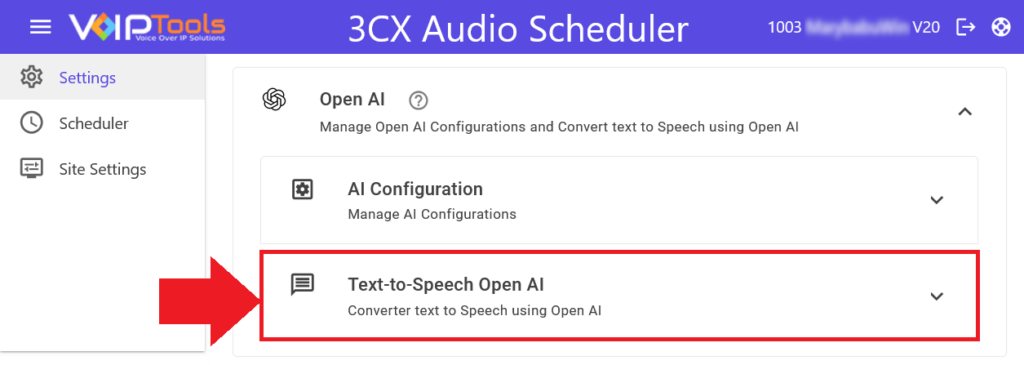


 button to further edit the appointment.
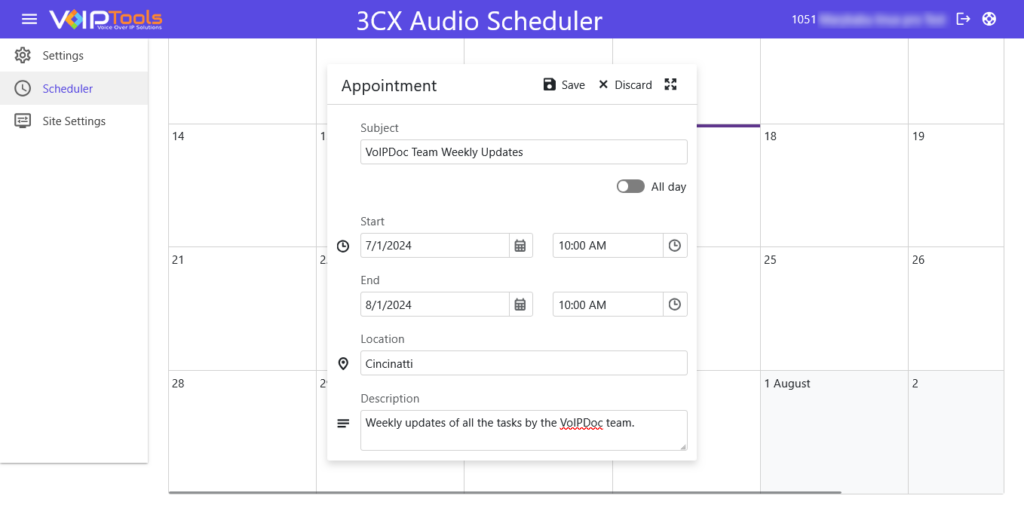


 button to save the header title prefix.