Experience the convenience of 3CX Audio Scheduler, a versatile tool that allows you to schedule tones or alarms across your paging system and phones effortlessly. Enhance workplace communication by effectively notifying employees of important events such as break times and shift changes. Seamlessly manage multiple alarms throughout the day, ensuring optimal efficiency and organization.
Customize your auditory experience with 3CX Audio Scheduler to meet your specific needs. Tailor tones for fire alarms, tornado warnings, or shift change notifications. This feature keeps your staff alert and informed, fostering a safe and productive environment.
Industries like schools, airports, and shift-based organizations can significantly benefit from the comprehensive functionality of the 3CX Audio Scheduler. Streamline operations and improve coordination within educational institutions, airports, and any environment that follows shift schedules. Unleash the true potential of your workplace communication with this indispensable solution.
Enhance your communication efficiency by scheduling the playback of tones or alarms on your paging system and phones. Take full advantage of the seamless scheduling capabilities to ensure timely delivery of custom tones or alarms, effectively optimizing workplace productivity.
SIMPLE CONFIGURATION
Intuitive web portal lets you schedule and manage your paging notifications with ease. You have complete control with user-friendly controls and a straightforward interface, allowing you to efficiently coordinate and customize your notifications according to your specific requirements.
CUSTOM AUDIO
Elevate your communication strategy by uploading personalized audio files for your announcements or notifications. Integrate custom audio files to make your messages distinctive and grab the attention of your audience.
AUTOMATE NOTIFICATIONS
Boost your organizational efficiency by utilizing our scheduling capabilities to seamlessly plan and deliver an unlimited number of notifications or messages.
Before you begin with the installation steps mentioned in this guide, you need to ensure that your computer meets the minimum requirements mentioned below for installing the 3CX Audio Scheduler.
There are several prerequisites that must be installed prior to installing the 3CX Audio Scheduler. These prerequisites include Microsoft Internet Information Server (IIS) and Microsoft SQL Server
INSTALL PREREQUISITES
You must install several prerequisites before installing the 3CX On Call Manager. The Advanced Installer identifies and installs these applications automatically.
INSTALL 3CX AUDIO SCHEDULER
This User Guide contains step-by-step instructions to successfully install 3CX Audio Scheduler. Begin by extracting the installer from the downloaded zip file (Step 1 above), then run the setup program named AudioSchedulerInstaller.exe
REGISTER YOUR SOFTWARE
You must register your license key to activate 3CX Audio Scheduler. Your license key is included in your order confirmation email and can also be found in your order history on our website.
Click on the software installer downloaded in Step 1. The installation wizard will automatically identify the prerequisites and assist you with each installation required to 3CX Power Dialer. It includes .NET Framework (Web Installer), SQL Server Express (Web Installer), and SQL Server Management Studio.
Click the downloaded installer executable to launch the Prerequisites Setup Wizard and click Next.
Figure 1: Prerequisites setup wizard
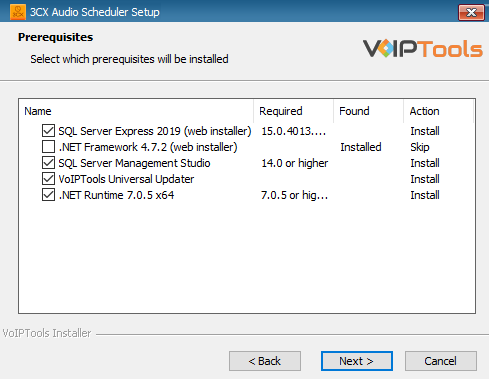
In the Prerequisites window, install all the required prerequisites identified by the installer, or select/ unselect the applications based on your requirements and click Next to continue.
Figure 2: Select prerequisites
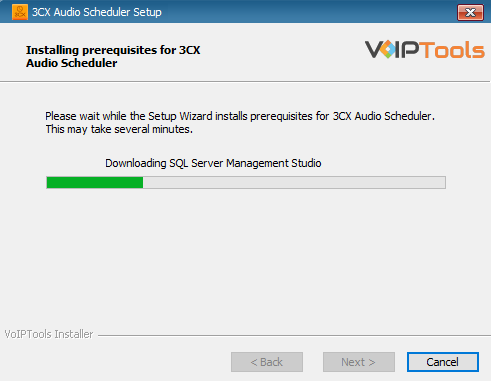
The Advanced Installer installs the required prerequisites. This may take several minutes to complete.
Figure 3: Prerequisites Installation in Process
NOTE:
The installer will identify any prerequisites needed. It is recommended that you allow the installer to automatically install and configure the required prerequisites. Once all the prerequisites are installed, you can continue with the tool install.
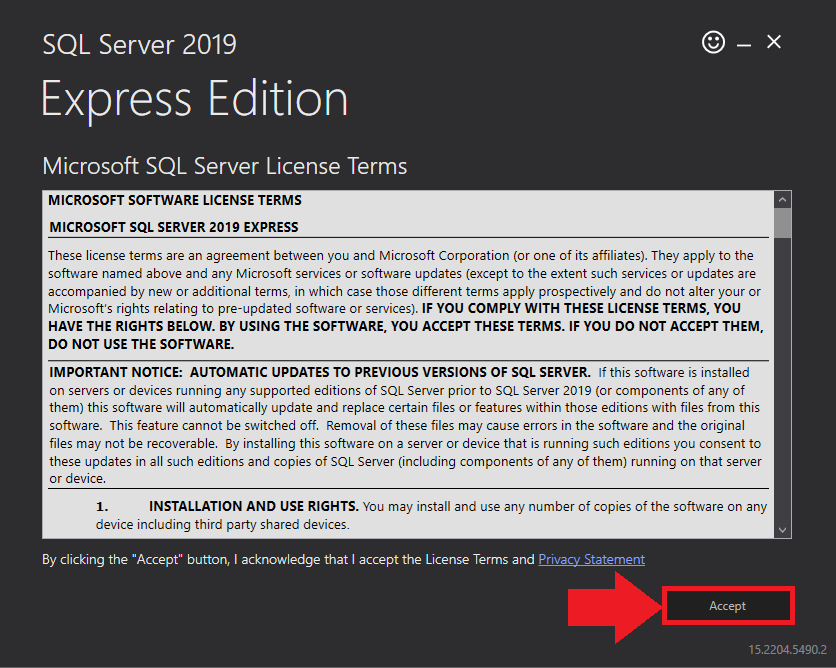
In the Microsoft SQL Server License Terms click the Accept button to acknowledge the license terms and continue.
This page appears if you do not have SQL Server Express preinstalled in your device.
Figure 4: SQL Server Express: Accept License Terms
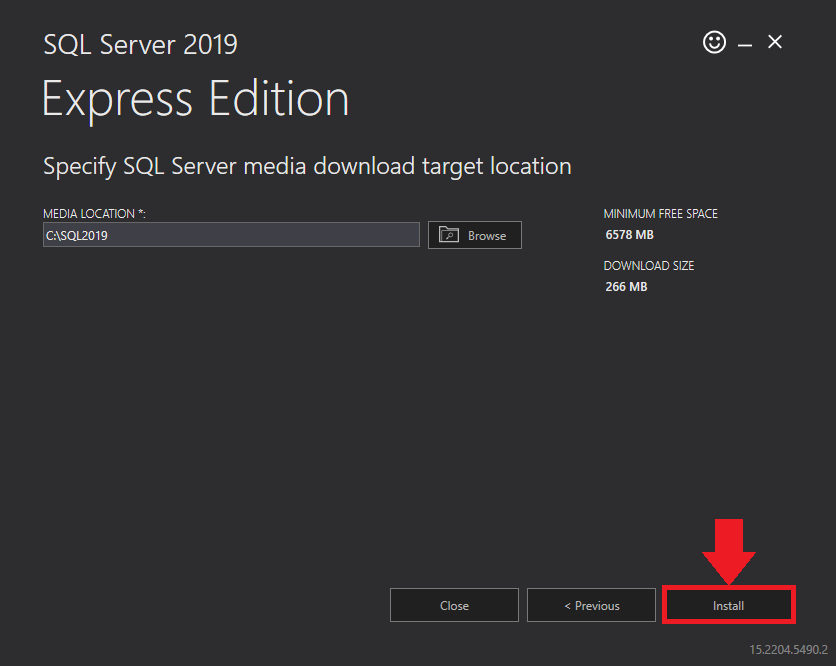
View the SQL Server Media target location in the Media Location field. If required, you can click the Browse button to change the location. Click Install to begin the installation of SQL Server Express.
Figure 5: SQL Server Express: Target Location
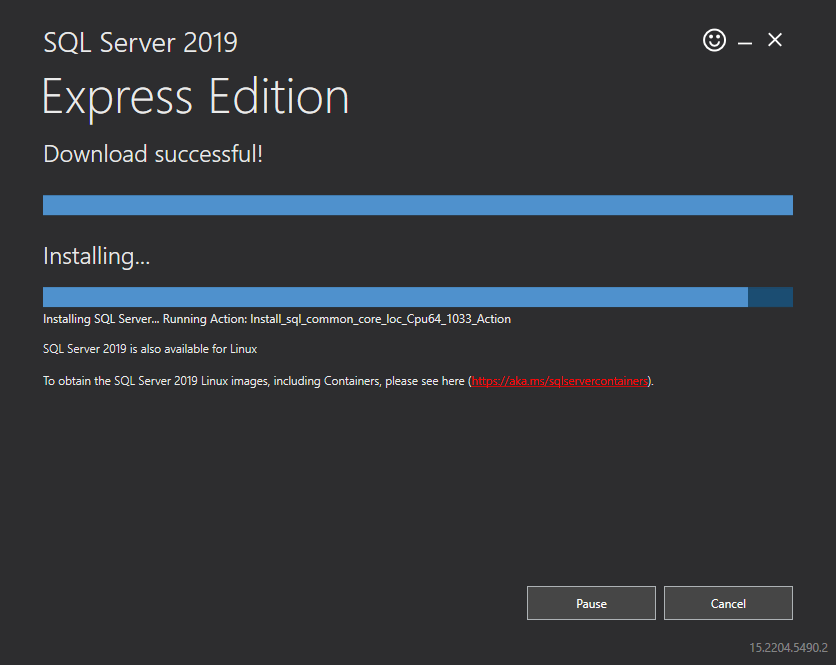
SQL server installation is in progress. This may take several minutes to complete.
Figure 6: SQL Server Installation In Progress
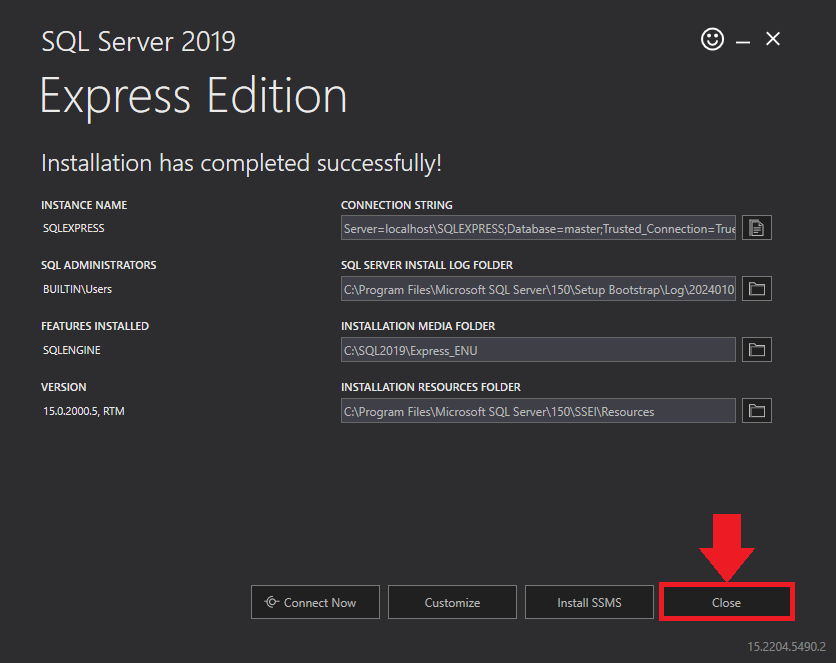
Click the Close button once the prerequisites are installed.
Figure 7: SQL Server Express: Installed Successfully
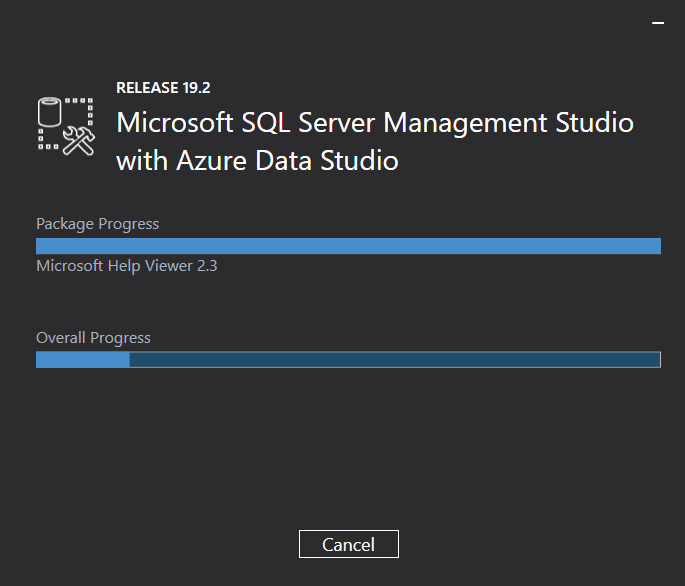
Microsoft SQL Management Studio installation is in progress. This may take several minutes to complete.
Figure 8: Microsoft SQL Server Management Studio: Installation in progress
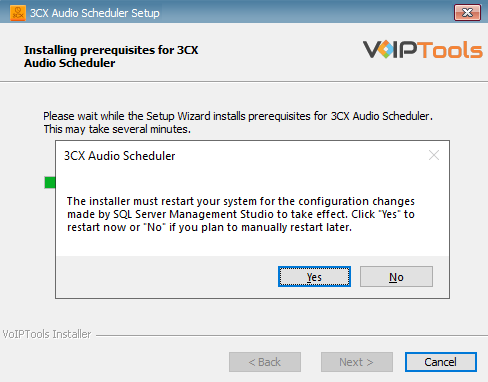
Click Yes in the Confirmation Message Box to reboot the computer.
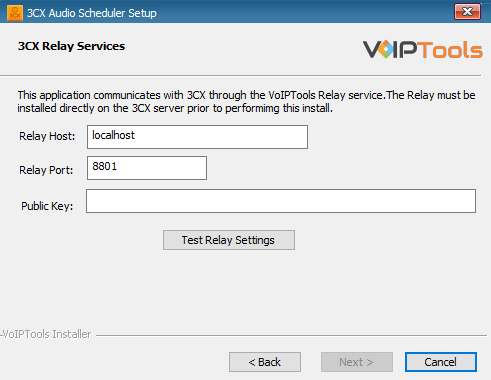
In the 3CX Relay Services window, in the Relay Host field, enter the FQDN of your 3CX server.
NOTE:
Do not include https:// to the Relay host data.
Enter 8801 in the Relay Port field.
Enter the public key you copied from VoIPTools Relay services in the Public Key text area.
Figure 12: Windows Installer: Relay Settings
Click the Test Relay Settings to confirm 3CX Audio Scheduler can communicate with the Relay services running on the 3CX server.
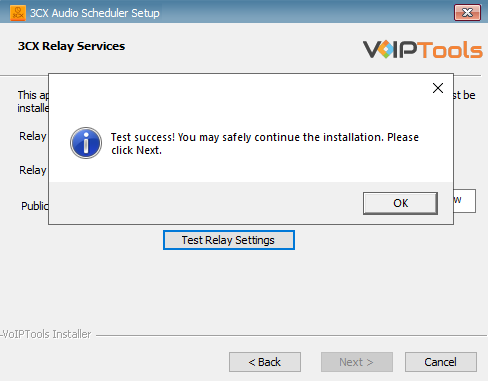
If the 3CX Audio Scheduler is successfully able to communicate with the Relay services that run on the 3CX server, a Success message box appears. Click OK. If the test fails, you will not be able to continue until communication with the relay is established.
Click Next to continue with the installation.
Figure13: Test Relay Success
NOTE:
You must set the Relay Port to 8801.
If the Relay test fails, you cannot continue the installation until you establish communication with the Relay. If the test was unsuccessful:
Confirm you have the correct firewall port open (default TCP 8801) on the 3CX server and the firewall protecting the 3CX server.
Confirm that you have entered the correct FQDN for the 3CX server.
Confirm that the 3CX Power Dialer and Relay use the same port and protocol.
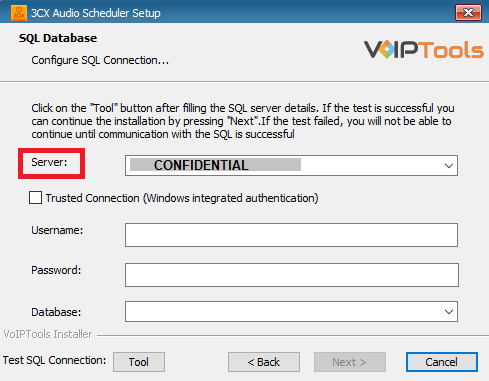
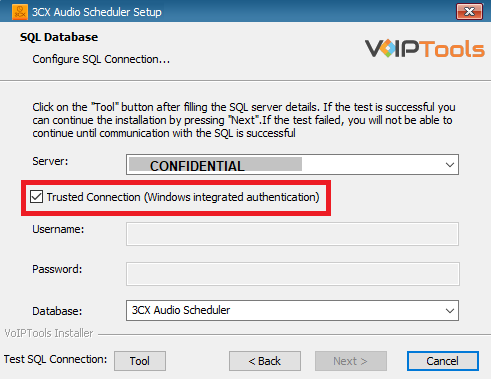
When configuring the 3CX Audio Scheduler, select an existing Microsoft SQL Server instance in your environment. The database server can be a remote SQL Server, or a local instance running on the VoIPTools server.
You can set up the SQL database using SQL Authentication or Windows Integrated Authentication.
If using the free SQL Express Edition, the default SQL Instance name is SQLExpress.
Figure 14: Configure Database – Server Field
NOTE:
If you want to use ‘SQL Authentication’, then install SQL Server in ‘Mixed‘ mode.
If SQL Server is installed on a server other than the server where 3CX Exporter is installed, you will need to configure SQL Server to allow remote connections.
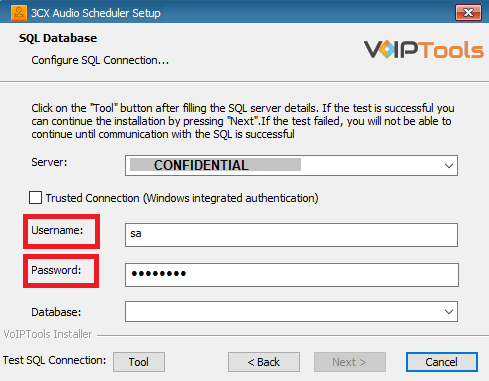
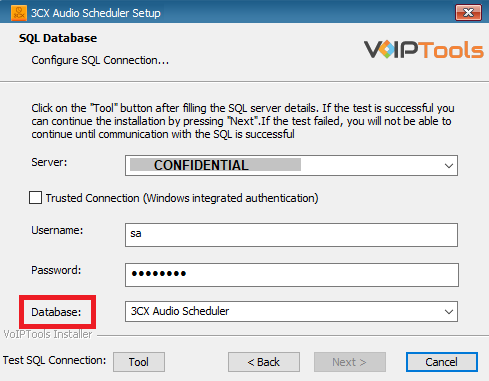
Enter your credentials in the Username and Password fields.
To use Windows Integrated Authentication check the Trusted Connection (Windows integrated authentication) checkbox.
The VoIPTools installer will create a local Windows user name as “VoIPToys” and give you sufficient rights to this user to create/update the SQL database.
Figure 18: Trusted Connection Checkbox
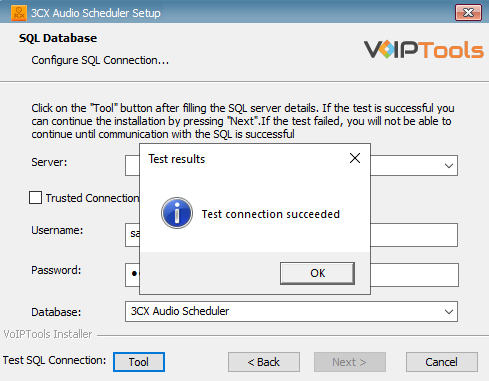
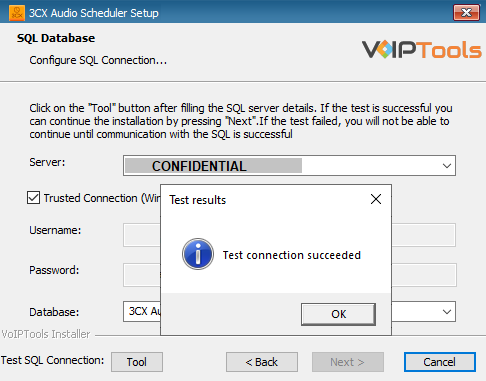
In the Test SQL Connection section, click the Tool button to test the connection.
Click the Next button which gets enabled when the database connection is successful.
Figure 19: Trusted Connection Test Results Message Box
NOTE:
We encourage you to use SQL Authentication rather than Windows authentication. Many of our tools leverage a Call Flow Designer (CFD) application running on the 3CX. Frequently our CFD applications require access to a SQL database. If the 3CX server and the database server are not in an Active Directory domain, Windows authentication will fail. To use SQL authentication, your SQL Server must be configured to run in “Mixed Mode”. If you installed SQL Server with one of our tools, we configure SQL in “Mixed Mode”.
To ensure the authorization of your license key, it is necessary to complete the registration process. By registering with VoIPTools, you gain access to a range of benefits:
Key Replacement Assistance
In the unfortunate event of a lost license key, registering with VoIPTools lets us provide you with a replacement key promptly.
Product Updates and Reminders
By registering, you will receive timely notifications from VoIPTools regarding any product updates. Additionally, we will send reminders when your key is nearing its renewal date, ensuring uninterrupted access to our services.
Follow the procedure to register your software,
Double-click 3CX Audio Scheduler on your desktop to open the web application.
In the Login page, do the following
In the Extension field, enter your 3CX extension number.
In the PIN field, enter your 3CX voicemail PIN.
Click the Login button to log in to your account.
Figure 22: Login Page
NOTE:
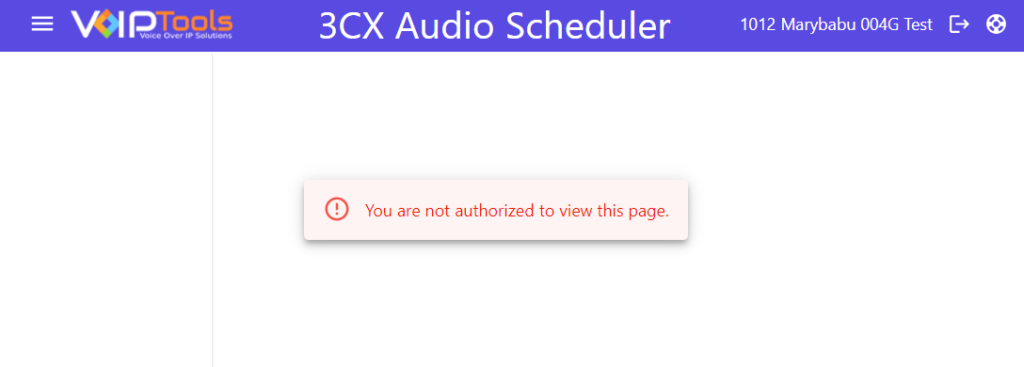
Only managers can log in to the application. Users are not authorized to access to access the application.
Figure 23: Access Denied to Non-Managers
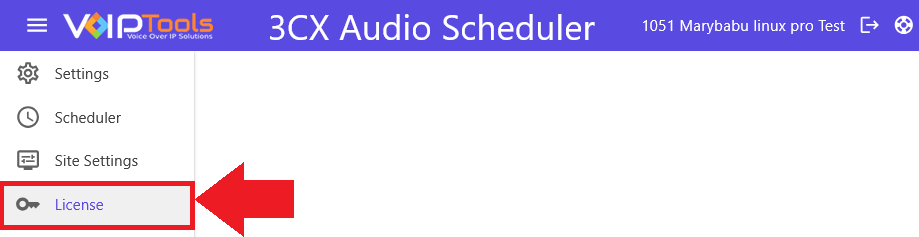
On the Web Application in the left side panel, click the License menu.
Figure 24: Left Side Panel – License Menu
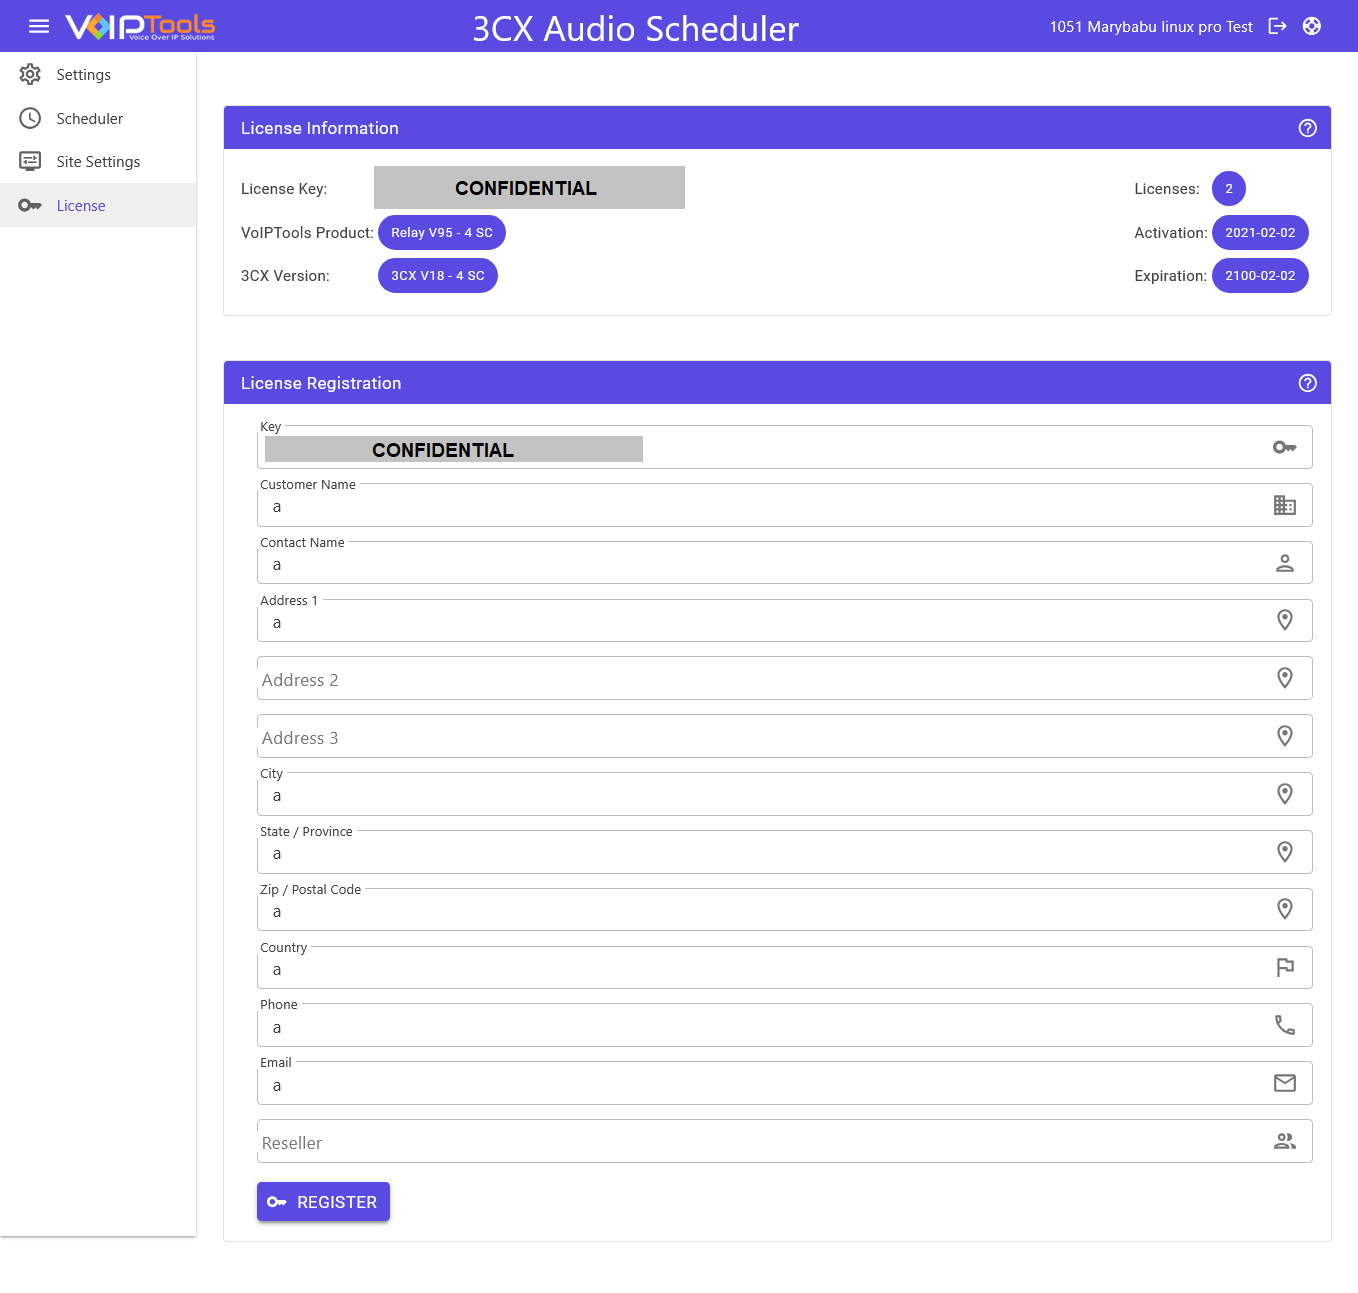
In the License Key field, enter the valid license key.
Enter appropriate details in all the other fields of the page Click Register to complete your registration.
Figure 25: Register Software
NOTE:
The license key permits you to install the software on one computer. This is not free software.
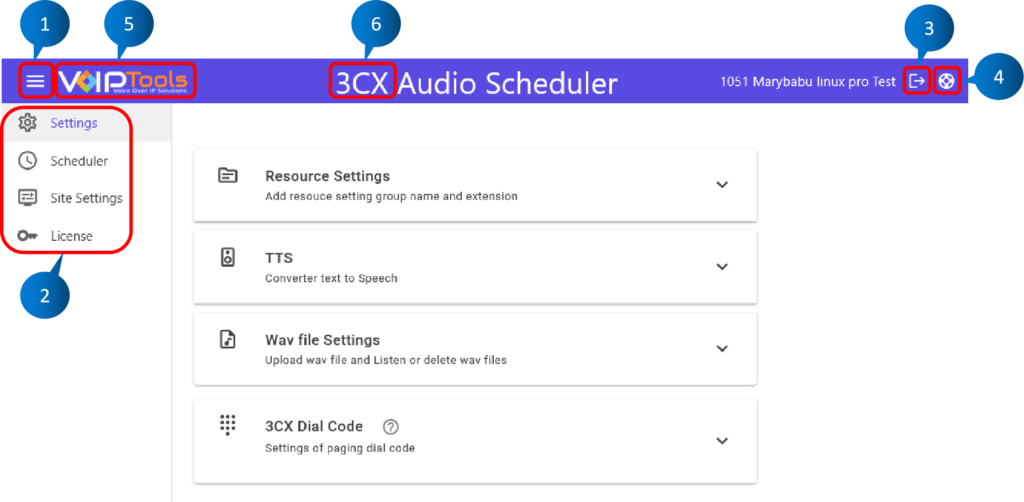
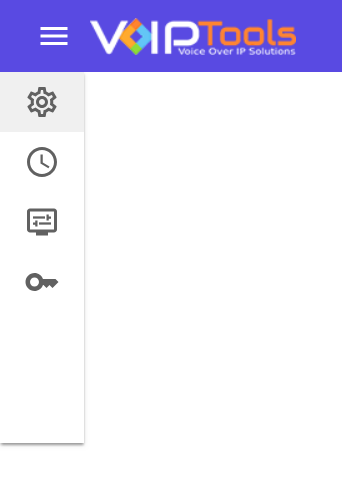
The Left Side Panel consists of all the menus of the web application. You can minimize the Left Side Panel to enlarge your main content.
Figure 27: Left Side Panel – Compact View
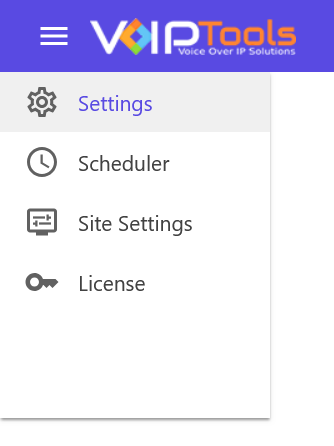
Figure 28: Left Side Panel – Expanded View
The left side panel consists of the following menus,
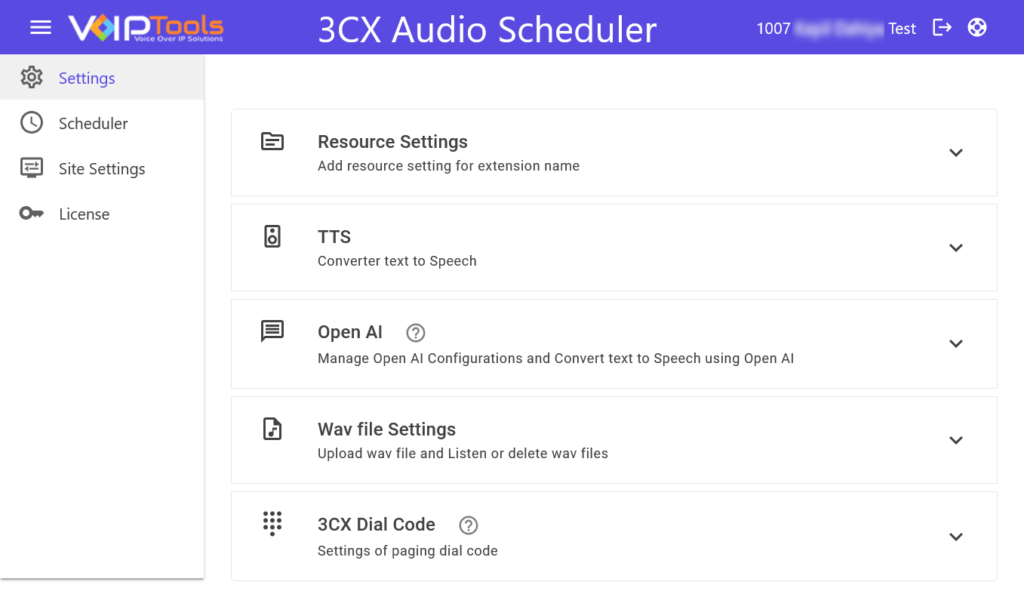
Settings menu
The Settings Menu allows users to configure essential application settings through four main tabs: Resource Settings, TTS Settings, WAV File Settings, and Page Dial Code settings. The Resource Settings tab facilitates the addition of resources and the assignment of audio files. The TTS Settings tab enables the creation and management of text-to-speech audio files. The WAV File Settings tab allows for the upload and deletion of local audio files. The Page Dial Code tab configures auto-answer functionality for phones.
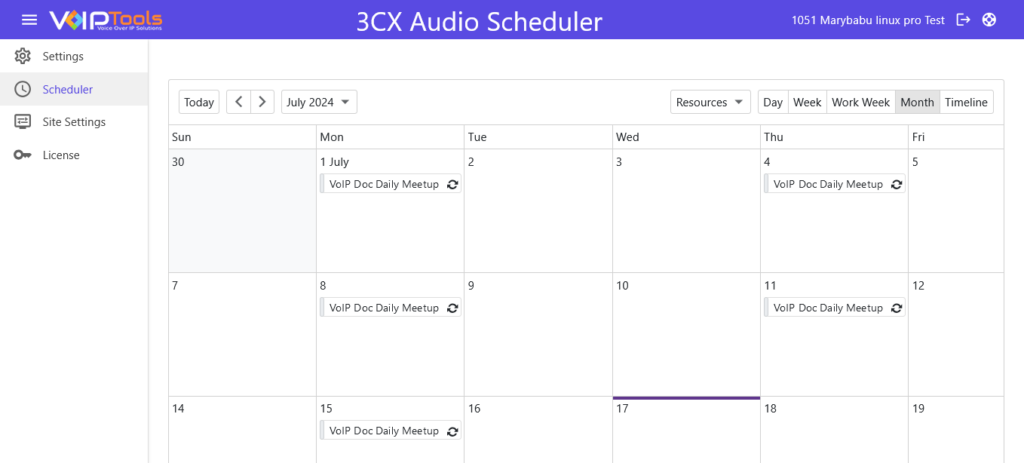
Scheduler menu
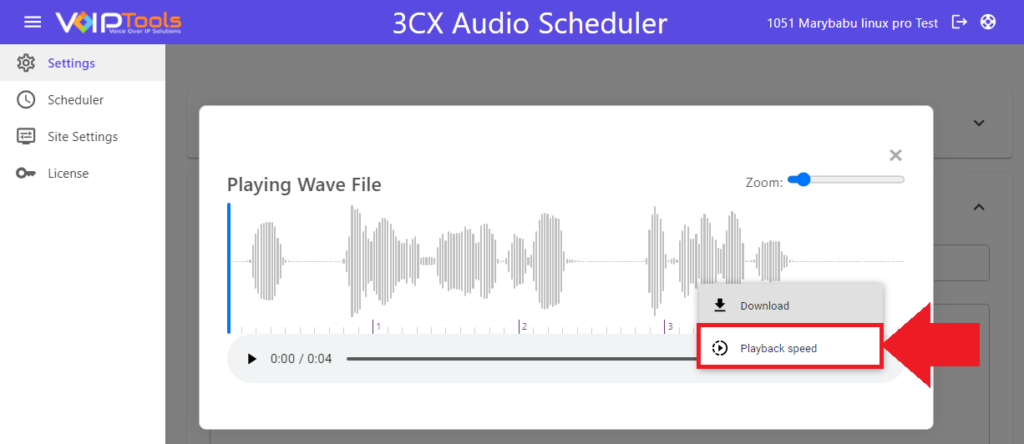
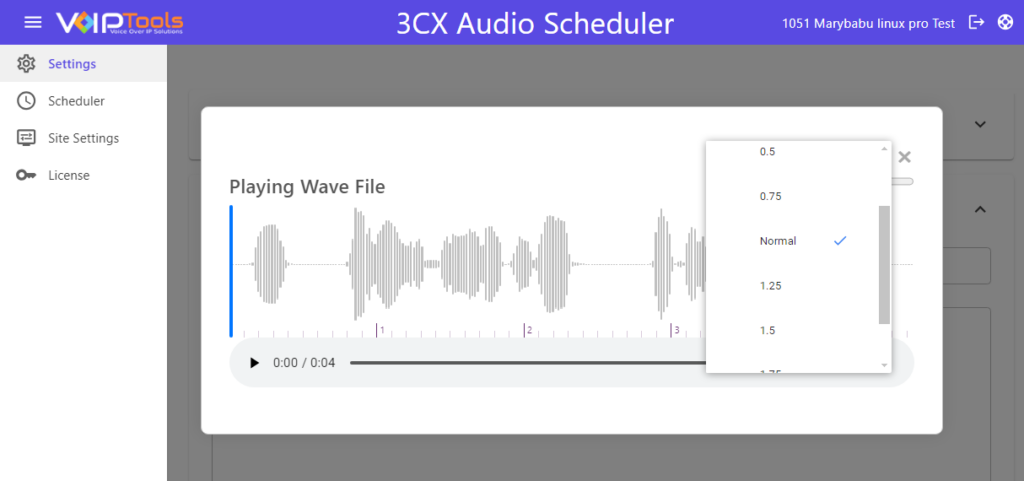
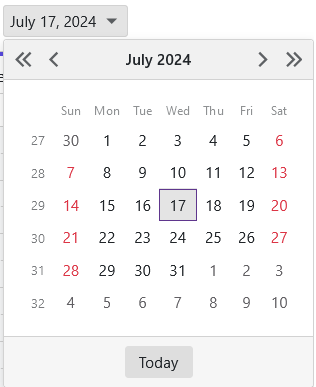
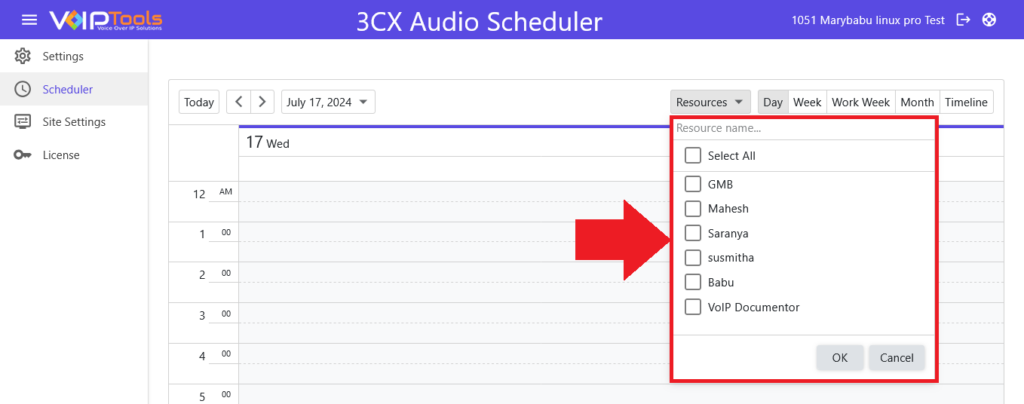
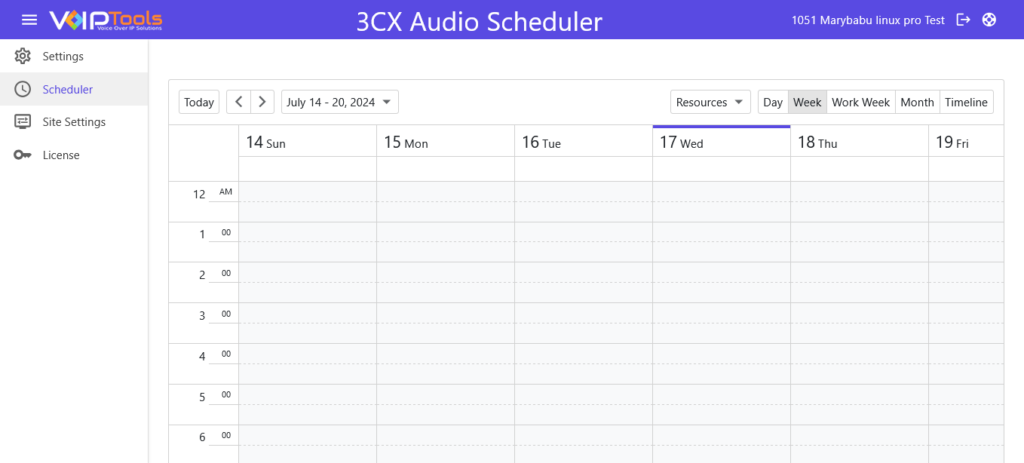
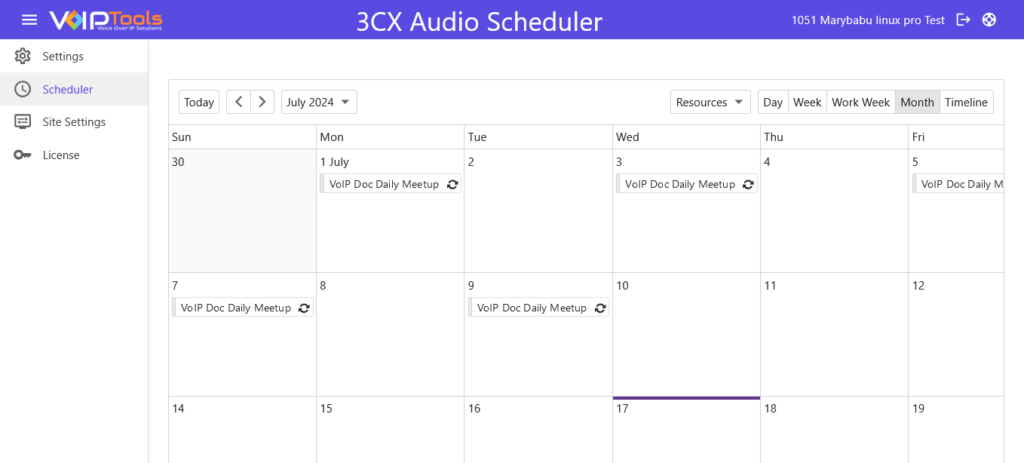
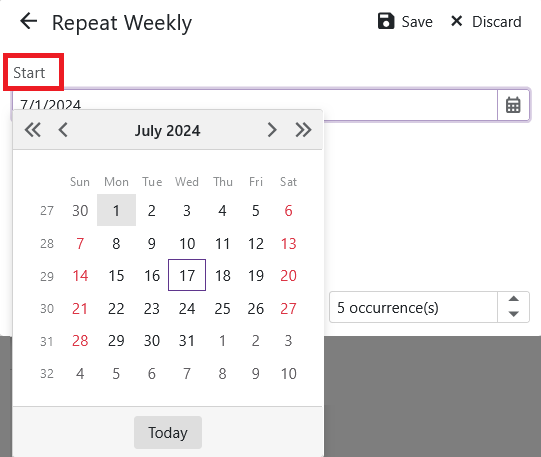
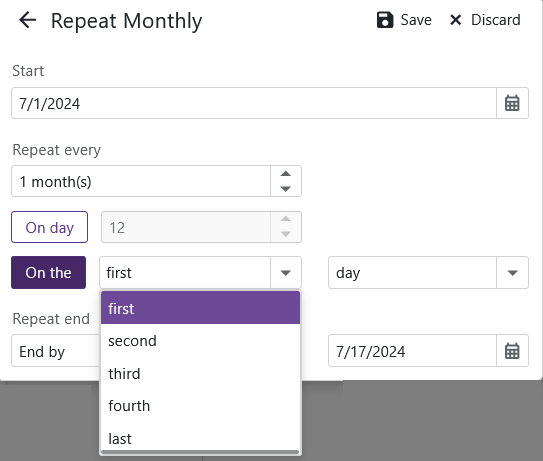
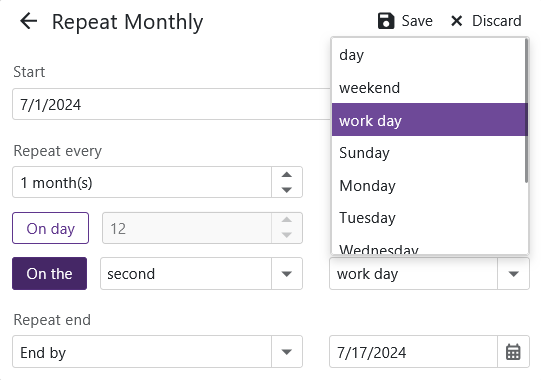
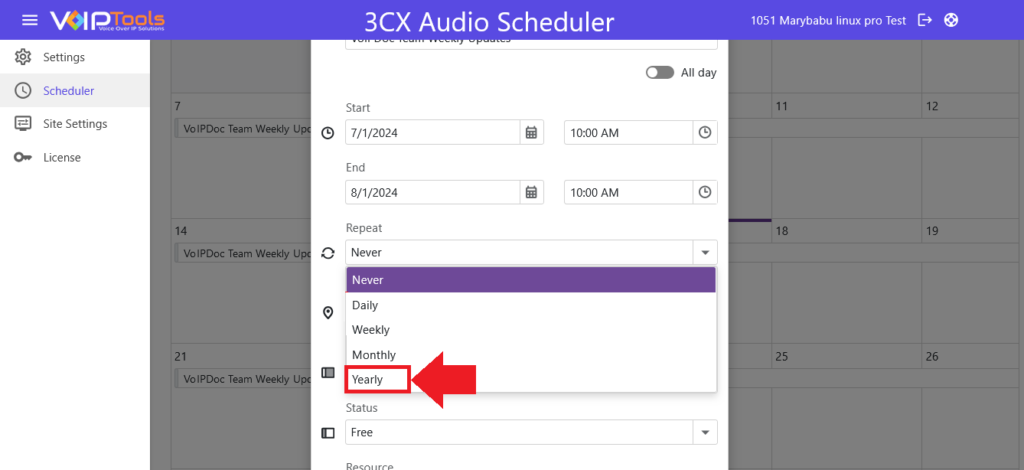
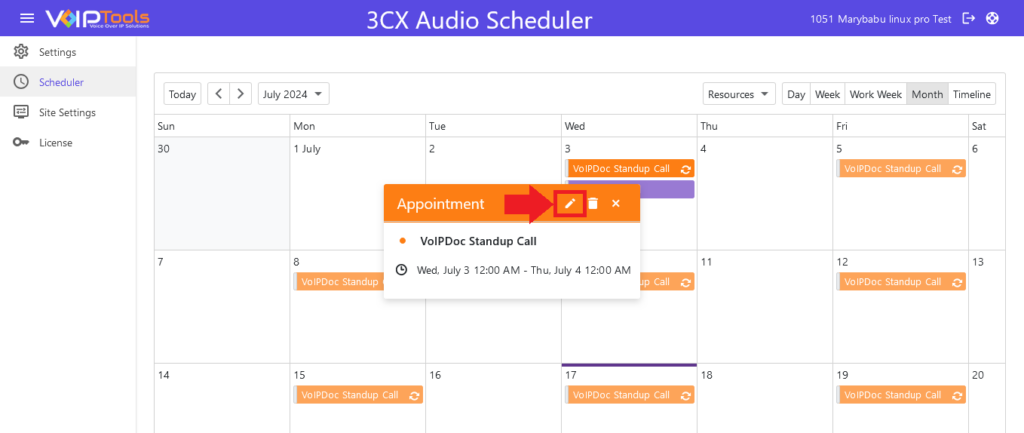
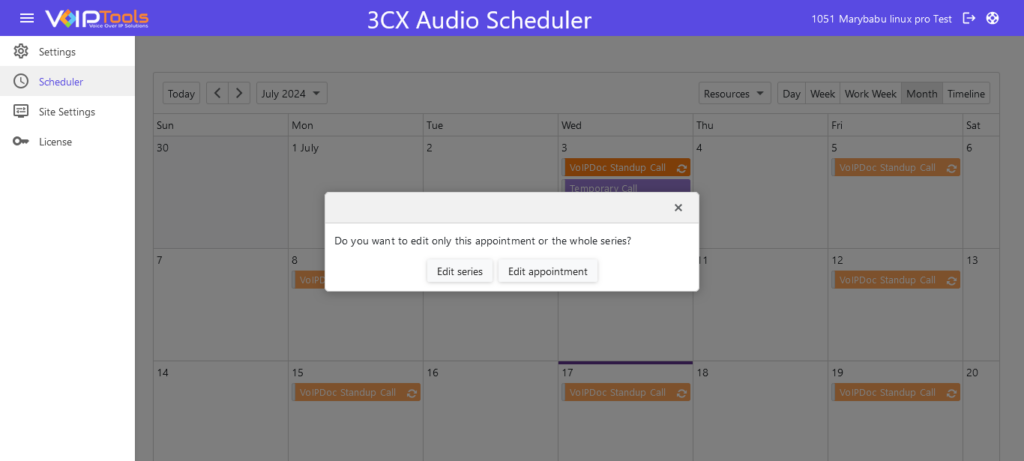
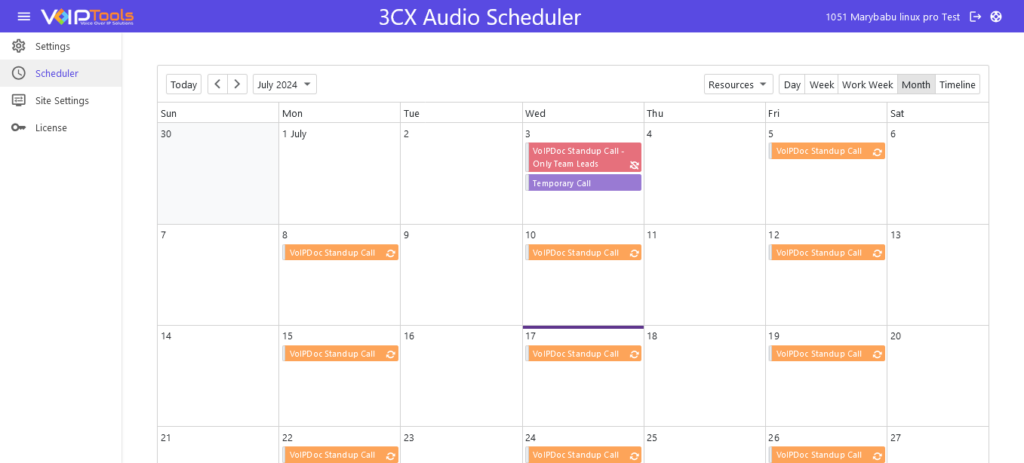
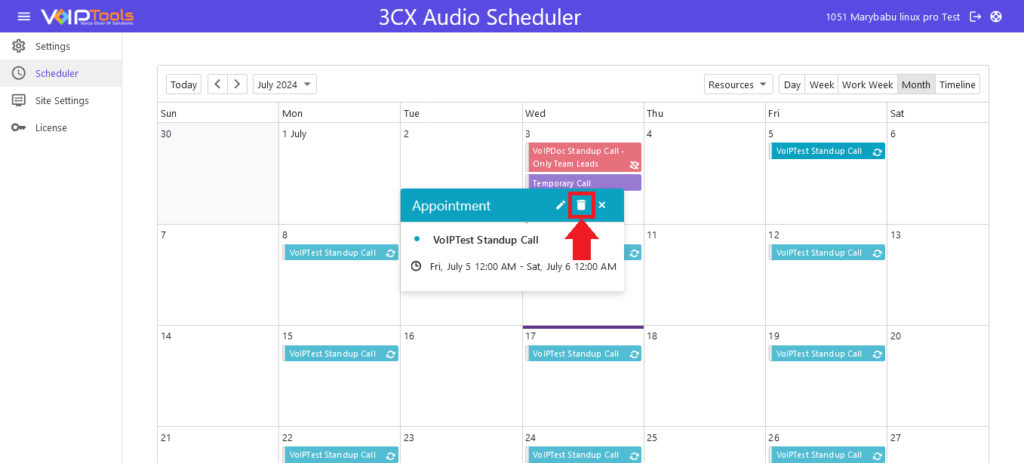
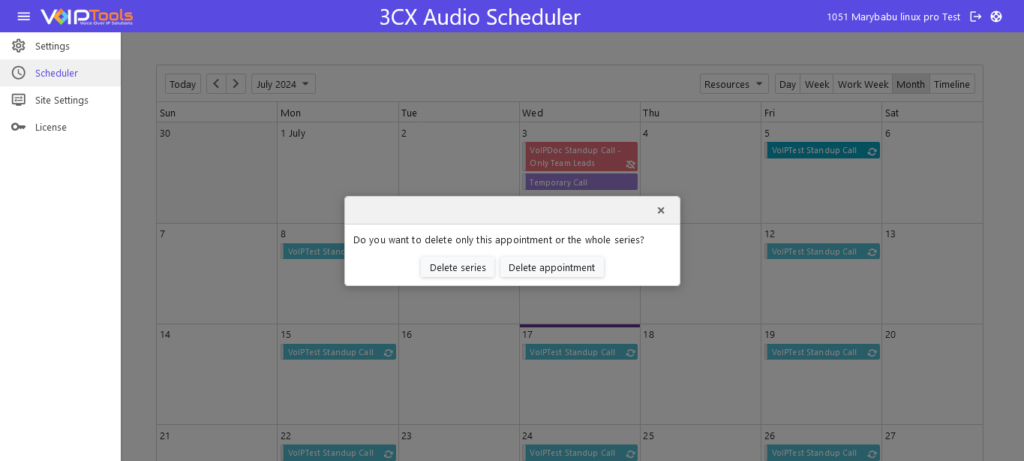
The Scheduler Menu facilitates efficient appointment management, allowing users to schedule, edit, and delete appointments. Key features include a Date Selection tool for viewing and modifying appointments by date, a Resource Dropdown for selecting resources, and various display options for viewing schedules in different formats. Users can create both simple and advanced appointments, set recurring appointments daily, weekly, monthly, or yearly, and adjust playback speed. This comprehensive scheduling tool enhances organization and productivity.
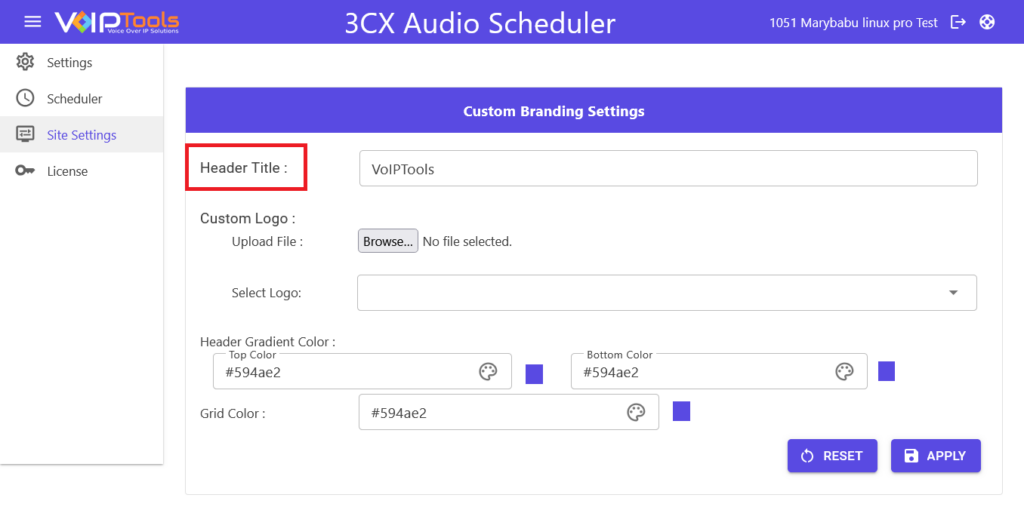
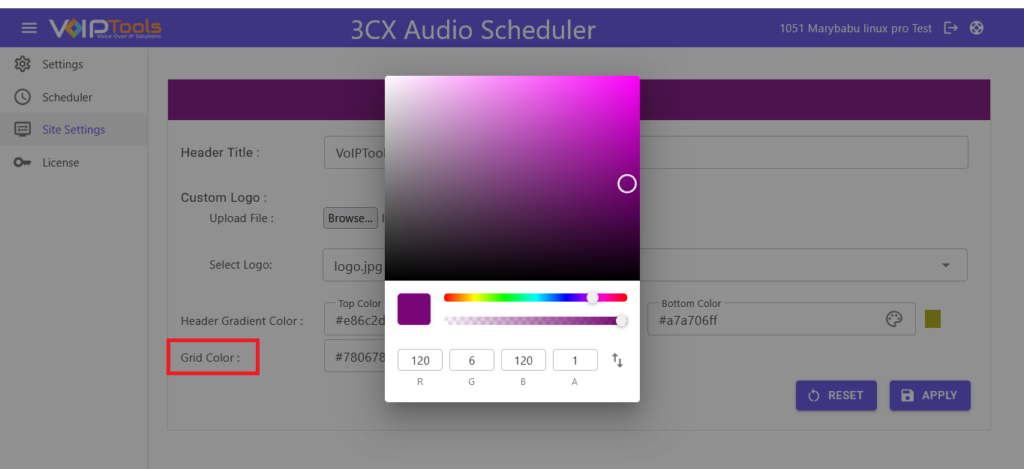
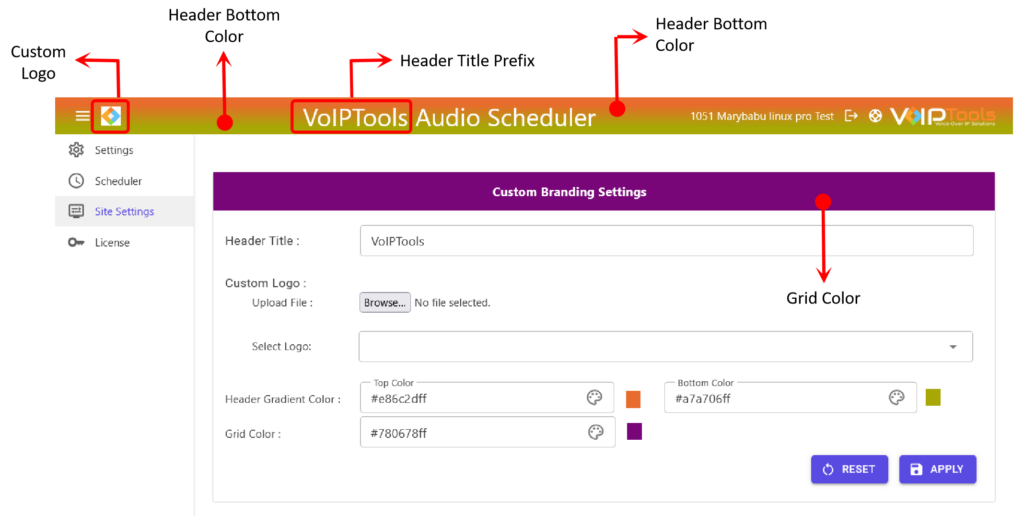
Site Settings menu
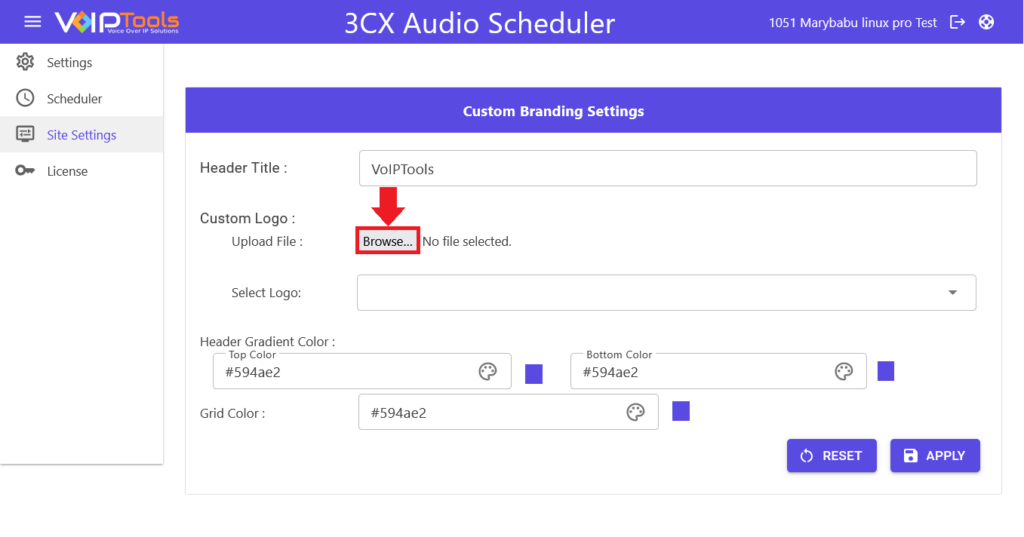
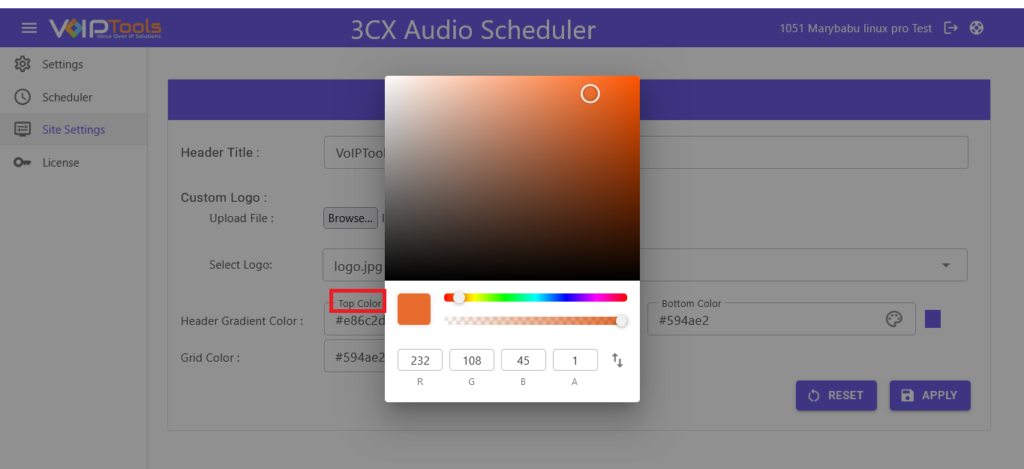
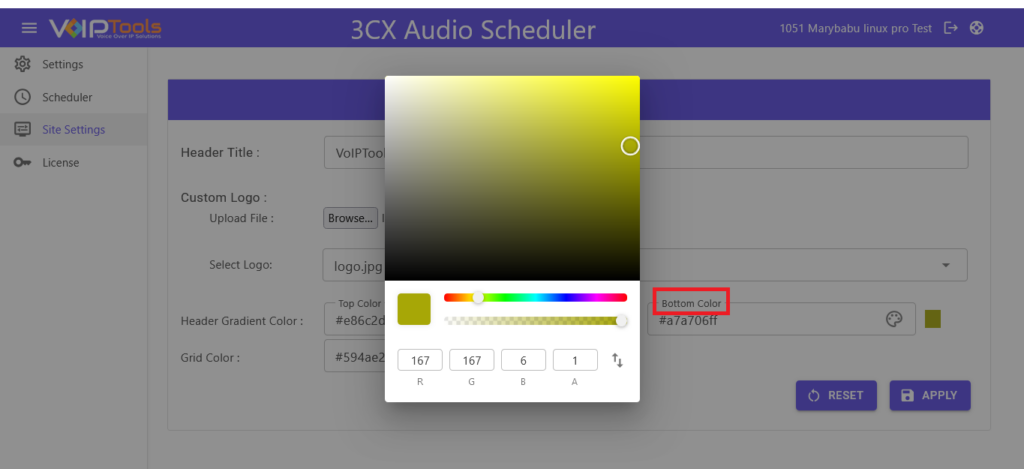
The Site Settings feature enables comprehensive customization of the application’s branding, allowing you to adjust the header’s gradient color, grid color, logo, and header title prefix. These customizations personalize the application to align with your company’s branding, enhancing the overall user experience. By tailoring these visual elements, you ensure the application’s appearance reflects your company’s identity, creating a cohesive and professional interface for users.
License menu
The License Tab serves to authenticate and manage your software license key through the registration process with VoIPTools. By registering, users ensure access to key benefits: prompt replacement of lost keys, timely notifications of product updates, and reminders for key renewal to maintain uninterrupted service access. It is essential to note that each license key permits installation on a single computer, emphasizing compliance with licensing terms and ensuring proper utilization of the software.
In the Settings Menu, you can configure essential application settings through four main tabs: Resource Settings, TTS Settings, WAV File Settings, and Page Dial Code Settings. In the Resource Settings tab, you add resources and assign audio files. The TTS Settings tab allows you to create and manage text-to-speech audio files. In the WAV File Settings tab, you upload and delete local audio files. The Page Dial Code tab lets you configure auto-answer functionality for phones.
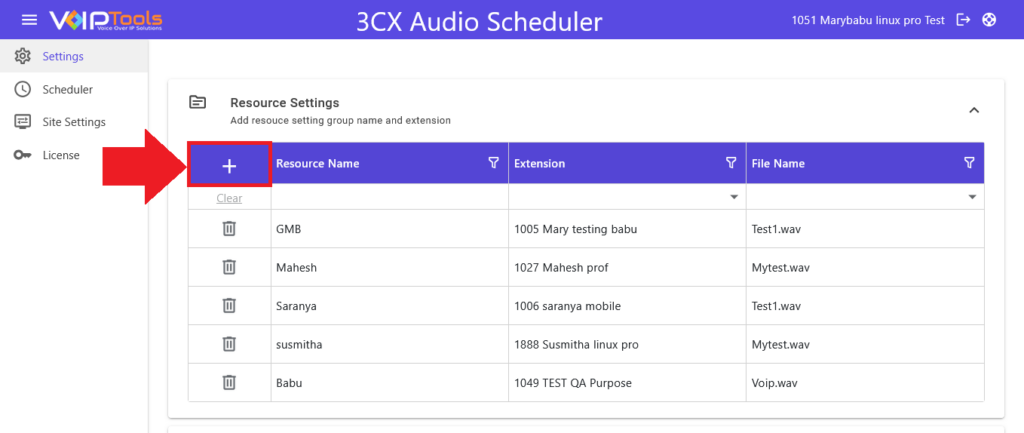
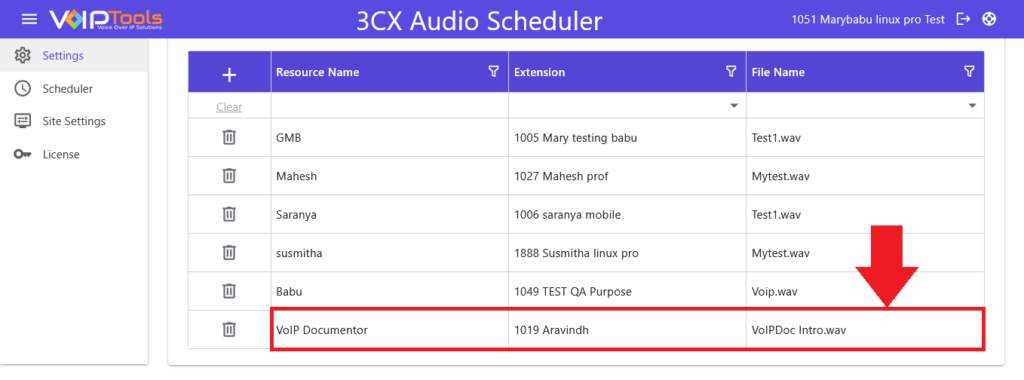
Resource Settings
In the Resource Settings tab, add resources and assign audio files using TTS or by uploading from your device.
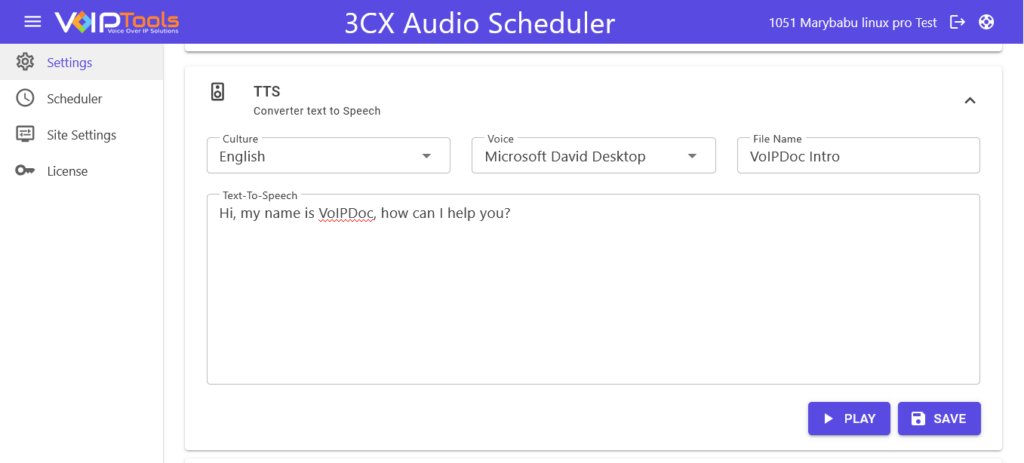
TTS
The TTS tab lets you create audio files that can be assigned to your resources.
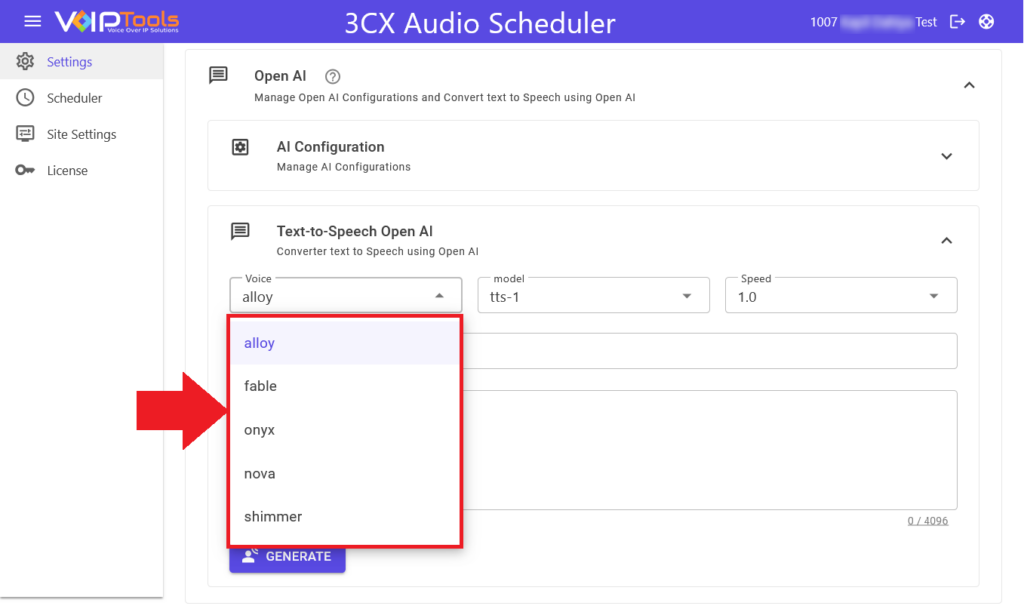
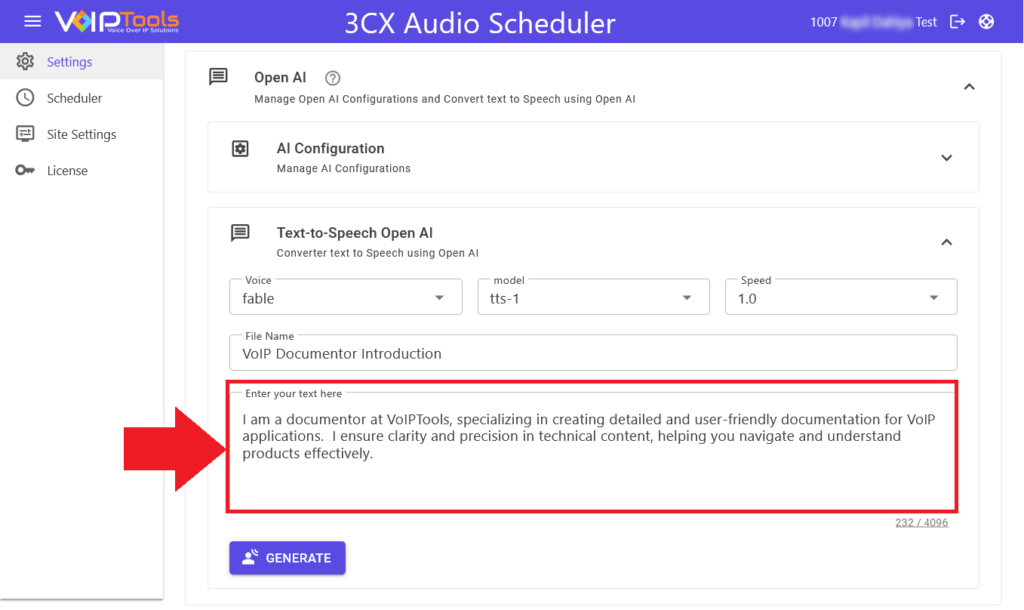
Open AI
The features let you connect to OpenAI, generate, customize, play, and download audio from text, with waveform controls.
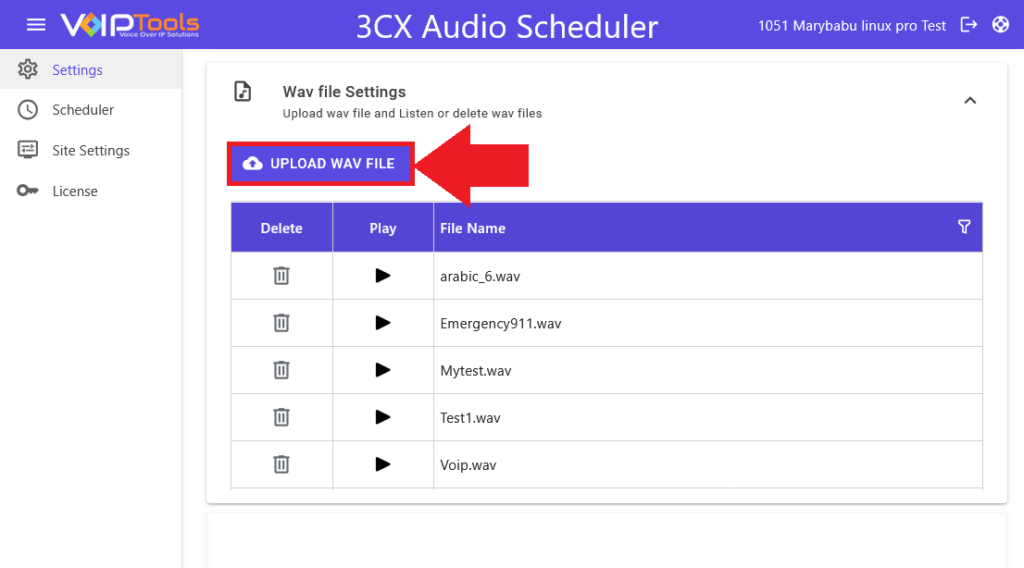
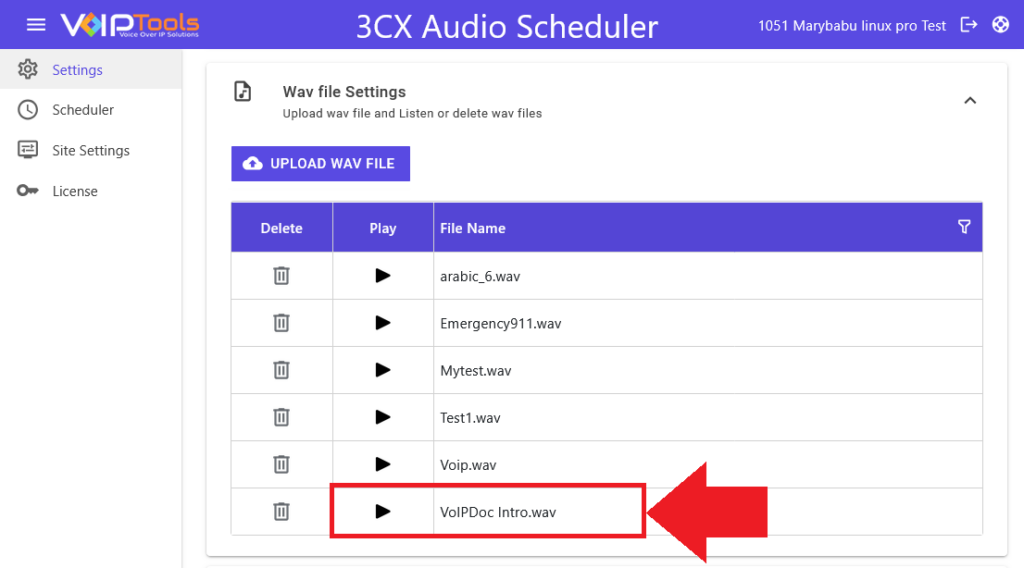
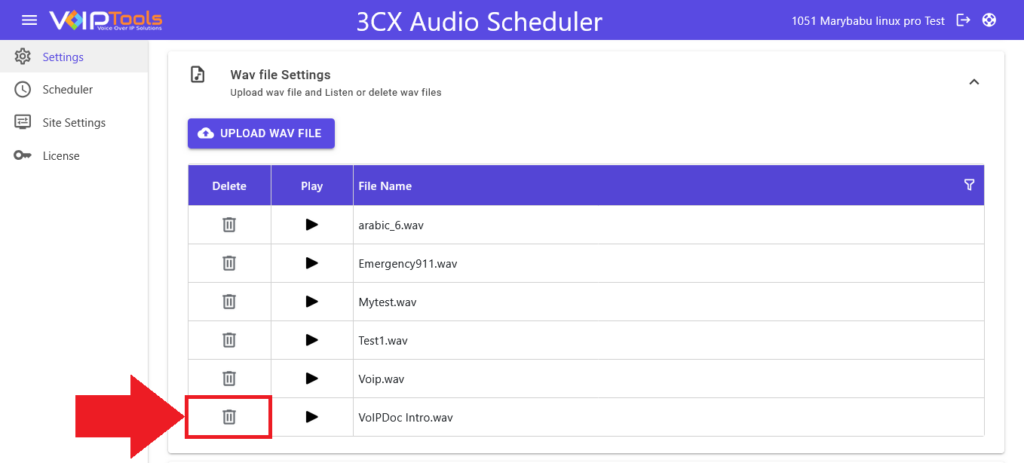
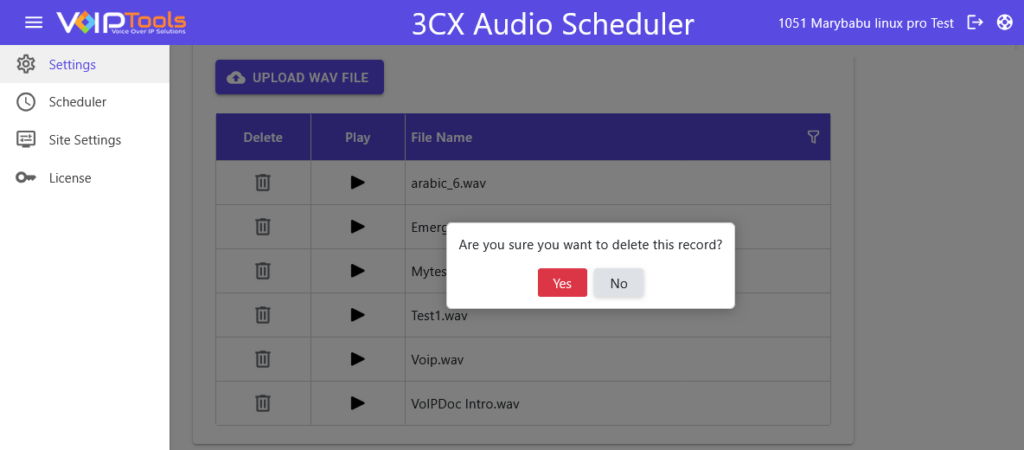
Wave File Settings
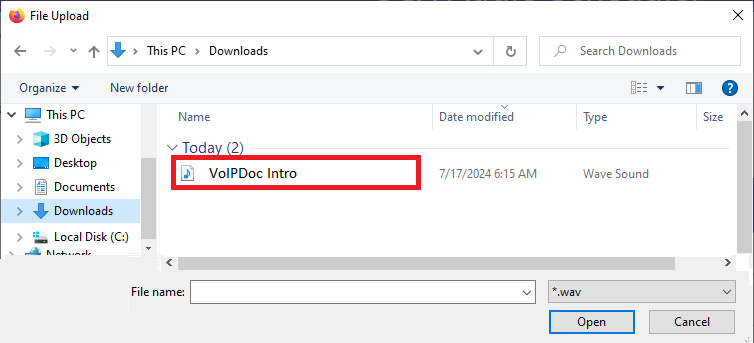
In the .WAV File Settings tab you can upload the audio files from your local device.
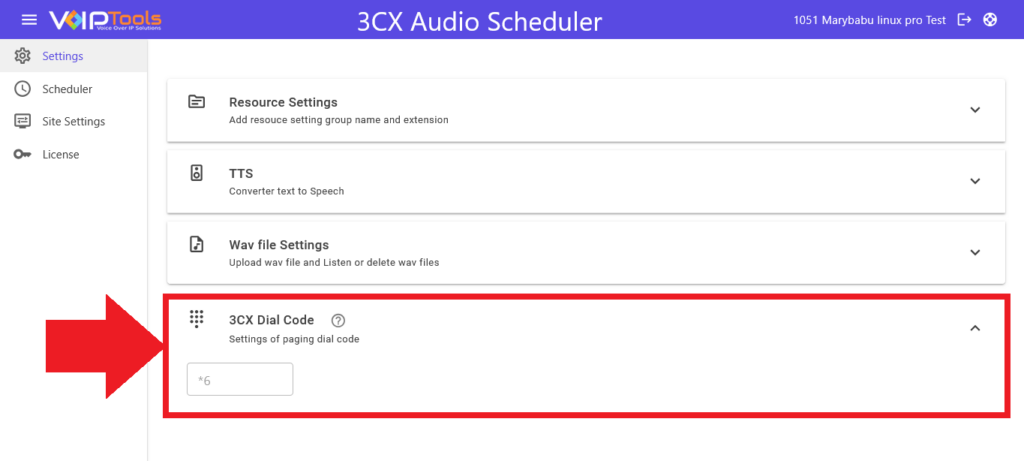
3CX Dial Code Settings
The Paging Dial Code lets your phone auto-answer, provided it is correctly provisioned in the 3CX Console Management.
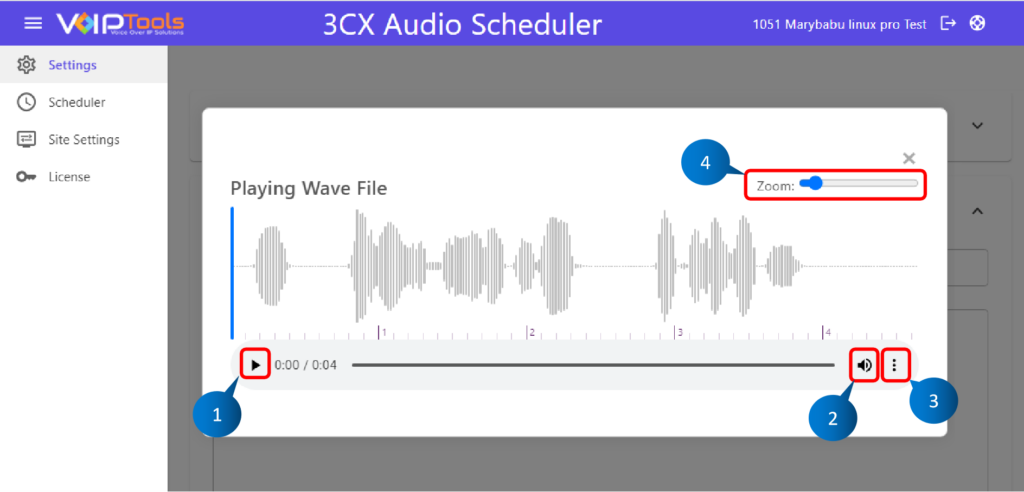
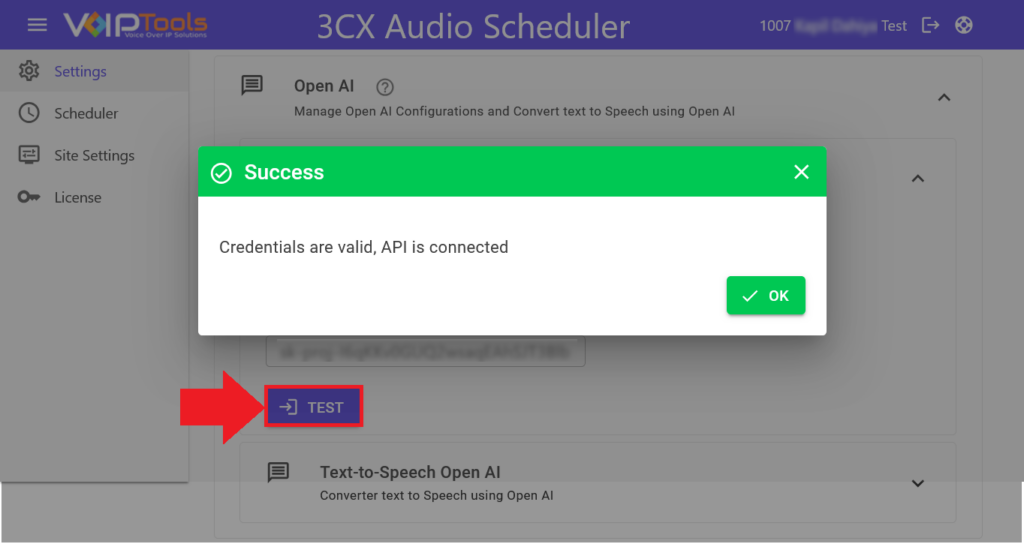
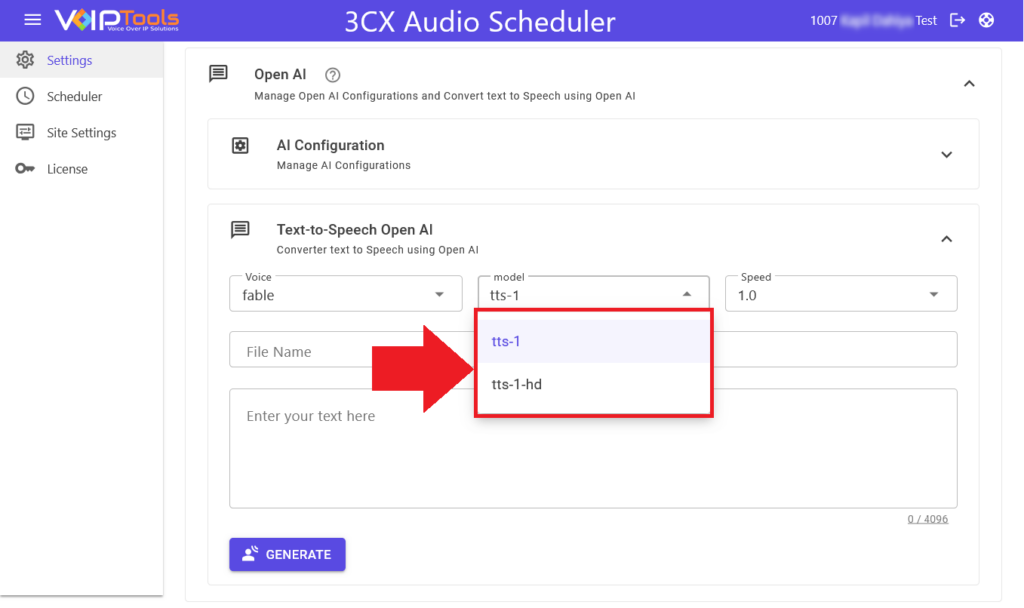
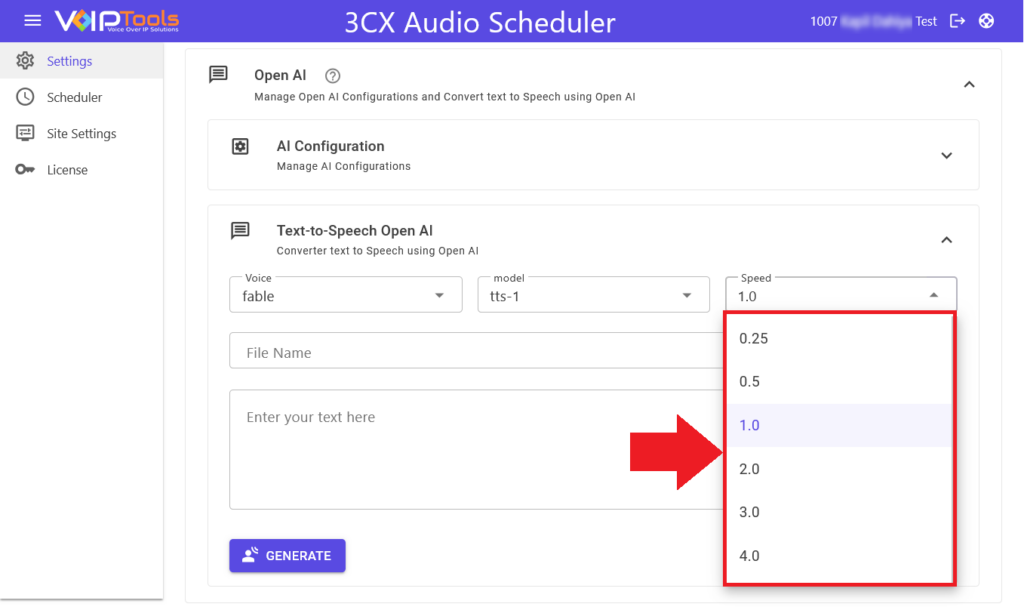
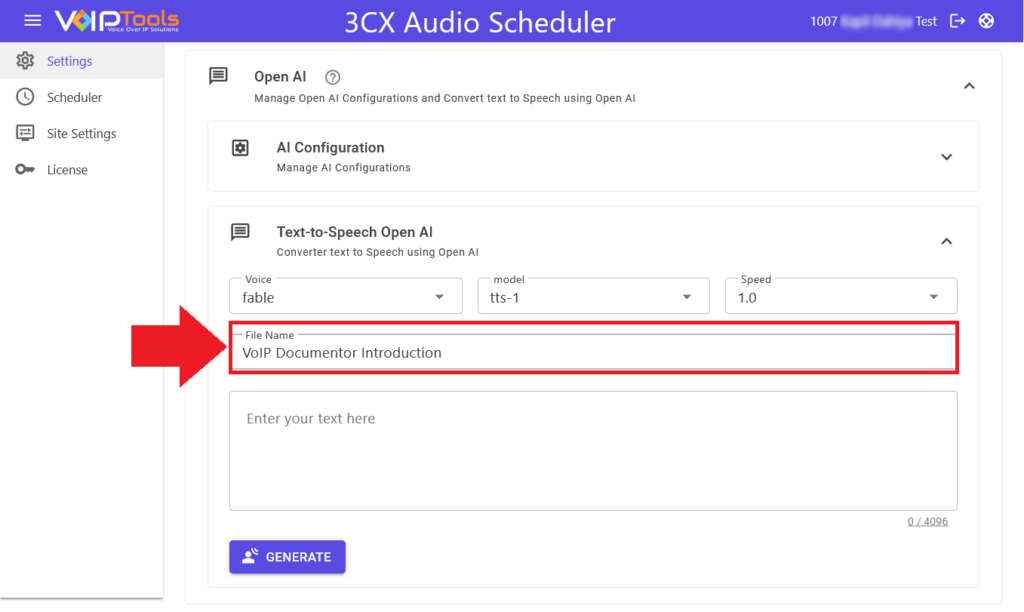
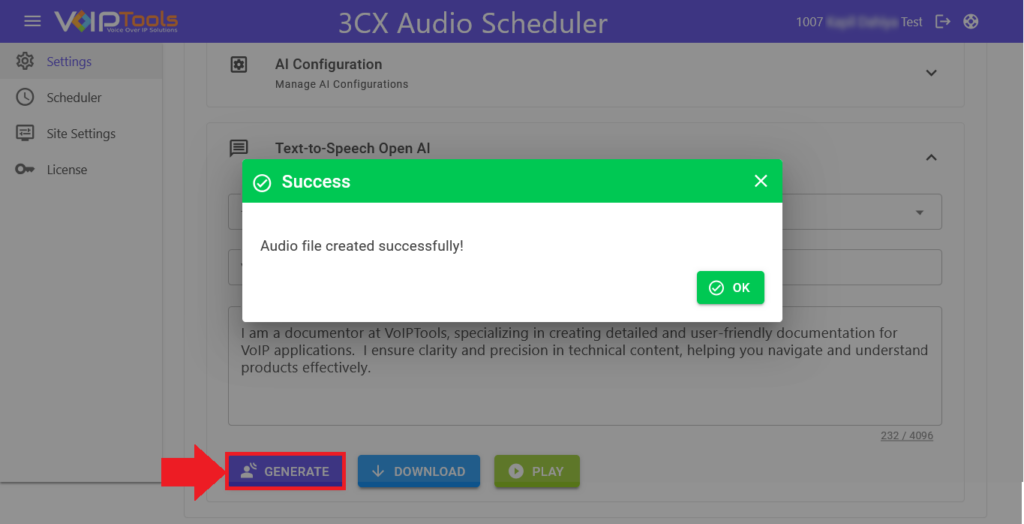
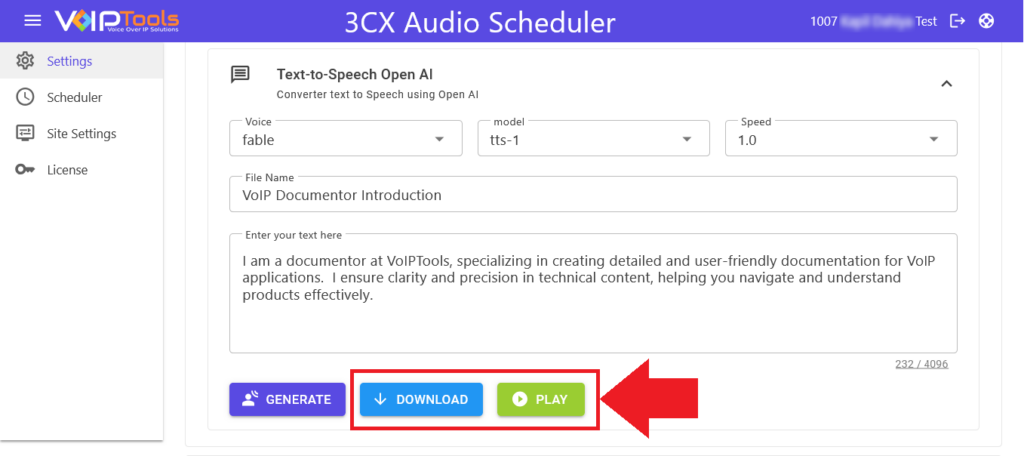
The AI Configuration and Text-to-Speech Open AI features allow you to connect to the OpenAI API, generate custom audio from text, and adjust settings like voice, model, and speech speed. You can save, play, and download the generated audio, with tools to fine-tune and view the waveform in detail.
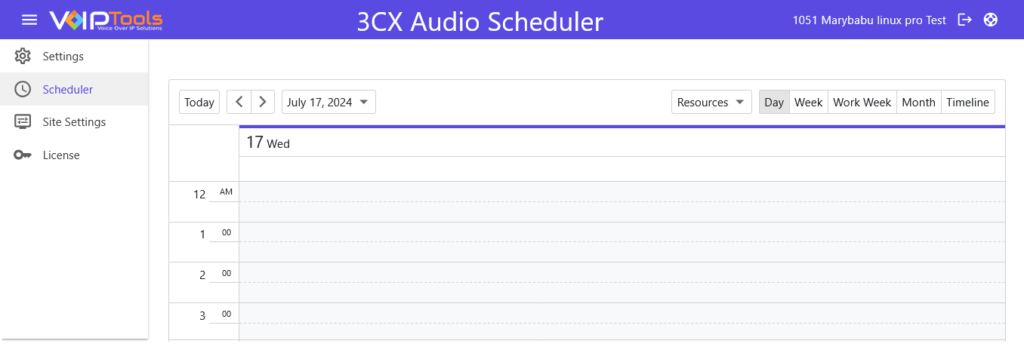
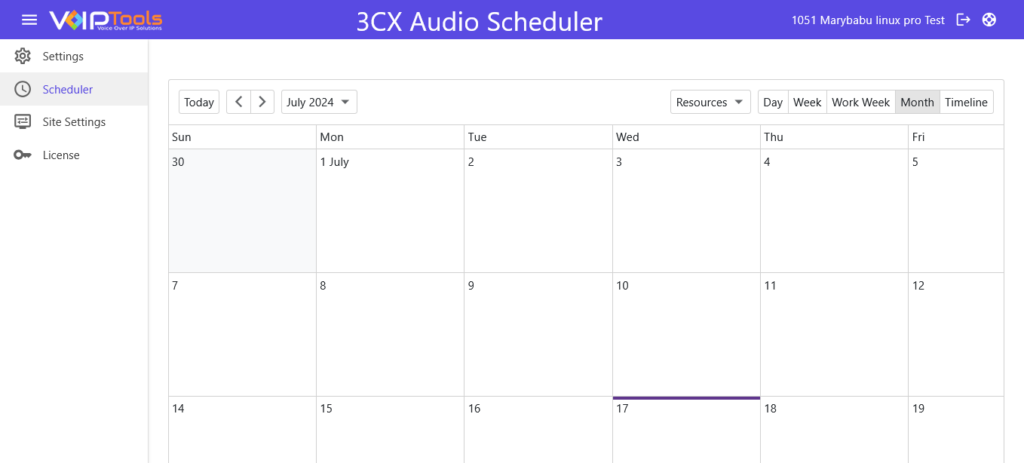
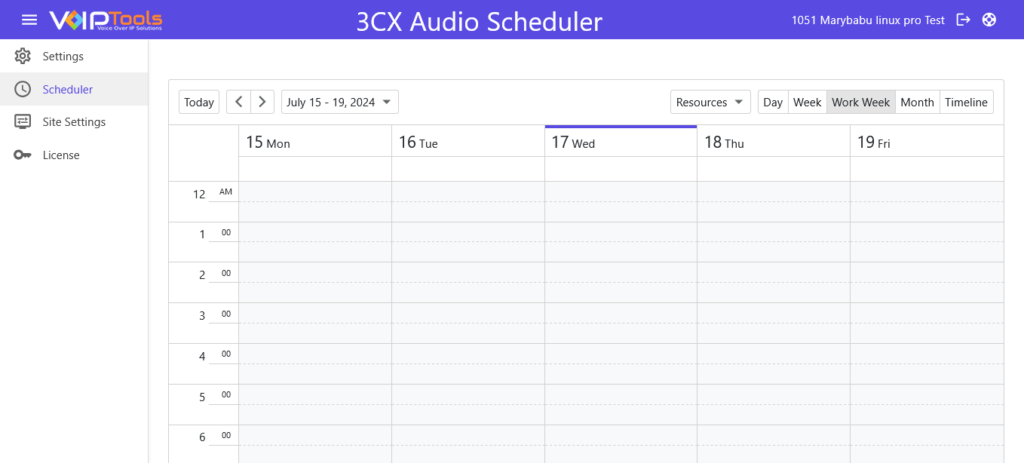
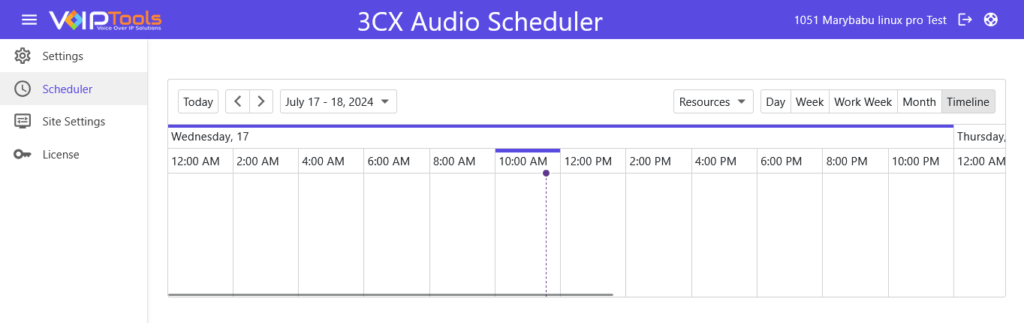
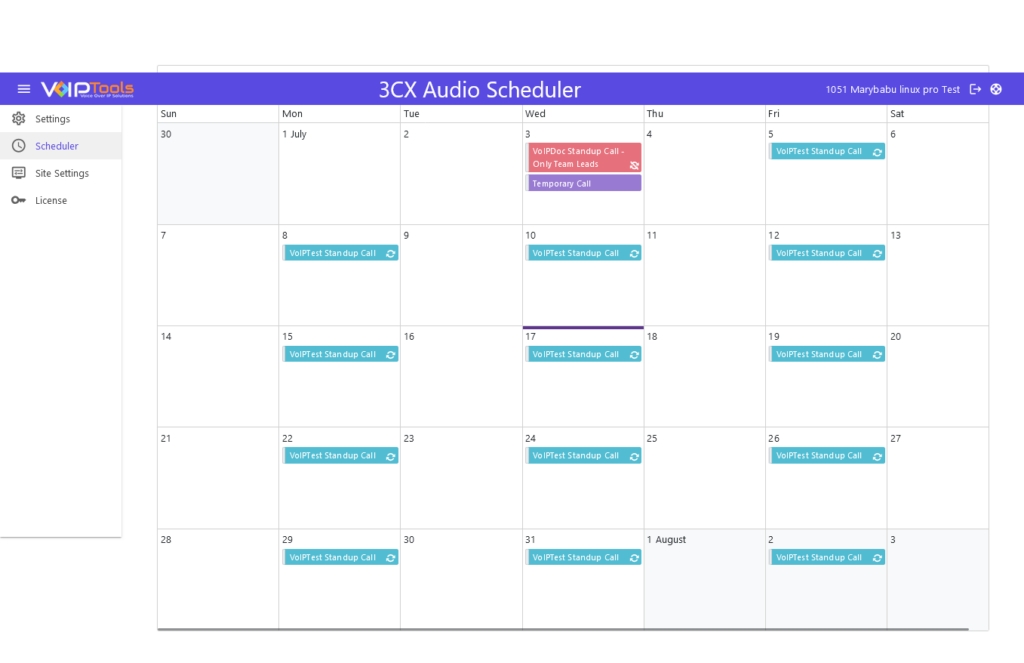
This feature offers enhanced flexibility and efficiency by allowing customized views. Whether a detailed daily schedule or a monthly overview is required, the various display formats facilitate improved time management, planning, and productivity. You can view the display area in multiple formats: Day, Week, Work Week, Month, and Timeline views.
Select the display type using the Display Option tool.
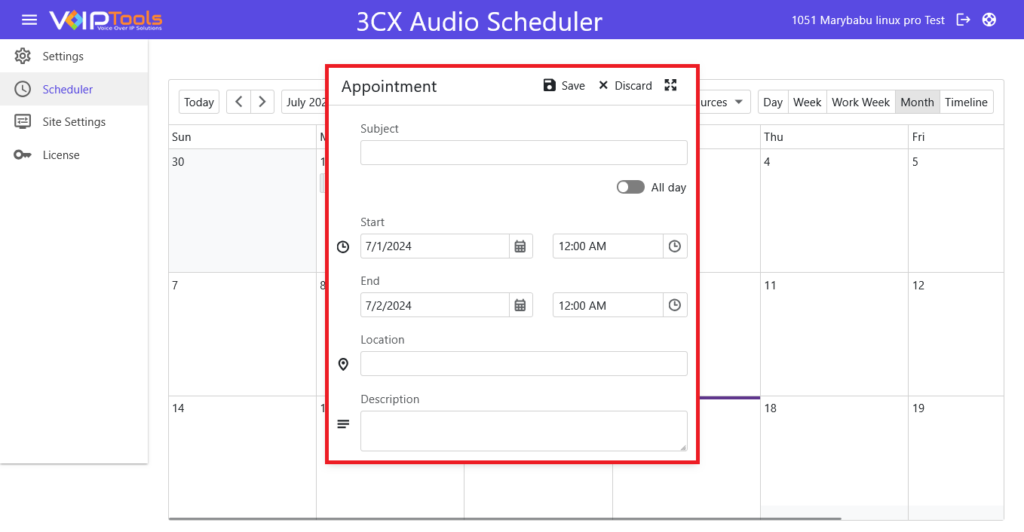
Click any day or date in the display to open the Add Appointment popup.
Figure 49: Simple Appointment Box
Enter the appointment details and click the Save button to save the appointment or click the Advanced Appointments button to further edit the appointment.
Follow the procedure to add more advanced appointments,
Click any day or date in the display to open the Add Appointment popup.
click the Advanced Appointments button to further edit the appointment.
Enter the appointment details and click the Save button to save the appointment.
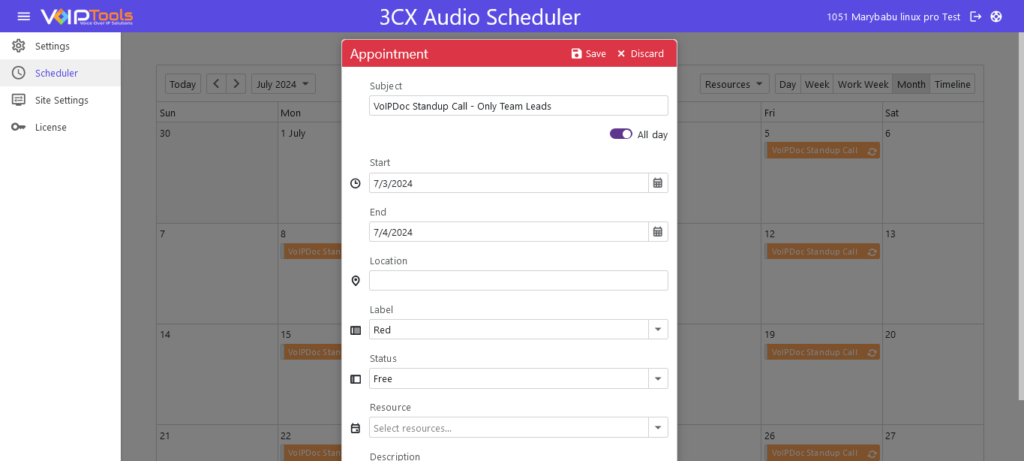
Figure 51: Advanced Appointment Details
SUBJECT
Brief description of the appointment
ALL DAY TOGGLE
If the schedule is for the complete day, then check the All-day event box. If you check this box, you will observe that the time selection box (from ‘Start time’) will disappear.
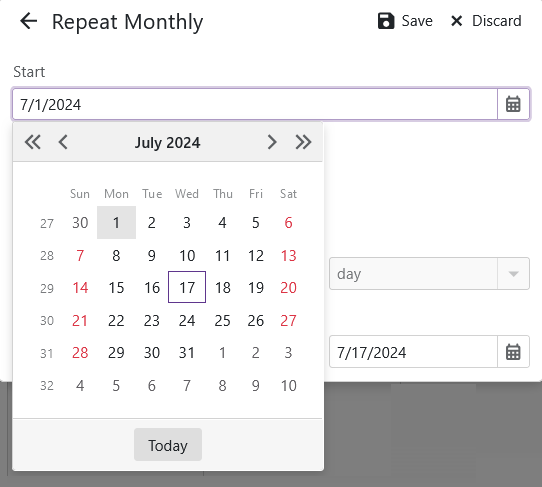
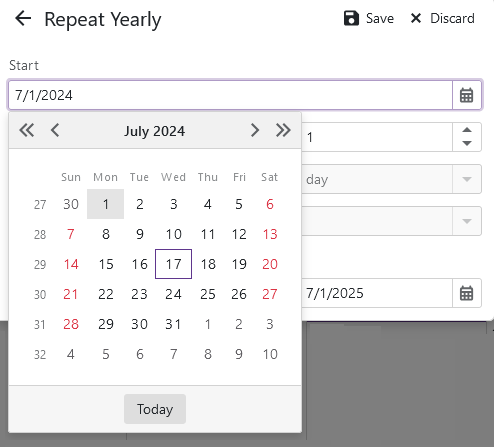
START TIME
The date and time from which the ‘On Call’ time starts for the agent
END TIME
The date and time at which the ‘On Call’ time ends for the agent
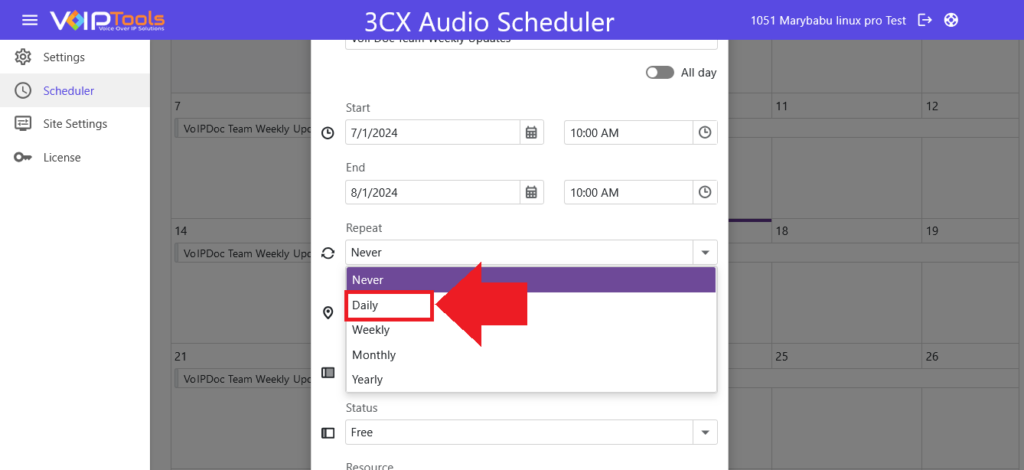
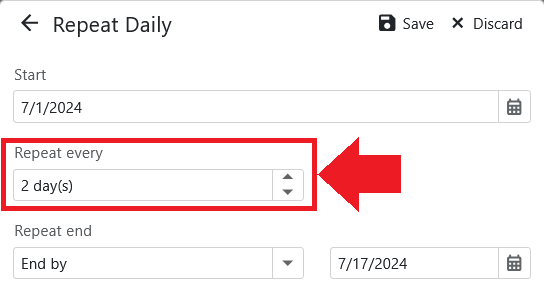
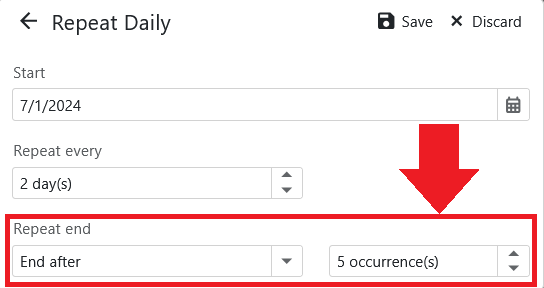
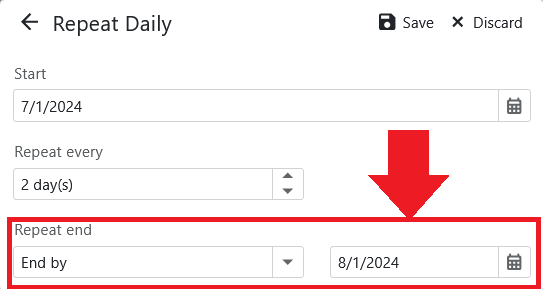
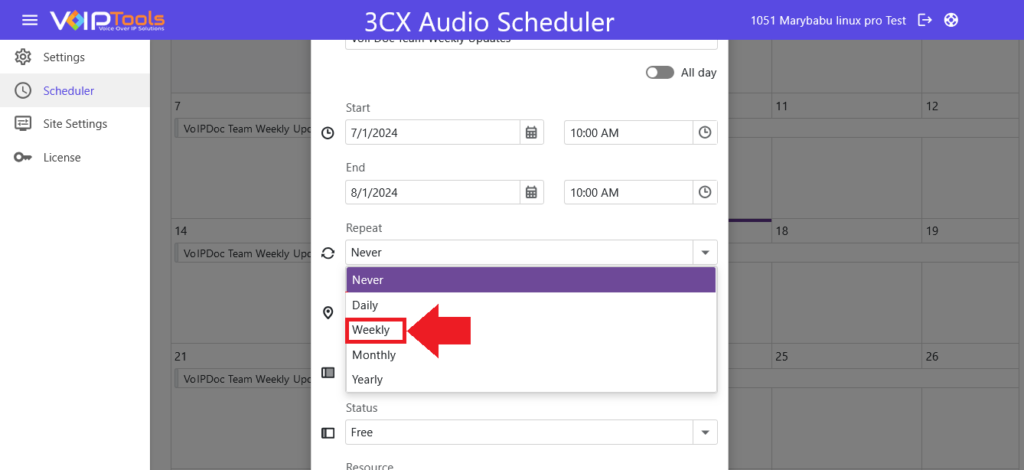
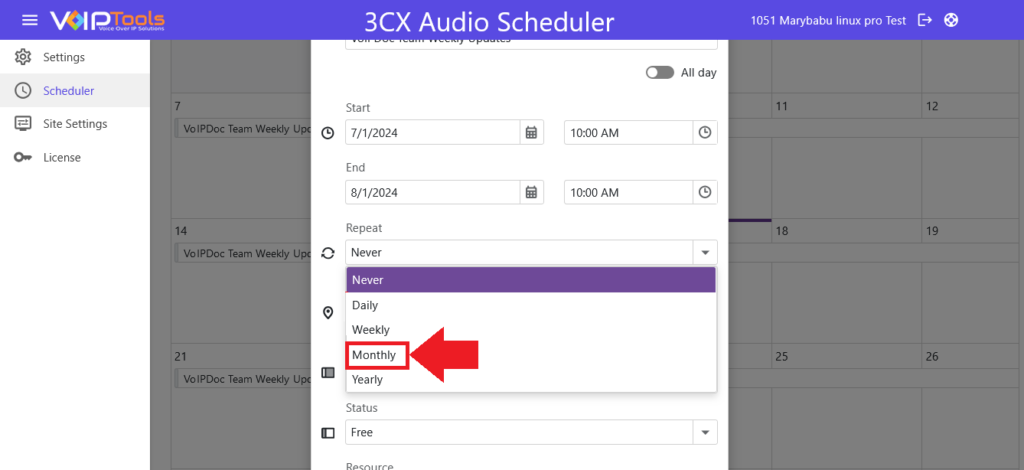
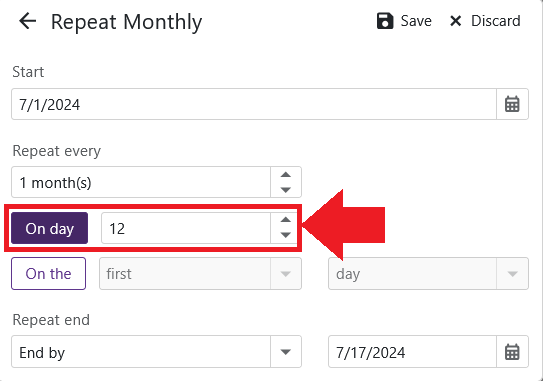
RECURRENCE
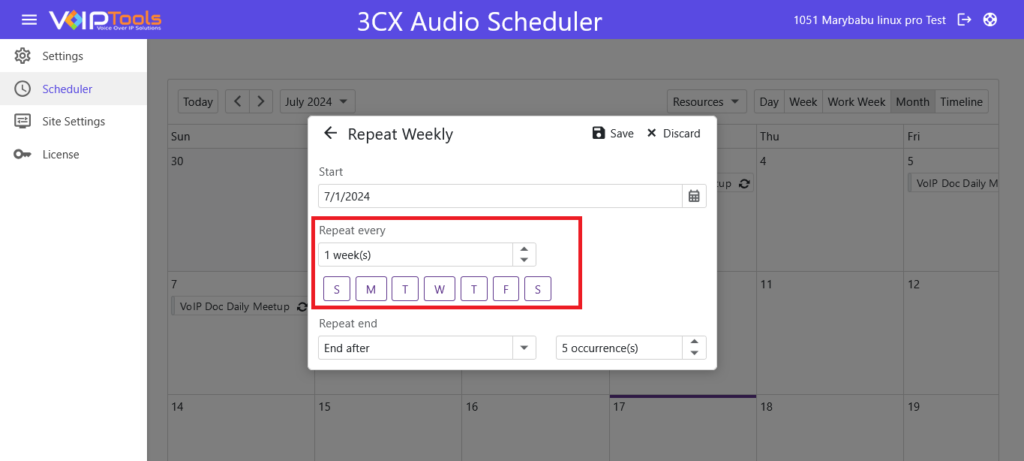
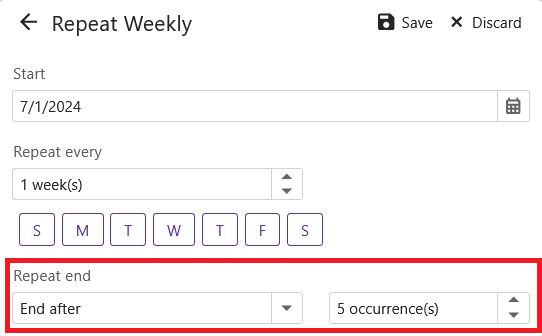
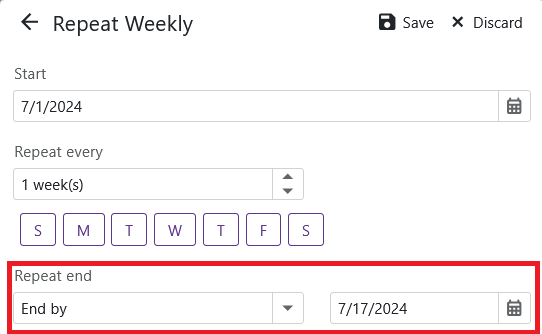
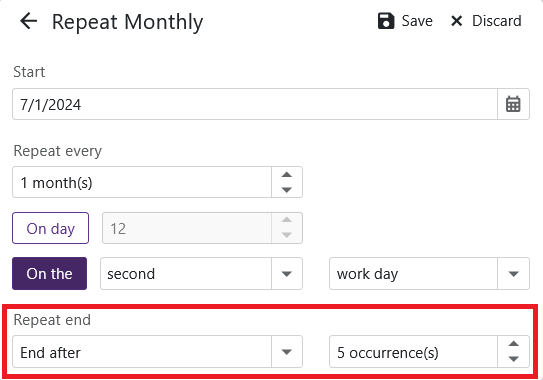
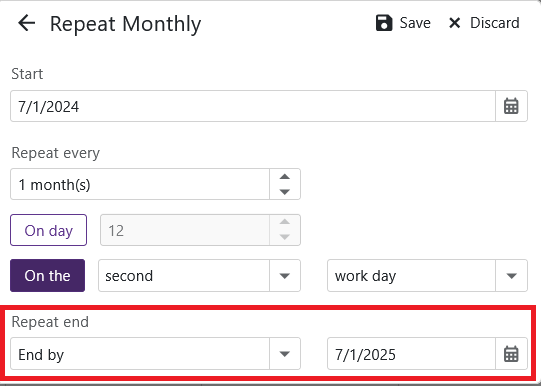
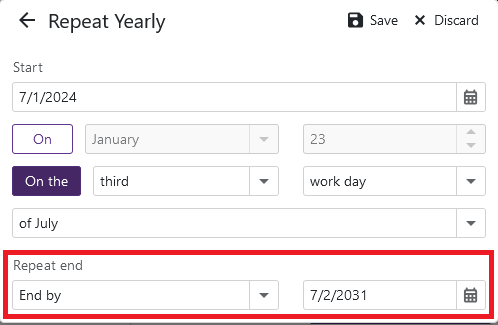
If you want the appointment to recur, check the Recurrence box. From the available options select the appropriate value (Daily, Weekly, Monthly, Yearly, Every—day(s) or Every weekday) for the appointment to recur.
LOCATION
Location of the agent for whom you are creating the appointment
LABEL
You can label the appointments using different colors.
STATUS
Specifies the work status of the agent as busy, free, tentative, out of the office or working elsewhere. Show time as is valid for Start time to End time
RESOURCE DROPDOWN
Select the agent from the dropdown for whom you are creating the appointment.
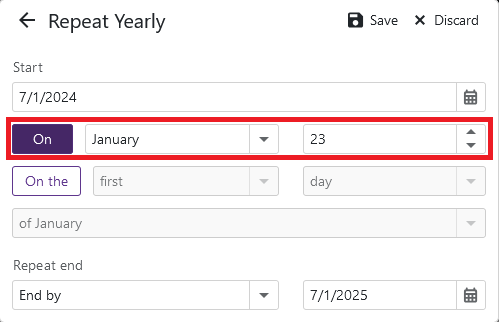
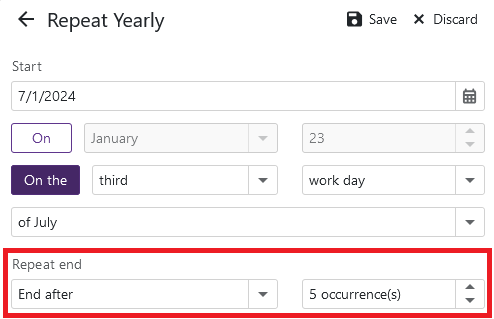
Recurring Appointments feature streamlines scheduling by automating repetitive appointments, saving time, reducing errors, and ensuring consistent and timely engagement for daily, weekly, monthly, or yearly events.
The Site Settings feature provides the advantage of comprehensive customization, allowing you to personalize the application’s branding. This includes adjusting the application header’s gradient color, grid color, logo, and header title prefix. These customizations enhance the user experience by aligning the application’s appearance with your company’s branding.
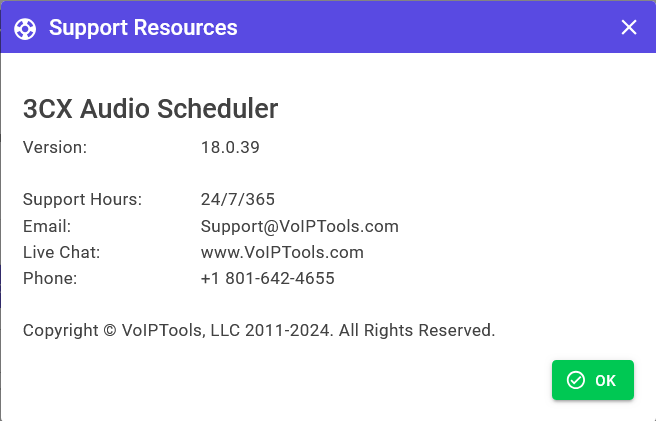
This tab provides you with essential support resources for the 3CX Audio Scheduler. It includes the version number (18.0.39), contact email, live chat link, and phone number. This information ensures you can access technical support and assistance whenever needed. For more details on VoIPTools Support click here.
You get quick answers to most of your inquiries in our online manual. If you prefer direct contact, we offer various support channels, including phone, email, live chat, and our helpful VoIPTools forums.
Rest assured, our dedicated team is here to assist you around the clock, every day of the year. Whether you’re based in the USA or India, we’re ready to provide prompt responses to your technical queries.
Windows Event Log for VoIPTools Applications and Services #
For troubleshooting any application errors, our Windows Event Log contains a comprehensive list of error messages, warnings, and informative notes related to all our VoIPTools applications and services. It’s a valuable resource to help you pinpoint and resolve any issues you may encounter.
Are you looking to collaborate with other VoIPTools customers facing similar challenges? Our forum is the perfect platform to exchange ideas, solutions, and best practices. Join the conversation at: https://www.voiptools.com/community/
Got questions that need immediate answers? Our chat support team is available to assist you in real time. Just click on the Live Chat button located at the lower right corner of our website, and we’ll acknowledge your queries right away.
To ensure a thorough understanding of your concerns, email us at support@voiptools.com. Describe your issue in detail, and we’ll get back to you within one business day with the support you need.
If you prefer to speak with a representative directly, you can reach us at +1 801-642-4655. Our attentive team is available to take your calls from 8:00 AM to 6:00 PM (Central Standard Time).
If you’ve purchased our products through a VoIPTools Partner, rest assured that they provide first-level support at no additional cost. Partners have access to 100% free technical assistance and actively participate in the troubleshooting process.
VoIPTools customers enjoy access to our online manuals and receive support through emails (with responses within one business day) and live chat. However, please note that we do not provide remote server login assistance.
For a more hands-on experience, consider our “Installation Support” package. Our expert support team can log in to your servers, and install and configure all our tools. This comprehensive service includes setting up SQL Server Express and Internet Information Server if necessary. We’ll work closely with you to tailor our applications to meet your requirements.
We’re committed to providing top-notch support to ensure your VoIPTools experience is smooth and hassle-free. Contact us today, and let us assist you in making the most of our powerful tools!


NOTE:


 button to download your application.
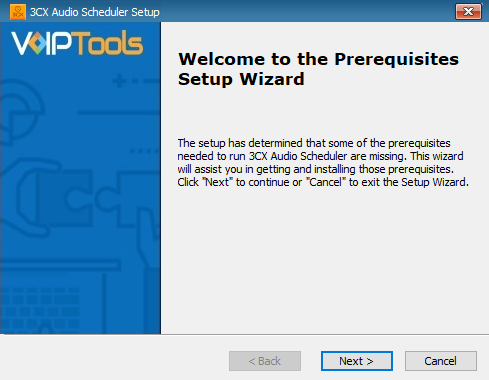

 on your desktop to open the web application.
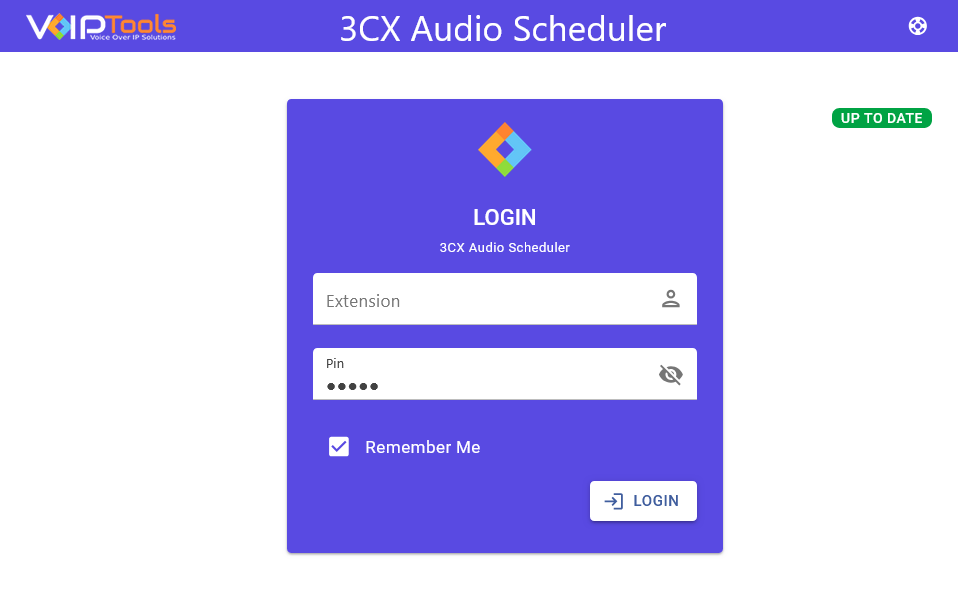
NOTE:


 button to save your audio file.
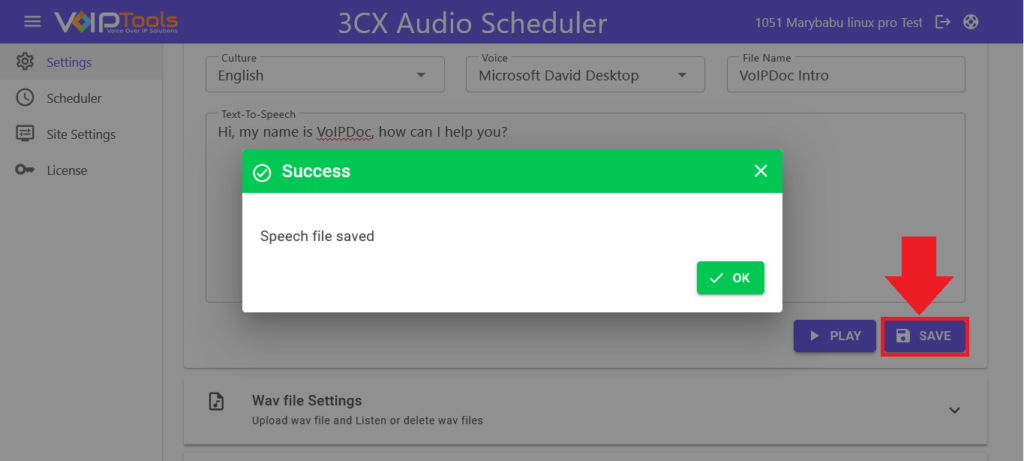

 section.
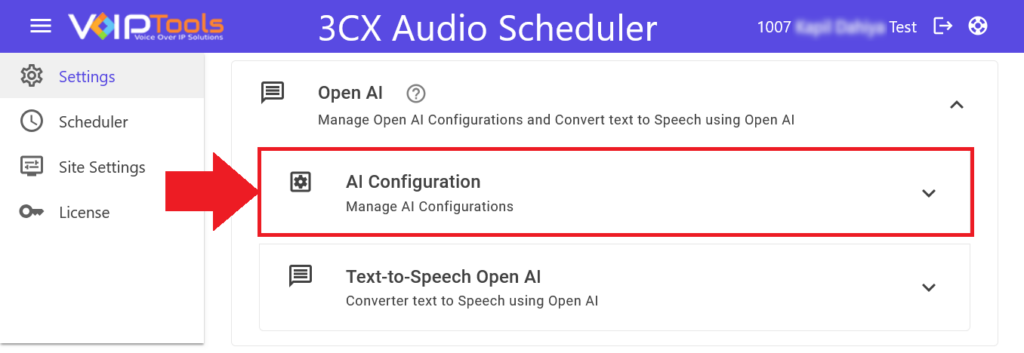

 section.


 button to further edit the appointment.
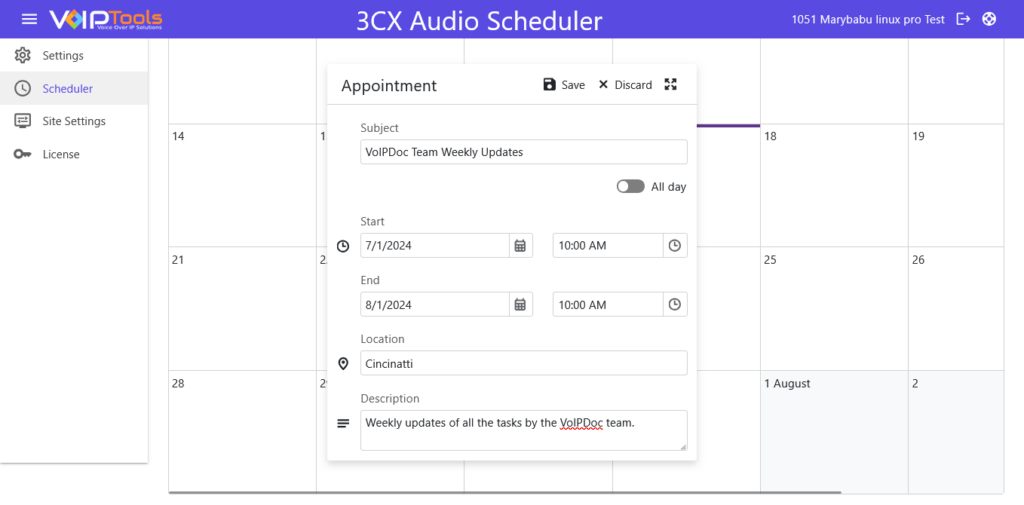


 button to save the header title prefix.