Introduction #
The VoIPTools Relay is a software application that enables remote applications to communicate with the 3CX Call Control API. Applications can send requests to 3CX using our REST API, or subscribe to real-time 3CX events using our “events” API.

NOTE:
The Relay is the only VoIPTools application that is installed directly on the 3CX server. All other VoIPTools applications must be installed on a separate server.
What’s new? JWT! #
The VoIPTools Relay is a software application that enables remote applications to communicate with the 3CX Call Control API. Applications can send requests to 3CX using our REST API, or subscribe to real-time 3CX events using our “events” API.
NOTE:
Want more information about how we use JWT? Take a look at our prerecorded JWT webinar here
Prerequisites #
| Linux Console Access | You need root access to your Linux console to run the setup program. You will need your 3CX server IP address, an administrative user (root), and a password. |
| Putty | You need a remote access program such as Putty to issue Linux commands. |
| Firewall | To enable our tools to communicate with the Relay remotely, you must open (port forward) TCP 8801 on your firewall, pointing to the 3CX server. If you use the built-in Linux firewall (iptables/nftables), the setup program will attempt to open port 8801 for you. If you use a different firewall or select a different port, you will need to configure your firewall to provide remote access to the Relay. |
| Notify Manager Access | Ensure your firewall does not block access to the registration service at keymanagerV3.voiptools.com:82. The relay must maintain uninterrupted access to this URL to receive notifications and successfully register your license key. |
Installing the 3CX Relay for Linux (Debian) #
The only application you install directly on the 3CX server is the Relay. The Relay allows our tools to communicate with the 3CX Call Control API. The remainder of our tools are always installed on a separate Windows server.
Once you have installed 3CX and have access to the Linux console, you can download the Relay setup program directly to your Linux server.
If you are upgrading, be sure to look at the steps in Upgrade Relay section before continuing.
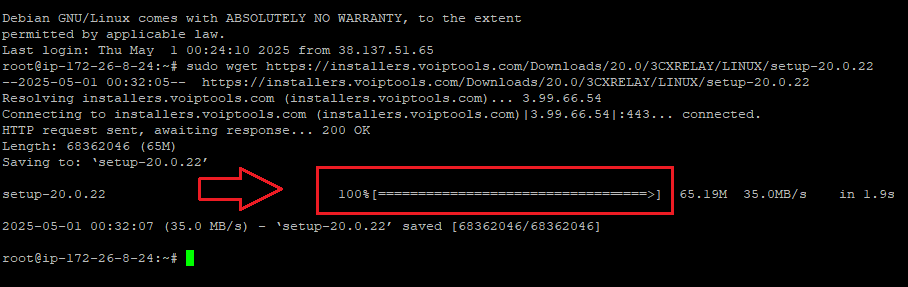
- Download the setup program with the following command:
sudo wget https://installers.voiptools.com/Downloads/20.0/3CXRELAY/LINUX/setup-20.0.22
Wait until the setup program downloads successfully before entering the next command.
- Give execute permissions to the setup program by entering this command.
sudo chmod +x setup-20.0.22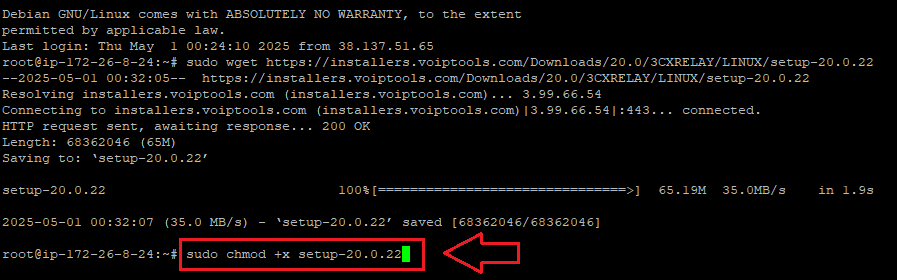
- Execute the setup program with the following command.
sudo ./setup-20.0.22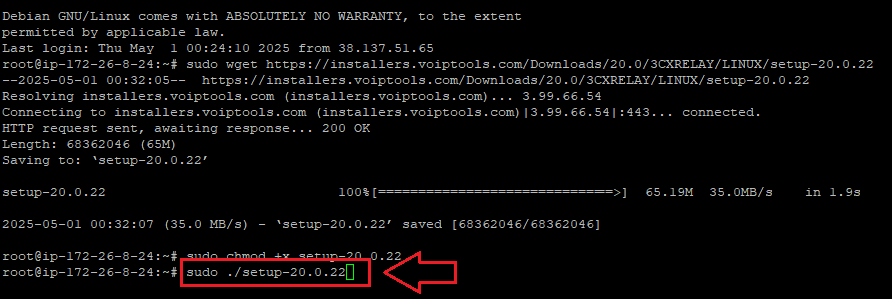
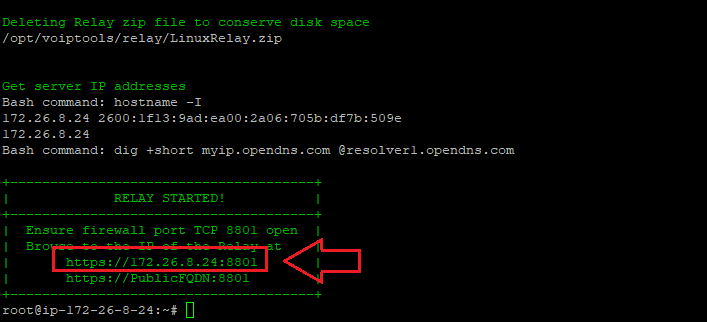
When the installation is complete, the setup program will display a message with the URL needed to access the web-based Relay administration console. Your URL should be something similar to the following:
https://<3cx-server-FQDN>:8801
Replace <3cx-server-FQDN> with the IP address of your 3CX server, or FQDN.
Relay Login #
To access the Relay, you can log in with either your 3CX Administrator credentials or with any 3CX extension that has 3CX System Admin rights. To log in with an extension, use your 3CX extension number and Web Password.
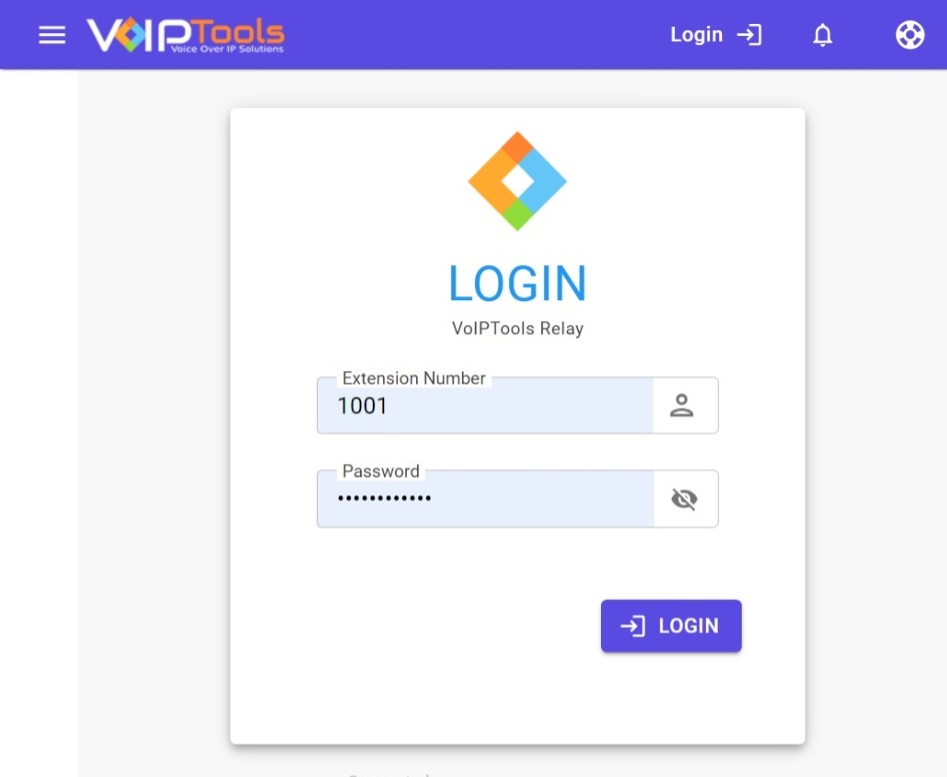
You can obtain your web password by editing your extension in the 3CX web console.
You are permitted 3 attempts to log in to the Relay console successfully. After 3 unsuccessful attempts, the Relay console will be locked FOR ALL USERS for the next 15 minutes.
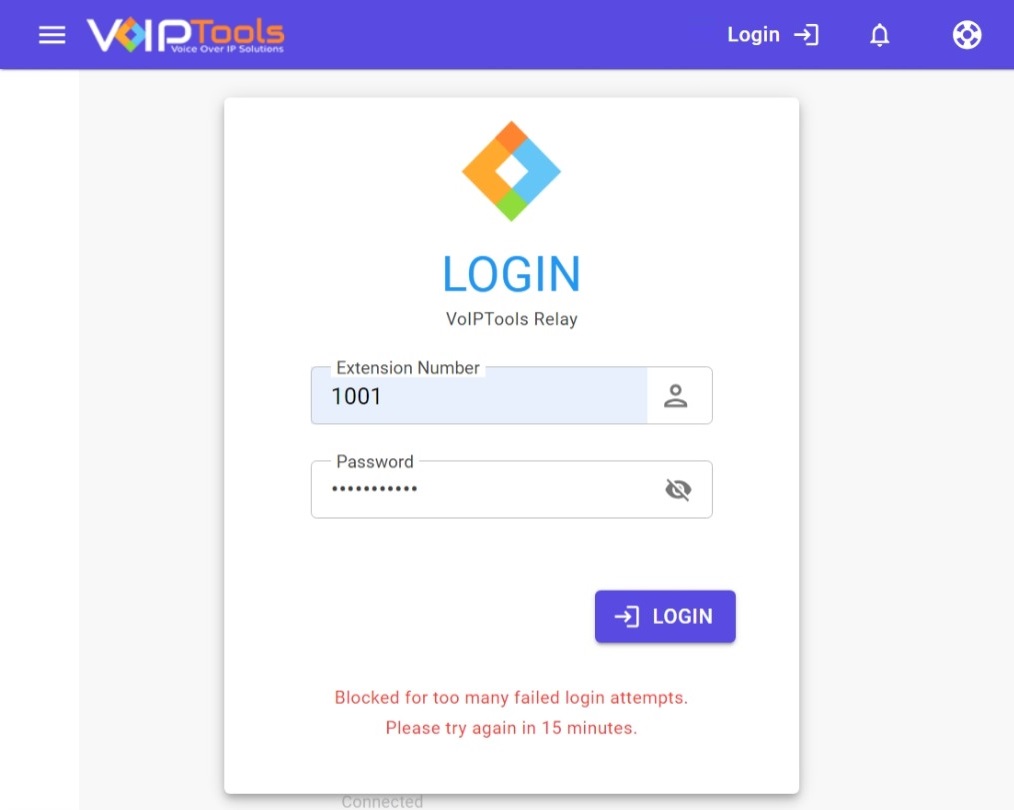
The only way to clear a failed login before the 15 minute lock out period, is to reboot the Relay service. You can restart the Relay from a secure shell session with the following commands:
systemctl stop voiptools_relay.service
systemctl start voiptools_relay.service
License Registration #
As the relay starts for the first time, it currently displays Free Mode since it has not yet had the chance to validate the license key,
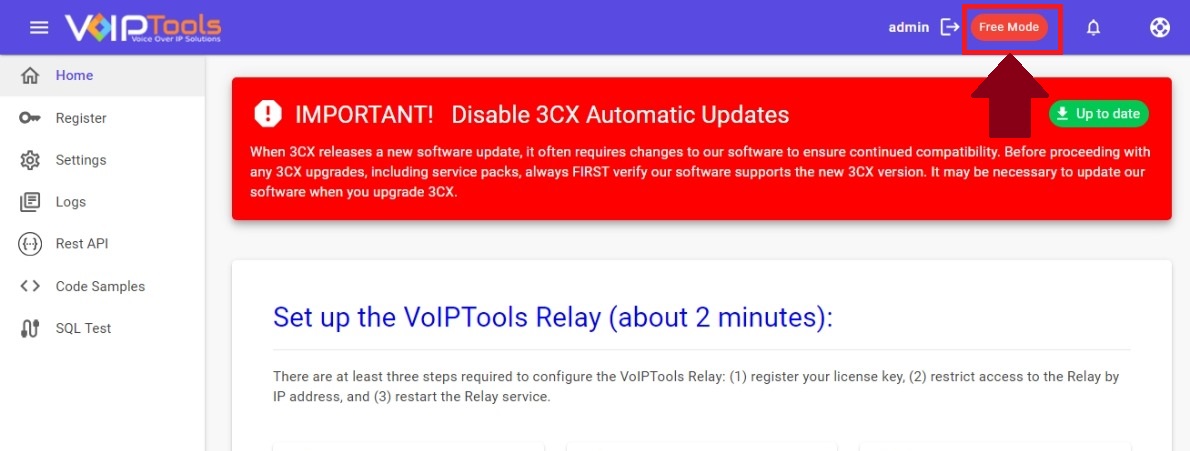
To ensure the authorization of your license key, it is necessary to complete the registration process. By registering with VoIPTools, you gain access to a range of benefits:
| Access to VoIPTools Applications | Upon completing Relay registration, further registrations for our tools are not necessary. Directly login to our tools using the extension and PIN without additional registrations. |
| Key Replacement Assistance | In the unfortunate event of a lost license key, registering with VoIPTools lets us provide you with a replacement key promptly. |
| Product Updates and Reminders | By registering, you will receive timely notifications from VoIPTools regarding any product updates. Additionally, we will send reminders when your key is nearing its renewal date, ensuring uninterrupted access to our services. |
The existing licensing information will be preserved if you previously registered your Relay. Follow the procedure if you are registering the relay for the first time,
- In the left side panel, select the Register
 option.
 - Enter your license key in the License Key field.
- In the Contact Name field enter the end-user (customer). include the Reseller company name if purchased through a 3CX Reseller.
- Click the Register button to complete your registration.
- If you do not have a license key, you can still use our free tools. To access the Relay API, you must register with a valid license key.

When registering your license key, . When complete, press the “Register” button to activate your license key. It is not necessary to restart the Relay after registering your key.
Home Screen: #
On the Home screen, you can do the following tasks,
- Upgrade the VoIPTools Relay to make sure it is compatible with the latest 3CX version.
- Learn how to set up the relay.
- Know the reasons to have VoIPTools Relay in the first place.

Settings Screen: #
The Services screen is used to configure how the Relay functions. This includes setting the protocol (HTTPS), the IP address the webserver will bind to, and the TCP port number. The IP whitelist is maintained on this screen, and you can turn on/off monitored events as well as the Swagger (Open API) documentation.
Warning Popup: #
Two different Warning popups appear when you open the Settings menu
- Whitelist IP Filtering Warning popup when you did not add any extra IP addresses or ranges in the whitelist. Click here to learn how to add an IP address to the Whitelist.
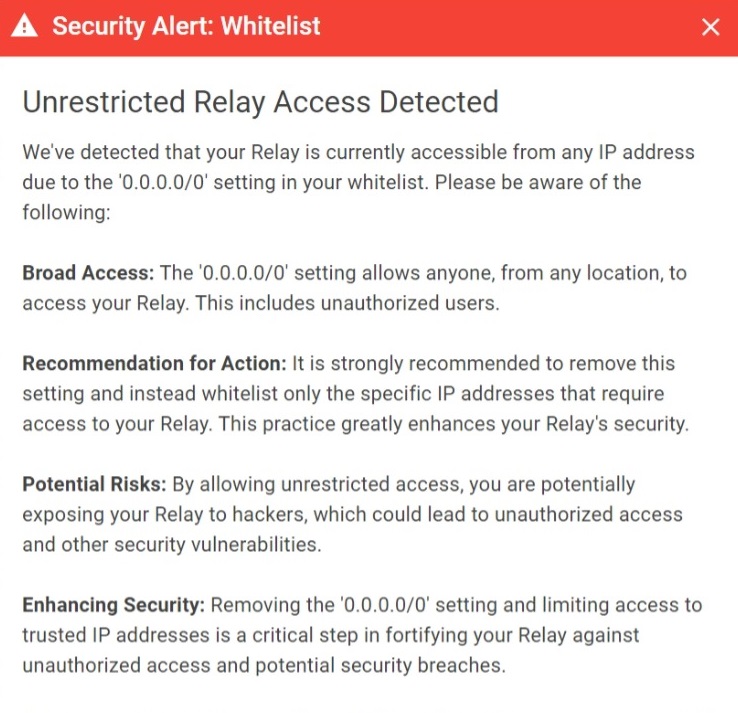
- Unrestricted Relay Access Detected popup when you allow everyone to use the relay.
Unrestricted Relay Access Detected Popup #
This popup apprears when your Relay currently allows access from any IP due to the ‘0.0.0.0/0’ whitelist setting, posing risks of unauthorized use. We strongly advise removing this setting and whitelisting specific IPs for enhanced security. Allowing unrestricted access exposes your Relay to potential hackers, increasing the likelihood of security vulnerabilities. To fortify your Relay, eliminate the ‘0.0.0.0/0’ setting and limit access to trusted IP addresses. Promptly review and update whitelist settings for optimal security.
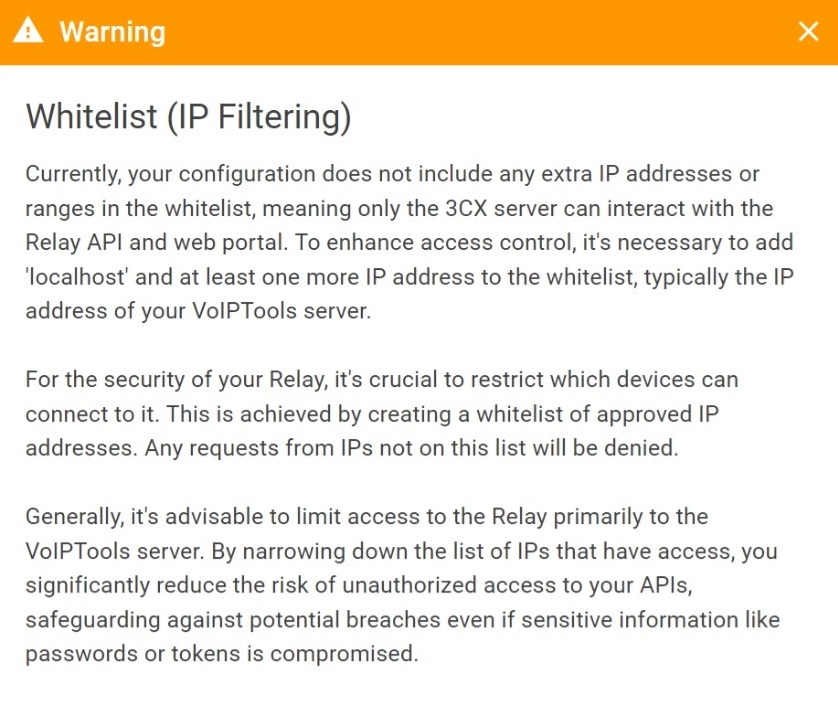
Whitelist IP Filtering Warning Popup #
This popup appears when your current setup lacks extra IP addresses in the whitelist, allowing only the 3CX server interaction. Enhance access control by adding ‘localhost’ and another IP, usually your VoIPTools server’s. To secure the Relay, create an IP whitelist, permitting only approved IPs to connect, reducing unauthorized API access risk. It’s advisable to limit access primarily to the VoIPTools server. Implement these restrictions on the Relay if your firewall lacks this feature, ensuring a secure configuration.
Click here to learn how to add an IP address to the Whitelist.
Web Server Bindings #
Ensure remote access to the specified port (Default: TCP/8801) by configuring your firewall. Restrict access to Relay APIs and the web console through the Whitelist section.
The Relay utilizes JWT (JSON Web Tokens), necessitating SSL/TLS for secure credential and token transmission.
The Relay’s built-in web server (Kestrel) only binds to IP addresses, not to domain names (with a few exceptions). You can use “*” to represent 0.0.0.0, or “localhost” to represent 127.0.0.1. You can also specify IPV6 addresses. You cannot use a FQDN like “pbx.mydomain.com”. Each URL should be separated by a comma.
No separate certificate is needed for the Relay, sharing the same certificate as 3CX on the server. Customize certificate paths if needed. Configure firewalls for TCP traffic forwarding on configured ports. Default: https://0.0.0.0:8801.

Typically, it is not necessary to change the default setting. If you make changes to the server bindings, a restart of the Relay may be required.
Restarting the Relay during production hours will temporarily stop the sending of events to client applications. Use wisdom when choosing a time to restart the Relay.
Access to the Relay is always permitted from localhost. We do not support configuring IP ranges. You must enter at least one IP address in the whitelist.
IP Whitelist #
Why You Need IP Whitelist? #
Enhance your Relay security by implementing IP restrictions. Limit communication with the Relay API and web portal to specific devices. Ensure to include the 3CX server’s IP address at a minimum. Examples for valid entries is given in the following table,
| IP Address Type | Example |
|---|---|
| Single IPs | 127.0.0.1 |
| IP ranges | 192.168.1.0/24 |
| IPv6 address | ::1 |
Immediate application of whitelist changes is effective, and no reboot of the Relay is necessary for these modifications.
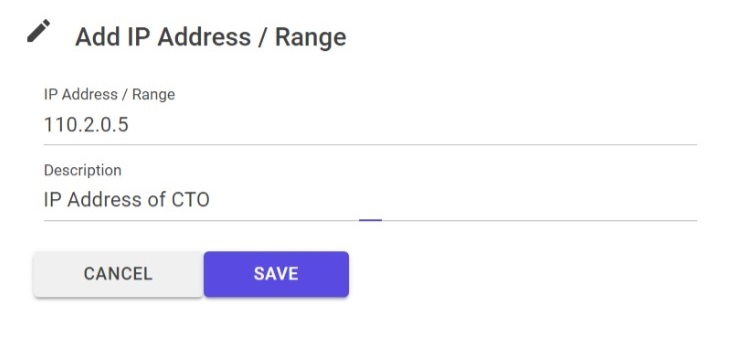
Steps to add an IP to the IP Whitelist #
- In the Whitelist section, click the Add button.

- Enter the IP address in the IP Address/Range field
- You can enter a description for of the IP address in the Description field.
- Click the Save button to save your Whitelist.
In most cases, the only device that needs to communicate with the Relay is the Windows server where your VoIPTools applications are installed. We recommend configuring your parameter firewall to reject requests from any other IP address. However, if your firewall does not support this feature, you can easily block access to the Relay using the IP Whitelist.
JSON Web Token Authorization #
Ensure secure communication with the Relay by using TLS encryption and JWT for applications. To connect, obtain a token by submitting your public key, ensuring its inclusion in every API request. Tokens expire, necessitating new ones for ongoing communication.

To implement JWT authorization, two keys are required:
- The Private Secret Key is only needed by the Relay. It serves to verify the public key submitted by the client.
- The Public Key is used by client applications when requesting a new token.
You can copy the keys by clicking the Copy ![]() icon.
icon.
Upon Relay installation, unique public and private keys are auto-generated, but you can create new ones anytime. Safeguard the JWT public key, promptly generating a new one if compromised. if you choose to generate a new public key, the client applications will need to be updated.
For key changes, manually update the configuration file at:
C:WindowsSystem32driversetcVoIPToolsappsettings.json
No Relay restart is needed after generating new keys, but update the new shared JWT Public key on the VoIPTools server.
Certificates #
How Does it Work? #
The VoIPTools Relay leverages the existing TLS certificate managed by 3CX eliminating the need for an additional certificate for encryption. On startup, the Relay scans for existing .pem cert and key files in standard 3CX locations, securing communications with client applications.
You must use HTTPS for REST API authorization due to JSON Web Tokens (JWT); the Relay doesn’t support unencrypted HTTP connections.
Updating your Web Server Certificates and Schedule Relay Restart #
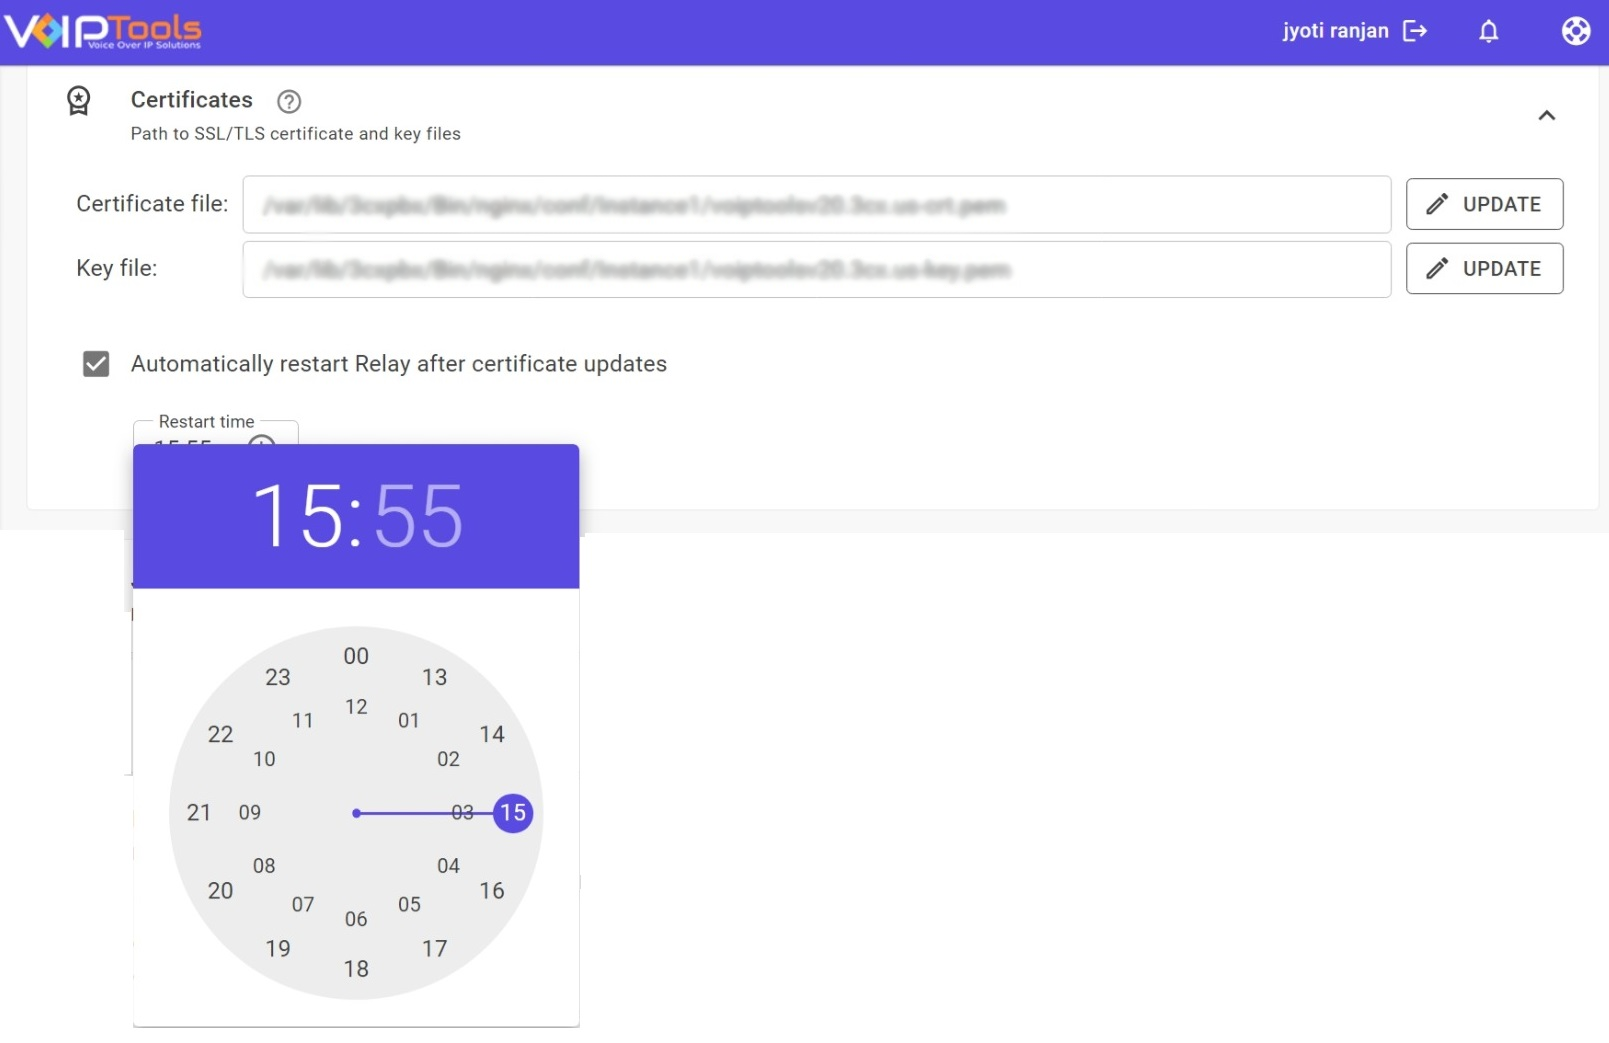
Certificates do expire periodically. The Relay is designed to track updates to the certificate files and can be configured to automatically restart the Relay to ensure it uses the updated certificates.
- You can update the certificates in either of the two ways,
- Click the Update button to prompt the Relay to locate these certificate files.
- If 3CX uses certificate files in a non-standard location, you can enter the full path of the location in the Certificates section.
The Relay requires both “crt” and “key” files, and it doesn’t support other certificate file types.
- Select the Automatically Restart Relay After Certificate Updates box and set the time to restart in the Restart Time field to restart the relay.
REST API #
The VoIPTools Relay features an API that operates using REST/ RPC principles.The automatically generated documentation through the “Swagger” tool provides thorough insights into each method. This enables seamless method execution directly from the documentation, a valuable asset for testing purposes.
While this direct execution is advantageous, it introduces an additional potential target for cyber attacks. To enhance security, it is advisable to deactivate the Swagger user interface when not actively in use.

The Swagger documentation is not available once you toggle the disable button,

Real Time Events #
You can use SignalR via the Relay to receive 3CX real-time events like phone calls, presence changes, file events (e.g., new recordings, voicemails, and CDR files). Most events are enabled by default but can be disabled if not needed, reducing Relay resources. VoIPTools support can guide you on this. A paid license key is necessary for real-time events, and if your license expires, the events will be automatically disabled
Registration events are necessary only when using the Emergency Notifier and the Location service features. If you’re not using these specific functions in the relay, deactivate the Registration events.

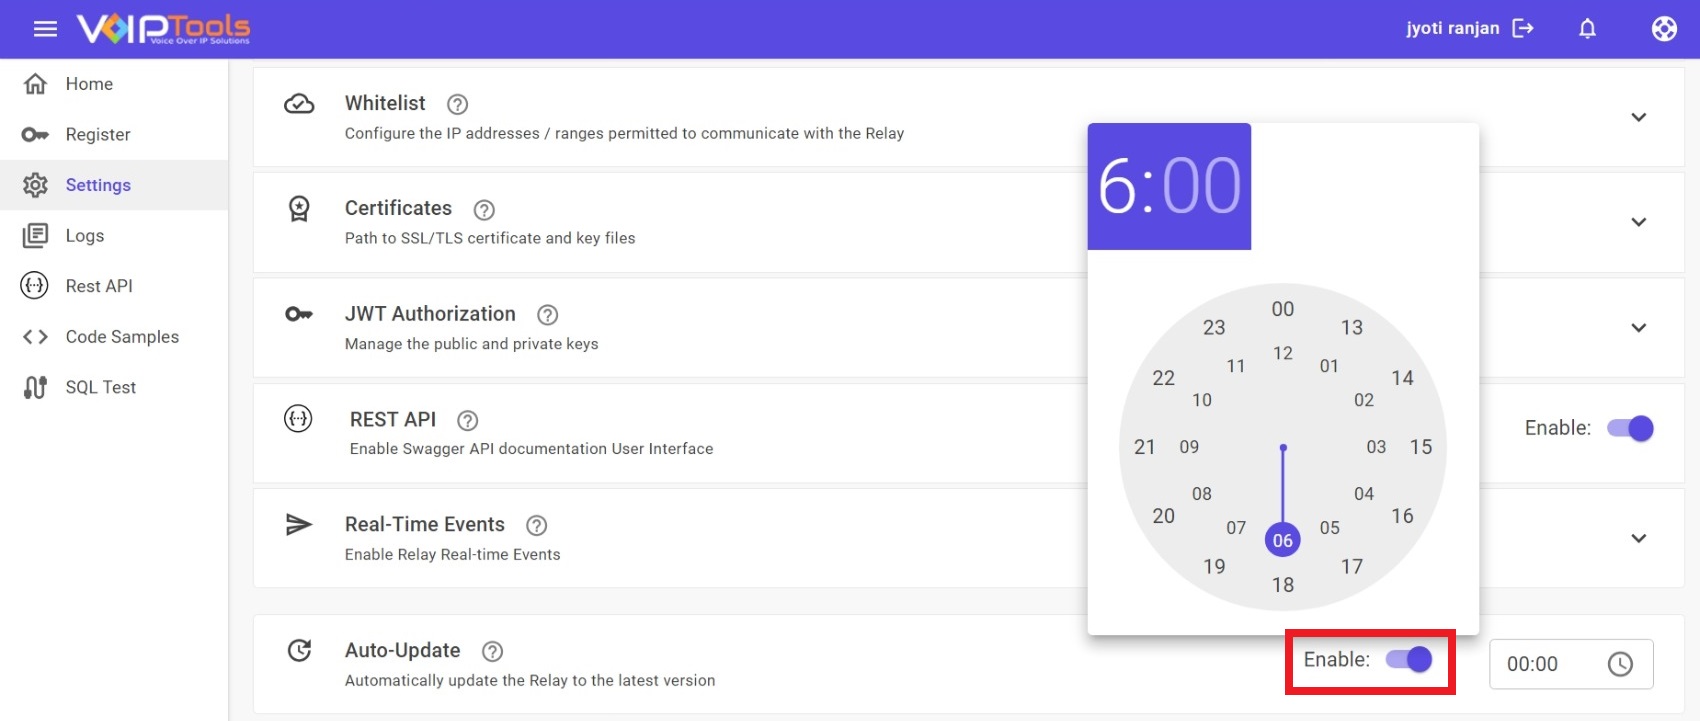
Auto Update: #
The Relay Auto-Update service checks for software updates daily. If an update is available, it will download and install. You can customize the update time according to your preference.
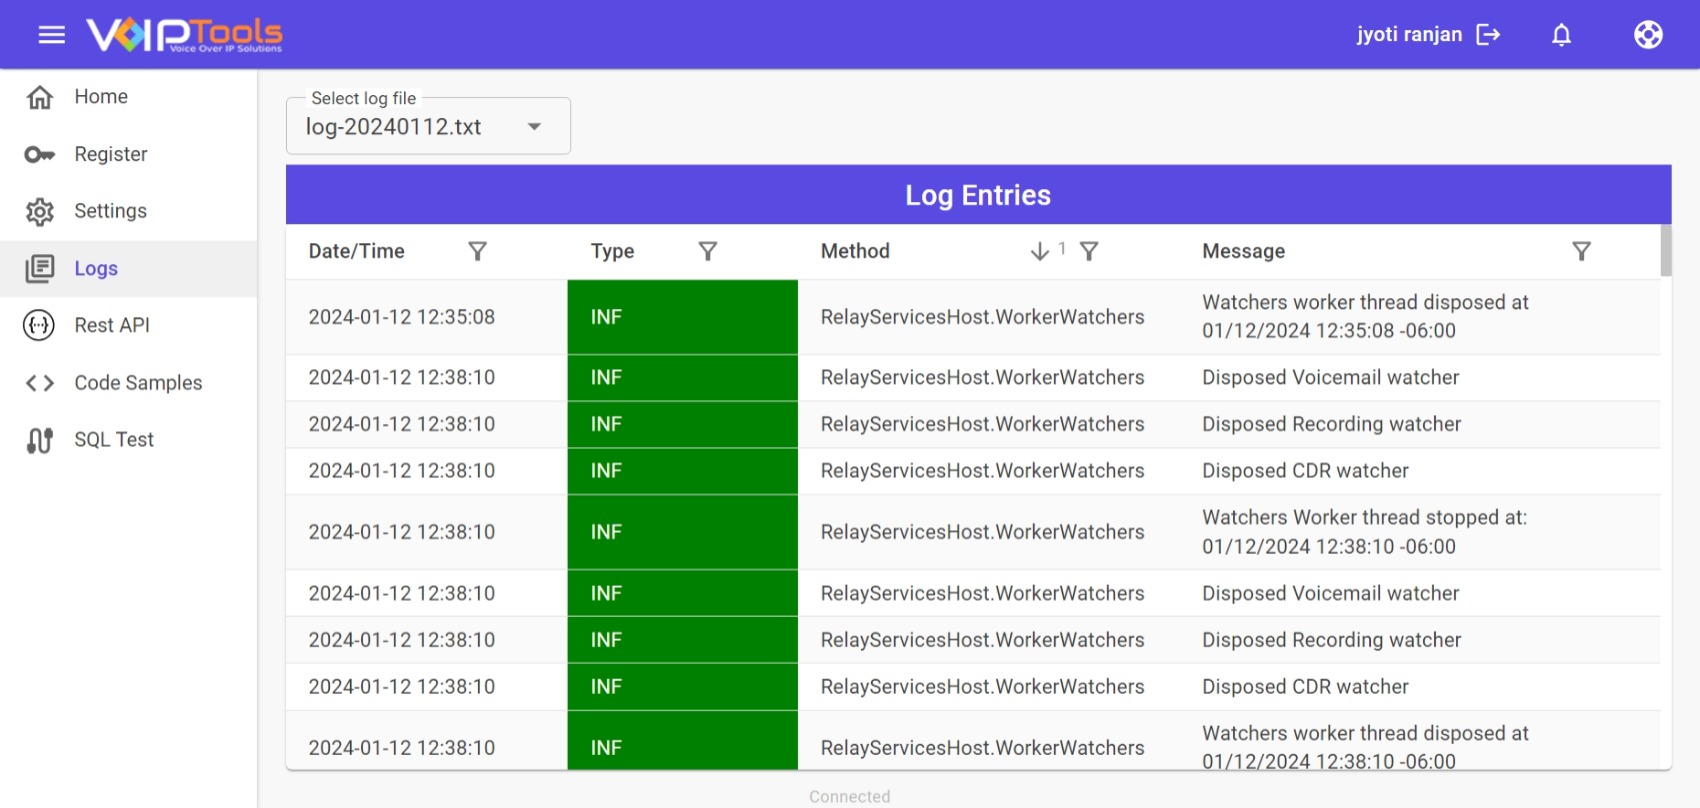
Logs Screen #
The Relay logs information about how the application is functioning. Each day a new log file is created automatically. The 7 most recent log files are kept. Older log files are deleted automatically.
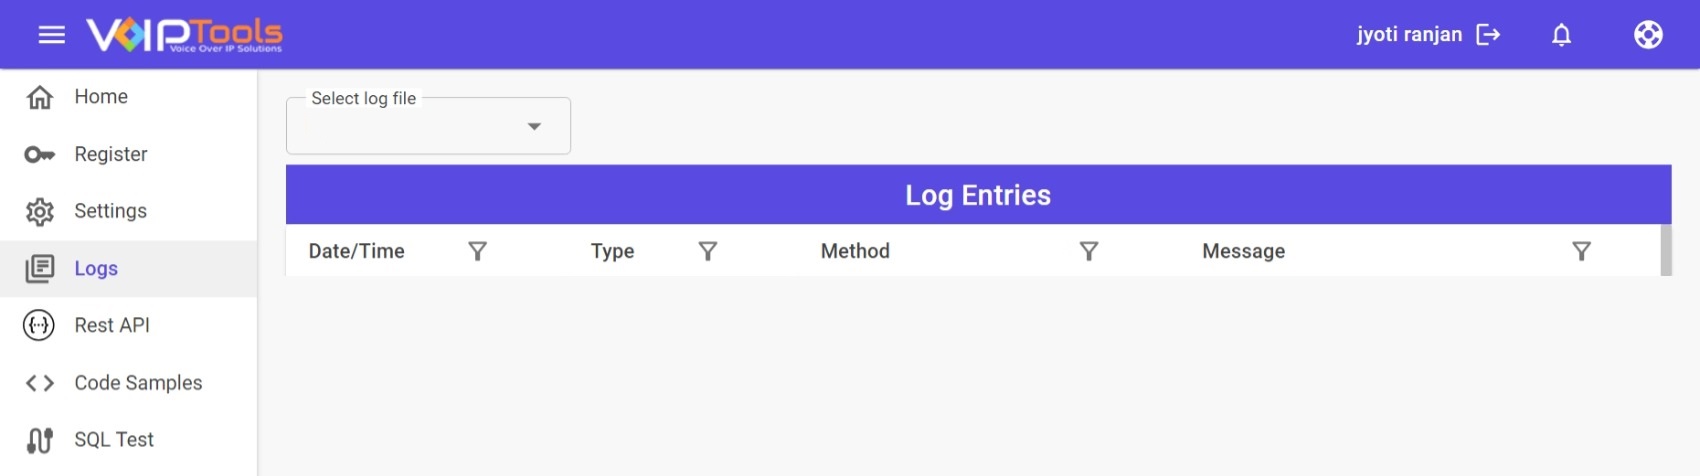
Open a Log File: #
VoIPTools Relay stores the Seven most recent log files. Older log files are deleted automatically.
- Click the Select Log File dropdown and select the desired log file.

Once selected the log file you can see its log entries,
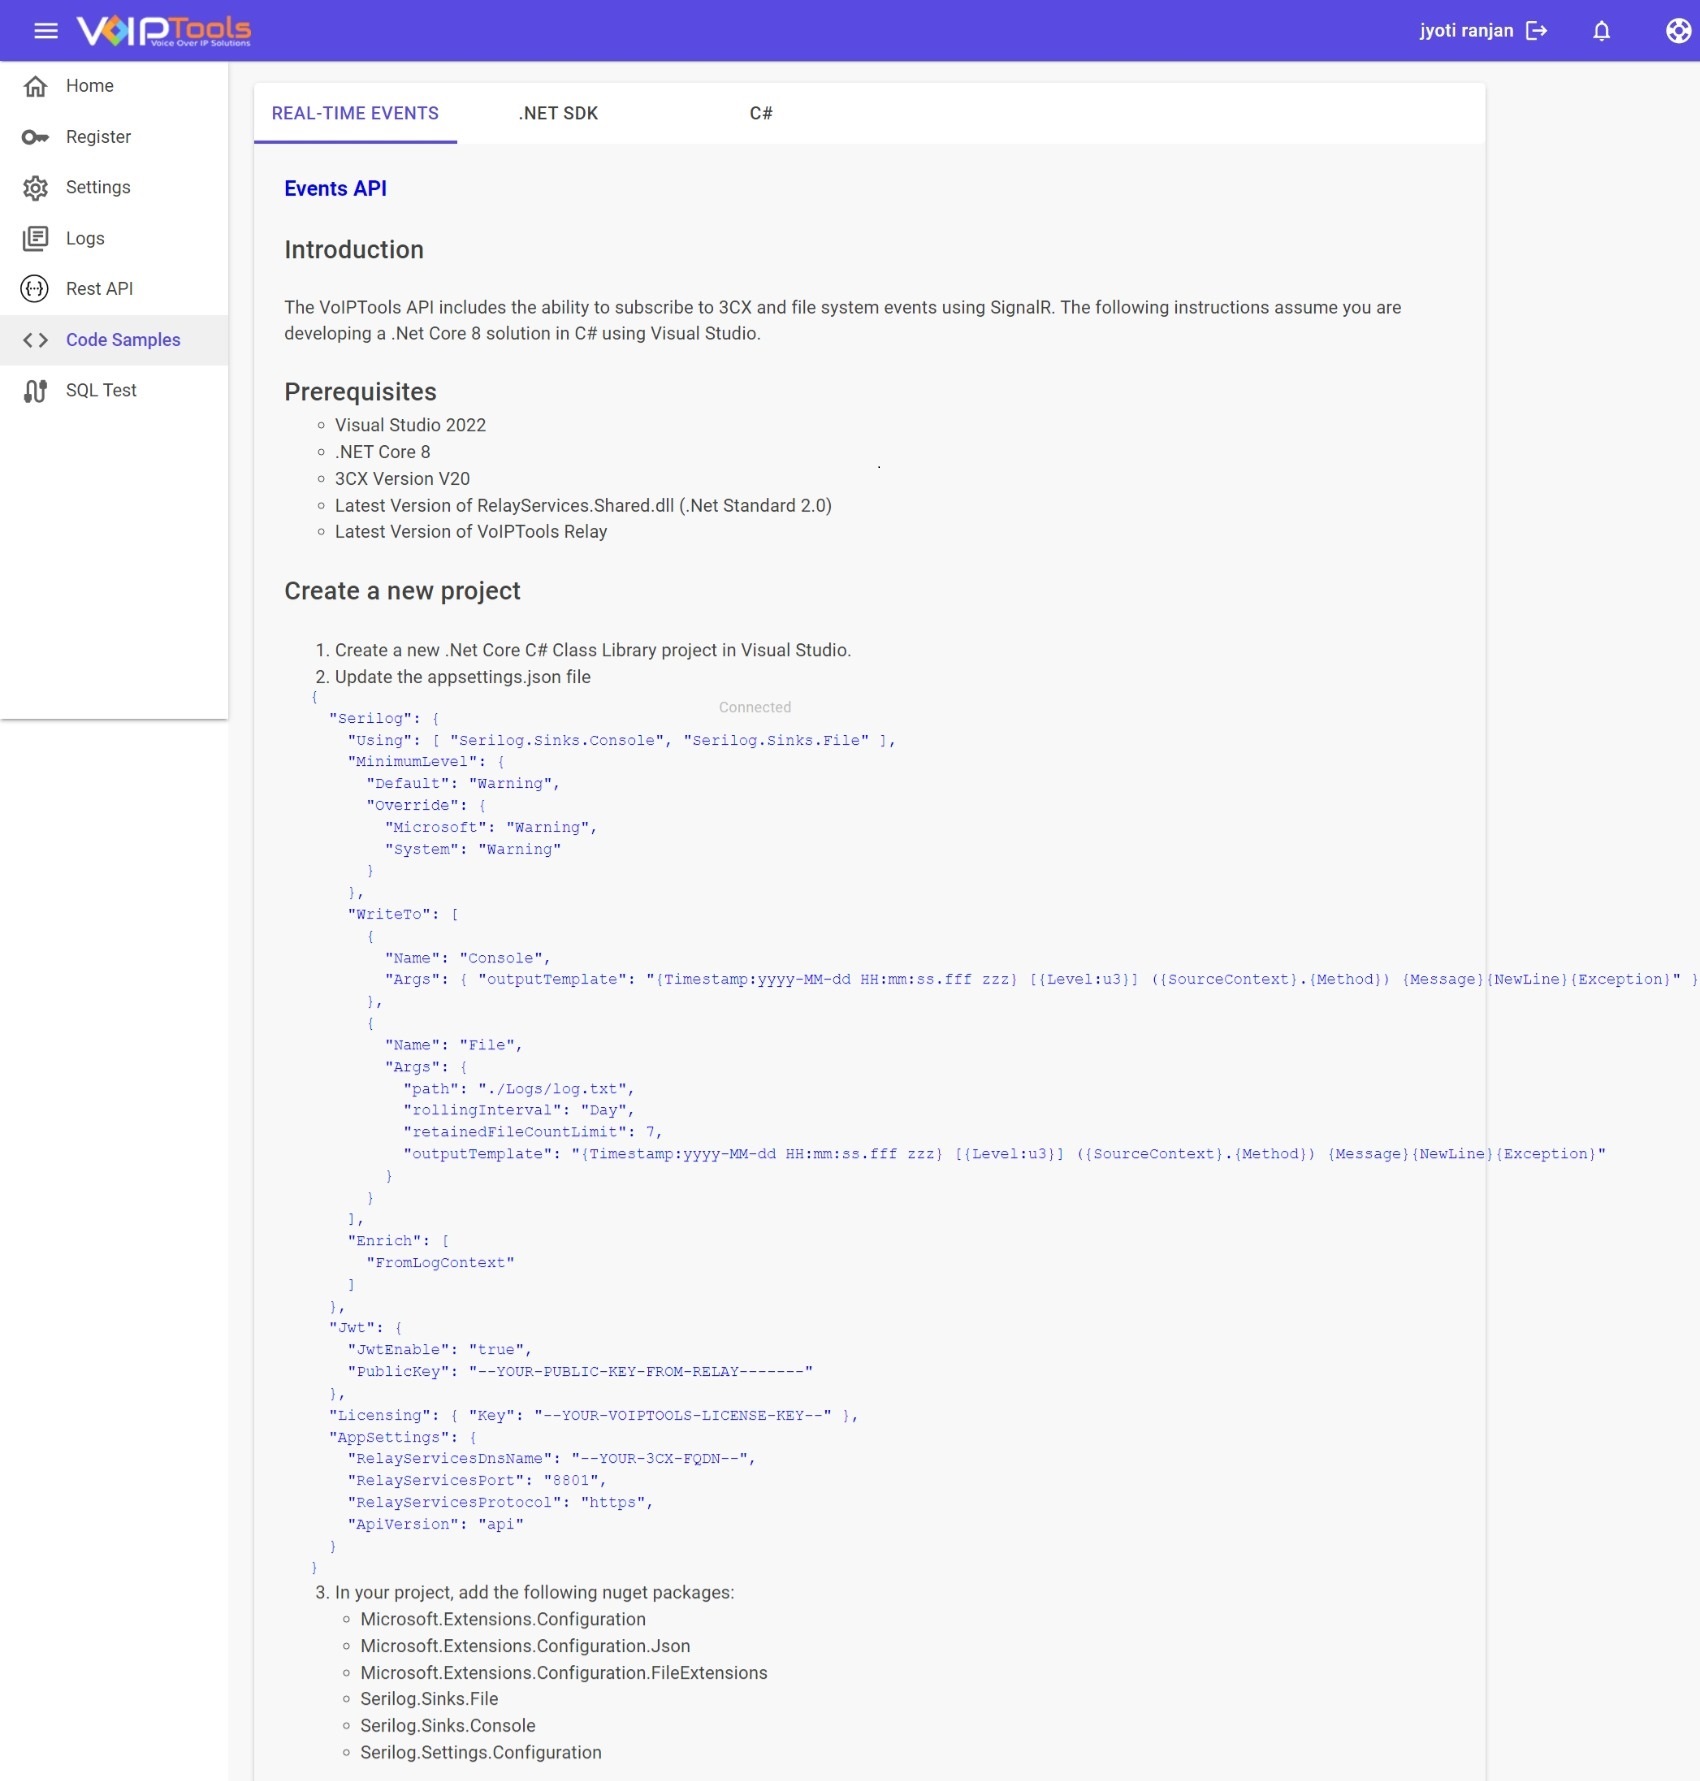
Code Samples Screen #
This section provides you with sample codes. You can get these sample codes without purchasing a subscription. The relay can be installed and accessed in free mode, allowing access to the documentation. The only requirement is that you install the relay directly on a 3CX server.
Real-Time Events #
It is a C# example that specifically shows you how to connect to real-time events.
.Net SDK #
In contrast to the technical complexities involved in the process of submitting a JWT authorization token request and subsequently making a web service request to our REST relay, our approach simplifies this workflow. All you need to do is request a list of extensions, and the intricate details associated with web interfaces and tokens are hidden from view.
Here’s how it works: You set up a client, request an extension, and you won’t have to worry about the intricate steps of submitting a JWT token request, adding the token to the web request header, executing a REST API request, retrieving a JSON string, and then dealing with the conversion to an object. All of this complexity is neatly concealed.
With the help of our Software Development Kit (SDK), you can accomplish this with a single line of code. Just ask for all the information about extension 100, and it’s as simple as that.
This is the true advantage of using our SDK, a method that underpins the operation of all our applications. Our development team is liberated from the need to become experts in JWT token requests and REST API interactions because they use our SDK to streamline the software development process. The level of simplification introduced is profound, making the workflow remarkably straightforward.

C# #
This is the procedure you’d follow if you weren’t using our SDK.
- Request a JWT token:
- You initiate the process by creating a web client and configuring the web interface components.
- Subsequently, you need to request a JWT token.
- Scroll further for steps on executing the REST API command. Manage the returned JSON string carefully.
Carrying out these actions in C# can be quite intricate. However, for those who aren’t using .NET, they might wonder how to accomplish these tasks in other programming languages. This provides them with an example of how to do so.

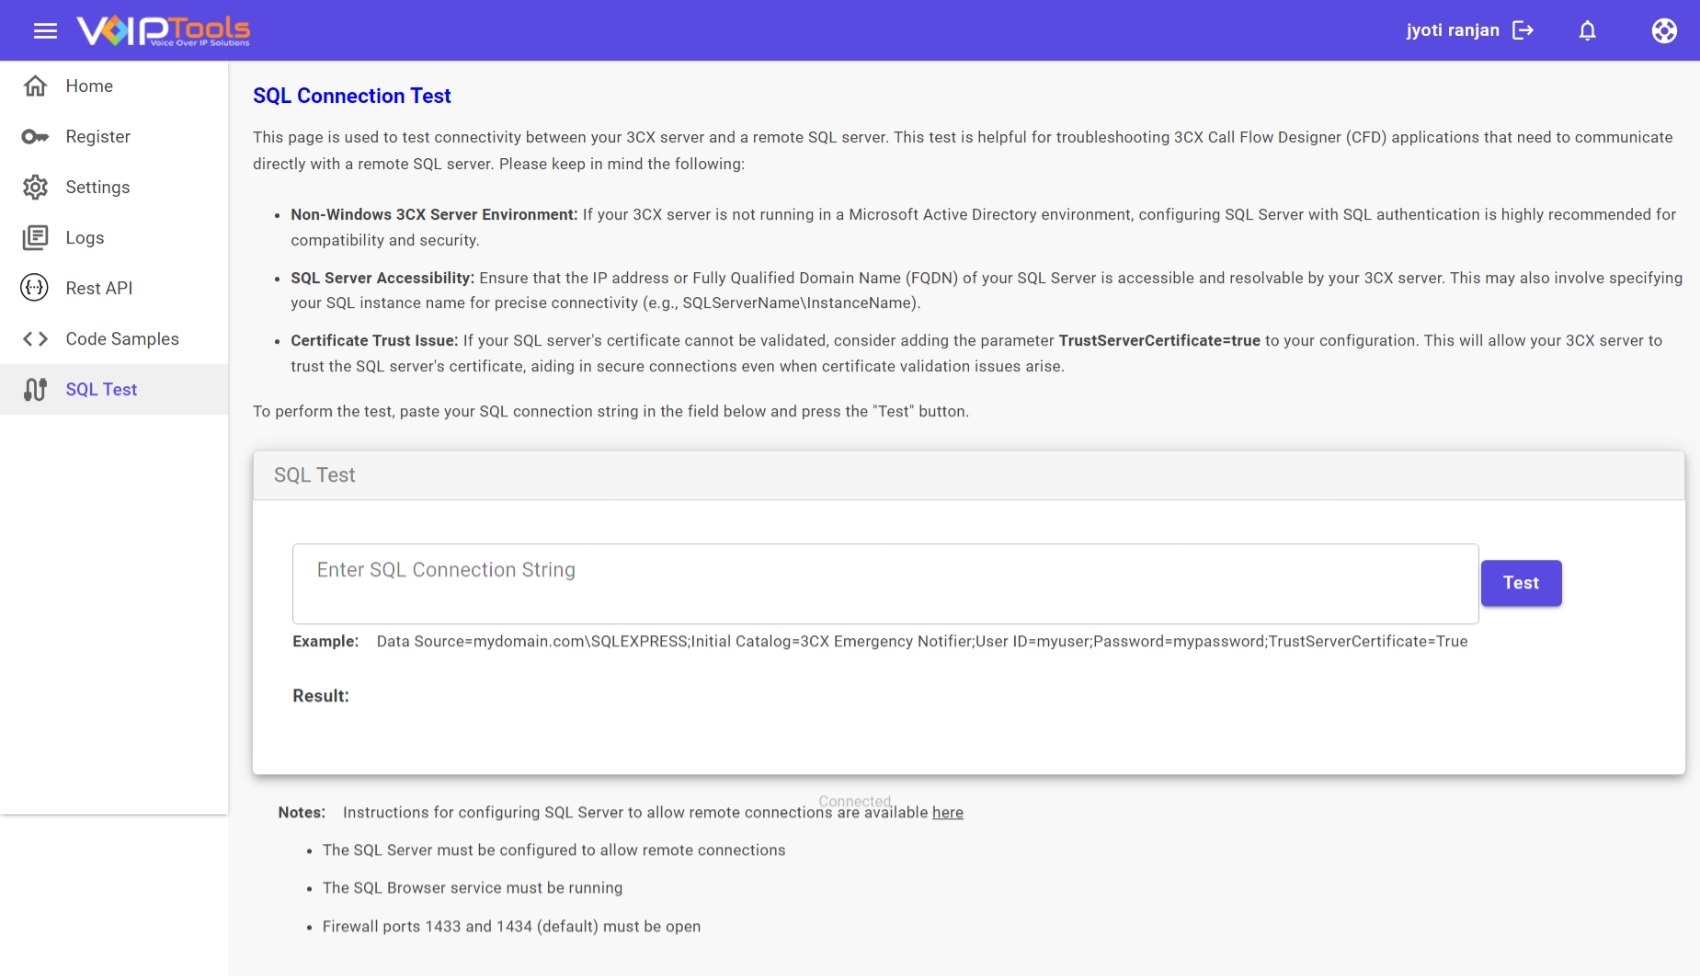
SQL Test Screen #
The SQL Test Screen allows you to assess connectivity between your 3CX Server and an external SQL server. This testing capability is invaluable for diagnosing issues with 3CX Call Flow Designer applications that necessitate direct interaction with a remote SQL server.
Rest API Screen #
The REST API screen offers many methods, encompassing functions like initiating phone calls, retrieving active call listings, generating extensions, modifying a user’s presence status, and more. Our auto-generated documentation, powered by Open API (Swagger), remains consistently current as it directly reflects our code, guaranteeing up-to-date reference materials.

How to Upgrade the Relay? #
There are three ways you can upgrade the Relay:
- Enable automatic updates
- Click the Upgrade button in the Settings screen.

- Click the Upgrade button on the Home Screen and in the popup menu click the Update button.

- Manually run the setup program again.
Running the setup program again deletes the existing Relay (while preserving any settings) and downloads and installs the latest Relay.
When updating the relay, the setup program will display a warning message explaining that the previous version of the Relay and logs will be deleted. Press “y” to confirm:
Continue? [y/n]:yExecuting API from Swagger #
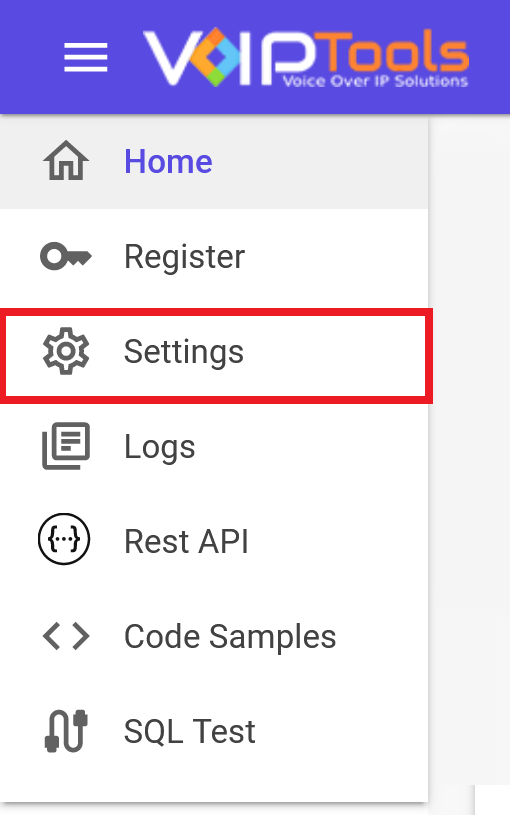
- In the Left Side Panel click the Settings
 menu.
menu.
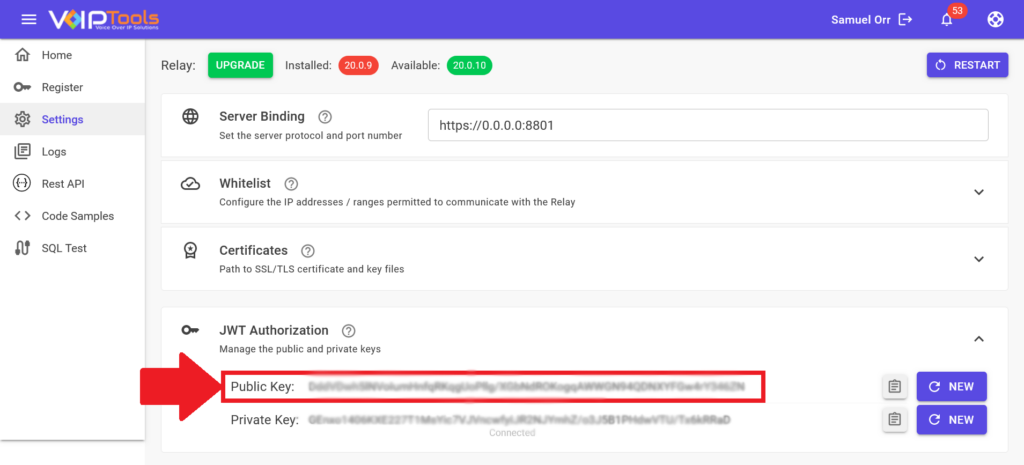
- Click the JWT Authorization section to view the public key. Click the Copy
 icon to copy the JWT Public Key.
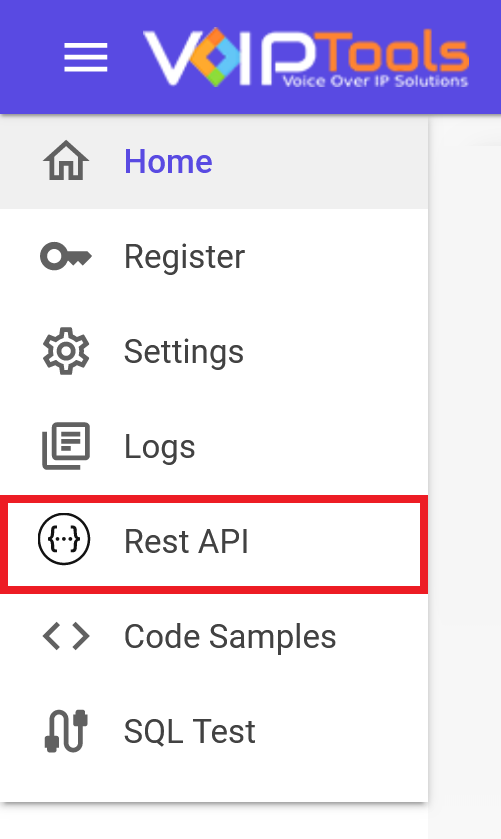
- In the Left Side Panel, click the Rest API menu.
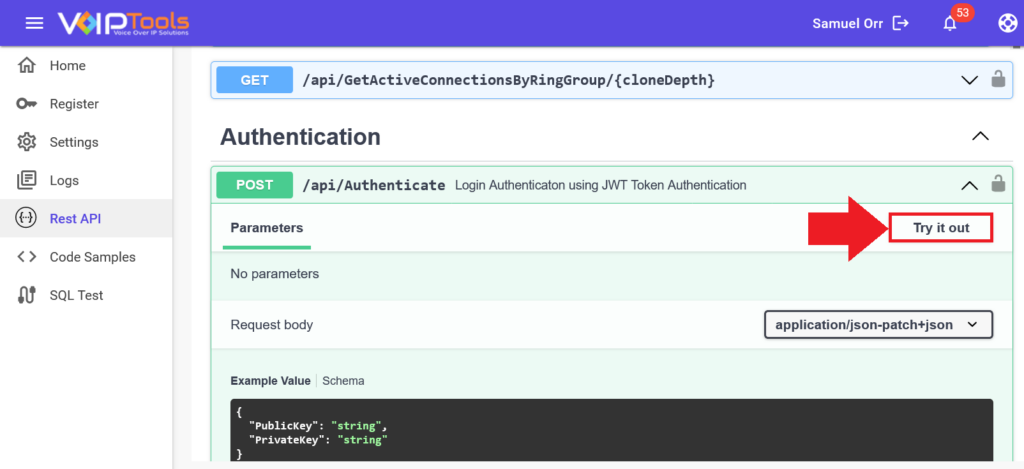
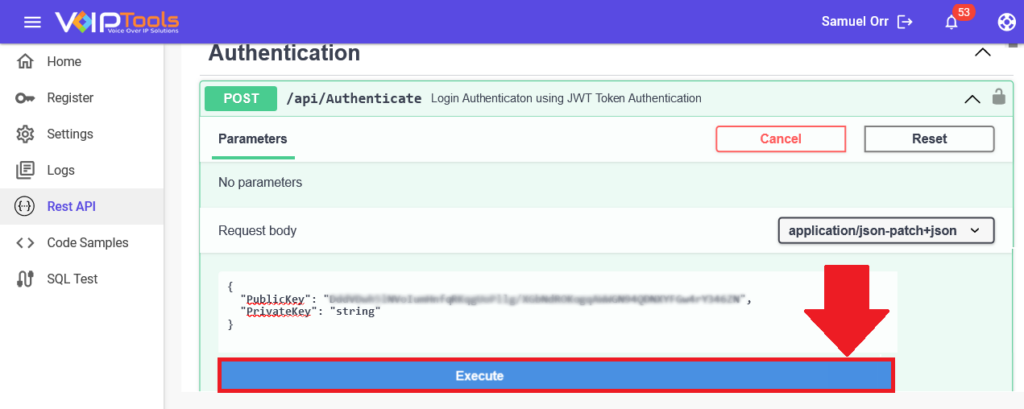
- Click to expand the Authentication section and click the Try It Out button.
- Paste the JWT public key in the Public Key String field.
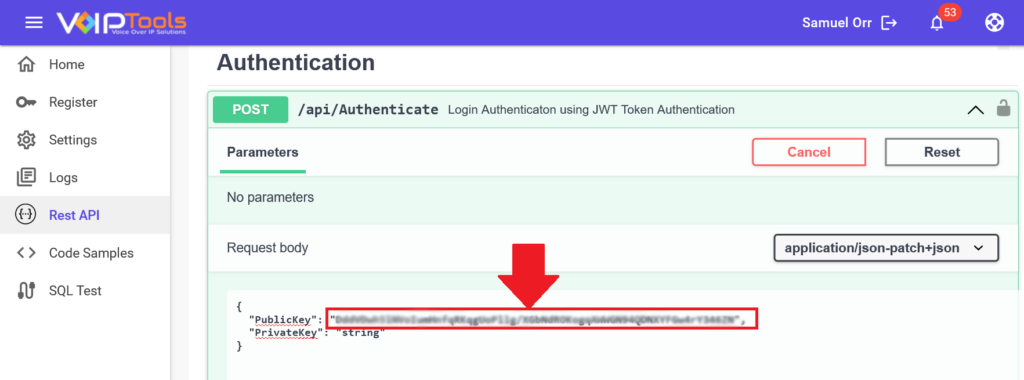
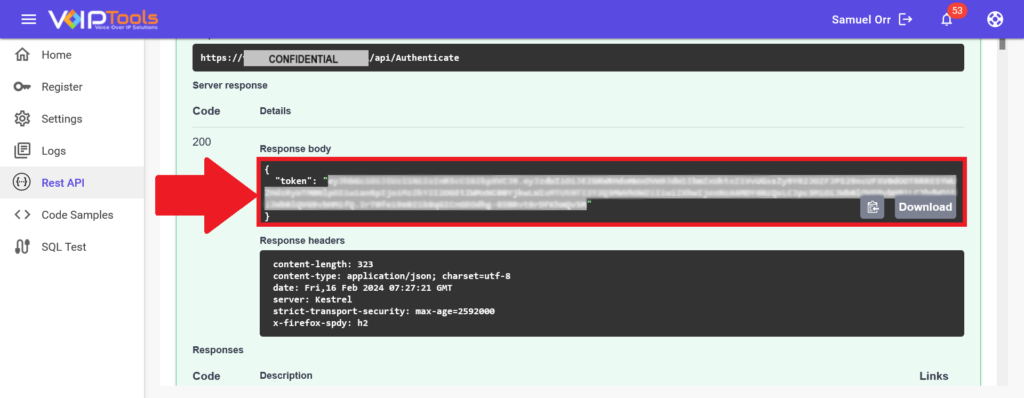
- Click the Execute button to get the JWT token response.
- Copy the Token Response, excluding the double quotes.
- Scroll up the screen and click the Authorize
 button.
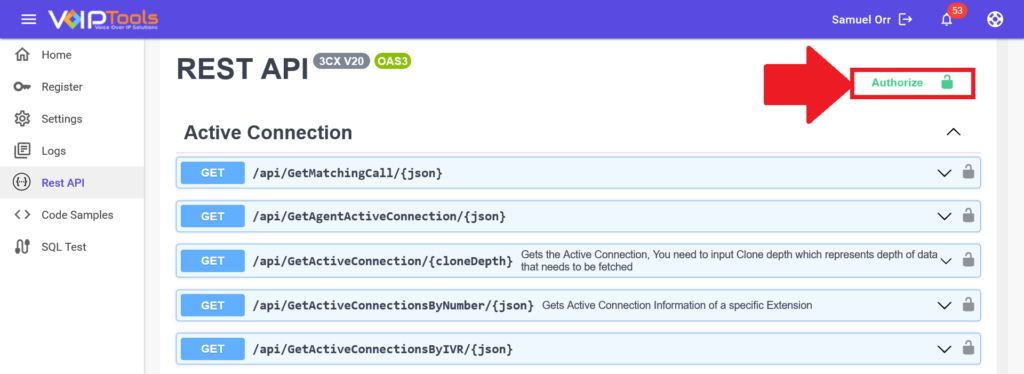
- In the Value field, enter the word Bearer, leave a space, and paste the JWT Token.
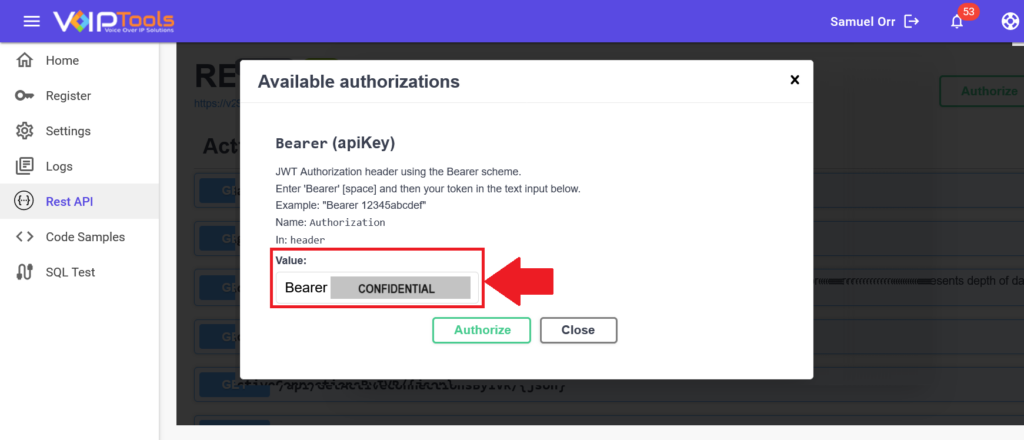
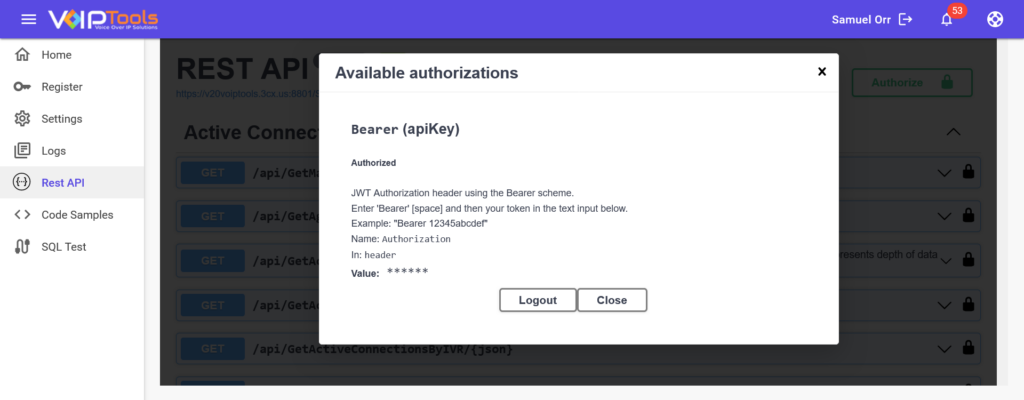
- Click the Authorize button and click the Close button to close the popup.
- Now, you receive a JWT token for Swagger and authorize API calls. These tokens expire, and you must obtain a new one every few minutes.
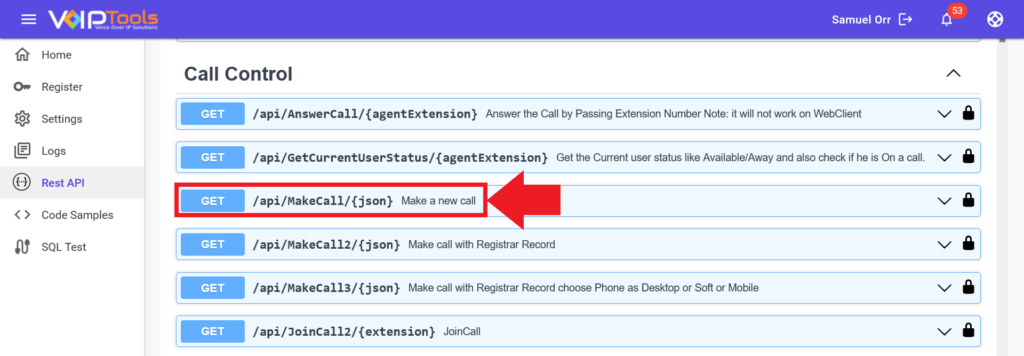
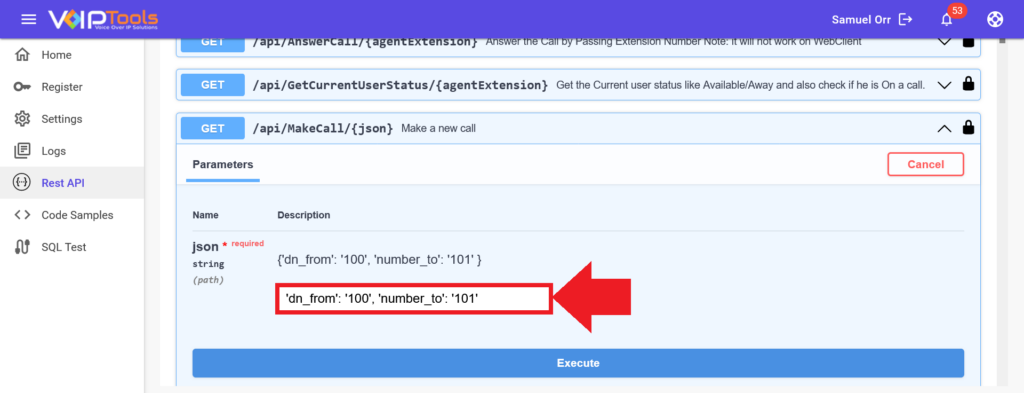
- In the Call Control section, click to expand the MakeCall API.
- Click the Try It Out button to enable the JSON String field.
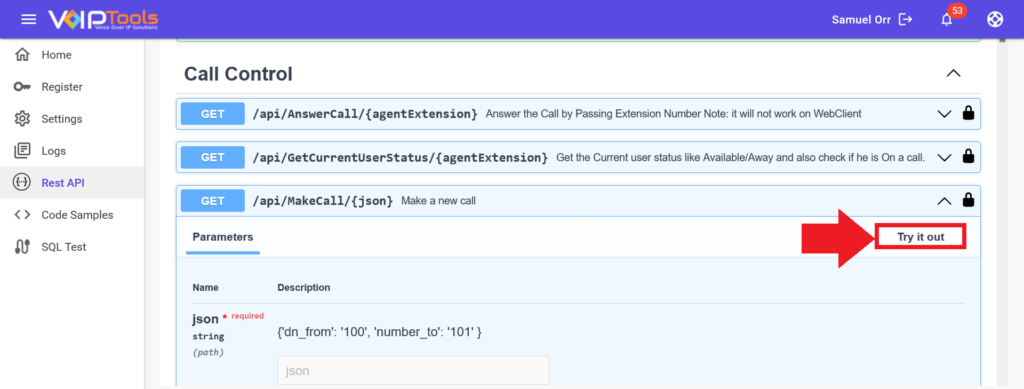
- Enter the string in the JSON String field using the syntax provided and click the Execute button.
Need Support? #
You get quick answers to most of your inquiries in our online manual. If you prefer direct contact, we offer various support channels, including phone, email, live chat, and our helpful VoIPTools forums.

24/7 Support Availability #
Rest assured, our dedicated team is here to assist you around the clock, every day of the year. Whether you’re based in the USA or India, we’re ready to provide prompt responses to your technical queries.

Windows Event Log for VoIPTools Applications and Services #
For troubleshooting any application errors, our Windows Event Log contains a comprehensive list of error messages, warnings, and informative notes related to all our VoIPTools applications and services. It’s a valuable resource to help you pinpoint and resolve any issues you may encounter.

Join Our Forum Community #
Are you looking to collaborate with other VoIPTools customers facing similar challenges? Our forum is the perfect platform to exchange ideas, solutions, and best practices. Join the conversation at: https://www.voiptools.com/community/

Real-Time Live Chat Assistance #
Got questions that need immediate answers? Our chat support team is available to assist you in real time. Just click on the Live Chat button located at the lower right corner of our website, and we’ll acknowledge your queries right away.

Efficient Email Support #
To ensure a thorough understanding of your concerns, email us at support@voiptools.com. Describe your issue in detail, and we’ll get back to you within one business day with the support you need.

Reach Us by Phone #
If you prefer to speak with a representative directly, you can reach us at +1 801-642-4655. Our attentive team is available to take your calls from 8:00 AM to 6:00 PM (Central Standard Time).
Comprehensive support services: #

Free Support #
If you’ve purchased our products through a VoIPTools Partner, rest assured that they provide first-level support at no additional cost. Partners have access to 100% free technical assistance and actively participate in the troubleshooting process.
VoIPTools customers enjoy access to our online manuals and receive support through emails (with responses within one business day) and live chat. However, please note that we do not provide remote server login assistance.

Paid Support #
For a more hands-on experience, consider our “Installation Support” package. Our expert support team can log in to your servers, and install and configure all our tools. This comprehensive service includes setting up SQL Server Express and Internet Information Server if necessary. We’ll work closely with you to tailor our applications to meet your requirements.
We’re committed to providing top-notch support to ensure your VoIPTools experience is smooth and hassle-free. Contact us today, and let us assist you in making the most of our powerful tools!
