Revolutionize Your Call Center Operations with Surveyor: The Future of Campaign Management and Customer Engagement
The 3CX Surveyor is an advanced web-based “preview” dialer designed to revolutionize your call center’s campaign management. With Surveyor, you easily make impactful outbound calls to your contacts, ensuring high-touch interactions and exceptional results. Manage campaigns, assign agents to phone lists, and personalize interactions with script-reading capabilities. Gain valuable insights through web-based performance reports to optimize your call center operations. 3CX Surveyor provides detailed customer profiles, an integrated mini CRM, and the tools to treat customers like family, empowering your team to build strong relationships, ensure customer satisfaction, and drive sales.
The 3CX Surveyor is a web-based “preview” dialer designed for the 3CX platform. Empower your agents to conduct personalized outbound calls, manage campaigns efficiently, use survey scripts, and generate performance reports. Manually import contacts into the tool and seamlessly integrate it with 3CX PBX for Windows. Agents can work from home or the office using the user-friendly web interface and 3CX softphone. Optimize your outbound calling processes with 3CX Surveyor for remarkable results.
Effectively engage your clients with captivating, personalized scripts tailored to their needs and preferences. Our user-friendly web-based system enables seamless script management and customization for exceptional customer interactions.
SEAMLESS MONITORING
Efficiently monitor customer service progress with our integrated mini CRM. Track and evaluate customer interactions seamlessly to deliver personalized experiences and exceptional support.
REAL-TIME INSIGHTS
Gain access to comprehensive and real-time insights through powerful web-based performance reports on survey data. Utilize simple yet robust analyses to reveal valuable trends and patterns, empowering data-driven decisions that propel your business forward.
CAMPAIGN OPTIMIZATION
Efficiently organize and optimize your campaigns by assigning agents to targeted phone lists and equipping them with survey scripts. Empower your team to conduct impactful outreach, ensuring valuable feedback and driving superior campaign results with confidence
HIGH-TOUCH OUTBOUND CALLS
Establish profound connections with your contacts through our personalized and “high-touch” outbound calls. Our solution empowers your agents to confidently build rapport and foster relationships, guaranteeing that every interaction leaves a positive and enduring impact.
You can order 3CX Surveyor online at https://www.voiptools.com. Your order confirmation email will include your license key and a link to download the software.
There are a number of prerequisites that must be installed prior to installing the 3CX Surveyor. These prerequisites include Microsoft Internet Information Server (IIS) and Microsoft SQL Server
This User Guide contains step-by-step instructions to successfully install 3CX Surveyor. Begin by extracting the installer from the downloaded zip file (Step 1 above), then run the setup program named SurveyorInstaller.exe
You must register your license key to activate 3CX Surveyor. Your license key is included in your order confirmation email, and can also be found in your order history on our website.
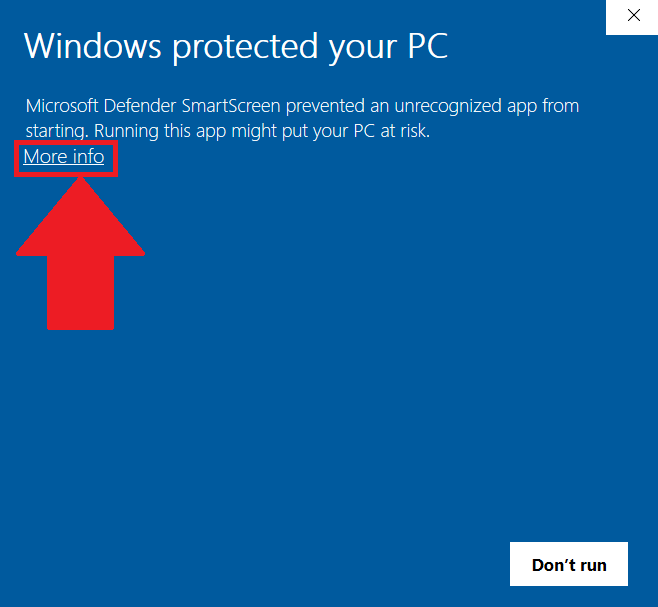
Find the software download link in the Order Confirmation Email, or you can find it in your order history on our website and download the 3CX Surveyor application.
In the Microsoft Defender SmartScreen, click the More Info option.
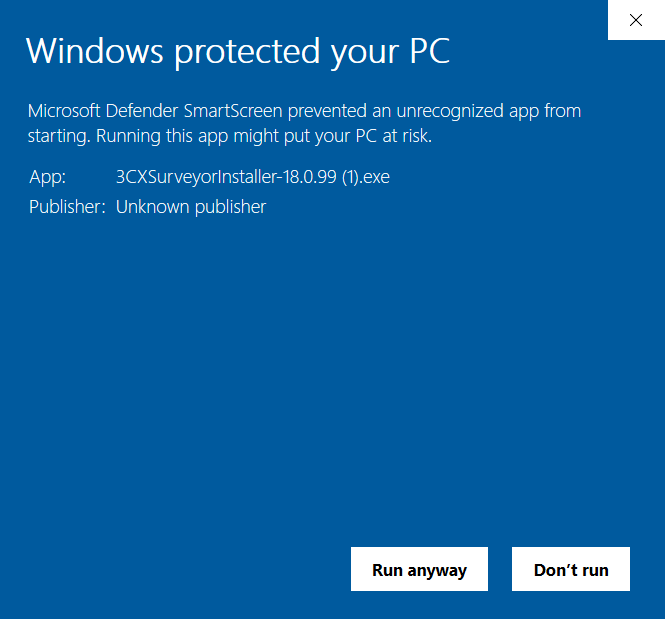
Figure 1: Windows defender screen
Click the Run Anyway option to start the installation.
Click on the software installer downloaded in Step 1. The installation wizard will automatically identify the prerequisites and assist you with each installation required to 3CX Surveyor. It includes .NET Framework (Web Installer), SQL Server Express (Web Installer), and SQL Server Management Studio.
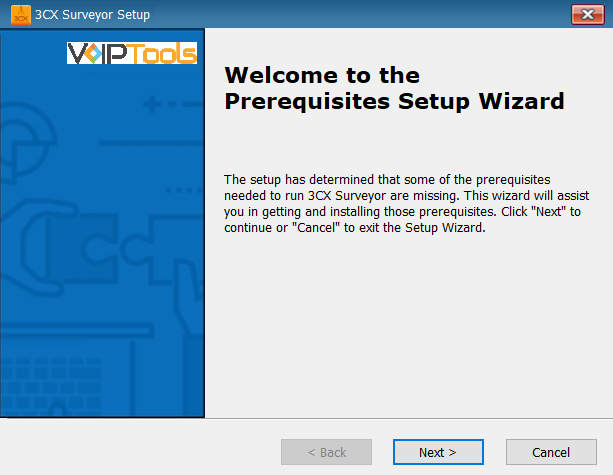
Click the downloaded installer executable to launch the Prerequisites Setup Wizard and click Next.
Figure 3: 3CX Surveyor Setup Wizard
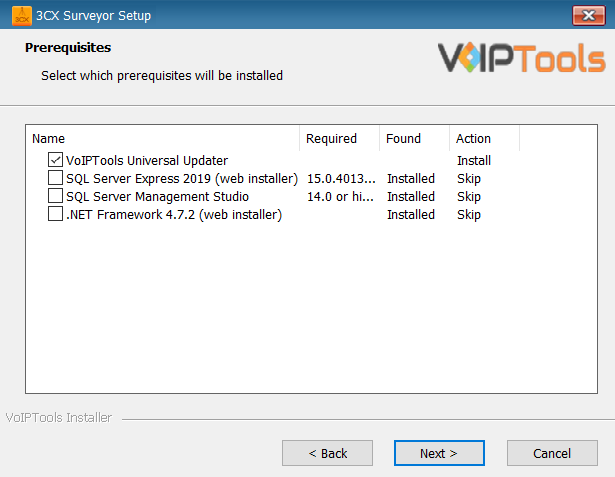
In the Prerequisites window, install all the required prerequisites identified by the installer, or select/ unselect the applications based on your requirements and click Next to continue.
Figure 4: Prerequisite installation Selection
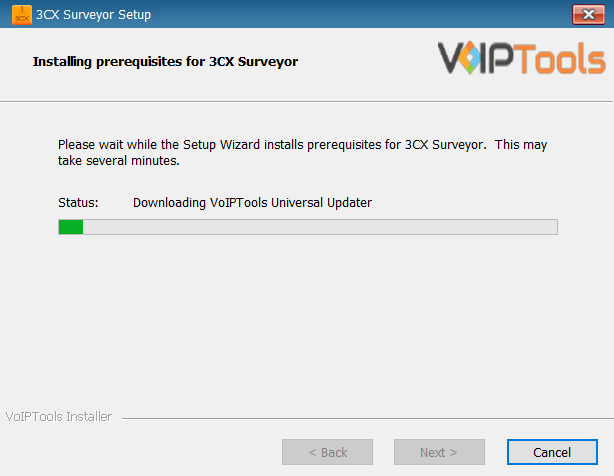
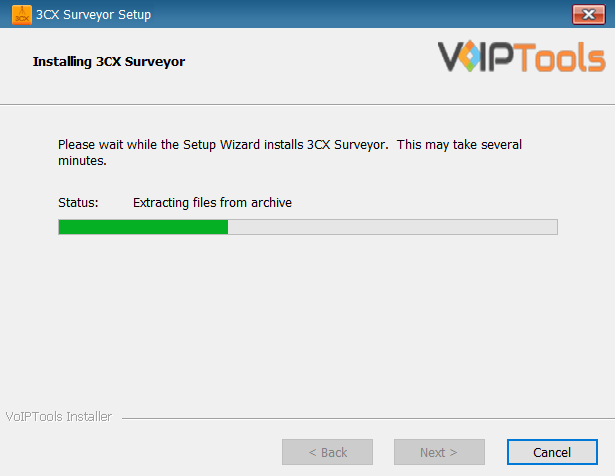
The installer will download and install the selected applications. It may take several minutes to complete.
Figure 5: Prerequisites Installation in progress
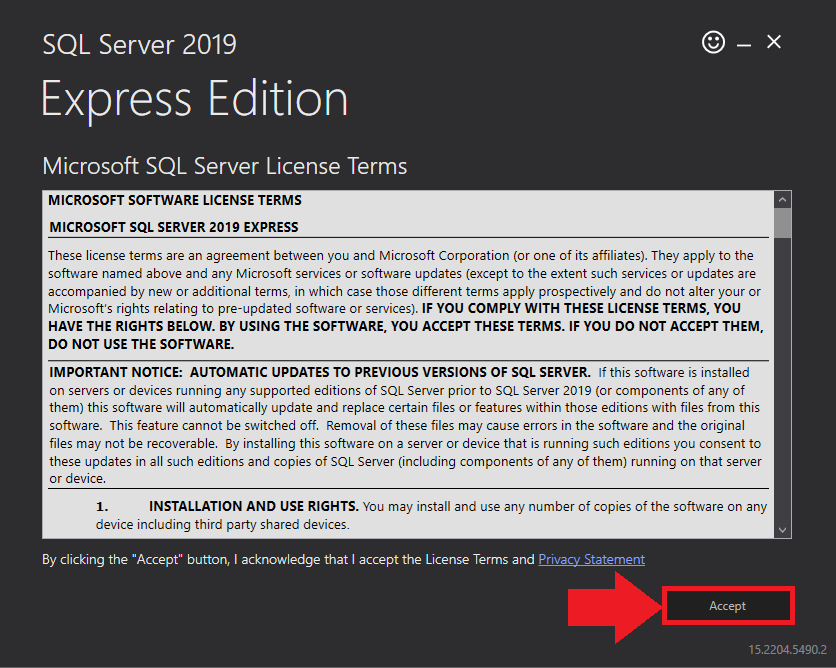
In the Microsoft SQL Server License Terms click the Accept button to acknowledge the license terms and continue.
This page appears if you do not have SQL Server Express preinstalled in your device.
Figure 6: SQL Server Express: Accept License Terms
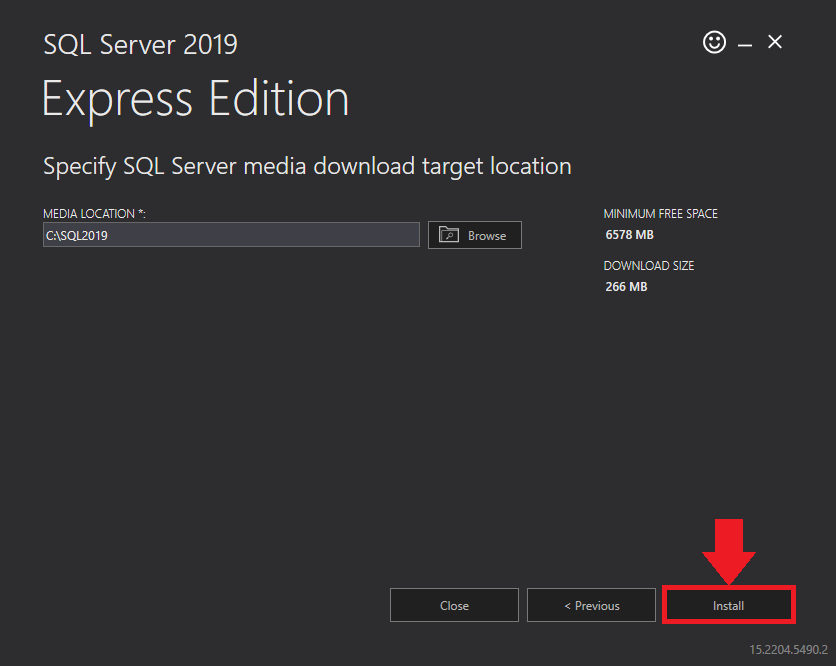
View the SQL Server Media target location in the Media Location field. If required, you can click the Browse button to change the location. Click Install to begin the installation of SQL Server Express.
Figure 7: SQL Server Express: Target Location
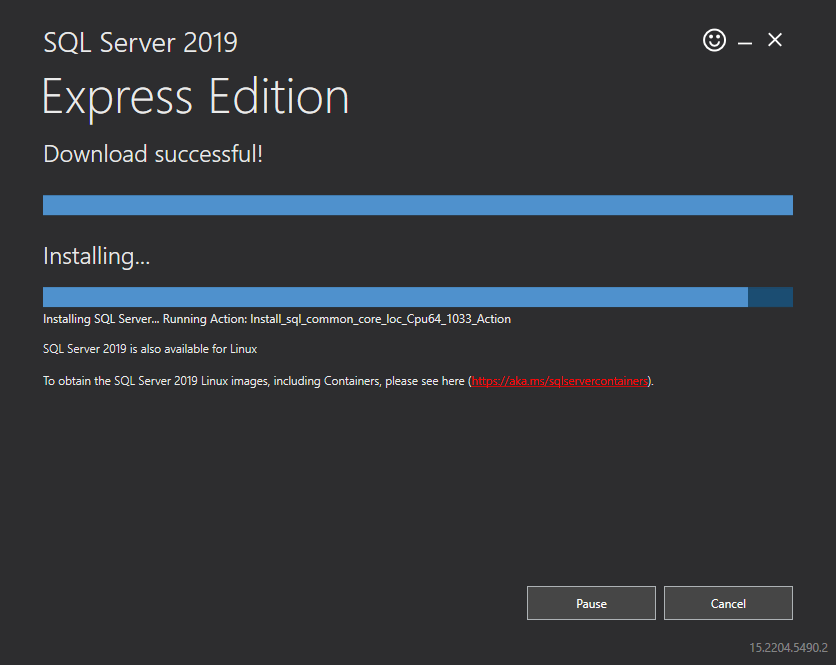
SQL server installation is in progress. This may take several minutes to complete.
Figure: SQL Server Installation In Progress
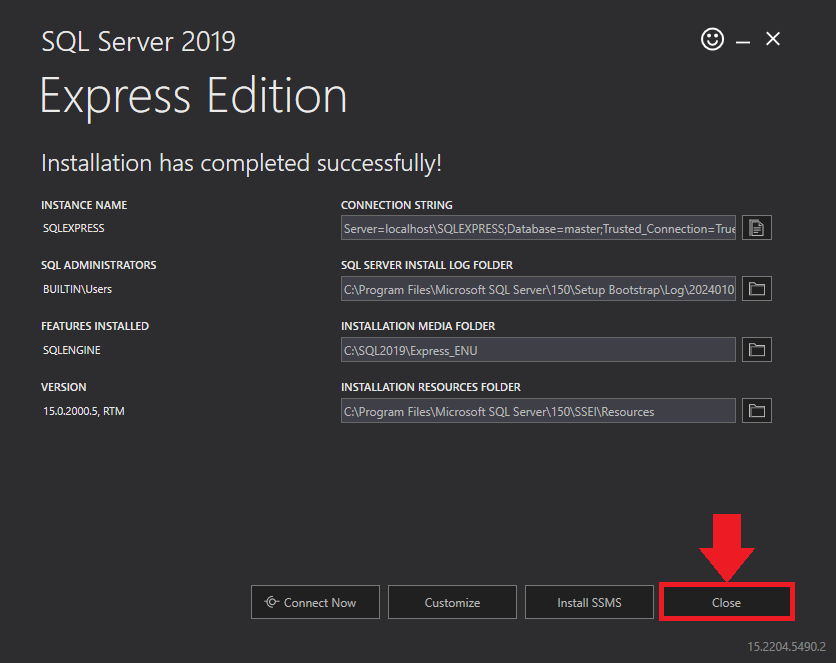
Click the Close button once the prerequisites are installed.
Figure 8: SQL Server Express: Installed Successfully
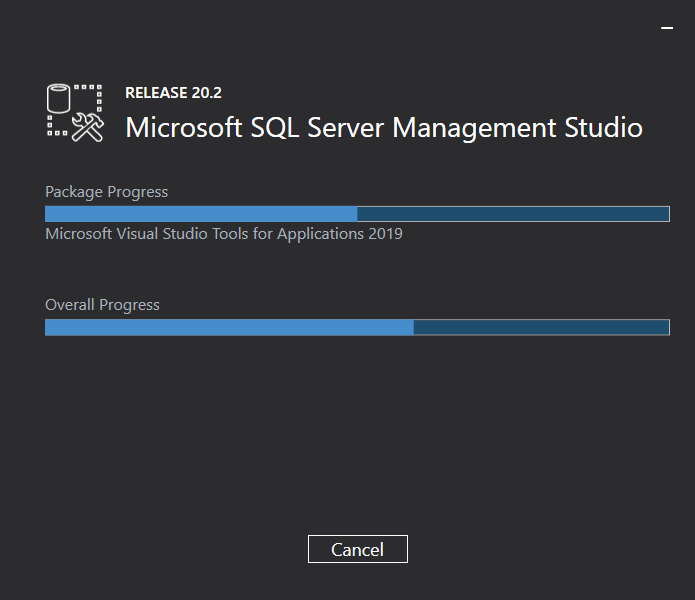
Microsoft SQL Management Studio installation is in progress. This may take several minutes to complete.
Figure 9: Microsoft SQL Server Management Studio: Installation in progress
Click Yes in the Confirmation Message Box to reboot the computer.
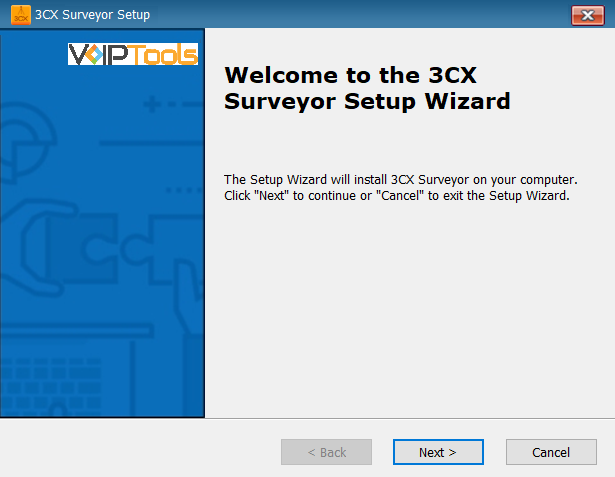
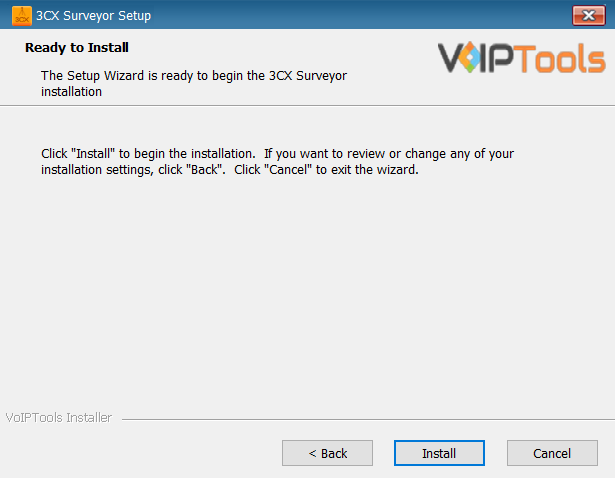
Click Next on the 3CX SurveyorSetup Wizard screen.
Figure 11: Surveyor setup wizard
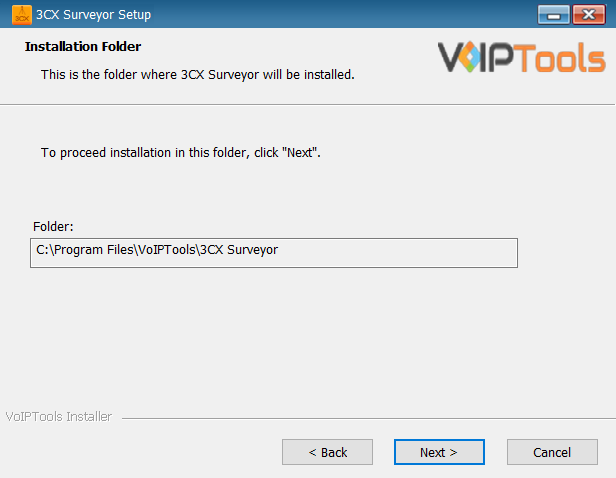
On the Select Installation Folder window, the Folder field displays the path where the 3CX Surveyor gets installed. You cannot change the location path.
Click Next to continue
Figure 12: Surveyor select the installation folder
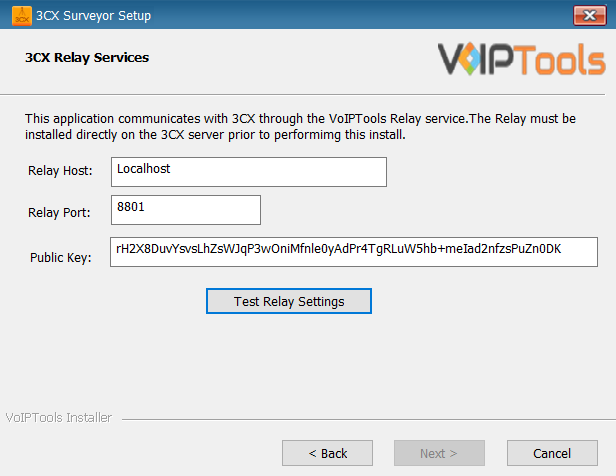
In the 3CX Relay Services window, in the Relay Host field, enter the FQDN of your 3CX server.
Enter 8801 in the Relay Port field.
Enter the public key you took from VoIPTools Relay services in the Public Key text area.
Figure 13: Configure Relay services
Click the Test Relay Settings to confirm ‘3CX Surveyor’ can communicate with the Relay services running on the 3CX server.
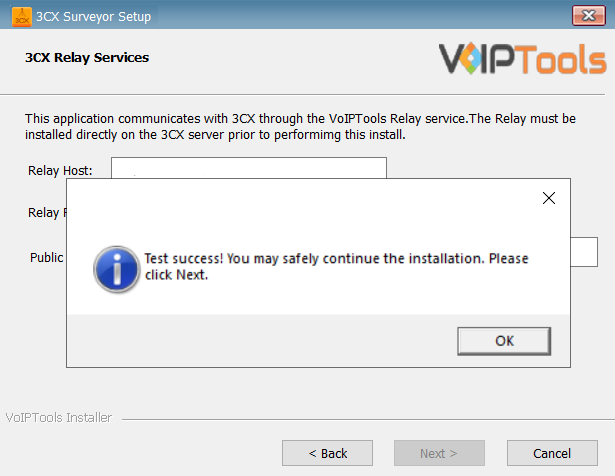
If the ‘3CX Surveyor’ is successfully able to communicate with the Relay services that run on the 3CX server, a Success message box appears. Click OK. If the test fails, you will not be able to continue until communication with the relay is established.
Figure 14: Test Relay Success
Click Next to continue with the installation.
NOTE:
You must set the Relay Port to 8801.
If the test was unsuccessful:If the Relay test fails, you cannot continue the installation until you establish communication with the Relay. Confirm the following if the Relay test failed,
Confirm you have the correct firewall port open (default TCP 8801) on the 3CX server and the firewall protecting the 3CX server.
Confirm that you have entered the correct FQDN for the 3CX server.
Confirm that the 3CX Surveyor and Relay use the same port and protocol.
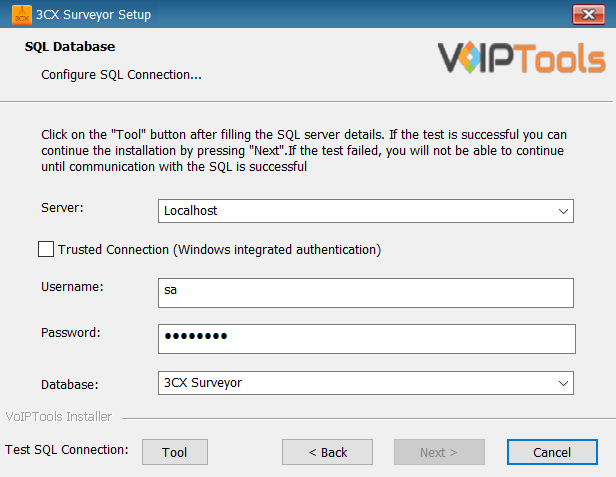
When configuring 3CX Surveyor, select an existing Microsoft SQL Server instance in your environment. The database server can be a remote SQL Server or a local instance running on the VolPTools server.
On the SQL Database window in the Server field, select the desired instance of SQL Server.
To use SQL Authentication, uncheck the Trusted Connection checkbox.
In the Username and Password fields, enter valid SQL login account credentials.
Figure 15: Configure SQL database
NOTE:
We recommend you use SQL Authentication rather than Windows authentication. Many of our tools leverage a Call Flow Designer (CFD) application running on the 3CX.Frequently our CFD applications require access to a SQL database. If the 3CX server and the database server are not in an Active Directory domain, Windows authentication will fail.
To use SQL Authentication, you must configure the SQL server to run in Mixed Mode. If you install SQL Server with our tools, we configure SQL in Mixed Mode.
To use Windows Integrated Authentication (not recommended), check the Trusted Connection (Windows integrated authentication) checkbox.
NOTE:
In the Database field, the installer will automatically display the default database name. We encourage you to use the default name. To upgrade or reinstall 3CX Surveyor, select the current database name from the list.
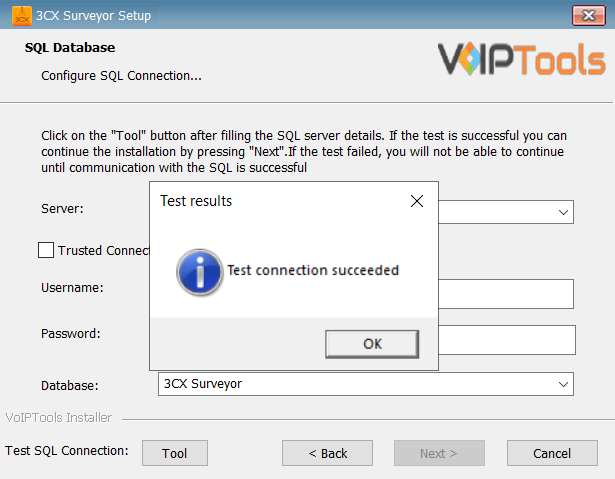
Click the Tool buttons to confirm connectivity to SQL Server. and click OK on the Test Results message box.
Click the Surveyor Webdesktop icon to open the web application.
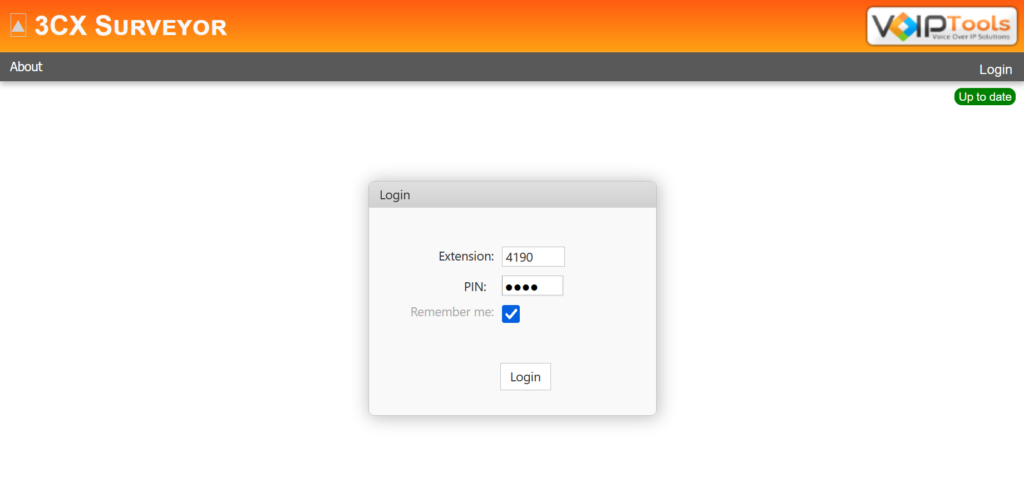
On the Login page, do the following tasks,
In the Extension field, enter your 3CX extension number.
In the PIN field, enter your 3CX voicemail PIN.
Click the Login button to log in to your account
NOTE:
When logging in initially as an Agent, access to the application is denied. Agents gain access to the web portal only after a manager registers the application, allowing their entry. This process ensures Agent access but requires prior managerial registration for application authorization.
Figure: Agent Restricted for Registration Process
NOTE:
If the Extension does not belong to Surveyor Extension Group then you will be unable to login to the 3CX Surveyor, and an error message appears as “Not Authorized for Dialer”
Figure 20: Web Portal Login
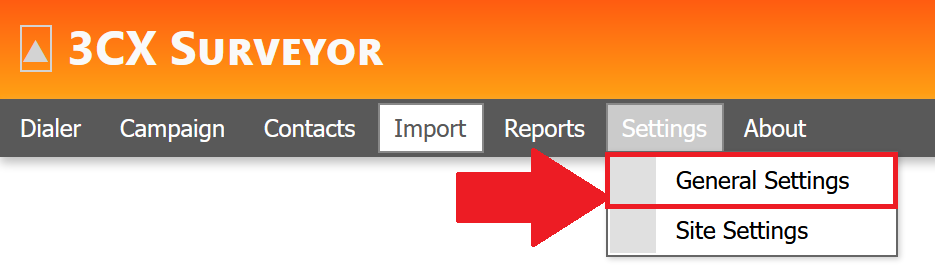
On the top menu, hover over the Settings tab to display the settings menu.
Select General Settings from the settings menu.
Figure 21: Settings menu
In the top menu click the Register tab.
Figure 22: Register tab
Enter the license key that you got in your order confirmation email. If you do not have one, you can order 3CX Surveyor online at https://www.voiptools.com so that your order confirmation email will include your license key and a link to download the software.
Click Registerto register your software.
Figure 23: 3CX Surveyor – Registration
NOTE:
The license key permits you to install 3CX Surveyor on one computer. This is not free software.
To access the ‘3CX Surveyor’ web portal, click the Web Portal button on the configuration program, or click on the desktop icon that was created during the installation process (3CX Surveyor Web).
In the 3CX Management Console, you can assign user roles to extensions in order to control the access rights within the application. From here, you can also view the type of role associated with a specific extension.
You can assign a ‘Manager’ role to a specific extension through the 3CX Console Management
Log in to 3CX Console Management with valid user credentials.
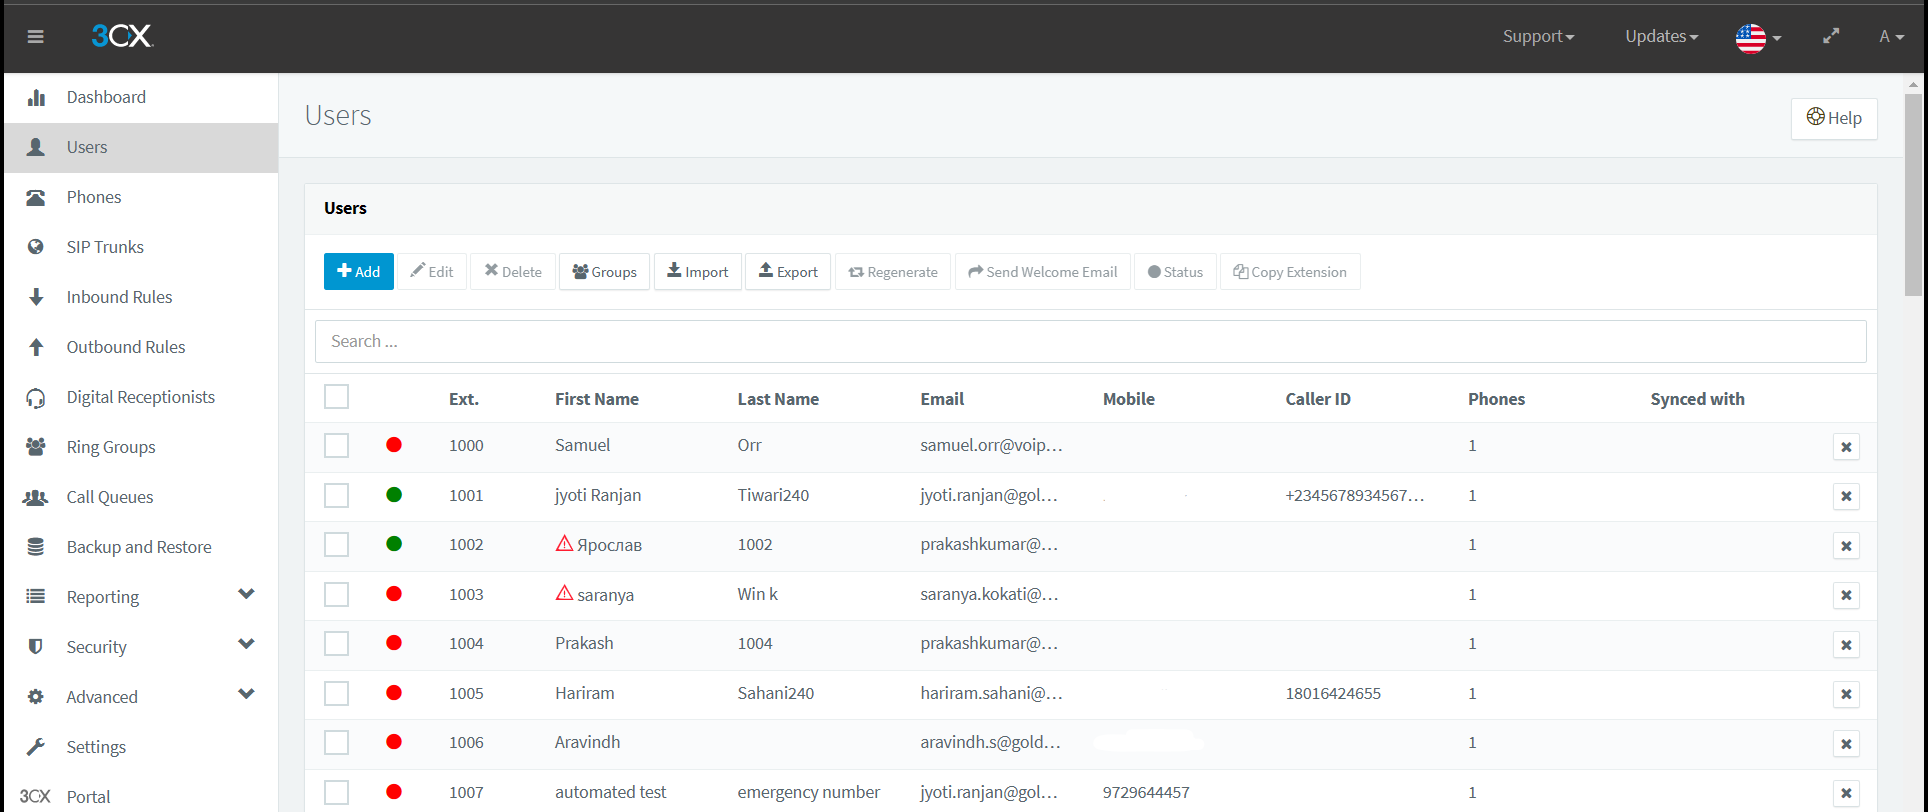
In the left side panel click the Users menu.
From the Extensions listing screen, find and double-click the desired extension to which you want to assign Manager Role. You can also type the extension number in the search bar for quick reference.
Figure 24: 3CX Console Management – Extensions
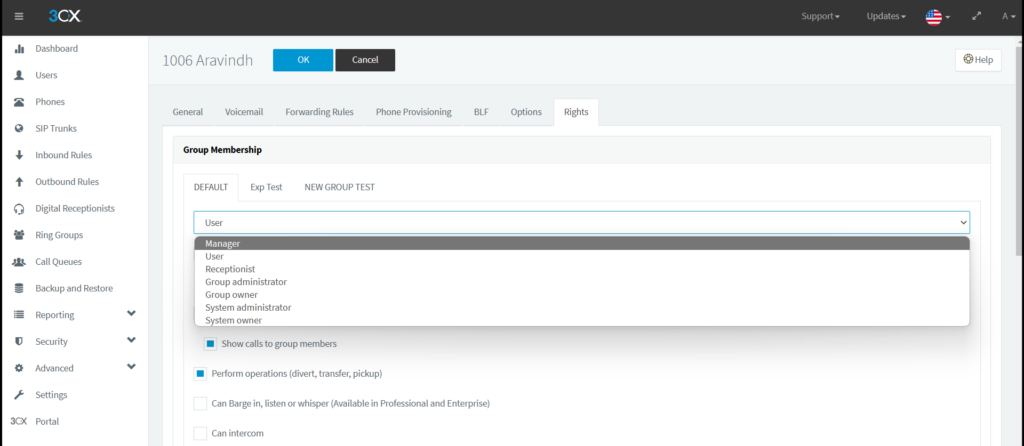
On the tab bar, select Rights.
From the Group Membership drop down, select desired group to which you want to associate the current extension as Manager
From the Role drop down, select the option as Manager
On the top of the page, beside user name, click OK
You can view user role for any extension through the 3CX Console Management
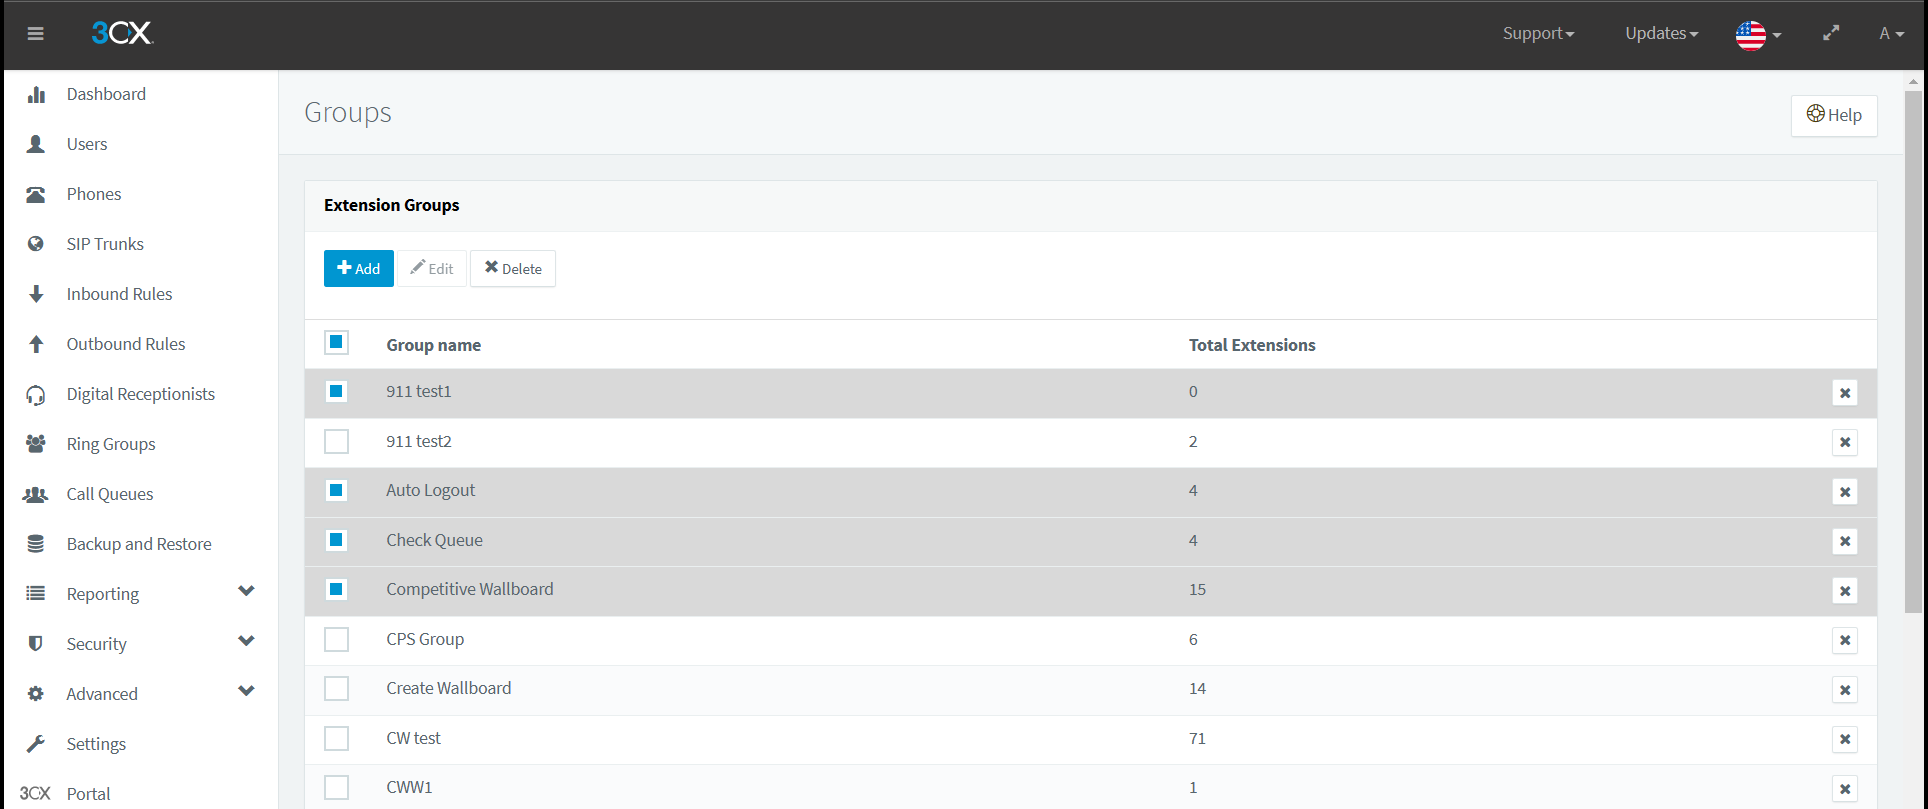
In the 3CX Console Management and from the Navigation Pane, select Groups.
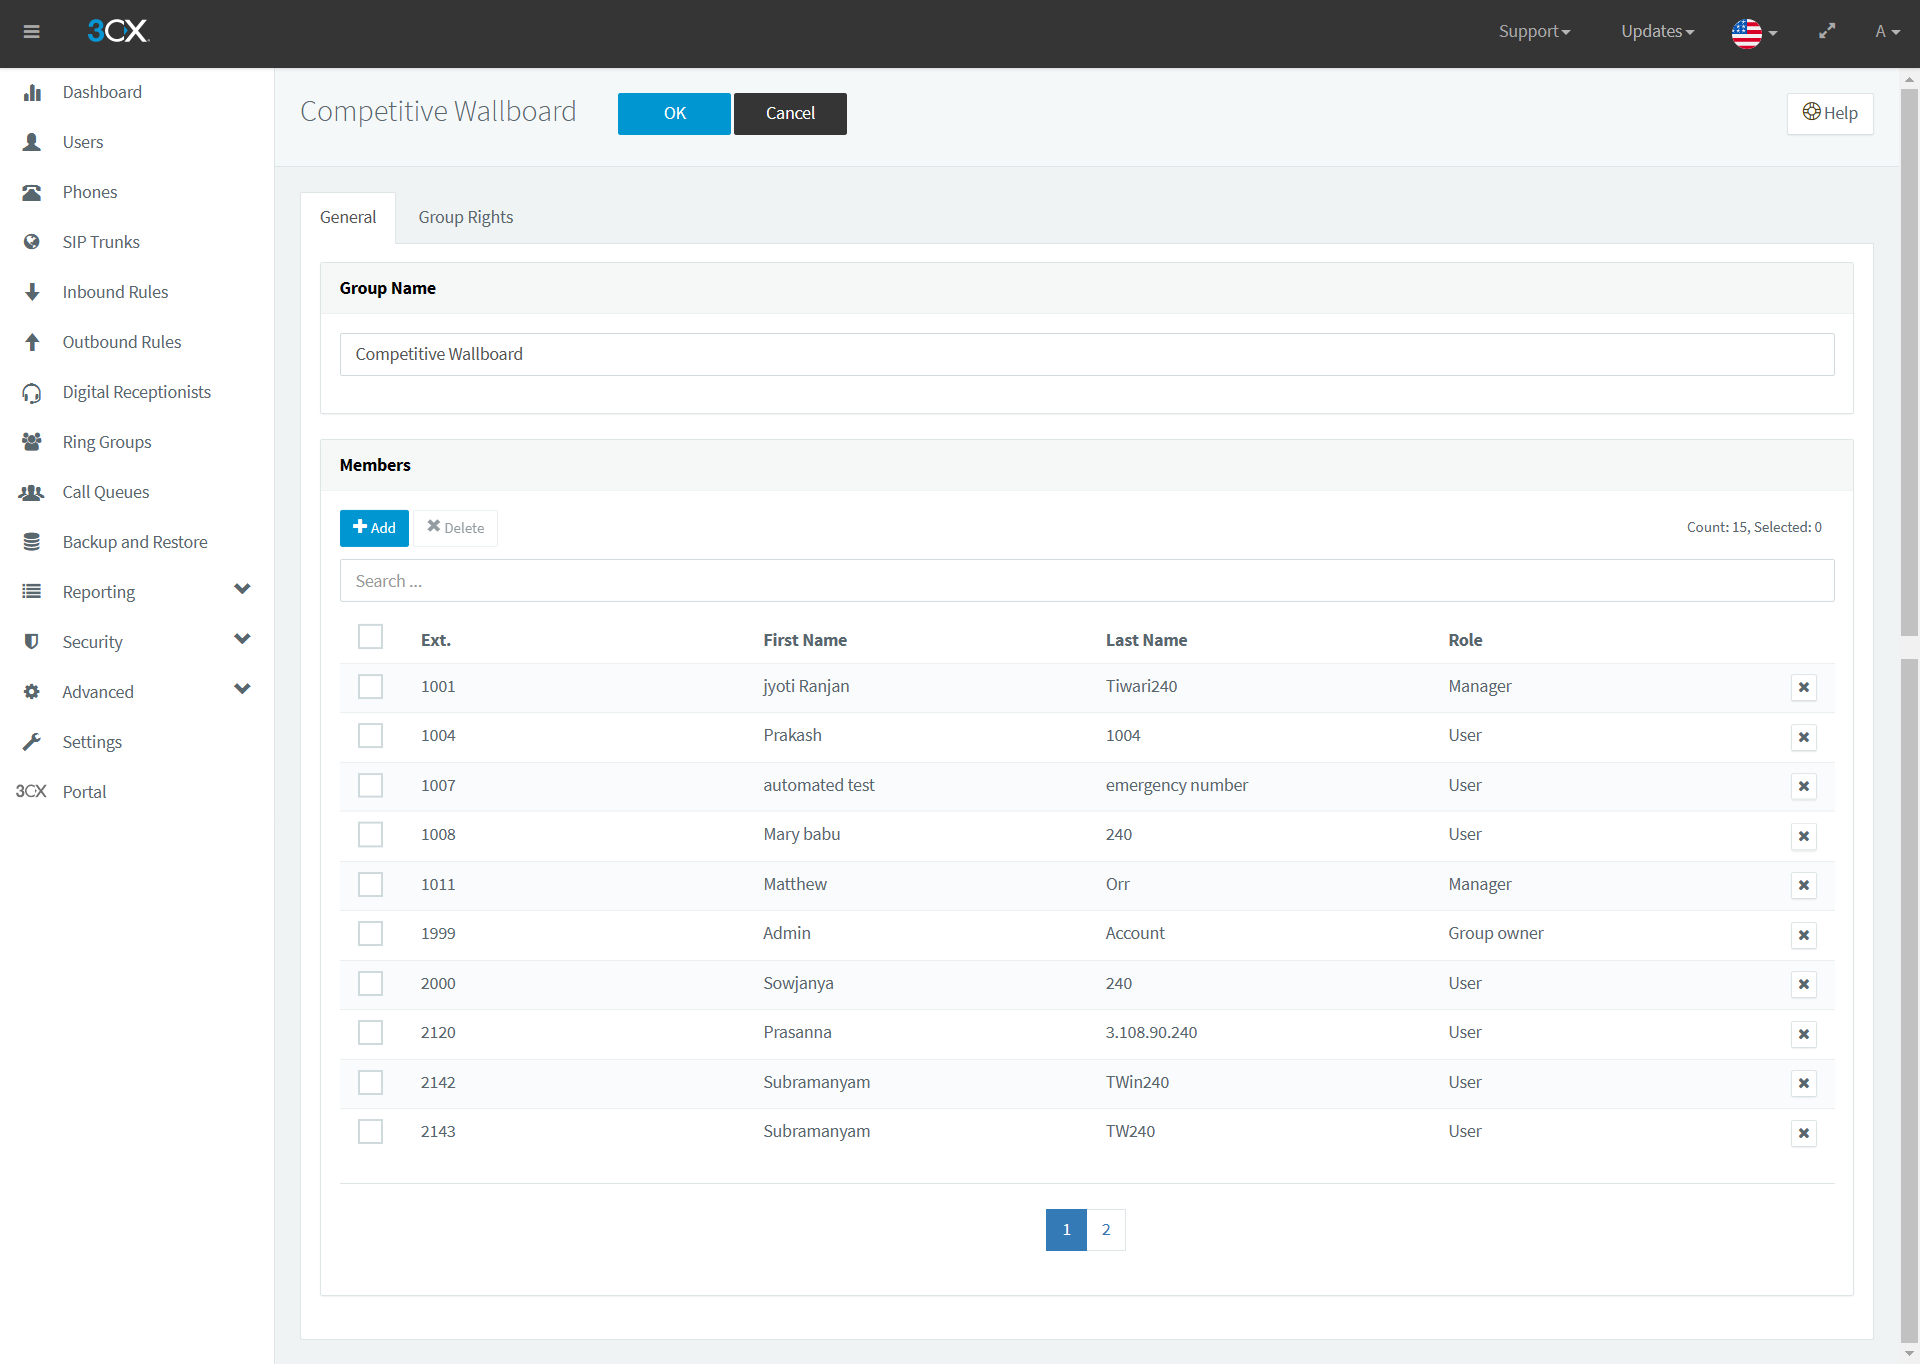
From the Extension Groups listing screen, find and double-click the desired extension group for which you want to view the user roles for all of its associated extensions (members).
Figure 26: 3CX Console Management – Groups – Surveyor Extension Group (For Example)
In the General tab, under Members and in the Role column, you can view the associated role for each of the extensions of the group.
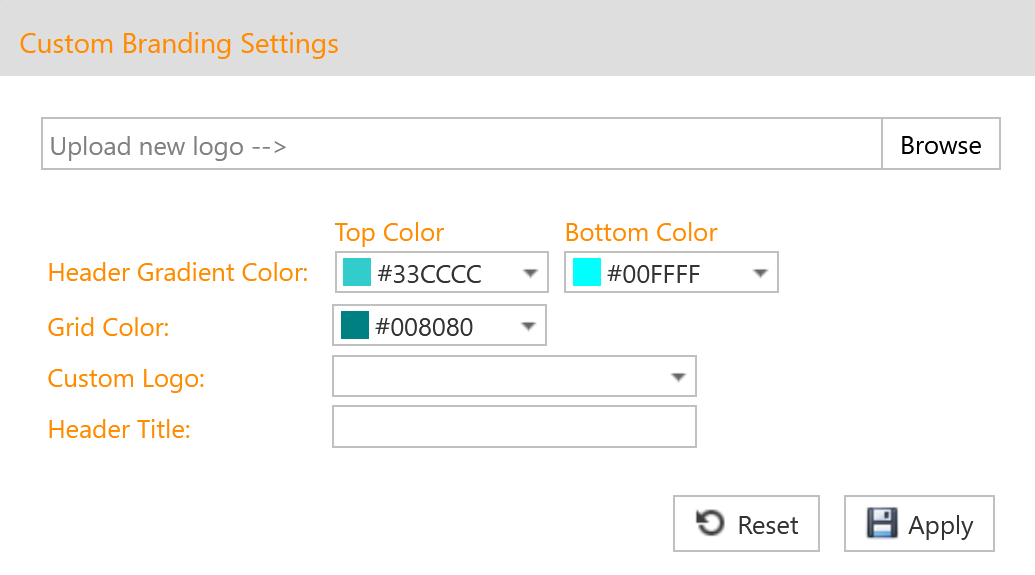
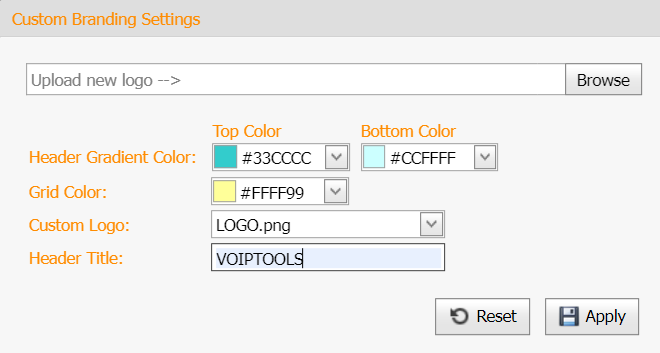
Settings enable you to configure general settings and customize brand settings.
General Settings enable you to register 3CX Surveyor software, control who can edit label text, and add dispositions and lookups. On the other hand, Site Settings enable you to customize branding settings for the application
Hover over the mouse on the Settings tab to display the dropdown menu with the following menu options:
You can perform the following function in the General section.
Culture drop-down list
Select the language to control how dates and currency should be displayed throughout the 3CX Surveyor web portal.
NOTE: The default Culture is English.
Figure 32: General settings: General section
Culture drop-down list
Select the language to control how dates and currency should be displayed throughout the 3CX Surveyor web portal.
NOTE: The default Culture is English.
Surveyor Extension Group field
Specify a 3CX extension group so that only the members assigned to this extension group can login to the 3CX Surveyor web portal.
NOTE: Surveyor licensing is based on the number of people in this extension group (including extension group managers).
Wait Time box
Enter time (in minutes) to control how soon a contact will be presented in the list of people to be called again, for example, the contact was previously dispositioned as “No Answer”
Session Timeout box
Enter the time (in minutes) to control when a web page (session) will expire based on inactivity. When a web page expires, the user is redirected to the login page.
If you want to enable the automatic import of new CSV files, check the Auto Import Contacts box.
Under Auto Import section, check Auto Import Contacts box to turn on the auto-import feature so that the 3CX Surveyor automatically imports new CSV files from the monitored folder.
Check First Row Header check box to skip the first row of the CSV file if this row contains column heading rather than data to be imported.
In the Import Path field, enter the path of the monitored folder used by the auto-import feature.
In the Archive Path field, enter the path of the folder to which the original CSV file has to be moved once it has been auto-imported.
Click Save to save the data.
NOTE:
Surveyor has the ability to monitor a specified folder and if a new CSV file is placed in the monitored folder, the contents are automatically imported into a campaign.
Figure 33: General Settings: Auto Import
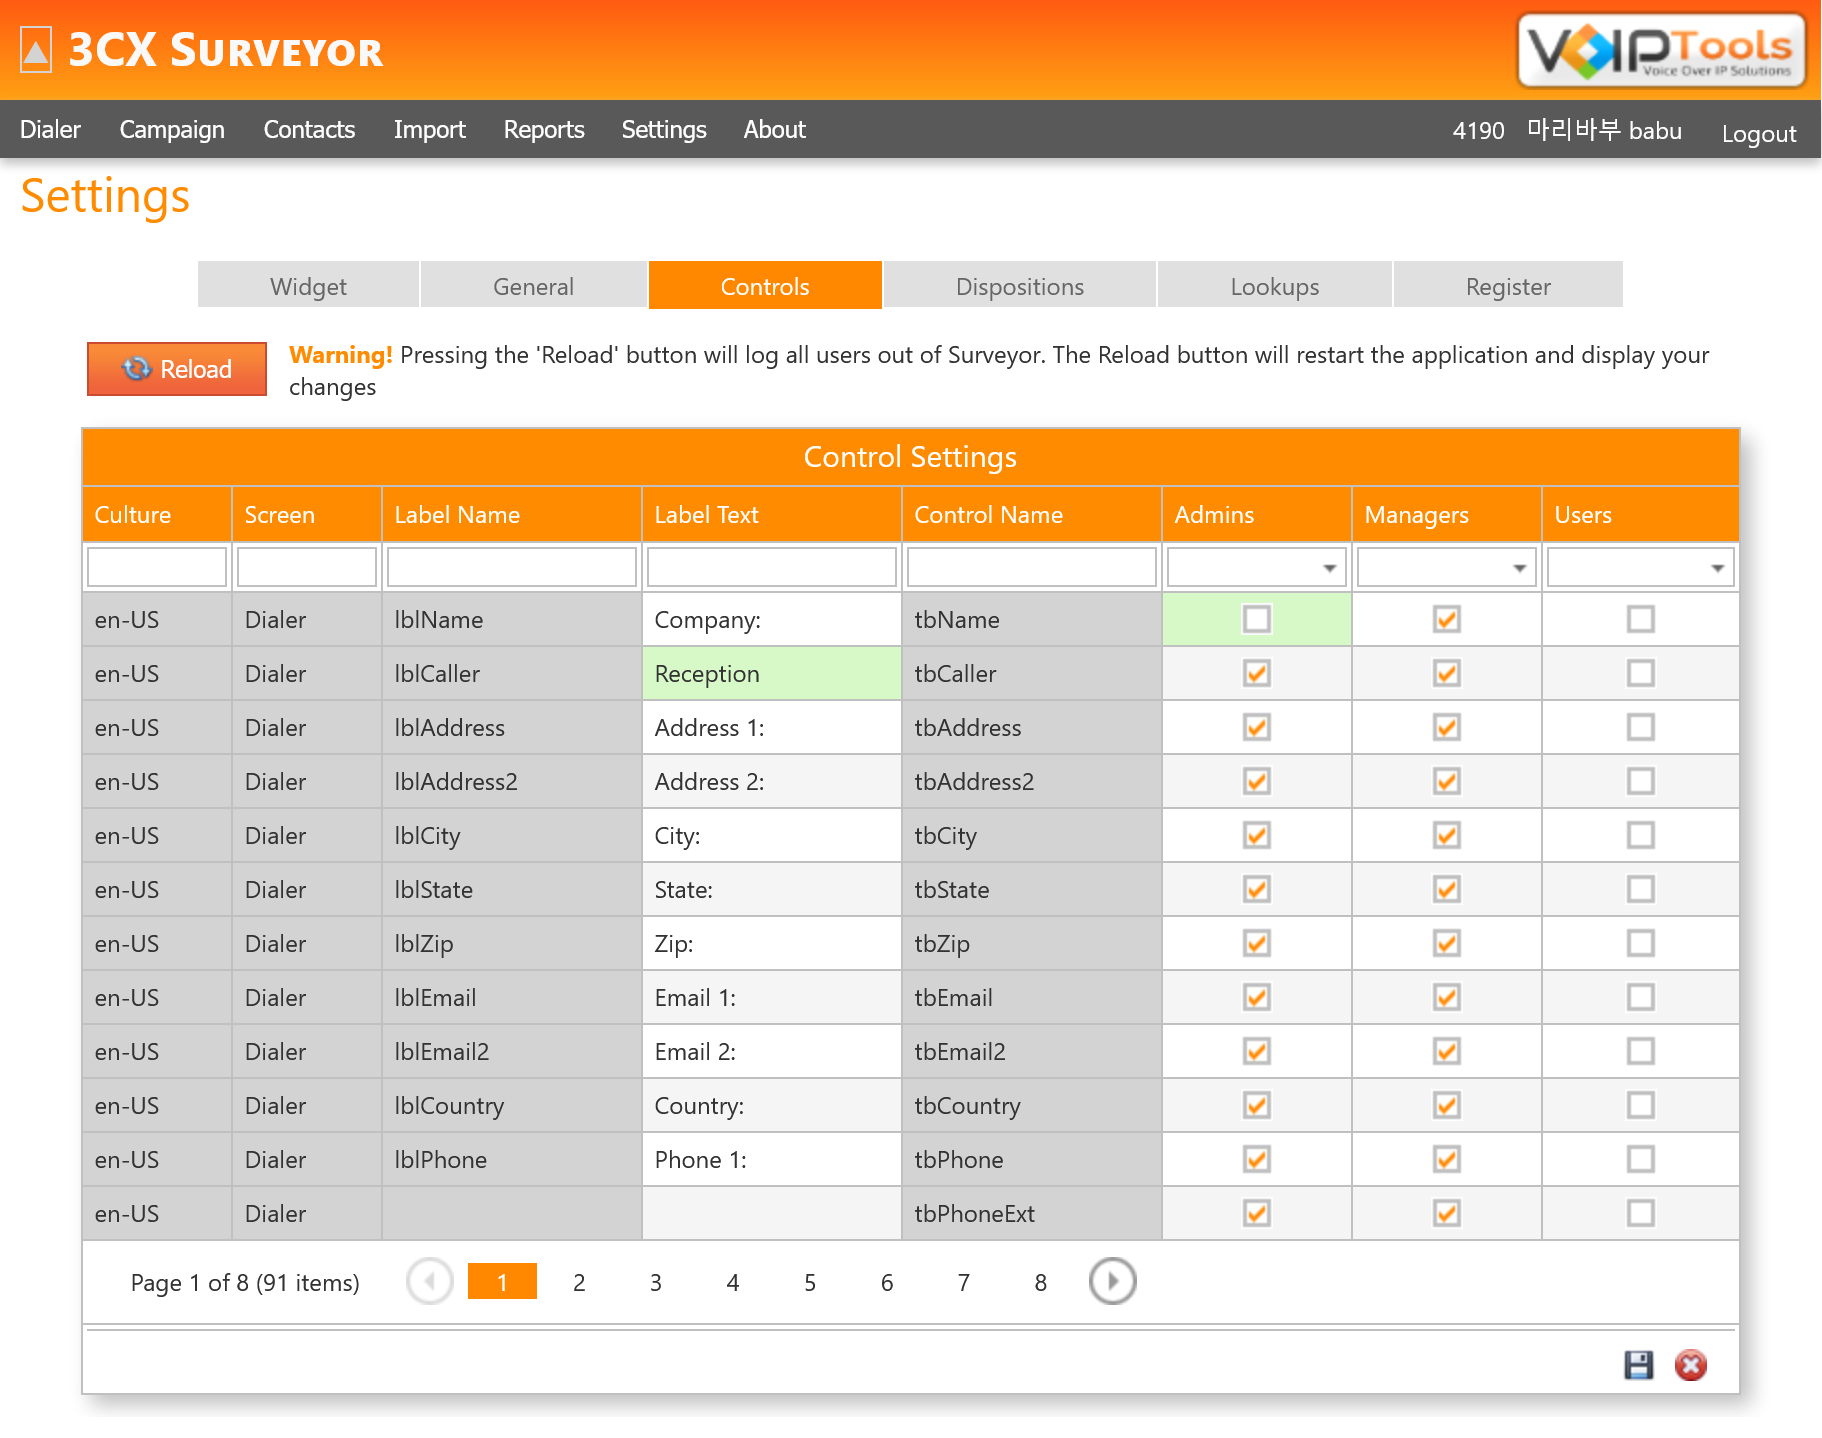
The controls screen enables you to edit Label Text and control who can edit data for a specific ‘Label’ that appears in a specific screen.
On the Settings screen and in the Controls tab, search for the control for which you want to grant ‘Update’ permission.
Check one or more of the groups (Admins, Managers, and Users) that you want to grant update rights so that they can edit ‘Label’ data in a specific screen.
On the bottom right corner of the screen, click Save to save the changes.
Disposition is a Call Status text that best describes why a call was dispositioned. (For instance, the disposition can be defined through call status as ‘Busy’, ‘Not Interested’, ‘Item Sold’ etc.). The disposition that you create will be added to the list in Call Status widget of Dialer screen. You can add a new or edit an existing disposition.
NOTE:
You cannot delete a disposition. However, you can make it unavailable by simply checking Disable box.
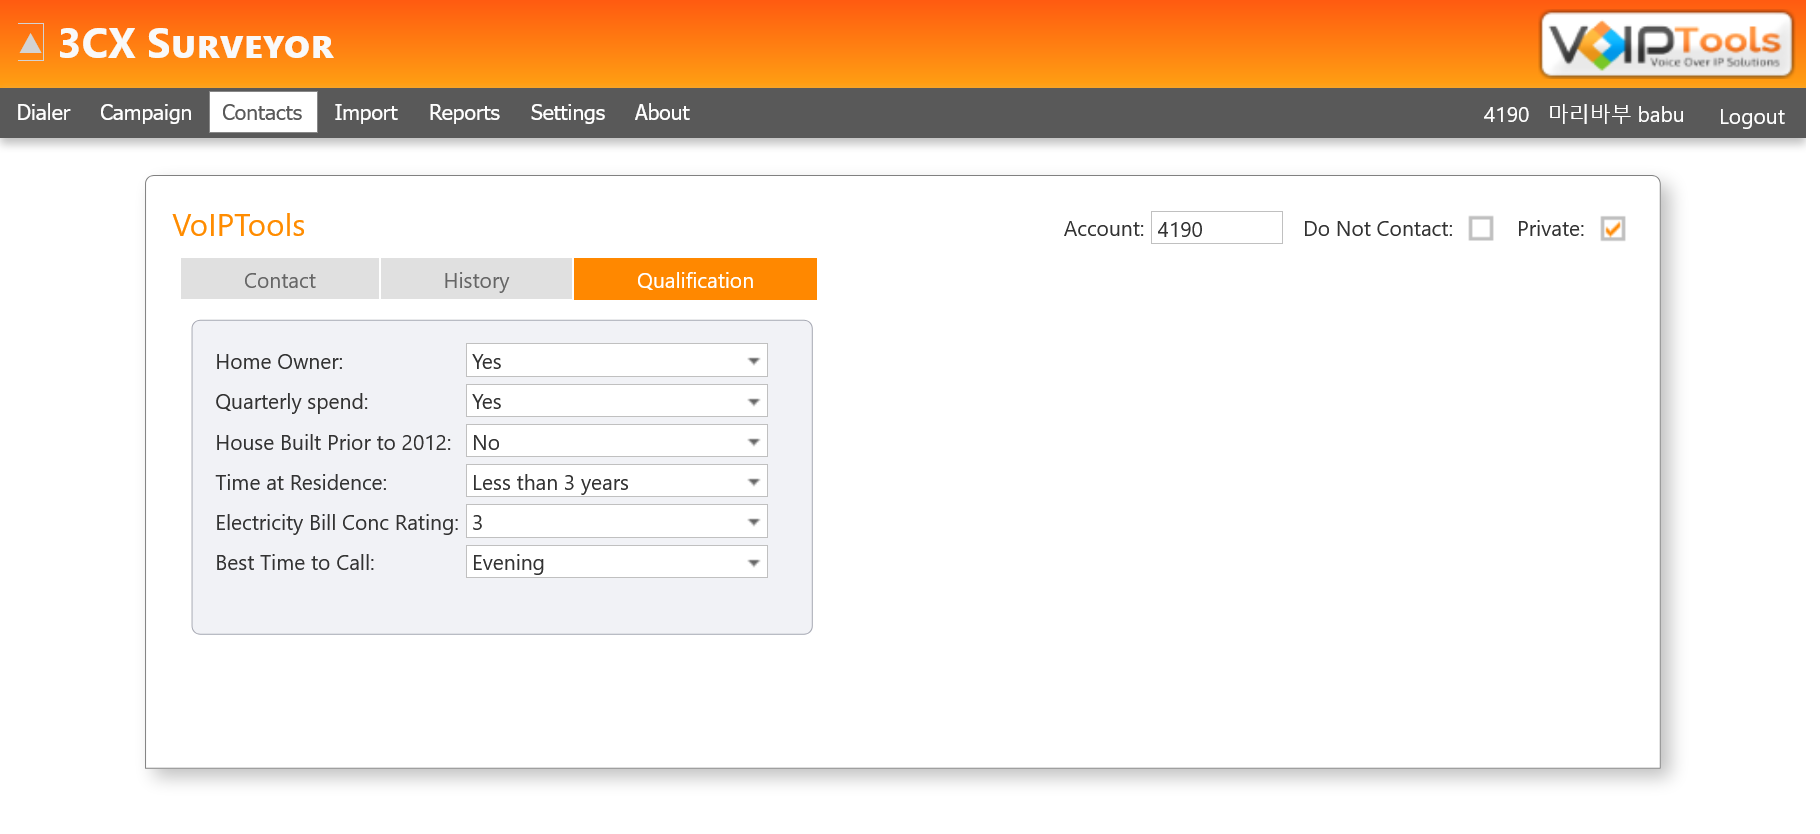
Lookups define the contact sales attributes. The lookups that you create here will appear in the Contact Attributes widget of the Dialer screen. It is through these details that you know what sales transactions the contact had made with your company in the recent times and how the customer’s response towards buying your product is.
Import screen enables you to import contacts from a CSV file into the central repository of contacts.
Beside the Import File field, click the Browse button to select the import file (.csv).
Click the Get Fields button to load the CSV column headers into the CSV File list box.
Move each column from the CSV File list box into the CSV Field list box by appropriately using buttons such that the columns in the CSV Field list box will match those of the Contact Field list box.
Select the Update Existing Contacts box to overwrite existing contacts.
Click the Import button to import all the contacts from the CSV file into the central repository of contacts.
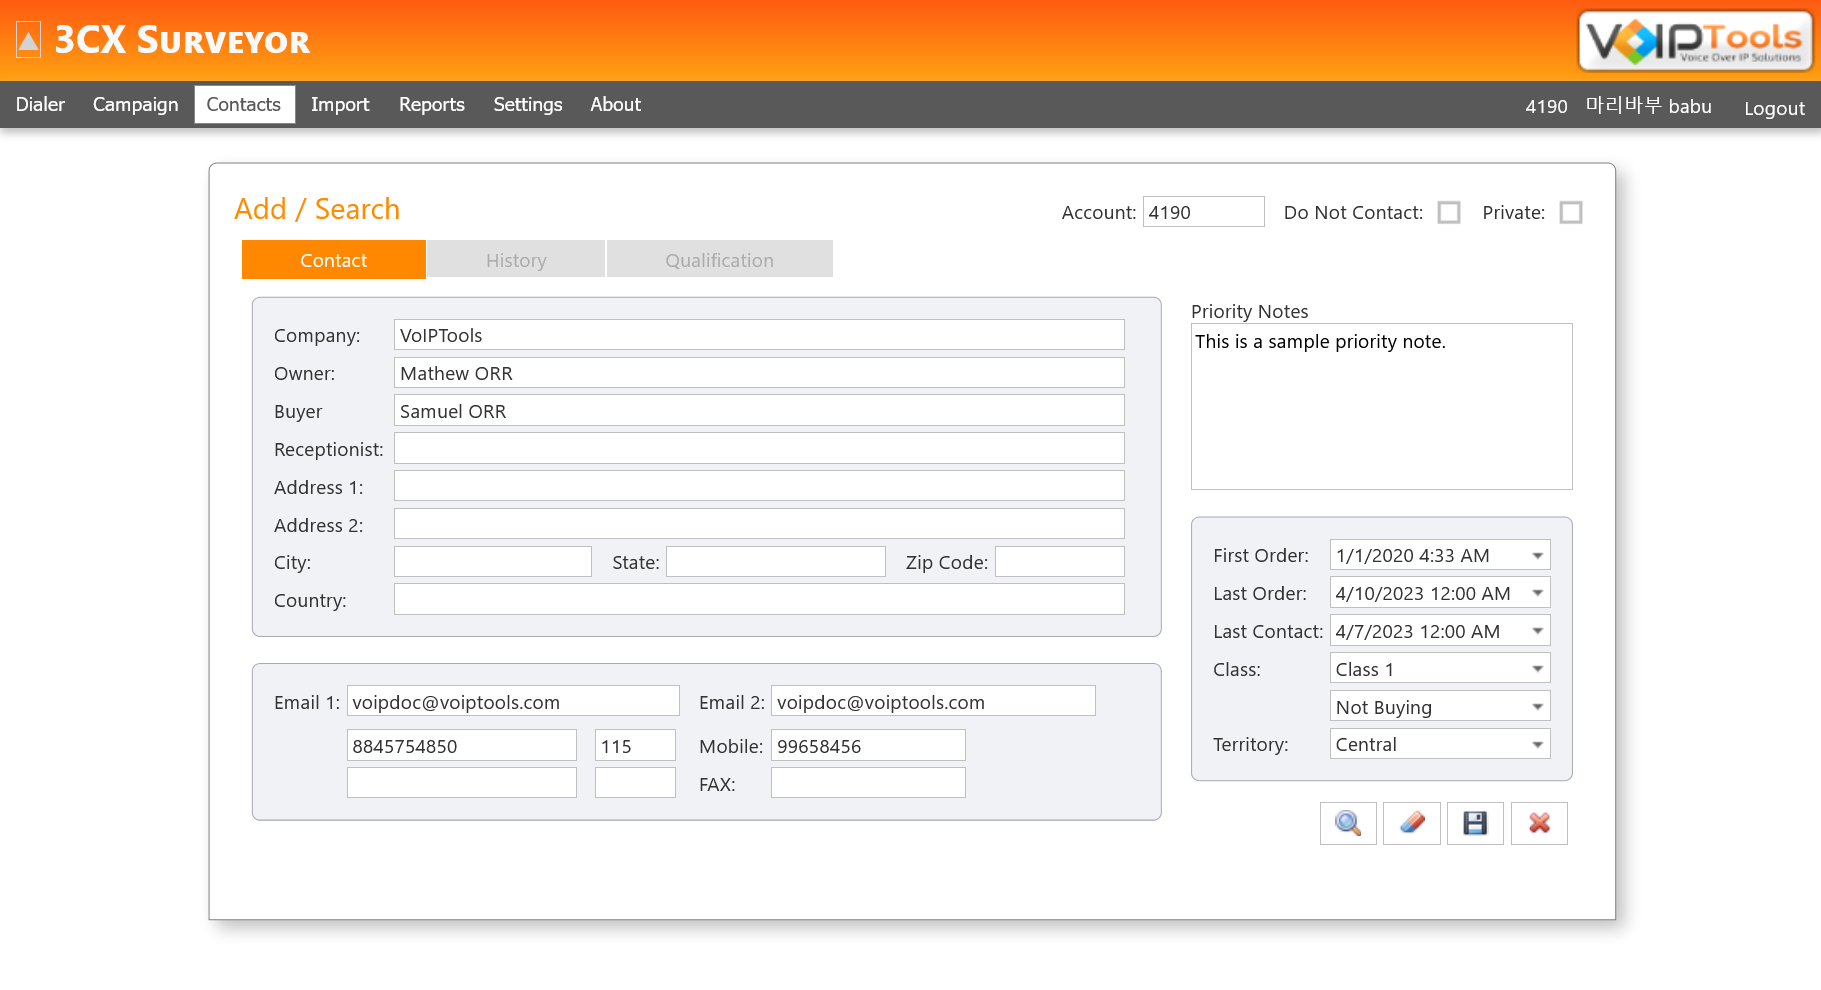
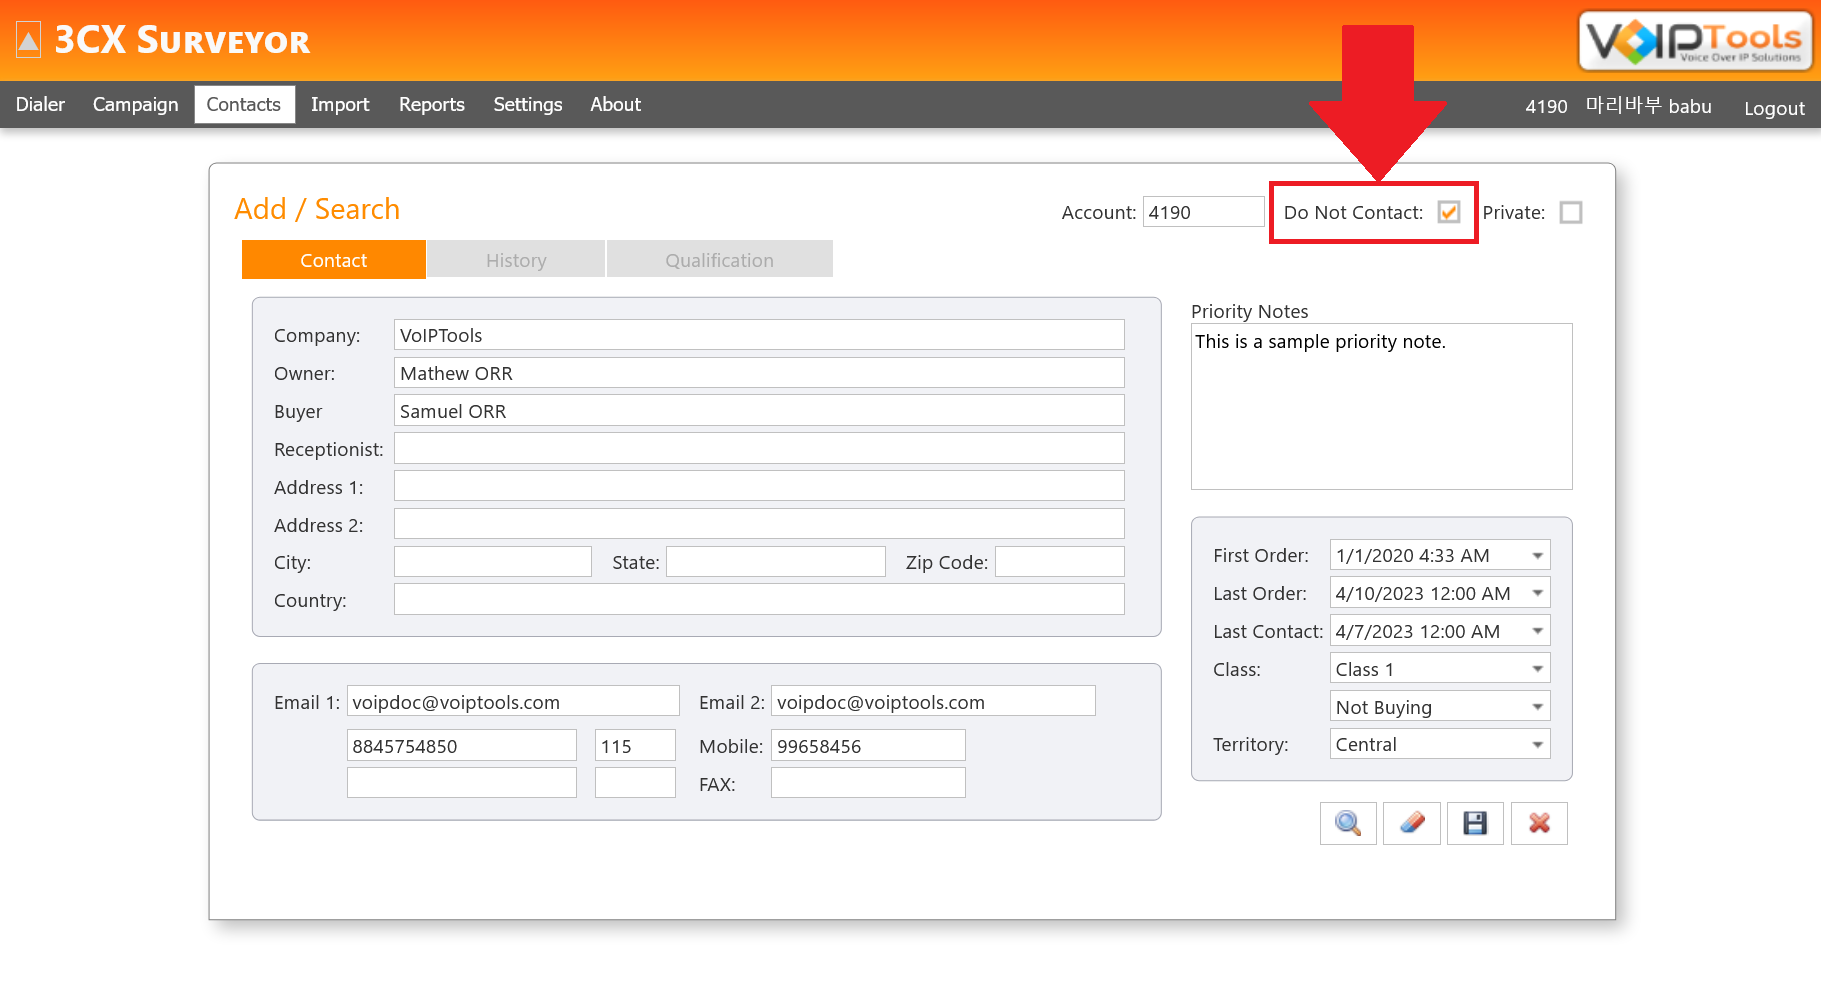
The contacts screen is like a mini CRM that manages all your contacts. Here, you can search for any contact by typing appropriate data in any one of the fields in the Contact screen and click the Search button so that 3CX Surveyor finds the result from the database.
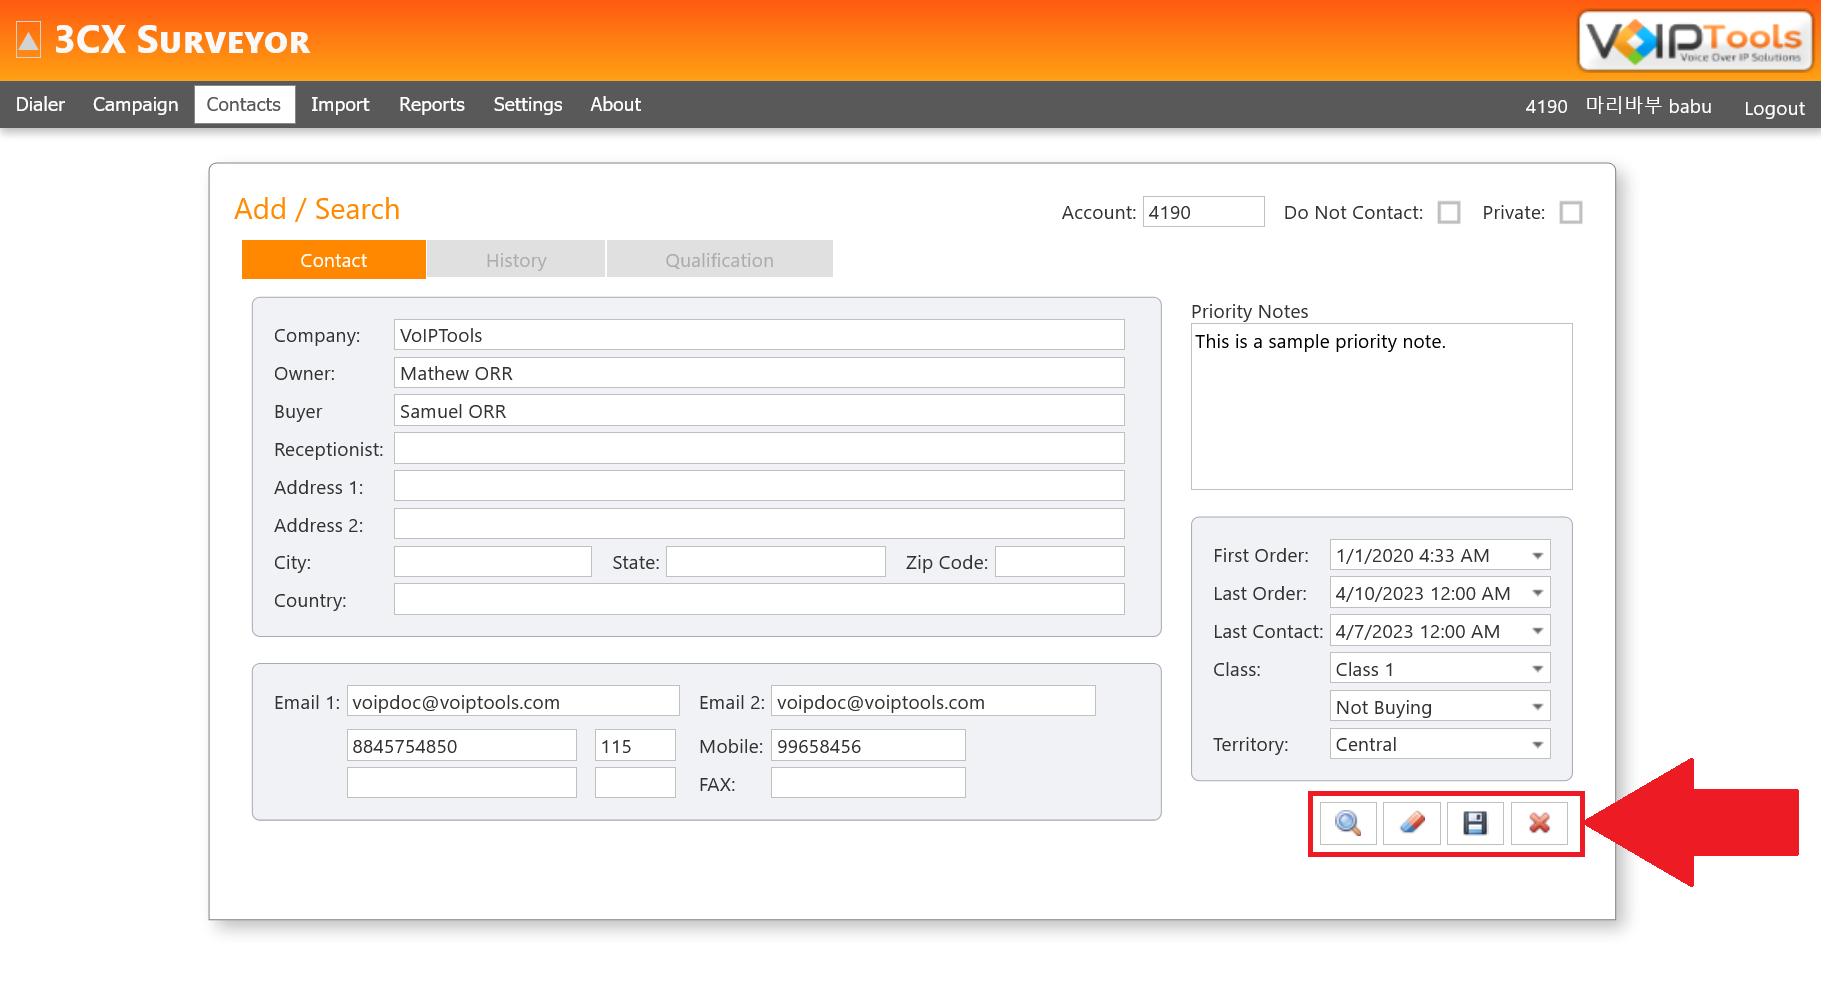
In the Contacts screen, and in the Contact tab, on the bottom right corner, the contact toolbar exists.
Figure 47: Contact tab: Contact toolbar
Search
Type appropriate information anywhere in the field and click the Search button. 3CX Surveyor finds the person from the database and populates the information in all the fields.
Delete Contact
Search for the contact that you want to delete and click the Delete Contact button to delete the contact.
Save
Click the Save button to save the changes you made to the contact.
Clear Contact
Click the Clear Contact button to clear the contact details in the Contact tab.
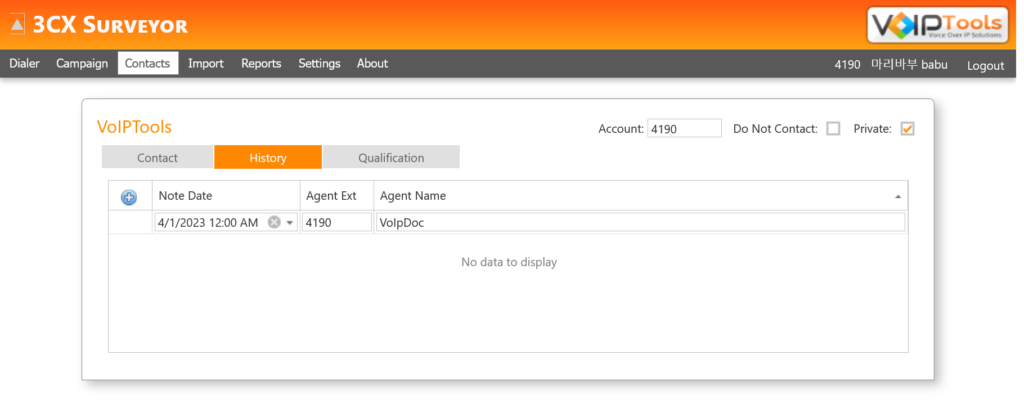
The History screen allows you to record notes about various conversations your company had with a specific contact over time. You can record important information like commitments or services you provided so that when the customer calls you, you can quickly look into notes to know if you can perform something on their behalf to achieve great customer satisfaction. It provides a great way to understand your customer even before you start talking to them.
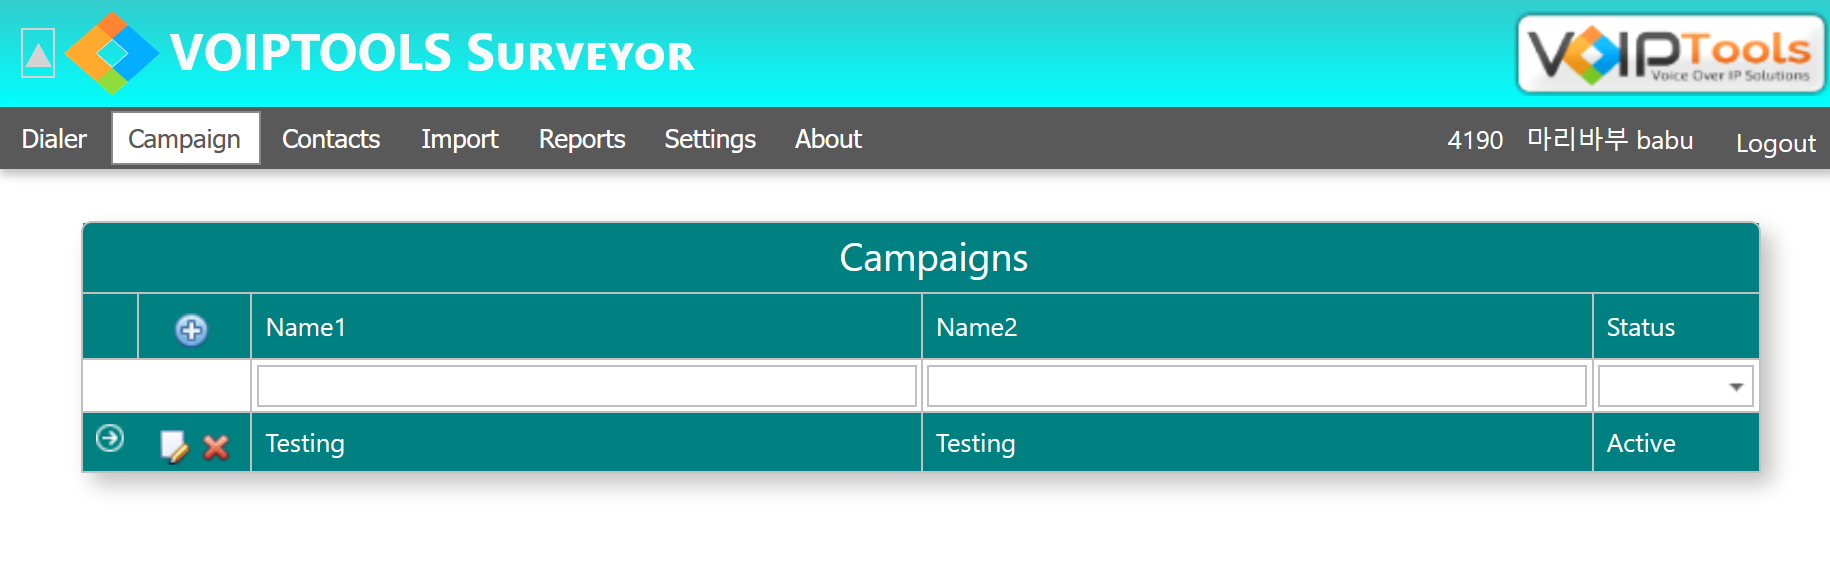
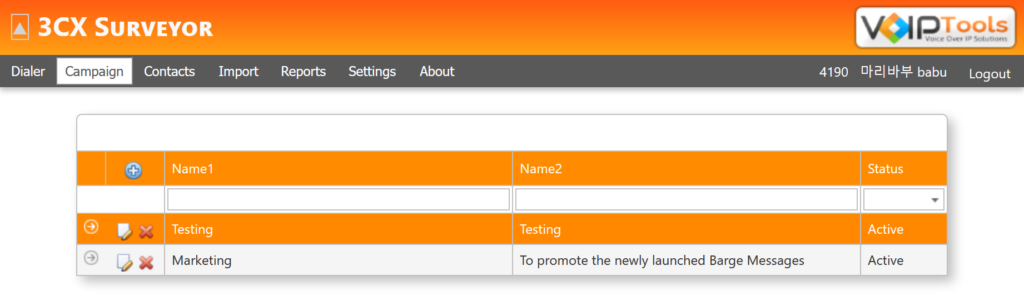
A campaign is a global contact list that can have one or more sub lists within it. Here, you make a subset of selected contacts and assign them to a list called ‘sub list’, and then assign agents to that sub list so that they can have people to call for. You can create a campaign ahead of time and it becomes available as soon as the correct date arrives.
If multiple agents are working on the same campaign/list, the system ensures that each of the agents will work on different contacts.
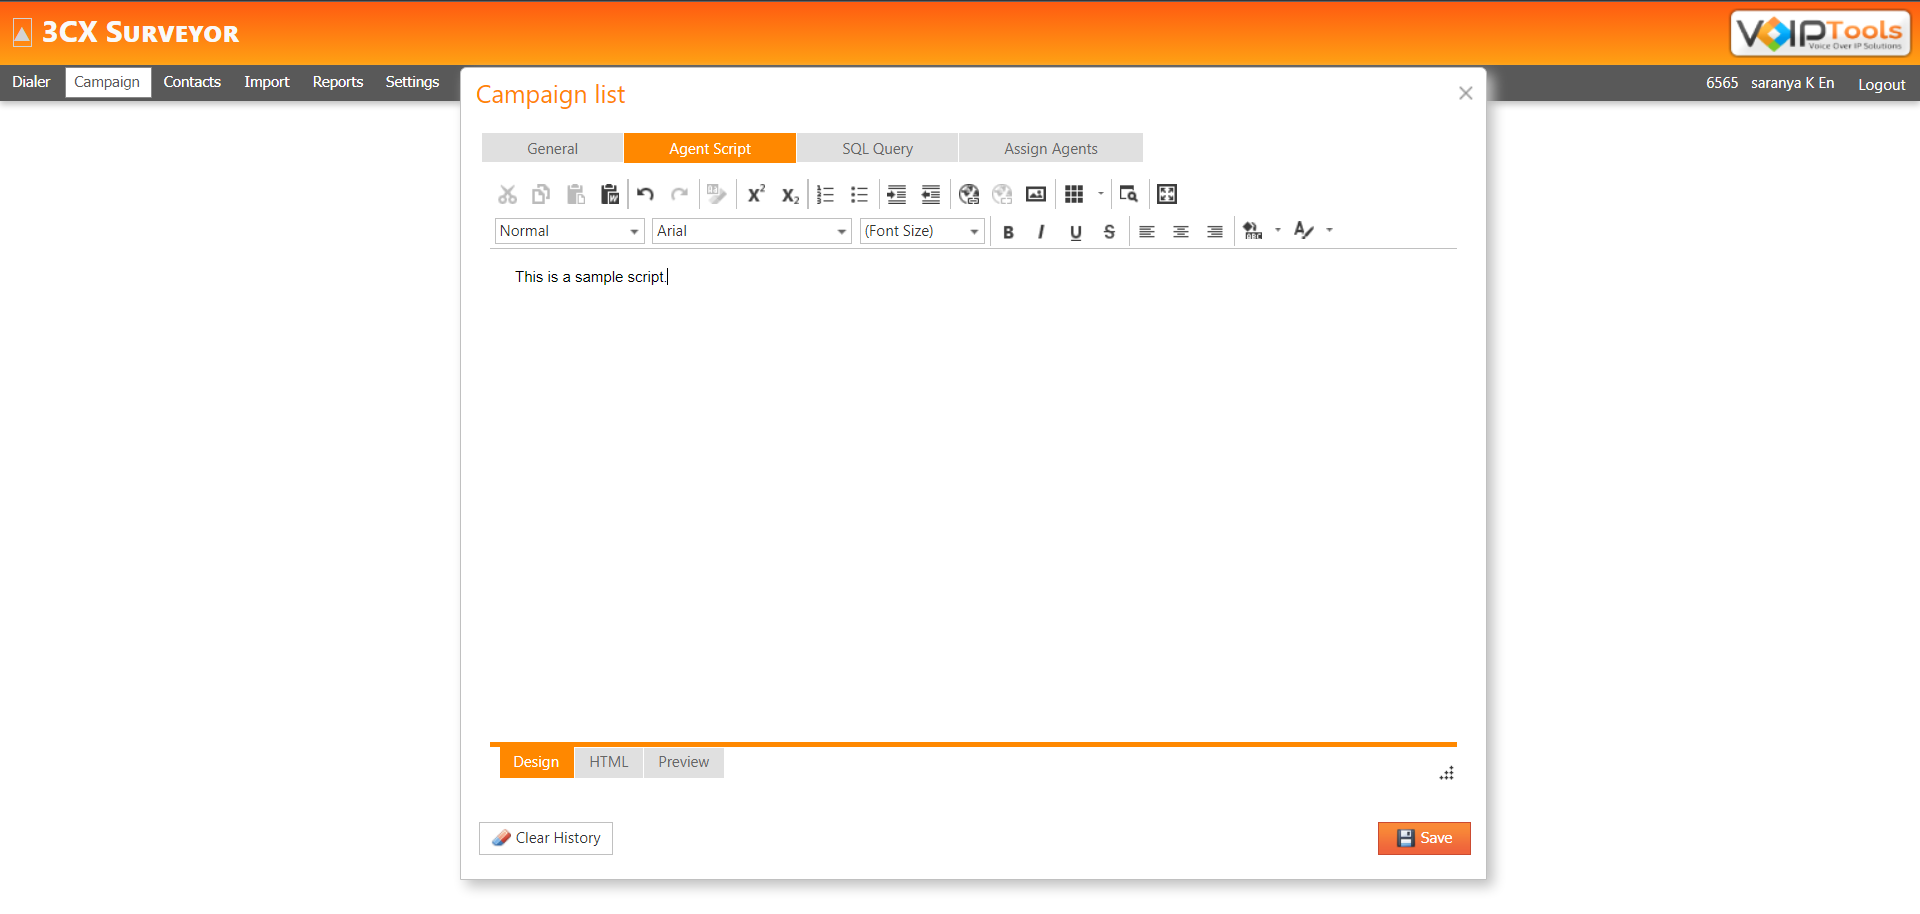
Agent Script screen enables an agent to typically note down important discussing subject or points to remember or any other verbatim while talking with the customer. Here, you can change font type, font color, add bullet points, add images and do many more that are required for you to create a script. You can prepare the ‘Agent Script’ in either Design or HTML editor.
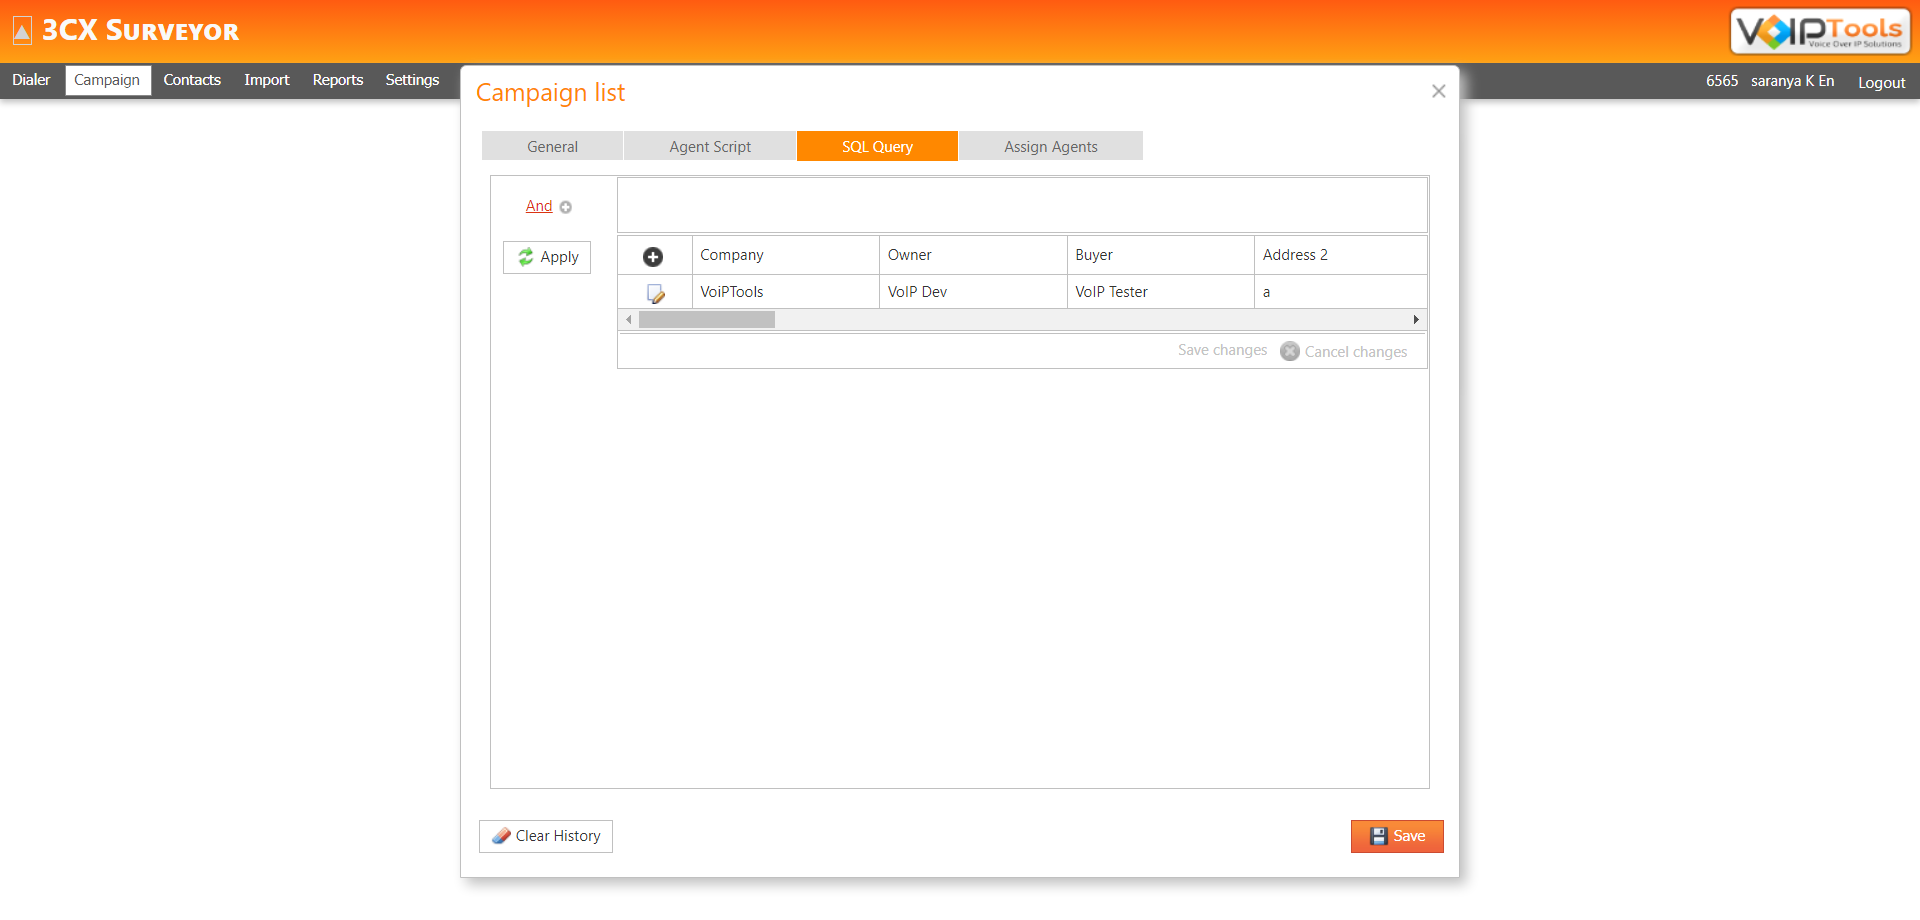
SQL Query tab enables you to filter the contacts by creating complicated SQL queries with specific criteria by using appropriate operators and conditions. The resulting contacts who meet the specified criteria will be included in the campaign. It is to these contacts that the assigned agents will perform calls.
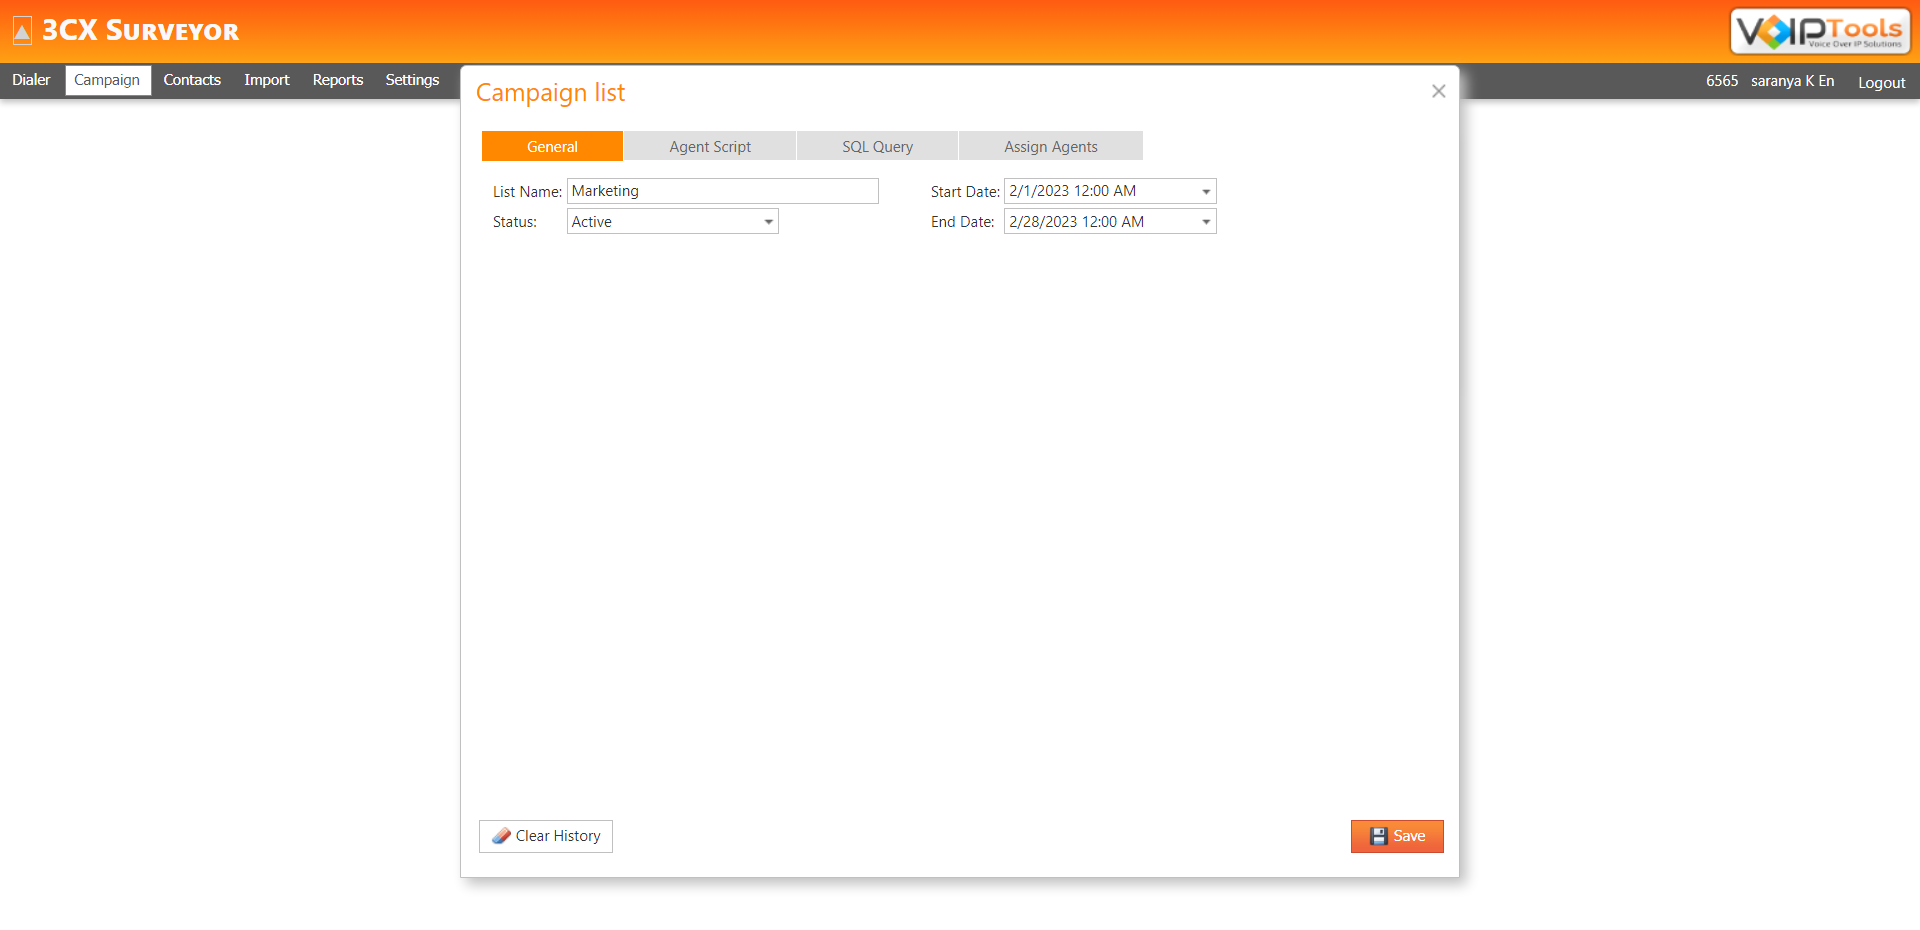
In the Campaign screen, click Edit Campaign Listbutton beside the campaign for which you want to create new contact list.
Figure 56: Edit campaign
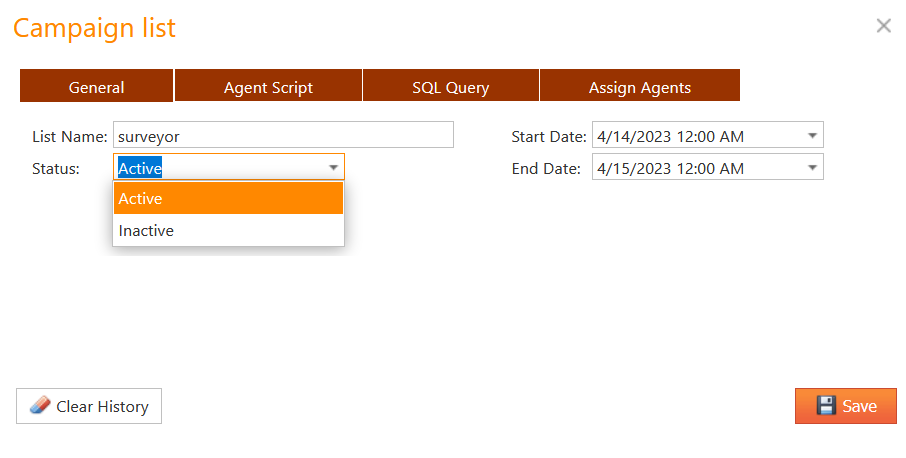
In the Campaign List dialog box, click SQL Query tab.
On the left top corner of the screen, beside click the Add button and then right below it, click Company and select appropriate value.
Click Begins with link and choose appropriate operator and then beside the link, enter a required value to retrieve the contacts as per the created search criteria. This creates complex SQL query.
Figure: 57: Query Builder
Click Applyto apply the search criteria you just added to your query.
Click Save to save the contacts for the campaign list.
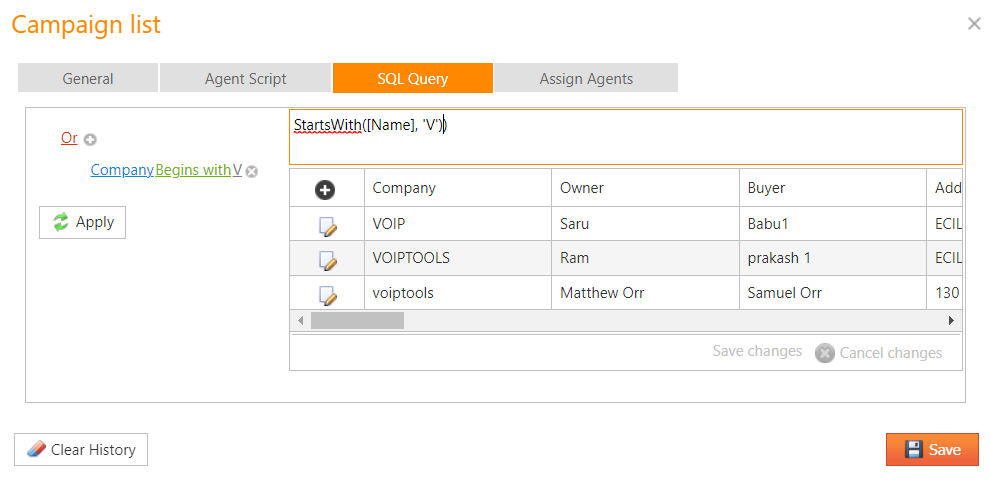
For example,
To search for the companies that begin with the letter “V”
The Clear History button clears all the history transaction log of the campaign. This is especially useful when you want to make calls all over again to all your contacts after every regular period of time (for example, every month) irrespective of making calls in the last period of time.
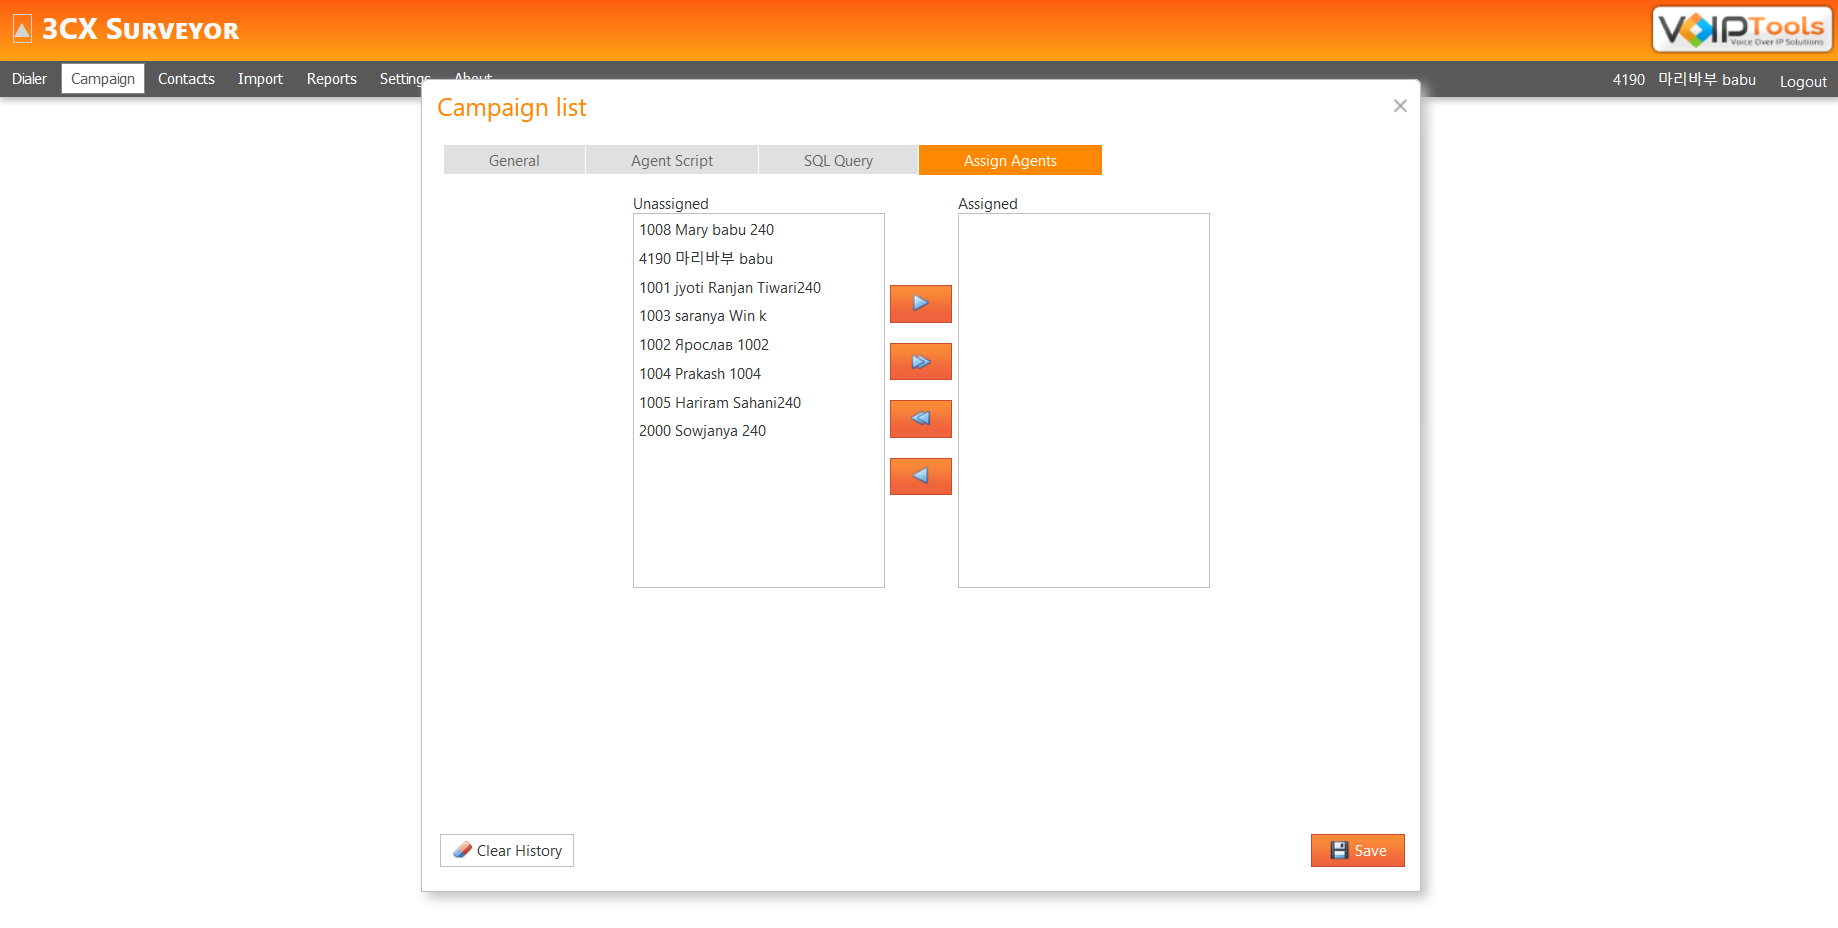
Assign Agents tab enables you to assign specific agents to a campaign list. The Unassigned list box displays list of all the agents that you assigned to the Surveyor Extension Group specified in the Settings–General tab. To assign agents to the campaign list, select the required agents from the Unassigned list box and move them to the Assigned list box.
In the Campaign list dialog box click Assign Agents tab.
From the Unassigned list box, move required agents to the Assigned list box to assign them to the campaign list.
Click Save to save the agents in the campaign list.
Figure 59: Campaigns: Assign Agents
The following table gives information on the icons used in the Assign Agent tab,
Assign Agent
Lets you assign a selected agent for the campaign.
Unassign Agent
Lets you remove a selected agent from the campaign.
Assign All
Lets you assign all the available agents to the campaign.
Unassign All
Lets you remove all the assigned agents in the campaign.
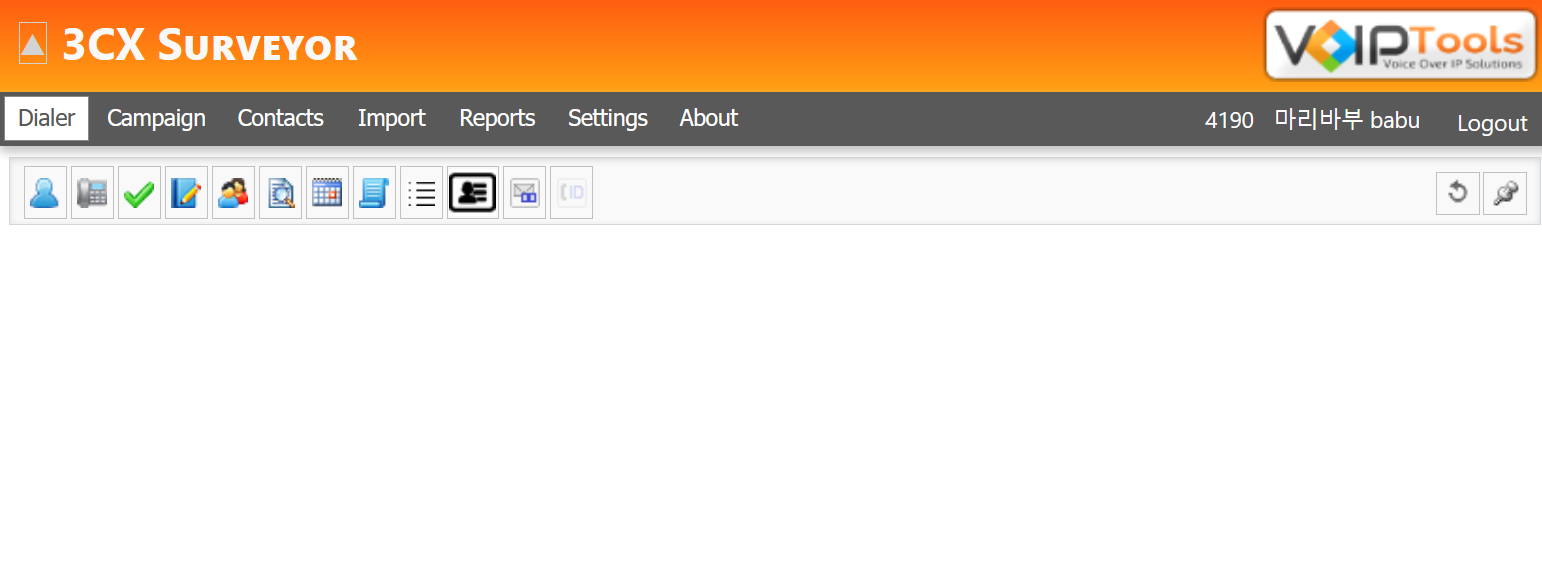
As an agent, you will be able to see Dialer, Contacts and About screens.
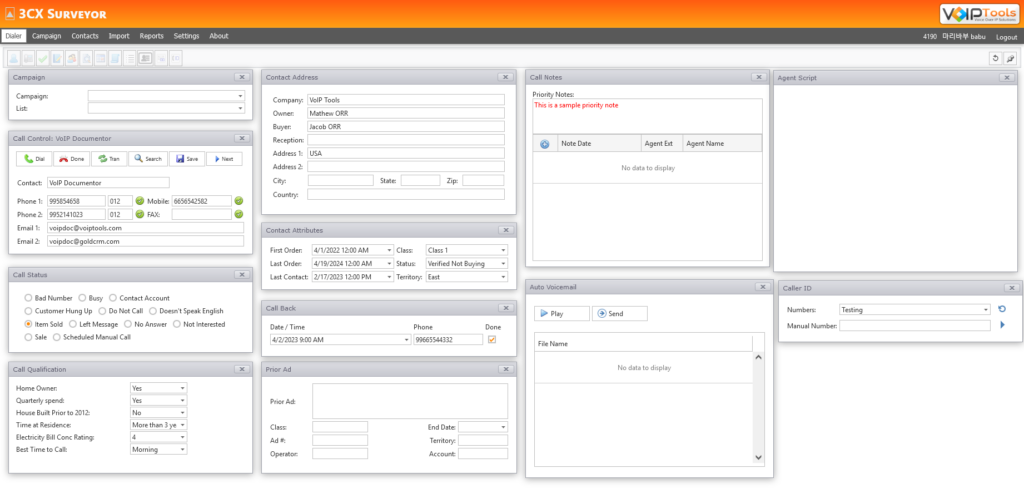
From the Dialer screen, an agent can select a campaign and a campaign list in order to call all the agents assigned to that campaign list.
The Dialer screen displays widgets; each designed specially to inform you specific information about the contact. Once a contact is ready to be dialed, all the information related to that contact will be automatically populated in all the fields of the widgets so that you can know important information about the customer even before you call them. This feature enables you to enjoy positive call experience.
You can move the widgets to the desired position on the screen to create your own screen layout. You can save your layout or can again reset it back to the original format.
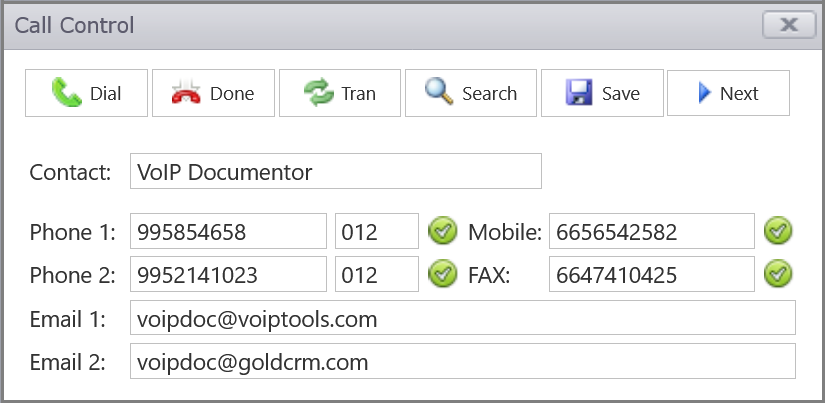
In the Call Control widget, you can automatically see the contact number of the first contact in the campaign list.
Click any of the following buttons to do the desired function,
Dial
lets you dial the contact number that appears in the Contact field. You can also dial additional phone numbers by clicking on the respective green Check icon beside Phone 1/ Phone 2/ Mobile/ FAX icons.
Done
Lets you transfer the call. To transfer a call to another extension, you must first enter the extension number in the Contact field. When you press the transfer buttfdialer n, the Surveyor looks at the Contact field to determine where to transfer the call. It will not prompt you for the number.
Search
Lets you search for a contact.
Save
Lets you save if you made any changes to the contact’s information.
Next
Goes to the next contact in the dialer.
NOTE: The number beside the Next button indicates how many people are yet to be called.
In order to move to the next customer, you need to disposition the call. Call Status widget enables you to select one of the dispositions from the available dispositions list.
In the Call Status widget, select the appropriate disposition.
In the Call Control widget, click Save. The call will be dispositioned.
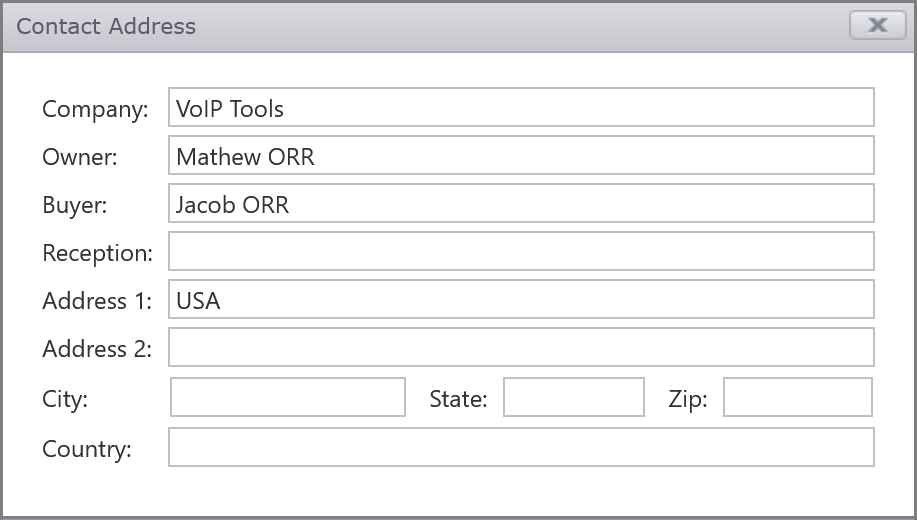
Contact Address widget displays address details of the contact. Once the contact number of the next caller is displayed in the Call Control widget, the address details of the contact will be automatically populated in this widget.
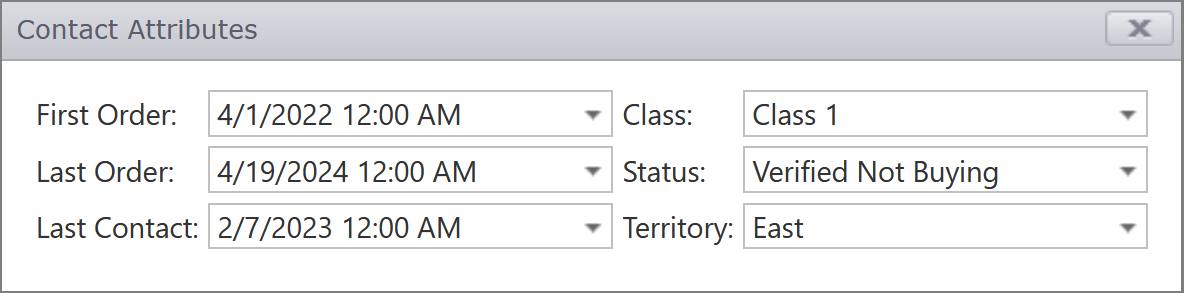
Once the contact number of the next caller is displayed in the Call Control widget, all the sales information related to the contact will be populated in the Contact Attributes widget. From here, you can know what the contact’s first order, last order, last contact details, class, status and territory are.
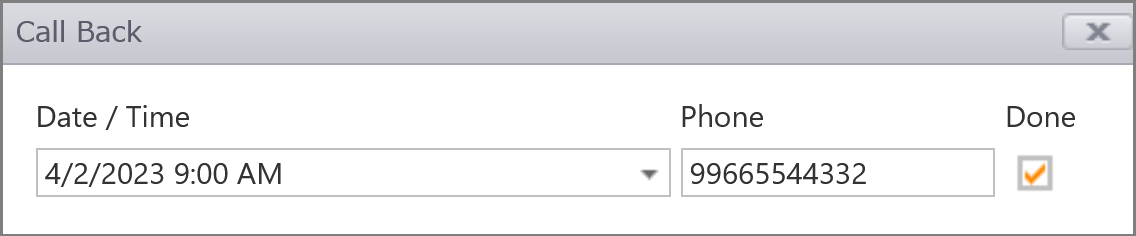
Call Back widget enables you to schedule a call back according to the customer’s preferred timings. If you are working on a call and if the call back scheduled time arrive, the dialer waits till you have finished the call and once you click the Next button, the call will be dialed to the Call Back number.
In the Call Back widget, from the Date/ Time drop-down, select the appropriate date and time.
In the Phone field, enter the phone number to which you need to call back.
Once the call back has been performed successfully, check the Done box to know in future that the call back for the customer has been performed.
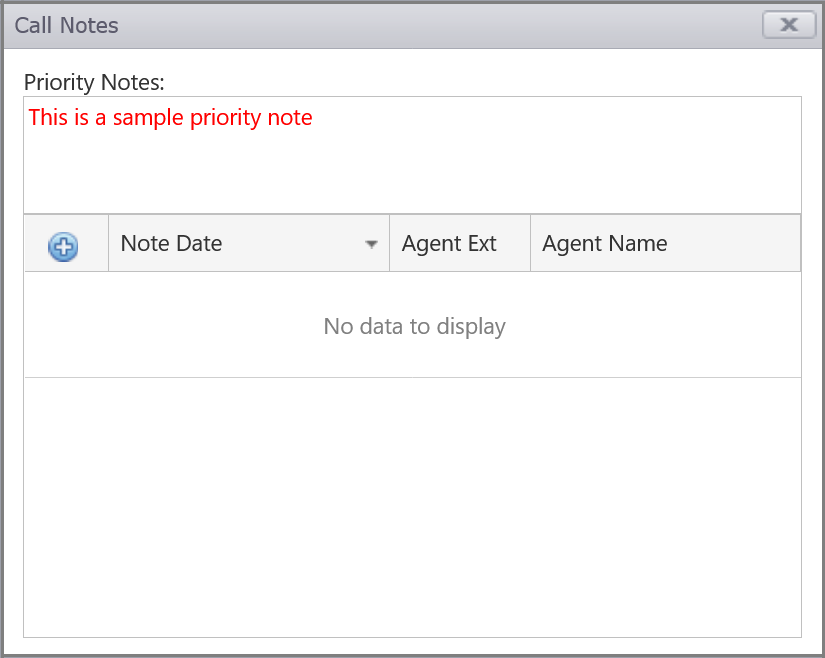
Call Notes widget displays all the call notes recorded in the previous calls with the contact.
Priority Notes section (top portion of the ‘Call Notes’ widget) displays important information about the contact that an agent needs to know before making the call.
The lower portion of the Call Notes widget displays the notes about the agent.
Click Add button in the ‘Column Header’ of the Call Notes widget.
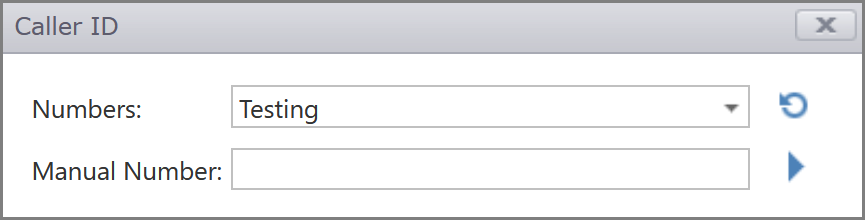
Caller ID widget enables you to work in sync with the ‘Caller IDs’ screen of the ‘3CX Caller ID’ application. From here, you can update Outbound Caller ID for logged-in user’s extension, revert back to agent default Caller ID, and manually update Outbound Caller ID for logged-in user’s extension. For more information, you can refer Caller ID manual.
NOTE:
To view Caller ID widget, you need to install ‘3CX Caller ID’ application.
Figure 73: Caller ID widget
Update Outbound Caller ID for Logged-in User’s Extension #
From the Numbers drop down, select the franchise whose extension you want to apply to your outbound caller ID.
Once applied, the system displays the successfully updated message.
Reverting a CallerID for an agent will revert it back to the ‘Agent Caller ID’ (specified in the Agents tab). If the agent is not assigned any Caller ID, then the application takes ‘Default CallerID’ (specified in the Settings tab) of the extension group to which the agent belongs to.
Beside Numbers drop down, click the Revert button.
Once the revert process is successful, the system displays the successfully reverted message.
NOTE:
Every agent must have a default Caller ID (Agents tab) else Caller ID will not be reverted.
Manually Update Outbound Caller ID for Logged-in User’s Extension #
In the Manual Number field, enter the desired number manually with which you want to update the ‘Outbound Caller ID’ for the logged-in user in the 3CX Console Management.’
Beside the Manual Number field, click the Update button to update the login extension with new manual CallerID.
Auto Voicemail widget enables you to access the ‘Play’ and ‘Send’ features in sync with the ‘Auto Voicemails’ screen of the ‘3CX Auto Voicemail’ application. Auto Voicemail widget enables your staff to automatically play prerecorded voice messages when connected to a customer’s voicemail box. For more information, you can refer Auto Voicemail manual.
NOTE:
To view Auto Voicemail widget, you need to install ‘3CX Auto Voicemail’ application.
Figure 74: Auto Voicemail widget
You can also insert all the widgets in the dialer screen,
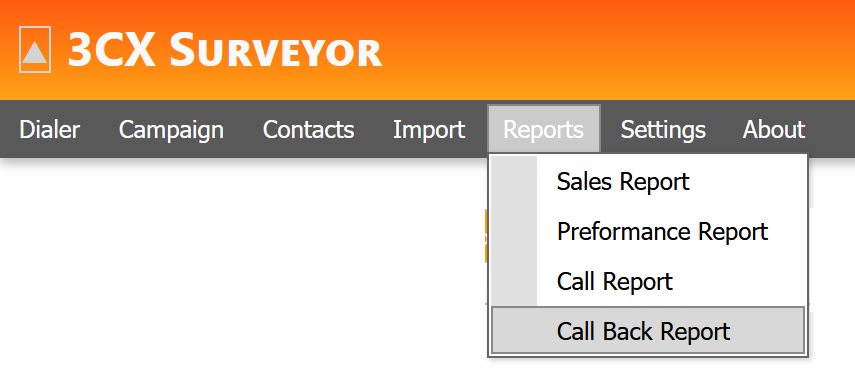
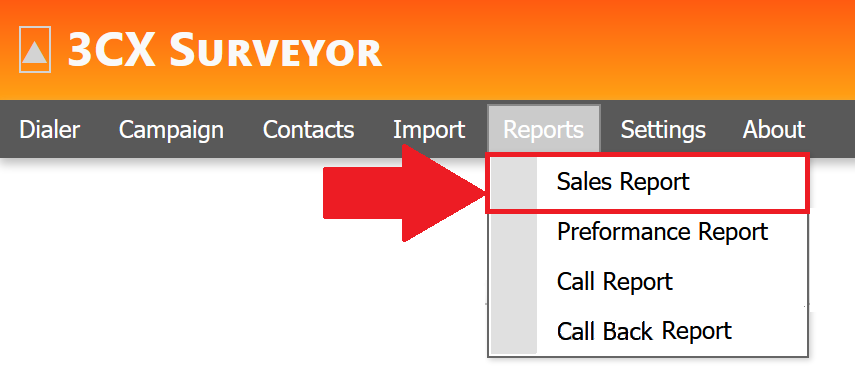
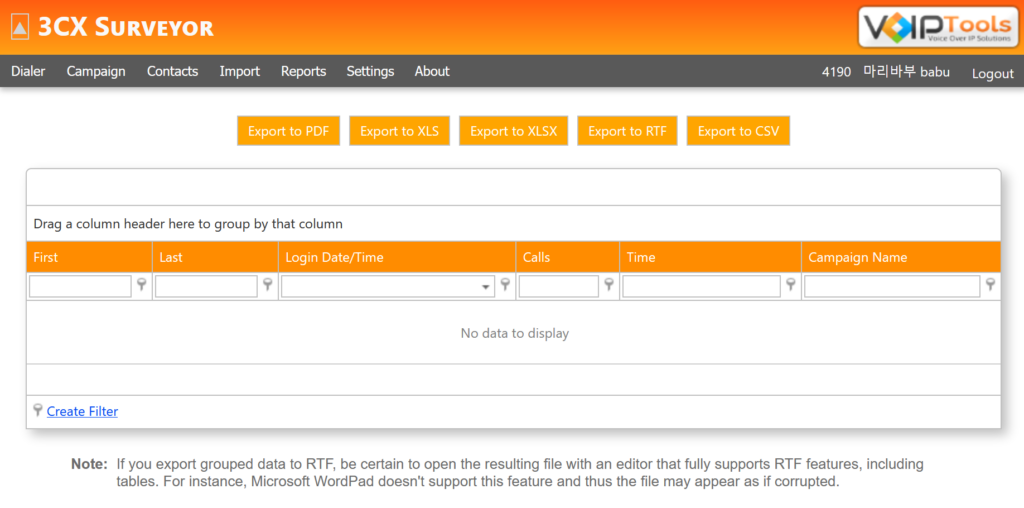
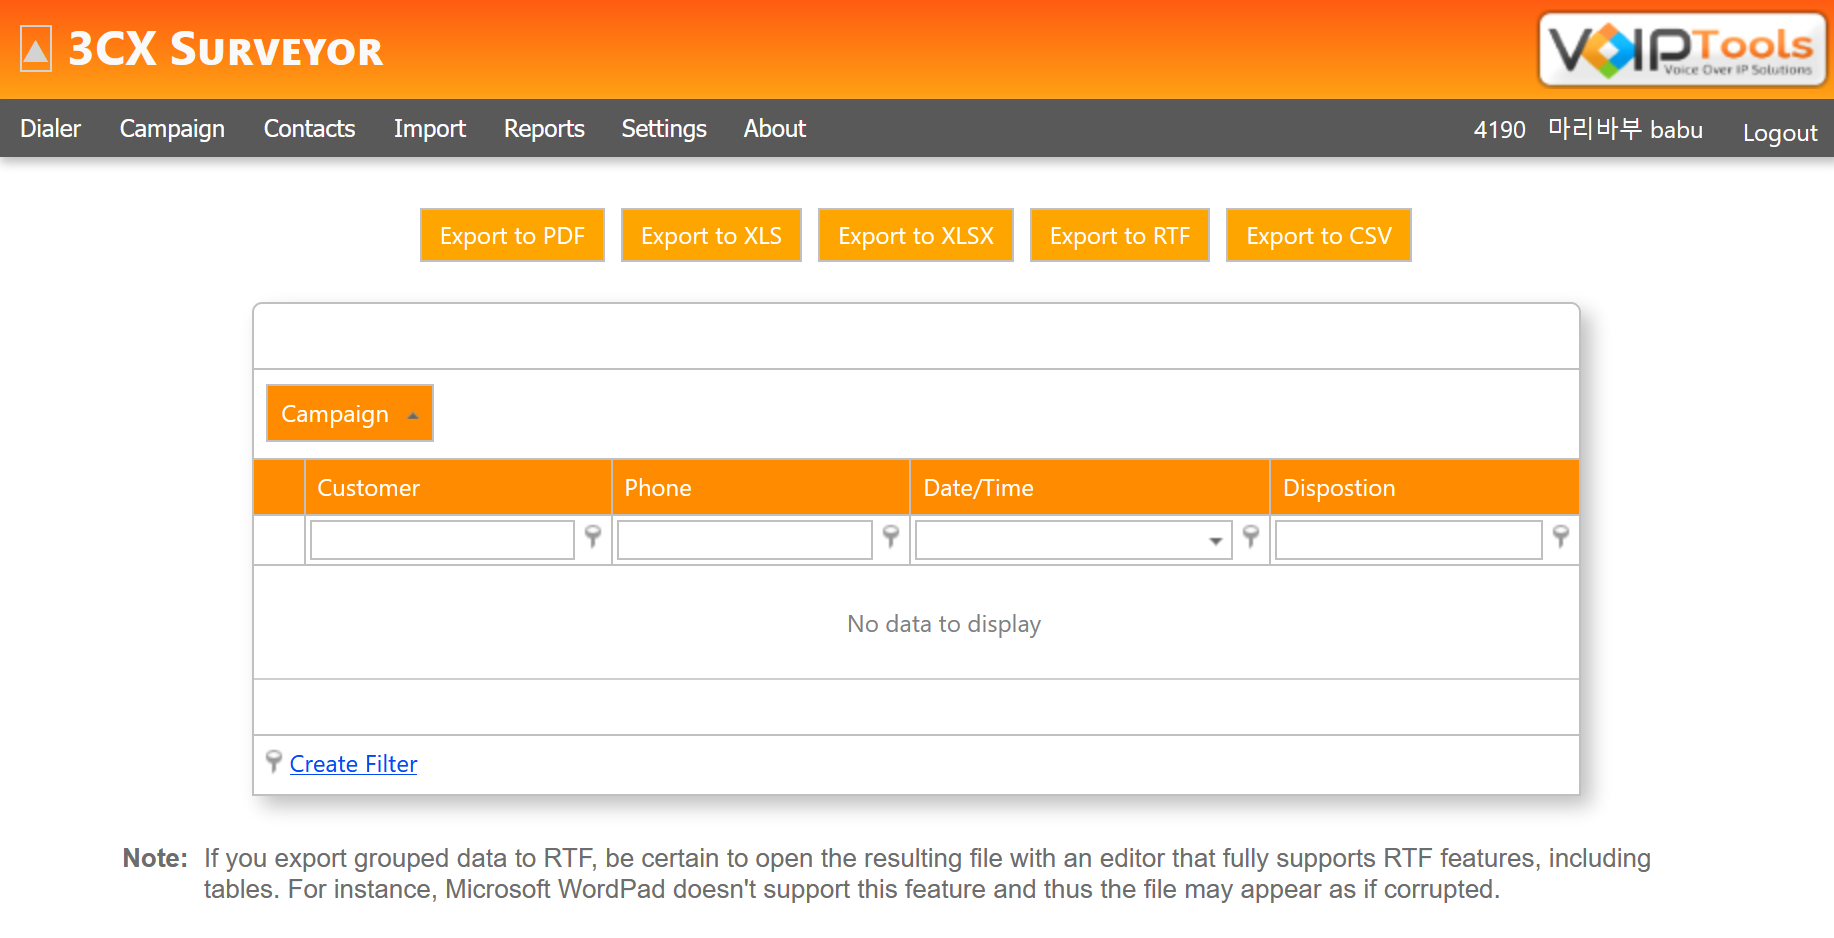
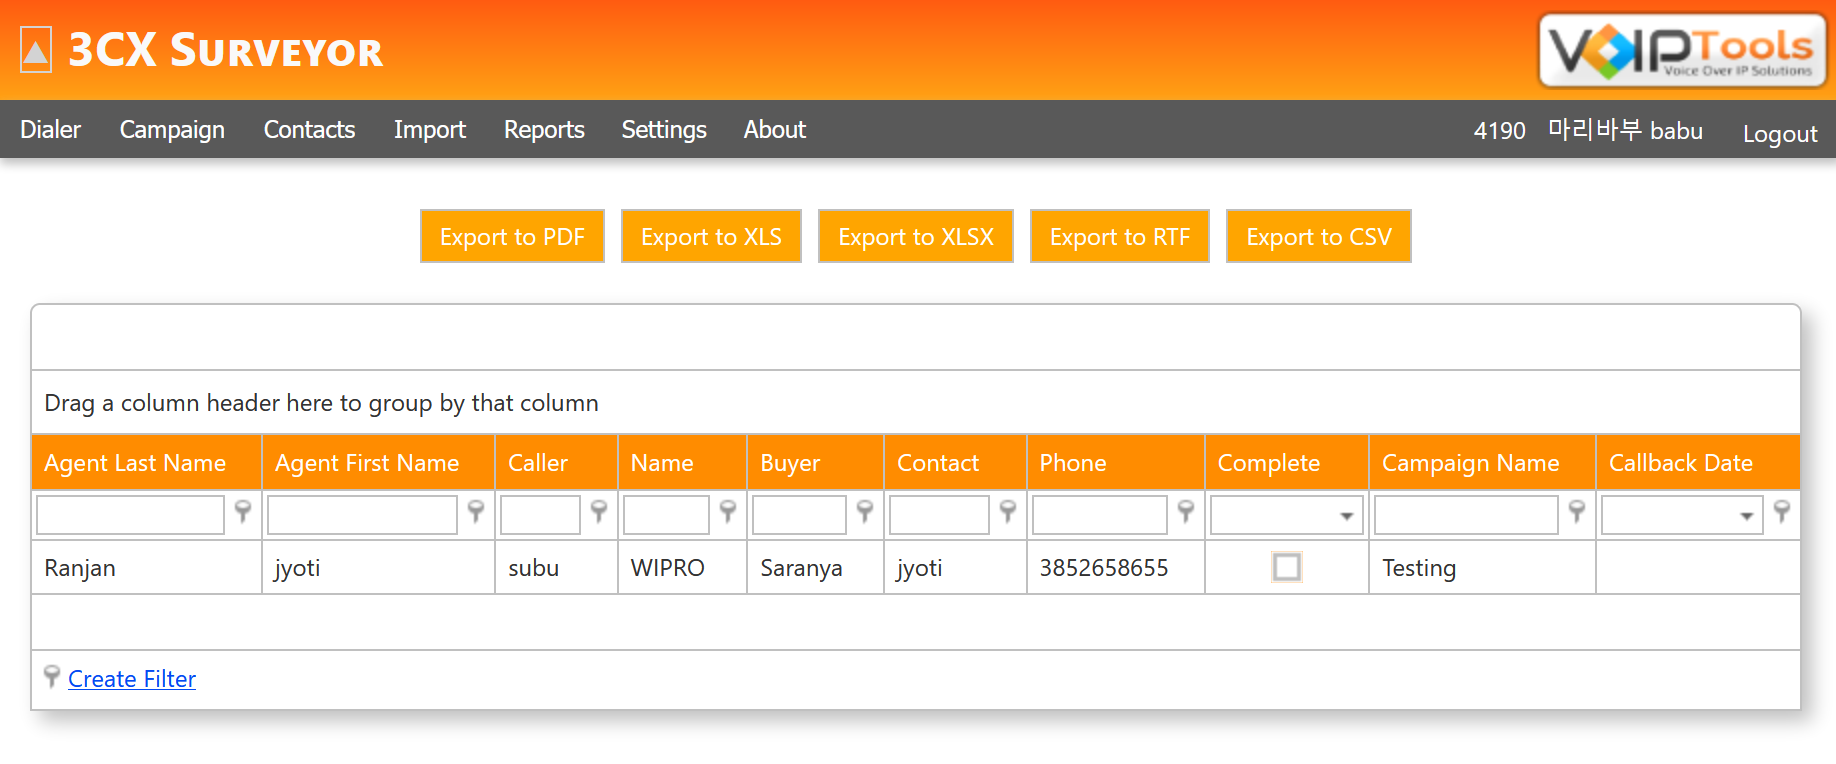
Reports screen enables you to view the sales report, performance report, call report and notes report for all the campaigns in the 3CX Surveyor. As a manager, you can filter the records by entering details in any one of the column headers and export data in various formats like pdf, xls, xlsx, rtf or csv.
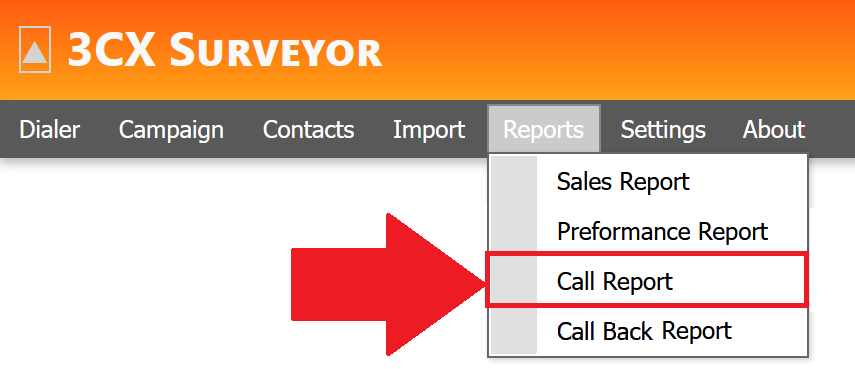
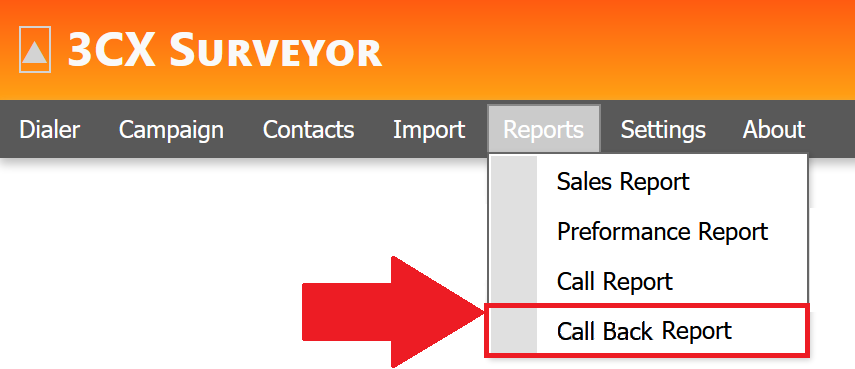
On the Reports menu, select the type of report that you want to view.
Figure 76: Reports menu
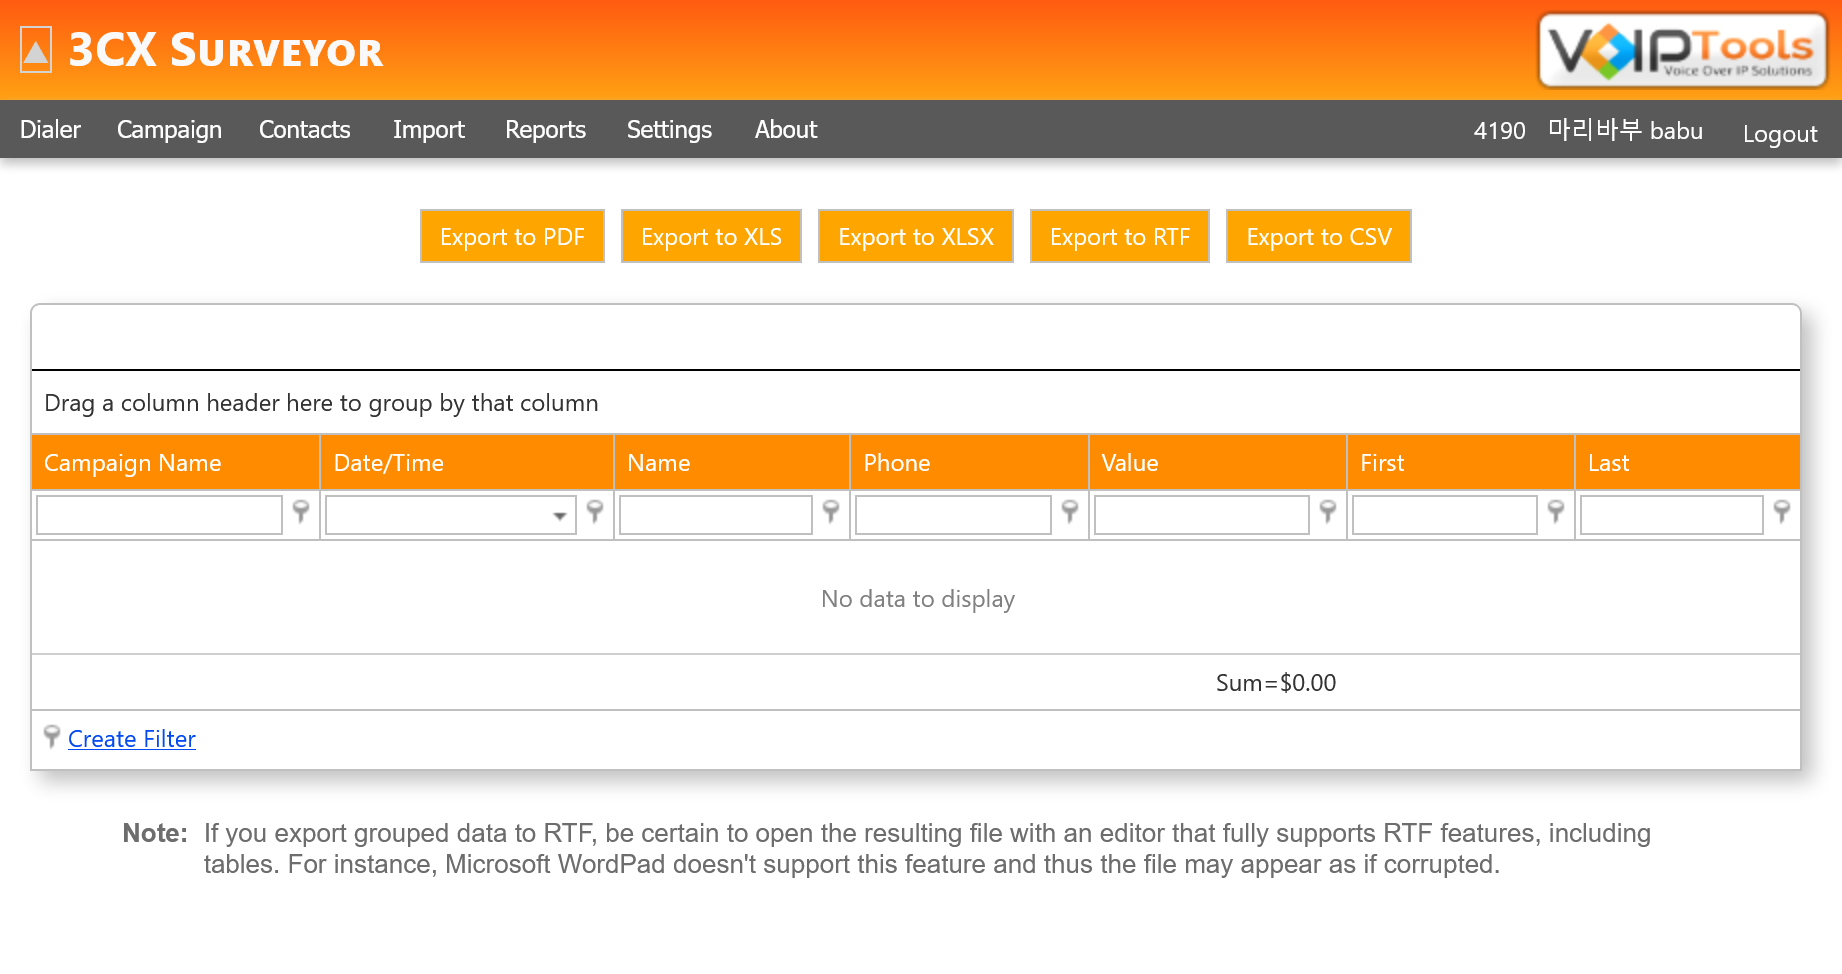
Click appropriate export button to export the logs in your desired format.
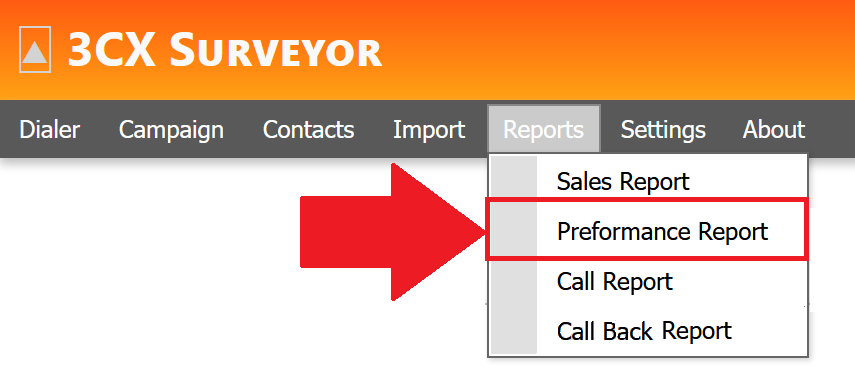
Performance Report screen displays performance data of an agent for a specific campaign. The record includes data such as name and login time of the agent, number of calls performed, total call time, and the name of the campaign.
To view the performance report follow the procedure,
On the menu bar hover over the Reports tab and select the Performance Report option.
Figure 80: Select Performance Report
View the Performance report or export the data in the available formats.
You get quick answers to most of your inquiries in our online manual. If you prefer direct contact, we offer various support channels, including phone, email, live chat, and our helpful VoIPTools forums.
Rest assured, our dedicated team is here to assist you around the clock, every day of the year. Whether you’re based in the USA or India, we’re ready to provide prompt responses to your technical queries.
Windows Event Log for VoIPTools Applications and Services #
For troubleshooting any application errors, our Windows Event Log contains a comprehensive list of error messages, warnings, and informative notes related to all our VoIPTools applications and services. It’s a valuable resource to help you pinpoint and resolve any issues you may encounter.
Are you looking to collaborate with other VoIPTools customers facing similar challenges? Our forum is the perfect platform to exchange ideas, solutions, and best practices. Join the conversation at: https://www.voiptools.com/community/
Got questions that need immediate answers? Our chat support team is available to assist you in real time. Just click on the Live Chat button located at the lower right corner of our website, and we’ll acknowledge your queries right away.
To ensure a thorough understanding of your concerns, email us at support@voiptools.com. Describe your issue in detail, and we’ll get back to you within one business day with the support you need.
If you prefer to speak with a representative directly, you can reach us at +1 801-642-4655. Our attentive team is available to take your calls from 8:00 AM to 6:00 PM (Central Standard Time).
If you’ve purchased our products through a VoIPTools Partner, rest assured that they provide first-level support at no additional cost. Partners have access to 100% free technical assistance and actively participate in the troubleshooting process.
VoIPTools customers enjoy access to our online manuals and receive support through emails (with responses within one business day) and live chat. However, please note that we do not provide remote server login assistance.
For a more hands-on experience, consider our “Installation Support” package. Our expert support team can log in to your servers, and install and configure all our tools. This comprehensive service includes setting up SQL Server Express and Internet Information Server if necessary. We’ll work closely with you to tailor our applications to meet your requirements.
We’re committed to providing top-notch support to ensure your VoIPTools experience is smooth and hassle-free. Contact us today, and let us assist you in making the most of our powerful tools!


NOTE:


 desktop icon to open the web application.
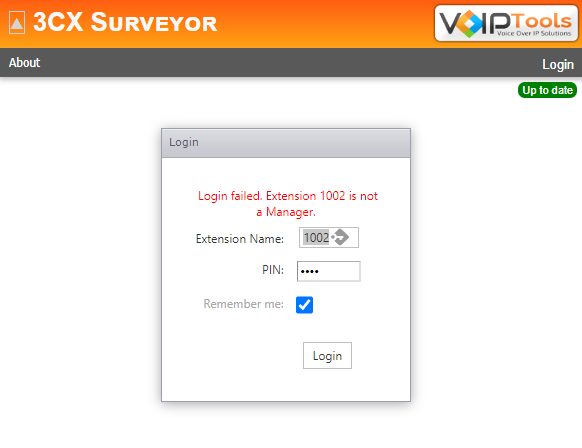

 to register your software.
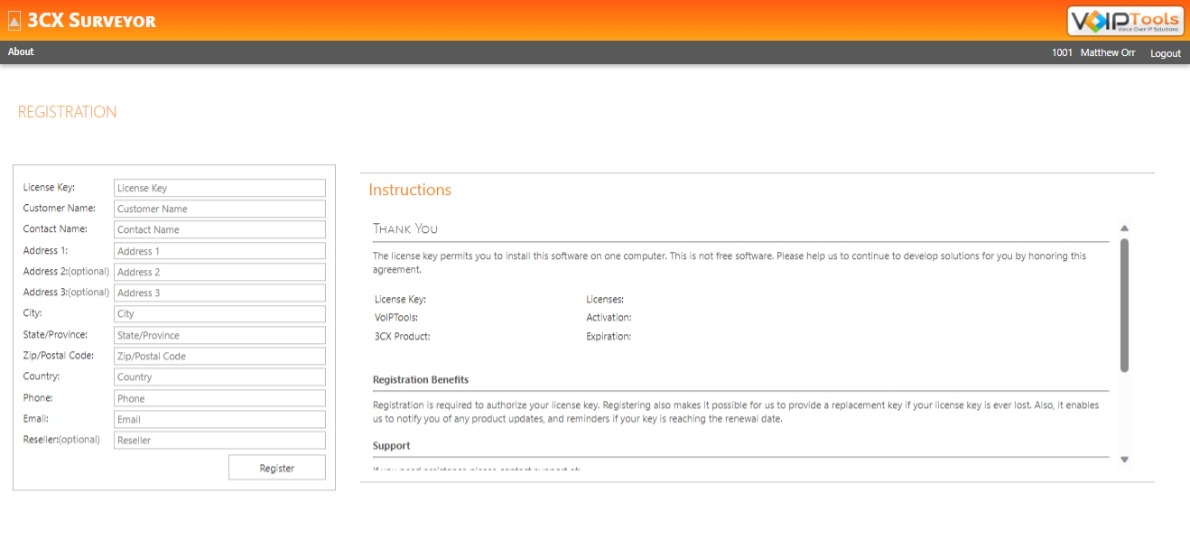


 Save
Save  Reload to restart the application and display your changes.
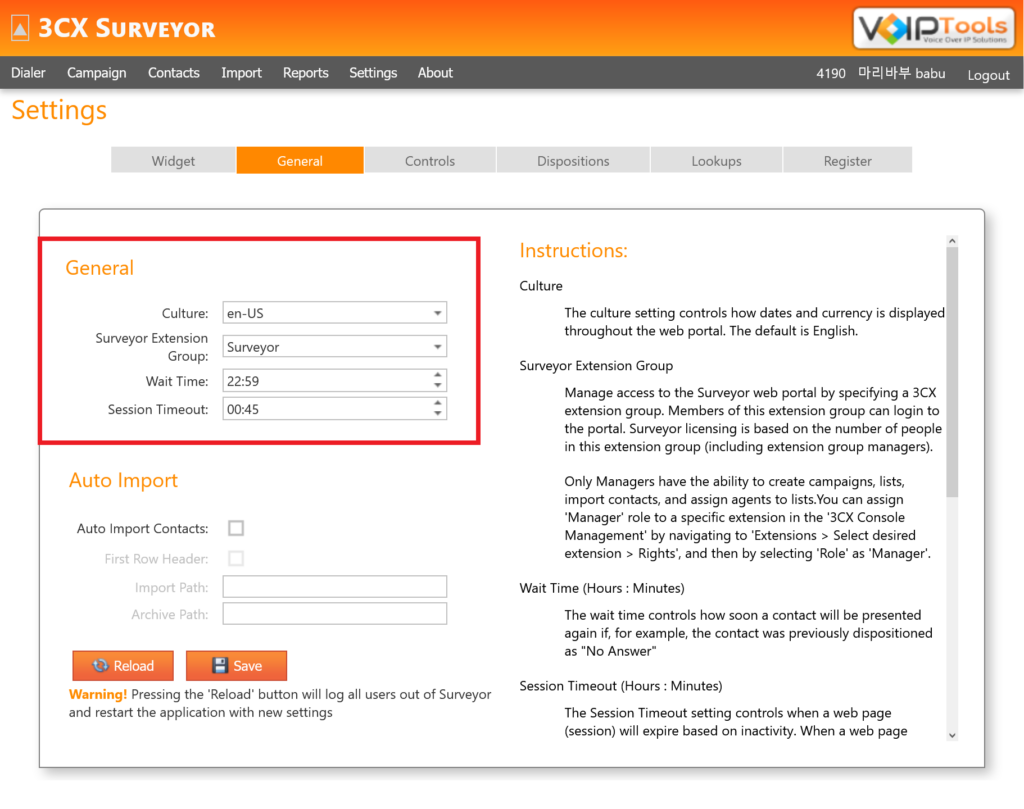

 to save the changes.
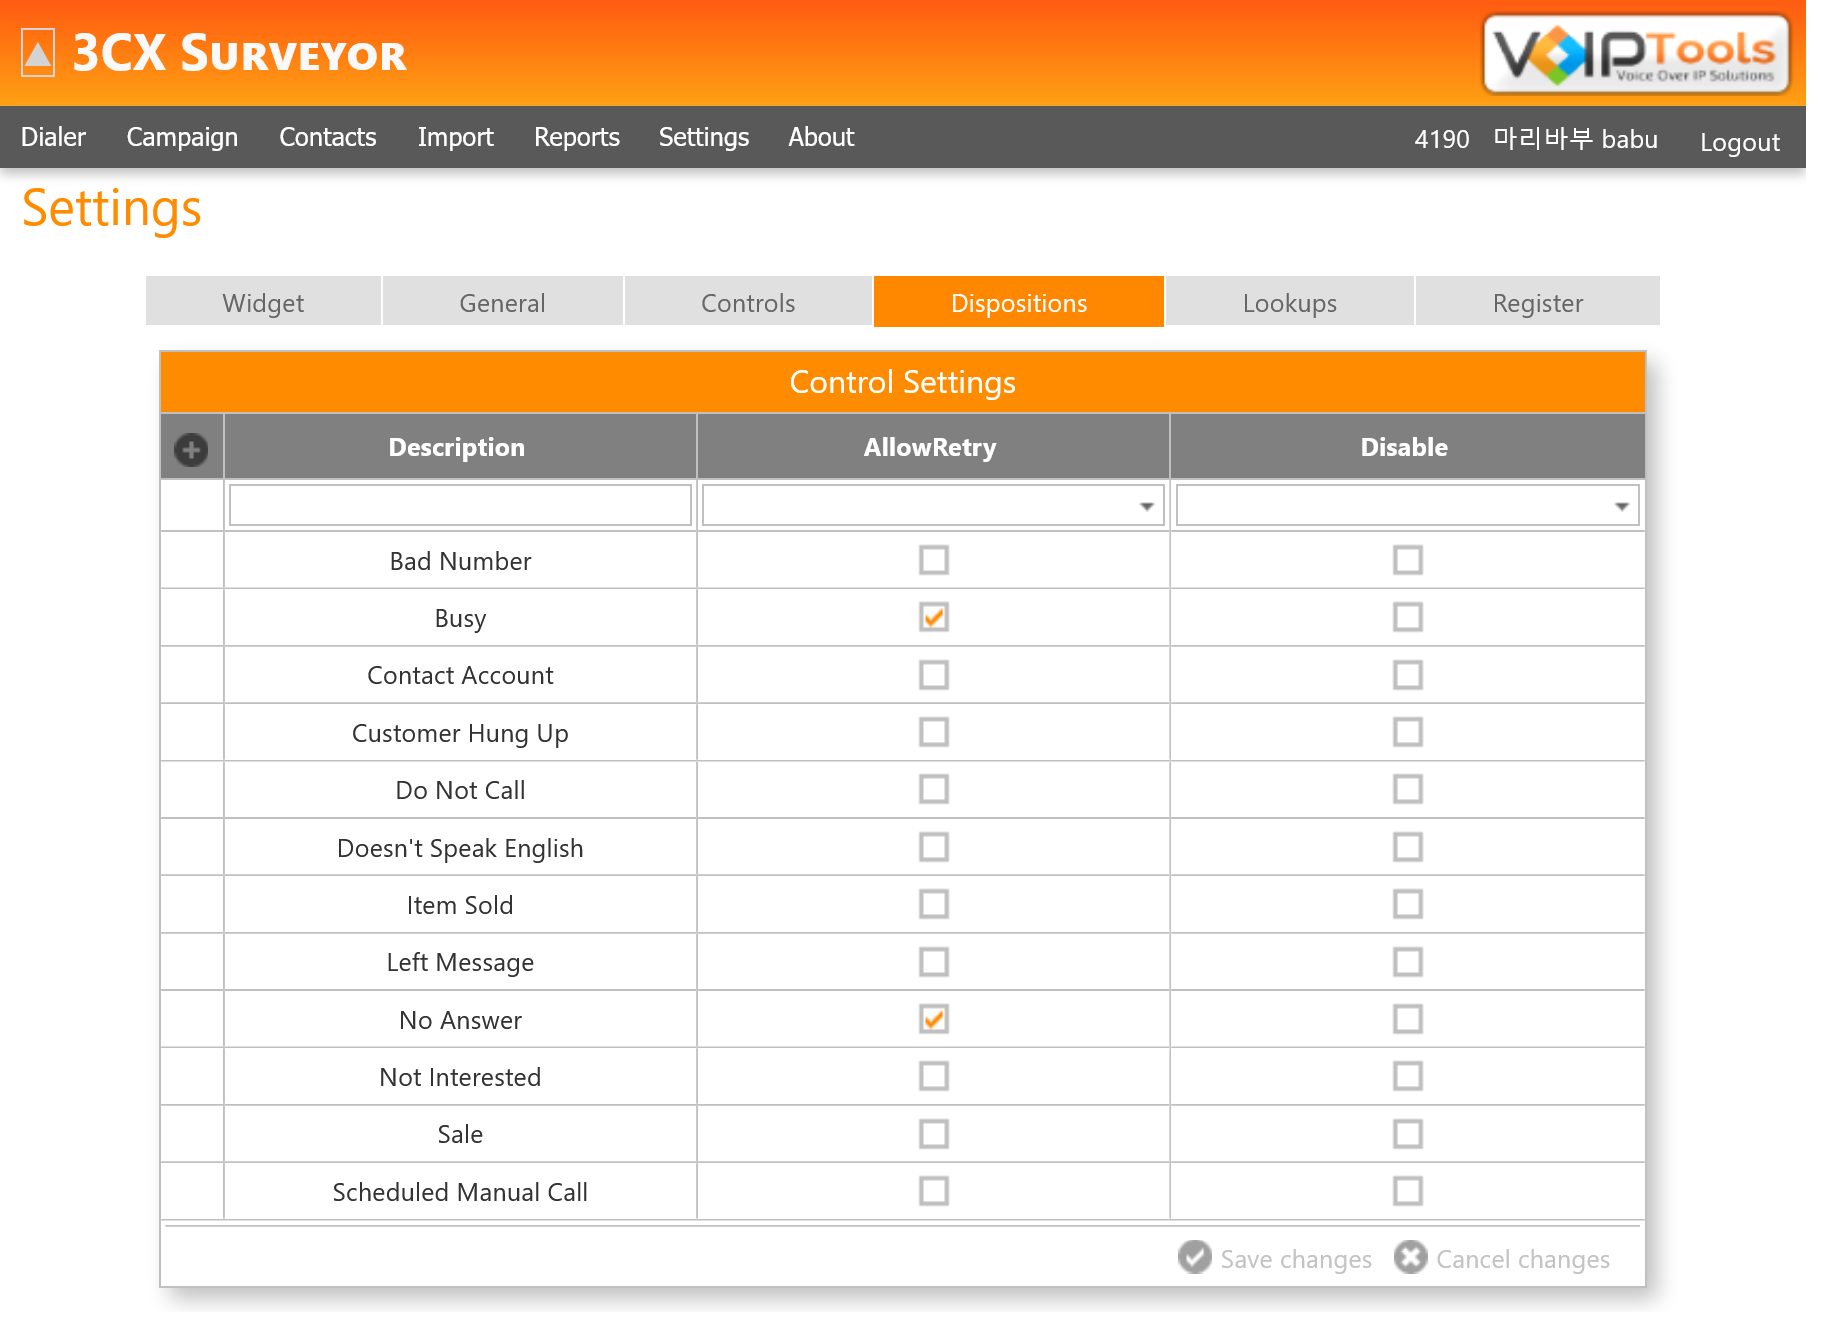
 button on the left of the ‘Column Header’.
 to save the new disposition

 button to load the CSV column headers into the CSV File list box.
 button to import all the contacts from the CSV file into the central repository of contacts.


 button that appears on the left of ‘Column Header’.
 Expand button that appears beside the campaign to which you want to add the campaign list.
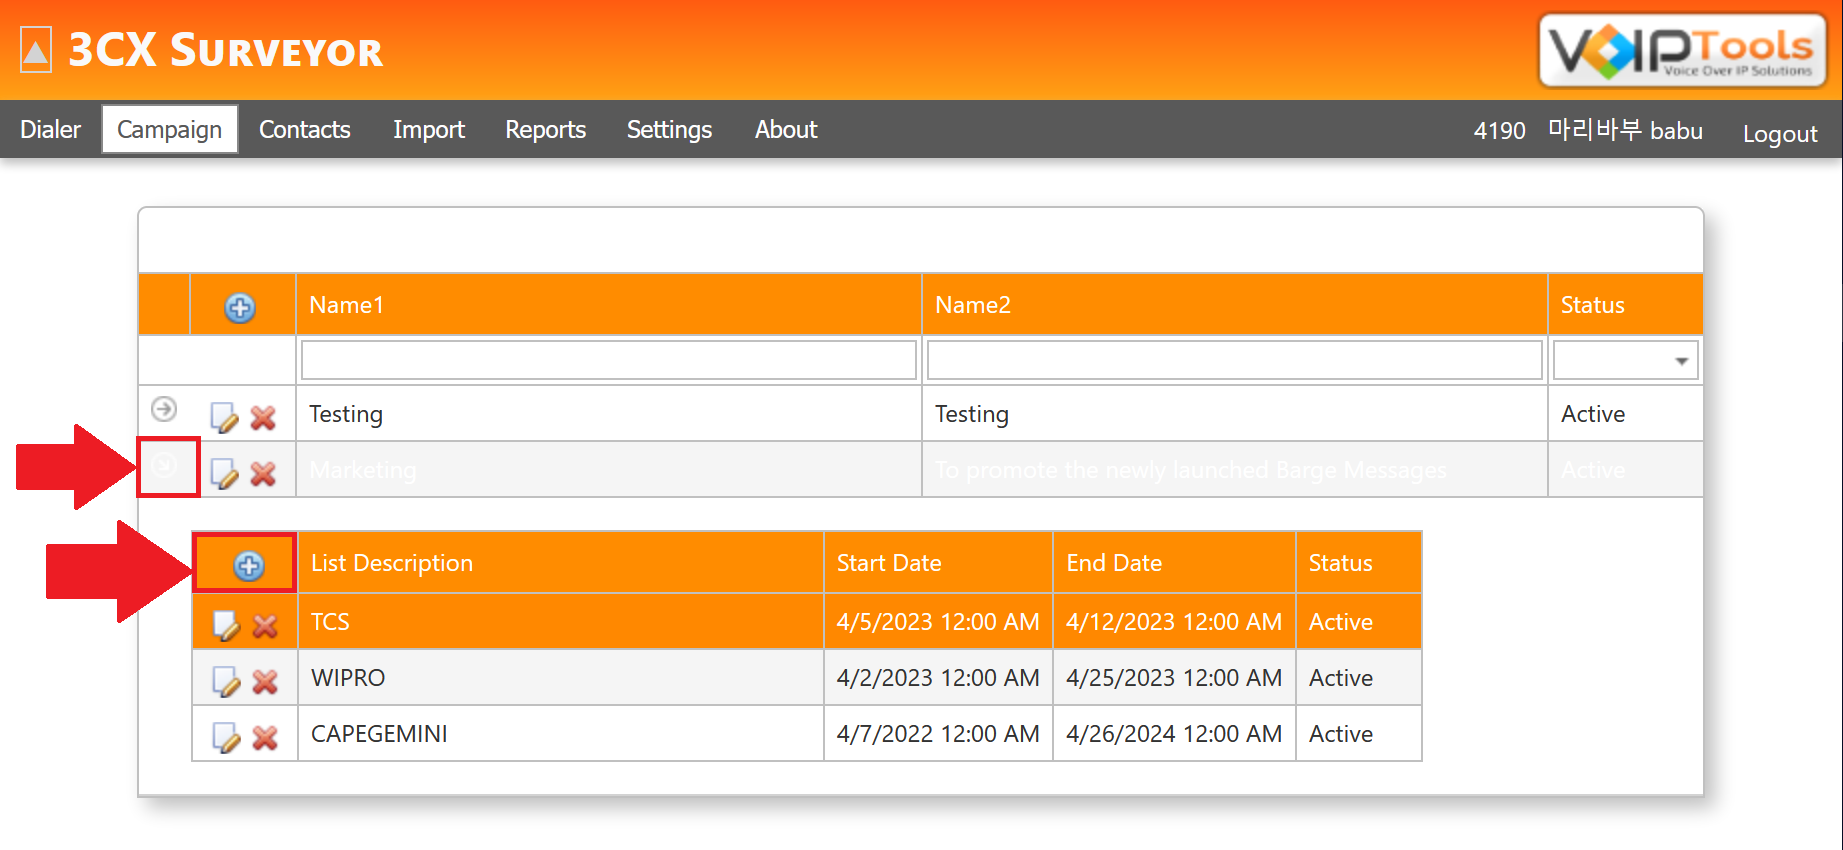
 button beside the campaign for which you want to create new contact list.
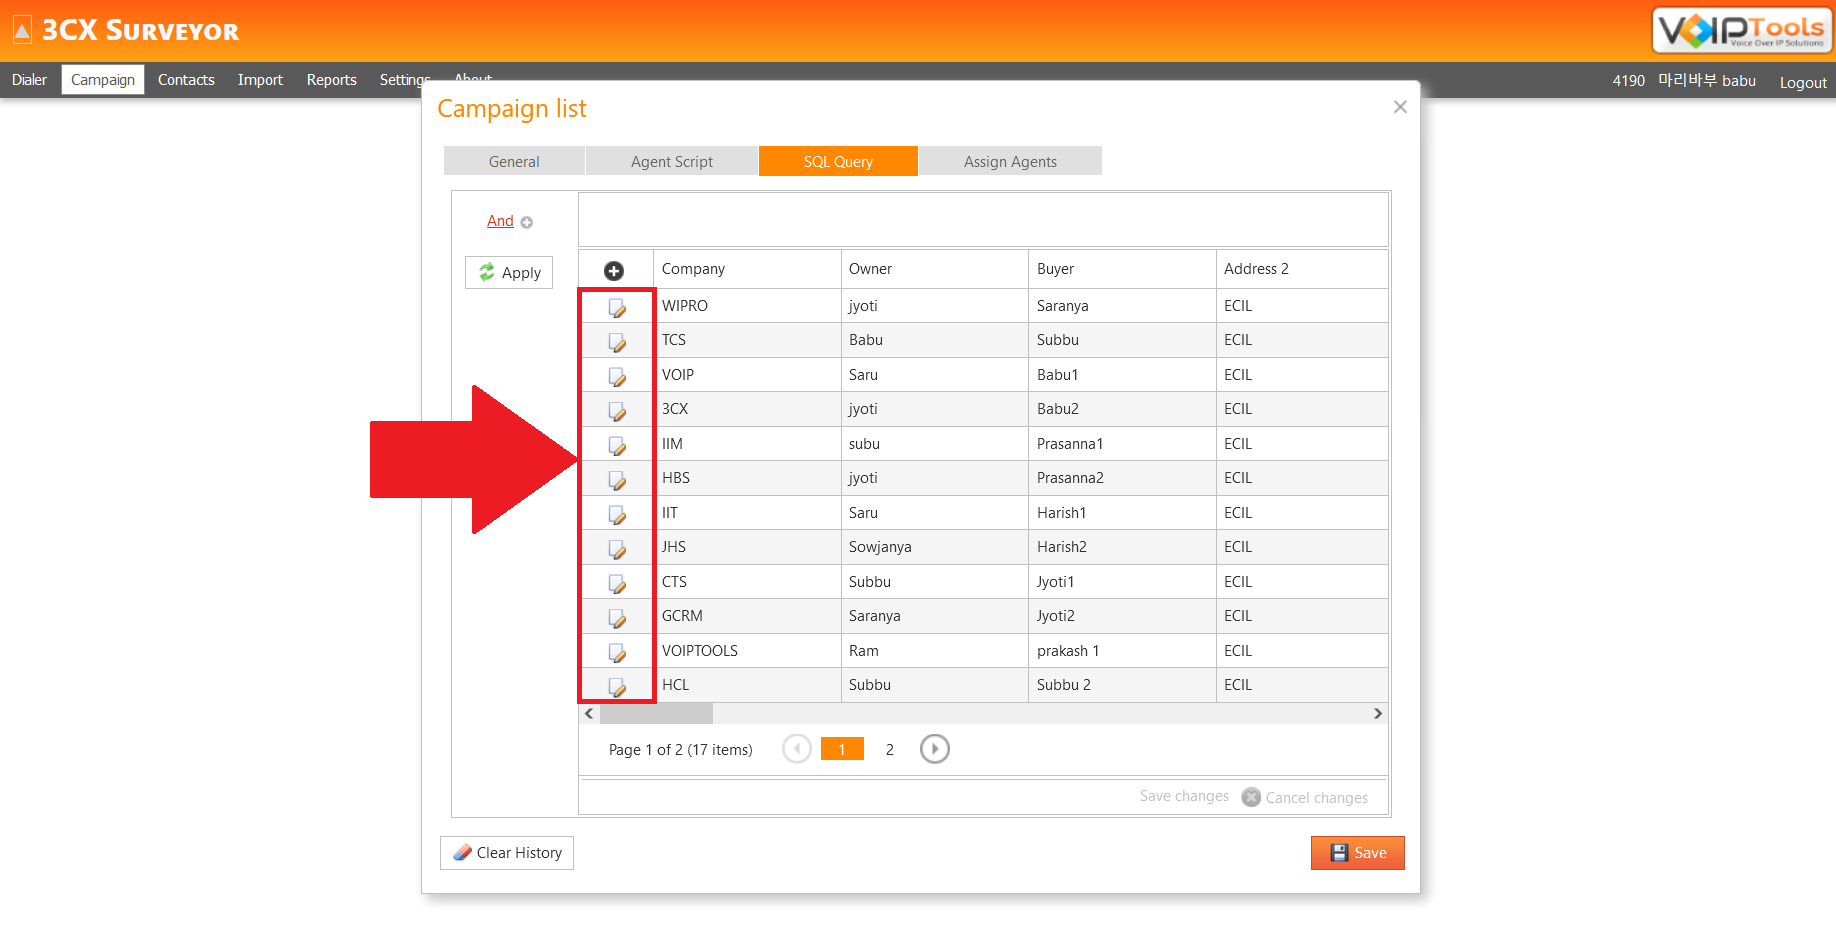
 button and then right below it, click Company and select appropriate value.


 Dropdown icon to expand the campaign.
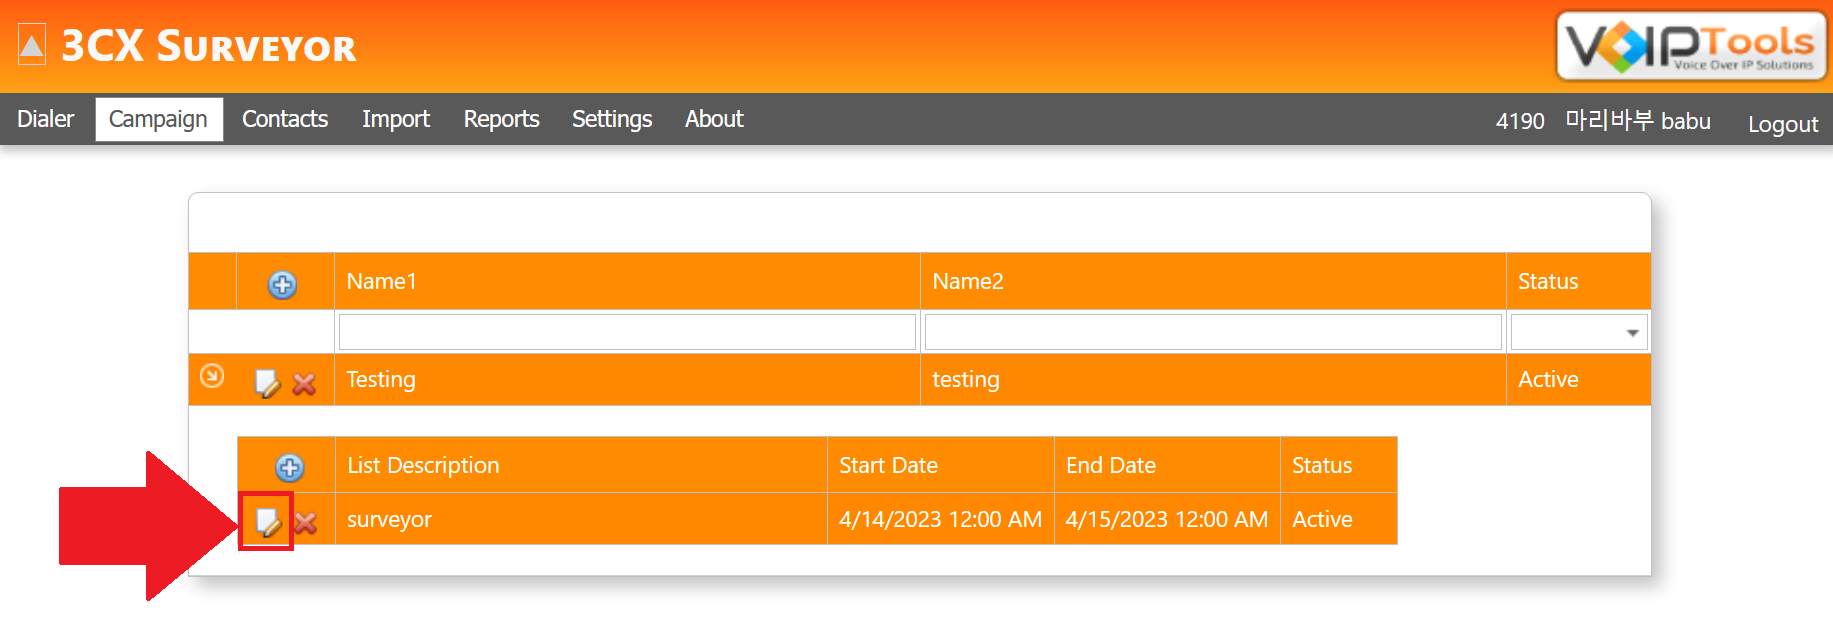


 button.
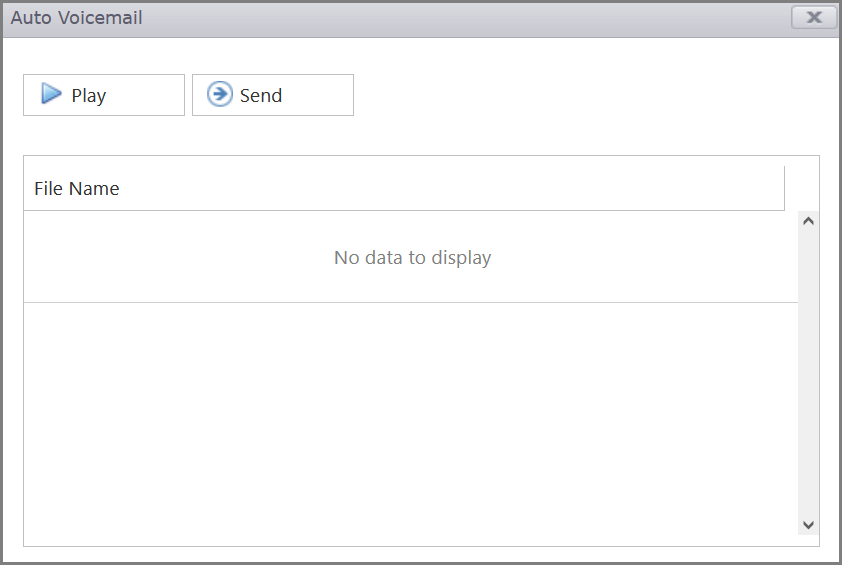


