Unleash the Power of Custom Presence: Elevate Communication with 3CX’s Limitless Status Customization.
Experience the power of 3CX Custom Presence, which allows you to have additional statuses such as “Break,” “Project Work,” “Wrap-up,” or “Vacation” for your agents. These custom statuses indicate their availability and ensure efficient handling of incoming work items. While 3CX provides only five built-in Presence Statuses, our solution enables you to establish a unique set of statuses that align with your operational needs. With our custom interface, you can create and manage these statuses, while adhering to the restrictions set by 3CX. Take control of your communication system and optimize your workflow with 3CX Custom Presence.
Monitor your agent’s availability and utilize data-driven insights to optimize productivity and workflow efficiency.
EASY REPORTING
Unlock the power of generating comprehensive reports on past presence information with our exclusive feature, unavailable in the standard 3CX package.
MAP TO 3CX
Align your unique status seamlessly with any of the five pre-set options to elevate your user experience. Ensure accurate and visible information within the user-friendly 3CX clients.
REAL-TIME WALLBOARD
Effortlessly monitor and manage your status and stay synchronized with your colleagues’ availability in real-time on a single, convenient screen. Experience the power of seamless collaboration and stay connected like never before.
Install .NET Core SDK. For this, go to the link https://www.microsoft.com/net/download. From the Windows section, under .NET Core, select Download .NET Core SDK. Install the software on your VoIPTools server.
NOTE:
You need a Static IP for both VoIPTools and 3CX servers to ensure proper two-way communication, both the 3CX server (Relay) and the VoIPTools server. Dynamically assigned IP addresses are not supported. Additionally, it is recommended to use HTTPS for secure communication, which requires a FQDN for SSL/TLS certificate validation between the VoIPTools server and the Relay.
NOTE:
While installing SQL Server, ensure the following,
Uninstall the previous versions of SQL Management Studio manually before installing the new version.
Install it in “Mixed Mode” to include SQL Authentication, and install SQL Management Studio
NOTE:
Installation on a domain controller may require additional assistance
When installing IIS, be sure to install Basic Authentication, .Net Extensibility, and ASP.Net 4.X
You can order 3CX Custom Presence online at https://www.voiptools.com. Your order confirmation email will include your license key and a link to download the software.
There are a number of prerequisites that must be installed prior to installing the 3CX Custom Presence. These prerequisites include Microsoft Internet Information Server (IIS) and Microsoft SQL Server
This User Guide contains step-by-step instructions to install 3CX Custom Presence successfully. Begin by extracting the installer from the downloaded zip file, then run the setup program named CustomPresence.exe
You must register your license key to activate 3CX Custom Presence. Your license key is included in your order confirmation email, and can also be found in your order history on our website.
Find the software download link in the Order Confirmation Email, or you can find it in your order history on our website and download the 3CX Custom Presence application.
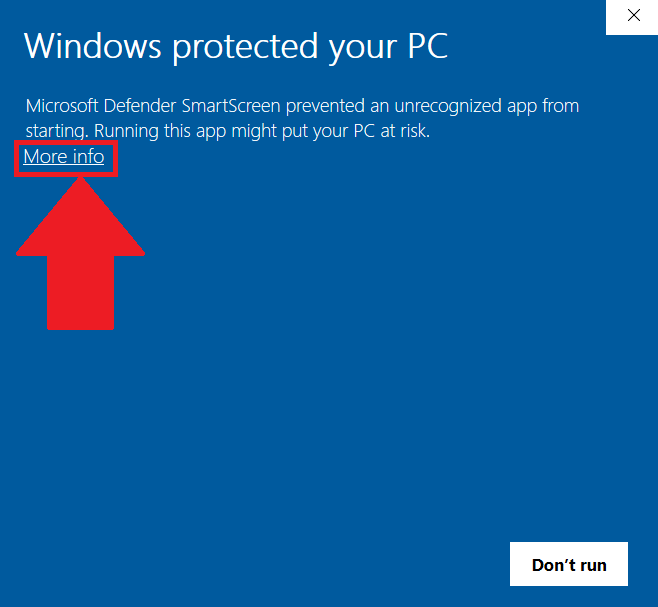
In the Microsoft Defender SmartScreen, click the More Info option.
Figure 1: Microsoft Defender: More info
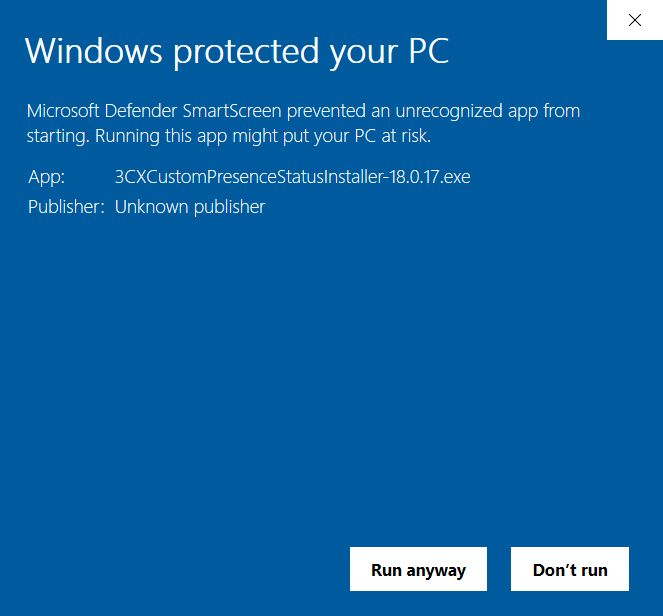
Click the Run Anyway option to start the installation.
Click on the software installer downloaded in Step 1. The installation wizard will automatically identify the prerequisites and assist you with each installation required for 3CX Custom Presence. It includes .NET Framework (Web Installer), SQL Server Express (Web Installer), and SQL Server Management Studio.
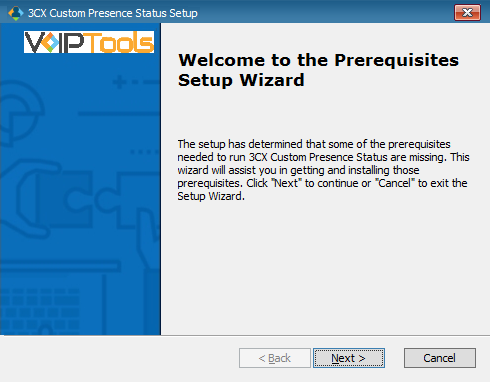
Click the downloaded installer executable to launch the Prerequisites Setup Wizard and click Next.
Figure 3: Prerequisites Setup Wizard
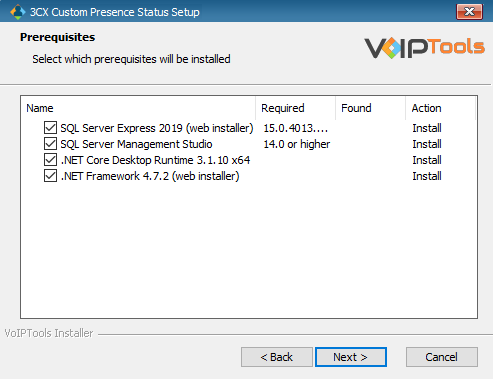
In the Prerequisites window, the installer will identify the missing prerequisites. It is important that you install all the required prerequisites. However, you can select/unselect the applications to be installed based on your unique requirements. Click Next to continue.
Figure 4: Select Prerequisites to Install
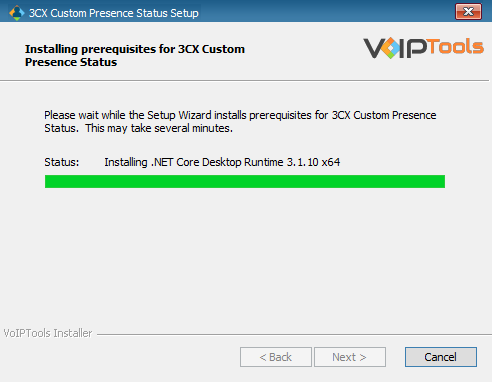
The installer will download and install the selected applications.
Figure 5: Prerequisites Installation in progress
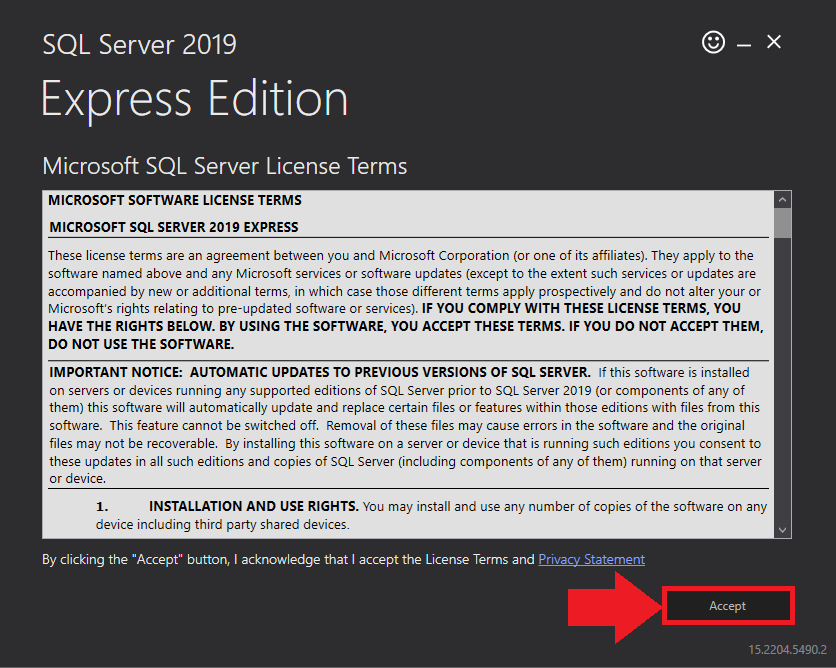
In the Microsoft SQL Server License Terms click the Accept button to acknowledge the license terms and continue.
This page appears if you do not have SQL Server Express preinstalled in your device.
Figure 6: SQL Server Express: Accept License Terms
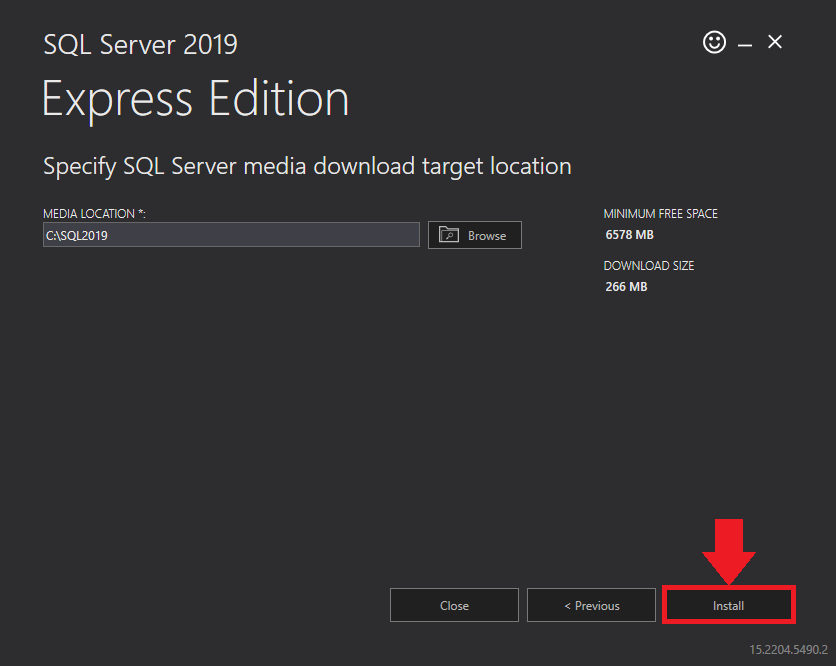
View the SQL Server Media target location in the Media Location field. If required, you can click the Browse button to change the location. Click Install to begin the installation of SQL Server Express.
Figure 7: SQL Server Express: Target Location
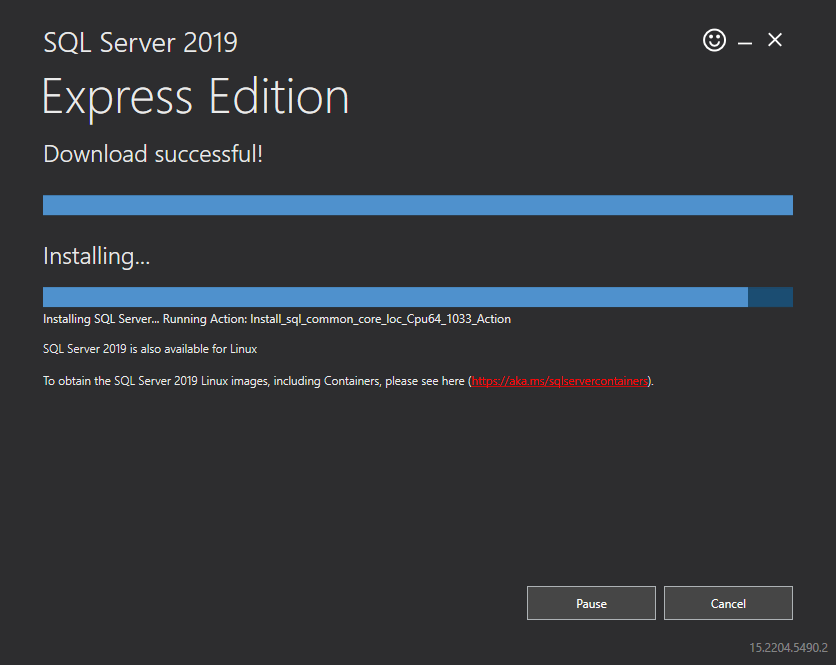
SQL server installation is in progress. This may take several minutes to complete.
Figure: SQL Server Installation In Progress
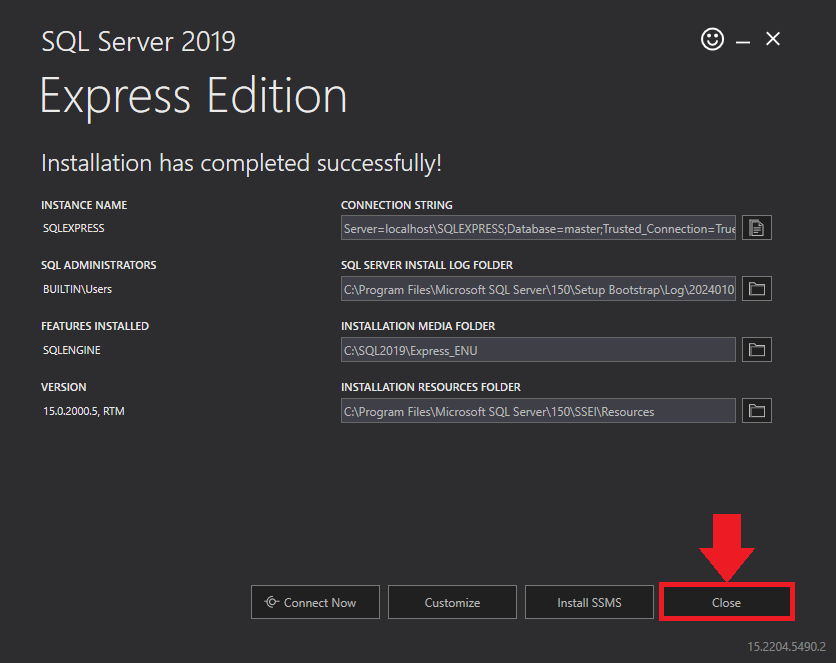
Click the Close button once the prerequisites are installed.
Figure 8: SQL Server Express: Installed Successfully
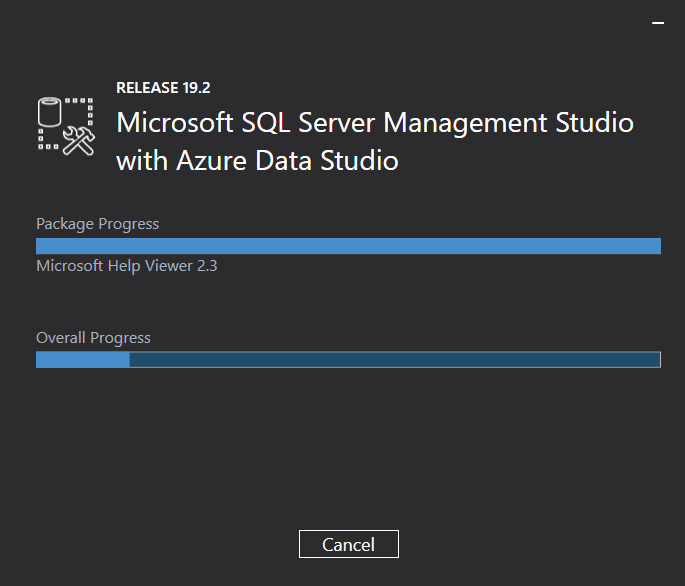
Microsoft SQL Management Studio installation is in progress. This may take several minutes to complete.
Figure 9: Microsoft SQL Server Management Studio: Installation in progress
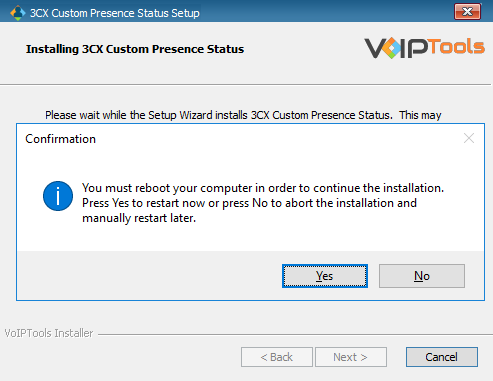
In the confirmation message box, click Yes to reboot the computer.
Figure 10: SQL Server Express: Reboot your computer
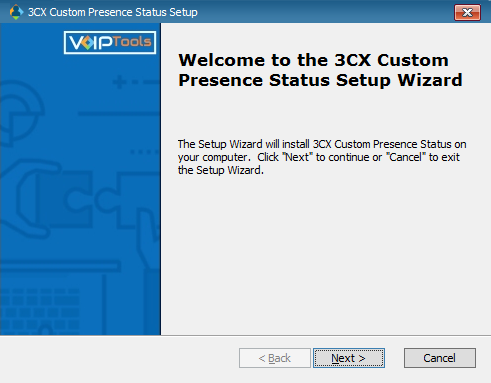
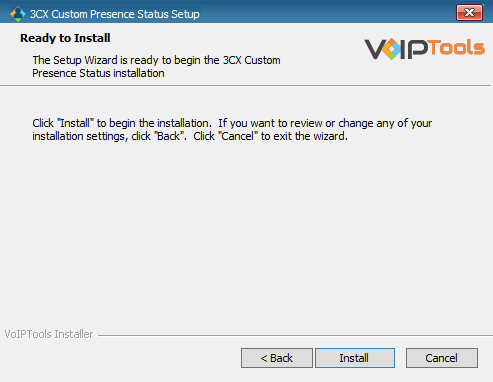
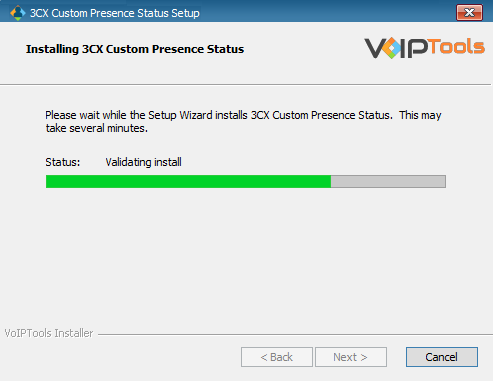
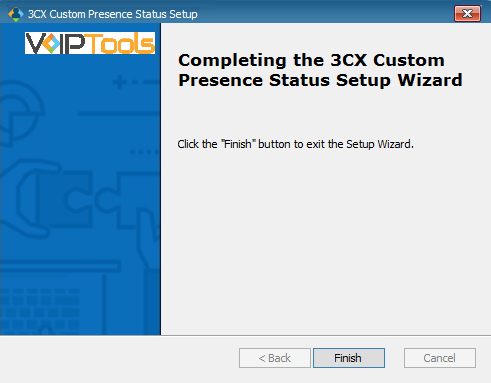
After all the prerequisites are installed, the 3CX Custom Presence Setup Wizard appears. Click Next to Continue.
Figure 11: 3CX Custom Presence Status Setup Wizard
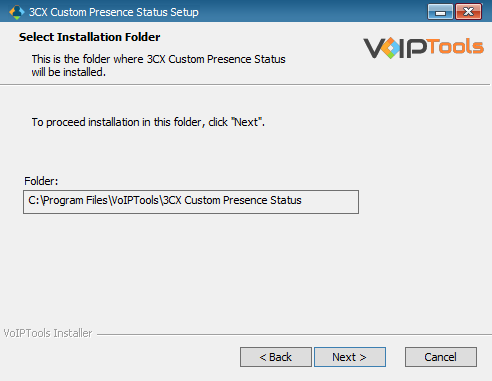
On the Select Installation Folder window, the Folder field displays the location where the ‘3CX Custom Presence’ will be installed. Note that you cannot change the path.
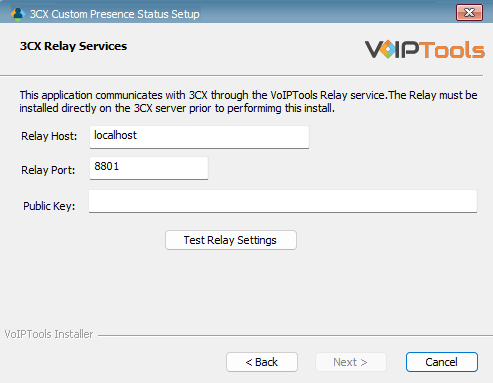
In the 3CX Relay Services window, in the Relay Host field, enter the FQDN of your 3CX server.
Enter 8801 in the Relay Port field.
Enter the public key you took from VoIPTools Relay services in the Public Key text area.
Figure 13: Configure Relay Services
Click the Test Relay Settings to confirm ‘3CX Custom Presence’ can communicate with the Relay services running on the 3CX server.
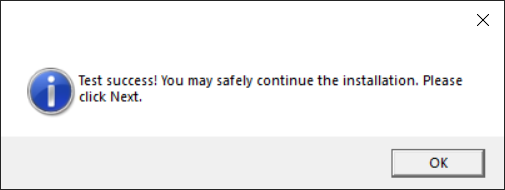
If the ‘3CX Custom Presence’ is successfully able to communicate with the Relay services that run on the 3CX server, a Success message box appears. Click OK. If the test fails, you will not be able to continue until communication with the relay is established.
Click Next to continue with the installation.
Figure14: Relay connection test successful
NOTE:
If the test was unsuccessful:
confirm you have the correct firewall port open (default TCP 8801) on the 3CX server and the firewall protecting the 3CX server.
confirm that you have entered the correct FQDN for the 3CX server.
confirm that 3CX Custom Presence and the Relay are using the same port and protocol.
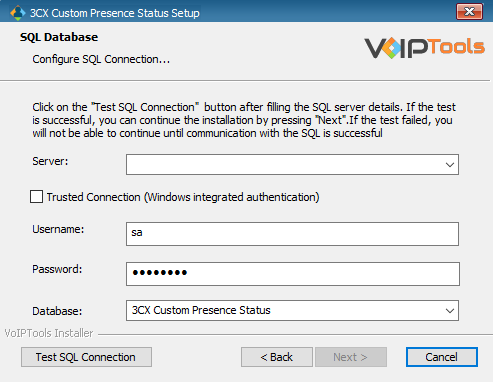
When configuring 3CX Custom Presence, select an existing Microsoft SQL Server instance in your environment. The database server can be a remote SQL Server, or a local instance running on the VoIPTools server.
On the SQL Database window, in the Server field, select the desired instance of SQL Server
NOTE:
We encourage you to use SQL Authentication rather than Windows authentication. Many of our tools leverage a Call Flow Designer (CFD) application running on the 3CX. Frequently our CFD applications require access to a SQL database. If the 3CX server and the database server are not in an Active Directory domain, Windows authentication will fail. To use SQL authentication, your SQL Server must be configured to run in “Mixed Mode”. If you installed SQL Server with one of our tools, we configure SQL in “Mixed Mode”.
Figure 15: SQL Authentication
To use SQL Authentication, be sure to uncheck the Trusted Connection checkbox.
In the Username and Password fields, enter valid SQL login account credentials
To use Windows Integrated Authentication (not recommended), check the Trusted Connection (Windows integrated authentication) checkbox.
In the Database field, the installer will automatically display the default database name. We encourage you to use the default name. If you are upgrading or reinstalling 3CX Custom Presence, select the existing database name from the list.
Click the Test SQL Connection button to confirm connectivity to SQL Server and then click OK to continue.
To ensure the authorization of your license key, it is necessary to complete the registration process. By registering with VoIPTools, you gain access to a range of benefits:
Key Replacement Assistance
In the unfortunate event of a lost license key, registering with VoIPTools lets us provide you with a replacement key promptly.
Product Updates and Reminders
By registering, you will receive timely notifications from VoIPTools regarding any product updates. Additionally, we will send reminders when your key is nearing its renewal date, ensuring uninterrupted access to our services.
Follow the procedure to register your software,
Click the 3CX Custom Presence Status desktop icon to open the web application.
On the Login page, do the following tasks,
In the Extension field, enter your 3CX extension number.
In the PIN field, enter your 3CX voicemail PIN.
Click the Login button to log in to your account.
Figure 19: 3CX Custom Presence Status Login
In the License screen, enter your license key in the Key field and other mandatory information.
Click Register to complete your software registration.
Figure 20: License Page – Before Registration
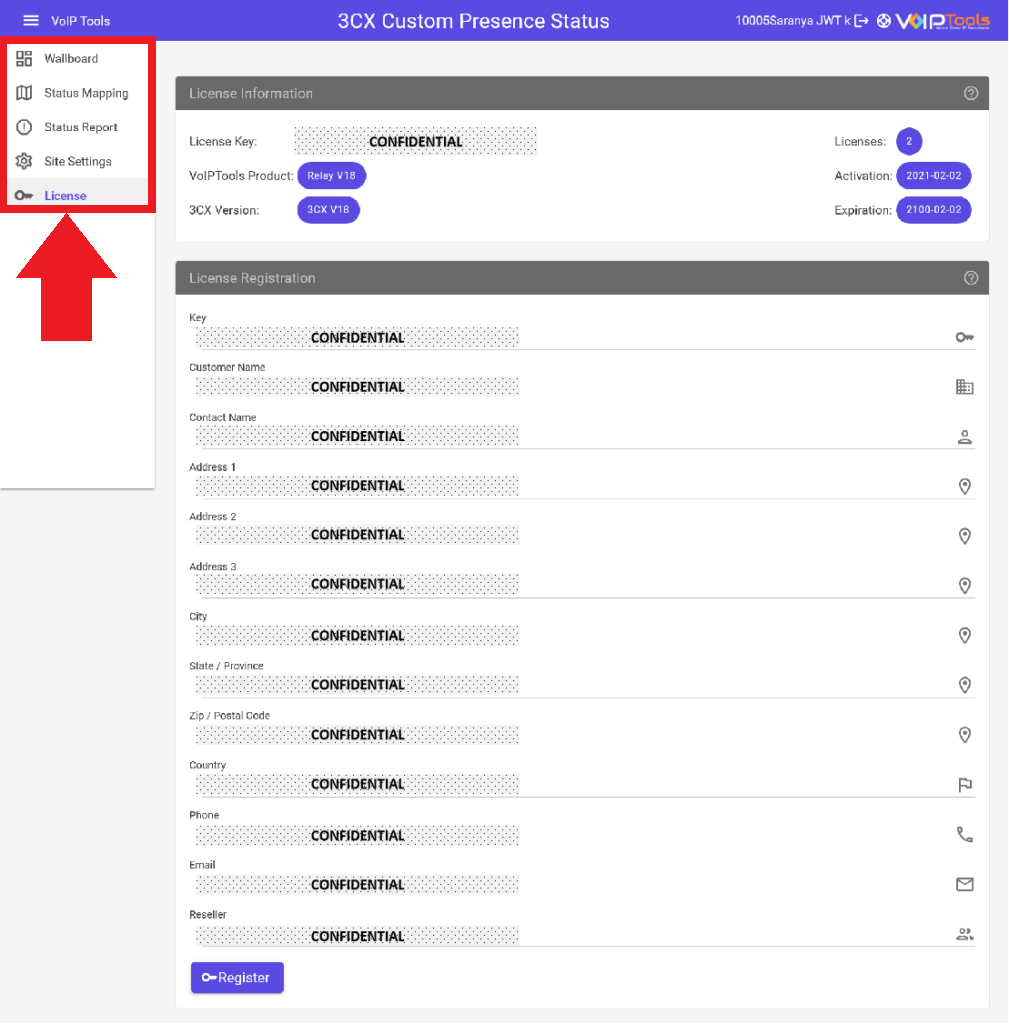
Once you have completed the registration, you can see all the tabs in the left side panel.
Figure 21: Web Application After Registration
NOTE:
The license key permits you to install the software on one computer.
3CX Custom Presence provides different screens for both users and Managers. This approach empowers managers with administrative authority, enabling oversight and specialized functionalities, while users maintain limited access, fostering security and tailored functionalities for their specific roles.
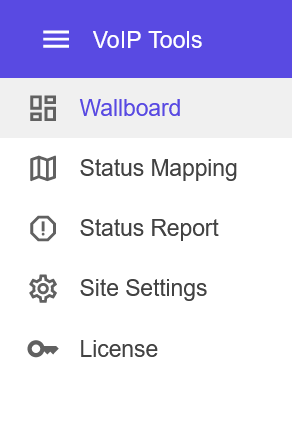
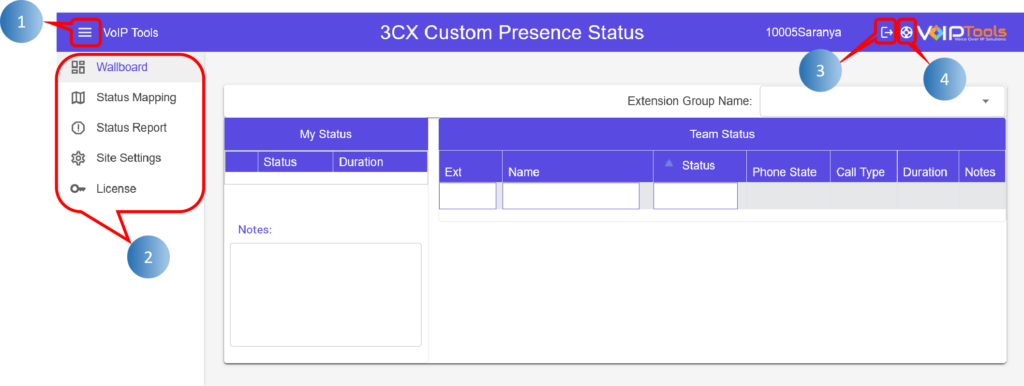
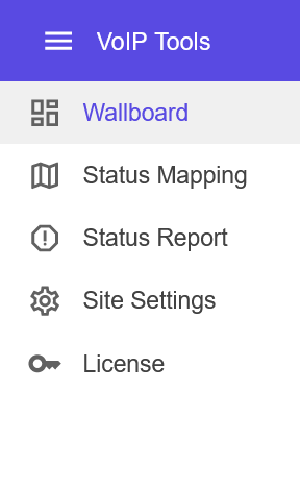
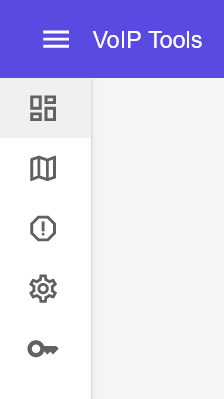
The Left Side Panel consists of all the menus of the web application. You can minimize the Left Side Panel to enlarge your main content.
Figure 23: Left Side Panel – Expanded View
Figure 24: Left Side Panel – Compressed View
The Left Side Panel consists of the following tabs,
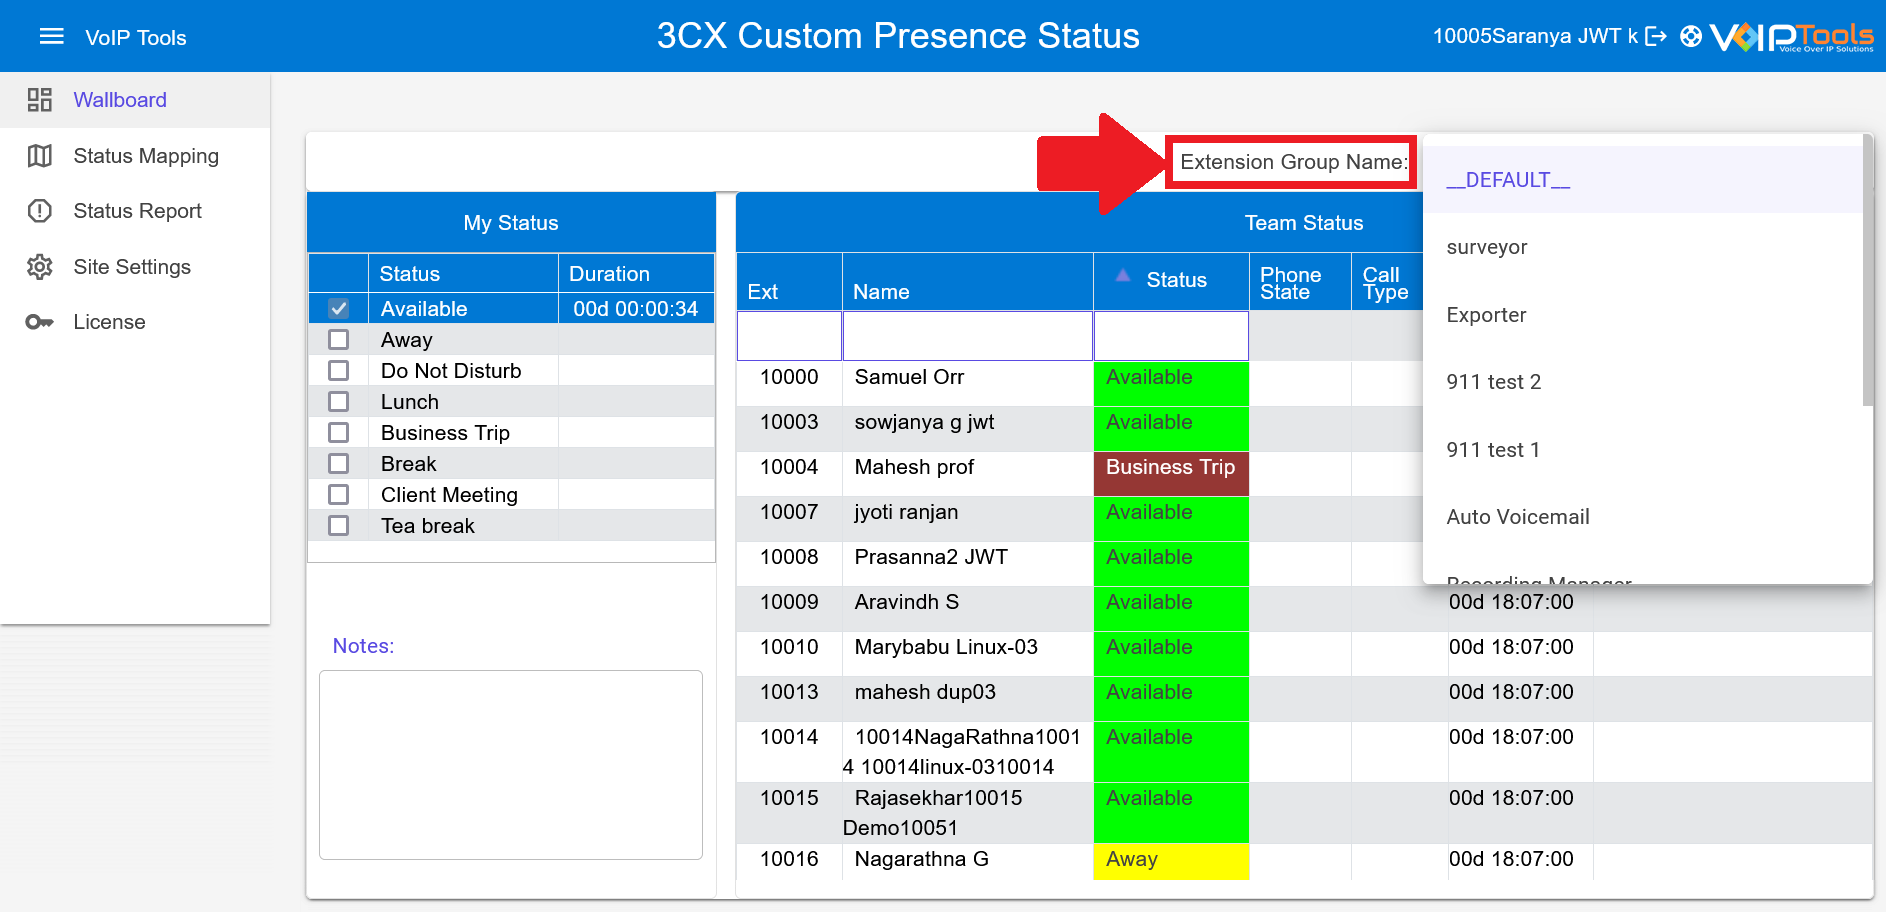
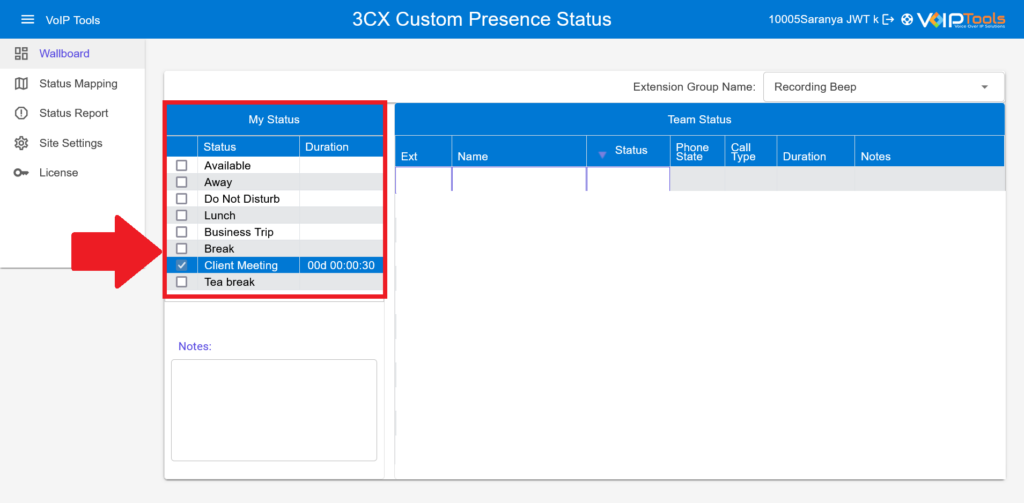
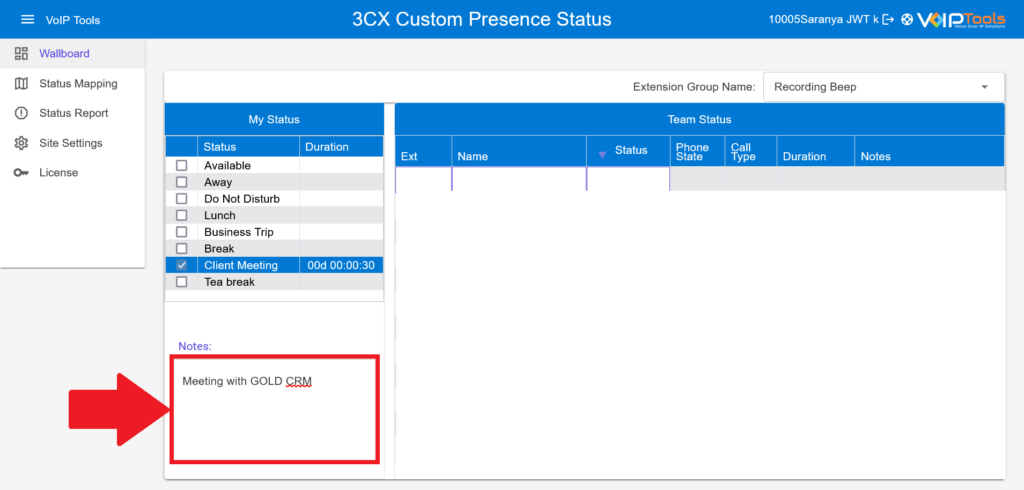
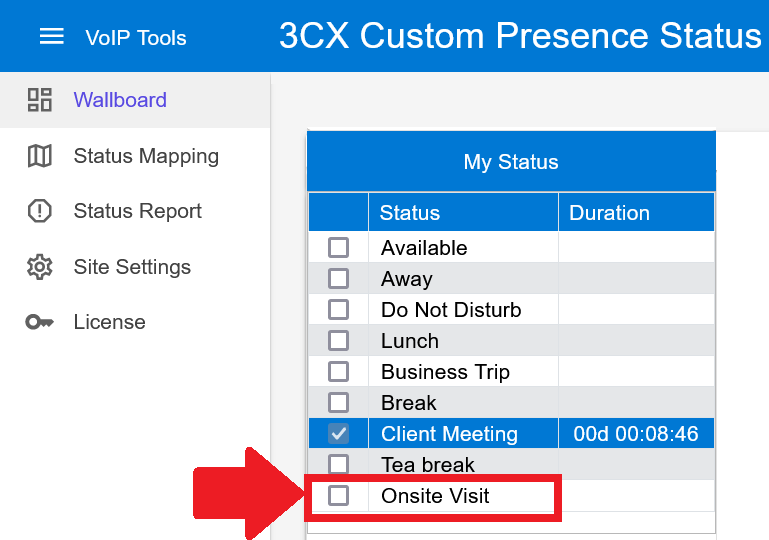
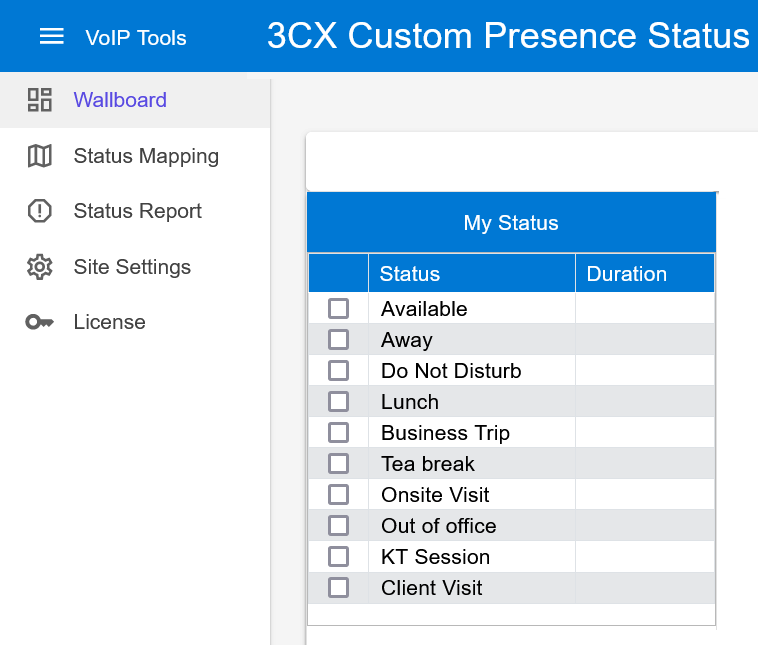
WALLBOARD
The Wallboard screen provides 3CX managers with a visual representation of staff statuses, allowing them to monitor and track the current status of various extensions associated with specific groups
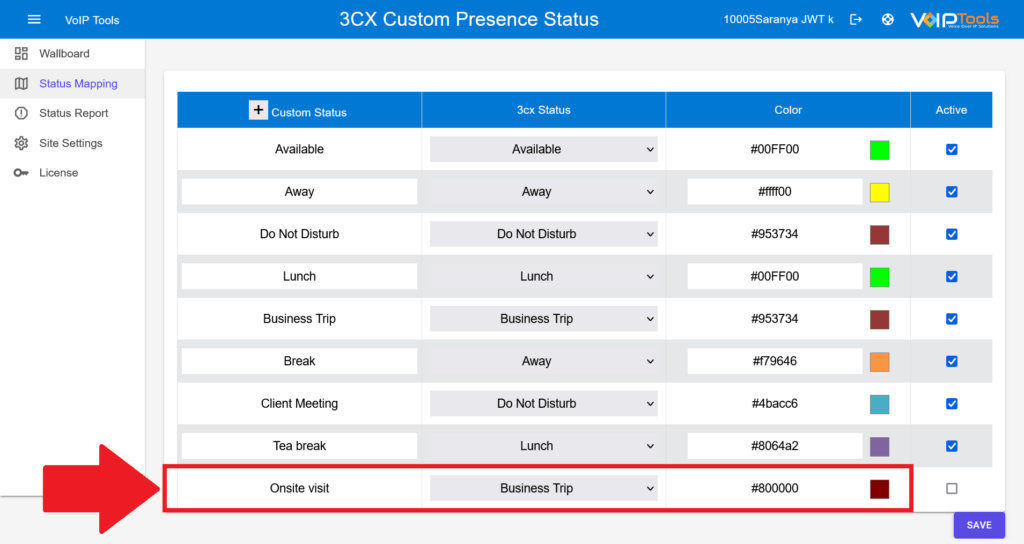
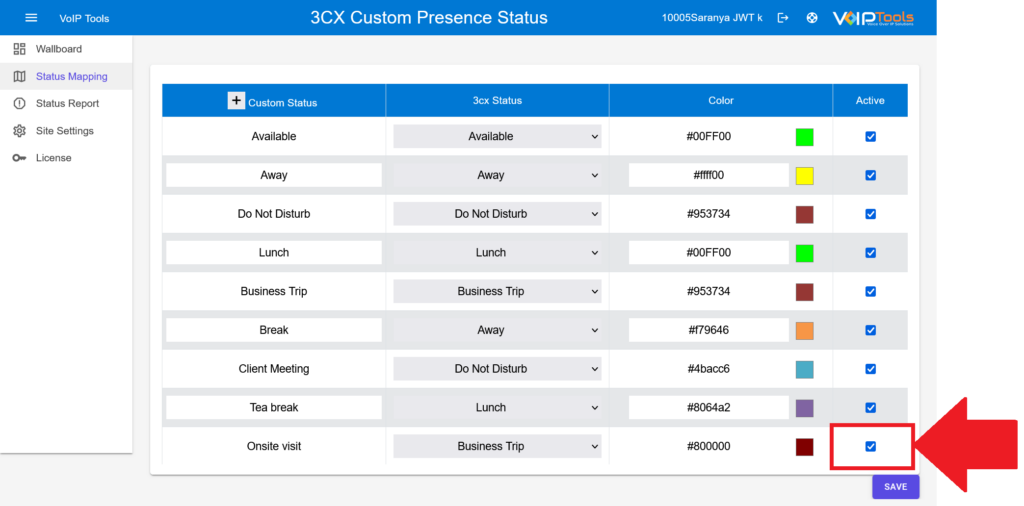
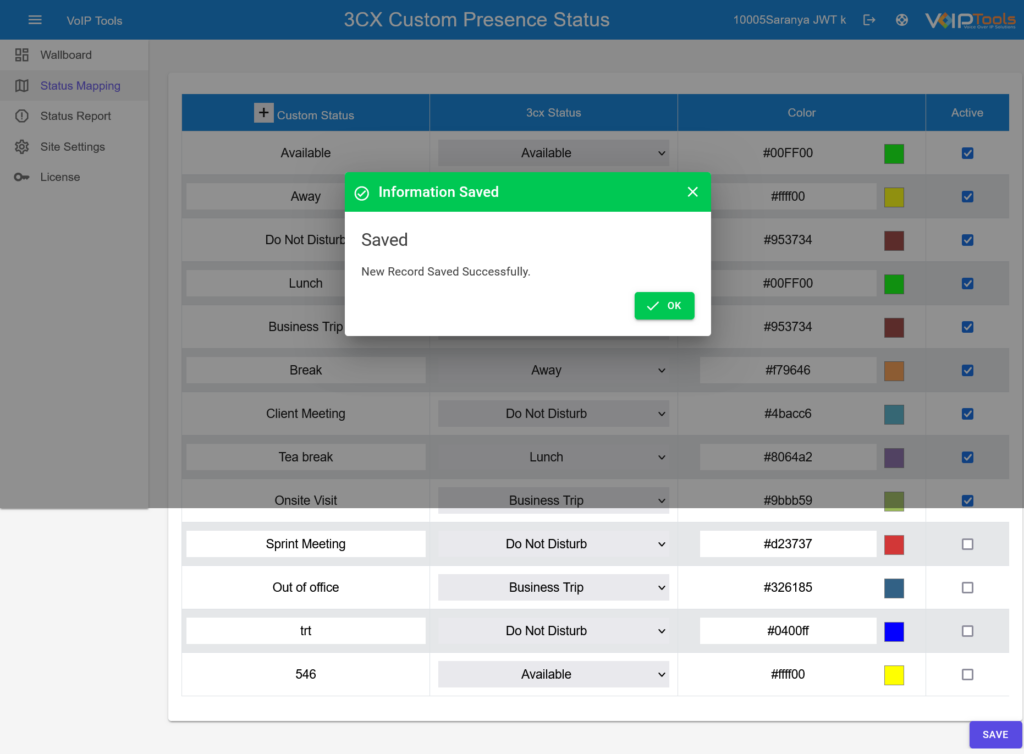
STATUS MAPPING
The Status Mapping screen allows customization of statuses, allowing administrators or managers to create and align multiple custom statuses with the 5 built-in presence statuses. This feature facilitates better organization and visualization of individualized statuses, ensuring their visibility on the Wallboard screen for effective communication and tracking of staff availability.
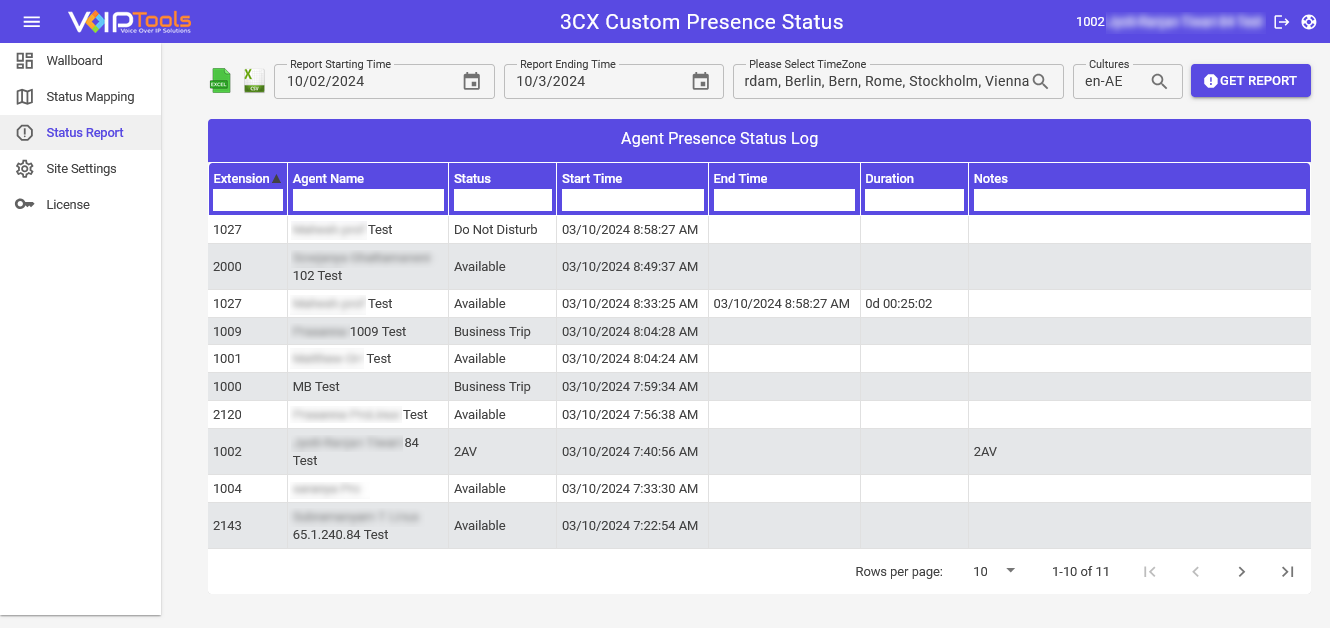
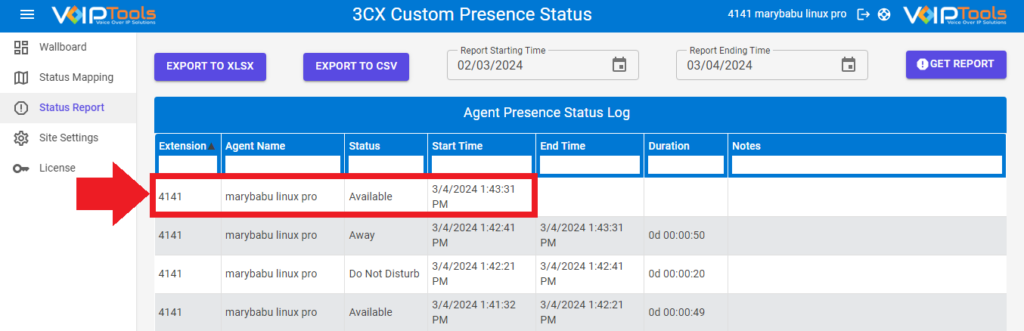
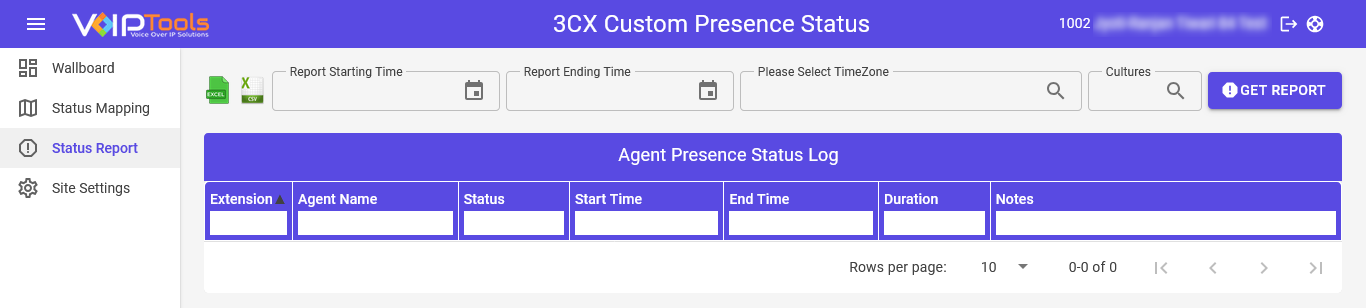
STATUS REPORT
The Status Reports screen lets managers with appropriate access rights track and analyze agents’ time spent on specific statuses. This feature provides detailed reports showcasing individual agent data, including status duration, facilitating performance assessment, and resource allocation. It allows for exporting data in various formats for further analysis or documentation purposes.
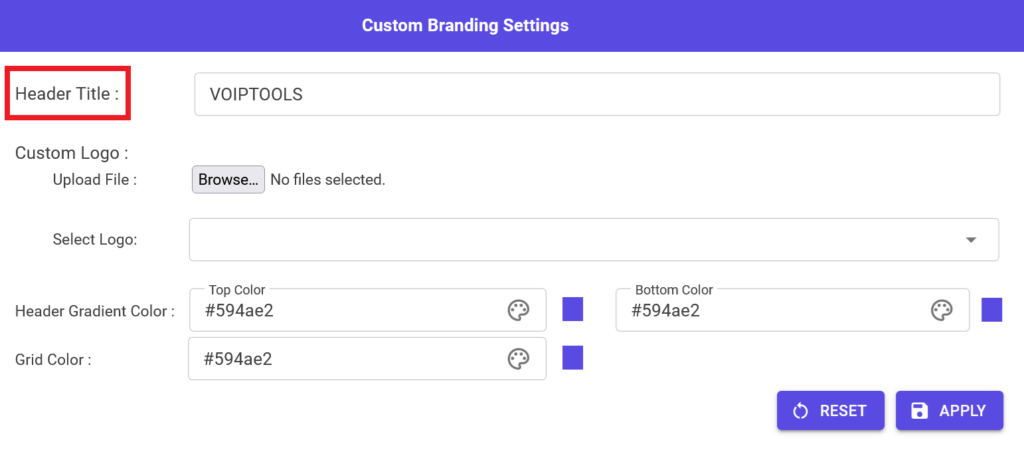
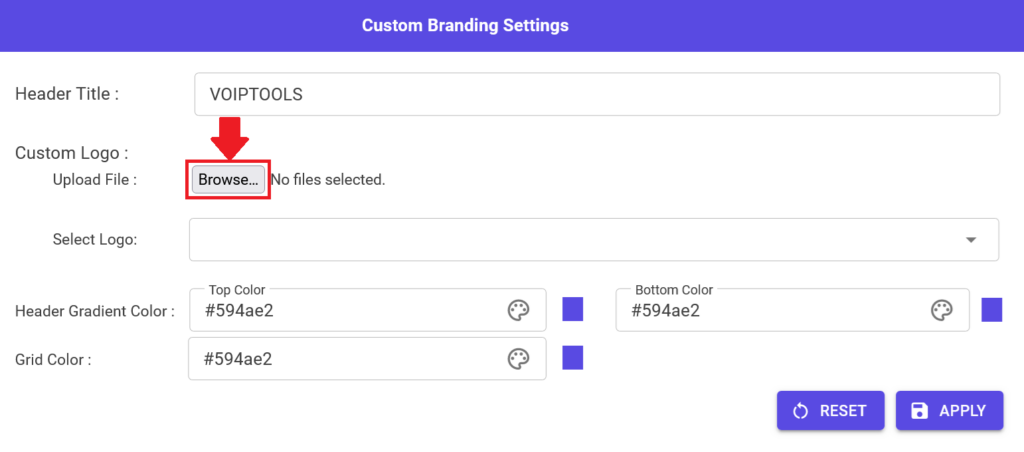
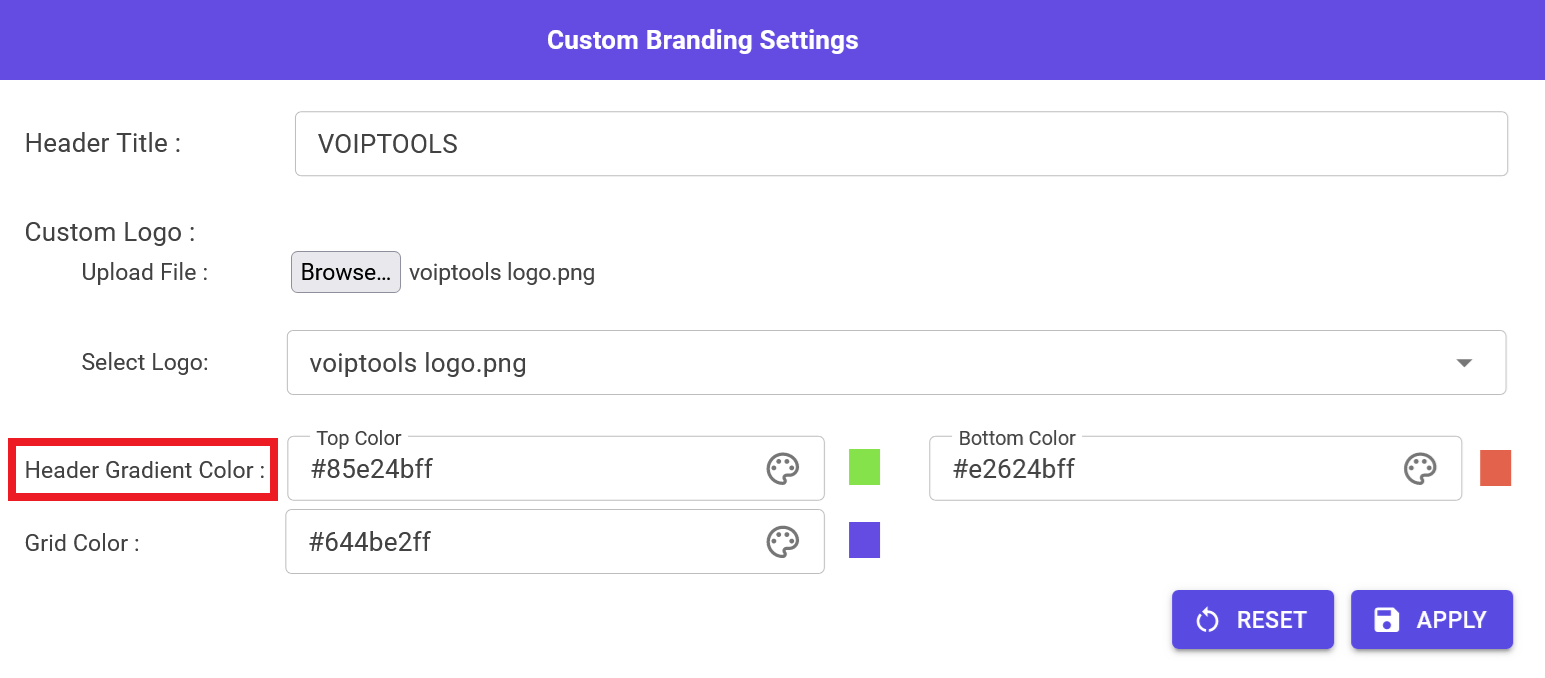
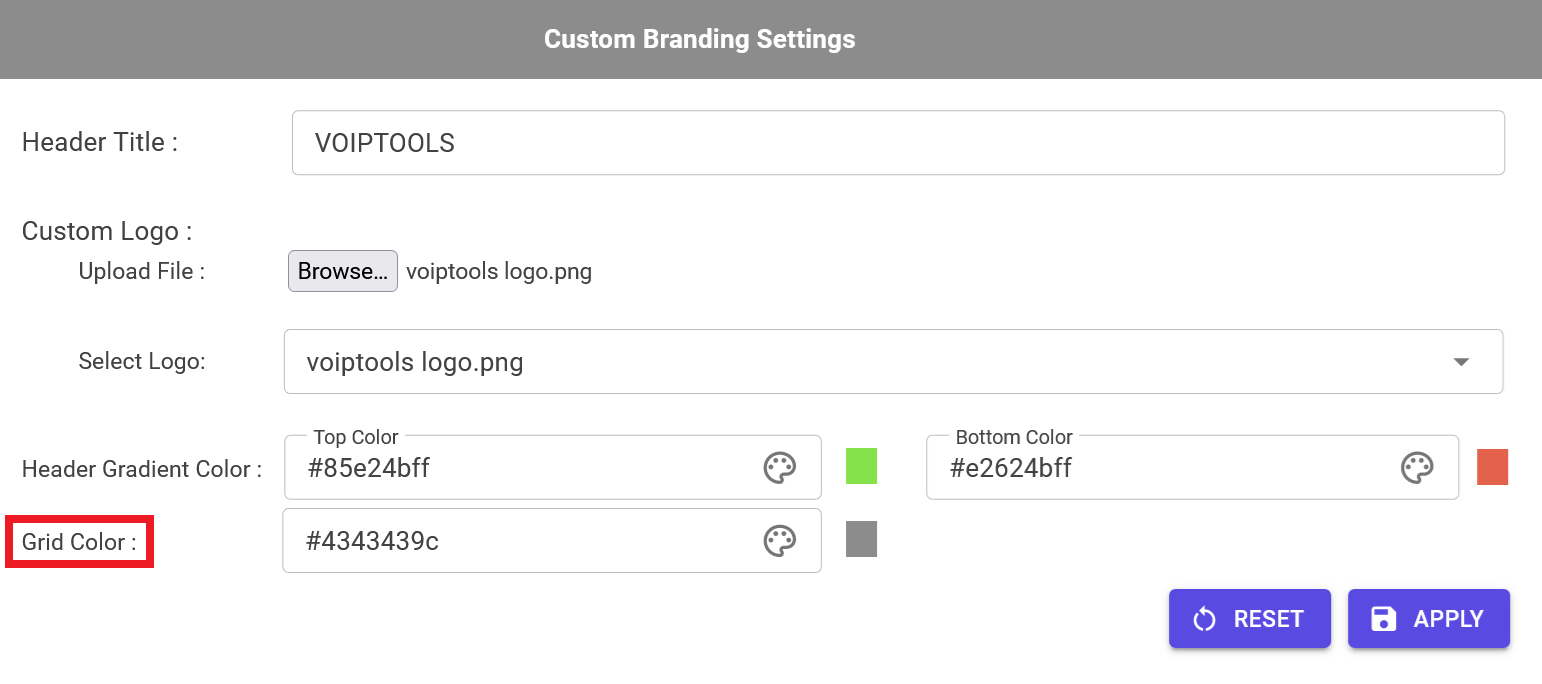
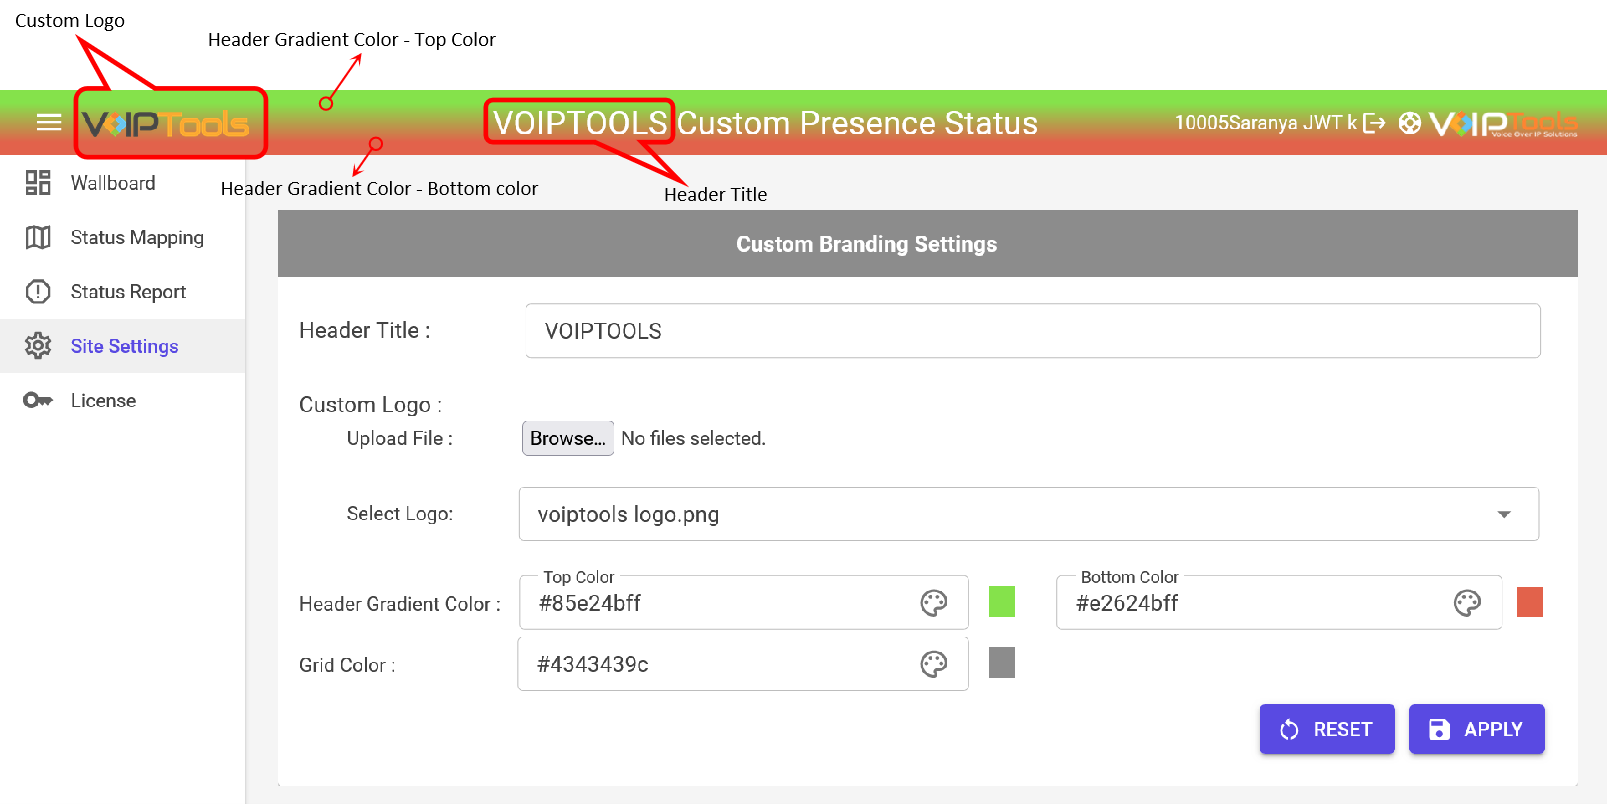
SITE SETTINGS
The Site Settings screen serves to customize the application’s branding elements. It lets users tailor the visual aspects such as header gradient color, grid color in data displays, custom logo uploads, and header title prefixes. This customization enhances the application’s appearance, aligning it with organizational branding guidelines for a cohesive user experience.
LICENSE
The License screen facilitates the registration process for the 3CX Custom Presence software. Successful registration grants access to all tabs within the web application interface, enabling full functionality and usage of the software.
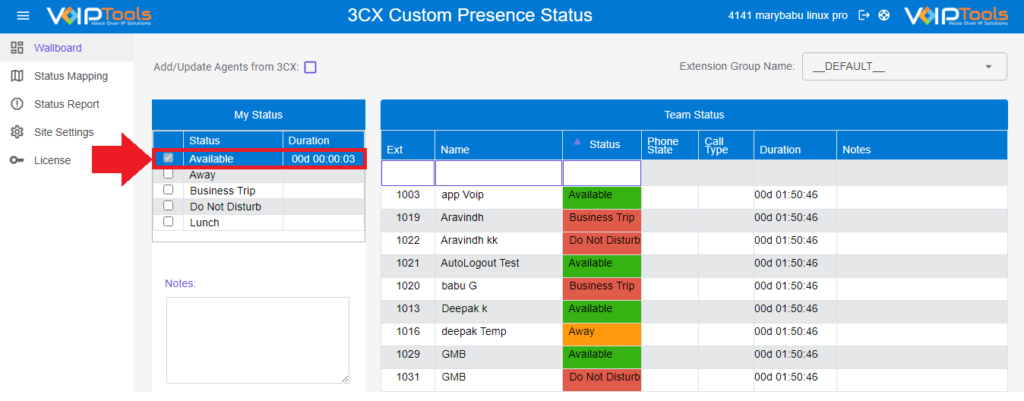
As a System Administrator, you can add the agents of a selected Extension Group Name from 3CX.
Click the Add/Update Agents From 3CX box to update the agents.
Figure 32: Add/Update Agents From 3CX Checkbox
NOTE:
The Add/Update Agents From 3CX checkbox is exclusively visible to System Administrators.
Changes made in extension names in the 3CX Admin Console will not reflect in the 3CX Custom Presence Status unless the System Administrator selects the Add/Update Agents From 3CX checkbox.
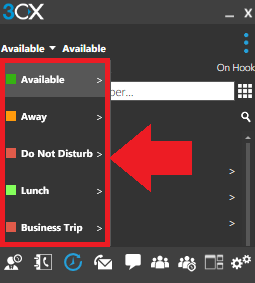
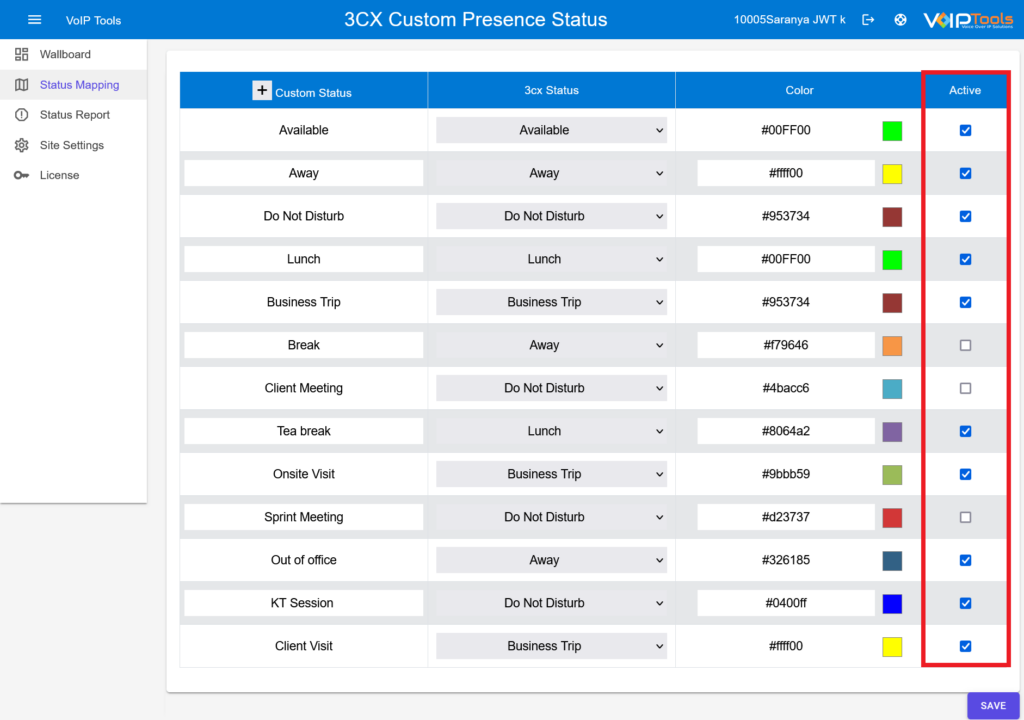
3CX only offers 5 built-in Presence Statuses. You can have as many custom statuses as you want, but they all have to map back to one of the 5 statuses built into 3CX. Only 3CX Admins/Managers can access the ‘Status Mapping’ screen to create or rename custom statuses.
In the Status Mapping screen, you can do the following tasks
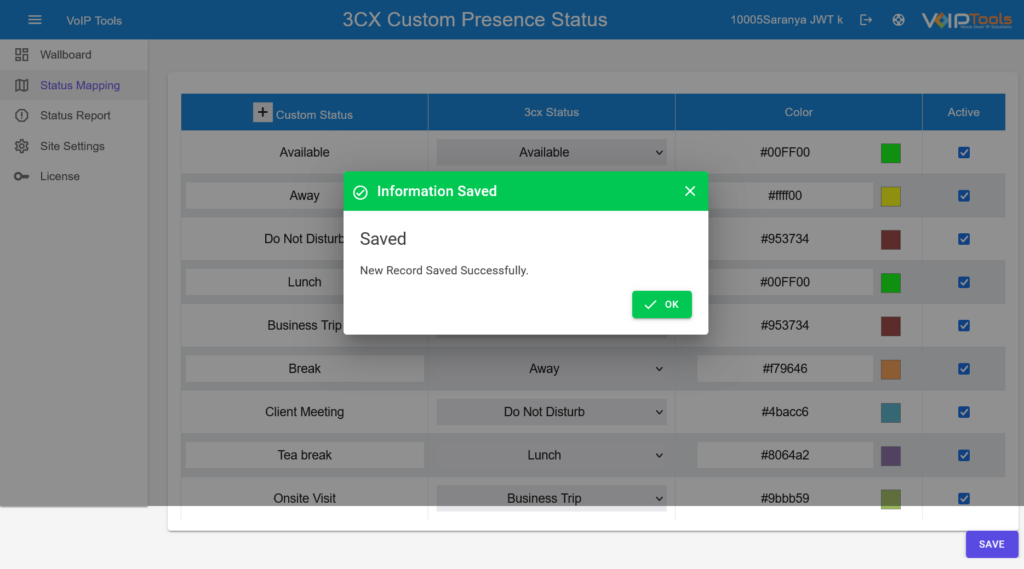
Add a new Custom Status
Activate and Inactivate existing Custom Statuses.
NOTE:
Only ‘Active’ Custom Statuses will appear in the ‘My Status’ grid of the ‘Wallboard’ page.
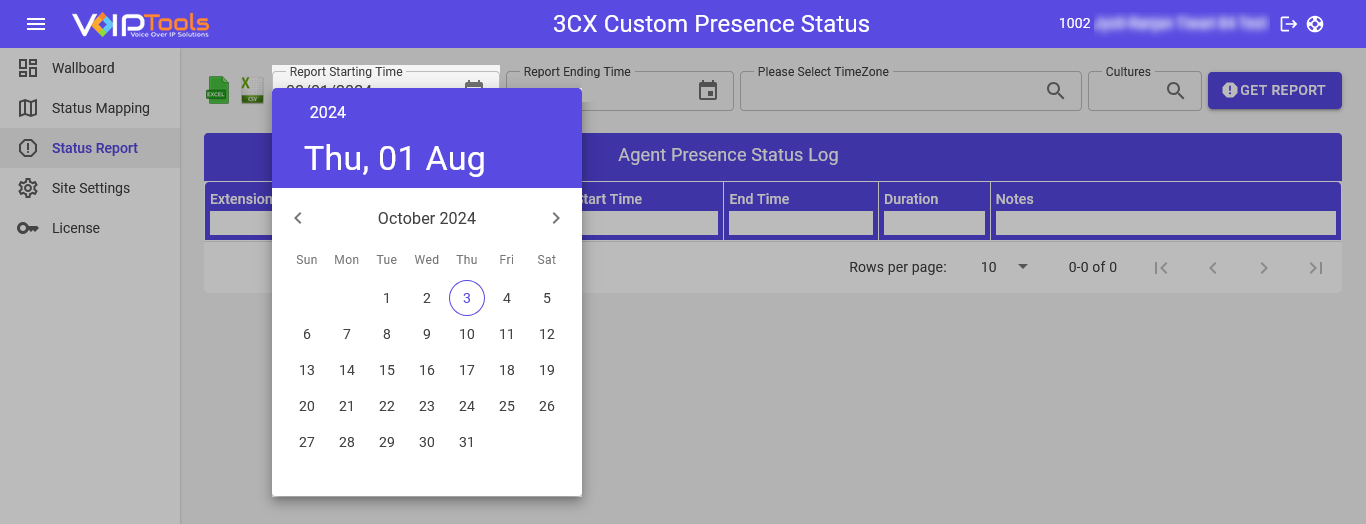
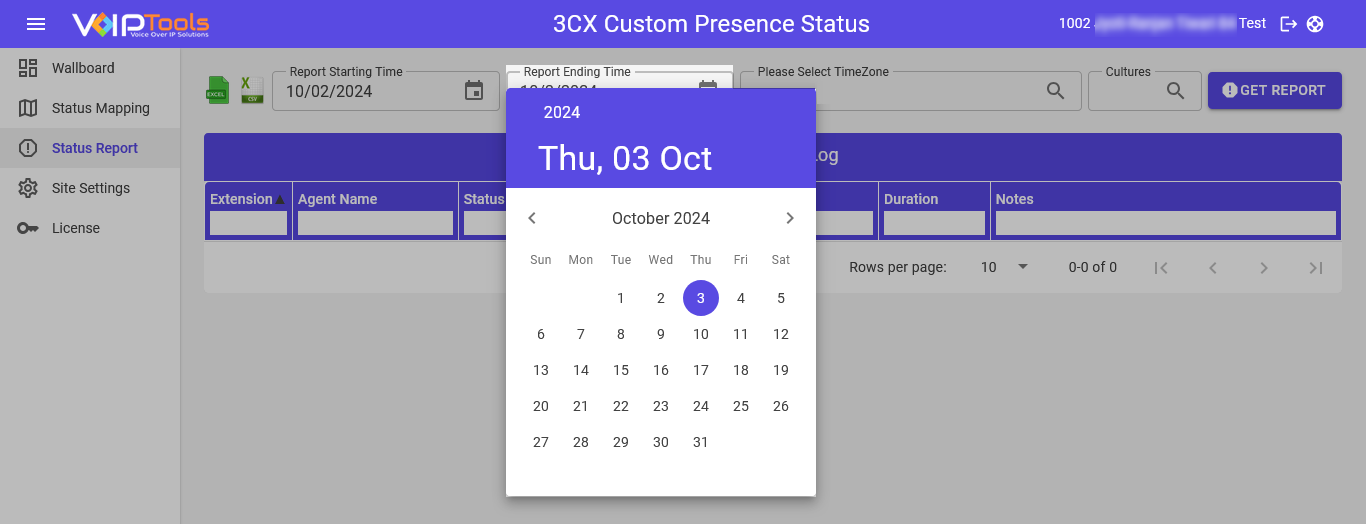
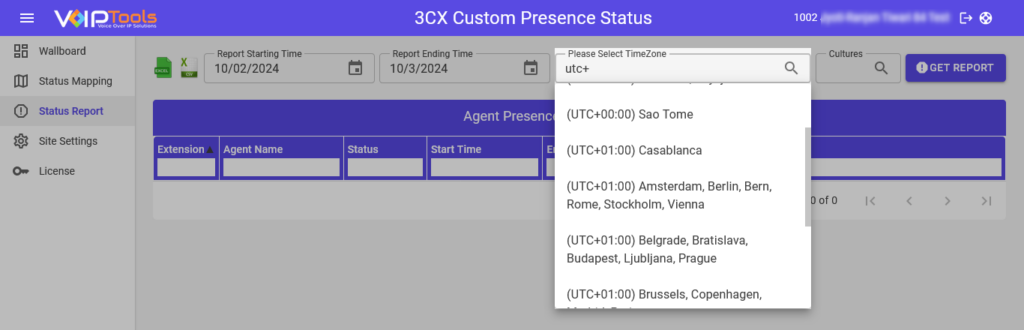
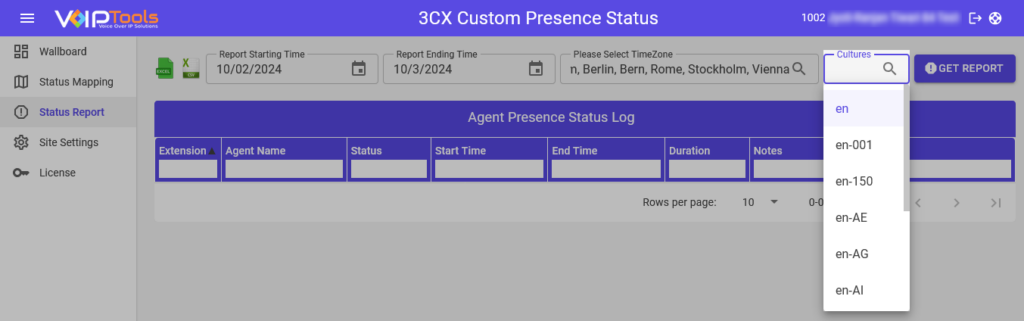
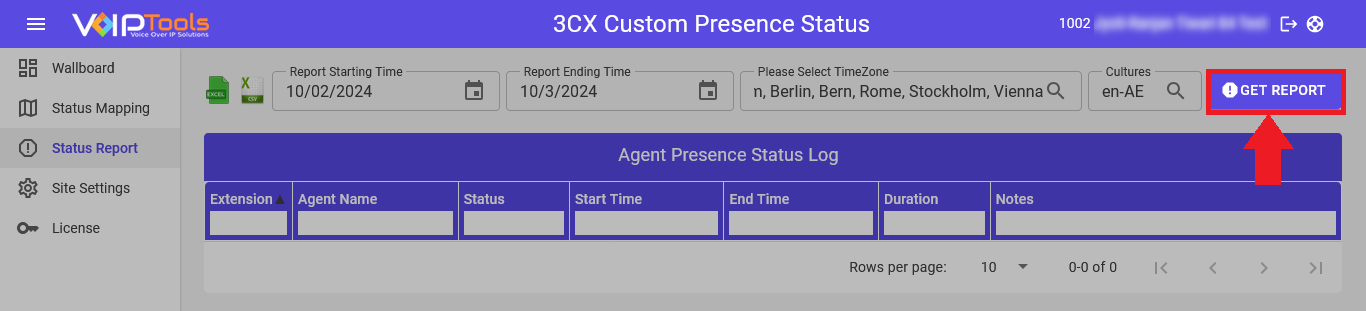
In the Report Starting Time and Report Ending Time fields, enter the date range and then click the Get Report button.
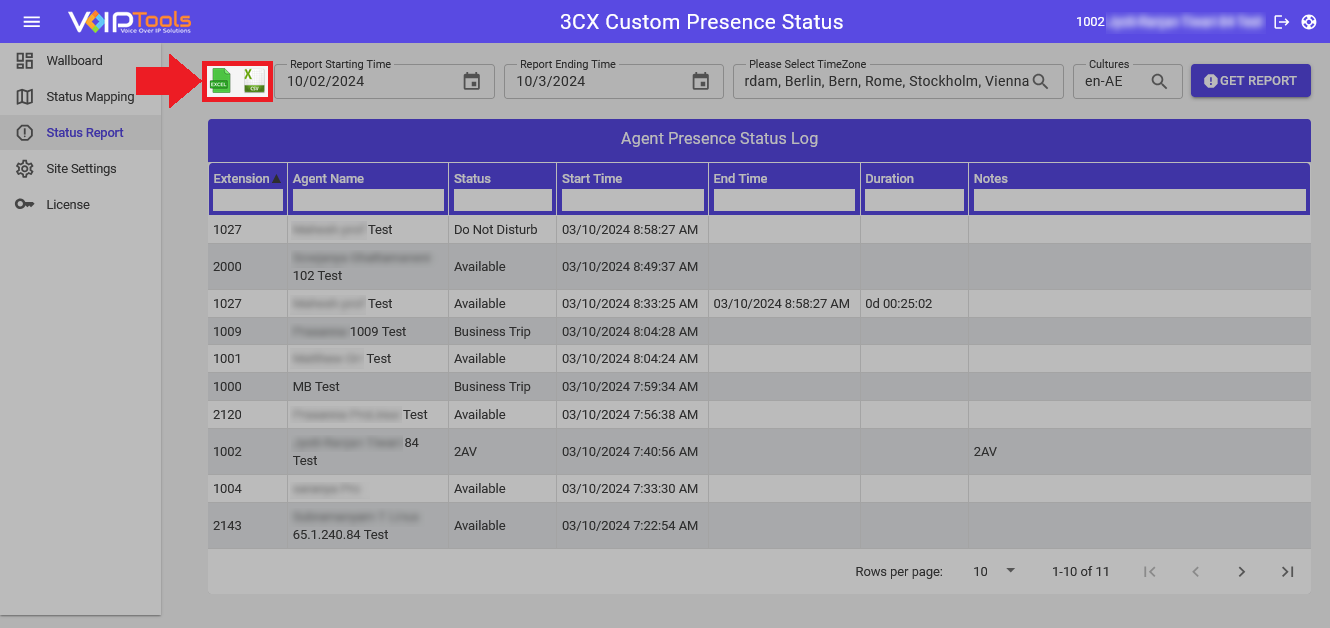
Once the Status Report page displays data as per the selected date range, click the desired export button to export the report data in the respective format.
Figure 50: Export Report Data
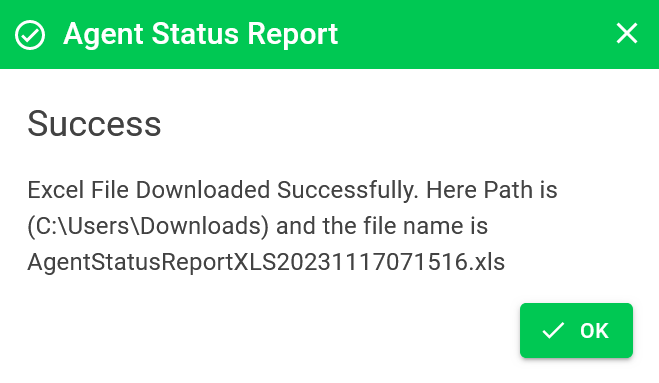
Click OK on the Success popup.
Figure 51: Export Data Success Popup
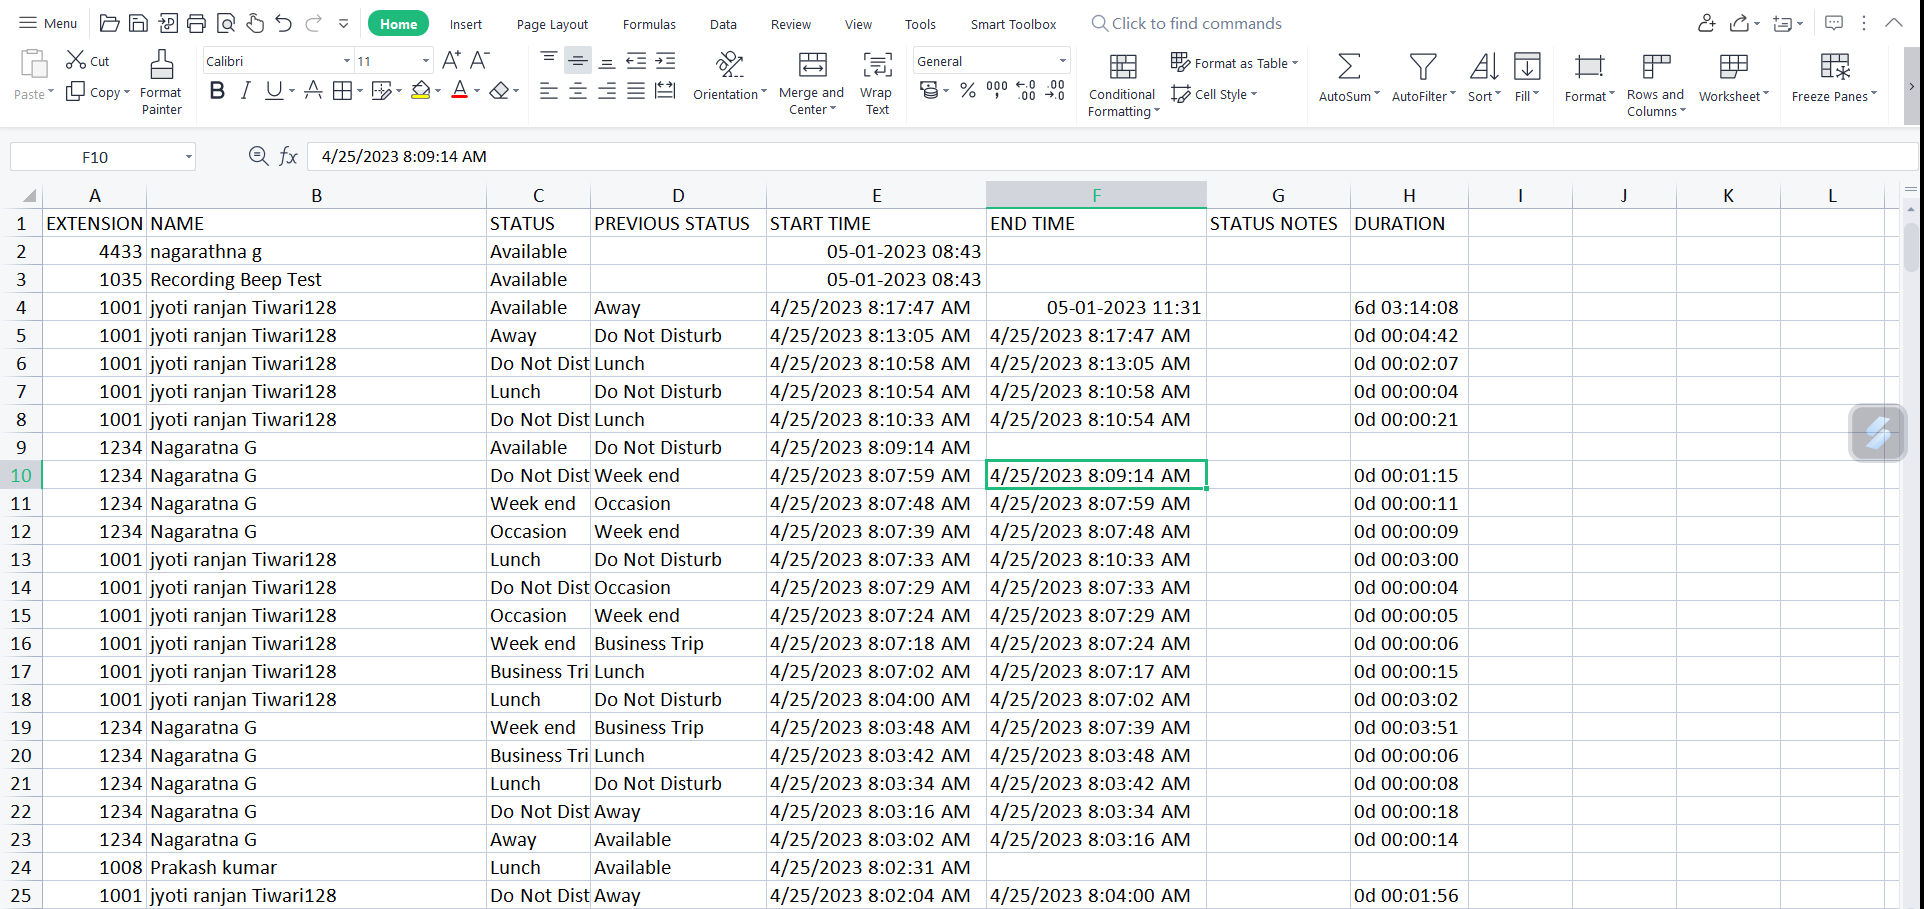
Following image represents data exported in xls. file,
Figure 52: Sample XLS report
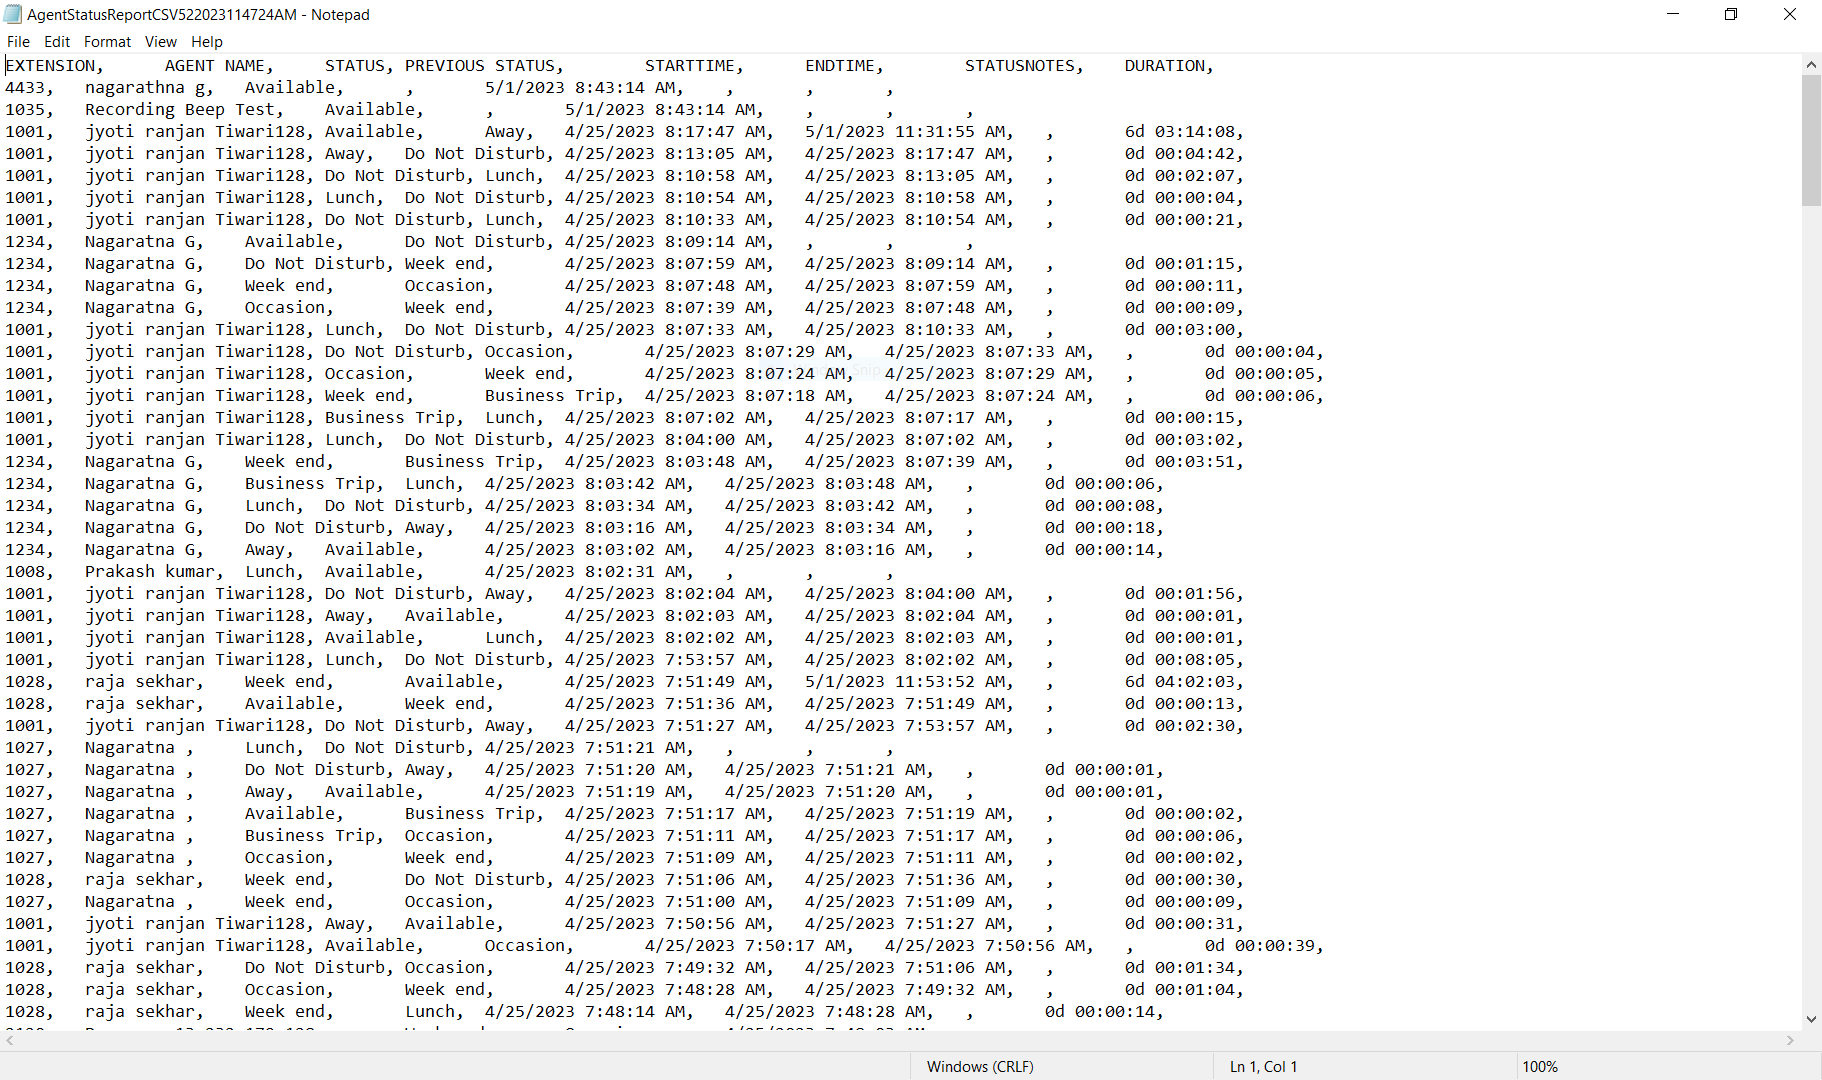
The following image reporesents data exported in .CSV file,
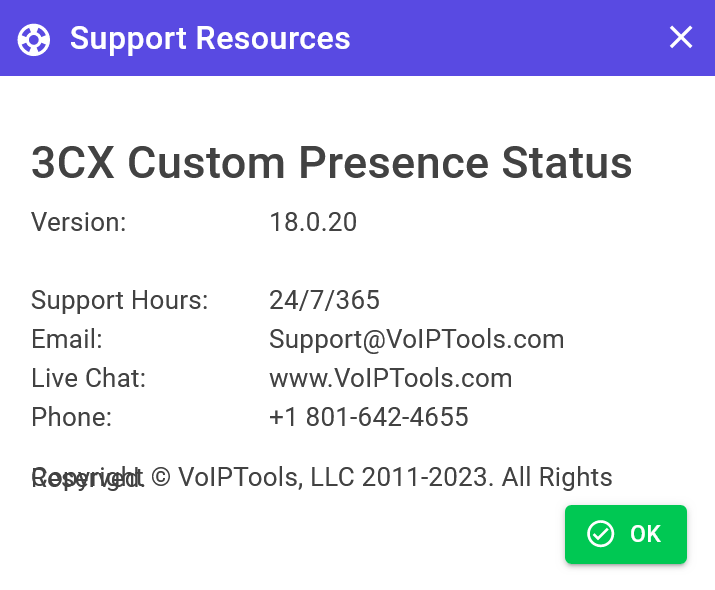
Click the Support Resources button on the top right of the application to open the Support Resources screen.
Figure 61: Support Resources Button
The Support Resources screen displays the application’s version number and the contact information of VoIPTools. Click on the link to learn about the comprehensive support provided by VoIPTools.
You get quick answers to most of your inquiries in our online manual. If you prefer direct contact, we offer various support channels, including phone, email, live chat, and our helpful VoIPTools forums.
Rest assured, our dedicated team is here to assist you around the clock, every day of the year. Whether you’re based in the USA or India, we’re ready to provide prompt responses to your technical queries.
Windows Event Log for VoIPTools Applications and Services #
For troubleshooting any application errors, our Windows Event Log contains a comprehensive list of error messages, warnings, and informative notes related to all our VoIPTools applications and services. It’s a valuable resource to help you pinpoint and resolve any issues you may encounter.
Are you looking to collaborate with other VoIPTools customers facing similar challenges? Our forum is the perfect platform to exchange ideas, solutions, and best practices. Join the conversation at: https://www.voiptools.com/community/
Got questions that need immediate answers? Our chat support team is available to assist you in real time. Just click on the Live Chat button located at the lower right corner of our website, and we’ll acknowledge your queries right away.
To ensure a thorough understanding of your concerns, email us at support@voiptools.com. Describe your issue in detail, and we’ll get back to you within one business day with the support you need.
If you prefer to speak with a representative directly, you can reach us at +1 801-642-4655. Our attentive team is available to take your calls from 8:00 AM to 6:00 PM (Central Standard Time).
If you’ve purchased our products through a VoIPTools Partner, rest assured that they provide first-level support at no additional cost. Partners have access to 100% free technical assistance and actively participate in the troubleshooting process.
VoIPTools customers enjoy access to our online manuals and receive support through emails (with responses within one business day) and live chat. However, please note that we do not provide remote server login assistance.
For a more hands-on experience, consider our “Installation Support” package. Our expert support team can log in to your servers, and install and configure all our tools. This comprehensive service includes setting up SQL Server Express and Internet Information Server if necessary. We’ll work closely with you to tailor our applications to meet your requirements.
We’re committed to providing top-notch support to ensure your VoIPTools experience is smooth and hassle-free. Contact us today, and let us assist you in making the most of our powerful tools!


NOTE:


 to open the web application.
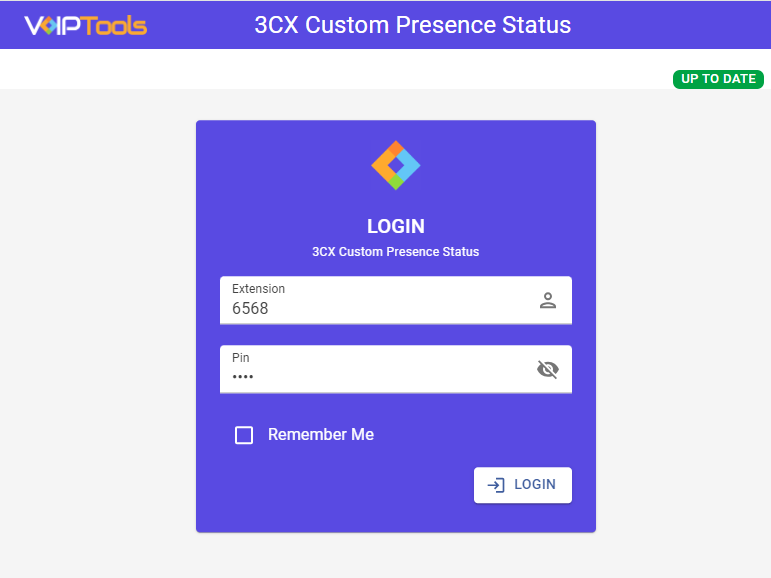
 field and other mandatory information.
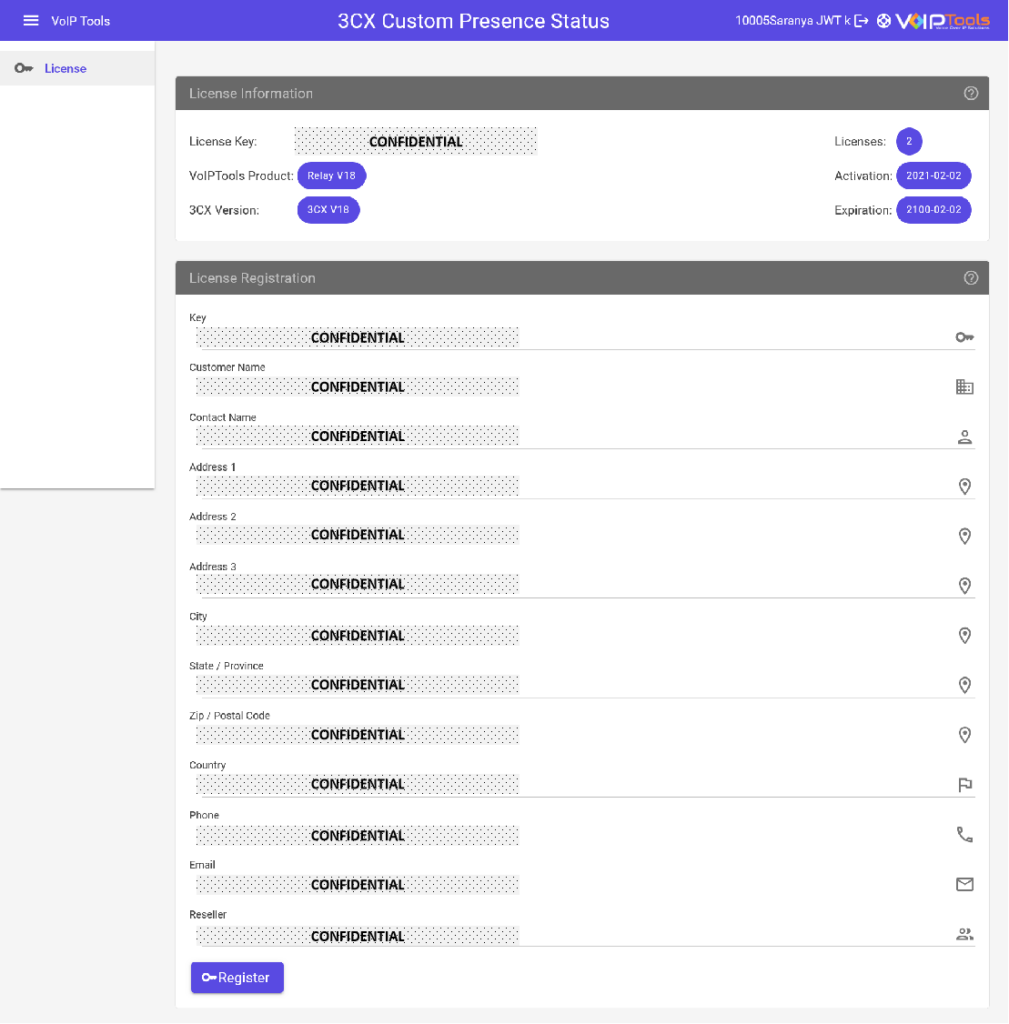


NOTE:

 icon to sort the column in ascending order.
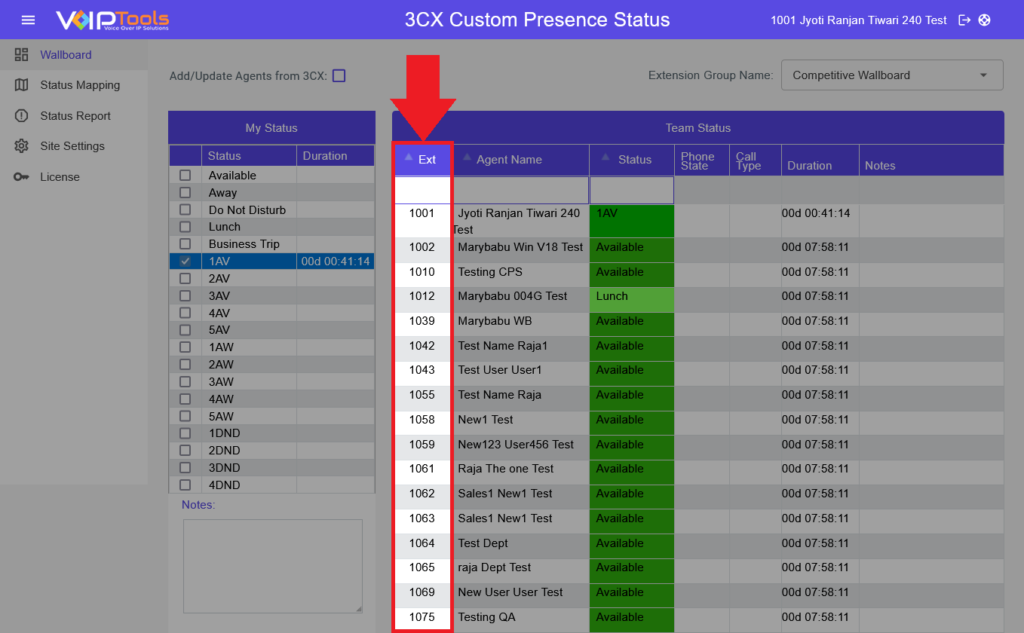
 icon to sort the column in ascending order.
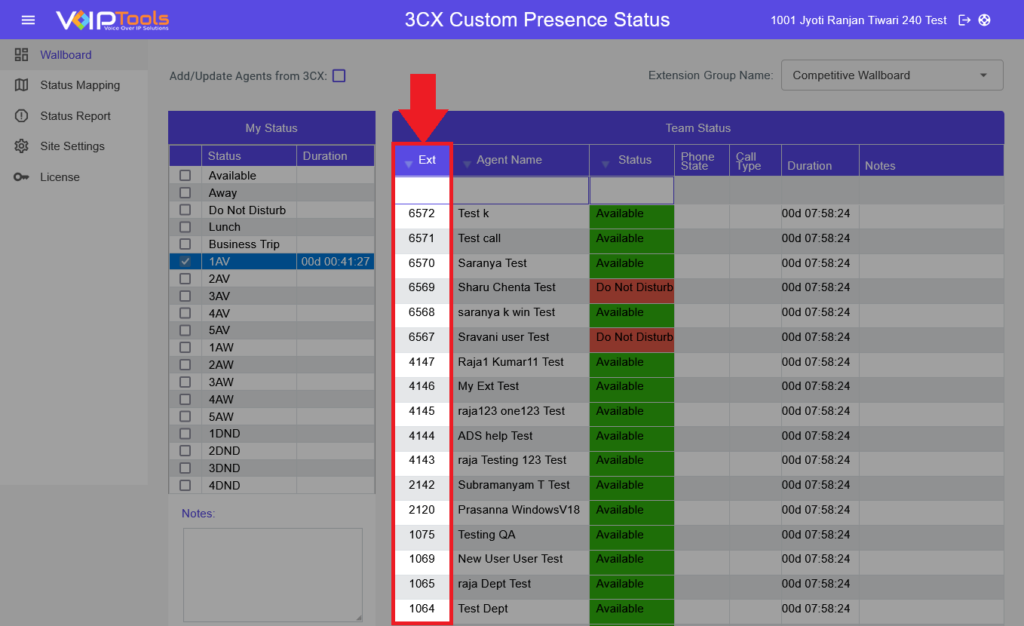
 button.
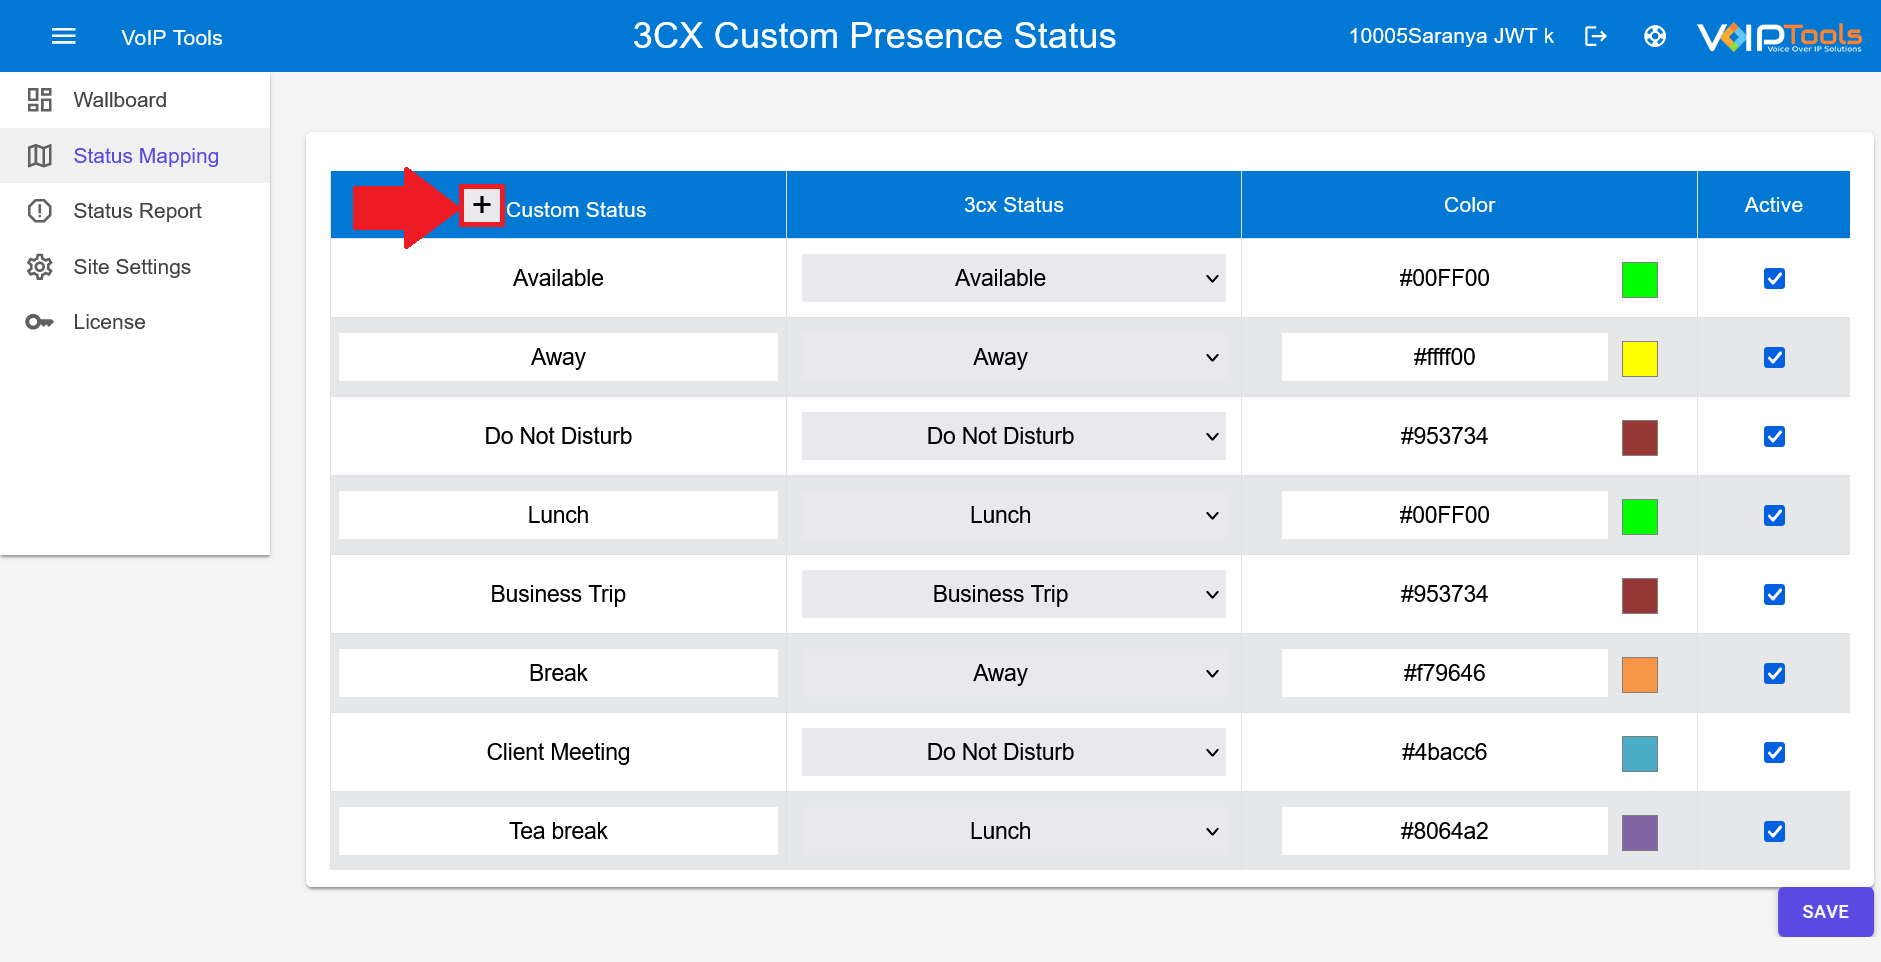
 or enter the start date and time.