Introduction #
The 3CX Custom Call Router CFD is an indispensable tool within the 3CX system, tailored to optimize call handling. Users employ this solution to efficiently direct incoming calls, personalize call experiences based on numbers or area codes, and enhance customer service by swiftly connecting callers to the right agents. Its role in streamlining communication processes, reducing wait times, and ensuring calls reach their intended destinations promptly makes it a crucial asset for maximizing productivity and delivering exceptional service.
Overview of the Procedure: #
 | Configure Default Tables | Create 3CX Custom Call Router CFD in SQL Server Management Studio, allowing table editing and automated ID generation. |
 | Assign Custom CFD to an Inbound Rule | Configure 3CX Console Management for inbound calls by setting up rules directing calls to the Custom CallRouter during and after office hours for efficient call flow management. |
Step 1: Configure Default Tables #
- Log in to Microsoft SQL Server Management Studio with your credentials.
- In the Object Explorer Panel, expand the 3CX Custom Call Router CFD dropdown.
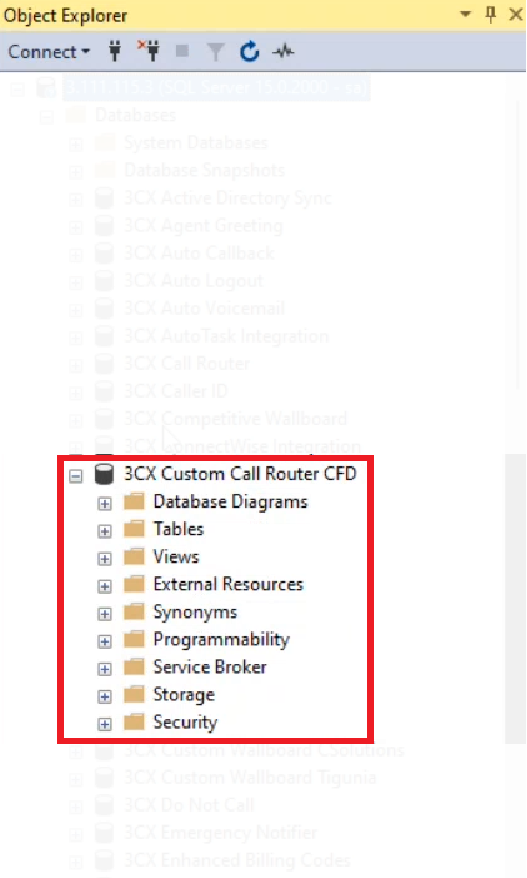
- Expand the Tables folder to view the default tables.
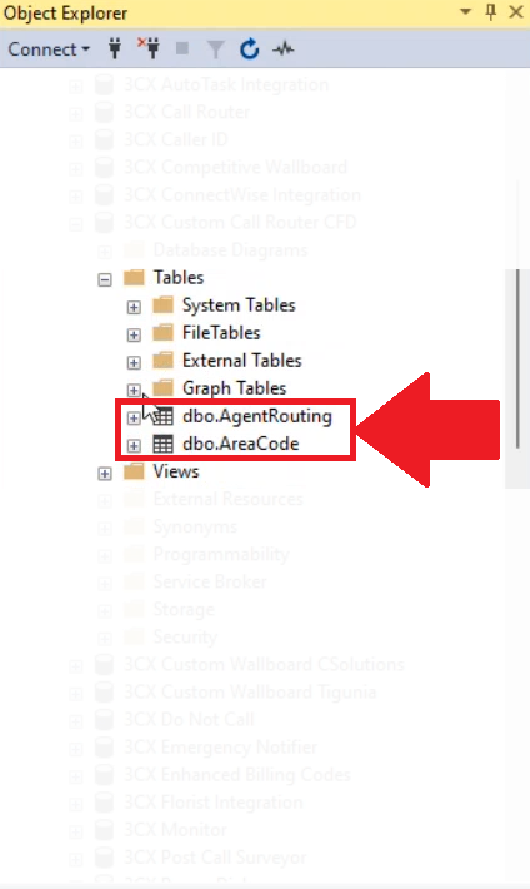
- Right-click the dbo. Agent Routing option and select Edit Top 200 Rows option.
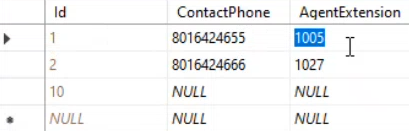
- Enter the details in the Contact Phone and Agent Extension fields. The script generates ID automatically.
- Contact Phone is the
- Agent Extension is the
- Right-click the dbo. Area Code option and select Edit Top 200 Rows option.
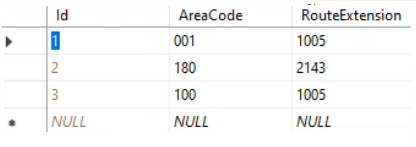
- Enter the details in the Area Code and Route Extension fields. The script generates ID automatically.
- Area Code is the
- Route Extension is the
NOTE:
If you have more than 200 records, then you need to update or insert records using the SQL command. Click here to know the procedure.
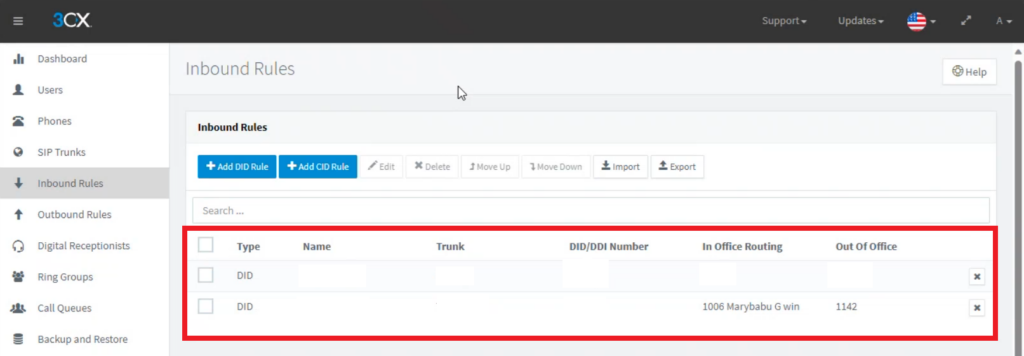
Step 2: Assign Custom CFD to an Inbound Rule #
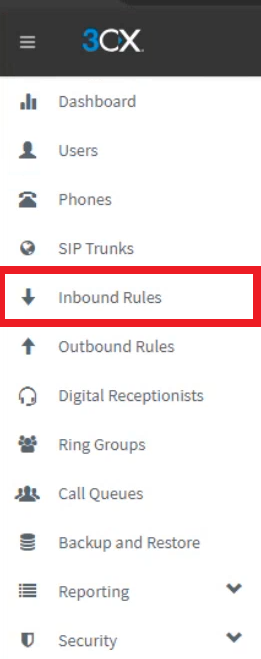
- Open the 3CX Console Management. In the Left Side Panel select the Inbound Rule menu.
- Select the desired inbound rule number to add the custom CFD.
- In the Route Calls To section, do the following tasks,
- In the Destination For Calls During Office Hours dropdown, select the Send Calls To Call Flow Apps option and in the File Selection dropdown, select the Custom_Callrouter.Main option.
- In the Destination For Calls After Office Hours dropdown, select the Send Calls To Call Flow Apps option, and in the File Selection dropdown, select the Custom_Callrouter.Main option.
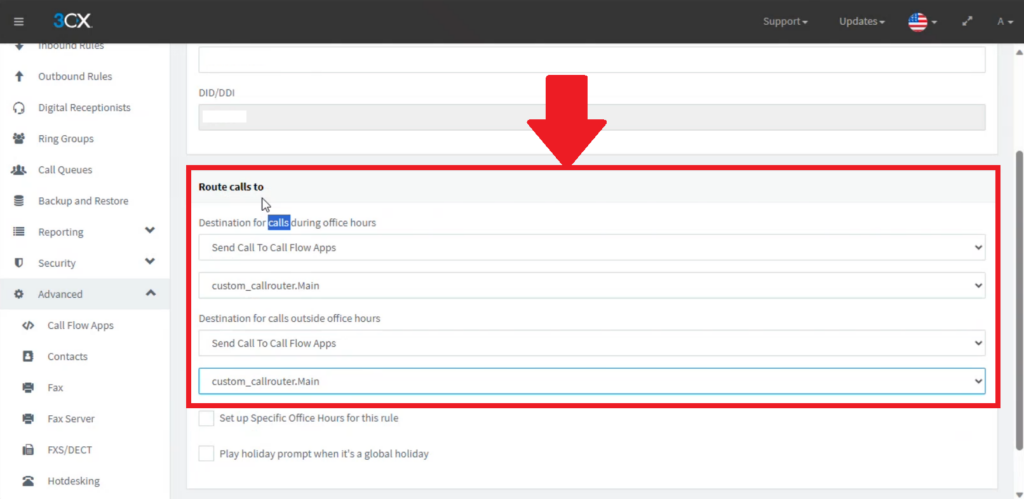
- Scroll up and click the OK button to save your changes.

You can view the custom CFD in the Inbound Rules screen.

Database Update Procedure #
If you have more than 200 records, follow the procedure,
- Copy and paste the following command to insert data into the table “AgentRouting” table with a phone number ‘1234567890’ and agent extension ‘1234’.
USE [3CX Custom Call Router CFD]
GO

INSERT INTO [dbo].[AgentRouting]
           ([ContactPhone]
           ,[AgentExtension])
     VALUES
           ('1234567890'
           ,'1234')
GO- Copy and paste the following command to insert data into the ‘AreaCode‘ table. This command adds a record with the area code ‘911’ and its corresponding route extension ‘1000’.
USE [3CX Custom Call Router CFD]
GO

INSERT INTO [dbo].[AreaCode]
           ([AreaCode]
           ,[RouteExtension])
     VALUES
           ('911'
           ,'1000')
GO- Copy and paste the following command to modify the ‘AgentRouting’ table. The command updates the contact phone to ‘12345021’ and the agent extension to ‘1111’ where the ID is 1.
USE [3CX Custom Call Router CFD]
GO

UPDATE [dbo].[AgentRouting]
   SET [ContactPhone] = '12345021'
      ,[AgentExtension] = '1111'
WHERE Id=1
GO- Copy and paste the following command to adjust the ‘AreaCode’ table. This command modifies the area code to ‘112’ and its corresponding route extension to ‘2142’ where the ID is 3.
USE [3CX Custom Call Router CFD]
GO

UPDATE [dbo].[AreaCode]
   SET [AreaCode] = '112'
      ,[RouteExtension] = '2142'
WHERE Id=3
GO