Introduction #
Experience the convenience of 3CX Audio Scheduler, a versatile tool that allows you to schedule tones or alarms across your paging system and phones effortlessly. Enhance workplace communication by effectively notifying employees of important events such as break times and shift changes. Seamlessly manage multiple alarms throughout the day, ensuring optimal efficiency and organization.
Customize your auditory experience with 3CX Audio Scheduler to meet your specific needs. Tailor tones for fire alarms, tornado warnings, or shift change notifications. This feature keeps your staff alert and informed, fostering a safe and productive environment.
Industries like schools, airports, and shift-based organizations can significantly benefit from the comprehensive functionality of the 3CX Audio Scheduler. Streamline operations and improve coordination within educational institutions, airports, and any environment that follows shift schedules. Unleash the true potential of your workplace communication with this indispensable solution.
Why 3CX Audio Scheduler? #
 | SCHEDULE NOTIFICATIONS | Enhance your communication efficiency by scheduling the playback of tones or alarms on your paging system and phones. Take full advantage of the seamless scheduling capabilities to ensure timely delivery of custom tones or alarms, effectively optimizing workplace productivity. |
 | SIMPLE CONFIGURATION | Intuitive web portal lets you schedule and manage your paging notifications with ease. You have complete control with user-friendly controls and a straightforward interface, allowing you to efficiently coordinate and customize your notifications according to your specific requirements. |
 | CUSTOM AUDIO | Elevate your communication strategy by uploading personalized audio files for your announcements or notifications. Integrate custom audio files to make your messages distinctive and grab the attention of your audience. |
 | AUTOMATE NOTIFICATIONS | Boost your organizational efficiency by utilizing our scheduling capabilities to seamlessly plan and deliver an unlimited number of notifications or messages. |
What’s New? #
- Compatible with 3CX Version 15-16
- Greatly simplified administration of scheduled audio
- Upload custom audio files
- Play an unlimited number of different audio files
- You can page to any device type including traditional overhead paging, phones, PA1 (and similar products)
- The improved installer allows you to add, edit, delete, and run scheduled audio directly from the configuration screen
Prerequisites #
Before you begin with the installation steps mentioned in this guide, you need to ensure that your computer meets the minimum requirements mentioned below for installing the 3CX Audio Scheduler.
- 3CX Version V18
- Microsoft .Net 4.7.2 or above
- Internet Information Server (IIS) 7.0 or above
- VoIPTools Relay Agent (Free)
NOTE:
When installing IIS, be sure to install Basic Authentication, .Net Extensibility, and ASP.Net 4.X
Installation overview #
 | DOWNLOAD SOFTWARE | There are several prerequisites that must be installed prior to installing the 3CX Audio Scheduler. These prerequisites include Microsoft Internet Information Server (IIS) and Microsoft SQL Server |
 | INSTALL PREREQUISITES | This User Guide contains step-by-step instructions to successfully install the 3CX Audio Scheduler. Begin by extracting the installer from the downloaded zip file (Step 1 above), then run the setup program named AudioSchedulerInstaller.exe |
 | INSTALL 3CX AUDIO SCHEDULER | This User Guide contains step-by-step instructions to successfully install 3CX Audio Scheduler. Begin by extracting the installer from the downloaded zip file (Step 1 above), then run the setup program named AudioSchedulerInstaller.exe |
 | REGISTER YOUR SOFTWARE | You must register your license key to activate 3CX Audio Scheduler. Your license key is included in your order confirmation email, and can also be found in your order history on our website. |
Step By Step Installation Procedure #
The following section guides you through a detailed walk-through of the installation process:
Step 1: Download 3CX Audio Scheduler #
- Find the software download link in the Order Confirmation Email, or you can find it in your order history on our website and download the 3CX Audio Scheduler application.
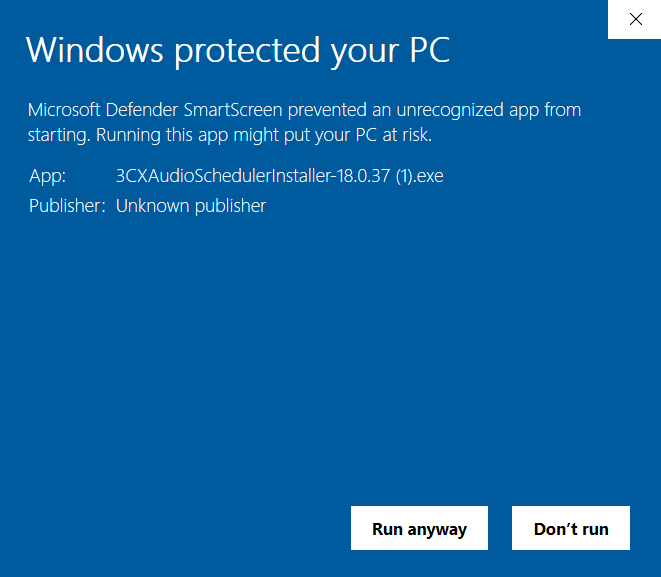
- In the Microsoft Defender SmartScreen, click the More Info option.
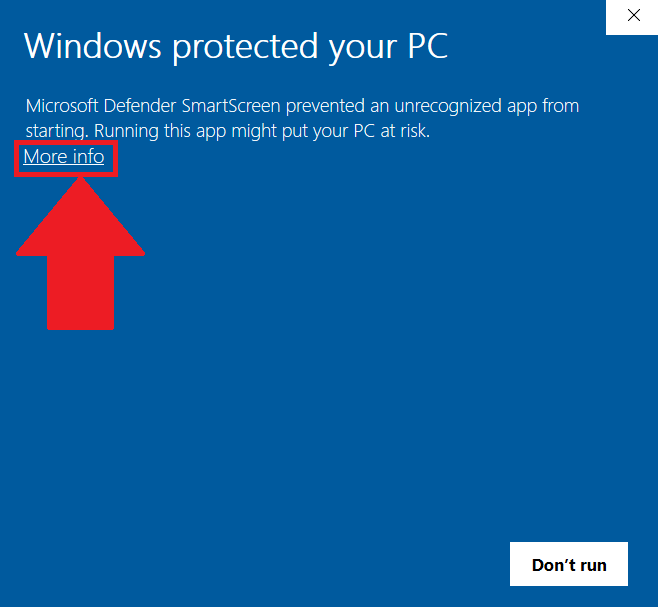
- Click the Run Anyway option to start the installation.
Step 2: Install the prerequisites #
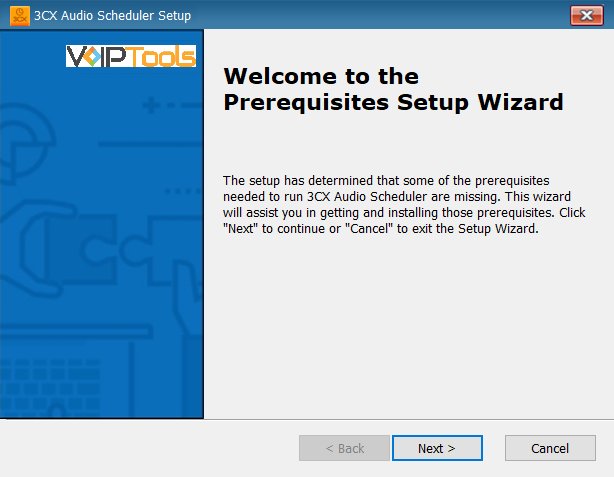
Click on the software installer downloaded in Step 1. The installation wizard will automatically identify the prerequisites and assist you with each installation required to 3CX Audio Scheduler.
- Click the downloaded installer executable to launch the Prerequisites Setup Wizard and click Next.
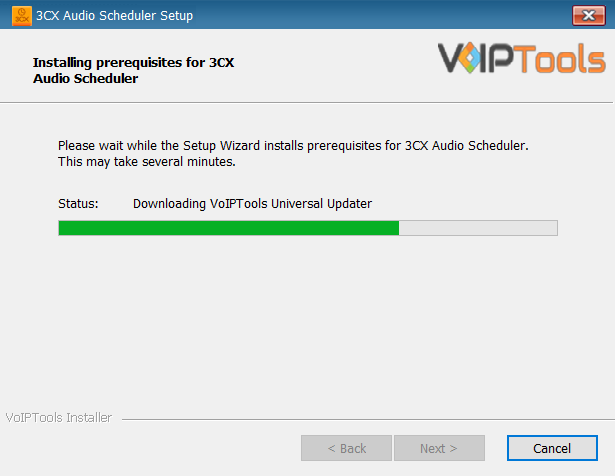
- In the Prerequisites window, install all the required prerequisites identified by the installer, or select/ unselect the applications based on your requirements and click Next to continue.
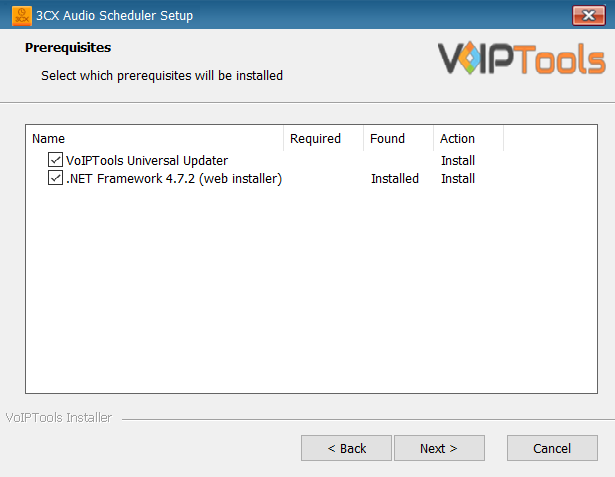
The installer will download and install the selected applications. It may take several minutes to complete.
- Click Yes in the Reboot Confirmation message box to reboot your computer.
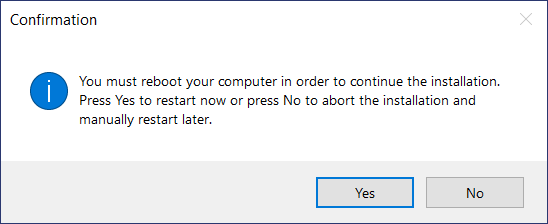
NOTE:
You must reboot your device to continue with the installation process.
Step 2: Start the Installation #
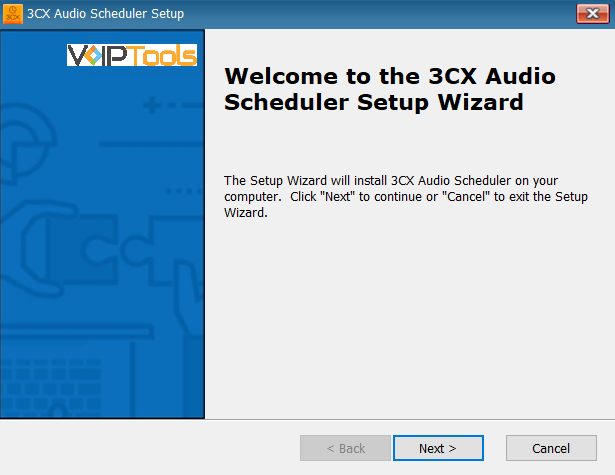
- Click the downloaded installer executable to start the 3CX Audio Scheduler setup wizard.
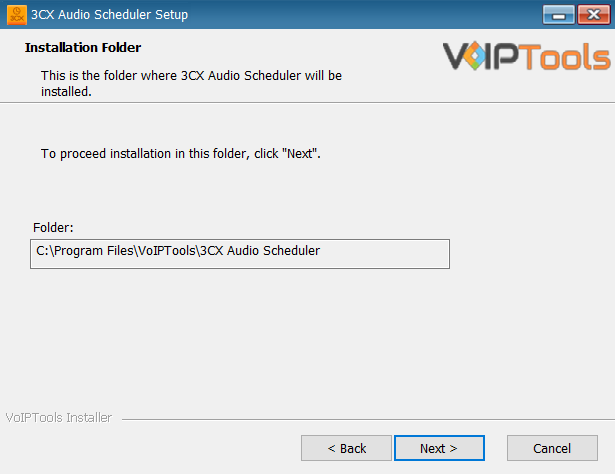
- On the Select Installation Folder window, view the installation folder. You cannot change the installation path.
Step 4: Test Relay Settings #
- In the 3CX Relay Services window, in the Relay Host field, enter the FQDN of your 3CX server.
- Enter 8801 in the Relay Port field.
- Enter the public key you took from VoIPTools Relay services in the Public Key text area.
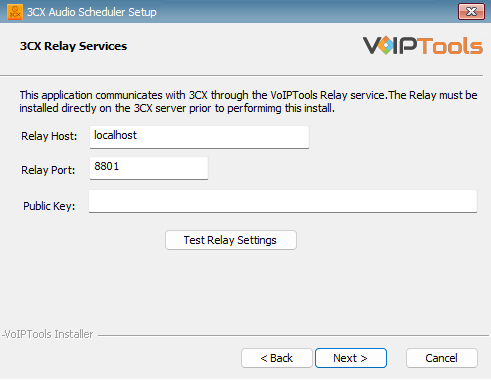
- Click the Test Relay Settings to confirm ‘3CX Audio Scheduler’ can communicate with the Relay services running on the 3CX server.
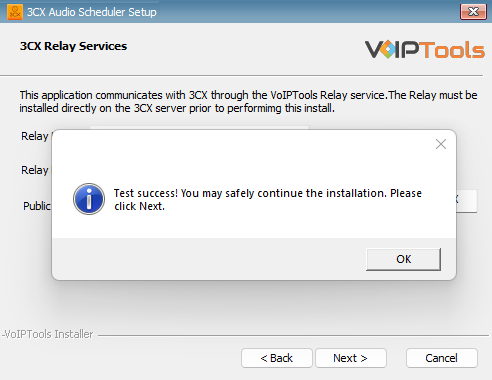
- If the ‘3CX Audio Scheduler’ is successfully able to communicate with the Relay services that run on the 3CX server, a Success message box appears. Click OK. If the test fails, you will not be able to continue until communication with the relay is established.
- Click Next to continue with the installation.
If the test was unsuccessful:
- confirm you have the correct firewall port open (default TCP 8801) on the 3CX server and the firewall protecting the 3CX server.
- confirm that you have entered the correct IP address / FQDN for the 3CX server.
- confirm that 3CX Audio Scheduler and the Relay are using the same port and protocol.
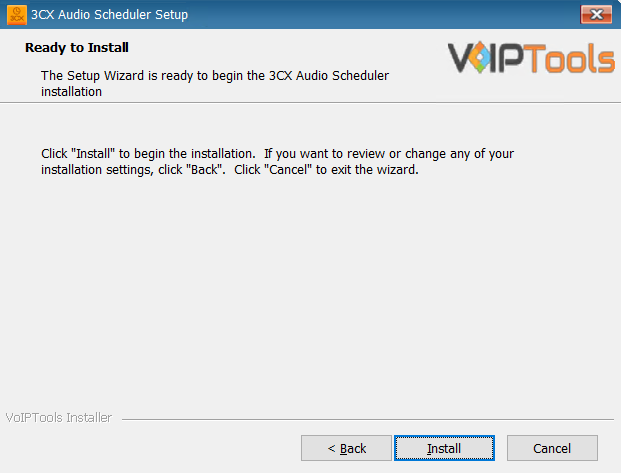
Step 6: Installing 3CX Audio Scheduler #
- In the Ready to Install window, click Install to start the installation of the ‘3CX Audio Scheduler’.
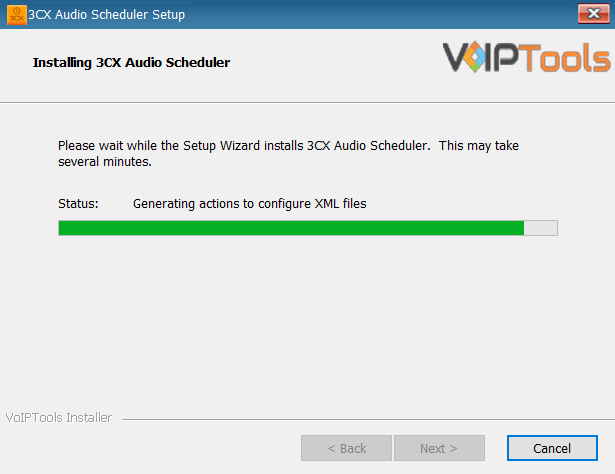
The application installation progresses. This may take several minutes to complete.
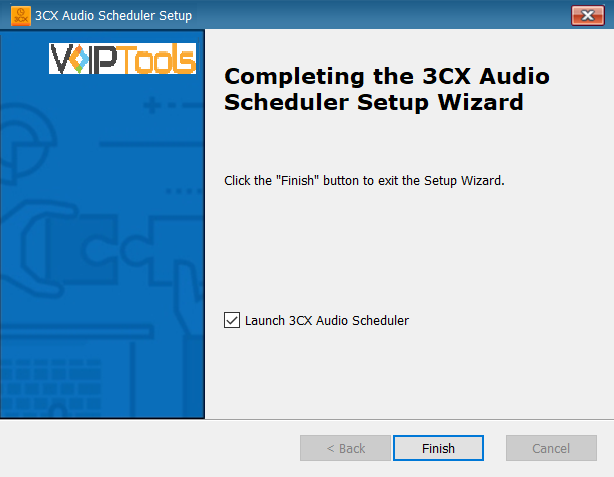
- Check the Launch 3CX Audio Scheduler check box and then click Finish to close the setup wizard and open the configuration screen. You can uncheck the box to close the installer without opening the configuration screen.
Step 7: Register your software #
To ensure the authorization of your license key, it is necessary to complete the registration process. By registering with VoIPTools, you gain access to a range of benefits:
| Key Replacement Assistance | In the unfortunate event of a lost license key, registering with VoIPTools lets us provide you with a replacement key promptly. |
| Product Updates and Reminders | By registering, you will receive timely notifications from VoIPTools regarding any product updates. Additionally, we will send reminders when your key is nearing its renewal date, ensuring uninterrupted access to our services.s |
Follow the procedure to register your software,
- Double-click 3CX Audio Scheduler
 on your desktop.
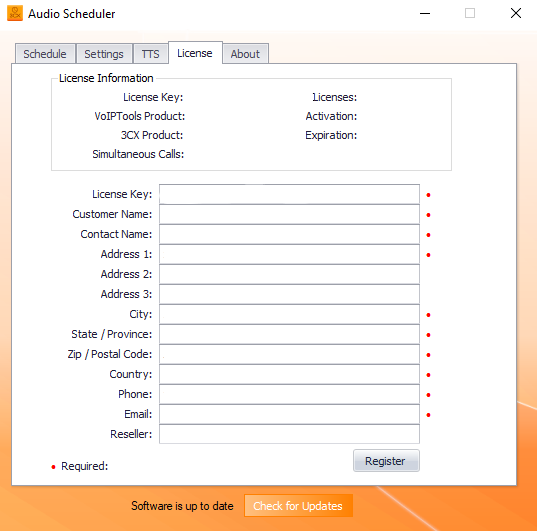
 - On the Configuration application, click the License tab.
- In the License Key field, enter the valid license key.
- Enter appropriate details in all the other fields of the page Click Register to complete your registration.
The license key permits you to install the software on one computer. This is not free software.
Configuration Screen #
The Audio Scheduler configuration screen enables you to perform various activities as mentioned below:
- Register Software
- Configure the paging dial code
- Upload/ delete/ play audio files
- Create/ edit/ delete/ run the scheduled tasks
- Configure the Text-To-Speech settings
Settings tab #
The Settings screen enables you to set a paging code that causes the phone to auto-answer, set a path for ‘Audio Folder’ to store audio files and make changes to the audio files from the 3CX Audio Scheduler.
3CX Dial Code #
When dialing a phone, using the paging dial code will cause the phone to auto-answer (provided it is provisioned correctly).
- Under the 3CX Dial Code section in the Paging Dial Code field enter a valid dial code already configured in the 3CX Management console.

Dial codes are configured in the 3CX Management console at:
- V12.5: Settings? Advanced? Dial Codes? Paging
- V14: Settings? PBX? Dial Codes? Paging
Audio Files #
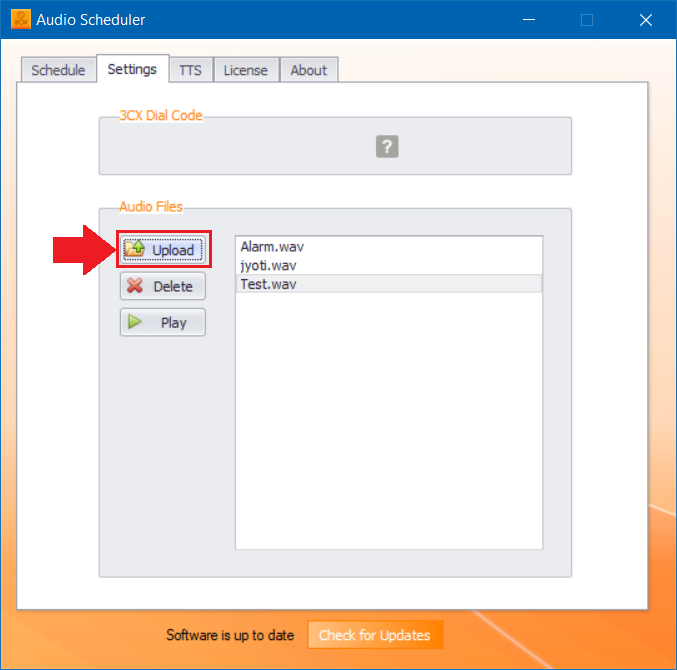
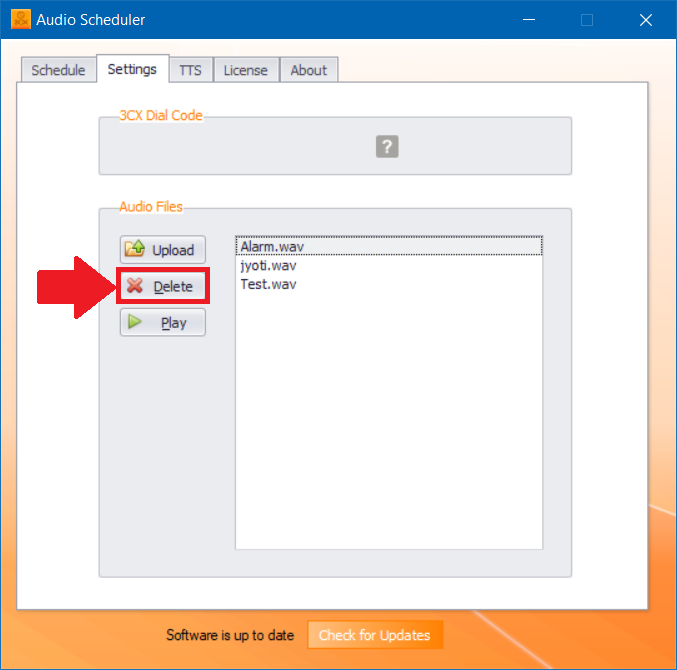
In the Audio Files section, you can upload audio files to the system. This will grant you easy access and playback options for the uploaded audio files within the system. Secondly, you can delete any existing audio files. This way, you ensure the system stays organized, keeping only the relevant audio content for your use.
Upload Audio File #
Follow the procedure to Upload an Audio File,
- In the Settings tab, click the Upload button.
- Browse for the audio file you want to upload and double-click the audio file to upload it to the application.
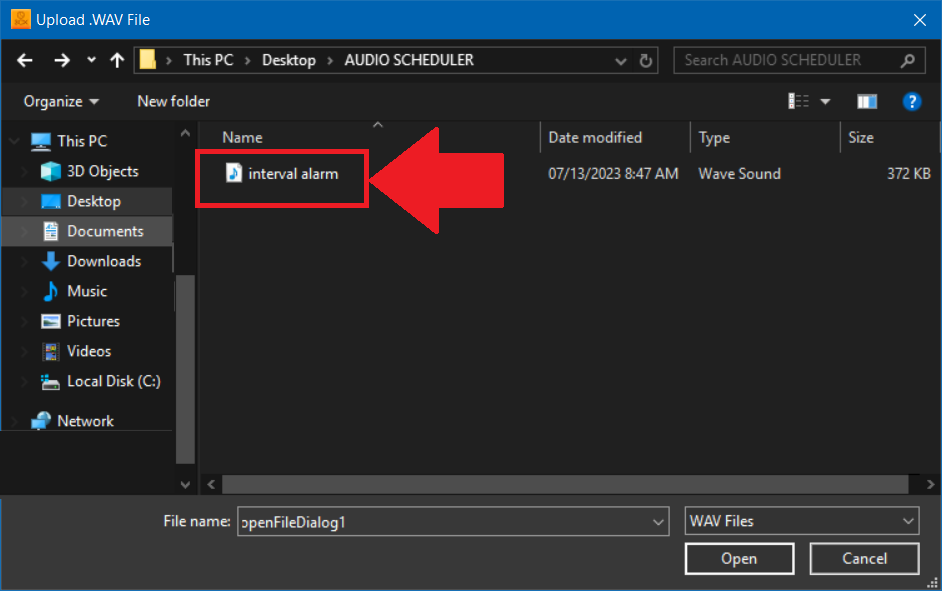
You can only upload .WAV audio files. Click the link to access 3CX’s audio file conversion feature to convert your audio files into .WAV format.
Delete Audio File #
Follow the procedure to Delete the Audio File,
- On the Settings tab in the Audio Files section, select the audio file that you want to delete.
- Click the Delete button.
Schedule tab #
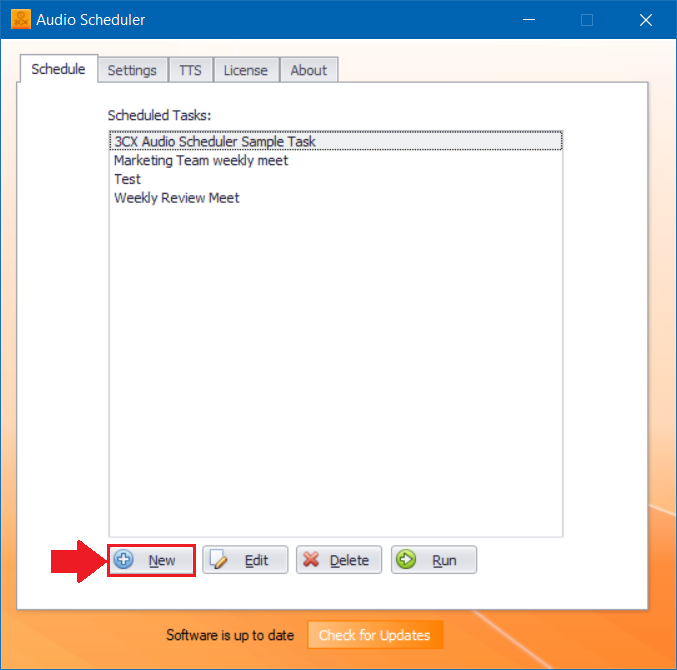
The Schedule tab enables you to create new scheduled tasks and delete, edit or run existing scheduled tasks.
Create New Scheduled Task #
- In the Schedule tab and in the toolbar, click the New
 button.
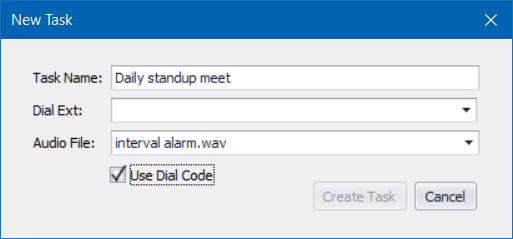
- In the New Task dialog box, and in the Task Name field, enter the name for the scheduled task.
- From the Dial Ext dropdown, select the extension for which you want to schedule the new scheduled task.
- From the Audio File dropdown, select the audio file that you want to play for this new scheduled task.
- If you want the phone to auto-answer the call, check the Use Dial Code box.
- Click Create Task to create a new task with the specified settings.
- In the Scheduled Task Properties dialogue box fill in the necessary fields and click OK.
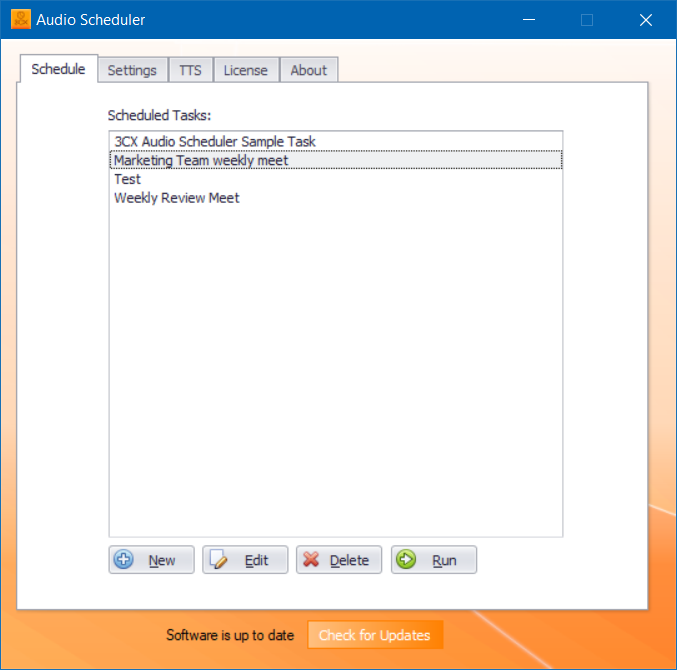
Edit Scheduled Task #
- In the Schedule tab and from the Scheduled Tasks list box, select the scheduled task that you want to edit.
- From the toolbar, click the Edit button.
- Make the necessary changes in the Schedule Task Properties dialog box and click OK to save your changes.
Scheduled Tasks Properties #
The Scheduled Tasks Properties offer you comprehensive control and configuration options for your scheduled tasks, ensuring smooth task execution based on your specified triggers and conditions. The Scheduled Tasks Properties box consists of the following tabs,
| GENERAL TAB | Set the overall properties of the task, including its description, user account, and other task behavior settings. |
| TRIGGERS TAB | Specify the conditions that will trigger the task to run. You can view, add, edit, or delete triggers for the task. |
| ACTIONS TAB | Determine the actions the task will perform when executed. You can add, edit, or delete actions based on your requirements. |
| CONDITIONS TAB | Control whether the task runs based on certain conditions, such as idle, power, or network settings. |
| SETTINGS TAB | Specify additional settings that affect the behavior of the task, like running on demand, handling missed tasks, and stopping or deleting tasks. |
| RUN TIMES TAB | View the scheduled tasks that are ready to run at a specific time range. |
| HISTORY TAB | View logs of previously executed scheduled tasks, providing details about their execution. |
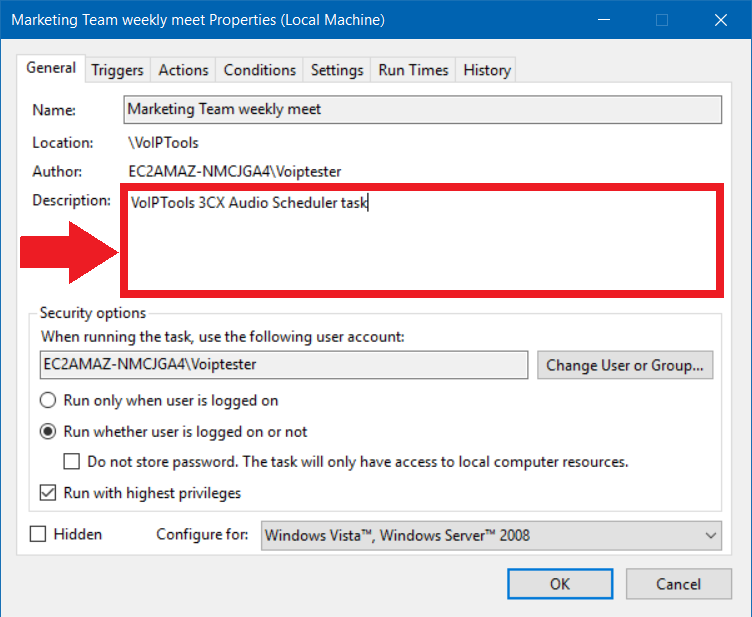
General Tab #
The General tab is the central hub for configuring a task’s properties. You can provide a description, select the user account, modify execution settings, run the task with the highest privileges, manage passwords, set operating system preferences, and hide the scheduled tasks.
Task Description #
- In the Schedule Task Properties dialog box and in the Description text field, enter the description for the task.
- Click the OK button to save your settings.
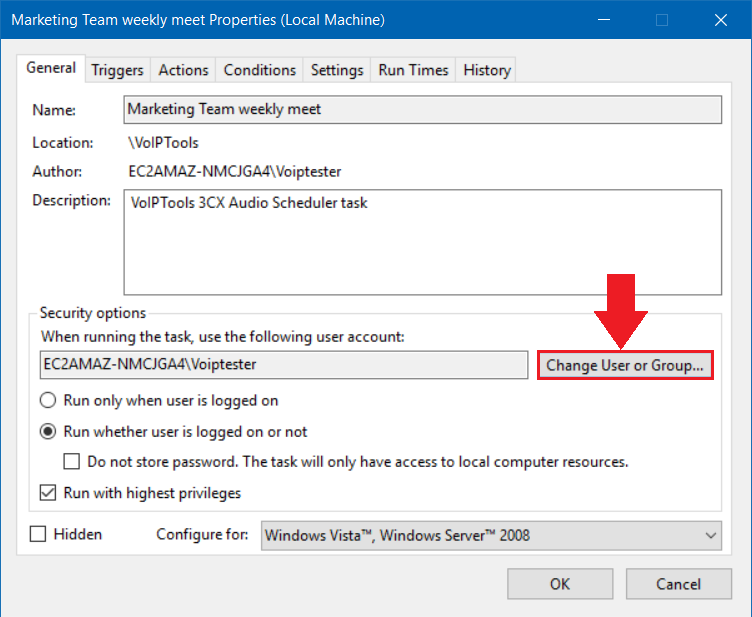
Select User Accounts #
- On the Scheduled Task Properties box in the Security Options section, select the Change User Or Group button to select a different user or group account for a task to run under.
- Click the OK button to save your settings.
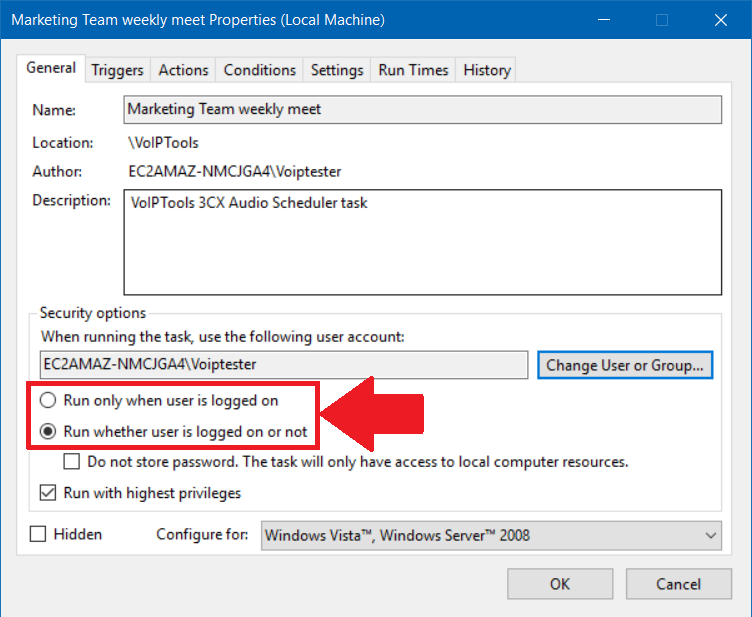
Execution settings #
Depending on your preferences, you can choose to run the task interactively when the user is logged on or have it run regardless of the user’s login status.
| EXECUTION OPTION | PURPOSE |
|---|---|
| Select the Run Only When User Is Logged On option | to run the task interactively |
| Select the Run Whether User Is Logged On Or Not option | to run the task when the user is logged in or not. |
NOTE:
When you select the Run Whether User Is Logged On Or Not option, you may be prompted to enter account credentials while saving the task, regardless of whether you checked the Do not store password box.
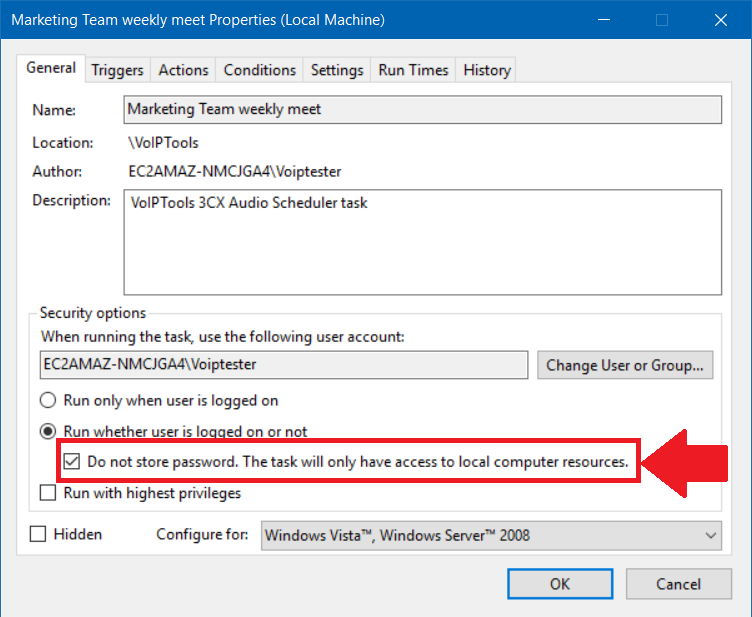
Manage Password #
- On the General tab in the Security Options section check the Do Not Store Password box if you do not want the Task Scheduler to store the credentials on the local computer.
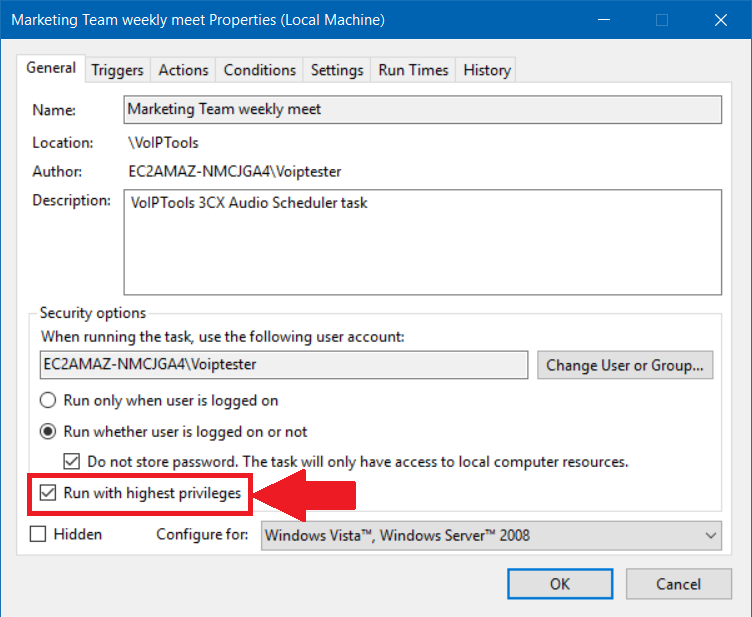
Run The Tasks With Highest Privileges #
- Check the Run With Highest Privileges box to run the task registered using the Administrators group.
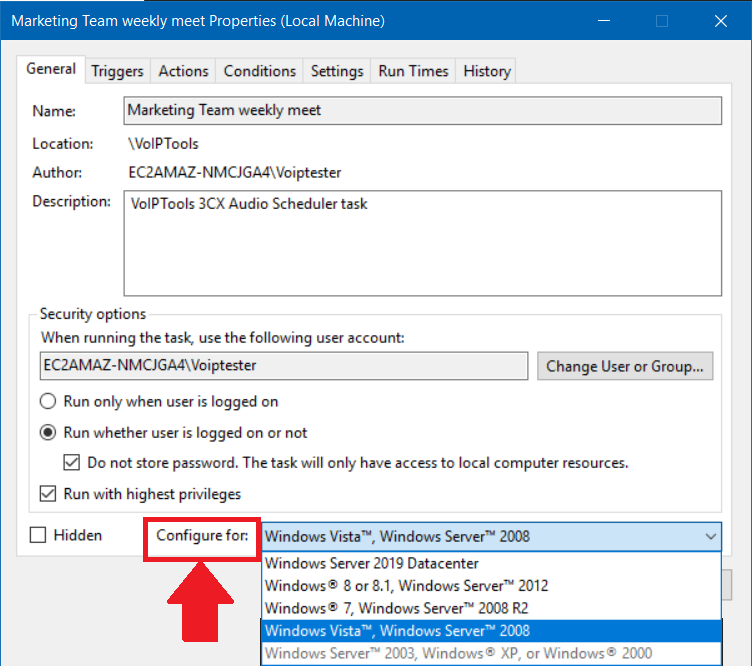
Set Operating System Preferences #
- In the Configure for dropdown select the operating system that the task is configured for.
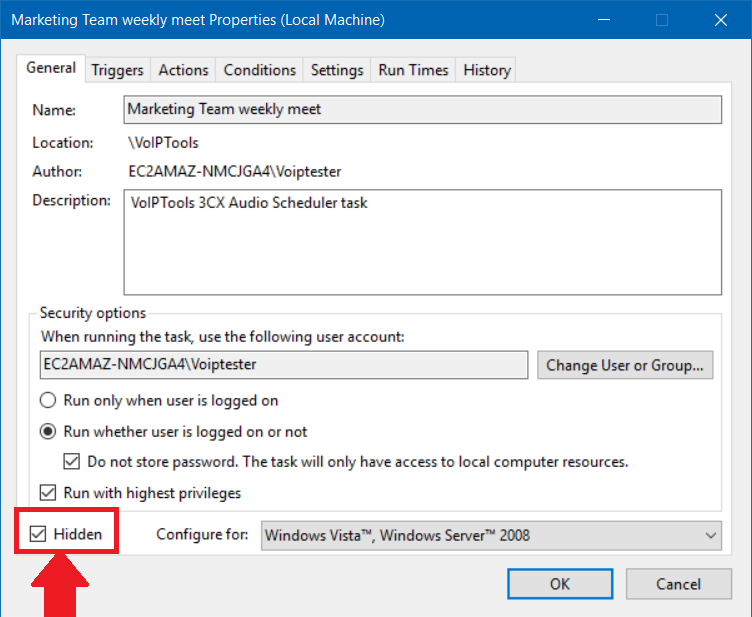
Hide The Task #
- On the General tab in the Security Options section, check the Hidden checkbox to hide the scheduled task.
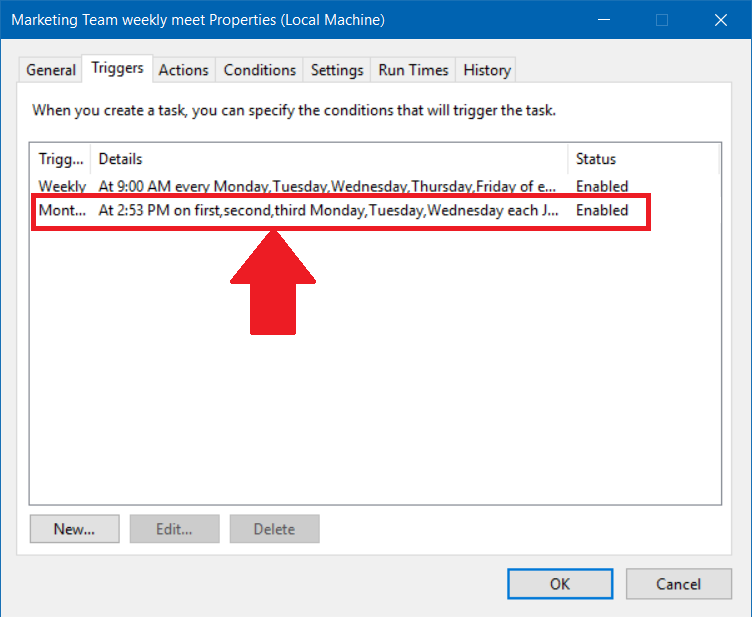
Triggers tab #
The Triggers tab is a crucial component in task configuration, enabling you to specify conditions that activate task execution. It provides an overview of existing triggers and allows adding new ones with customizable settings, such as scheduled times, user logins, system startup, and edit the existing triggers.
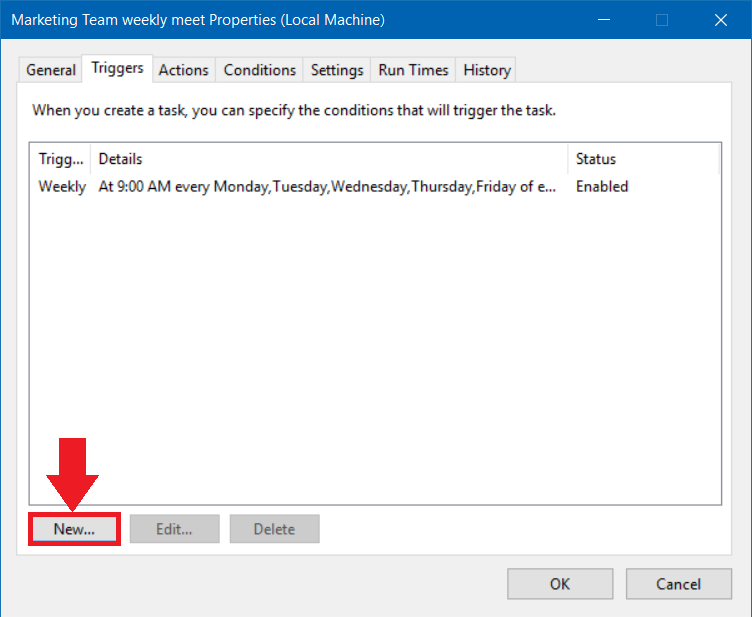
Add a New Trigger #
Follow the steps to Add a new Trigger,
- On the Scheduled Task Properties box in the Triggers tab, click the New button.
- In the New Trigger Settings box do the necessary configurations and click the OK button to create a new trigger.
You can view the new trigger that was added in the Triggers tab
Edit an Existing Trigger #
Follow the procedure to edit an existing trigger,
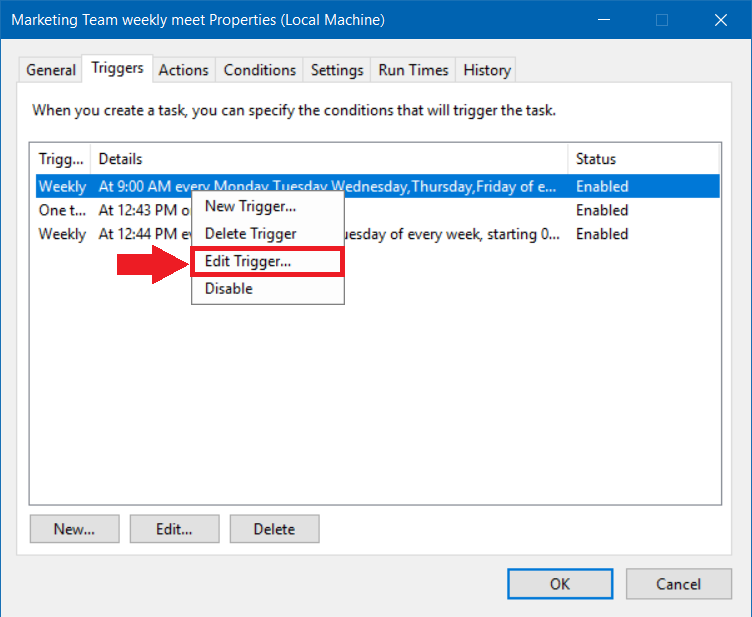
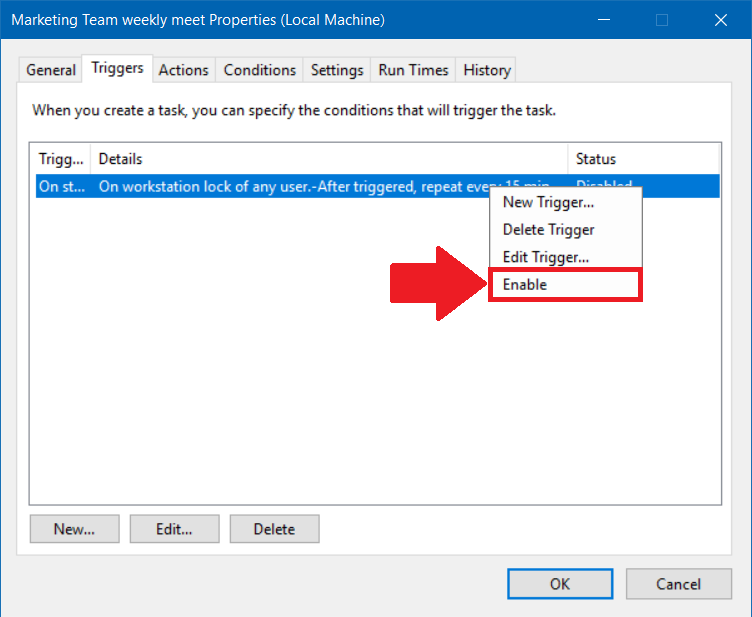
- On the Scheduled Task Properties box in the Triggers tab, select the desired trigger to edit and click the Edit button or you can right-click the desired trigger to edit and click the Edit option.
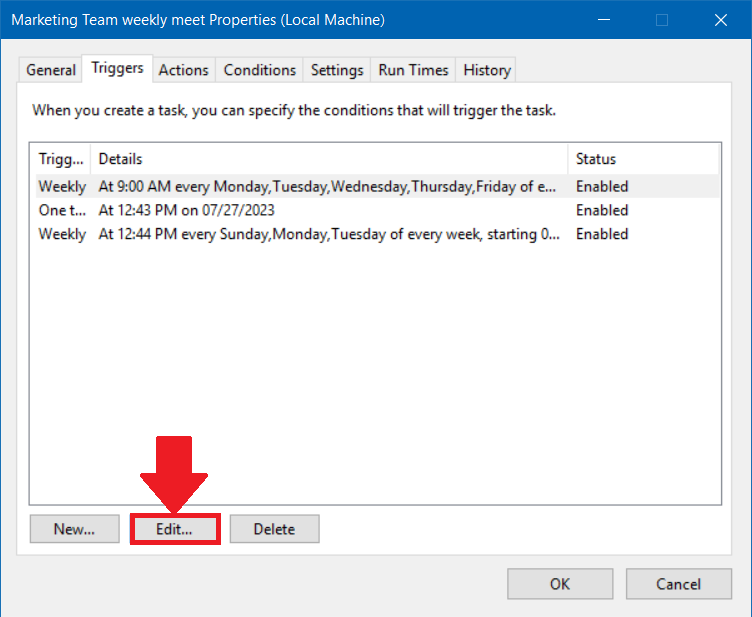
- In the Edit Trigger Settings box do the necessary trigger settings and click the OK button to save your trigger settings.
Edit Trigger/ New Trigger Settings box #
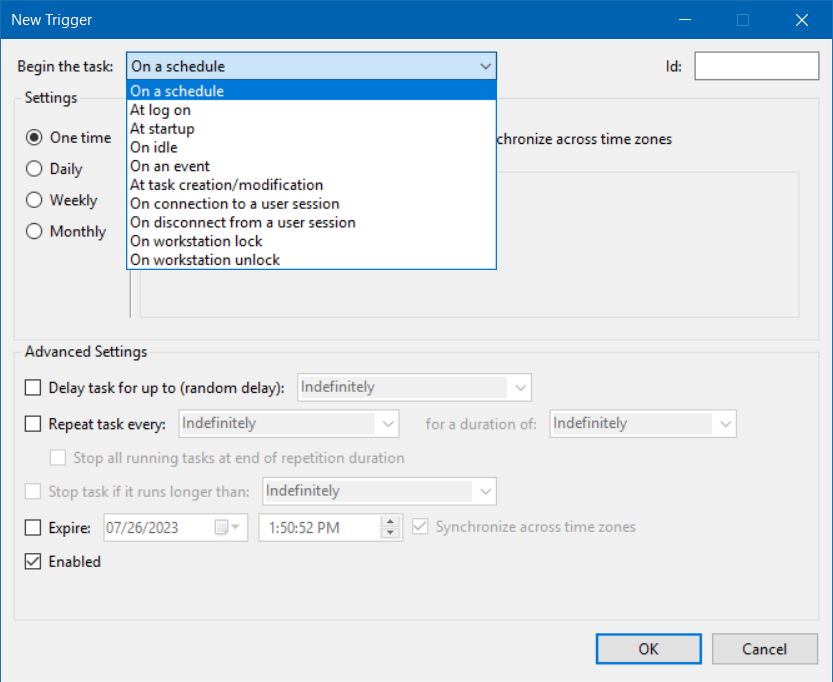
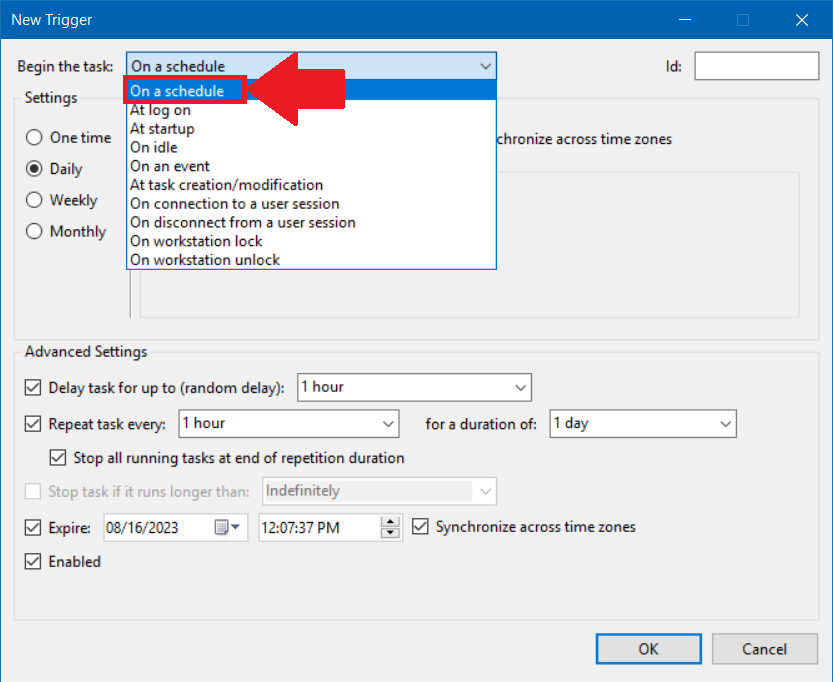
- In the Begin The Task list, select the desired option based on the following details
| BEGIN THE TASK OPTION | PURPOSE OF THE OPTION |
|---|---|
| ON A SCHEDULE | To run the task when the computer starts up. The only settings for this trigger are the ones described in the Advanced Settings section of the New Trigger dialog box. |
| AT LOG ON | To run the task when a user logs on to the computer, and the trigger’s settings allow you to specify that the task should be triggered when any user logs on the computer or when a specific user logs on. |
| AT START UP | To run the task when a user logs on to the computer, and the trigger’s settings allow you to specify that the task should be triggered when any user logs on to the computer or when a specific user logs on. |
| ON IDLE | To run the task after the computer enters an idle state, and the idle settings can be set from the Conditions tab in the Create Task or Task Properties dialog box. |
| ON AN EVENT | To run the task when specific event entries are added to an event log. |
| AT TASK CREATION/ MODIFICATION | To run the task as soon as it is created and when the task is modified. The only settings for this trigger are the advanced settings described in the Advanced Settings section of the New Trigger dialog box. |
| ON CONNECTION TO USER SESSION | To run the task when a user session is connected to the local computer or from a remote desktop connection. |
| ON DISCONNECT FROM USER SESSION | To run the task when a user session is disconnected from the local computer or from a remote desktop connection. |
| ON WORKSTATION LOCK | To run the task when the computer is locked. |
| ON WORKSTATION UNLOCK | To run the task when the computer is unlocked. |
- In the Settings section do the required changes. The Settings section has different options for each trigger type.
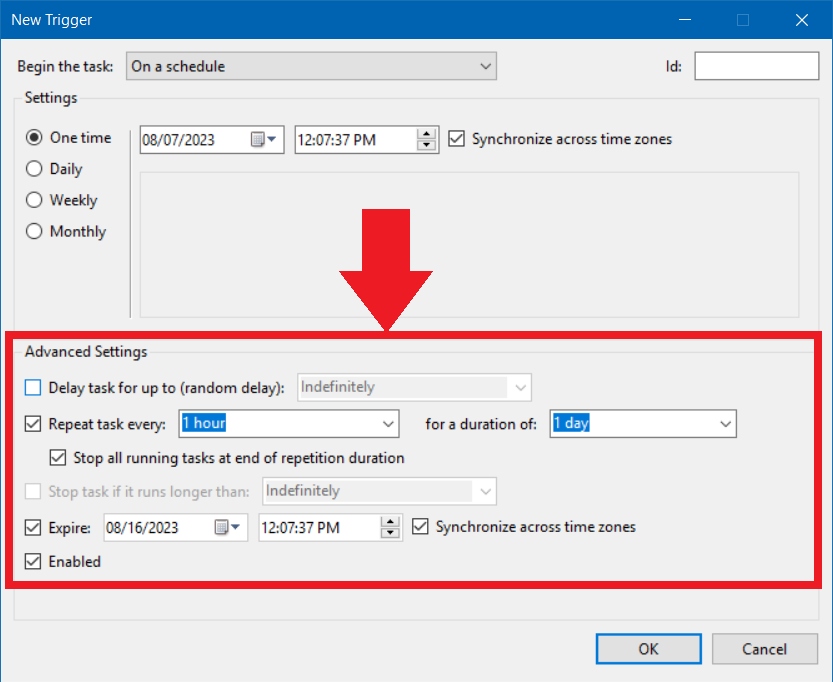
- In the Advanced Settings section, you can fine-tune your trigger settings. Click the OK button to save your trigger settings.
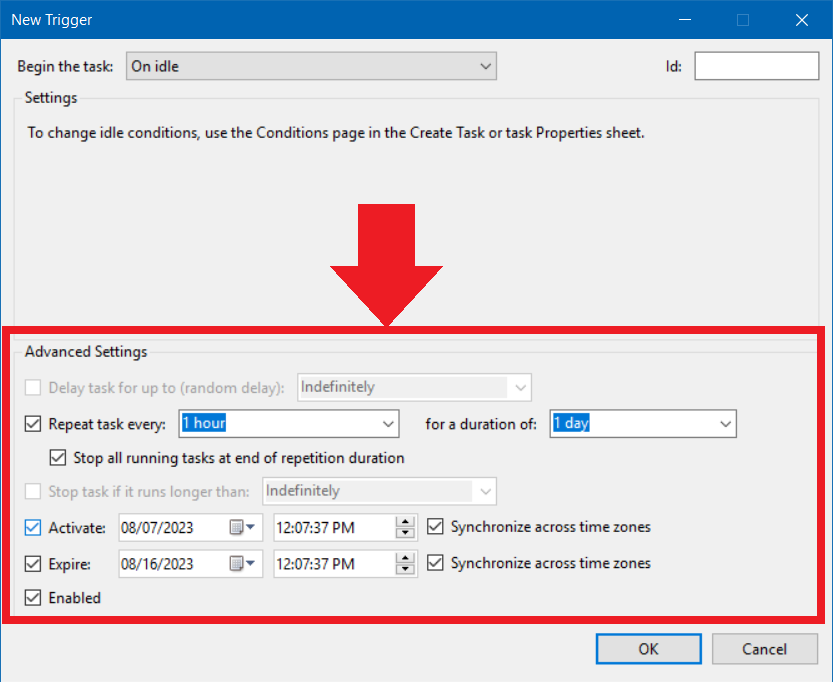
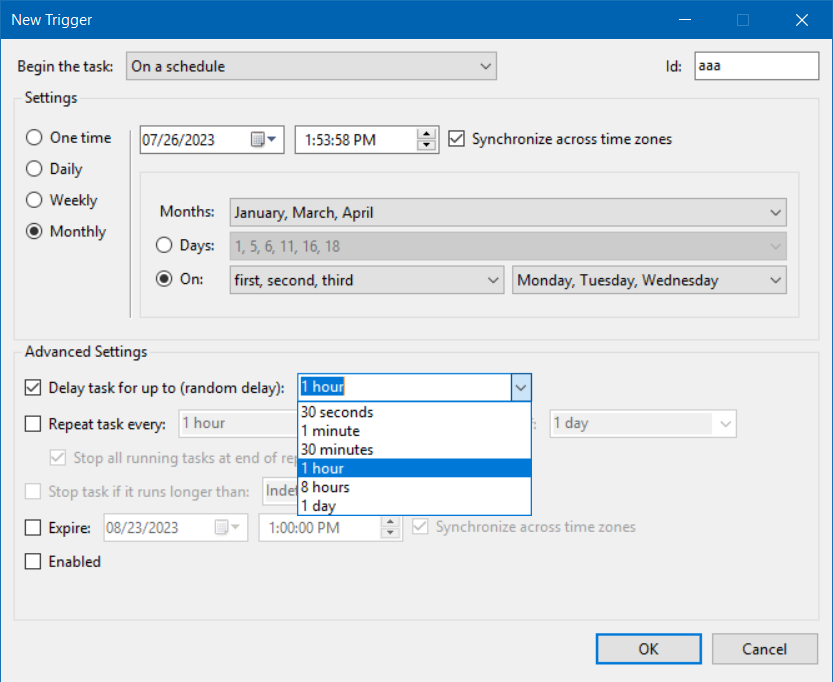
Edit Trigger/ New Trigger Settings box – Advanced Settings #
| TASK TO BE DONE | STEPS TO FOLLOW |
Set task delay time. # |
The task will run, wait for the time interval specified, and then run again. This cycle will continue until the duration time is met
|
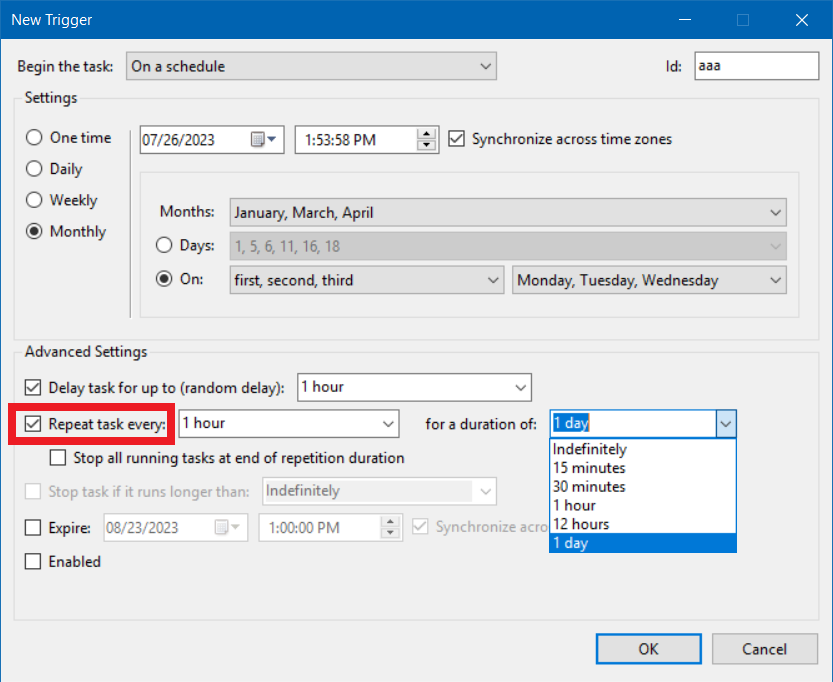
Set a repetition time interval # |
For example, if you want to repeat the task every hour for an entire day, select 1 hour in the Repeat Task Every list and select 1 Day in the For a Duration Of list. |
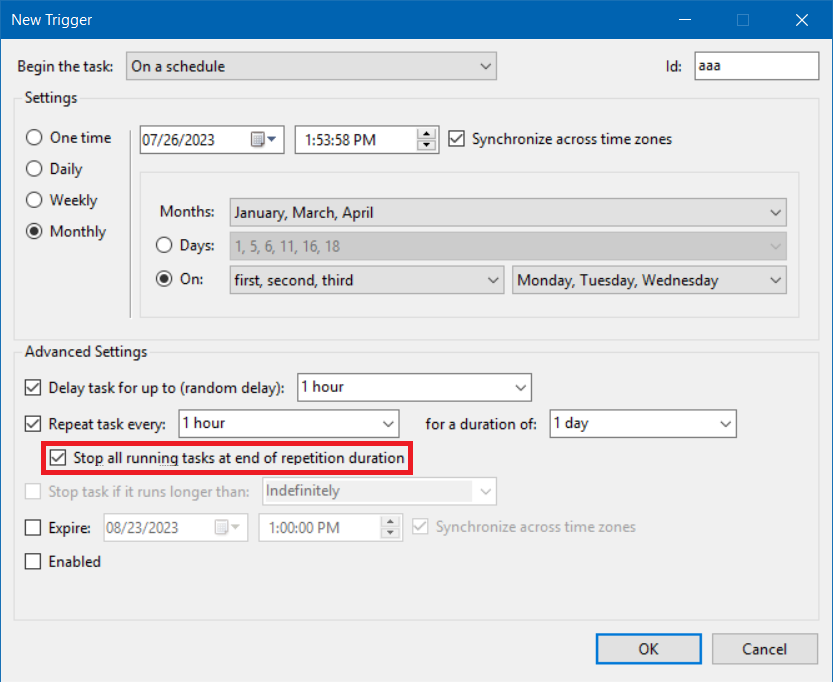
Limit task duration to stop long-running actions. # |
|
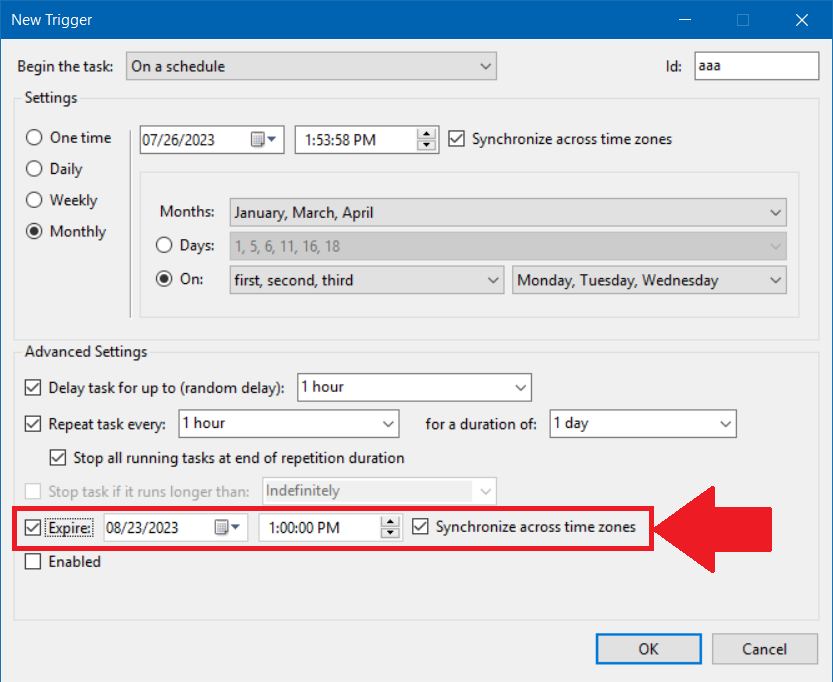
Expire the trigger # |
|
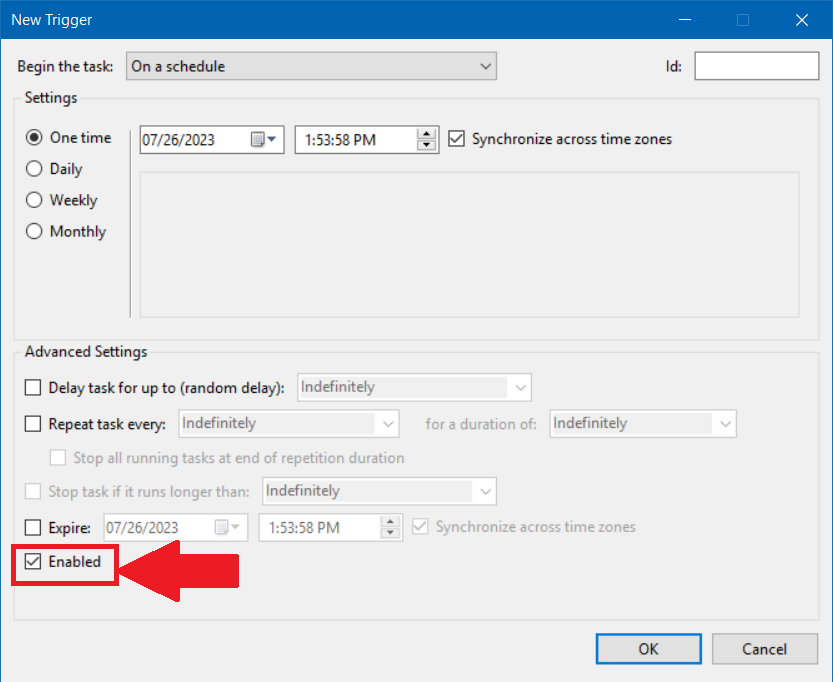
Enable the trigger # |
You can enable the trigger in either of the following ways,
|
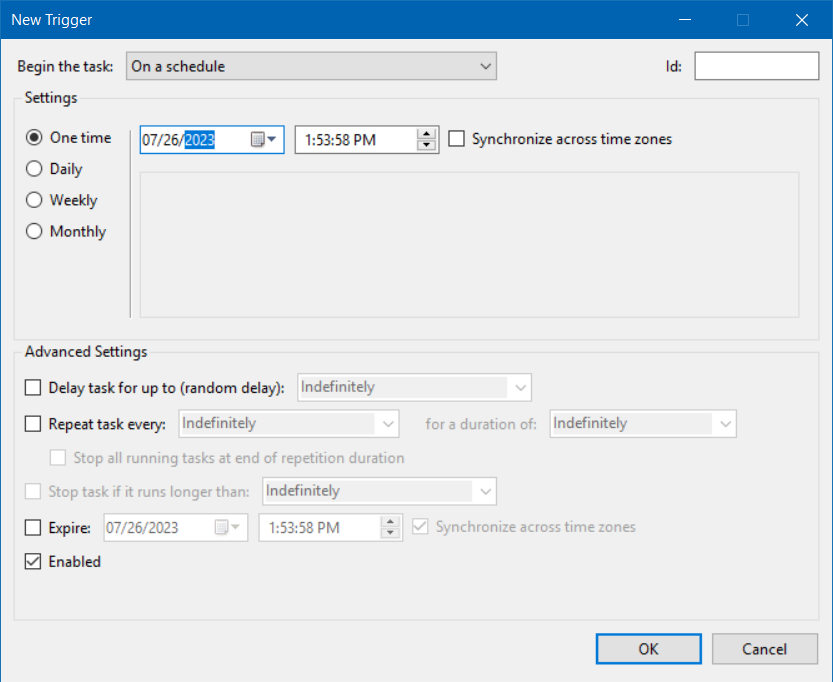
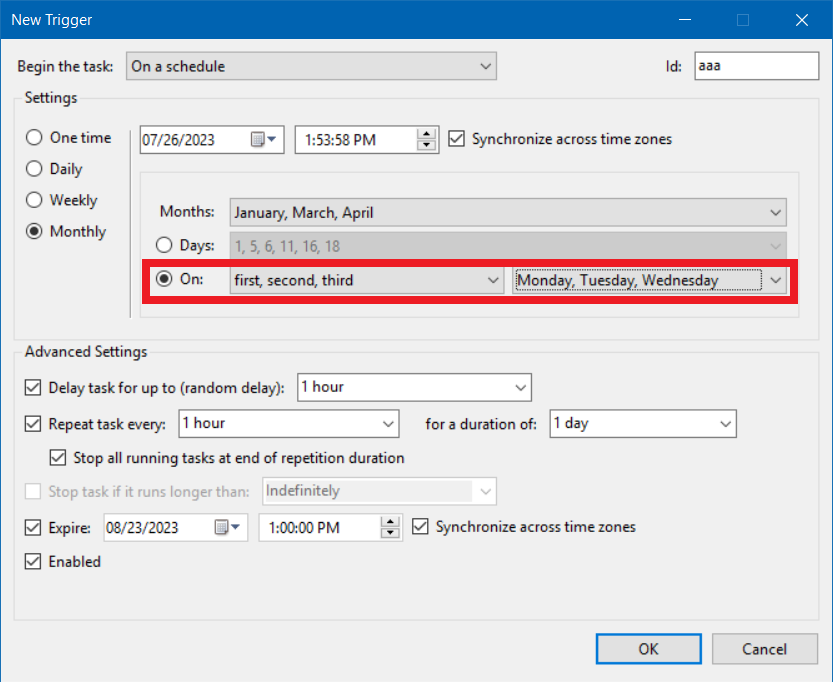
Methods of Beginning the Task: On a Schedule #
This trigger facilitates the automatic execution of the task based on a predefined schedule while offering configurable trigger settings to define the specific schedule parameters.
Follow the procedure to create a new task that runs the task according to the schedule,
- On the New Trigger/ Edit Trigger Settings box in the Begin the Task list select the On a Schedule option.
- Select and configure the desired time to begin the tasks in the Settings section. Available time frames are – One Time, Daily, Weekly, and Monthly.

- In the Advanced Settings section configure additional settings for the trigger and click the OK button to save your settings.
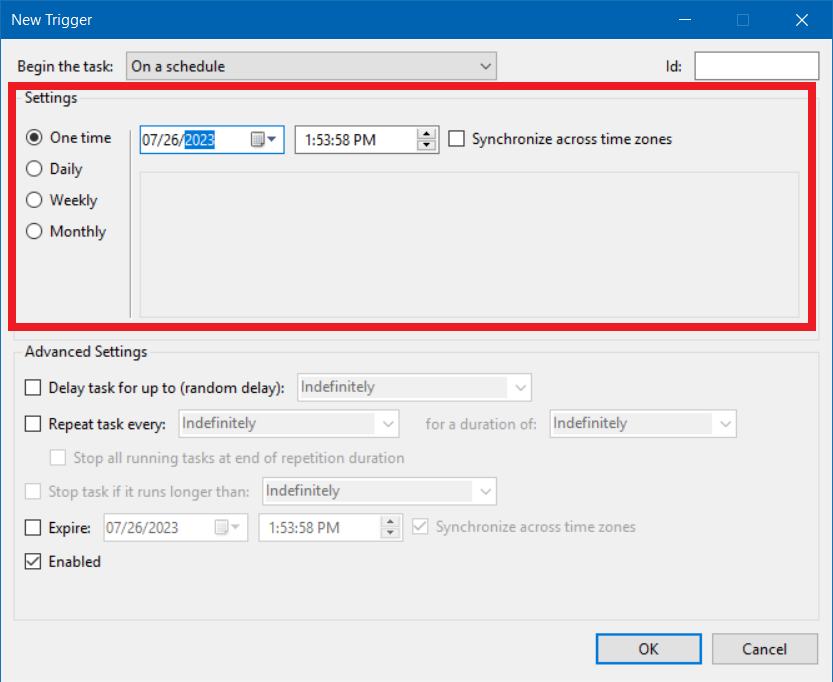
Begin the Task Only One Time #
Follow the procedure to create a new trigger or edit an existing trigger to do the action only once.
- On the New Trigger/ Edit Trigger Settings box in the Begin the Task dropdown list, select the On a Schedule option.
- In the Settings section, select the One Time option.
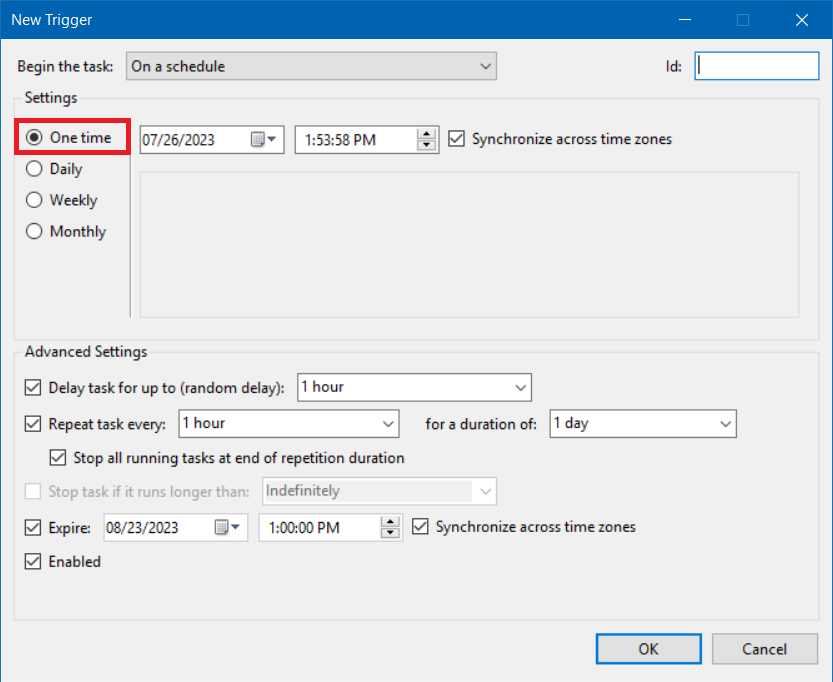
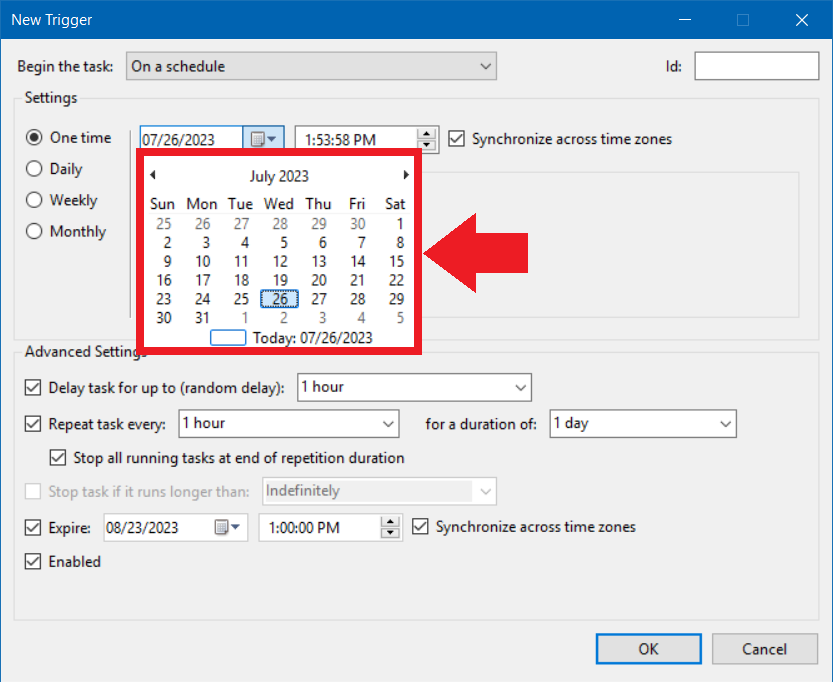
- In the Calendar dropdown, select the date at which you want to schedule the trigger.
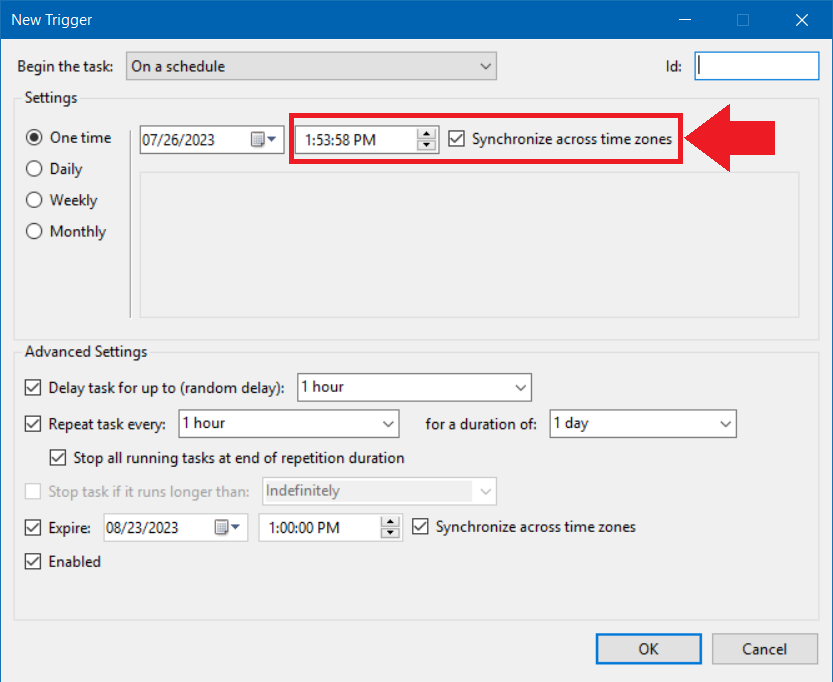
- In the Time field, enter the time at which you want to schedule the trigger.
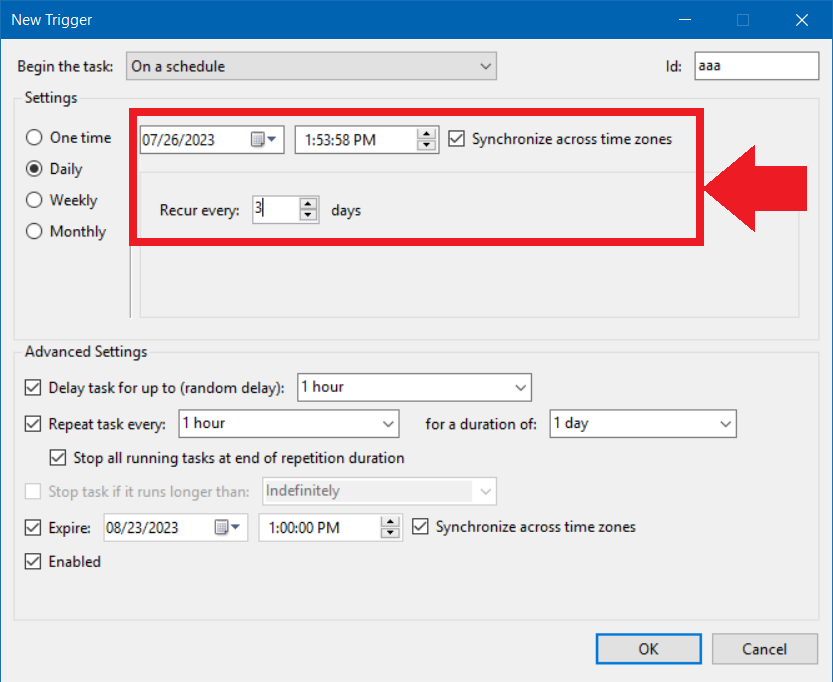
Begin the Task Daily #
Follow the procedure to create a new trigger or edit an existing trigger to do the action daily.
- On the New Trigger/ Edit Trigger Settings box in the Begin the Task dropdown list, select the On a Schedule option.
- In the Settings section, select the Daily option.
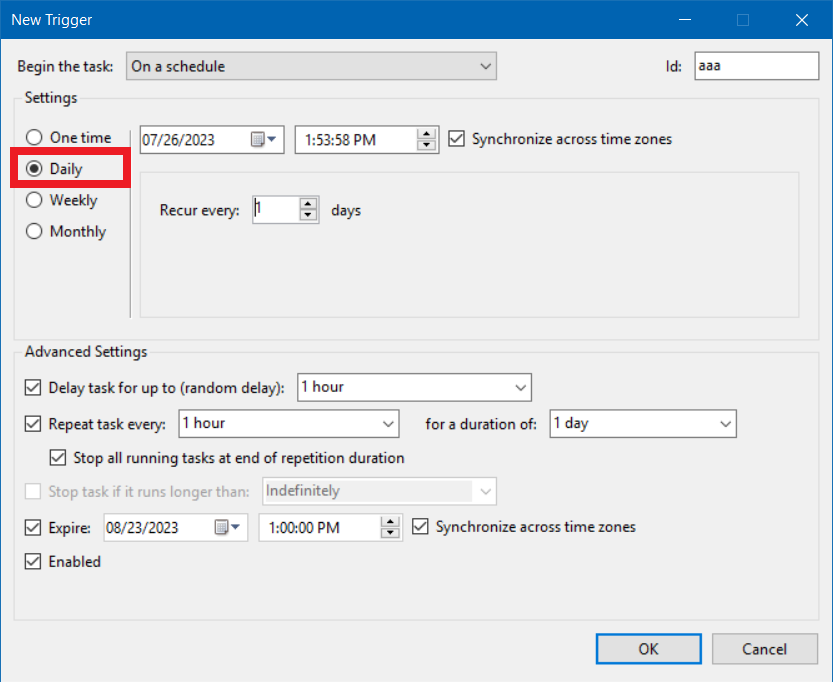
- In the Calendar dropdown, select the date at which you want to schedule the trigger.
- In the Time field, enter the time at which you want to schedule the trigger.
- In the Recur Every field, select the number of days you want the task to trigger at the selected date and time.
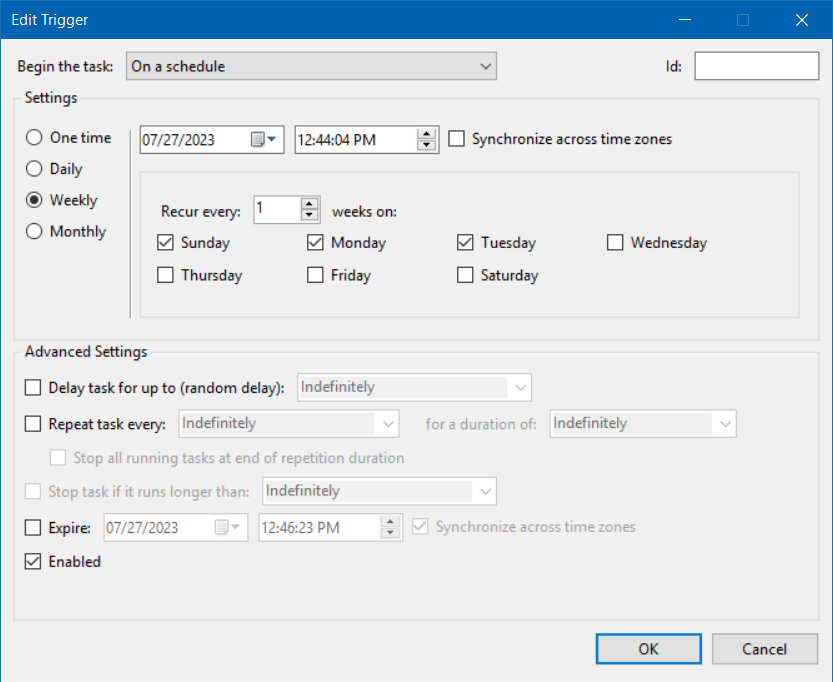
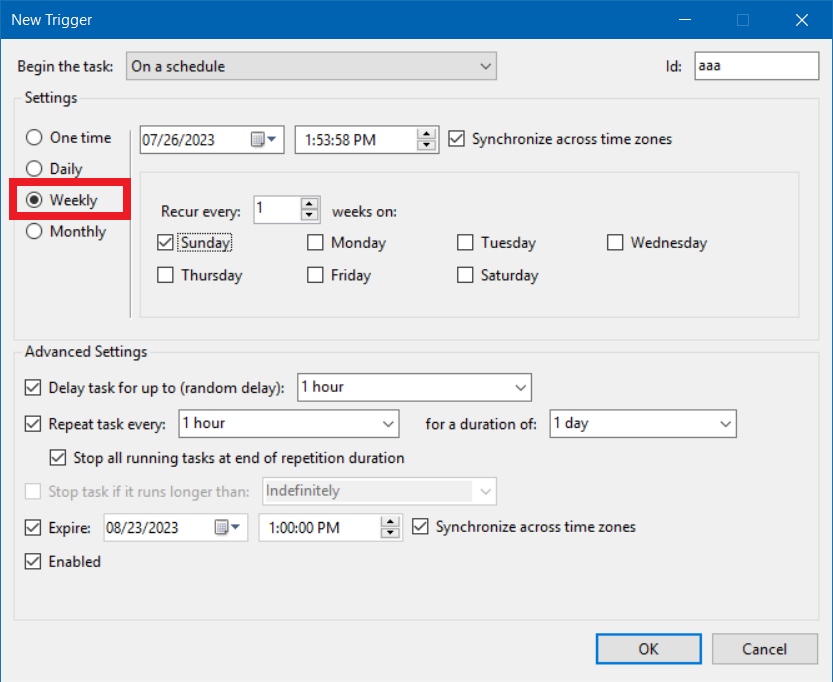
Begin the Task Weekly #
Follow the procedure to create a new trigger or edit an existing trigger to do the action weekly.
- On the New Trigger/ Edit Trigger Settings box in the Begin the Task dropdown list, select the On a Schedule option.
- In the Settings section, select the Weekly option.
- In the Calendar dropdown, select the date at which you want to schedule the trigger.
- In the Time field, enter the time at which you want to schedule the trigger.
- In the Recur Every field, select the number of weeks.
- Select the days of the week at which you want to task to get triggered.
Begin the Task Monthly #
Follow the procedure to create a new trigger or edit an existing trigger to do the action monthly,
- On the New Trigger/ Edit Trigger Settings box in the Begin the Task dropdown list, select the On a Schedule option.
- In the Settings section, select the Monthly option.
- In the Calendar dropdown, select the date at which you want to schedule the trigger.
- In the Time field, enter the time at which you want to schedule the trigger.
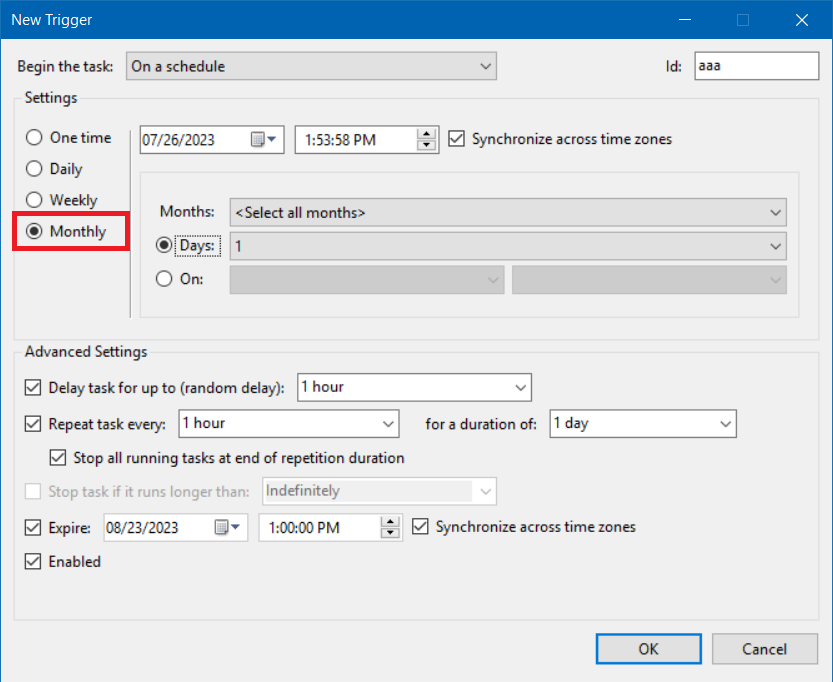
- You have two choices to select the specific days of the selected months,
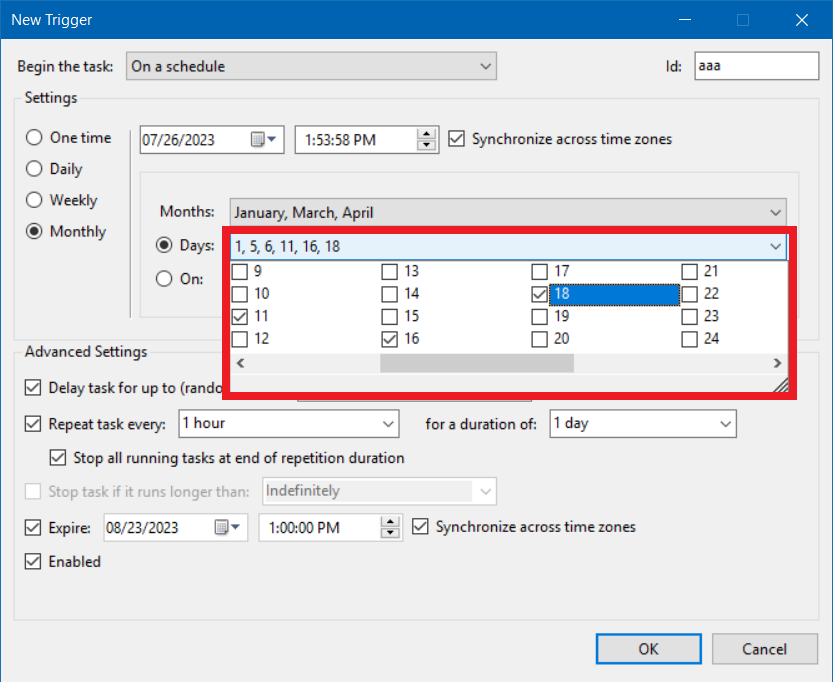
- Method 1:
- Select the Days radio button.
- In the Days dropdown select the days of the desired month that you want the task to get triggered
- Method 1:
- Method 2:
- Select the Week Number dropdown, and select the weeks.
- In the Days dropdown, select the days of the desired weeks at which you want the task to trigger.
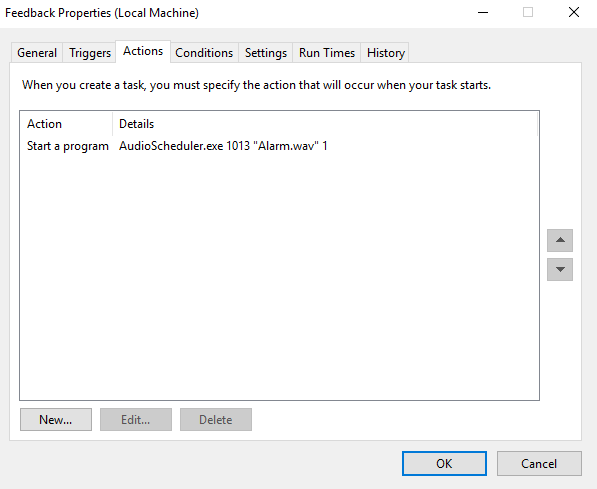
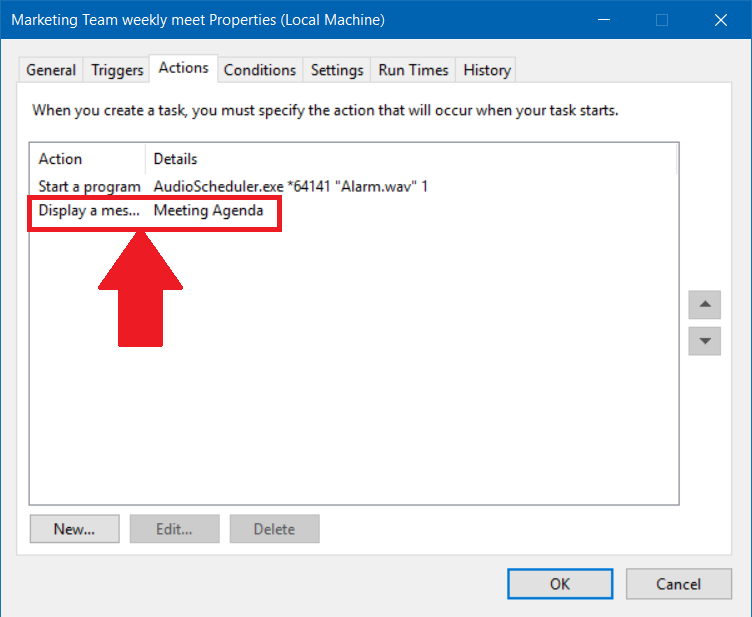
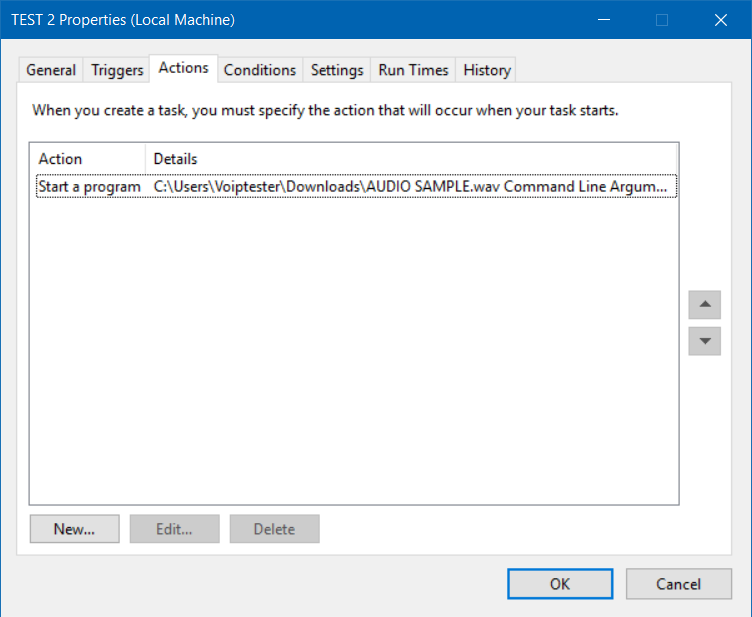
Actions tab #
A task action denotes the work carried out upon task execution. A task may consist of one to a maximum of 32 actions, each comprising settings that determine its execution process. During task creation, you must specify the action that will occur when the task is initiated. Access to the ‘Actions’ settings is available when either creating a new task or modifying an existing one.
In the Action tab, you can create a new action or you can edit an existing action.
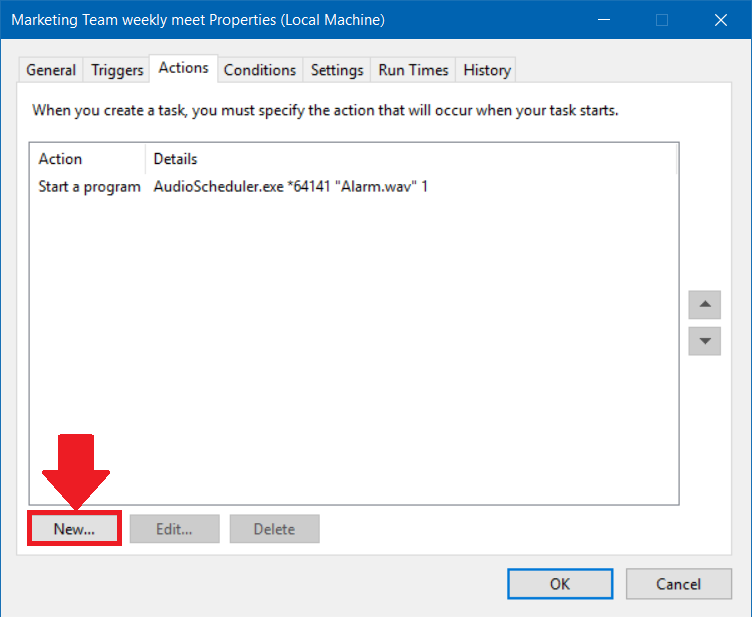
Add a New Action #
Follow the steps to Add a New Action,
- In the Actions tab, click the New button or you can right-click anywhere to open the Right-Click menu and select the New Action option.
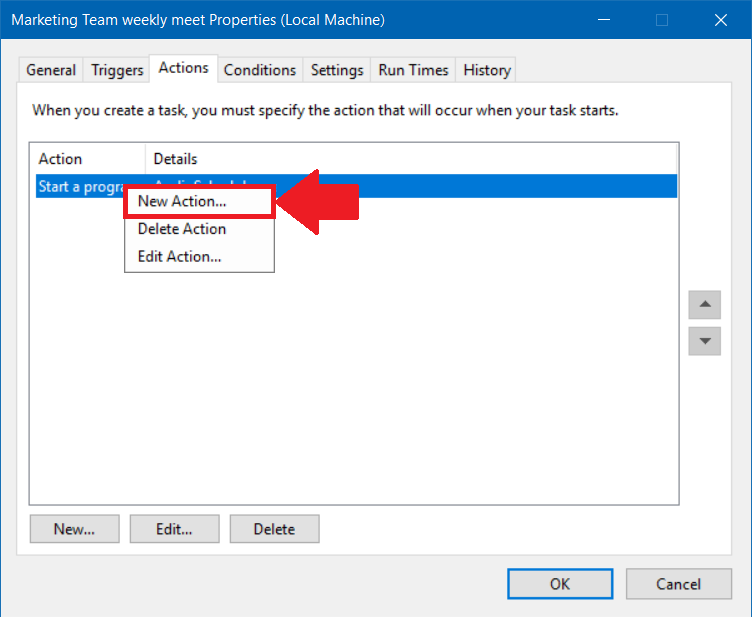
- In the New Action box do the necessary configurations and click the OK button to create a new action.
You can see a new action is now added to the Actions tab.
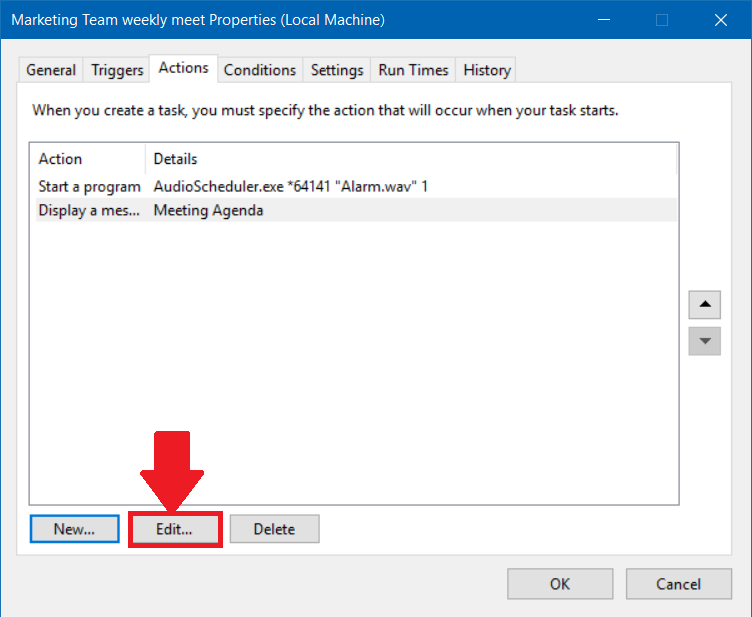
Edit an Existing Action #
Follow the procedure to edit an existing action,
- In the Actions tab, you can do any of the following,
- Click on the Action that you want to edit and click the Edit button.
- Right-click the Action to edit and click the Edit Action option from the Right Click menu.
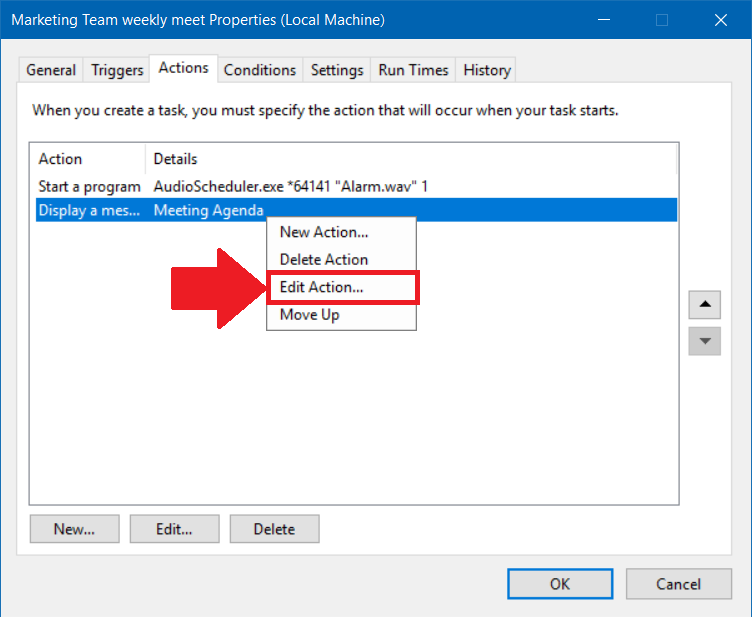
- In the Edit Action box, perform the necessary changes and click the OK button to save your settings.
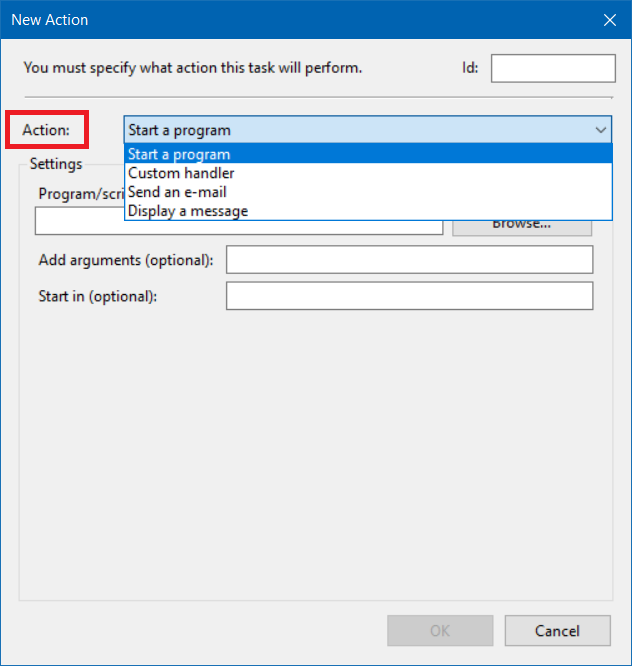
Edit Action/New Action box #
- In the Actions list, select the desired action type. Available action types are
- In the Settings section fill in the required details and click the OK button.
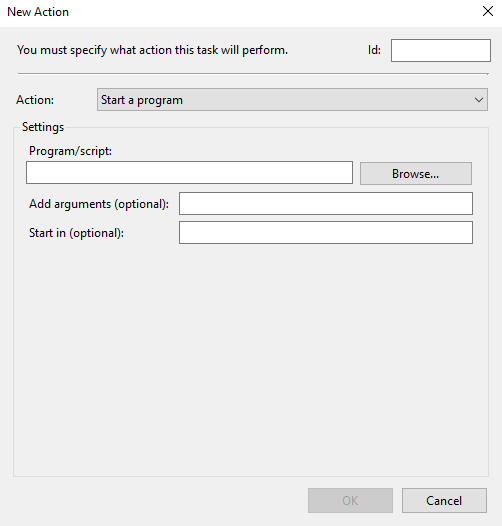
Action Type: Start a program #
Follow the procedure to initiate the action of starting a program on the script,
- On the New Action/Edit Action box in the Action dropdown list, select the Start a Program option.
- In the Program/ script text box, enter the name of the program or script that you want to start or click the Browse button to add a new script from your local device.
- In the Add arguments (optional) text box, enter the arguments if the program or script takes command line arguments.
- In the Start in (optional) text box, you can specify the working directory for the command line that executes the program or script. This should be either the path to the program or script file or the path to the files used by the executable file.
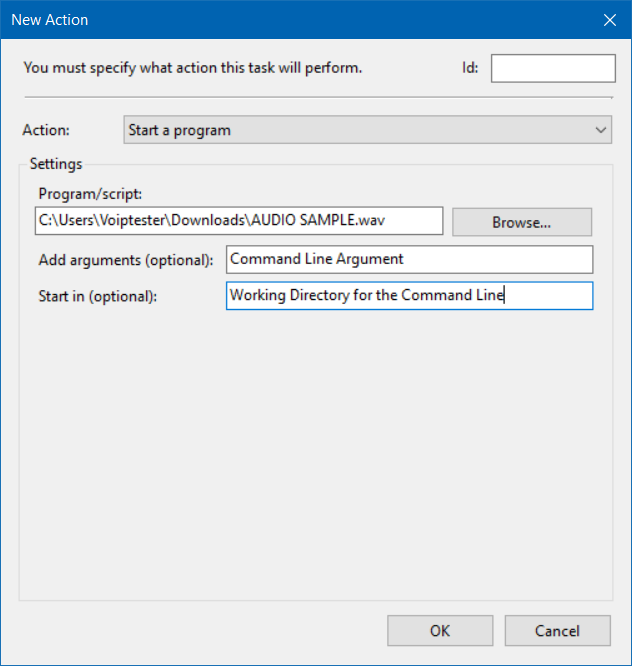
You can see the new action is added.
Action type: Custom Handler #
Follow the procedure to configure the Custom Handler action type,
- On the New Action/Edit Action box in the Action dropdown list, select the Custom Handler option.
- In the COM (Component Object Model) Object field, select the More
 button to choose a way to enter the CLSID (Class Identifier).
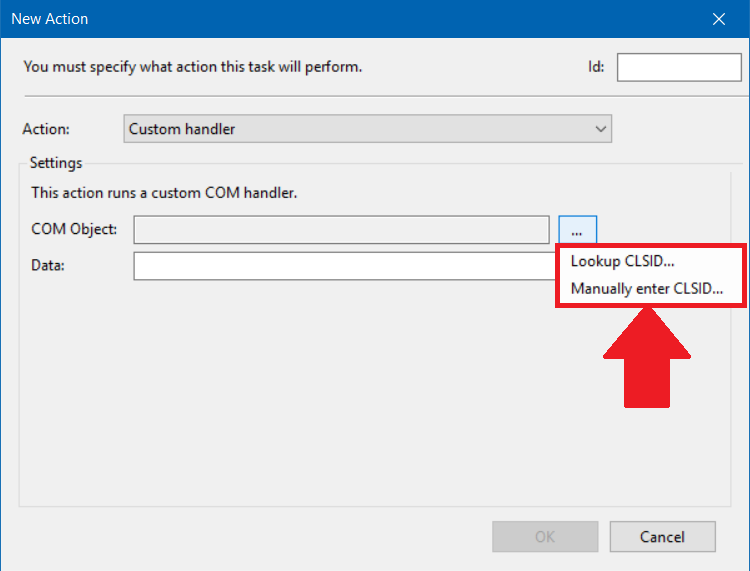
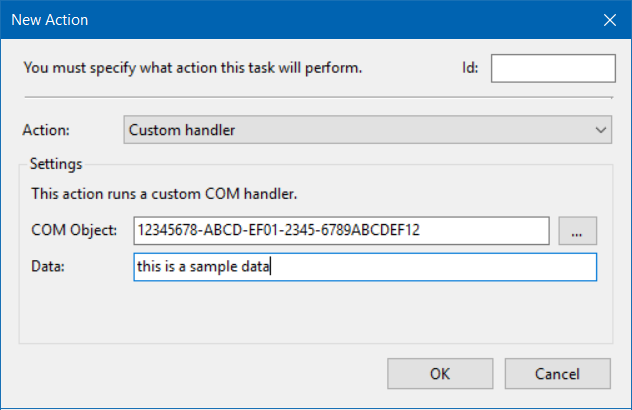
- Depending on the selected method in step 2, either manually enter the CLSID into the COM Object field or select the provided options to browse and select the appropriate COM object from a list.
- In the Data field, enter the relevant technical data required for the customized action and click the OK button.
- This data might include configuration parameters, file paths, or any other specifics necessary for the custom handling process.
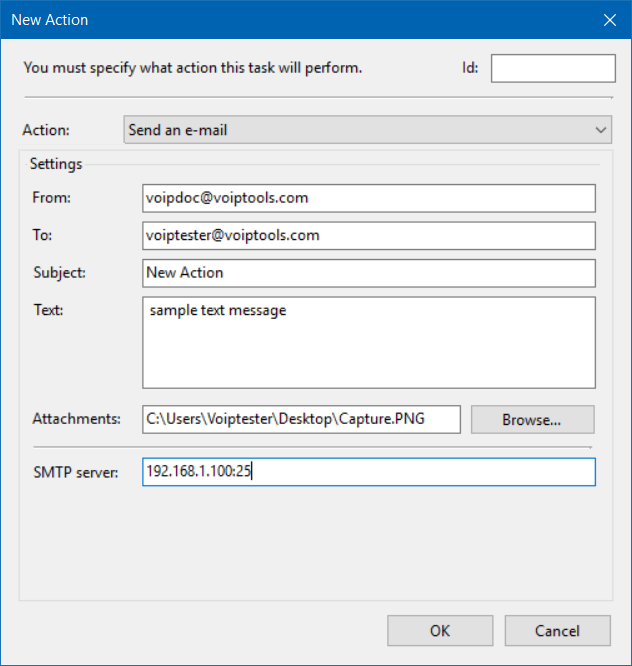
Action Type: Send an Email #
Follow the procedure to send an email,
- On the New Action/Edit Action box in the Action dropdown list, select the Send an Email option.
- In the From field, enter your email address.
- In the To field, enter the recipient’s email address.
- In the Subject field, enter a concise and descriptive subject for the email content.
- In the Text area, compose the main content of the email.
- If you have any attachments to include, click the Browse button and select the files from your local storage.
- In the SMTP Server field, enter the details of the Simple Mail Transfer Protocol (SMTP) server that your email service provider uses.
- Click the OK button to save action settings.
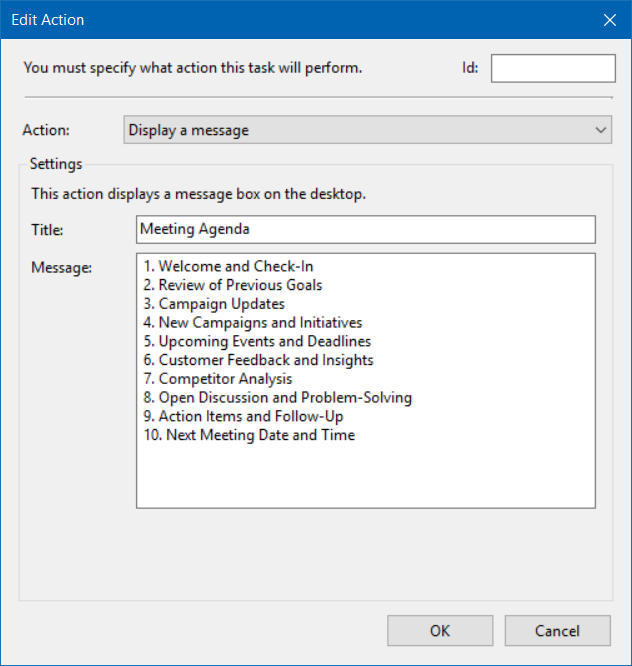
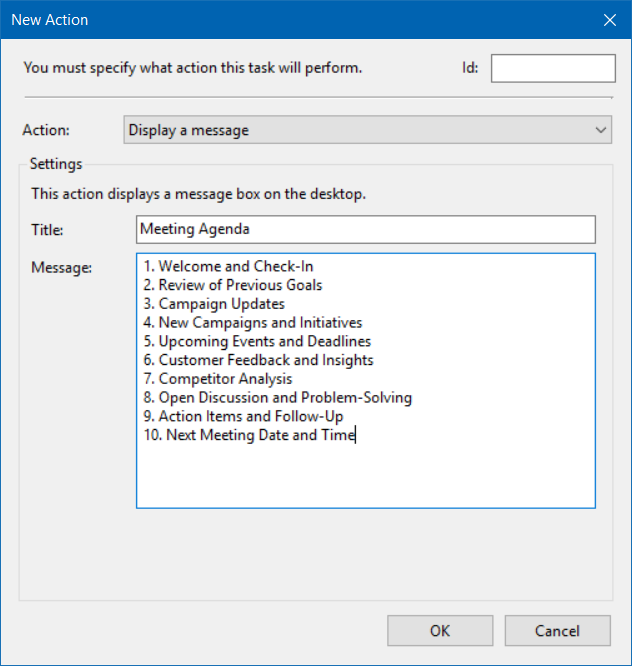
Action type: Display a Message #
Follow the procedure to show a message box with a specified message and title
- On the New Action/Edit Action box in the Action dropdown list, select the Display a Message option.
- In the Title field, enter the title for the message.
- In the Message field, enter the message that you want to send and click OK to save the settings.
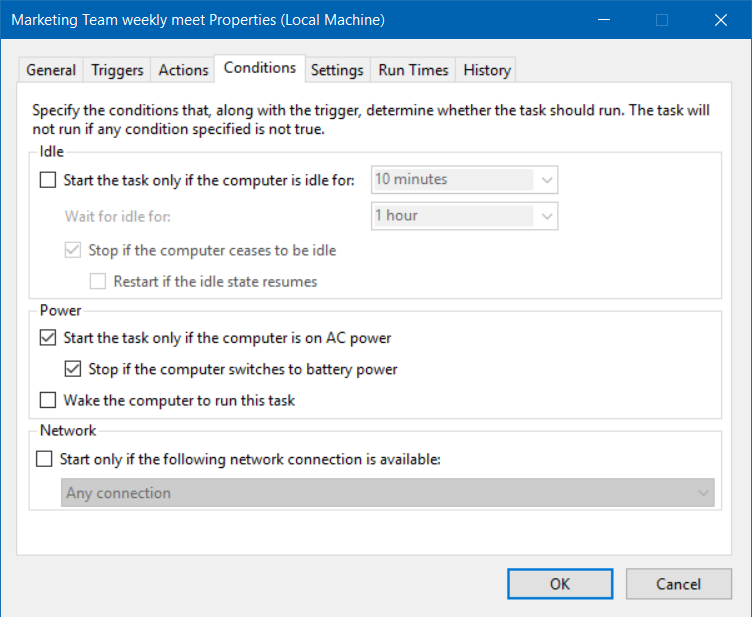
Conditions tab #
Conditions control whether a task along with the trigger should run. The task will not run if any condition specified is not true.
Types of Task Conditions #
Within the task configuration, you have the option to specify various conditions that govern when the task should be executed. These conditions include idle conditions, power conditions, and network conditions.
| TYPE | DESCRIPTION |
|---|---|
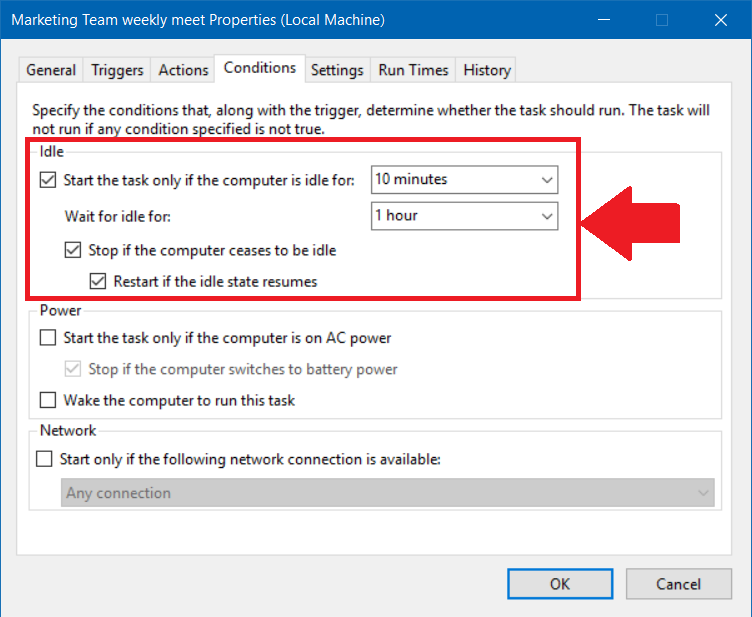
| IDLE | Idle conditions determine that the task will only run when the computer remains idle for a specific duration after the task trigger is activated. This ensures that the task operates during periods of inactivity, optimizing resource utilization. |
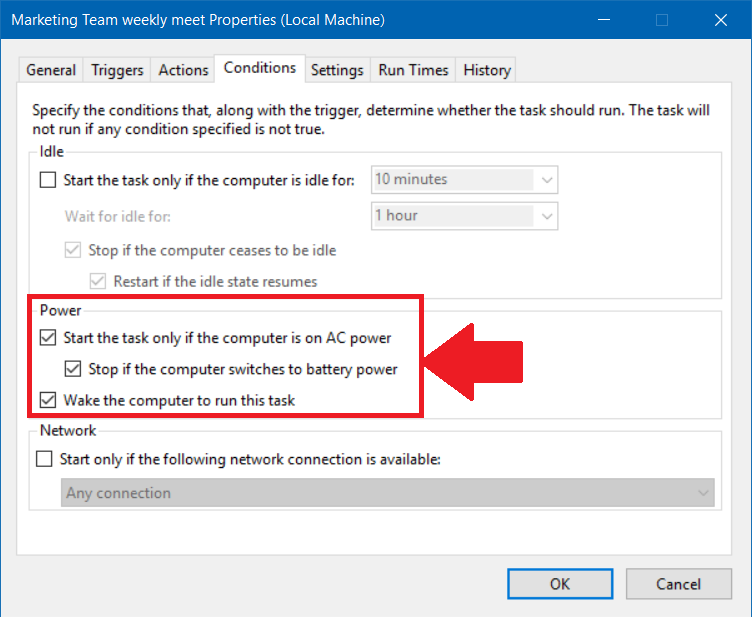
| POWER | Power conditions allow you to set the task to run exclusively when the computer is connected to an AC power source and not running on battery power. Should this condition be enabled, the task will automatically halt if the computer switches to battery mode, preserving battery life and prioritizing efficient power management. |
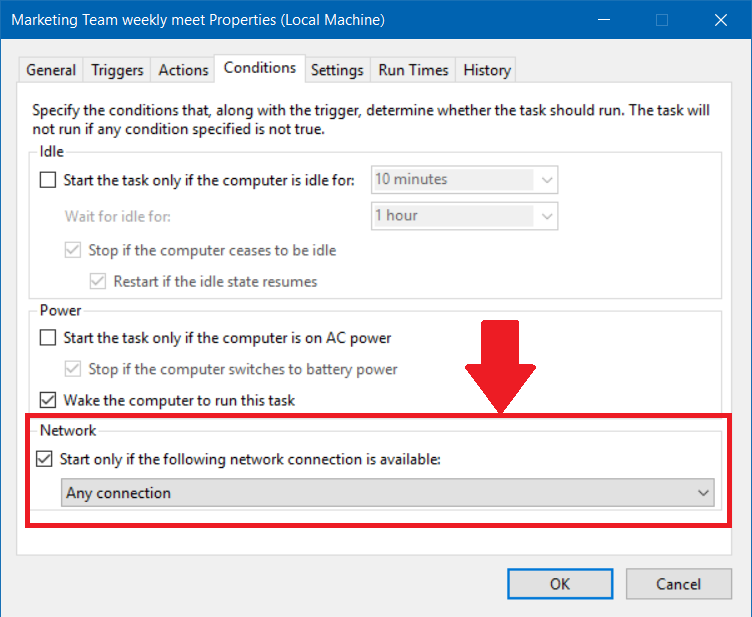
| NETWORK | Network conditions offer further control over task execution based on the availability of specific named network connections or any available network connection. This setting proves valuable when your task action relies on a network connection to execute successfully. |
Idle Conditions #
- Check the Start The Task Only If The Computer Is Idle For box to start the task if the computer is idle for the specified time and you can select the time from the dropdown.
- Select the amount of time to wait (after the task is triggered) for the computer to enter an idle state in the Wait For Idle For dropdown.
- Check the Stop If The Computer Ceases To Be Idle check box so that when a task is running while the computer is in an idle state, it will stop running when the computer ceases to be idle.
- Check the Restart If The Idle State Resumes box so that the task that stopped when the computer was in an idle state will start running again the next time the computer enters an idle state.
Power Conditions #
- Check Start The Task Only If The Computer Is On AC Power box if you want to run the task only when the computer runs on AC power.
- Check the Stop If The Computer Switches To Battery Power box to stop the task if the computer switches to battery power.
- Check the Wake The Computer To Run This Task box to wake the computer from sleep mode and run the task when the trigger is activated.
Network Conditions #
- Check the Start Only If The Following Network Connection Is Available box if your task action requires a network connection.
- From the dropdown, select the required network connection so that the task will run when the specified network is available.
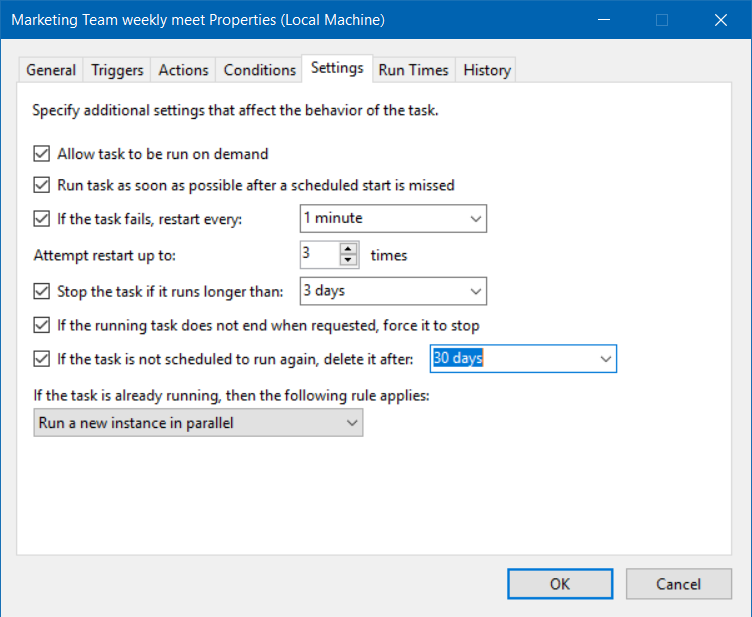
Settings tab #
The settings tab lets you to specify additional settings that affect the behavior of the task. The task settings specify how a task should run, stop, or delete.
| DESIRED TASK | REQUIRED ACTION |
|---|---|
| Run the task at any time on demand. | Check the Allow task to be run on demand box |
| Start the task if the task was scheduled to run at a specific time, but the task was not activated for some reason | Check the Run task as soon as possible after a scheduled start is missed box. The Task Scheduler service will not start the task immediately after the task Is missed. By default, the service waits for ten minutes before starting the missed task |
| Restart a task if the last run of the task fails | 1. Check the If The Task Fails, Restart Every box. 2. From the dropdown, specify the time interval that takes place between task restart attempts and the number of times to try to restart the task. |
| Limit the amount of time a task is allowed to run | 1. Check the Stop The Task If It Runs Longer Than box. 2. From the dropdown, select the appropriate time. |
| Automatically delete the task after waiting for the specified time period, if it is not scheduled to run again. | Check the If The Task Is Not Scheduled To Run Again, Delete It After box. |
| Apply rules on a running task | From the If The Task Is Already Running, Then The Following Rule Applies dropdown, select any of the following based on your specific purpose. Click here to learn more about the rules. |
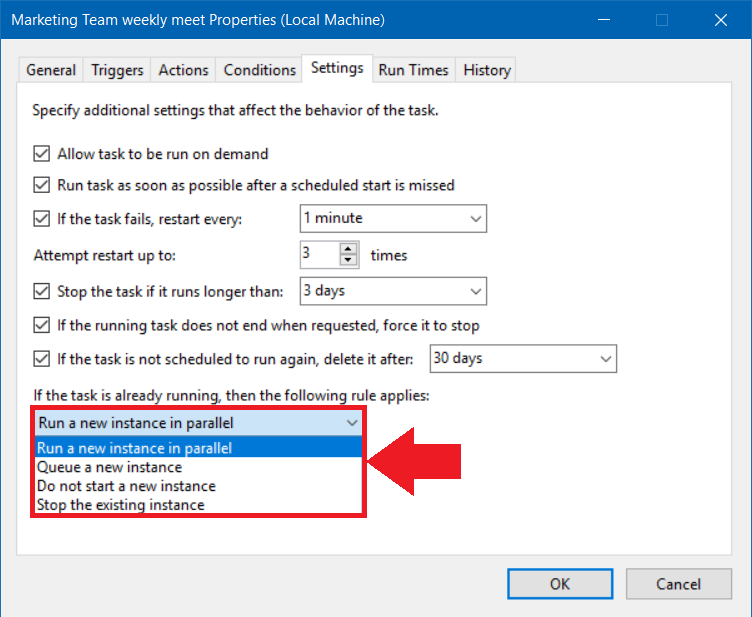
Rules For Running Tasks #
| RULES | PURPOSE |
|---|---|
| Do not start a new instance | The Task Scheduler service will not run the new instance of the task and will not stop the instance that is already running. |
| Run a new instance in parallel | The Task Scheduler service will run the new instance of the task in parallel with the instance that is already running. |
| Queue a new instance | The Task Scheduler service will add the new instance of the task to the queue of tasks that the service will run, and the service will not stop the instance of the task that is already running. |
| Stop the existing instance | The Task Scheduler service will stop the instance of the task that is already running, and run the new instance of the task. |
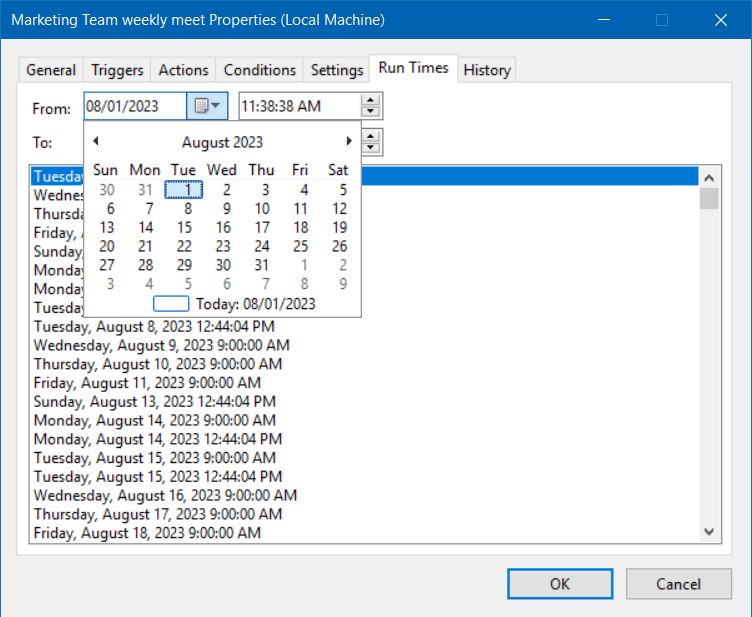
Run Times tab #
The Run Times tab displays the list of run-time data for a specific range of time.
- In the From field, select the date and time from which you want to start the run times.
- In the To field, select the date and time at which you want to end the run times data.
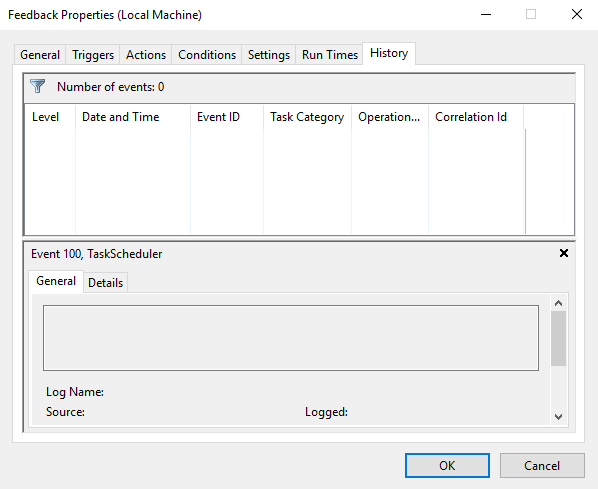
History Tab #
The History tab enables you to view the scheduled task logs that have run. The details include level, date and time, event id, task category, operation, and correlation ID. To view further details, select the log and click the General and Details tabs.
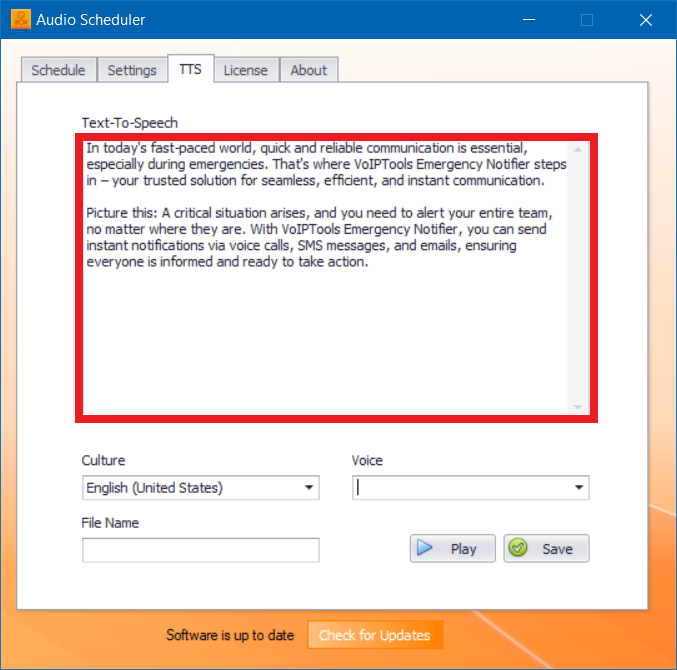
TTS Tab: #
The TTS screen enables you to type the text that you want the ‘Audio Scheduler’ to convert into speech. The conversion will be done according to the Culture you select and the voice of the speech will be according to the Voice you select.
Follow the procedure to configure the TTS settings,
- On the 3CX Audio Scheduler configuration screen, in the TTS tab and the Text-To-Speech textbox, enter the text you want to convert into speech.
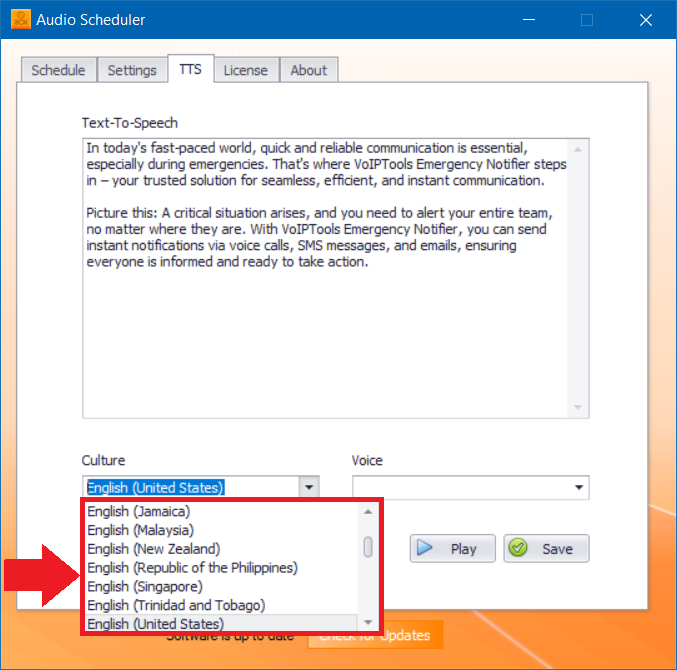
- From the Culture dropdown, select the type of language into which you want to the ‘Audio Scheduler’ to convert the Text-To-Speech.
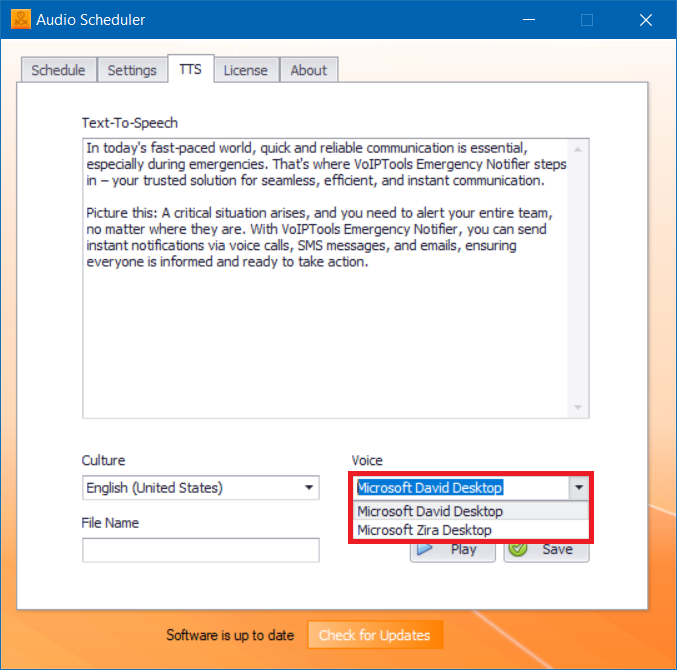
- From the Voice dropdown, select the voice so that the ‘Text-To-Speech’ audio file will play according to the voice you have selected.
- In the File Name field, enter the name for the ‘Text-To-Speech’ audio file.
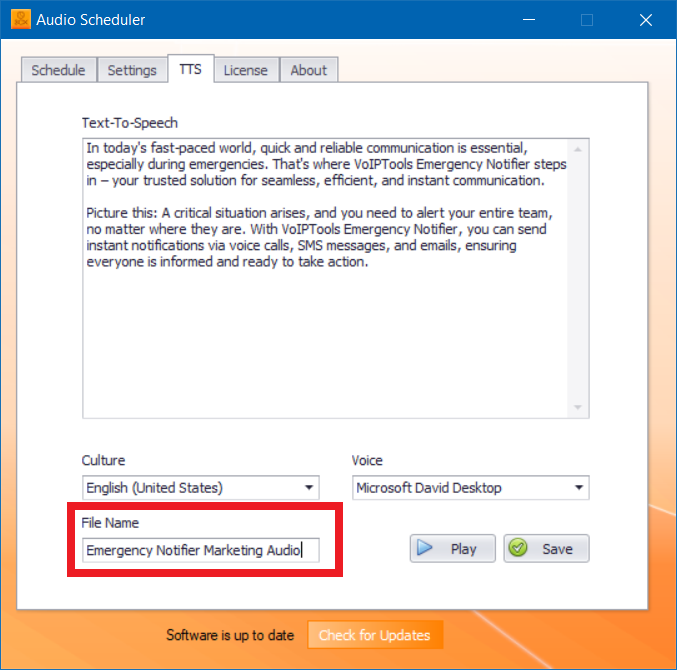
- Click the Play
 to play the ‘Text-To-Speech’ audio file or Click the Save
  to save the ‘Text-To-Speech’ audio file.
 - Click OK on the Confirmation Message box.
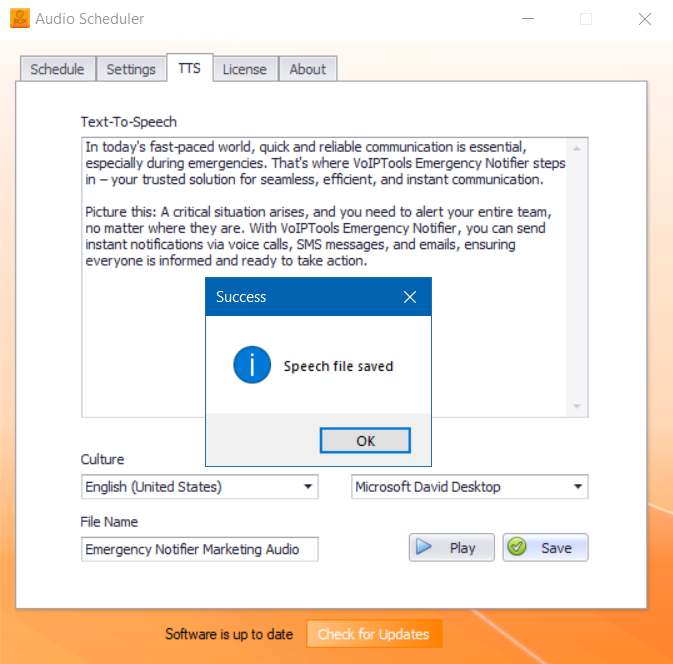
NOTE:
Every time you play the ‘Text-To-Speech’ audio file, you should save it or else the file will be deleted from the database.
Need Support? #
You get quick answers to most of your inquiries in our online manual. If you prefer direct contact, we offer various support channels, including phone, email, live chat, and our helpful VoIPTools forums.

24/7 Support Availability #
Rest assured, our dedicated team is here to assist you around the clock, every day of the year. Whether you’re based in the USA or India, we’re ready to provide prompt responses to your technical queries.

Windows Event Log for VoIPTools Applications and Services #
For troubleshooting any application errors, our Windows Event Log contains a comprehensive list of error messages, warnings, and informative notes related to all our VoIPTools applications and services. It’s a valuable resource to help you pinpoint and resolve any issues you may encounter.

Join Our Forum Community #
Are you looking to collaborate with other VoIPTools customers facing similar challenges? Our forum is the perfect platform to exchange ideas, solutions, and best practices. Join the conversation at: https://www.voiptools.com/community/

Real-Time Live Chat Assistance #
Got questions that need immediate answers? Our chat support team is available to assist you in real time. Just click on the Live Chat button located at the lower right corner of our website, and we’ll acknowledge your queries right away.

Efficient Email Support #
To ensure a thorough understanding of your concerns, email us at support@voiptools.com. Describe your issue in detail, and we’ll get back to you within one business day with the support you need.

Reach Us by Phone #
If you prefer to speak with a representative directly, you can reach us at +1 801-642-4655. Our attentive team is available to take your calls from 8:00 AM to 6:00 PM (Central Standard Time).
Comprehensive support services: #

Free Support #
If you’ve purchased our products through a VoIPTools Partner, rest assured that they provide first-level support at no additional cost. Partners have access to 100% free technical assistance and actively participate in the troubleshooting process.
VoIPTools customers enjoy access to our online manuals and receive support through emails (with responses within one business day) and live chat. However, please note that we do not provide remote server login assistance.

Paid Support #
For a more hands-on experience, consider our “Installation Support” package. Our expert support team can log in to your servers, and install and configure all our tools. This comprehensive service includes setting up SQL Server Express and Internet Information Server if necessary. We’ll work closely with you to tailor our applications to meet your requirements.
We’re committed to providing top-notch support to ensure your VoIPTools experience is smooth and hassle-free. Contact us today, and let us assist you in making the most of our powerful tools!
