Introduction #
The VoIPTools Relay is a software application that enables remote applications to communicate with the 3CX Call Control API. Applications can send requests to 3CX using our REST API, or subscribe to real-time 3CX events using our “events” API.
Prerequisites #
Linux Console Access
You will need root access to your Linux console to run the setup program. You will need your 3CX server IP address, an administrative user (root), and a password.
Putty
You will need a remote access program such as Putty to issue Linux commands.
Firewall
To enable our tools to remotely communicate with the Relay, you will need to open (port forward) TCP 8801 on your firewall, pointing to the 3CX server. If you use the built-in Linux firewall (iptables/nftables), the setup program will attempt to open port 8801 for you. If you use a different firewall or select a different port, you will need to configure your firewall to provide remote access to the Relay.
Installing the 3CX Relay for Linux (Debian) #
The only application you install directly on the 3CX server is the Relay. The Relay makes it possible for our tools to communicate with the 3CX Call Control API. The remainder of our tools are always installed on a separate Windows server.
Once you have installed 3CX and have access to the Linux console, you can download the Relay setup program directly to your Linux server. There are essentially 3 steps to install the Relay:
Note: If you are upgrading, be sure to look at the steps in Upgrade Relay section before continuing.
- Download the setup program with the following command
sudo wget
https://installers.voiptools.com/Downloads/18.4/3CXRELAY/LINUX/setup
Note: Wait until the setup program downloads successfully before entering the next command.
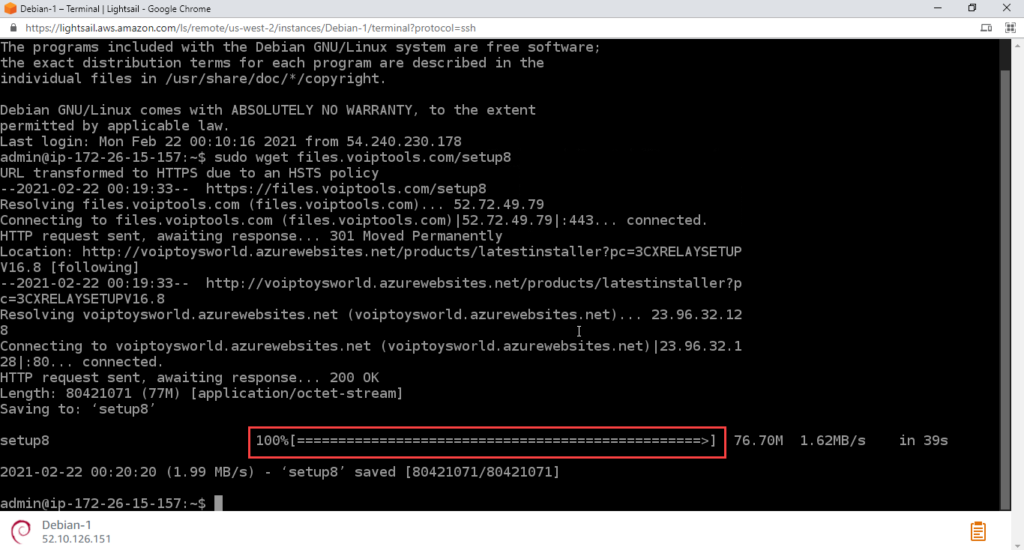
2. Give execute permissions to the setup program by entering this command
sudo chmod +x setup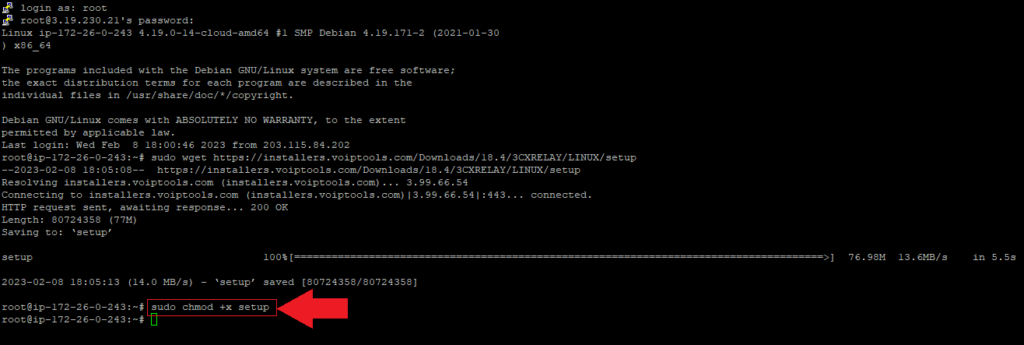
3. Execute the setup program with the following command
sudo ./setup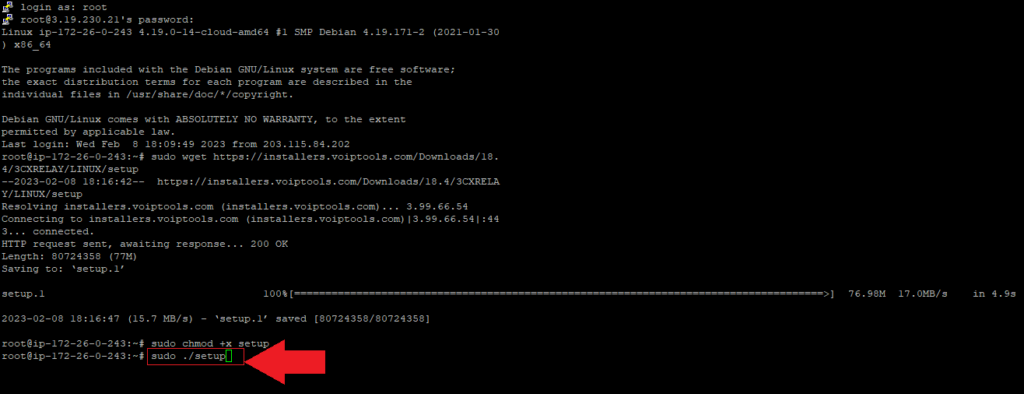
Figure 4: Execute Setup Program
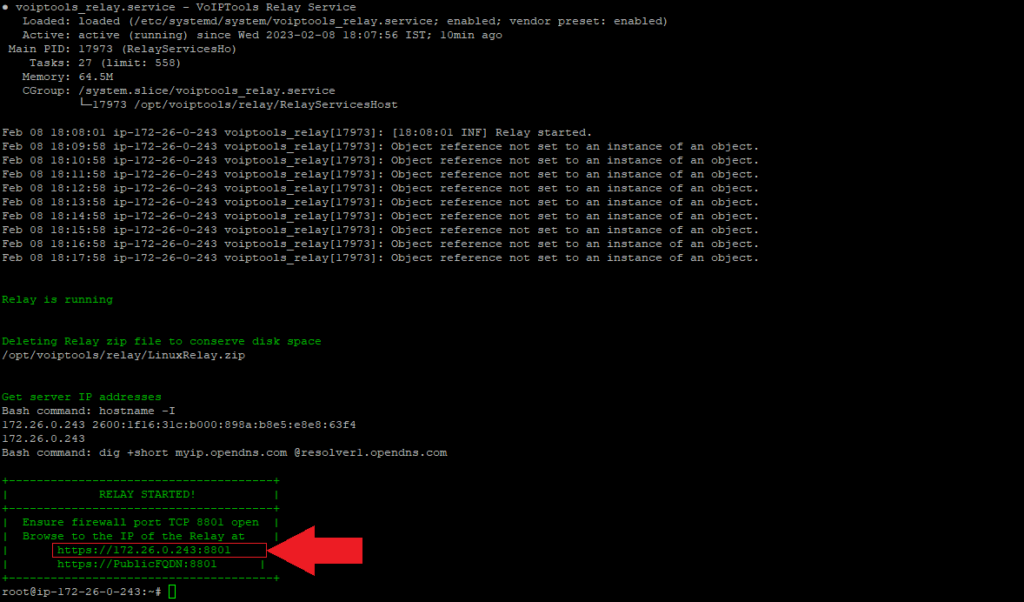
When the installation is complete, the setup program will display a message with the URL needed to access the web-based Relay administration console. Your URL should be something similar to the following:
http://<3cx-server-IP>:8801Note: Replace <3cx-server-ip> with the IP address of your 3CX server, or FQDN.
Relay Login #
To access the Relay, you can login with either your 3CX Administrator credentials, or with any 3CX extension that has 3CX System Admin rights. To login with an extension, use your 3CX extension number and WEB password.
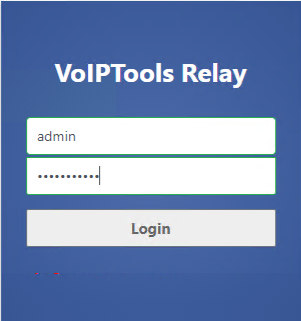
Note: You can obtain your web password by editing your extension in the 3CX web console.
You are permitted 3 attempts to login to the Relay console successfully. After 3 unsuccessful attempts, the Relay console will be locked FOR ALL USERS for the next 15 minutes.
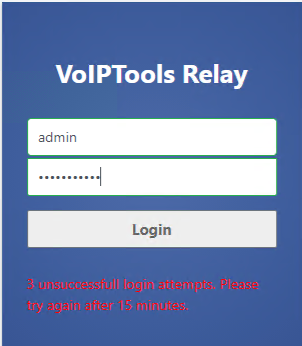
Note: The only way to clear a failed login before the 15 minute lock out period, is to reboot the Relay service. You can restart the Relay from a secure shell session with the following commands:
systemctl stop voiptools_relay.service
systemctl start voiptools_relay.service
License Registration #
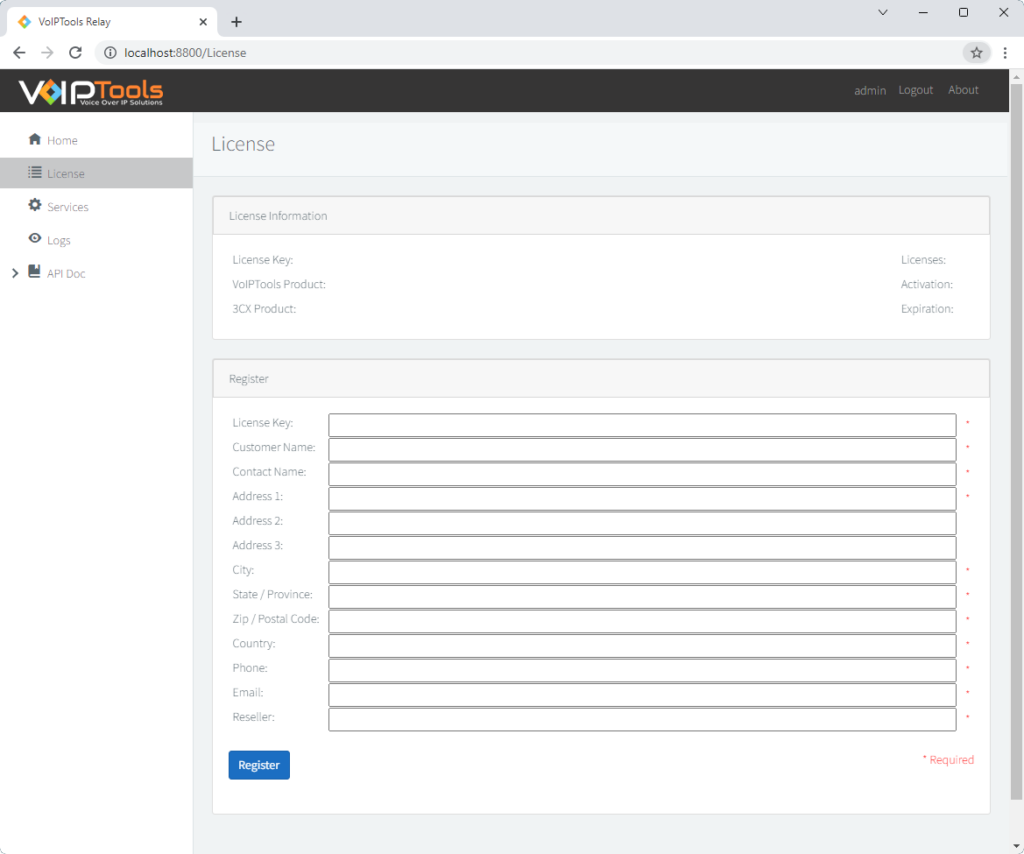
If you previously registered your Relay, the existing licensing information will be preserved. For new installs, select the licensing option from the left-side panel. Enter your license information and press the “Register” button. If you do not have a license key, you can still use our free tools. To access the Relay API, you must register with a valid license key.
When registering your license key, the contact information should be the end-user (customer). Be sure to include the Reseller company name if purchased through a 3CX Reseller. When complete, press the “Register” button to activate your license key. Note: It is not necessary to restart the Relay after registering your key.
Services Settings #
The Services screen is used to configure how the Relay functions. This includes setting the protocol (HTTPS), the IP address the webserver will bind to, and the TCP port number. The IP whitelist is maintained on this screen, and you can turn on/off monitored events as well as the Swagger (Open API) documentation.
Warning Popup: #
The Warning popup displays immediately when you open the Services menu. You must enter at least one entry in the IP address whitelist. Typically, the only entry needed is the IP address of your VoIPTools server. It is essential, to ensure the security of your Relay, that you limit the devices allowed to communicate with it. This is done by specifying a list of permitted (whitelisted) IP addresses. Requests received from an IP address, not in the whitelist will be rejected.
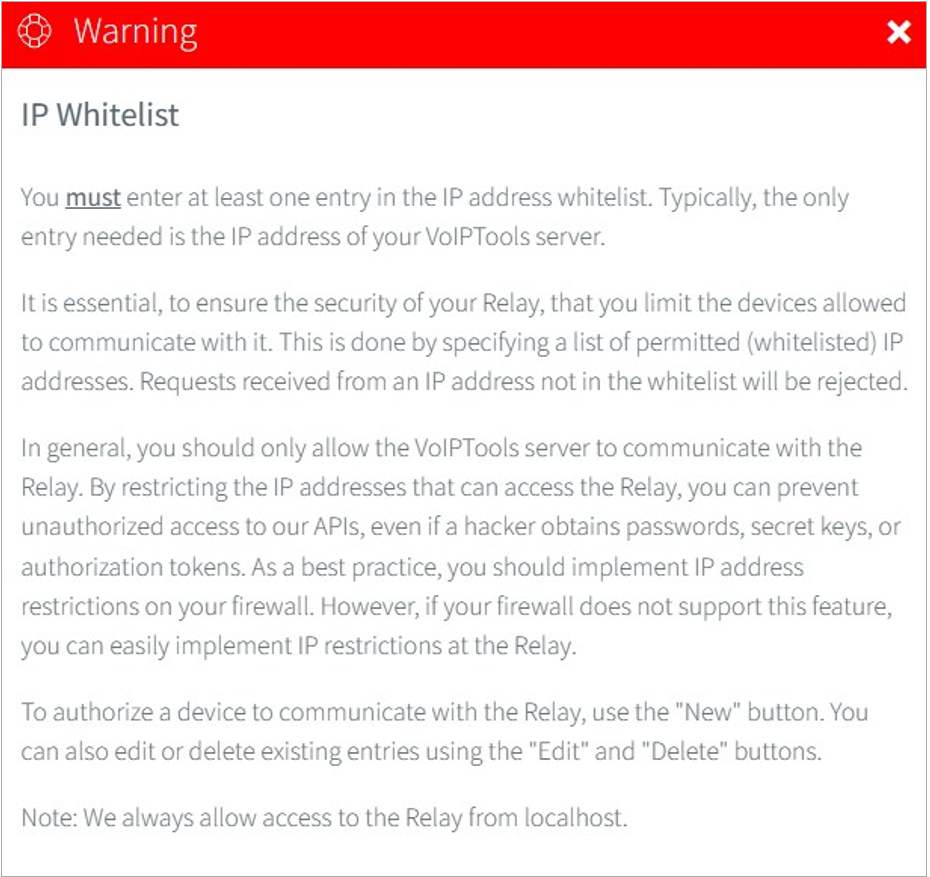
Click here to know how to add an IP address to the Whitelist.
Web Server Bindings #

The Relay’s built-in web server (Kestrel) only binds to IP addresses, not to domain names (with a few exceptions). You can use “*” to represent 0.0.0.0, or “localhost” to represent 127.0.0.1. You can also specify IPV6 addresses. You cannot use a FQDN like “pbx.mydomain.com”. Each URL should be separated by a comma.
Below is the recommended setting:
https://0.0.0.0:8801It is strongly recommended that you encrypt the Relay communication by specifying the use of SSL/TLS (HTTPS). Ensure all of the URLs specified use “https”. (see example below).
Note: If you make changes to the server bindings, a restart of the Relay may be required.
Restarting the Relay during production hours will temporarily stop the sending of events to client applications. Use wisdom when choosing a time to restart the Relay.
Automatic software updates #

The Relay Auto-Update service checks for software updates daily. If an update is found, the service will download the latest available Relay and install the update.
You can enter the hour and minute that the service checks for updates. Pressing the “Start” button saves your settings and starts the service. To disable the service, simply press the button to stop the service.
Note: The “Hour” field assumes a 24-hour clock. For example, to configure the service to perform updates at 5:00 P.M., enter 17 in the hour field.Default Value: Disabled, 23:59
IP Whitelist #
Follow the steps to add an IP to the IP Whitelist,
- In the IP Restriction section, click the New option.

- Enter the IP address in the IP Address field and click the Update option.
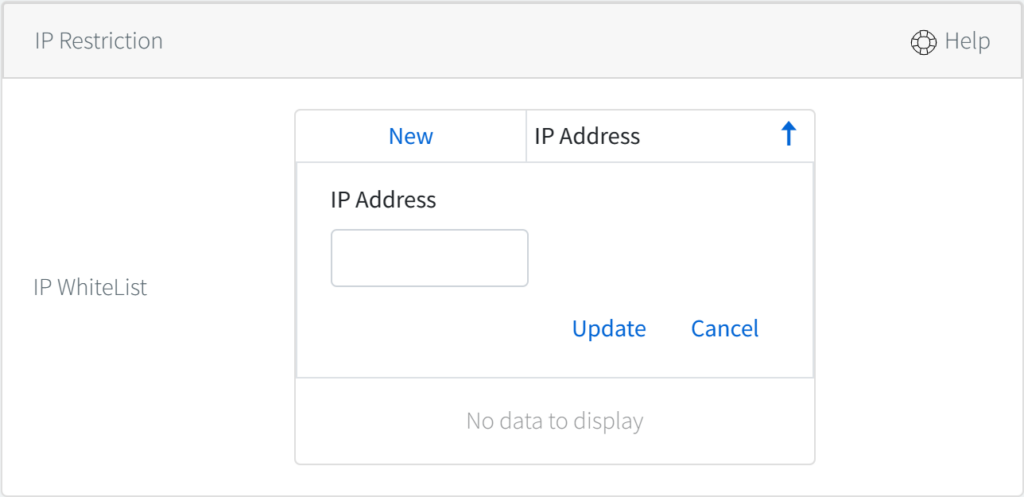
NOTE:
You must enter the IP address of your VoIPTools server in the IP Address field.

In most cases, the only device that needs to communicate with the Relay is the Windows server where your VoIPTools applications are installed. We recommend configuring your parameter firewall to reject requests from any other IP address. However, if your firewall does not support this feature, you can easily block access to the Relay using the IP Whitelist.
The Relay IP Whitelist setting is used to identify the computers that are permitted to communicate with the Relay. Requests from any other computer (IP address) will be rejected.
Note: Access to the Relay is always permitted from localhost. We do not support configuring IP ranges. You must enter at least one IP address in the whitelist.
Enable Events #
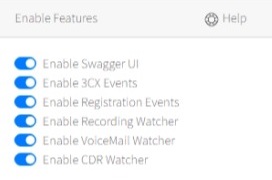
The Relay can “publish” 3CX events to client applications using SignalR (websockets under the covers). For example, the Relay can publish phone call events, presence status changes, as well as file events (new recordings, voicemails, and CDR files). These events are enabled by default but can be disabled at the recommendation of VoIPTools support if not needed by any of the tools you have installed. Disabling unused events will reduce the resources required by the Relay.
Logs #
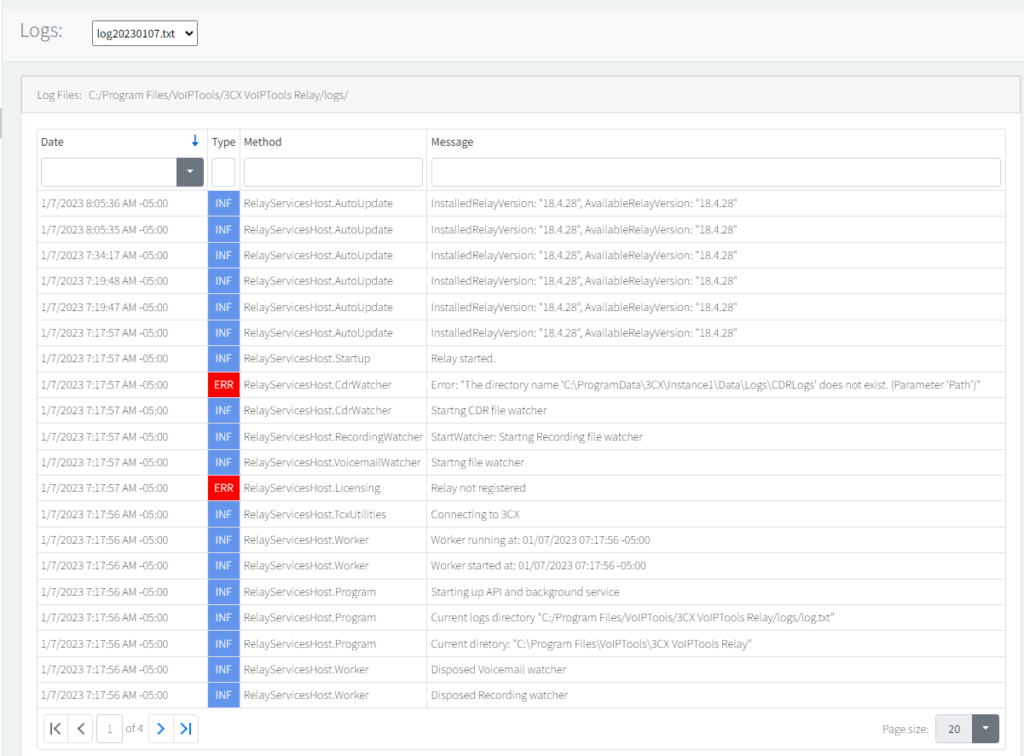
The Relay logs information about how the application is functioning. Each day a new log file is created automatically. The 7 most recent log files our kept. Older log files are deleted automatically..
Note: To view events for a specific day, select the desired file from the Logs drop down.
Upgrading the Relay #
There are three ways you can upgrade the Relay:
- Enable automatic updates
- Click on the Relay version number in the upper right-hand corner of the home screen
- Manually run the setup program again.
Running the setup program again deletes the existing Relay (while preserving any settings) and downloads and installs the latest Relay.
When updating the relay, the setup program will display a warning message explaining that the previous version of the Relay and logs will be deleted. Press “y” to confirm:
Continue? [y/n]:yAPI Documentation #
The Relay includes an extensive API you can use to build your own custom 3CX integrations. In fact, all our tools use this same API to communicate with 3CX. For API documentation, expand “API Doc” from the left-hand side panel by clicking on the arrow (>).
Note: We provide support for our APIs to the extent that we can offer suggestions on what methods are available, and how to use them. However, we will not write the application for you. If you would like our help building a custom solution, contact our Support team at Support@VoIPTools.com
REST API #
Our REST API has an extensive list of methods to choose from and includes actions to make phone calls, get a list of active phone calls, create extensions, change a user’s presence status and much more. The documentation is auto-generated using Open API (Swagger) and is derived directly from our code thus ensuring the documentation is always up-to-date.
SQL API #
In truth, this is not an API, rather, this is a testing tool you can use to determine whether your 3CX server can communicate with your SQL Server. This is important if you are using a 3CX Call Flow Designer (CFD) application that needs database access. To test your SQL connectivity, simple paste your SQL connection string in the field provided and press the Test Connection button.
Common problems connecting to a remote SQL Server are:
- Firewalls are blocking the required ports
- SQL is not configured to permit remote access
- The SQL Browser service is not started
Note: Instructions for configuring SQL Server to permit remote connections can be found
Events API #
The Relay offers a variety of events that your applications can subscribe to in order to be notified of changes or actions. For example, you can set up subscriptions to detect when new calls are made, when presence settings are altered, when calls are placed in a queue, or when recordings are generated.
To help C# .Net developers utilize our events API, we have provided two downloads:
Data and Shared DLLs #

To reduce the complexities of using a REST API, we provide two DLLs that contain class object definitions and methods that you can use to work with our API.
Visual Studio sample project #

To see how to use our DLLs in your project and how to subscribe to events, we provide a sample Visual Studio project that provides a basic example you can use as a starting point for your project.
SSL / TLS Certificate #
The Relay shares the same certificates used by 3CX. It is not necessary to provide separate certificate files for the Relay.
Need Support? #
Visit our website to access our on-line manuals and receive quick answers to most of your questions. Otherwise, you can contact us by email, live chat, and phone.
Contact Us #
| Email: | Support@VoIPTools.com |
| Live Chat: | VoIPTools.com |
| Phone: | +1 801-642-4655 |
Support Hours #
We are now available 24/7 365 days a year
Event Logs #
The Windows Event Log lists various errors, information messages and warnings related to all our VoIPTools applications and services. The data here can be used for troubleshooting various application errors.
Note: For Windows events look in the Windows event viewer under: “Applications and Settings / VoIPTools”
Email #
You can email us at: support@voiptools.com. Be sure to describe your issue in detail. We’ll get back to you within one business day of receiving your request. Be sure to include the following information:
- 3CX Server:
- Operating system (Windows / Linux)
- 3CX version number
- 3CX Edition (Startup / Pro / Enterprise)
- License size (simultaneous calls)
- The VoIPTools applications you have installed (including version numbers)
- The version number of your Relay
- Description of your issue
Live Chat #
Our chat support team is ready to acknowledge your queries in real-time. You can start a live chat with us by simply clicking on the Live Chat button at the lower right corner of our web page.
Phone Support #
Our USA phone support is available Monday – Friday 8:00 a.m. to 5:00 p.m. CST. All other times, phone support is provided by our team in Deli and Hyderabad India.
Submit a bug #
If you suspect a bug in any of our VoIPTools products, you can bring it to our notice by reporting your issue at: https://www.voiptools.com/report-a-bug/
Note: be sure to include the same information required for email support (see above)


