Mastering Contact Sync: A Unified Approach for Enhanced 3CX Contact Management
The 3CX Contact Sync application facilitates seamless contact synchronization between the 3CX Console Management system and external sources like CSV files or Google Contacts. This application serves as a comprehensive resource for configuring, syncing, and scheduling contacts, benefiting users seeking streamlined contact management across various platforms within their 3CX system.
With functionalities enabling CSV file uploads, contact sync with 3CX, and synchronization between Google Contacts and 3CX, along with scheduling options, the application ensures efficient contact management by minimizing duplicates and maintaining updated information. Its mission revolves around providing an automated, user-friendly solution for contact synchronization, enhancing data consistency and accessibility within the 3CX environment.
This guide offers detailed step-by-step instructions for setting up contact synchronization, configuring sync settings, scheduling sync operations, and managing contacts effectively.
This application simplifies the process of importing contacts from various sources like CSV files or Google Contacts into 3CX, ensuring smooth integration and access to diverse contact databases.
Minimize Duplicates
By comparing specific fields during synchronization, the app identifies and removes duplicate contacts, maintaining a clean and organized contact list within the 3CX system.
Enhanced Data Consistency
It ensures that contact information remains updated and consistent across different platforms integrated with 3CX, facilitating easy access to accurate details whenever required.
Scheduling Options
Offering the flexibility to schedule sync operations, users can automate contact updates at regular intervals, ensuring that contacts are always up-to-date without manual intervention.
User-Friendly Automation
With an intuitive interface and automated processes, the application simplifies contact management tasks, reducing manual effort while enhancing accuracy and efficiency in maintaining contact records.
You can order 3CX Contacts Sync online at https://www.voiptools.com. The order confirmation email includes your license key and a link to download the software
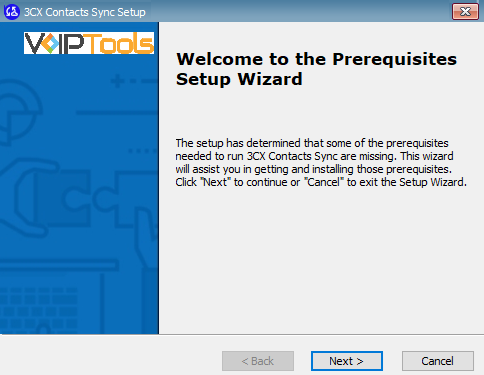
INSTALL PREREQUISITES
You must the prerequisites listed earlier prior to installing the 3CX Contacts Sync. Click here to know the list of required prerequisites.
INSTALL 3CX CONTACTS SYNC
This User Guide contains step-by-step instructions to successfully install 3CX Contacts Sync. Begin by extracting the installer from the downloaded zip file (Step 1 above), then run the setup program named 3CXContactsSyncInstaller.exe
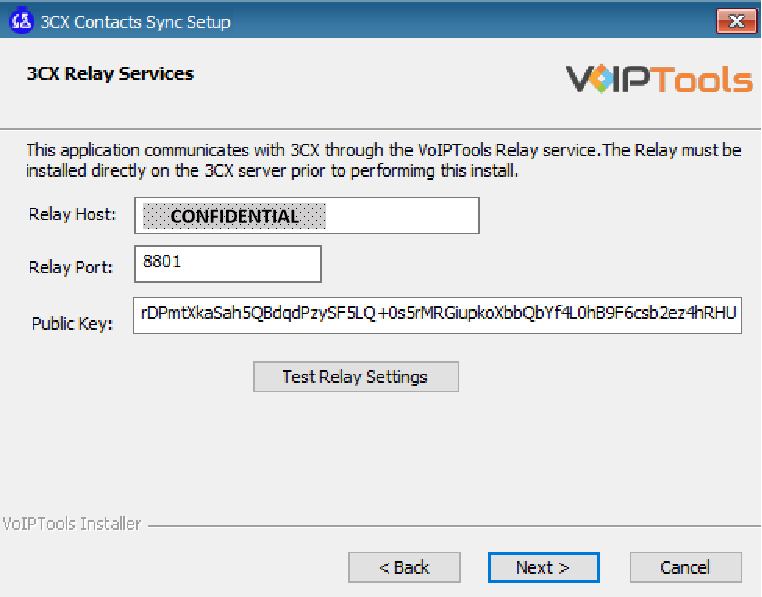
CONFIGURE THE RELAY
You must configure the Relay settings to communicate with 3CX. Click here to learn more about VoIPTools Relay.
REGISTER YOUR SOFTWARE
To activate 3CX Contacts Sync, register your license key, available in your order confirmation email and order history on our website
Find the software download link in the Order Confirmation Email, or you can find it in your order history on our website and download the 3CX Contacts Sync application.
In the Microsoft Defender SmartScreen, click the More Info option.
Click the Run Anyway option to start the installation.
Double-click on the Software Installer downloaded in Step 1. The installation wizard automatically identifies the prerequisites and assists you with each installation required to 3CX Contacts Sync.
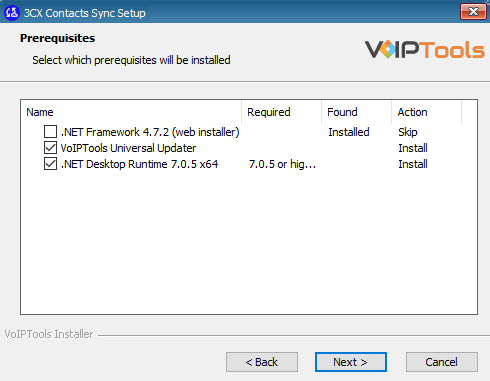
Click the downloaded installer executable to launch the Prerequisites Setup Wizard and click Next.
Figure 3: Prerequisites Setup Wizard
In the Prerequisites window, install all the required prerequisites identified by the installer, or select/ unselect the applications based on your requirements and click Next to continue.
Figure 4: Select Prerequisites to Install
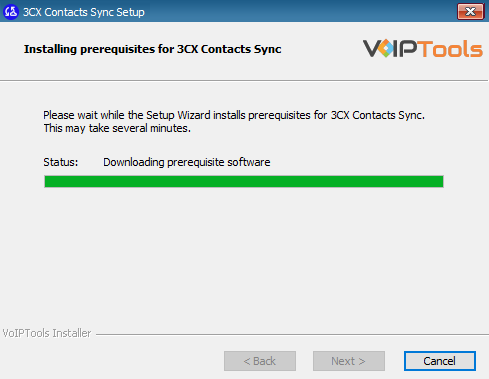
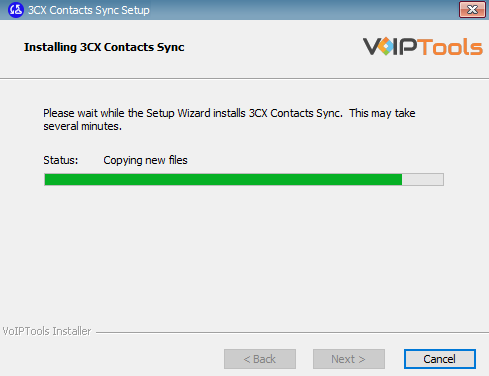
The installer will download and install the selected applications. This may take several minutes to complete.
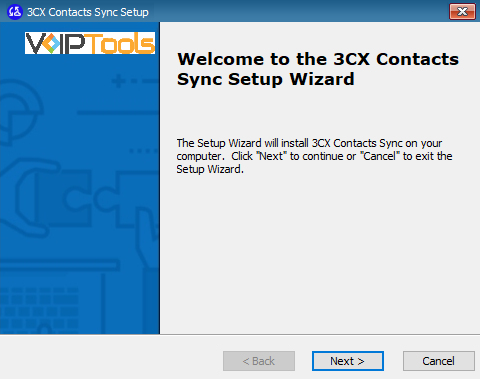
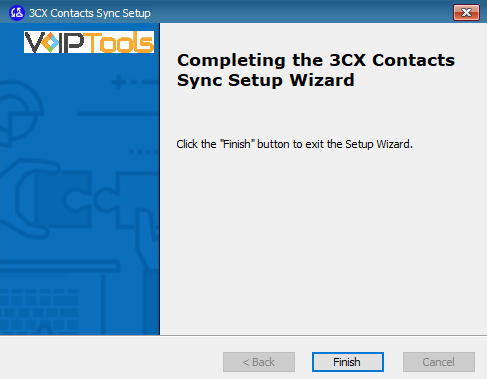
Click Next on the 3CX Contacts SyncSetup Wizard screen.
Figure 6: 3CX Contacts Sync Setup Wizard
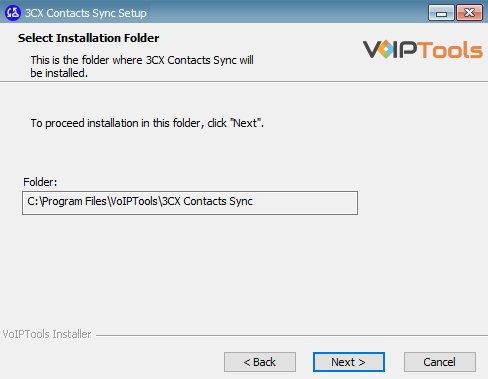
The Folder field on the Select Installation Folder window shows the installation path for 3CX Contacts Sync. The location path cannot be altered. Click Next to proceed.
To ensure the authorization of your license key, it is necessary to complete the registration process. By registering with VoIPTools, you gain access to a range of benefits:
Key Replacement Assistance
In the unfortunate event of a lost license key, registering with VoIPTools lets us provide you with a replacement key promptly.
Product Updates and Reminders
By registering, you will receive timely notifications from VoIPTools regarding any product updates. Additionally, we will send reminders when your key is nearing its renewal date, ensuring uninterrupted access to our services.s
Follow the procedure to register your software,
Double-click the 3CX Contacts Sync desktop iconto open the web application.
On the Login page, do the following tasks,
In the Extension field, enter your 3CX extension number.
In the PIN field, enter your 3CX voicemail PIN.
Click the Login button to log in to your account.
Figure 13: Login Page
Enter all the necessary information on the License Registration page and click the Register button.
Figure 14: License Registration Page
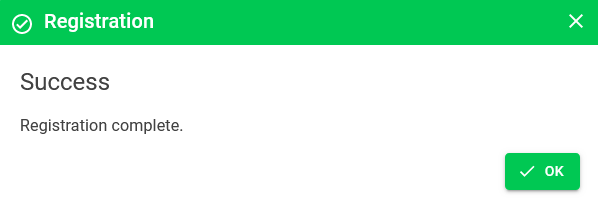
Click OK on the Registration Success popup.
Figure 15: Registration Success Popup
NOTE:
The web application can be accessed only by the extensions with Manager rights.
Follow these steps to configure sync settings for uploading CSV files from your local device.
On the 3CX Sync Contacts web application in the left side panel, click the Settings menu.
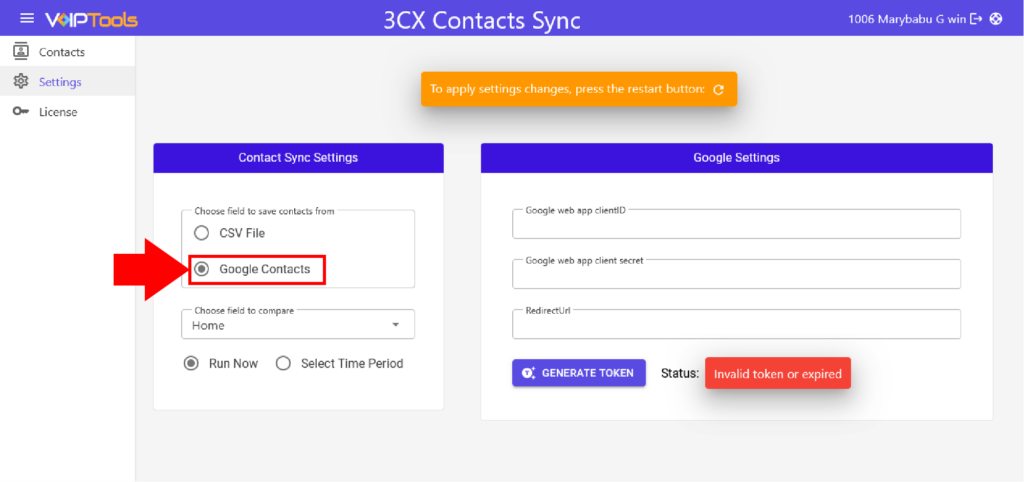
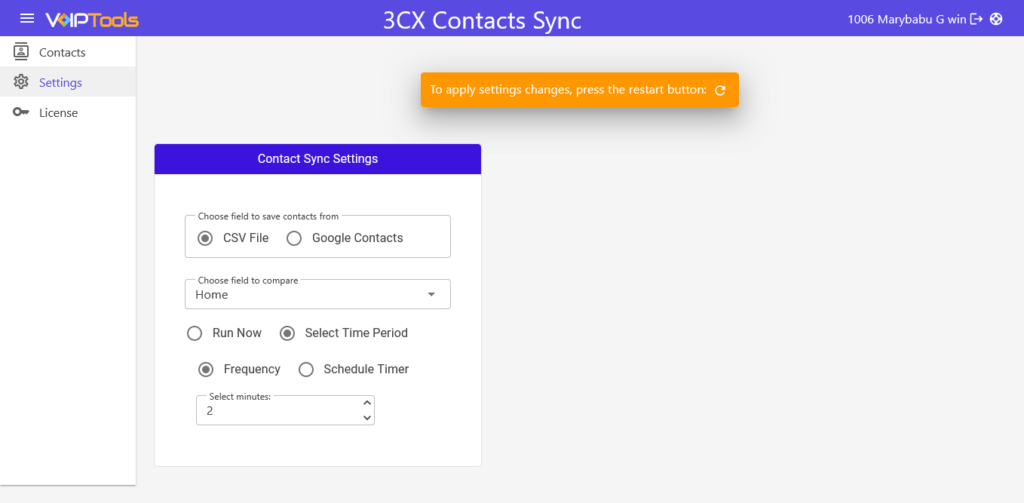
Select the CSV File radio box in the Choose Field to Save Contacts From section.
Figure 17: Contact Sync Settings – Upload file
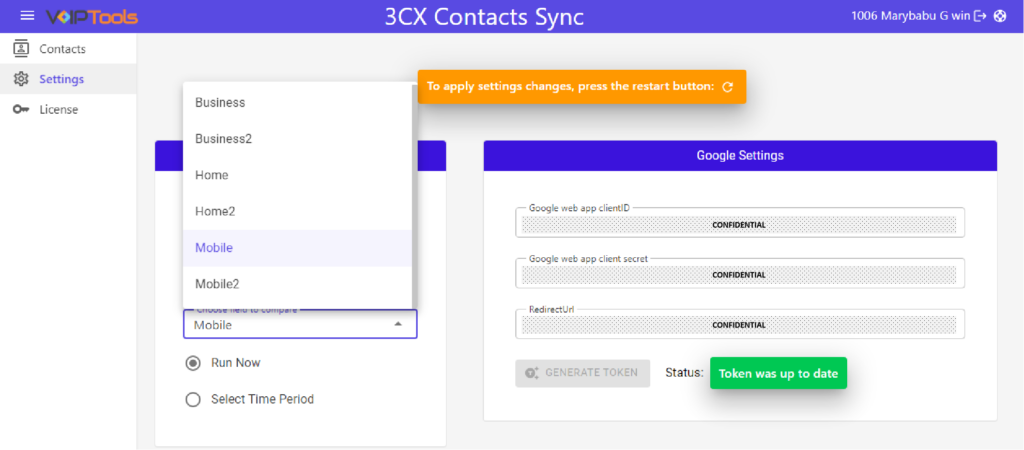
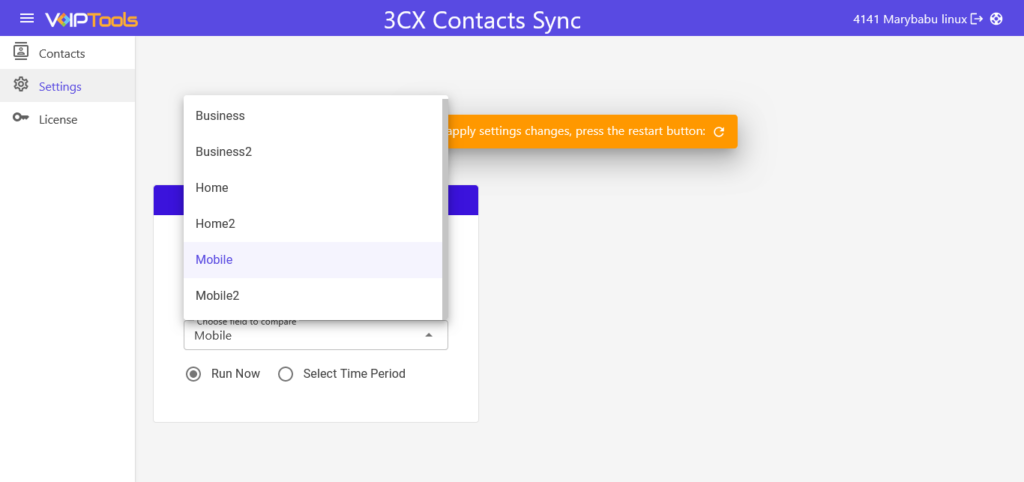
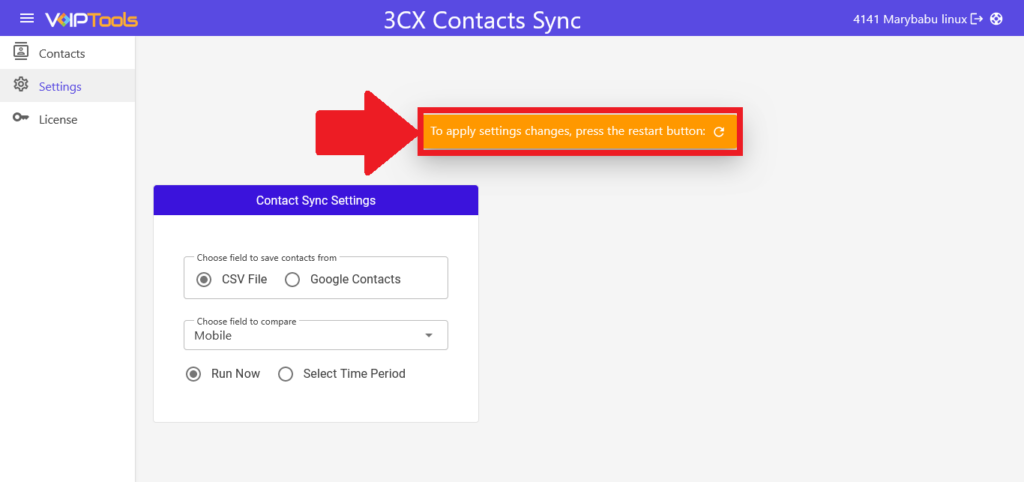
Select the desired field to compare from the Choose Filed to Compare list.
For example, if you select the “Mobile” field, 3CX Contact Sync will compare the mobile numbers of your current 3CX contacts with the newly uploaded ones and eliminate any duplicates.
NOTE:
You must select a field from the Choose Field to Compare list that is available in the CSV file or else it will create a new contact in 3CX Server.
Figure 17: Configure Contact Sync Settings – Fields for comparison
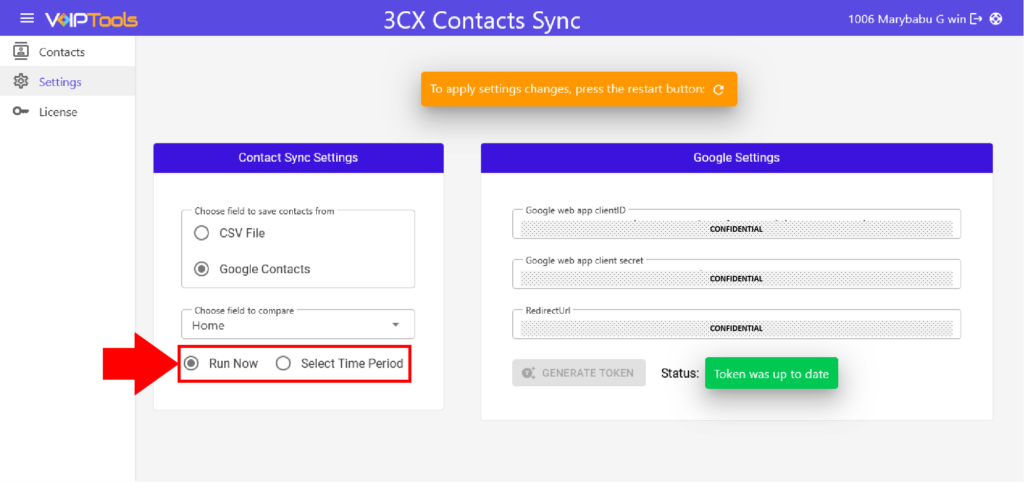
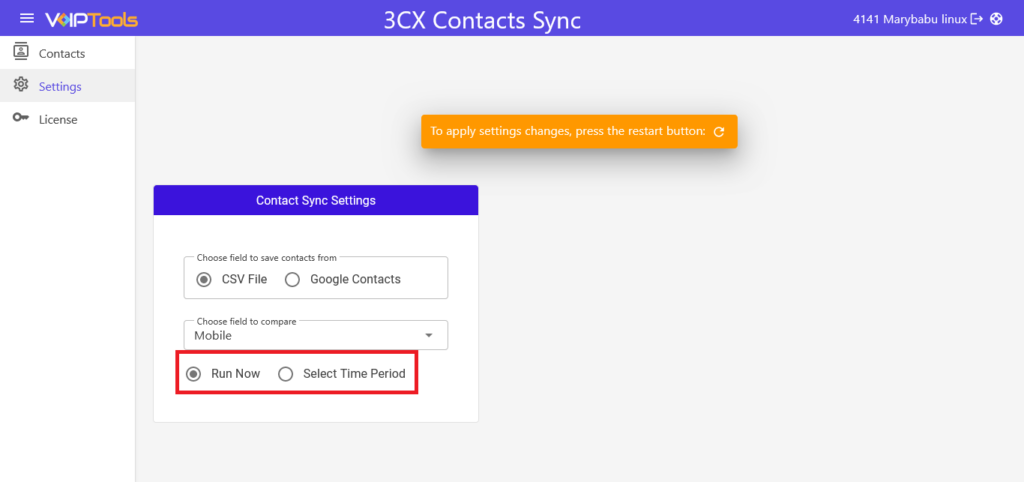
Select the Run Now radio box to sync the contacts immediately or you can select theSelect Time Periodradio box to schedule the operation.
Figure 18: Configure Contact Sync Settings – Run options
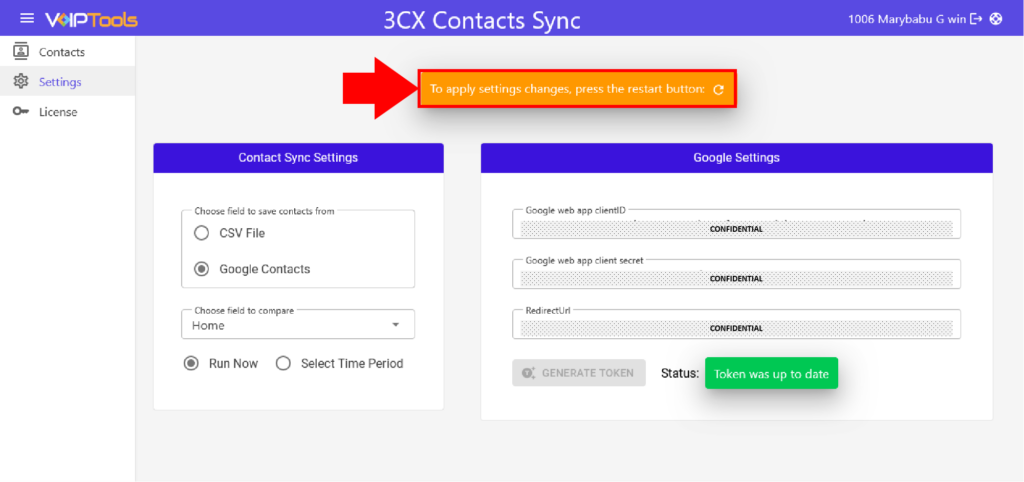
Click the Reload option to restart the service.
Figure 19: Reload option
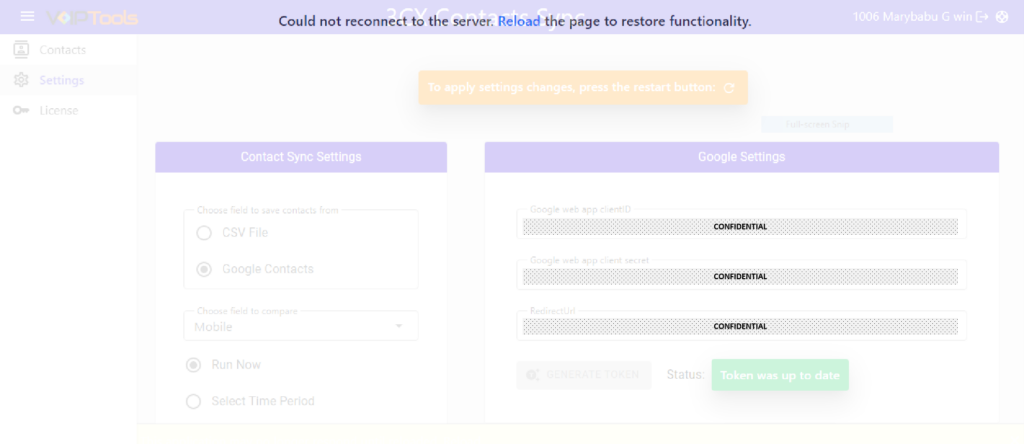
In the Reload Confirmation message, click on the Reload link and wait for 30 Seconds.
Figure 20: Confirm Reload Message
NOTE:
Wait for 30 Seconds after you click the Reload button before proceeding to the following steps.
On the 3CX Contact Sync web portal in the left side panel, click the Contacts menu.
Figure 21: Left Side Panel – Contacts Menu
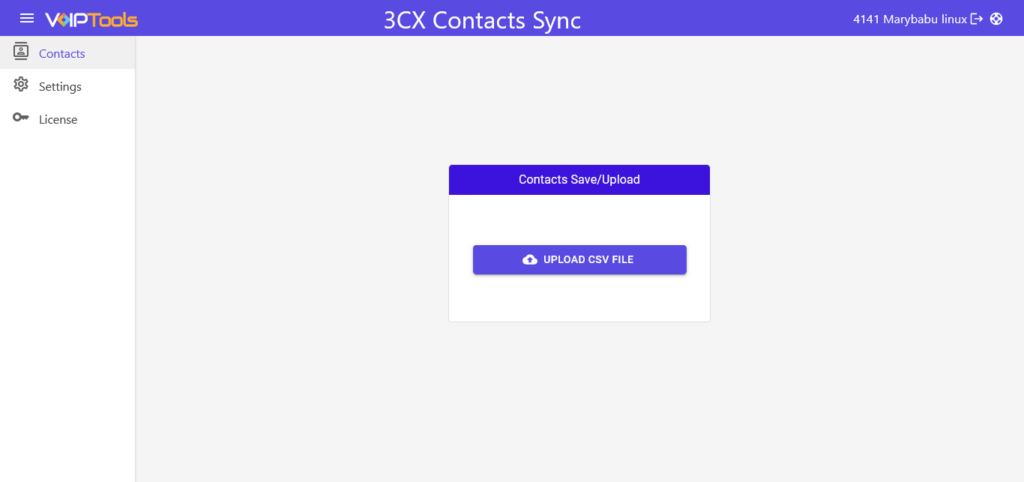
Click the Upload CSV File option to browse and upload the CSV file from your local device.
Figure 22: Contacts tab – Upload CSV File
NOTE:
The CSV file must be delimited by commas and must have the following headings,
FirstName
LastName
Company
Mobile
Mobile2
Email
Home
Home2
Business
Business2
BusinessFax
Other
HomeFax
Tag
Pager
Figure 23: Sample CSV file
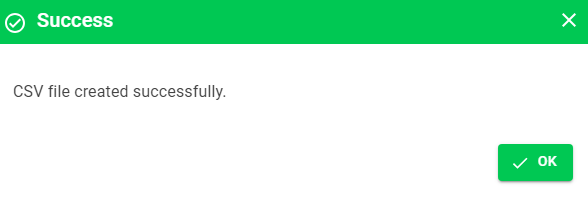
Once you upload the CSV file with the required headers, click OK on the Success Popup message.
On the Settings screen in the Contact Sync Settings section, select the Select Time Period radio box.
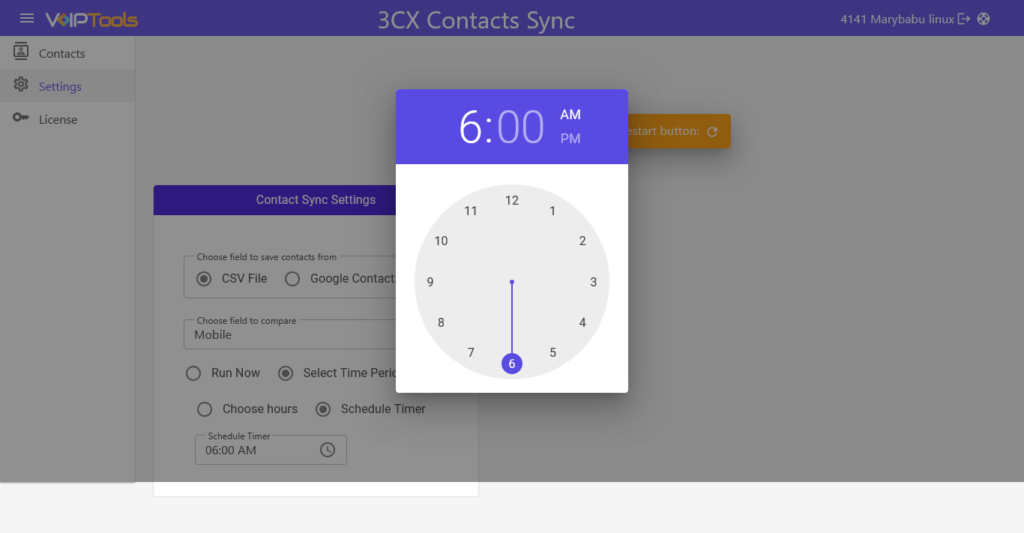
Select the Schedule Timer radio box to set the delay.
In the Schedule Timer field, click the Clock icon to set the time to sync.
Figure 26: Schedule a time to sync contacts
NOTE:
Allow for a brief delay after the scheduled time for contacts to sync with 3CX. It may take up to 30 seconds for the application to fully synchronize your contacts. For example, if scheduled for 6:30 PM, anticipate a brief delay in the synchronization process rather than an immediate update at the scheduled time.
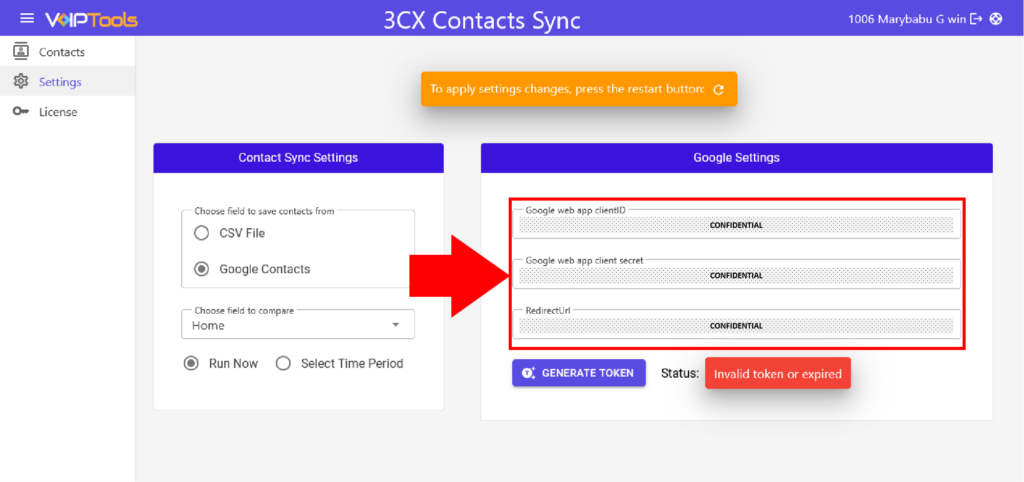
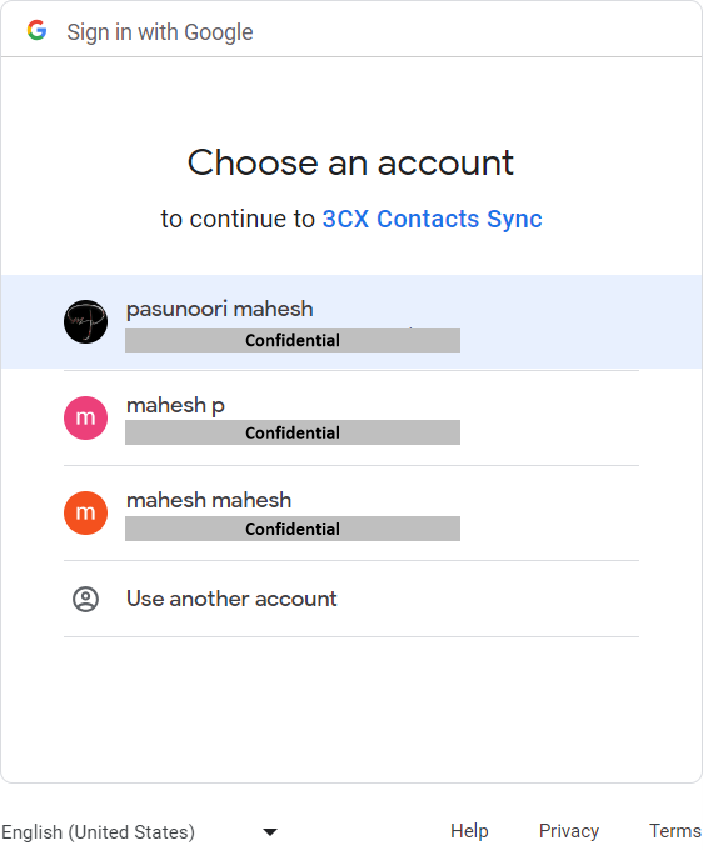
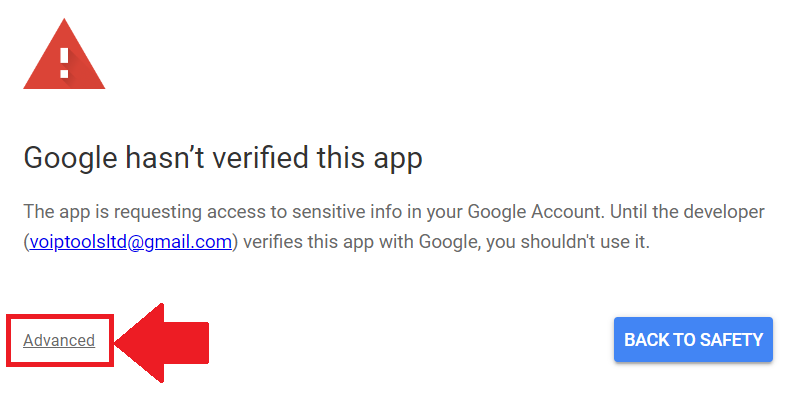
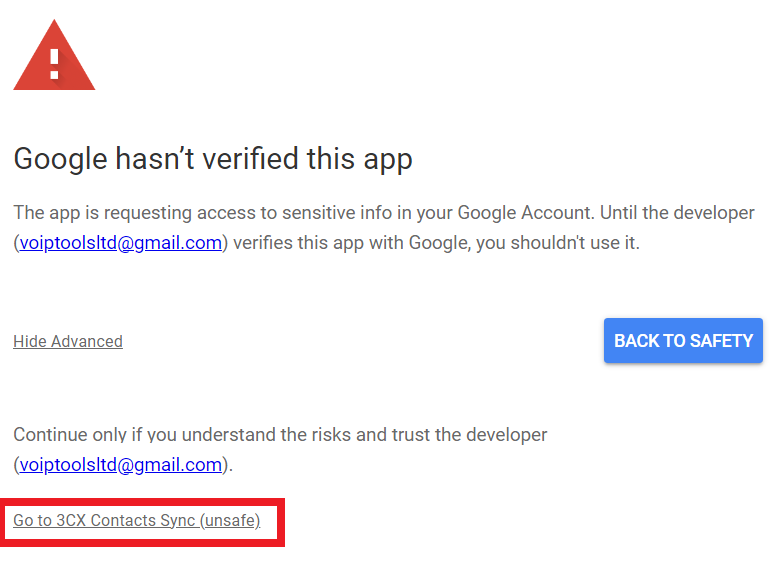
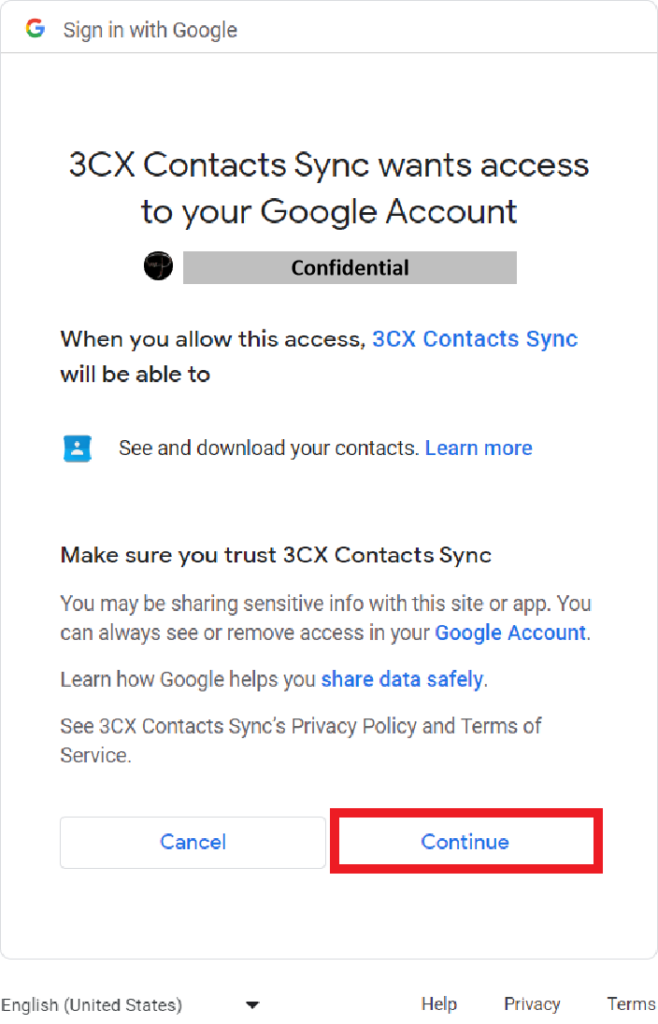
Click the Continue option, to give 3CX Contact Sync access to your Google account.
Figure 33: Google account access screen
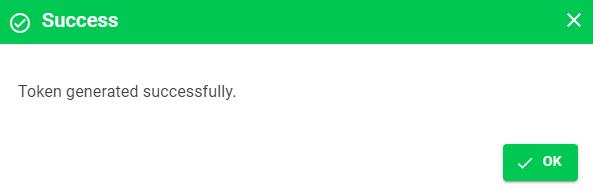
Once you give your Google account access, a token gets generated successfully. Click OK on the Token Generated popup.
Figure 34: Token Generated Success Popup
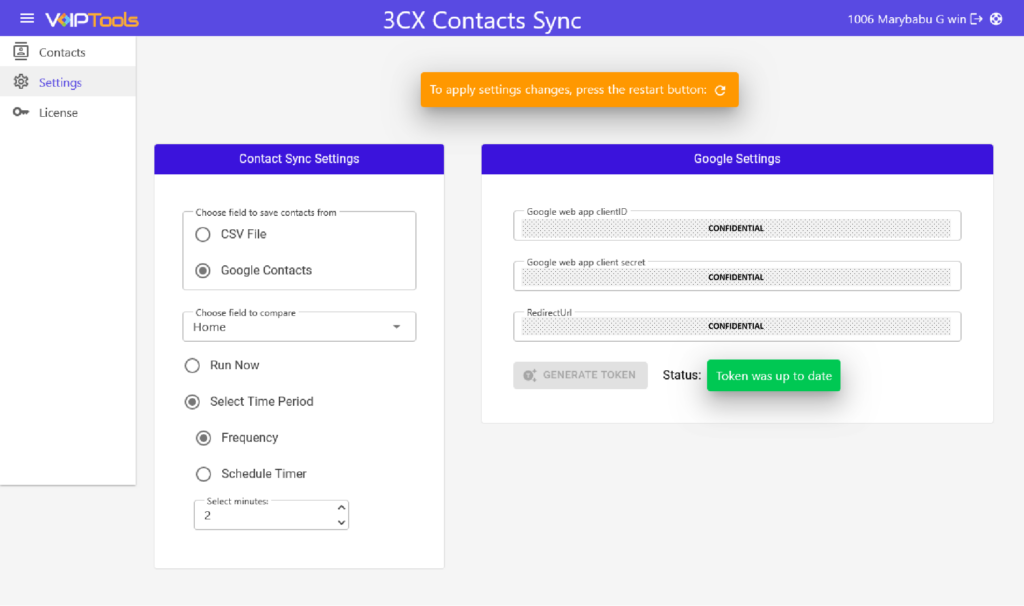
On the Settings menu, in the Choose Field to Compare Section dropdown, select the desired field to compare.
For example, if you select the “Mobile” field, 3CX Contact Sync will compare the mobile numbers of your current 3CX contacts with the newly uploaded ones and eliminate any duplicates.
NOTE:
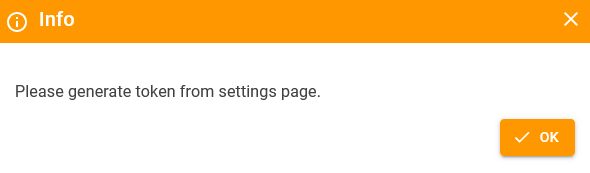
You must regenerate the token if you change your email address password. Click here to know the procedure.
NOTE:
You must select a field from the Choose Field to Compare list that is available in the Google Contacts or else it will create a new contact in 3CX Server.
Deleting contacts in Google Contacts will not impact your 3CX server contacts.
Figure 35: Google Contacts – Fields for comparison
Select the Run Now radio box to sync the contacts immediately or you can select theSelect Time Periodradio box to schedule the operation.
Figure 36: Time for Contact Sync
Click the Reload option to restart the service.
Figure 37: Reload Button
In the Reload Confirmation message, click on the Reload link.
Figure 38: Reload Confirmation Message
NOTE:
Wait for 30 Seconds after you click the Reload button before proceeding to the following steps.
NOTE:
Ensure that the Redirect URL matches with the browser URL.
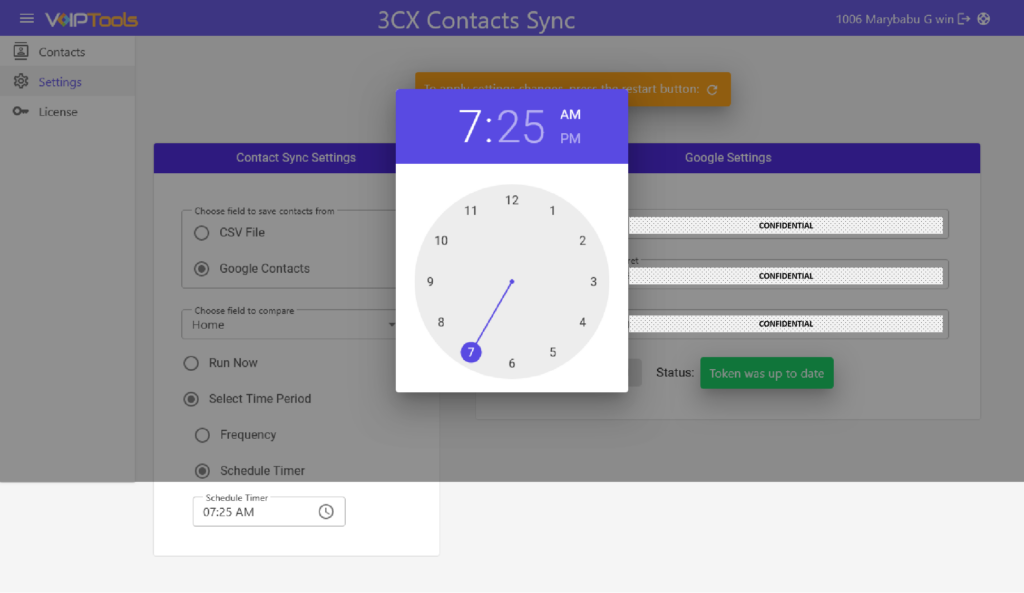
On the Settings screen in the Contact Sync Settings section, select the Select Time Period radio box.
Select the Schedule Timer radio box to set the delay.
In the Schedule Timer field, click the Clock icon to set the time to sync.
Figure 44: Schedule a time to sync contacts
NOTE:
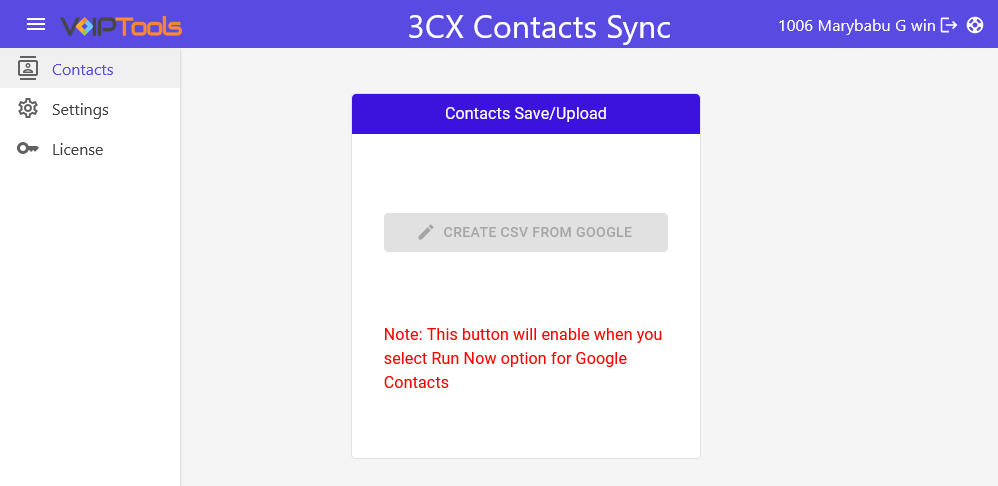
When contact sync is scheduled from your Google account to 3CX, it’s not required to click the Create CSV File button in the Contacts tab. This step avoids duplicate contacts generated automatically by the application and manually via the ‘Create CSV File’ button. Your contacts will seamlessly sync to 3CX without additional action.
Figure 45: Create CSV File From Google Button Disabled For Contact Duplication
NOTE:
Allow for a brief delay after the scheduled time for contacts to sync with 3CX. It may take up to 30 seconds for the application to fully synchronize your contacts. For example, if scheduled for 6:30 PM, anticipate a brief delay in the synchronization process rather than an immediate update at the scheduled time.
How to Regenerate Token If the Google Credentials are Changed? #
If you change your Gmail credentials, you must regenerate the token for Google Contacts to sync to 3CX. However, the Generate Token button won’t activate unless you clear the previously generated token.
Open the AppSettings.JSON file in your local device available in the following path
C:\Program Files\VoIPTools\3CX Contacts Sync
Delete the generated token in the Refresh Token field and save the file. Click here to learn how to generate the token.
You get quick answers to most of your inquiries in our online manual. If you prefer direct contact, we offer various support channels, including phone, email, live chat, and our helpful VoIPTools forums.
Rest assured, our dedicated team is here to assist you around the clock, every day of the year. Whether you’re based in the USA or India, we’re ready to provide prompt responses to your technical queries.
Windows Event Log for VoIPTools Applications and Services #
For troubleshooting any application errors, our Windows Event Log contains a comprehensive list of error messages, warnings, and informative notes related to all our VoIPTools applications and services. It’s a valuable resource to help you pinpoint and resolve any issues you may encounter.
Are you looking to collaborate with other VoIPTools customers facing similar challenges? Our forum is the perfect platform to exchange ideas, solutions, and best practices. Join the conversation at: https://www.voiptools.com/community/
Got questions that need immediate answers? Our chat support team is available to assist you in real time. Just click on the Live Chat button located at the lower right corner of our website, and we’ll acknowledge your queries right away.
To ensure a thorough understanding of your concerns, email us at support@voiptools.com. Describe your issue in detail, and we’ll get back to you within one business day with the support you need.
If you prefer to speak with a representative directly, you can reach us at +1 801-642-4655. Our attentive team is available to take your calls from 8:00 AM to 6:00 PM (Central Standard Time).
If you’ve purchased our products through a VoIPTools Partner, rest assured that they provide first-level support at no additional cost. Partners have access to 100% free technical assistance and actively participate in the troubleshooting process.
VoIPTools customers enjoy access to our online manuals and receive support through emails (with responses within one business day) and live chat. However, please note that we do not provide remote server login assistance.
For a more hands-on experience, consider our “Installation Support” package. Our expert support team can log in to your servers, and install and configure all our tools. This comprehensive service includes setting up SQL Server Express and Internet Information Server if necessary. We’ll work closely with you to tailor our applications to meet your requirements.
We’re committed to providing top-notch support to ensure your VoIPTools experience is smooth and hassle-free. Contact us today, and let us assist you in making the most of our powerful tools!


NOTE:
 to open the web application.
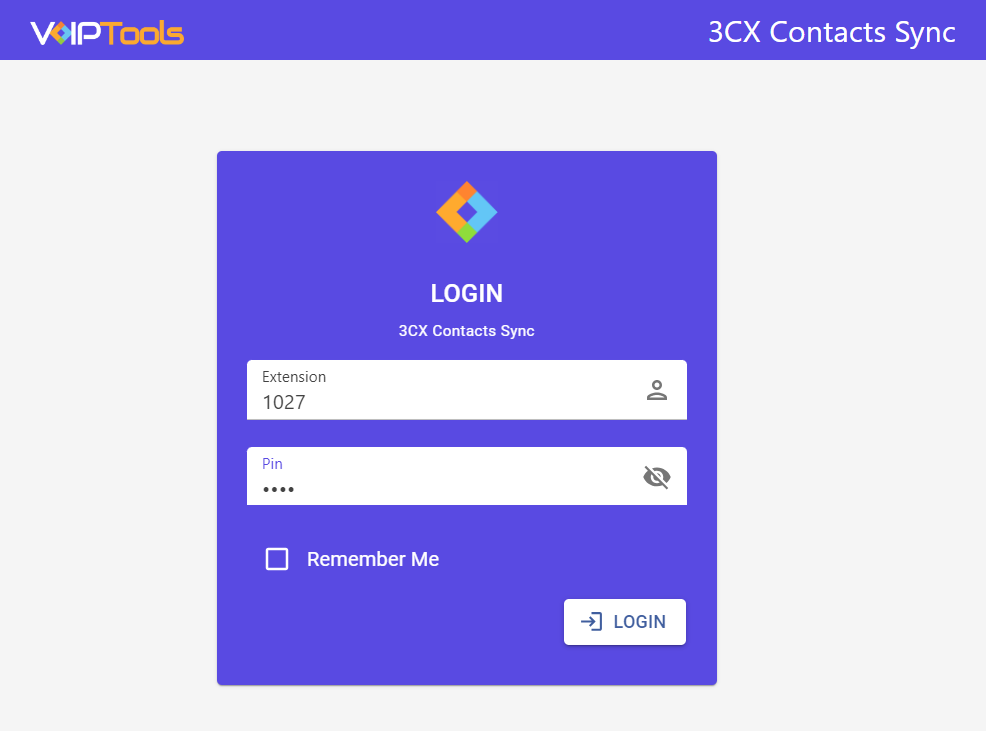

NOTE:
 menu.
menu. 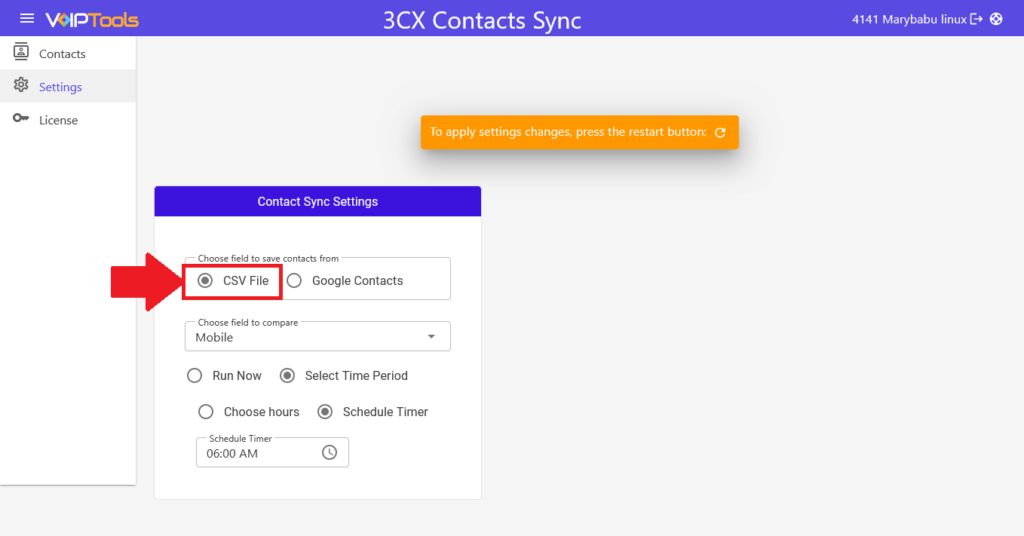
NOTE:

NOTE:
 menu.
menu.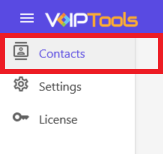

 icon to set the time to sync.